
How to Stack and Secure MultiTier Layer Cakes (Simplified)

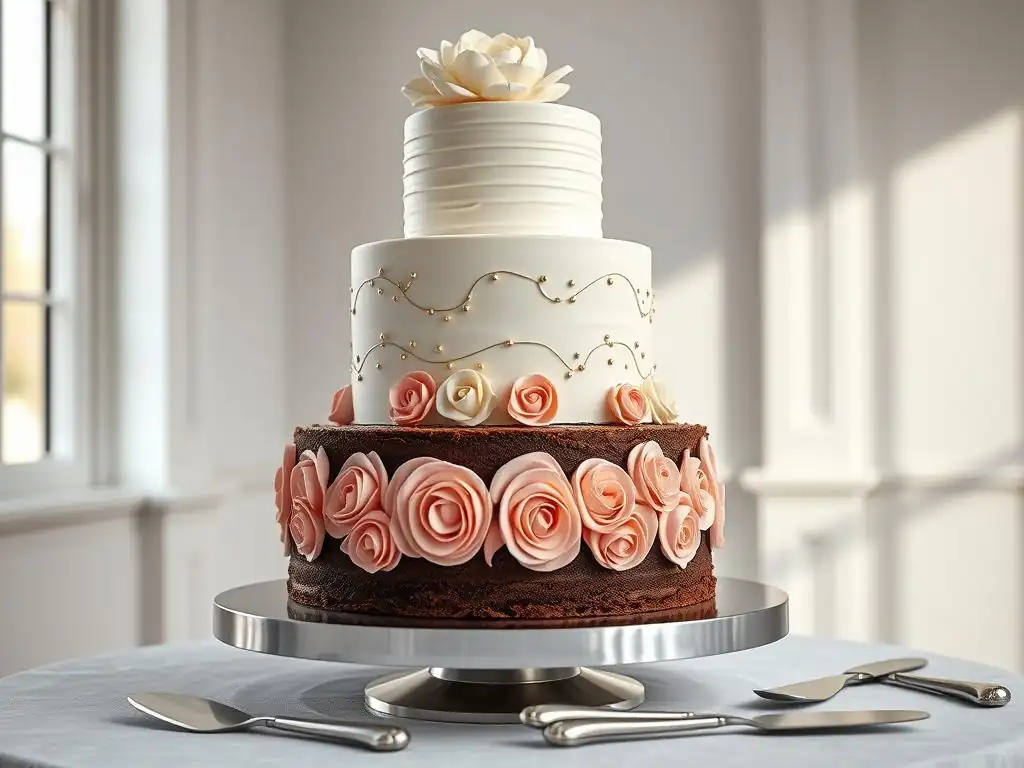
Welcome to BakeWithEase, your shortcut to baking brilliance! Ever dreamed of creating a show-stopping masterpiece? This week, we're demystifying the art of multitier cake stacking. Learn how to build impressive, stable cakes with our simplified tutorial. Intrigued? Let's get stacking and create something unforgettable together!
- How to Stack and Secure Multi-Tier Wedding Cakes
- Introduction to Multi-Tier Cake Stacking
- Essential Tools for Multi-Tier Cake Assembly
- Preparing Your Cake Layers for Stacking
-
Step-by-Step Multi-Tier Cake Stacking Tutorial
- Step 1: Placing the First Cake Layer on the Cake Board
- Step 2: Applying Filling and Frosting to the First Layer
- Step 3: Adding Dowels for Support in the Bottom Tier
- Step 4: Placing the Next Cake Layer on Top of the Dowels
- Step 5: Repeating the Process for Each Tier
- Step 6: Inserting the Center Dowel
- Frosting and Decorating Your Stacked Cake
- Troubleshooting Common Multi-Tier Cake Stacking Problems
- Advanced Cake Stacking Techniques
- Conclusion: Mastering the Art of Multi-Tier Cake Assembly
-
Frequently Asked Questions
- What are the most common mistakes people make when stacking multi-tier cakes?
- What kind of support system is best for stacking a multi-tier cake?
- How do I ensure my multi-tier cake stays moist while I'm working on it?
- What is the best type of frosting to use for a multi-tier cake?
- How do I transport a multi-tier cake without damaging it?
- Final Reflection: The Enduring Allure of the Perfectly Stacked Cake
- Unleash Your Inner Cake Artist: Master the Multi-Tiered Marvel!
How to Stack and Secure Multi-Tier Wedding Cakes
Introduction to Multi-Tier Cake Stacking
Why Master Multi-Tier Cake Construction?
Creating a multi-tier cake is often the centerpiece of significant celebrations like weddings, anniversaries, and milestone birthdays. Mastering multi-tier cake stacking techniques allows you to create stunning, tall confections that not only look impressive but can also serve a large number of guests efficiently.
A standard three-tier cake, for instance, with 6-inch, 8-inch, and 10-inch tiers, can comfortably serve anywhere from 50 to over 100 people, depending on serving size. Beyond the practical aspects of serving a crowd, building tiered cakes is a rewarding skill that elevates your baking and decorating abilities, turning simple layers into a breathtaking edible structure.
Developing proficiency in multi-tier cake assembly opens up a world of creative possibilities. You can experiment with different flavor combinations for each tier, incorporate intricate designs across multiple levels, and build cakes that truly reflect the scale and importance of the event. Learning how to properly stack and secure these cakes means you can confidently take on larger projects, delighting clients and guests with stable, beautiful, and delicious creations. This foundational skill is key to progressing from baking single-layer cakes to constructing grand, celebratory masterpieces.
The Importance of Secure Cake Stacking Techniques
The primary goal when assembling any multi-tier cake is ensuring its structural integrity. Without proper support and secure stacking techniques, a beautiful cake can quickly become a disaster, leading to leaning tiers, collapsed layers, or even complete failure. This is especially critical for wedding cakes or other cakes that need to be transported or displayed for several hours. The weight of the upper tiers, frosting, and decorations is substantial, and the lower tiers require robust internal support to prevent them from being crushed.
Employing reliable cake stacking methods safeguards your hard work and provides peace of mind. Techniques like using internal dowels and a central support rod distribute the weight of each tier down to the sturdy base board, rather than resting it directly on the cake layer below. This prevents sagging and maintains the cake's clean lines and level appearance. A securely stacked cake is essential not only for aesthetics and stability during the event but also for safe and successful transportation, which is often one of the most nerve-wracking parts of delivering a large tiered cake.
Essential Tools for Multi-Tier Cake Assembly
Cake Boards: Choosing the Right Size and Thickness
Cake boards are fundamental to successful multi-tier cake stacking. Each individual cake tier, except possibly the very top one, needs to be placed on its own sturdy cake board. These boards serve as the base for the tier, provide a surface for dowels to support the tier above, and make handling individual layers much easier during assembly. For most tiered cakes, you'll want boards that are either the exact same diameter as the cake tier or up to a quarter-inch smaller, ensuring the board doesn't show once the cake is frosted.
The thickness of the cake board is also crucial, particularly for larger and heavier tiers. Thin cardboard rounds are suitable for smaller, lighter cakes, but for multi-tier constructions, you'll need something more substantial. Foam core boards or double-thick cardboard are excellent choices, typically measuring around 1/2 inch in thickness. These provide the rigidity needed to support the weight of the cake and the tier(s) above it, preventing the board from bending or collapsing under pressure, which could lead to instability in the stacked structure.
Dowels: The Key to Cake Support
Dowels are the unsung heroes of the multi-tier cake stacking process. These rods, typically made of food-grade plastic or wooden skewers/dowel rods, are inserted vertically into the lower cake tiers. Their purpose is to transfer the weight of the tiers above down to the cake board below, bypassing the cake itself. Without properly placed and cut dowels, the soft cake layers would simply compress and collapse under the load of the tiers stacked on top.
Choosing the right type and size of dowels depends on the cake's size and weight. For standard tiered cakes, plastic dowels or wooden dowels with a diameter of 1/4 inch to 3/8 inch are commonly used. Plastic dowels offer consistent thickness and are easy to clean, while wooden dowels are readily available and can be sharpened for easier insertion. The key is to use enough dowels and place them strategically to create a stable platform for the next tier.
Center Dowel: Adding Extra Stability
While individual dowels within each tier support vertical weight, a central dowel provides crucial lateral stability, especially important for taller cakes or those that need to be transported. This single, longer dowel is inserted after all tiers have been stacked, running vertically through the center of the entire cake, from the top tier all the way down to the bottom cake board. It acts like a central pin, holding all the stacked tiers together and preventing them from shifting or sliding horizontally during movement or display.
Inserting a center dowel is a final step that locks the multi-tier cake assembly into a single, more rigid unit. It significantly reduces the risk of tiers separating or becoming misaligned during transport over bumps or around corners. For very tall cakes (four tiers or more), some decorators even use a thicker wooden dowel or a specialized plastic center support system for maximum stability.
Cake Leveler: Ensuring Even Layers
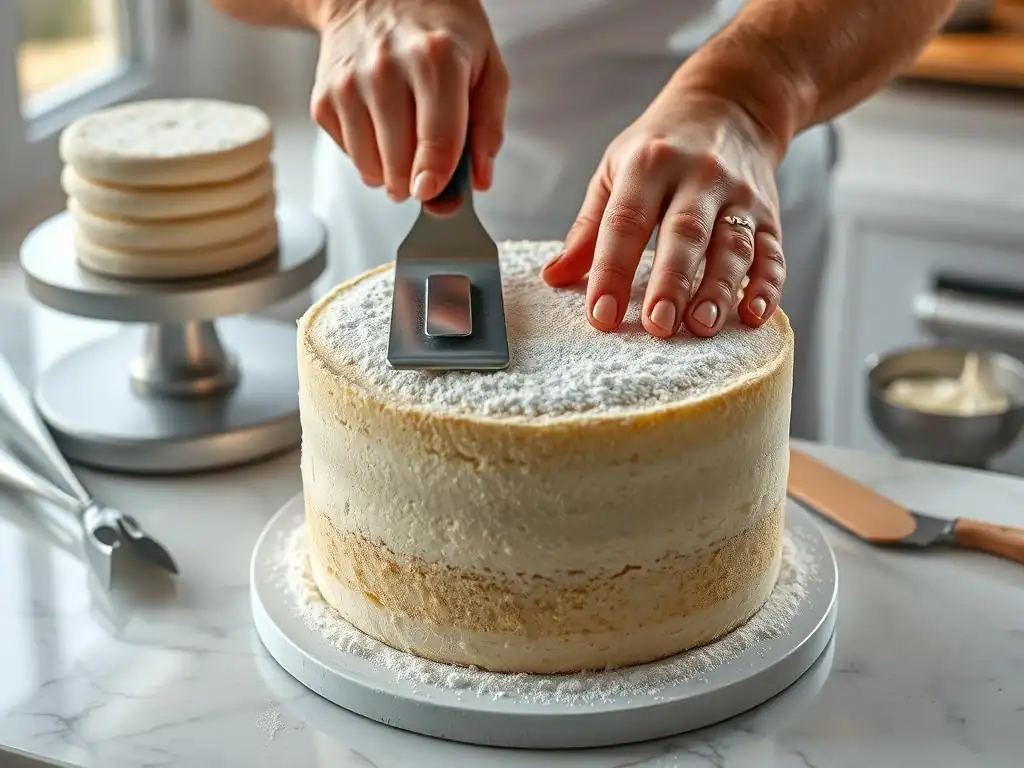
A cake leveler is an indispensable tool for anyone serious about creating professional-looking multi-tier cakes. Cakes often bake with a slight dome on top, and stacking uneven layers is a recipe for disaster – literally. A cake leveler, which is essentially a wire or serrated blade adjustable to different heights, allows you to easily and accurately slice off the dome, creating perfectly flat cake layers of consistent thickness.
Using a cake leveler ensures that each layer in your multi-tier creation is flat and level. This uniformity is critical for stable stacking, as flat surfaces sit squarely on top of one another without creating gaps or pressure points that could lead to leaning or collapse. Consistent layer height also contributes to the overall aesthetic of the finished cake, making the frosting and filling layers appear even and professional.
Offset Spatula: For Smooth Frosting Application
An offset spatula is a baker's best friend for applying frosting smoothly and evenly, a crucial step before and during multi-tier cake stacking. Its angled blade keeps your hand clear of the cake surface, allowing for easier application and smoothing of frosting or filling. You'll use this tool extensively for applying crumb coats, filling between layers, and applying the final layer of frosting to each tier.
For multi-tier cakes, an offset spatula helps achieve clean, level layers of filling and a smooth surface for stacking. A smaller offset spatula is useful for spreading filling and working between layers, while a larger one is great for frosting the sides and top of each tier before stacking. Proper frosting application isn't just for looks; a smooth, even layer provides a better surface for the next tier to rest upon and helps hold the structure together.
Preparing Your Cake Layers for Stacking
Leveling Your Cakes: Achieving a Flat Surface
Before you even think about stacking, each cake layer must be perfectly level. Cakes baked in round pans often develop a slight dome in the center. If you stack domed layers, the cake will be unstable, potentially leaning or collapsing under the weight of the upper tiers. Using a cake leveler or a long, serrated knife, carefully slice off the domed top of each cooled cake layer to create a flat surface. Aim for layers of consistent thickness for a balanced look and stable structure.
This process ensures that when you place one cake layer on top of another, they meet flush, creating a solid, level base for your filling and the subsequent tier. Don't discard the cake scraps you level off – they're perfect for making cake pops or enjoying as a baker's treat! Taking the time to level properly is a foundational step that prevents many common multi-tier cake stacking problems down the line.
Applying a Crumb Coat: Sealing in Crumbs
Once your cake layers are leveled and cooled, apply a thin "crumb coat" of frosting to each layer. This involves spreading a very thin layer of frosting over the entire surface (top and sides) of each cake layer. The purpose of the crumb coat is to trap any loose crumbs, sealing them into this initial layer of frosting so they don't mix into your final, smooth frosting layer. It also provides a stable base for the final frosting application.
After applying the crumb coat, chill the cake layers in the refrigerator for about 20-30 minutes, or until the crumb coat is firm to the touch. This allows the crumb coat to set, effectively gluing down all those pesky crumbs. A well-executed crumb coat is essential for achieving a smooth, professional-looking finish on your multi-tier cake, especially when working with flavors prone to crumbling like chocolate or red velvet.
Chilling the Cake Layers: Making Them Easier to Handle
Chilling your cake layers after they've been leveled and crumb-coated is a critical step that significantly improves their handling and stability during the multi-tier cake stacking process. When cake layers are cold, they become much firmer and less fragile. This makes them easier to lift, move, and stack without risking tears, cracks, or breakage. Chilling also sets the crumb coat, preparing the surface for the final frosting layer.
Ideally, chill your crumb-coated cake layers for at least 30 minutes to 1 hour in the refrigerator. For even greater stability, especially with softer cake recipes or in warm environments, you can chill them for longer or even freeze them briefly (about 15-20 minutes) just before stacking. Working with firm, cold cake layers is one of the best tips for a stress-free multi-tier cake assembly experience, making the process smoother and reducing the chance of accidents.
Step-by-Step Multi-Tier Cake Stacking Tutorial
Step 1: Placing the First Cake Layer on the Cake Board
Begin your multi-tier cake stacking tutorial by placing the bottom-most cake tier onto the final cake board or stand you plan to use for display and transport. This tier is typically the largest. Ensure the cake is centered on the board. You can add a small dab of frosting to the center of the board before placing the cake to help secure it in place and prevent it from shifting. This bottom board should be sturdy and ideally the same size or slightly larger than the cake tier for stability.
Step 2: Applying Filling and Frosting to the First Layer
Once the bottom tier is securely on its board, it's time to add your filling and frosting. If using a soft filling like fruit compote or mousse, pipe a border (a "dam") of frosting around the edge of the layer before adding the filling to prevent it from squeezing out. Spread the filling evenly within the dam. Then, place the second layer of the bottom tier on top, ensuring it's level. Apply a layer of frosting to the sides of this completed bottom tier, smoothing it with an offset spatula or bench scraper.
Step 3: Adding Dowels for Support in the Bottom Tier
This is a crucial step in any multi-tier cake stacking tutorial. Before placing the next tier on top, you must insert support dowels into the bottom tier. The number and placement of dowels depend on the size of the tier you are supporting. For example, an 8-inch cake tier supporting a 6-inch tier might require 4 to 6 dowels. The dowels bear the weight of the tiers above, protecting the cake layer below from compression.
Choosing the Right Dowel Placement Pattern
The most common pattern for placing dowels is to create a circle slightly smaller than the diameter of the tier that will sit on top. For instance, if an 8-inch tier is supporting a 6-inch tier, arrange the dowels in a circle about 5 inches in diameter. Ensure the dowels are spaced relatively evenly within this area, perhaps 1.5 to 2 inches apart. This pattern ensures the weight of the upper tier is distributed directly onto the dowels, which transfer the load to the cake board below, bypassing the cake itself.
Cutting Dowels to the Correct Height
This is perhaps the most critical part of using dowels: they must all be cut to the exact same height. Measure the height of your frosted bottom tier. Cut each dowel to this precise height.
A simple way to do this is to insert one dowel into the cake until it hits the board, mark the top where it meets the frosting surface, pull it out, and use that as your guide to cut all other dowels. Insert the cut dowels into the cake within your chosen pattern, pushing them straight down until they are flush with the surface of the frosting. If dowels are uneven, the upper tier will rest on the tallest one(s), creating instability.
Step 4: Placing the Next Cake Layer on Top of the Dowels
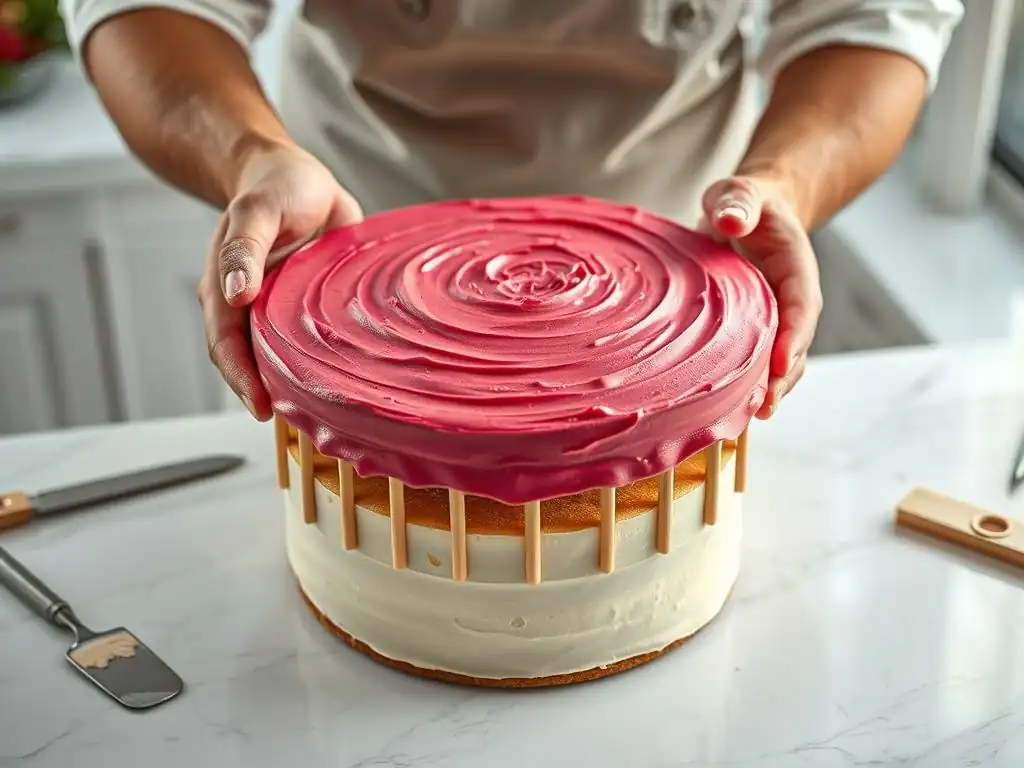
Now, take the next smaller tier (which should be assembled on its own cake board and chilled). Carefully lift this tier, ideally using a cake lifter or two large offset spatulas for support under its cake board. Center this tier directly on top of the dowels you inserted into the bottom tier. Lower it gently onto the dowels, ensuring it sits level. The weight of this tier should be resting entirely on the dowels below, with a small gap (maybe 1/16 inch) between its cake board and the surface of the lower cake layer.
Step 5: Repeating the Process for Each Tier
Continue this multi-tier cake stacking tutorial by repeating steps 2 through 4 for each subsequent tier. For the second tier (which will support the third), add filling and frosting, then insert dowels into it using the same method as before. The number and placement of these new dowels will be based on the size of the next tier up.
Then, lift and place the third tier onto the dowels in the second tier. Repeat until all tiers are stacked. Always ensure each tier is centered on the one below and that the upper tier's weight is supported by the dowels in the tier beneath it.
Step 6: Inserting the Center Dowel
Once all cake tiers are stacked and aligned, you'll insert the center dowel for added stability, particularly important for transport. Choose a long, sturdy dowel (often wooden or a thick plastic rod) that is slightly taller than the total height of your stacked cake. For easier insertion, you can sharpen one end of a wooden dowel with a pencil sharpener or knife.
Safely Inserting a Central Dowel
Carefully push the sharpened end of the center dowel straight down through the exact middle of the top tier, through all the cake layers and cake boards, until you feel it hit the bottom base board. Maintain a steady, vertical pressure. If it's difficult to push, you can gently tap the top of the dowel with a hammer (protecting the cake with a piece of cardboard or a clean cloth).
Once the dowel is fully inserted and hits the base board, mark the dowel flush with the top surface of the cake, pull it out slightly, and trim the excess length. Re-insert the dowel so it is flush with the top of the cake. This central pin prevents the tiers from shifting horizontally.
Frosting and Decorating Your Stacked Cake
Achieving a Smooth Finish on a Multi-Tier Cake
Applying the final smooth layer of frosting to a multi-tier cake after it's stacked can be challenging but often yields the best results for a seamless finish. Start by applying a generous amount of frosting to the sides of the top tier, working your way down. Use a large offset spatula to spread the frosting, then switch to a bench scraper held against the side of the cake at a 90-degree angle to smooth it out, rotating the cake stand. Scrape off excess frosting and reapply as needed.
Work on one tier at a time, smoothing the sides and then the top edge. For sharp edges, apply slightly more frosting than needed, chill the cake until firm, and then use a warm bench scraper or offset spatula to trim and smooth the edge. Take your time, especially where tiers meet, to ensure a clean transition. Practice is key to mastering smooth frosting on stacked cakes.
Decorating Ideas for Stacked Cakes
Decorating a multi-tier cake is where your creativity truly shines! The stacked structure provides a wonderful canvas for intricate designs and arrangements. Popular techniques include covering the cake smoothly with buttercream or ganache, then adding details, or covering each tier individually with fondant before stacking and then adding decorations to the assembled cake. The possibilities are nearly endless, from simple elegant designs to elaborate themes.
Fresh Flowers, Fondant Drapes, and Royal Icing Piping
- Fresh Flowers: A classic choice for wedding cakes. Ensure flowers are food-safe or use floral tape and picks to isolate stems from the cake. Arrange flowers cascading down the tiers or in clusters.
- Fondant Drapes: Rolled fondant can be shaped into elegant drapes or swags applied to the sides of fondant-covered tiers, adding a touch of sophisticated texture and movement.
- Royal Icing Piping: Use royal icing to pipe intricate patterns, lace designs, dots, or borders directly onto the frosted or fondant-covered cake surface. This allows for very fine detail and adds a traditional decorative element.
Transporting Your Multi-Tier Cake Safely
Transporting a finished multi-tier cake is often the most stressful part of the process. Proper preparation is essential. Ensure the bottom cake board is secured to a sturdy base, ideally one designed for cake transport, like a heavy-duty cardboard box or a wooden base. A non-slip mat under the cake board can help prevent sliding.
Using a Sturdy Box and Cooling Techniques
Place the secured cake base inside a strong transport box that is taller than the cake and has minimal excess space around the sides to prevent shifting. For maximum safety, particularly in warm weather, transport the cake in a refrigerated vehicle. If that's not possible, surround the base of the box with ice packs (ensuring they don't touch the cake or box directly, perhaps wrapped in towels). Drive slowly and carefully, avoiding sudden stops or sharp turns. Have a passenger hold the cake box steady if possible. Keep the cake cool until the last possible moment before delivery.
Troubleshooting Common Multi-Tier Cake Stacking Problems
Cake Tiers Sinking or Leaning
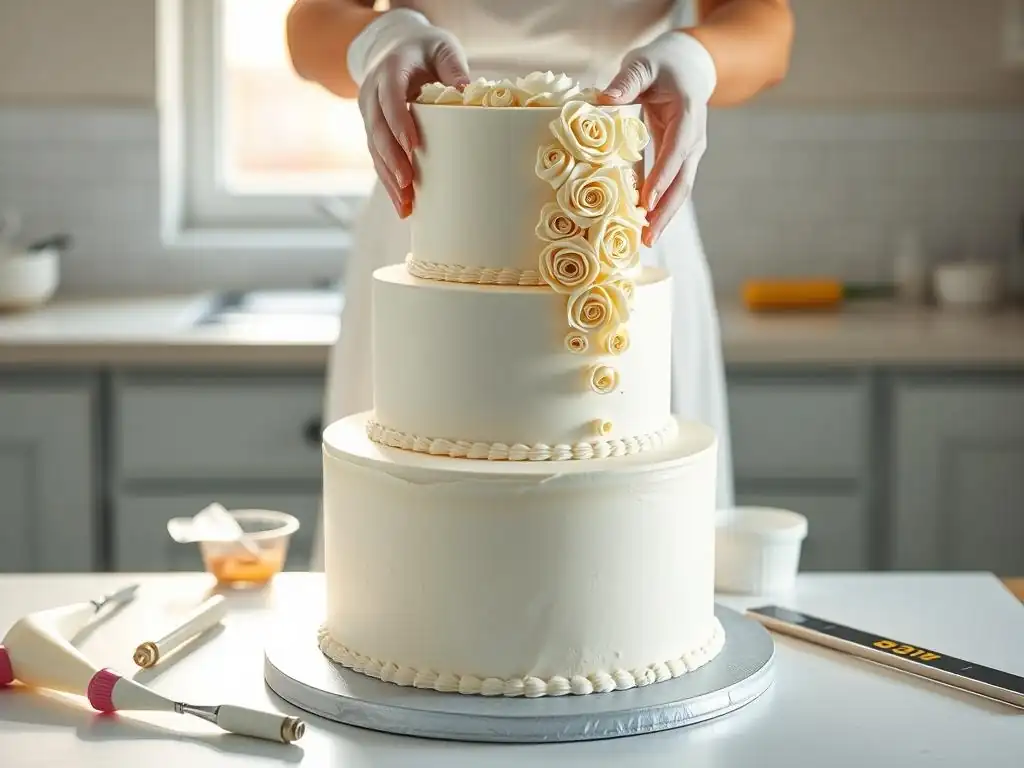
One of the most common issues in multi-tier cake stacking is tiers sinking or leaning. Sinking usually occurs when the dowels are not cut to the correct height (they must be flush with the frosting surface) or if there are not enough dowels to support the weight of the tier above. Leaning can result from uneven cake layers, uneven frosting/filling layers, or dowels that are not inserted straight or are cut to slightly different heights. Using soft fillings that compress easily can also contribute.
To troubleshoot, ensure your cake layers are perfectly level, use a firm frosting/filling suitable for stacking (like buttercream with a good amount of butter/shortening or ganache), and most importantly, meticulously measure and cut your support dowels so they are all exactly the same height and flush with the cake surface. If a cake starts to lean slightly after stacking, sometimes gently pushing it back into alignment is possible, but prevention through proper technique is best. Adding more dowels than you think you need is often a good safety measure.
Uneven Cake Layers
Uneven cake layers, usually due to not properly leveling the tops, are a primary cause of instability in a stacked cake. If you bake a cake with a significant dome and stack it without leveling, the weight of the upper tiers will rest unevenly, inevitably causing the cake to lean or even collapse.
If you find your layers are uneven before stacking, use a cake leveler or serrated knife to trim them flat. If you discover unevenness after stacking, it's much harder to fix. You might be able to add extra frosting to the lower side to try and level it out, but this is a temporary fix and can compromise stability. The best solution is always prevention: ensure all your cake layers are perfectly level before you begin the assembly process.
Frosting Issues: Melting or Sliding
Frosting problems like melting, bulging, or sliding can also impact the stability and appearance of a multi-tier cake. This is often caused by using a frosting that is too soft or unstable for stacking, especially in warm conditions. Frostings like simple whipped cream or a very soft buttercream can struggle to hold the weight and structure of stacked tiers.
To prevent this, use a sturdy frosting recipe designed for decorating and stacking, such as an American buttercream with a good ratio of butter to shortening or powdered sugar, or a stable ganache. Ensure your cake and frosting are well-chilled before and during the stacking process. If frosting starts to melt or bulge, it indicates the cake is getting too warm or the frosting isn't stable enough.
Get the cake into a cooler environment immediately. Sometimes, adding a decorative border around the base of each tier can help conceal minor bulges, but for structural integrity, a stable frosting is key.
Advanced Cake Stacking Techniques
Using Separators for a Dramatic Effect
Beyond the basic stacked multi-tier cake stacking tutorial, decorators often use separators to add height and visual interest. Separators can be pillars, risers, or even clear acrylic stands placed between tiers, creating space and allowing for additional decoration beneath or around the upper tiers. Using separators requires proper support within the lower cake tier.
When using separators, the lower tier must have a strong foundation of support dowels placed directly underneath where the separator will rest. The separator then sits on these dowels, and the cake tier above is placed directly on top of the separator. This technique allows for creative designs, such as placing flowers or other elements in the space between tiers, and can make a cake appear taller and more grand without simply increasing the number of cake layers.
Creating Tilted or Offset Cakes
For a truly unique look, decorators can create tilted or offset multi-tier cakes, where tiers are stacked at angles rather than straight up. These designs defy gravity and are real showstoppers. However, they require specialized internal support structures, often involving angled dowels, PVC piping, or custom-built armatures, that are anchored securely to the baseboard.
Building a tilted or offset cake is significantly more complex than standard multi-tier cake stacking and is generally recommended for experienced cake decorators. It involves precise calculations for weight distribution and angles, and the internal structure must be robust enough to bear the unevenly distributed weight of the upper tiers. These cakes are often assembled partly or fully on-site due to the difficulty of transport.
Incorporating Internal Structures for Extreme Heights
For multi-tier cakes exceeding four or five tiers, or those with particularly heavy decorations, relying solely on standard doweling might not be sufficient. Professional decorators often incorporate more elaborate internal structures, such as a central support rod (thicker than a standard center dowel, sometimes threaded for stability) or even a cage-like structure built from dowels or pipes within the lower tiers.
These advanced internal supports provide maximum stability for very tall or heavy multi-tier constructions. They ensure that the immense weight of multiple tiers is safely transferred down to the base, preventing any possibility of collapse. While beyond the scope of a basic multi-tier cake stacking tutorial, understanding that such structures exist is important for appreciating the engineering involved in truly monumental cake creations.
Conclusion: Mastering the Art of Multi-Tier Cake Assembly
Recap of Key Cake Stacking Tips
Mastering multi-tier cake stacking is an achievable skill that requires attention to detail and practice. Remember the essential steps:
- Level your cake layers precisely.
- Apply a crumb coat and chill your layers thoroughly.
- Use sturdy cake boards for each tier (except the top).
- Insert sufficient support dowels into the lower tiers, ensuring they are all cut to the exact height of the frosted tier.
- Carefully stack chilled tiers onto the dowels.
- Insert a central dowel through the entire cake for added stability, especially for transport.
- Use a stable frosting suitable for stacking.
- Plan your transport method carefully using a sturdy box and cooling techniques.
[x] Level cakes
[x] Crumb coat and chill
[x] Use cake boards
[x] Insert support dowels
[x] Cut dowels evenly
[x] Stack tiers carefully
[x] Insert center dowel
[x] Choose stable frosting
[x] Plan transport
Encouragement to Practice and Experiment
Don't be intimidated by the prospect of stacking multi-tier cakes! Like any baking skill, it improves with practice. Start with smaller, two-tier cakes to build your confidence before moving on to larger, three or four-tier creations. Experiment with different cake flavors, fillings, and frosting types to see how they behave during stacking.
Every cake is a learning opportunity. If something doesn't go perfectly the first time, analyze what happened and apply that knowledge to your next project. With patience, attention to detail, and consistent practice using proper techniques, you'll be creating stable, beautiful, and delicious multi-tier cakes that impress everyone! Enjoy the process of building these edible works of art.
Frequently Asked Questions
What are the most common mistakes people make when stacking multi-tier cakes?
The most common mistakes include using insufficient support structures like dowels or cake boards, and not leveling each tier properly. This leads to unstable and leaning cakes.
What kind of support system is best for stacking a multi-tier cake?
A combination of cake boards cut to the size of each tier and dowels (wood or plastic) inserted into the lower tiers is usually best. This distributes the weight evenly and provides structural integrity.
How do I ensure my multi-tier cake stays moist while I'm working on it?
Wrap each layer in plastic wrap after baking and cooling, then store them in the refrigerator. For extended work times, consider using a simple syrup to add moisture and prevent drying out.
What is the best type of frosting to use for a multi-tier cake?
A sturdy frosting like buttercream or ganache is ideal, as it provides stability and structure. Avoid whipped cream or mousse-based frostings, as they are too soft and won't hold the weight of the tiers.
How do I transport a multi-tier cake without damaging it?
Use a sturdy cake box and secure the base of the cake to the box with a non-slip mat. Drive carefully and consider assembling the final tier on-site to minimize the risk of transportation damage.
Final Reflection: The Enduring Allure of the Perfectly Stacked Cake
The art of stacking multi-tiered cakes remains a testament to both culinary skill and unwavering patience. While seemingly a niche pursuit, mastering this technique offers a profound understanding of structural integrity and creative design, principles applicable far beyond the kitchen. The demand for visually stunning, gravity-defying cakes continues to grow, reflecting our ongoing fascination with both the delicious and the visually impressive.
The journey of creating a multi-tiered cake is more than just a recipe; it's a metaphor for life's challenges. Each layer represents a step, each dowel a crucial support, and the final product, a testament to careful planning and execution. The process demands precision, attention to detail, and a willingness to adapt – qualities valuable in any endeavor. The best things in life are worth the wait,
a sentiment perfectly encapsulating the rewarding experience of successfully stacking a multi-tiered cake.
Now, consider your own "layers." What are the foundational elements in your life that provide support and stability? What are the "dowels" – the crucial connections and strategies – that hold everything together? Take a moment to reflect on the meticulous planning and careful execution required to achieve your goals. Just as a perfectly stacked cake requires balance and precision, so too does building a fulfilling and successful life. Embrace the challenge, celebrate the successes, and remember the sweet reward that awaits.
Unleash Your Inner Cake Artist: Master the Multi-Tiered Marvel!
Thanks for taking the time to learn the secrets of perfectly stacking and securing multi-tiered cakes! You're now equipped with the knowledge to create stunning, show-stopping desserts. Ready to put your new skills to the test?
- Bake your dream cake: Choose your favorite flavors and create a magnificent multi-tiered masterpiece. Don't be afraid to experiment!
- Share your creation: Tag us on social media with your #BakeWithEaseMultiTieredMasterpiece to inspire other bakers.
- Join our baking community: Leave a comment below and share your biggest cake-stacking challenge – let's help each other succeed!
What incredible flavor combinations will you create for your next multi-tiered cake?