
Scoring Sourdough: Crafting Beautiful & Functional Oven Spring

Welcome to BakeWithEase, your trusted guide in the delightful world of baking! Are you ready to transform your sourdough loaves from simply delicious to breathtaking works of art? Unlock the secrets to achieving that perfect oven spring and visually stunning crusts with our comprehensive Sourdough Scoring Patterns Tutorial. Discover techniques that not only enhance the beauty of your bake but also optimize its rise. Intrigued? Let's dive in and elevate your sourdough game!
Intermediate Sourdough Scoring Patterns
Creating Visually Appealing Designs
Moving beyond the simple single slash or crosscut opens up a world of artistic expression on your sourdough loaf. While the primary function of scoring is to control oven spring and prevent blowouts, exploring intermediate sourdough scoring patterns allows bakers to add a personal touch and create loaves that are as beautiful as they are delicious. These patterns can transform a rustic loaf into a centerpiece, showcasing skill and creativity.
Think of it as edible art, where the dough is your canvas and the lame is your brush. Mastering these designs not only enhances the visual appeal but also deepens your understanding of dough behavior during baking, as different patterns can subtly influence crust development and the overall shape of the final loaf.
Beyond mere aesthetics, these more complex sourdough scoring patterns can also offer nuanced control over how the crust expands. For example, a series of shallow, overlapping cuts can encourage a more uniform "shingle" effect on the crust, providing many small areas for expansion rather than one large bloom. This can be particularly useful for achieving a consistently crisp crust across the entire surface.
Exploring these patterns is a natural next step in any sourdough scoring patterns tutorial, pushing bakers to refine their technique and develop a keener eye for detail and dough readiness. It's a practice that combines technical precision with artistic vision, rewarding patience and experimentation with stunning results.
The Wheat Stalk Pattern: A Step-by-Step Guide
The wheat stalk pattern is a classic and elegant design that is popular in many sourdough scoring patterns tutorial guides. It mimics the appearance of a stalk of wheat and is created using a series of curved, overlapping cuts. To execute this pattern, you typically start with a single, deeper cut running most of the length of the loaf, slightly off-center.
This central cut will be the main point of expansion. Then, using a curved lame held at a low angle (perhaps around 20-30 degrees relative to the dough surface), make a series of overlapping cuts that sweep towards the central cut from one side. Each subsequent cut should overlap the previous one by about 1-2 cm, creating the layered effect of wheat grains.
Once you have completed one side, repeat the process on the other side, ensuring the cuts also sweep towards the central line. The depth of these side cuts should be shallower than the main central cut, perhaps just 0.5-1 cm deep, depending on your dough hydration and desired outcome. The angle and overlap are key to achieving the distinct layered look.
Practicing this pattern on a few loaves will help you get a feel for the right depth and angle for your specific dough. This technique not only looks impressive but also effectively guides oven spring along the central line, resulting in a beautiful ear and a well-defined shape, making it a valuable skill covered in any comprehensive sourdough scoring patterns tutorial.
The Leaf Pattern: Adding Artistic Flair to Your Loaf
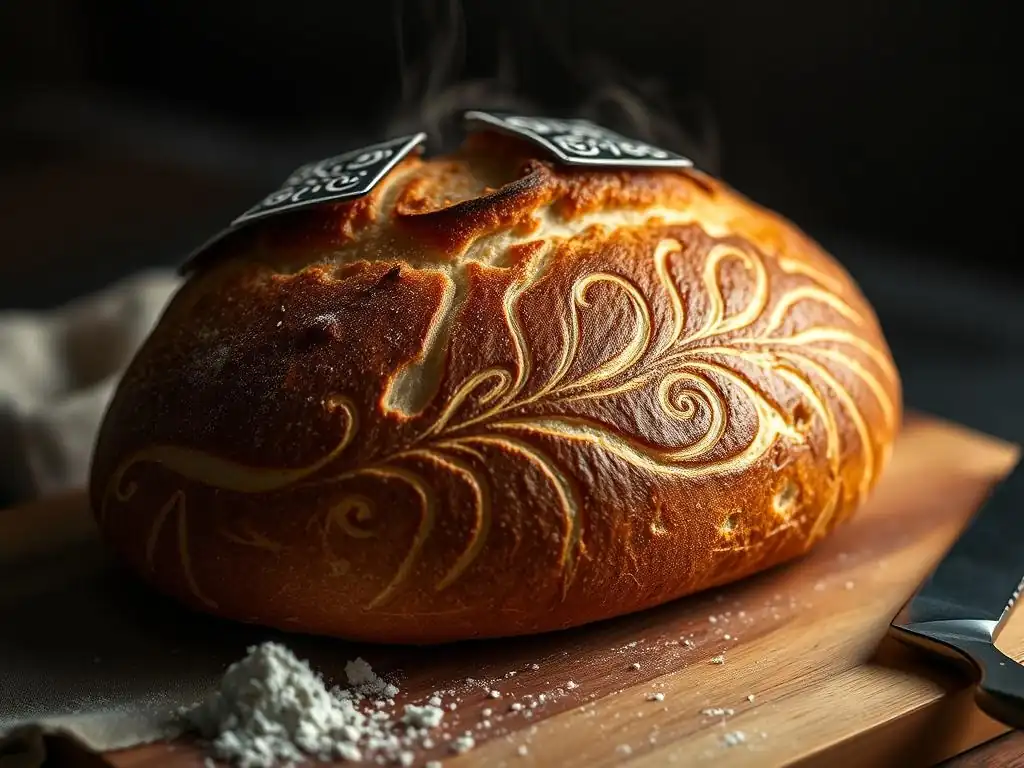
The leaf pattern is another beloved design, offering a beautiful organic look that can vary significantly in its execution. Like the wheat stalk, it relies on a series of curved, overlapping cuts, but typically without a dominant central score. To create a basic leaf pattern, imagine a central vein running down the loaf. You will then make a series of curved cuts branching off from this imaginary vein, alternating sides. Each cut should be curved, mimicking the shape of a leaf vein, and overlap the previous cut slightly towards the "stem" end of the leaf.
The depth of these cuts is crucial for a good leaf pattern. Often, the cuts are made at a relatively shallow depth, perhaps 0.5-1 cm, to encourage a delicate opening rather than a large bloom. The angle of the lame is also important; holding it at a low angle (again, around 20-30 degrees) helps create the characteristic flap or "ear" of the leaf.
You can create a single large leaf down the center of the loaf or multiple smaller leaves. Experimenting with the number of cuts, their length, curvature, and overlap will allow you to develop your own unique leaf style. This pattern adds significant artistic flair and is a fantastic way to personalize your loaves, often featured as a creative option in sourdough scoring patterns tutorial resources.
Experimenting with Geometric Sourdough Scoring Designs
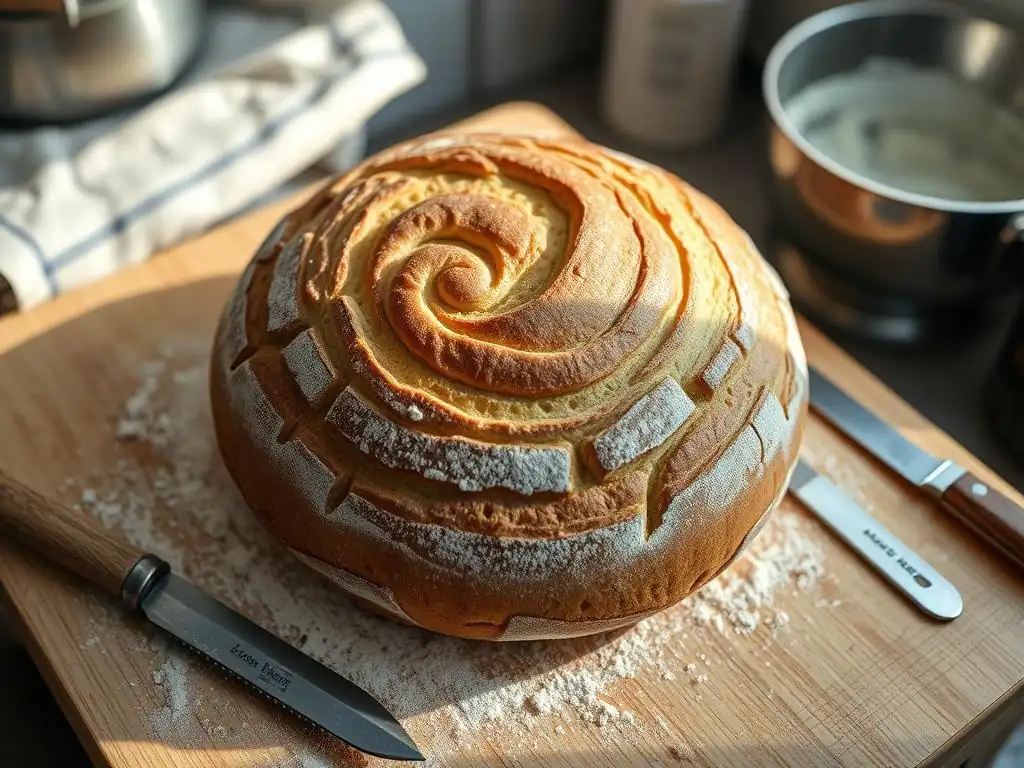
Beyond organic shapes like wheat stalks and leaves, geometric patterns offer a modern and often very functional approach to sourdough scoring. These designs, such as grids, diamonds, or concentric circles, rely on straight or consistently curved lines placed at specific angles and intervals. A simple grid pattern, for instance, involves making parallel cuts in one direction across the loaf, followed by another set of parallel cuts perpendicular to the first. The spacing and depth of these cuts will determine how the crust expands, often resulting in a crackled or segmented appearance.
Geometric patterns can be surprisingly effective at controlling oven spring, distributing expansion evenly across the scored surface. A diamond pattern, achieved by making diagonal cuts in two directions, creates numerous small areas for expansion, which can lead to a very even, honeycomb-like crust texture. When exploring these geometric sourdough scoring patterns tutorial methods, consider the hydration of your dough; higher hydration doughs might require slightly deeper or more numerous cuts to manage their expansive nature.
Don't be afraid to sketch your design on paper first and measure out your intended cuts on the dough (perhaps using a light dusting of flour as a guide) before applying the lame. This structured approach can help you achieve precision and consistency in your geometric scoring.
Frequently Asked Questions
What is sourdough scoring and why is it important?
Sourdough scoring involves making cuts on the surface of the dough before baking. It's important for controlling the expansion of the dough (oven spring) and creating a visually appealing loaf.
What tools do I need for sourdough scoring?
The most common tool is a lame, which is a razor blade attached to a handle. Alternatively, a sharp knife can be used, but a lame provides a cleaner and more precise cut.
What are some simple sourdough scoring patterns for beginners?
Beginner-friendly patterns include a single straight slash, a simple X, or a series of short, parallel cuts. These allow for controlled expansion without being too complex.
How deep should I score my sourdough?
The depth depends on the desired effect, but generally, aim for about 1/4 to 1/2 inch deep. Deeper cuts encourage more oven spring, while shallower cuts are more for decorative purposes.
Can scoring affect the taste or texture of my sourdough?
No, scoring primarily affects the shape and appearance of the loaf. However, proper scoring ensures even expansion, which can indirectly contribute to a better crumb structure and overall baking success.
Final Reflection: The Art and Science of Sourdough Scoring
The perfect sourdough loaf isn't just about taste; it's a testament to understanding the intricate dance between flour, water, time, and the deliberate act of scoring. This seemingly simple act profoundly impacts the final rise, texture, and overall aesthetic appeal of your bread. Mastering scoring isn't just about achieving a beautiful bloom; it's about unlocking the full potential of your sourdough starter and your baking skills.
The journey of learning sourdough scoring has been a fascinating exploration of both artistry and precision. It's a constant process of observation, experimentation, and adaptation, mirroring the ever-evolving nature of sourdough itself. The baker's hands are the instruments of his art.
This quote, though not specifically about scoring, perfectly captures the intimate connection between the baker and their craft, a connection deeply felt when carefully crafting each cut into the risen dough. The impact of scoring extends beyond the individual loaf; it's a visible representation of the patience, dedication, and understanding required to produce truly exceptional bread, a testament to the enduring appeal of this ancient craft.
Consider the next loaf you bake. Don't just approach scoring as a necessary step; see it as an opportunity for creative expression and a chance to refine your technique. Experiment with different patterns, depths, and angles. Observe how each cut influences the final oven spring. Embrace the imperfections, learn from them, and celebrate the journey of mastering this essential aspect of sourdough baking. The beauty of sourdough lies not only in the delicious result but also in the process itself – a process you are now empowered to shape and refine with each carefully considered score.
Unleash Your Inner Baker: Mastering the Perfect Oven Spring
Thanks for taking the time to explore the secrets of achieving that glorious oven spring! We hope you now feel more confident in your sourdough journey. Ready to put your new knowledge into practice?
- Bake a loaf today! Experiment with your newfound understanding of shaping and proofing techniques – you’ll be amazed by the difference.
- Share your baking triumphs (and challenges!) with our community on social media using #BakeWithEaseSourdough. Let's learn from each other!
- Try a different flour blend to see how it impacts your oven spring – the possibilities are endless!
What unique technique will you try to perfect your sourdough's oven spring next?