
Troubleshooting Gummy Sourdough Crumb: Causes and Cures


Welcome to BakeWithEase, your trusted guide to the delightful world of baking! Ever wrestled with a gummy sourdough crumb? That dense, almost undercooked texture can be frustrating. Uncover the secrets behind this common sourdough challenge and learn proven techniques to achieve that perfect, airy crumb you've always dreamed of. Let's dive in and transform your sourdough baking today!
- Troubleshooting Dense Sourdough: Causes and Cures - BakeRight.com
- Understanding Dense Sourdough: An Introduction
-
Diagnosing the Root Cause of Dense Sourdough
- Cause 1: Insufficient Gluten Development - Weak Dough Structure
- Cause 2: Over-Proofing - Collapsed Dough Structure
- Cause 3: Salt Imbalance - Incorrect Salt Percentage
- Cause 4: Oven Temperature Issues - Inconsistent Baking Environment
- Cause 5: Starter Imbalance - Acetic vs. Lactic Acid
- Cause 6: Dough Handling - Over-Handling or Rough Shaping
-
Curing Dense Sourdough: Solutions and Prevention
- Solution 1: Improving Gluten Development - Kneading Techniques
- Solution 2: Optimizing Proofing Time - Visual Cues and Temperature
- Solution 3: Adjusting Salt Levels - Accurate Measurement
- Solution 4: Ensuring Consistent Oven Temperature - Oven Calibration
- Solution 5: Balancing Starter Acidity - Feeding Schedules
- Solution 6: Gentle Dough Handling - Shaping Techniques
- Advanced Techniques for Avoiding Dense Crumb
- Dense Sourdough Troubleshooting: A Recap
-
Frequently Asked Questions
- What is the most common cause of a gummy sourdough crumb?
- How does hydration level affect the sourdough crumb structure?
- What role does starter activity play in avoiding a gummy sourdough?
- Can over-proofing contribute to a gummy sourdough crumb?
- What baking techniques can help prevent a gummy sourdough crumb?
- Final Reflection: Unlocking the Secrets of a Perfect Sourdough Crumb
- Unlock Your Perfect Sourdough: Rise to the Challenge!
Troubleshooting Dense Sourdough: Causes and Cures - BakeRight.com
Understanding Dense Sourdough: An Introduction
What is Dense Sourdough? Identifying the Problem
Dense sourdough is a common frustration for many bakers. Instead of a light, airy crumb with beautiful open pockets, you end up with a loaf that feels heavy, sometimes wet or 'gummy', and lacks that characteristic springiness. A truly dense loaf might be uniformly heavy throughout, or it could have patches of unbaked dough, often near the bottom or center. This undesirable texture is a key indicator that something went awry during the complex sourdough process, from mixing to baking.
Identifying the problem often involves looking at the final loaf's cross-section. Does it look like a brick? Is the crumb structure tight with no visible air pockets? Does it feel sticky or compressed when you press it? This gummy texture and lack of openness are the tell-tale signs. Understanding the gummy sourdough crumb causes is the first step towards achieving that perfect, light loaf you're aiming for.
Why is My Sourdough Dense? Common Causes and Contributing Factors
Several factors can contribute to a dense or gummy sourdough crumb. It's rarely just one single issue, but often a combination of subtle missteps throughout the process. Primary suspects include issues with gluten development, which provides the structure; improper fermentation timing, leading to under or over-proofing; incorrect hydration or salt levels; and problems during the crucial baking phase, especially insufficient heat or steam. Even how you handle the dough can make a difference.
Each stage of sourdough baking, from the health of your starter to the final oven spring, plays a vital role in the crumb structure. A weak starter won't produce enough gas, leading to a dense loaf. Insufficient kneading or folding means the gluten network can't trap the gas produced. Over-proofing causes the structure to collapse. Underbaking leaves the starches gelatinized and the crumb sticky and gummy. Pinpointing the exact gummy sourdough crumb causes requires a bit of detective work, examining your process step-by-step.
Diagnosing the Root Cause of Dense Sourdough
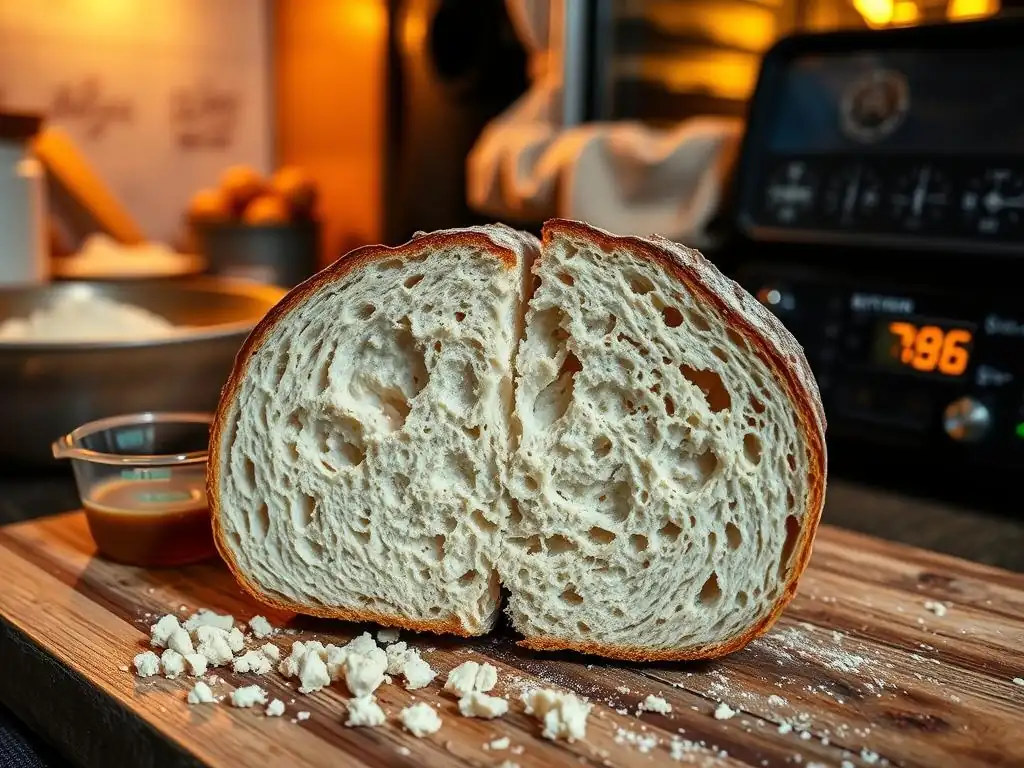
Cause 1: Insufficient Gluten Development - Weak Dough Structure
Gluten is the protein network that gives dough its elasticity and strength, allowing it to trap the carbon dioxide produced by fermentation. If this network is underdeveloped, the dough won't be able to hold onto the gas, resulting in a dense, tight crumb rather than an open, airy one. This is a very common culprit behind a gummy sourdough crumb. The flour type significantly impacts gluten potential; a high-protein bread flour (typically 12-14% protein) develops gluten more readily than an all-purpose flour (around 10-11.5% protein).
Insufficient kneading, inadequate resting periods between folds, or using a weak flour can all lead to poor gluten development. The dough might feel slack, tear easily, and lack resilience. Without a strong gluten structure, the dough collapses during proofing or baking, leading to a heavy, gummy loaf. Understanding how to properly develop gluten is fundamental to avoiding a dense or gummy sourdough crumb.
How to Test for Gluten Development in Sourdough Dough
A common way to check for adequate gluten development is the "windowpane test". After a period of kneading or several rounds of stretch and folds, take a small piece of dough (about the size of a golf ball). Gently stretch it between your fingers. If you can stretch it thin enough to see light through it without it tearing, forming a translucent "windowpane," the gluten is well-developed. If it tears quickly or resists stretching, it needs more work.
Another indicator is the dough's overall feel. Well-developed dough becomes smooth, elastic, and less sticky. It will hold its shape better and have a lively, resilient feel when you handle it. Performing the windowpane test periodically during your bulk fermentation and folding process helps you gauge when the dough has built sufficient strength to support an open crumb structure and prevent a gummy sourdough crumb.
Improving Gluten Development Through Kneading and Folding
Gluten develops when the proteins in flour (glutenin and gliadin) are hydrated and then worked, either through mechanical kneading or gentle folding over time. For sourdough, which often has higher hydration levels, techniques like stretch and folds or coil folds are popular alternatives to traditional kneading. These methods develop strength gradually while also degasing the dough gently.
Performing 3-5 sets of stretch and folds or coil folds during the first few hours of bulk fermentation, spaced 30-60 minutes apart, is highly effective. For stretch and folds, wet your hands, grab one side of the dough, stretch it up and over the center, and repeat for all four sides. For coil folds, lift the dough from the center with wet hands, letting the ends fold under themselves, then place it back in the container. Both methods build tension and align gluten strands, crucial steps in preventing a gummy sourdough crumb.
Cause 2: Over-Proofing - Collapsed Dough Structure
Over-proofing occurs when the dough ferments for too long or in too warm a temperature. The yeast and bacteria consume too much sugar, and the gluten structure that was built to trap gas begins to break down. This results in a dough that looks puffy and expanded initially but lacks internal strength. When you try to bake it, it often collapses, either in the proofing basket, upon scoring, or during the initial phase of baking, leading to a flat, dense loaf with a tight, sometimes gummy crumb.
An over-proofed dough might look very bubbly on the surface but feels fragile and doesn't spring back quickly when gently poked. The wonderful tension you built during kneading and folding is lost. The gas produced during fermentation escapes because the weakened gluten network can no longer contain it. This structural failure is a significant cause of a gummy sourdough crumb.
Understanding the Effects of Over-Proofing on Sourdough
The primary effect of over-proofing is the degradation of the gluten network by enzymes present in the flour and produced by the starter. These enzymes, particularly proteases, break down the protein chains, weakening the dough's ability to hold its shape and trap gas. The dough becomes overly acidic, which can also contribute to gluten weakening.
Visually, an over-proofed dough might initially appear very expanded, perhaps even showing signs of collapse around the edges. When gently poked, the indentation will remain or spring back very slowly, indicating a loss of elasticity. The dough may also feel sticky and difficult to handle. Baking over-proofed dough results in poor oven spring, a flattened loaf profile, and a dense, often gummy sourdough crumb because the structure needed for expansion and even baking has been compromised.
Adjusting Proofing Time for Optimal Dough Strength
Optimal proofing time is perhaps the most challenging aspect of sourdough baking, as it depends heavily on ambient temperature, starter activity, hydration level, and flour type. Rather than relying solely on recipes' timing, learn to read your dough. Watch for visual cues: a typical bulk fermentation might involve a 30-50% increase in volume, depending on temperature and desired outcome. The dough should look bubbly and feel aerated but still have tension.
The "poke test" is a useful indicator. Gently press a floured finger into the dough about half an inch deep. If the indentation springs back completely and immediately, it needs more time. If it springs back slowly, leaving a small indentation, it's likely ready. If the indentation remains fully, it's likely over-proofed. Adjusting proofing time based on these cues, rather than a strict clock, is crucial for preventing a gummy sourdough crumb. Using a proofer box or controlling ambient temperature can also help manage proofing speed.
Cause 3: Salt Imbalance - Incorrect Salt Percentage
Salt is more than just a flavor enhancer in bread baking; it plays a critical role in controlling the fermentation rate and strengthening the gluten network. Too little salt allows fermentation to proceed too quickly, potentially leading to over-proofing before sufficient gluten structure is built. It also results in a weaker gluten network that is less able to hold gas and structure during baking.
A typical salt percentage in sourdough is between 1.8% and 2.2% of the total flour weight (using baker's percentage). Deviating significantly below this range can accelerate yeast activity and enzyme action, leading to a dough that is harder to control, ferments too fast, and develops a weaker gluten structure. This lack of structural integrity and potential for rapid, uncontrolled fermentation are significant gummy sourdough crumb causes.
The Role of Salt in Sourdough Fermentation and Structure
Salt has two primary functions in sourdough: controlling fermentation and strengthening gluten. By slightly inhibiting yeast and bacterial activity, salt slows down the fermentation process, allowing for a longer, more controlled bulk fermentation and proofing period. This slower fermentation allows more time for complex flavors to develop and, importantly, provides ample time for the gluten network to develop and strengthen.
Secondly, salt tightens the gluten structure, making the dough more elastic and less sticky. It helps the gluten network align properly, increasing its ability to trap gas and hold its shape during proofing and baking. Without enough salt, the dough can be slack, sticky, and prone to collapsing, contributing directly to a dense, gummy sourdough crumb.
Calculating and Adjusting Salt Levels in Your Sourdough Recipe
Accurate measurement of all ingredients, especially salt, is crucial. Using a digital scale is highly recommended for precision. Salt is typically measured as a percentage of the total flour weight (baker's percentage). For example, if your recipe uses 500g of flour and calls for 2% salt, you need 10g of salt (500g * 0.02 = 10g).
If you suspect your salt level was too low in a previous bake that resulted in a gummy crumb, ensure you are accurately measuring it according to your recipe's baker's percentage. If the recipe doesn't provide percentages, calculate the flour weight and aim for 1.8% to 2.2% salt. Consistently using the correct salt level helps regulate fermentation speed and build a stronger gluten network, reducing the likelihood of a gummy sourdough crumb.
Cause 4: Oven Temperature Issues - Inconsistent Baking Environment
Even if you've done everything right up to the point of baking, an incorrect or inconsistent oven temperature can ruin your sourdough. Insufficient heat, especially during the crucial initial phase with steam, leads to poor oven spring and an underbaked interior. The starches in the center don't gelatinize properly, and the moisture isn't driven off, resulting in a heavy, wet, and gummy sourdough crumb.
Many home ovens are not accurately calibrated, and the temperature displayed might be significantly different from the actual temperature inside. If your oven is running cooler than you think, your bread won't bake through properly, regardless of how long it's in there. This underbaking is a primary gummy sourdough crumb cause.
Understanding the Impact of Oven Temperature on Sourdough
High heat is essential for sourdough baking for several reasons. The initial burst of heat (often with steam) causes rapid expansion (oven spring) as the gas pockets within the dough expand before the crust sets. This creates the open crumb structure. Sustained heat then bakes the interior, converting starches, evaporating moisture, and setting the structure.
If the oven temperature is too low, the oven spring will be diminished because the gas doesn't expand rapidly enough before the crust hardens. More importantly, the interior will not reach the temperature required to fully cook the starches and proteins (around 200-210°F or 93-99°C internally). This leaves the crumb dense, doughy, and gummy.
Calibrating Your Oven for Accurate Temperature Readings
Relying solely on your oven's built-in thermostat can be misleading. A simple and relatively inexpensive solution is to use a separate, oven-safe thermometer placed inside your oven. Place it near where you bake your bread, ideally attached to the rack. Preheat your oven to your desired baking temperature and let it stabilize for at least 30-45 minutes (or even longer for heavy vessels like Dutch ovens). Then, check the reading on the oven thermometer.
Compare the thermometer's reading to your oven's display. You might find it's consistently 25°F (about 14°C) or more off. Knowing this difference allows you to adjust your oven setting accordingly. If your oven thermometer reads 450°F when your oven is set to 500°F, you know you need to set it higher next time or allow more preheating time. Accurate temperature is vital to prevent a gummy sourdough crumb.
Cause 5: Starter Imbalance - Acetic vs. Lactic Acid
A healthy sourdough starter is a balanced ecosystem of wild yeast and lactic acid bacteria (LAB). These microbes produce gases that leaven the bread and acids that contribute to flavor and help condition the dough. LAB produce two main types of acid: lactic acid (milder, yogurt-like flavor, contributes to extensibility) and acetic acid (sharper, vinegar-like flavor, contributes to elasticity). The balance between these acids impacts the dough's behavior and the final crumb.
While a starter that is too acidic isn't a direct gummy sourdough crumb cause in the same way underbaking or over-proofing is, a starter that is too dominant in acetic acid can potentially lead to a slightly weaker gluten structure over very long fermentation periods or if used in very high percentages, indirectly contributing to denseness or a less open crumb if other factors aren't perfect. More commonly, a weak or inactive starter (regardless of acid balance) that doesn't produce enough gas is a direct cause of dense crumb.
Understanding the Balance of Acids in Sourdough Starter
Lactic acid bacteria thrive in wetter, warmer conditions and when fed more frequently. They produce lactic acid, contributing a creamy, tangy flavor and making the dough more extensible (stretchy). Acetic acid bacteria are favored by stiffer starters, cooler temperatures, and less frequent feeding. They produce acetic acid, contributing a sharper, vinegary tang and making the dough more elastic (snappy).
A healthy starter should ideally have a good balance, though the exact ratio can be manipulated for flavor preferences. You can often tell which is dominant by smell: a strongly vinegary smell indicates higher acetic acid. While both contribute to flavor, a very high level of acetic acid could potentially have a subtle tenderizing effect on gluten over prolonged fermentation, though this is less common as a primary cause of gummy crumb than other factors like proofing or baking.
Adjusting Starter Feeding to Influence Acid Production
You can influence the acid balance in your starter by adjusting its hydration and feeding frequency. To encourage more lactic acid (milder flavor, potentially more extensible dough), maintain a higher hydration (like 100% or more) and feed more frequently (e.g., every 12 hours if kept at room temperature).
To encourage more acetic acid (sharper flavor, potentially more elastic dough), maintain a lower hydration (like 50-80%) and feed less frequently (e.g., every 24 hours or longer if kept cooler). Ensuring your starter is robust and active, regardless of the exact acid balance, is paramount. A starter that doubles or triples reliably within a predictable timeframe after feeding indicates it's strong enough to leaven your dough and prevent a dense or gummy sourdough crumb caused by insufficient gas production.
Cause 6: Dough Handling - Over-Handling or Rough Shaping
The way you handle your dough during shaping can significantly impact the final crumb structure. After developing the gluten network during bulk fermentation and building tension through folds, the goal of shaping is to create a taut outer skin and prepare the dough for its final proof and bake. However, being too rough or degassing the dough excessively during this stage can undo all the good work you've done.
Over-handling or aggressively degassing the dough pushes out too much of the precious carbon dioxide gas that creates the open crumb. If you pop too many bubbles or stretch the dough too thin and tear the gluten network during shaping, the dough won't have enough gas or structural integrity left to achieve good oven spring and an open crumb. This can lead to a denser, tighter, and potentially gummy sourdough crumb.
The Impact of Dough Handling on Sourdough Structure
Gentle handling preserves the gas bubbles created during fermentation. These bubbles are the foundation of your open crumb structure. Think of the dough after bulk fermentation as a delicate network of gluten strands trapping gas pockets. Your goal during pre-shaping and final shaping is to consolidate this structure and build surface tension without destroying the internal aeration.
Roughly tearing or punching down the dough, stretching it too aggressively, or spending too much time manipulating it on the counter can deflate the dough significantly. While some degassing is natural and necessary during shaping, excessive handling leads to a loaf that lacks the internal lift needed for an open crumb, resulting in a dense or gummy sourdough crumb.
Gentle Shaping Techniques for a Light and Airy Loaf
The key to gentle handling is minimizing manipulation while still achieving a taut surface. Techniques vary depending on the dough's hydration and type, but common gentle methods include the envelope fold, stitching, and using a bench scraper to build tension. Pre-shaping allows the dough to rest and relax before the final shape, making it easier to handle gently.
For final shaping, aim to create a smooth, taut surface by gently pulling the dough towards you while simultaneously pushing it slightly away with your hands or a bench scraper. Use just enough flour on your work surface to prevent sticking, but not so much that it interferes with the dough sticking to itself and creating tension. Practice makes perfect; learning to feel the dough and work with its natural elasticity gently will significantly improve your crumb structure and help avoid a gummy sourdough crumb.
Curing Dense Sourdough: Solutions and Prevention
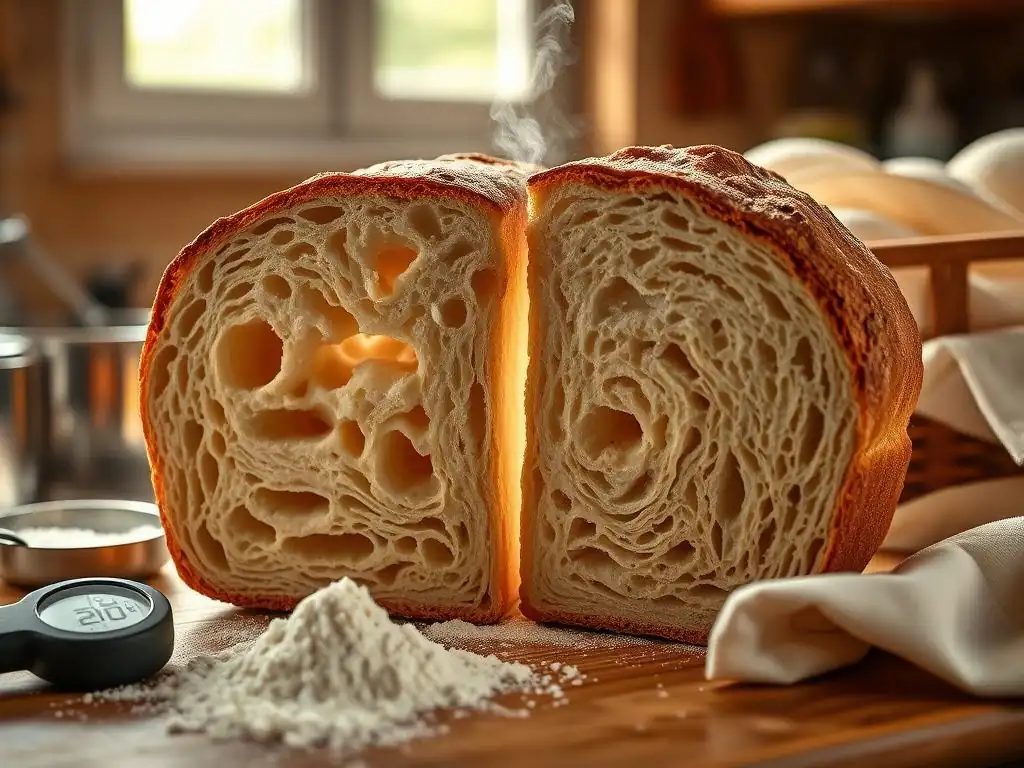
Solution 1: Improving Gluten Development - Kneading Techniques
To combat dense or gummy sourdough crumb caused by weak structure, focus on strengthening your gluten network. This can be achieved through various kneading or folding methods, adapted to your dough's hydration. For lower hydration doughs (below 70%), traditional kneading on a counter or using a stand mixer can be effective. Knead until the dough is smooth, elastic, and passes the windowpane test.
For higher hydration doughs (70% and above), which are common in sourdough, stretch and folds or coil folds during the first 2-3 hours of bulk fermentation are ideal. Perform 3-5 sets, spaced 30-60 minutes apart. These techniques build strength gently and gradually. Ensure you are performing the folds correctly, feeling the dough gain tension after each set. Adequate gluten development is foundational to preventing a gummy sourdough crumb.
Different Kneading Methods for Sourdough
- Traditional Kneading: Working the dough vigorously on a surface by folding and pushing. Best for lower hydration doughs. Develops gluten through mechanical force.
- Stretch and Folds: Wet hands, grab dough edge, stretch up and over the center. Repeat 4-8 times per set. Good for medium to high hydration. Builds strength and incorporates air gently.
- Coil Folds: With wet hands under the dough, lift from the center allowing ends to coil underneath. Gently lower. Good for high hydration. Very gentle, preserves aeration.
- Stand Mixer: Using a dough hook on low to medium speed. Effective for various hydration levels but can overheat dough if done too long. Monitor dough temperature.
Solution 2: Optimizing Proofing Time - Visual Cues and Temperature
Avoiding over-proofing is critical to prevent a gummy sourdough crumb. Instead of strictly following a recipe's time, learn to read your dough. Monitor its volume increase during bulk fermentation – aim for a 30-50% rise, depending on the dough and desired outcome. The dough should look aerated and slightly domed, not completely flat or collapsing.
Use the poke test (as described earlier) as your primary guide for both bulk fermentation and final proofing. For final proofing, the dough should spring back slowly, leaving a small indentation. If it springs back immediately, it needs more time. If the indentation stays completely, it's likely over-proofed. Adjust proofing based on these cues, not just the clock.
Using Temperature to Control Proofing Speed
Temperature is a major factor influencing fermentation speed. Warmer temperatures (like 75-80°F or 24-27°C) accelerate proofing, while cooler temperatures (like 65-70°F or 18-21°C) slow it down. If your kitchen is warm, your dough will proof faster than a recipe might indicate. If it's cool, it will take longer.
You can control proofing speed by finding a warmer or cooler spot in your kitchen, using a proofing box, or utilizing the refrigerator for a long, slow cold proof. A cold proof (typically 8-48 hours in the fridge at 38-40°F or 3-4°C) significantly slows fermentation, develops flavor, and makes shaping easier. It's a great technique to prevent accidental over-proofing at room temperature and often contributes to a better crumb structure, helping avoid a gummy sourdough crumb.
Solution 3: Adjusting Salt Levels - Accurate Measurement
Ensure you are using the correct amount of salt, typically between 1.8% and 2.2% of the total flour weight. Using a digital scale is essential for accuracy. Don't guesstimate or rely on volume measurements for salt. A small error here can impact fermentation speed and gluten strength, contributing to a gummy sourdough crumb.
If your recipe doesn't provide baker's percentages, calculate them yourself. Total flour weight is 100%. Salt is a percentage of that. Salt Weight = Total Flour Weight * (Salt Percentage / 100). For example, if you use 600g of total flour and want 2% salt, you need 600g * (2 / 100) = 12g of salt.
Using Baker's Percentage for Precise Salt Calculation
Baker's percentage is a standard way to write recipes, expressing each ingredient's weight as a percentage of the total flour weight. Total flour is always 100%.
- Flour: 100%
- Water: e.g., 75% (Hydration)
- Starter: e.g., 20% (Starter as a percentage of flour)
- Salt: e.g., 2%
To calculate the weight of each ingredient from percentages, multiply the total flour weight by the percentage (as a decimal). Example: Total Flour = 500g
- Water weight = 500g * 0.75 = 375g
- Starter weight = 500g * 0.20 = 100g
- Salt weight = 500g * 0.02 = 10g
Using baker's percentages ensures consistency and accuracy, helping you maintain the correct salt level needed for controlled fermentation and strong gluten, crucial for preventing a gummy sourdough crumb.
Solution 4: Ensuring Consistent Oven Temperature - Oven Calibration
To prevent underbaking and a gummy sourdough crumb, verify your oven's actual temperature. Use an inexpensive oven-safe thermometer placed inside your oven. Preheat your oven for a sufficient time, at least 30-45 minutes, to allow the temperature to stabilize, especially if using a baking stone or Dutch oven.
Compare the thermometer reading to your oven's display. If there's a discrepancy, note it and adjust your oven setting accordingly for future bakes. For example, if you want to bake at 450°F (230°C) but your thermometer reads 425°F (220°C) when set to 450°F, set your oven to 475°F (245°C) next time to hopefully achieve the desired 450°F actual temperature. Consistent, accurate heat is vital for a proper bake and preventing a gummy sourdough crumb.
Using an Oven Thermometer for Accurate Temperature Monitoring
An oven thermometer is a simple tool that can drastically improve your baking results. Place it on the middle rack where your bread will bake. Monitor it during preheating and baking. This gives you real-time information about the environment your bread is experiencing.
If your oven temperature fluctuates significantly, consider baking in a Dutch oven. A Dutch oven acts as a mini-oven within your oven, providing a more stable and consistent temperature around the loaf, especially during the initial high-heat phase, which aids in oven spring and even baking. This helps ensure the loaf bakes through properly, avoiding a gummy sourdough crumb.
Solution 5: Balancing Starter Acidity - Feeding Schedules
While less common as a direct cause of gummy crumb than other factors, ensuring your starter is healthy and active is paramount. A weak starter won't produce enough gas, leading to a dense loaf. Focus on regular feeding to keep your starter vigorous. Feed it when it's at its peak or just starting to fall, typically when it has doubled or tripled in volume and is bubbly.
If you suspect your starter's acid balance is affecting your dough's structure (though less likely the primary cause of gummy crumb compared to density from underbaking/proofing), you can adjust feeding ratios and hydration. A 1:1:1 ratio (starter:flour:water by weight) fed regularly at room temperature encourages a good balance. Using slightly warmer water (around 80°F / 27°C) can encourage yeast and lactic acid bacteria activity.
Adjusting Feeding Ratios for Desired Starter Characteristics
The ratio of starter to fresh flour and water influences feeding frequency and acid development.
- 1:1:1 ratio: Equal parts starter, flour, water (by weight). Requires frequent feeding (e.g., every 12 hours) at room temp. Promotes faster activity and can lean slightly more lactic.
- 1:2:2 ratio: One part starter, two parts flour, two parts water. Slower feeding cycle (e.g., every 24 hours). Good for maintaining starter at room temp.
- 1:5:5 ratio or higher: One part starter, five or more parts flour and water. Very slow feeding cycle. Good for storing starter in the fridge for longer periods.
Using higher ratios (less starter, more food) and cooler temperatures encourages acetic acid. Using lower ratios (more starter, less food) and warmer temperatures encourages lactic acid. For a strong, balanced starter capable of preventing a dense or gummy sourdough crumb, consistency in feeding at a ratio that allows it to double reliably within a predictable timeframe (e.g., 4-8 hours after feeding at room temp) is key.
Solution 6: Gentle Dough Handling - Shaping Techniques
Practice gentle dough handling during pre-shaping and final shaping. Avoid degassing the dough excessively. Use a light touch and minimal flour on your work surface. The goal is to create surface tension without tearing the gluten or deflating the internal structure.
Focus on techniques that fold and tuck the dough to create a taut skin. For a boule (round loaf), gently cup the dough with your hands or a bench scraper, rotating it to build tension on the surface. For a batard (oval loaf), fold the dough like an envelope, then roll it tightly away from you, sealing the seam. Watching video tutorials can be incredibly helpful to visualize these techniques. Gentle handling preserves the gas needed for an open crumb and helps prevent a gummy sourdough crumb.
Video Tutorials on Gentle Sourdough Shaping
While I cannot provide direct links, searching online platforms for "gentle sourdough shaping techniques," "how to shape a sourdough boule," or "how to shape a sourdough batard" will yield many helpful video tutorials. Look for bakers who emphasize working with the dough's tension and avoiding aggressive degassing. Pay attention to how they use their hands and minimal flour. Visualizing these techniques is often the best way to learn the feel of gentle shaping required for a light, airy crumb.
Advanced Techniques for Avoiding Dense Crumb
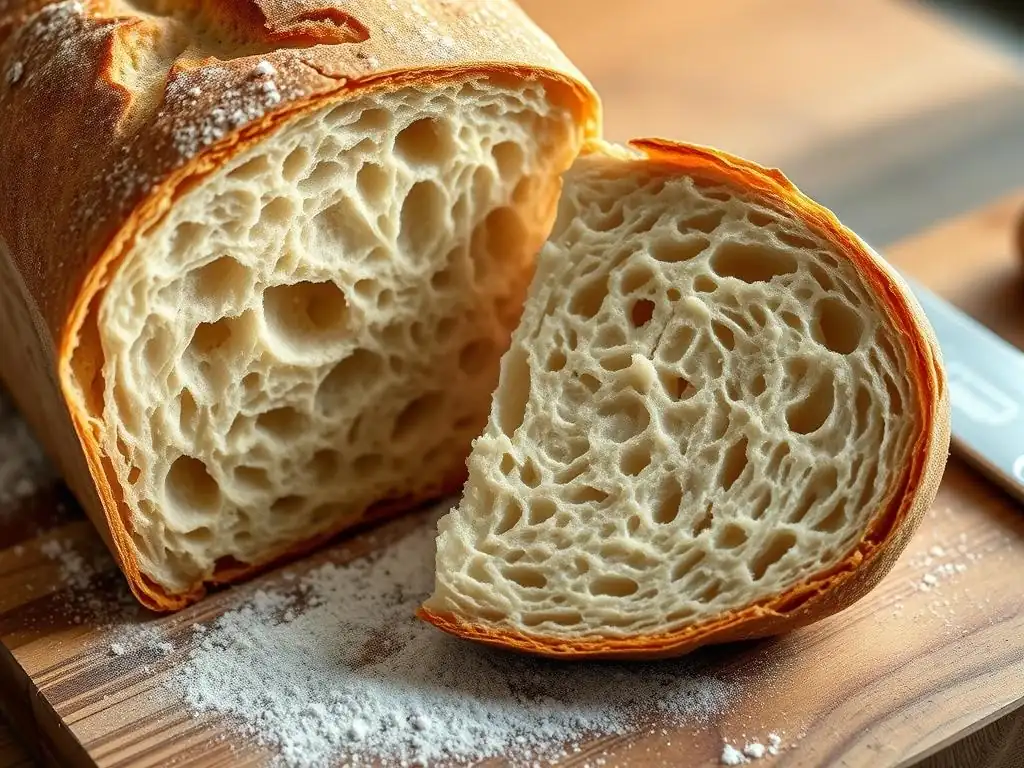
Laminating Dough: Creating Layers for Open Crumb
Laminating is an advanced technique that can significantly improve crumb openness and help avoid a gummy sourdough crumb. After the initial mixing and a short rest, the dough is gently stretched out into a very thin rectangle, almost transparent. Then, it's folded like a business letter (in thirds or quarters). This process is typically done early in bulk fermentation (e.g., after the first hour).
This stretching and folding creates layers within the dough. During fermentation and baking, these layers separate slightly, encouraging the formation of large, irregular air pockets characteristic of a very open crumb. It also further strengthens the gluten network gently. Laminating requires a dough with sufficient initial strength to be stretched thin without tearing, but when done correctly, it's a powerful technique against a gummy sourdough crumb.
Cold Retardation: Slowing Down Fermentation
Cold retardation, or cold proofing, involves placing the shaped dough in the refrigerator (typically 38-40°F or 3-4°C) for an extended period, usually 8 to 48 hours. This significantly slows down yeast activity while allowing lactic acid bacteria to continue producing flavorful acids. The cold also firms up the dough, making it easier to score and handle before baking.
This slow, cold fermentation develops complex flavors and strengthens the gluten structure further. It also provides a buffer against accidental over-proofing at room temperature. Baking the dough directly from the cold fridge often results in excellent oven spring because the cold, firm surface is easier to score cleanly, and the temperature difference provides a powerful thermal shock in the hot oven. This technique is highly effective in preventing a gummy sourdough crumb by ensuring proper fermentation and aiding oven spring.
Using a Dutch Oven: Creating a Steamy Baking Environment
Baking sourdough in a preheated Dutch oven is a popular method for achieving professional results in a home oven and is excellent for preventing a gummy sourdough crumb. The lidded Dutch oven traps the moisture released by the dough as it heats up, creating a steamy environment around the loaf during the crucial first 20-25 minutes of baking.
Steam is vital for maximizing oven spring. It keeps the dough's surface supple, allowing it to expand freely before the crust sets. Without sufficient steam, the crust forms too quickly, restricting expansion and resulting in a denser loaf with less oven spring and potentially a gummy crumb. After the initial steamed phase (lid on), removing the lid allows the crust to brown and crisp up beautifully. The high heat retained by the cast iron also contributes to a powerful bake and helps ensure the loaf is cooked through, preventing a gummy sourdough crumb caused by underbaking.
Dense Sourdough Troubleshooting: A Recap
Key Takeaways for Perfecting Your Sourdough Crumb
Achieving a light, airy crumb instead of a dense or gummy sourdough crumb involves mastering several interconnected stages of the baking process.
- Strong Starter: Ensure your starter is active and healthy, reliably doubling or tripling after feeding.
- Gluten Development: Adequately knead or perform sufficient stretch and folds/coil folds to build a strong, elastic gluten network (check with the windowpane test).
- Proofing Control: Learn to read your dough's volume increase and use the poke test to avoid over-proofing. Consider using temperature control or cold retardation.
- Accurate Salt: Measure salt precisely (1.8-2.2% of flour weight) using a scale; it's crucial for fermentation control and gluten strength.
- Oven Accuracy: Verify your oven's temperature with a thermometer and preheat adequately.
- Gentle Handling: Shape your dough gently, preserving the internal gas structure.
- Proper Baking: Use high heat and steam (like from a Dutch oven) to ensure maximum oven spring and thorough baking.
Addressing these gummy sourdough crumb causes systematically will significantly improve your results.
Further Resources for Sourdough Baking Excellence [Link to Sourdough Baking Community]
Mastering sourdough baking takes practice and patience. Don't be discouraged by a dense or gummy crumb; it's a common learning experience. There are many excellent resources available online, from detailed guides and recipes to vibrant communities of fellow bakers. Engaging with a sourdough baking community can provide valuable insights, tips, and support as you hone your skills and consistently bake beautiful, airy loaves. Sharing your experiences and troubleshooting with others is a great way to learn and grow as a baker.
Frequently Asked Questions
What is the most common cause of a gummy sourdough crumb?
The most common cause is undercooking the bread. This means the internal temperature hasn't reached the ideal point for proper starch gelatinization and protein coagulation, resulting in a sticky texture.
How does hydration level affect the sourdough crumb structure?
Excessive hydration can lead to a gummy crumb. While sourdough often benefits from high hydration, too much makes it difficult for the gluten to develop properly, resulting in a dense and gummy texture after baking.
What role does starter activity play in avoiding a gummy sourdough?
A weak or inactive starter is a major contributor to gummy sourdough. A starter needs to be vigorous and able to properly ferment the dough, producing enough gas to create a light and airy crumb.
Can over-proofing contribute to a gummy sourdough crumb?
Yes, over-proofing can weaken the gluten structure, leading to a collapsed and gummy crumb. The dough becomes overly acidic, breaking down the gluten network that provides structure.
What baking techniques can help prevent a gummy sourdough crumb?
Baking in a Dutch oven with a lid traps steam, helping the dough rise fully and cook evenly. Ensuring the internal temperature reaches 205-210°F (96-99°C) is crucial for a non-gummy crumb.
Final Reflection: Unlocking the Secrets of a Perfect Sourdough Crumb
The quest for the perfect sourdough crumb—that airy, open texture we all crave—is a journey fraught with challenges, but understanding the underlying causes of gummy crumb is the key to unlocking success. This journey, as detailed in this article, highlights the crucial interplay between hydration, fermentation, and baking techniques. Mastering these elements isn't just about achieving a visually appealing loaf; it's about understanding the fundamental science behind sourdough baking.
The struggle with gummy sourdough is a common thread woven throughout the baking community. It's a frustrating experience that can discourage even the most dedicated bakers. The most important thing is to have patience and to learn from your mistakes,
a wise baker once said, and this rings especially true when tackling the complexities of sourdough. The journey to a perfect crumb is a testament to perseverance and the rewarding feeling of finally achieving that elusive, light-as-air texture. It's a journey of learning, adapting, and ultimately, mastering the art of sourdough.
Now, armed with the knowledge gained from exploring the various causes and solutions presented in this article, I invite you to reflect on your own sourdough baking experiences. Consider the specific challenges you've faced, and how the information provided here can help you refine your technique. Don't be afraid to experiment, to adjust your hydration levels, to tweak your fermentation times, and to embrace the iterative process of sourdough baking. The perfect crumb awaits—all you need is the patience and the willingness to learn. Go forth and bake!
Unlock Your Perfect Sourdough: Rise to the Challenge!
Thanks for diving into the world of sourdough with us! We hope you now feel empowered to tackle those gummy crumb issues head-on. Ready to put your new knowledge into practice?
- Bake your best loaf yet: Try the recipe adjustments we discussed, focusing on the hydration and fermentation stages. This is your chance to perfect your technique!
- Share your sourdough journey: Post a picture of your next loaf on social media using #BakeWithEaseSourdough – let’s inspire each other!
- Dive deeper into sourdough techniques: Explore our other articles on shaping and scoring for an even more refined outcome.
So, tell us: What unique adjustment will you make to your next sourdough bake based on what you've learned today?