
Understanding Proofing Signals: When Is Your Sourdough Ready?

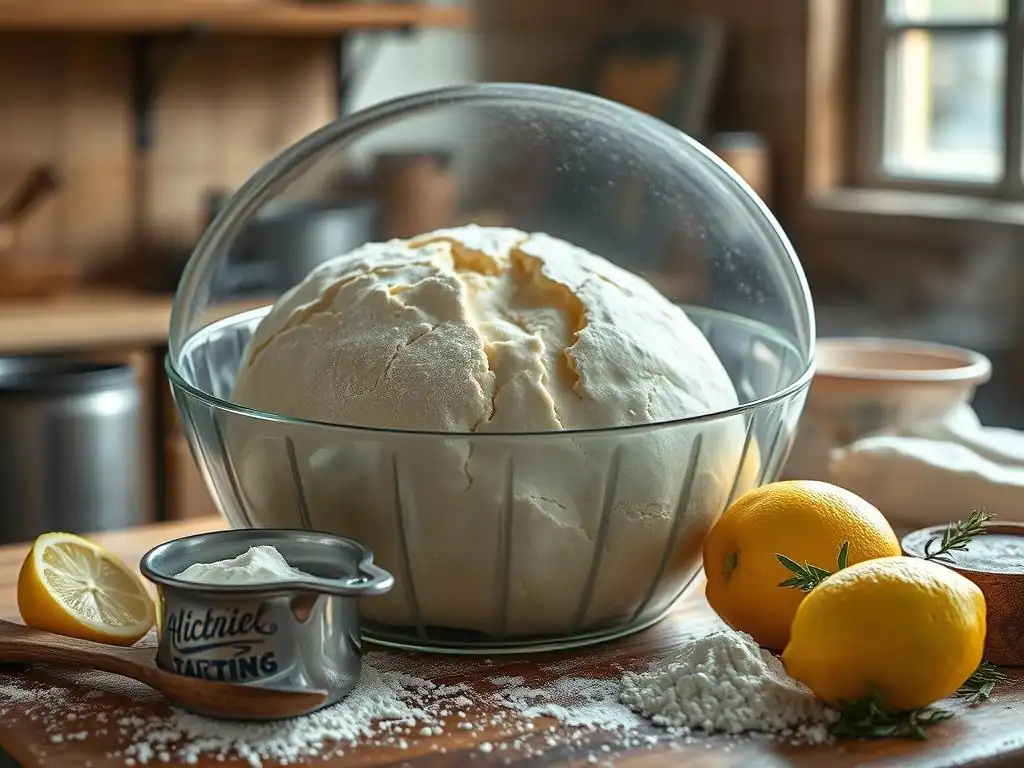
Welcome to BakeWithEase, your trusted companion on your baking journey! Ever wondered if your sourdough starter is truly ready to unlock the magic of a perfectly risen loaf? This article dives deep into understanding sourdough starter proofing time, revealing the subtle signals that separate a good bake from a great one. Discover the secrets to mastering the art of sourdough and elevate your baking game!
- Introduction to Sourdough Proofing
- Decoding Sourdough Proofing Time: A Comprehensive Guide
- Key Indicators of a Properly Proofed Sourdough
- Factors Affecting Sourdough Proofing Time
- Troubleshooting Common Sourdough Proofing Problems
- Optimizing Your Sourdough Proofing Process
- Advanced Techniques for Sourdough Proofing
- Conclusion: Mastering Sourdough Proofing
-
Frequently Asked Questions
- What is sourdough starter proofing and why is it important?
- How long should I proof my sourdough starter?
- What are some visual signs that my sourdough starter is ready to use?
- What happens if I use my sourdough starter before it's properly proofed?
- Can I over- proof my sourdough starter, and what does that look like?
- Final Reflection: The Dance of Patience and Precision in Sourdough Baking
- Unlock Your Sourdough's Potential: Bake the Perfect Loaf!
Introduction to Sourdough Proofing
The Importance of Proper Proofing in Sourdough Baking
Proper proofing is arguably one of the most critical stages in sourdough baking, directly impacting the final texture, flavor, and rise of your loaf. It's the period where the yeast and bacteria in your sourdough starter work their magic, fermenting the dough, producing gases (primarily carbon dioxide), and developing complex flavors through metabolic processes.
An under-proofed loaf will be dense, gummy, and lack oven spring, while an over-proofed loaf can collapse, have a poor structure, and a less desirable crumb. Getting the sourdough starter proofing time just right is the key to achieving that coveted open crumb and delightful tangy flavor.
Mastering the proofing stage means learning to read your dough, not just relying on a clock. While recipes provide estimated sourdough proofing times, these are merely guidelines. Environmental conditions like temperature, the hydration of your dough, and the activity of your specific starter can significantly alter how quickly your dough proofs. Developing an intuitive understanding of the signs of proper proofing is essential for consistent, high-quality sourdough bread, making the difference between a flat, disappointing bake and a beautifully risen, airy loaf.
Understanding the Sourdough Starter and Its Role in Proofing
Your sourdough starter is a living culture of wild yeast and lactic acid bacteria (LAB). Think of it as the engine that drives the proofing process. When you feed your starter, the yeast and bacteria consume the flour and water, multiplying and producing acids and gases. This activity level directly influences how long your dough will take to proof. A vigorous, active starter will ferment your dough much faster than a sluggish one.
The health and activity of your starter are paramount. A well-maintained starter, fed regularly and kept at a favorable temperature (typically around 70-80°F or 21-27°C) before use, will be bubbly, have increased significantly in volume, and smell pleasantly tangy. Using a starter that hasn't reached its peak activity will result in a much longer sourdough proofing time and potentially an under-fermented dough, regardless of how long you let it sit. Understanding the relationship between your starter's peak and when you mix your dough is foundational to managing proofing.
Decoding Sourdough Proofing Time: A Comprehensive Guide
What is Sourdough Proofing?
Sourdough proofing is the fermentation period between mixing your final dough and baking it. This process is typically divided into two main stages: bulk fermentation (the first rise, usually done in a single mass) and final proofing (the second rise after shaping, often done in a banneton). During proofing, the natural yeasts consume sugars in the flour, producing carbon dioxide gas which causes the dough to rise and build structure. Simultaneously, lactic acid bacteria produce organic acids, contributing to the characteristic tangy flavor and improving the dough's structure and shelf life.
This period is where the magic happens, transforming a shaggy mass of flour and water into a supple, aerated dough ready for the oven. The duration of the sourdough proofing time can vary dramatically, from a few hours at warm room temperature to 12-24 hours or even longer when cold proofing in the refrigerator. It's not just about size; proofing is also about developing strength, extensibility, and flavor in the dough.
Factors Influencing Sourdough Proofing Time
Several variables play a significant role in determining the optimal sourdough proofing time for your loaf. The most impactful factors include temperature, hydration level, the type of flour used, the strength and activity of your sourdough starter, and even the amount of salt in your recipe (salt slows down fermentation). For example, a dough proofing at 80°F (27°C) might be ready in 3-4 hours during bulk fermentation, whereas the exact same dough proofing at 68°F (20°C) could take 6-8 hours or even longer.
Understanding how these elements interact is crucial for predicting and managing your sourdough starter proofing time. A high-hydration dough with a strong starter will typically proof faster than a low-hydration dough with a less active starter, assuming all other factors are equal. Similarly, using a large percentage of whole wheat or rye flour, which have more available sugars, can sometimes speed up fermentation compared to using only white bread flour, although their structure might require careful handling.
Key Indicators of a Properly Proofed Sourdough
Visual Cues: Observing Dough Volume and Texture
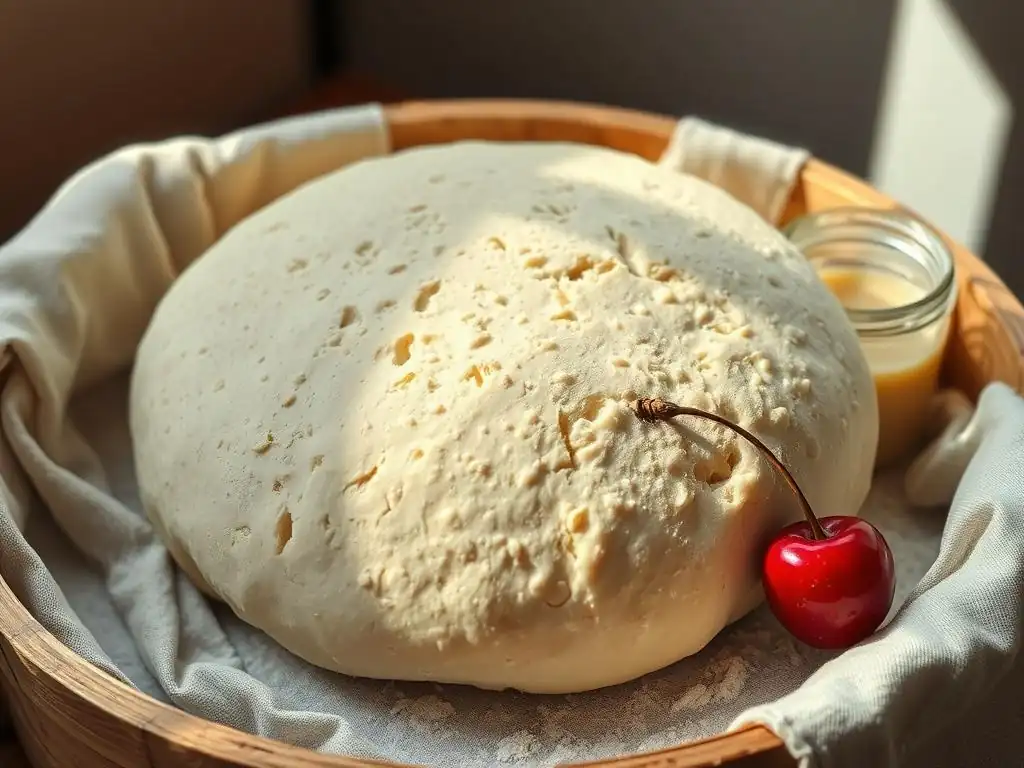
One of the most accessible ways to gauge if your sourdough is properly proofed is simply by observing its appearance. During bulk fermentation, you'll notice the dough increasing in volume. It will transform from a dense, tight mass into a visibly larger, often dome-shaped or rounded form. The surface might become smoother and show signs of small bubbles just beneath the skin.
Beyond just volume, pay attention to the dough's texture. A well-proofed dough should feel lighter and airy compared to its initial state. When gently disturbed (like during a coil fold), it should hold its shape reasonably well but also feel extensible and relaxed, not tight or resistant. The visibility of bubbles on the surface or sides of your proofing container is another positive sign of active fermentation.
Evaluating Dough Rise: How Much is Enough?
Quantifying the "right" amount of rise is often where bakers face uncertainty, but there are general guidelines. For bulk fermentation, a common target is a 30-50% increase in volume from the initial mixed dough. Some bakers aim for closer to a 75-100% increase, especially if doing a shorter, warmer bulk. The key is that the dough should look visibly larger and aerated, but not necessarily doubled in size, particularly if you plan a long cold proof later. Over-reliance on doubling can sometimes lead to over-proofing, especially with high-hydration doughs or warm temperatures.
During the final proof (after shaping), the rise is typically more subtle, perhaps a 20-40% increase in volume. The dough will fill out its banneton or proofing basket nicely. The edges should look rounded, and the dough should feel pillowy. Again, the goal isn't necessarily doubling, but achieving a state where the dough has enough gas for oven spring but still retains structure and isn't fragile or about to collapse.
Checking for Air Bubbles: The Interior Structure
Observing the interior of the dough can also provide clues about fermentation progress, especially during bulk fermentation. As the dough proofs, gas bubbles are produced and trapped within the gluten network. If you perform folds during bulk fermentation, you might notice these bubbles pop or see them visibly through the side of a clear container.
Towards the end of bulk fermentation, if you gently pull a piece of the dough or look at the underside where it meets the container, you should see a network of varying-sized bubbles. This indicates that the yeast has been active and the gluten has developed sufficiently to trap the gas. A dough that shows very few or no bubbles internally is likely under-proofed, meaning the sourdough starter proofing time needs to be extended.
The Poke Test: A Hands-On Method for Assessing Readiness
The poke test is a classic technique used primarily to assess the readiness of dough after shaping, just before baking (final proof). It's a simple yet effective way to feel the dough's structure and estimate its level of fermentation. While not foolproof on its own, it provides valuable tactile information to complement visual cues.
It's less commonly used during bulk fermentation because the dough is still developing structure and is often handled more roughly with folds. However, for the final proof, it's a standard check. The result of the poke test helps determine if the dough has enough strength to hold its shape in the oven or if it's becoming over-proofed and losing tension.
Performing the Poke Test Correctly
To perform the poke test, lightly flour your finger (usually your index finger) to prevent sticking. Gently but firmly press your floured finger into the side of the dough to a depth of about half an inch to an inch (1-2 cm). Then, observe how quickly the indentation springs back. Do this test on a part of the dough that won't be the top of your loaf if possible, or be prepared for a slight mark.
It's important to use a gentle but confident press. Don't just lightly touch the surface. You need to slightly compress the dough to see how it recovers. The temperature of the dough (e.g., cold proofed vs. warm proofed) will affect the speed of the spring back, so keep that in mind when interpreting the results. A cold dough will spring back slower than a warm one.
Interpreting the Results: Over-Proofed vs. Under-Proofed
The way the indentation behaves tells you a lot about the dough's proofing stage:
- Under-Proofed: The indentation springs back immediately and completely. The dough feels tight and resistant. This means the dough hasn't produced enough gas and the gluten network is still too tense. It needs more time for the sourdough starter proofing time to complete its work.
- Properly Proofed: The indentation springs back slowly and only partially, leaving a small indentation. The dough feels soft and airy but still has some resistance. This indicates the dough has built enough gas and structure, and the gluten is relaxed but not degraded. It's ready to bake.
- Over-Proofed: The indentation stays completely or almost completely. The dough feels very soft, fragile, and might even deflate slightly with the poke. This means the gluten structure has weakened significantly, and the dough has produced too much gas for its structure to hold. Baking an over-proofed loaf can result in a flat bread with a dense crumb at the bottom.
The Float Test: Determining Starter Activity Before Mixing Dough
The float test is a simple method used before you even mix your dough to check if your sourdough starter is active enough. It assesses the buoyancy of a small piece of starter, which is directly related to the amount of carbon dioxide gas it has produced. While not a perfect indicator of when to mix your dough (some starters float at peak, others just before), it's a good baseline check for starter health and readiness.
Performing the float test gives you confidence that your starter is capable of lifting your dough during proofing and baking. If your starter doesn't float, it's a strong signal that it's not active enough, and using it to bake will likely lead to a very long or failed proof. In such a case, you would need to feed your starter again and wait until it shows peak activity (typically doubled or tripled in volume and bubbly) before attempting the float test again or mixing your dough.
How to Perform the Float Test
To perform the float test, fill a small glass or bowl with room temperature water. Gently take a tiny amount of your sourdough starter, perhaps half a teaspoon to a full teaspoon, from the top or middle of your recently fed and active starter. Carefully drop this small blob of starter into the water.
Observe what happens. Does it sink immediately, float on top, or slowly sink after a moment? It's important not to drop it from a height, as this can trap air and give a false positive. Just gently place it on the surface of the water. Ensure the water is not too cold, as cold temperatures can temporarily reduce the starter's buoyancy.
Understanding Float Test Results for Optimal Dough Development
The results of the float test provide a quick assessment of your starter's gassy activity:
- Floats: If the piece of starter floats on the surface of the water, it generally indicates that your starter is active and has produced a significant amount of gas. This is a good sign that it's ready to be used for baking, suggesting it will contribute well to your sourdough starter proofing time.
- Sinks Slowly/Hovers: If the starter slowly sinks or hovers just below the surface, it might be close to peak activity, slightly past peak, or perhaps not quite vigorous enough yet. It's worth observing your starter's volume and bubble activity in its jar for confirmation. It might still be usable, but proofing could take longer.
- Sinks Immediately: If the starter sinks straight to the bottom, it is not active enough. It hasn't produced sufficient gas. Using this starter will likely result in a very slow proofing process or a dense loaf. It's best to feed your starter and wait until it shows more signs of activity before testing again.
Factors Affecting Sourdough Proofing Time
Temperature's Impact on Proofing Speed
Temperature is arguably the single most influential factor on sourdough proofing time. The wild yeast and bacteria in your starter are microorganisms whose metabolic rates are highly sensitive to temperature. Warmer temperatures accelerate their activity, leading to faster fermentation and a shorter proofing time. Conversely, cooler temperatures slow down activity, resulting in a longer, slower proof. This is why cold proofing is used to extend proofing time and develop flavor.
Even a few degrees difference can significantly alter the proofing schedule. For instance, a dough that proofs in 4 hours at 78°F (26°C) might take 6-8 hours at 72°F (22°C) and potentially 12-18 hours or more if placed in a refrigerator at 38°F (3°C). Understanding this relationship allows you to manipulate proofing time to fit your schedule or achieve specific flavor profiles.
Ideal Temperature Ranges for Sourdough Proofing
While sourdough can proof at a wide range of temperatures, specific ranges are often targeted depending on the desired outcome. For a relatively quick room temperature bulk fermentation, bakers often aim for temperatures between 75°F and 82°F (24°C - 28°C). In this range, bulk fermentation might take 3-5 hours, depending on starter strength and hydration.
For a slower, slightly warmer proof, temperatures between 70°F and 74°F (21°C - 23°C) are common. This extends bulk fermentation time to perhaps 5-8 hours, allowing for more flavor development. For cold proofing, refrigerator temperatures typically between 38°F and 45°F (3°C - 7°C) are used, slowing fermentation down to 12-48 hours or even longer, significantly enhancing complex flavors and making the dough easier to handle.
Adjusting Proofing Time Based on Ambient Temperature
Since most home kitchens aren't temperature-controlled bakeries, learning to adjust your sourdough proofing time based on your ambient temperature is key. If your kitchen is warmer than usual (e.g., 80°F in summer), be prepared for your dough to proof much faster than a recipe might state. You'll need to start checking for readiness earlier. Conversely, in a cooler kitchen (e.g., 65°F in winter), your dough will proof slower, and you'll need to allow considerably more time for both bulk fermentation and final proof.
Using a thermometer to check your dough's temperature and the ambient temperature of your proofing spot is highly recommended. If your kitchen is cool, finding a warmer spot (like near a warm appliance or in a proofing box) can help speed things up. If it's too warm, finding a cooler spot or using cooler water when mixing the dough can help slow down the initial fermentation rate.
Hydration Levels and Their Influence
Hydration refers to the ratio of water to flour in your dough, typically expressed as a percentage of the flour weight. A higher hydration dough contains more water relative to flour (e.g., 80% hydration), while a lower hydration dough contains less (e.g., 65% hydration). Hydration significantly impacts the dough's consistency and, consequently, its proofing speed and behavior.
Higher hydration doughs are wetter, stickier, and generally more extensible. The increased water content facilitates enzyme activity and allows yeast and bacteria to access sugars more readily. This often leads to faster fermentation and a shorter sourdough starter proofing time compared to a stiff, low-hydration dough under the same conditions. However, high-hydration doughs can be more challenging to handle and shape.
How Hydration Affects Dough Rise and Texture
Hydration affects not just the speed of proofing but also how the dough rises and its eventual texture. In higher hydration doughs, the gluten network is surrounded by more water, making it more extensible and allowing it to stretch further to accommodate the gas produced during fermentation. This potential for greater expansion can contribute to a more open, airy crumb structure in the final bread.
Lower hydration doughs, being stiffer, tend to rise more compactly. The gluten network is tighter, requiring more work (kneading or folding) to develop adequately. While they might proof slower, they are easier to handle and shape, making them ideal for beginners. They typically result in a denser, more uniform crumb compared to high-hydration loaves.
Managing Hydration for Consistent Results
Consistency in your hydration percentage is key to predicting your sourdough proofing time. If you constantly change your hydration, you'll find proofing times are unpredictable. Start with a moderate hydration (e.g., 70-75%) until you get a feel for how your starter and environment behave. As you gain experience, you can experiment with higher hydrations, understanding that they will likely reduce your required proofing time.
When adjusting hydration, consider that very wet doughs might look more expanded during bulk fermentation but can be prone to collapsing during final proof if over-proofed. Learning to read the dough's texture and feel, alongside visual cues, becomes even more important when working with varying hydration levels.
Flour Type and Its Effect on Proofing
The type of flour used in your dough also plays a role in the sourdough proofing time. Different flours have varying protein content (affecting gluten development) and different levels of available sugars (food for the yeast and bacteria). Using a blend of flours is common in sourdough baking.
Flours like whole wheat and rye contain more nutrients and active enzymes than refined white flour. These enzymes break down starches into simpler sugars, which can sometimes lead to faster fermentation rates, especially in the initial stages. However, whole grain flours also contain bran and germ, which can interfere with gluten development, potentially affecting the dough's ability to hold gas if not managed correctly.
The Role of Gluten Development in Proofing
Gluten is the protein network formed when flour and water are mixed and developed through kneading or folding. This network is crucial because it traps the carbon dioxide gas produced by the yeast, allowing the dough to rise. Without a sufficiently developed gluten structure, the gas would simply escape, and the dough wouldn't hold its shape or rise properly.
The strength and elasticity of the gluten network directly influence how much gas the dough can contain before it becomes over-proofed and the structure begins to break down. Flours with higher protein content, like strong bread flour (typically 12-14% protein), can form a more robust gluten network capable of supporting a larger volume increase during proofing than flours with lower protein (like pastry flour).
Choosing the Right Flour for Your Sourdough
The choice of flour impacts not just flavor and texture but also your sourdough proofing time. A dough made solely with high-protein bread flour might require a slightly longer bulk fermentation to fully develop the gluten and allow for sufficient gas production compared to a blend that includes a percentage of whole wheat or rye.
For example, a recipe using 100% white bread flour might proof slower initially than one using 80% white and 20% whole wheat, assuming the same temperature and hydration. However, the whole wheat dough might also reach its peak sooner and be more prone to over-proofing if not monitored closely, due to the increased enzymatic activity. Experimenting with different flour blends will help you understand how they affect your sourdough starter proofing time in your kitchen.
Troubleshooting Common Sourdough Proofing Problems
Recognizing and Correcting Under-Proofed Dough
Under-proofing is a common issue, especially when bakers are new to sourdough and hesitant to let the dough proof for what seems like a long time. It occurs when the dough hasn't fermented long enough to produce sufficient gas or develop adequate structure and flavor.
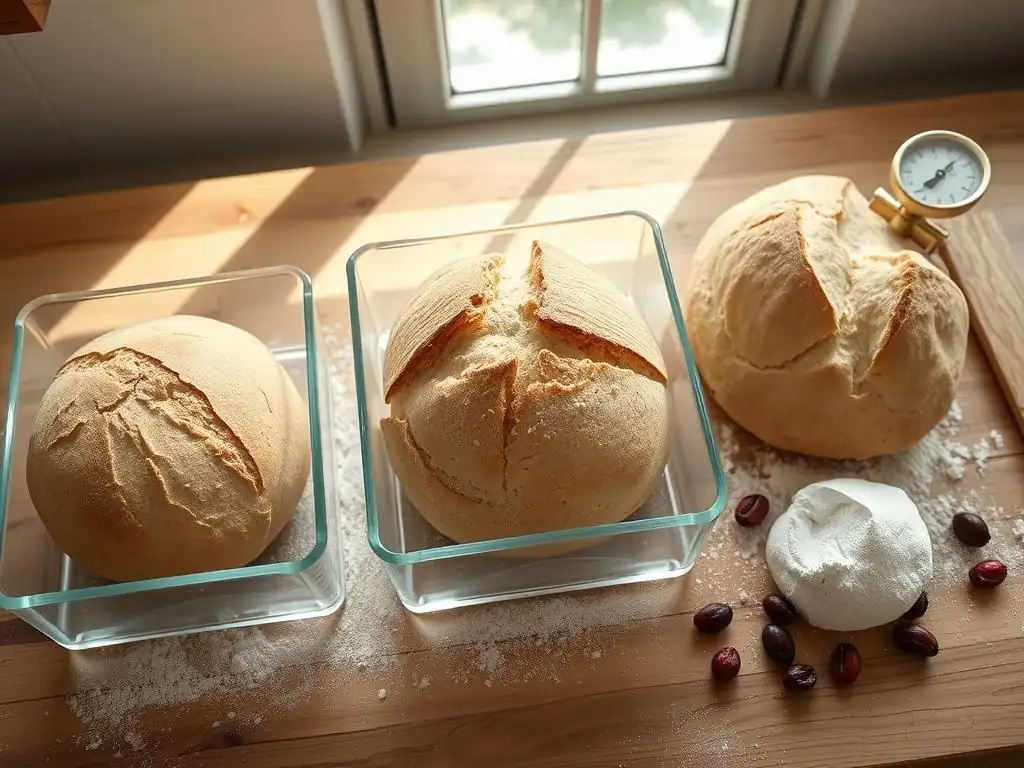
The results of baking an under-proofed loaf include a dense, heavy crumb (sometimes called a "hockey puck"), poor oven spring (the loaf doesn't expand much in the oven), and a gummy texture. The crust might be thick and hard, and the flavor might be less complex or tangy than desired. Recognizing the signs early is crucial for corrective action.
Signs of Under-Proofing
Visual signs of an under-proofed dough during final proof include:
- The dough hasn't increased much in volume since shaping.
- It still feels dense and heavy for its size.
- The surface might look tight and smooth with few visible bubbles.
- The poke test results in the indentation springing back immediately and completely.
- When scoring, the dough feels very tight and resistant to the blade.
If you notice these signs just before baking, it means the sourdough starter proofing time wasn't sufficient.
Strategies for Rescuing Under-Proofed Dough
If you realize your dough is under-proofed before baking:
- Extend Proofing Time: If it's still in bulk fermentation, let it continue proofing at room temperature until it shows signs of readiness (volume increase, bubbles, lighter feel).
- Warm it Up: If it's in final proof (especially if cold proofing), take it out of the refrigerator and let it sit at room temperature for 30-60 minutes or longer, depending on how under-proofed it is, until the poke test yields a slow spring back.
- Gentle Handling: Be very gentle when handling and scoring, as the gluten is still tight.
- Accept and Learn: Sometimes, the best strategy is to bake it as is and learn from the experience. An under-proofed loaf is still usually edible, just not ideal. Document your sourdough starter proofing time and conditions for next time.
Identifying and Addressing Over-Proofed Dough
Over-proofing happens when the dough ferments for too long, either because the temperature was too high, the proofing time was misjudged, or the starter was exceptionally vigorous. The yeast eventually exhausts its readily available sugars, and the gluten structure, weakened by enzymatic activity and acids, begins to break down, losing its ability to hold gas.
An over-proofed loaf is typically flat and lacks oven spring. The crumb structure might be dense at the bottom with large, irregular holes near the top, or it could be uniformly dense and gummy. The flavor can sometimes be overly acidic or vinegary due to excessive bacterial activity.
Signs of Over-Proofing
Visual signs of an over-proofed dough during final proof include:
- The dough has expanded significantly, perhaps looking too large or puffy.
- The surface might look slack, fragile, or even start to deflate slightly, especially around the edges.
- There may be many large bubbles visible on the surface.
- The poke test results in the indentation staying in completely or almost completely.
- When scoring, the dough feels very soft, floppy, and might tear easily or deflate.
If you see these signs, your sourdough starter proofing time has gone too long for the conditions.
What to Do with Over-Proofed Dough
If your dough is over-proofed before baking:
- Bake Immediately: If it's only slightly over-proofed and still has some structure, bake it right away. It might not have the ideal shape or rise, but it will likely still be salvageable.
- Reshape: For significantly over-proofed dough (especially during bulk fermentation), you can gently punch it down, reshape it, and give it a very short final proof (maybe 30-60 minutes at room temperature or straight into the oven if it feels very slack). This can sometimes salvage the structure, though it might result in a denser crumb.
- Turn into Something Else: An over-proofed dough can be repurposed!
- Focaccia: Gently pour or spread the dough into an oiled pan. Dimple it, add toppings, and bake. The lack of structure is less critical for focaccia.
- Flatbreads/Pizza: Roll or stretch the dough gently into flatbreads or pizza bases and bake immediately.
- Discard: If it's severely degraded and like soup, it might be best to discard it and start fresh, learning from the experience to manage your next sourdough starter proofing time better.
Optimizing Your Sourdough Proofing Process
Creating a Consistent Proofing Environment
Controlling the proofing environment is key to achieving predictable and repeatable results with your sourdough starter proofing time. Wild fluctuations in temperature will make it difficult to know when your dough is ready. Aim for a stable temperature throughout the proofing period, whether you're doing a warm, fast bulk or a long, cold final proof.
Consistency allows you to rely more on timing alongside visual and tactile cues. Once you understand how your dough behaves at a consistent 75°F (24°C), for example, you can better estimate the sourdough proofing time required and spot when things are progressing faster or slower than expected.
Tips for Maintaining Stable Temperatures
- Use an Oven with the Light On: The warmth from the oven light can often create a stable environment around 75-85°F (24-29°C). Place your dough inside (oven off! ).
- Proofing Box: Consider investing in a dedicated proofing box or using a DIY setup (like a cooler with a bowl of hot water). These provide excellent temperature control.
- Warm Spots in Your Home: Find a spot in your house that maintains a relatively stable temperature – often a shelf high up, near a water heater, or in a consistent room. Avoid drafty areas or direct sunlight unless you're trying to intentionally warm the dough rapidly.
- Temperature Monitoring: Use an inexpensive thermometer to check the ambient temperature where you are proofing and even the temperature of your dough itself.
Using a Proofing Box or Warm Place
A proofing box (like the Brod & Taylor Proofing Box) offers precise temperature control, making your sourdough starter proofing time highly predictable. You can set it to your desired temperature (e.g., 78°F) and trust that the dough will proof consistently. This is invaluable for developing reliable recipes and techniques.
If you don't have a dedicated proofing box, improvising a warm place works well. Placing your dough in a microwave or oven (turned off) with the light on, or even in a cooler with a container of hot water (refreshing the water as needed), can create a microclimate warmer than your ambient kitchen temperature. Just monitor the temperature inside your improvised setup to ensure it's not getting too hot.
Monitoring Dough Development Closely
Successful proofing requires active observation. Don't just set a timer and walk away, especially when you're still learning. Regularly check your dough's progress, paying attention to its volume increase, the appearance of bubbles, and its texture.
Checking every 30-60 minutes during bulk fermentation (especially in warmer conditions) allows you to catch the dough at its optimal point. For final proof, checks might be less frequent, but still necessary, particularly if proofing at room temperature. This vigilance helps you avoid both under-proofing and over-proofing.
Regular Checks and Adjustments
During bulk fermentation, regular checks allow you to perform folds at the right time (if your recipe calls for them) and gauge how much longer the dough needs. If it's proofing faster than expected due to a warm kitchen, you might reduce the bulk time or perform an extra fold to build more tension. If it's slow, finding a warmer spot can help accelerate it.
For the final proof, especially if doing a cold proof, checking the dough after several hours and again closer to your planned baking time will help you confirm its readiness using visual cues and the poke test. If the dough seems ready sooner than planned, you can adjust your baking schedule. If it's still under-proofed, a short stint at room temperature can finish it off.
Documenting Your Proofing Process for Future Success
Keeping a baking journal is one of the best things you can do to master your sourdough starter proofing time. For each bake, record details such as:
- Date and time
- Recipe (hydration, flour types, salt %)
- Starter details (how recently fed, how it looked/felt)
- Mixing time and temperature
- Bulk fermentation start time, temperature, number/timing of folds, and duration
- Observations during bulk (how it looked, felt, bubble development)
- Shaping time
- Final proof start time, temperature (room temp or fridge temp), and duration
- Observations during final proof (volume increase, poke test result)
- Bake time and temperature
- Result (oven spring, crumb structure, flavor)
By documenting these variables, you'll start to see patterns. You'll learn how your starter behaves in your kitchen at different temperatures and hydration levels, making it much easier to predict and control your sourdough proofing time in the future.
Advanced Techniques for Sourdough Proofing
Cold Proofing: Slowing Down the Process for Enhanced Flavor
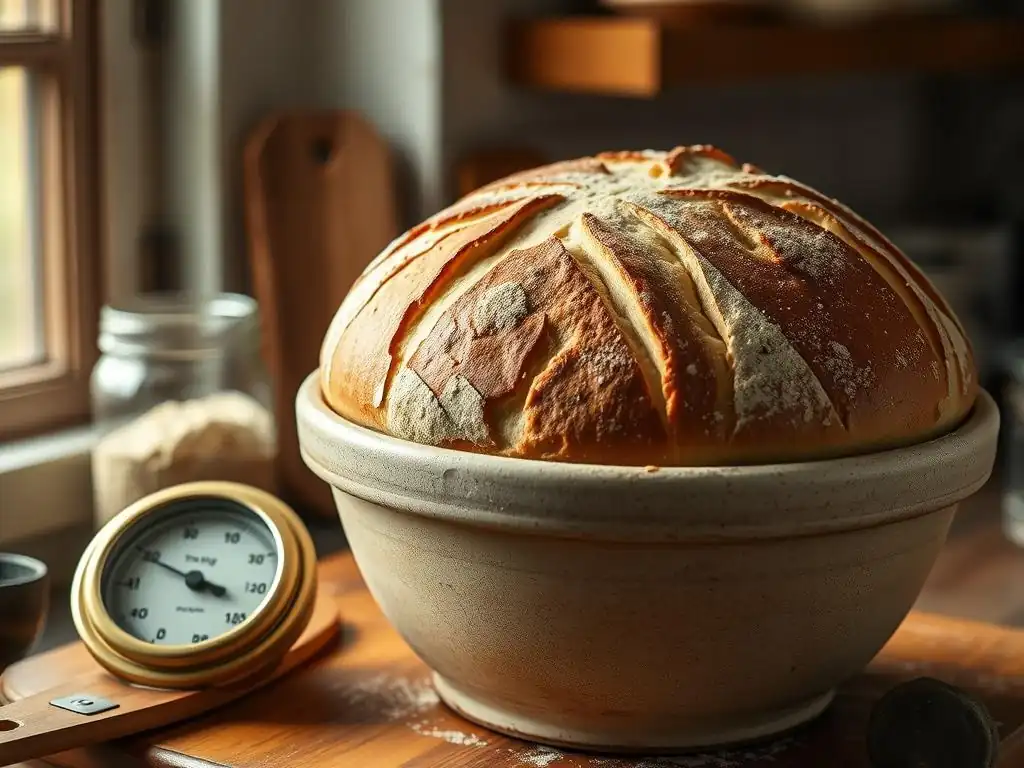
Cold proofing involves placing the shaped dough in a refrigerator (typically 38-45°F or 3-7°C) for an extended period, usually 12 to 48 hours, but sometimes longer. This drastically slows down the yeast activity while allowing the lactic acid bacteria to continue producing acids, resulting in a more complex, tangy flavor profile.
Beyond flavor, cold proofing offers practical benefits. It makes the dough firmer and easier to score just before baking. It also provides flexibility in your baking schedule; you can mix the dough one day, shape and refrigerate it, and then bake it straight from the fridge the next day or even two days later, fitting baking into a busy life.
The Benefits of Cold Proofing
The primary benefits of cold proofing are:
- Enhanced Flavor: The long, slow fermentation allows for the development of more complex organic acids, contributing to a deeper, tangier sourdough flavor.
- Improved Texture: The slow fermentation can contribute to a more open and airy crumb structure.
- Easier Handling & Scoring: Cold dough is much firmer and less sticky than warm dough, making it easier to turn out of the banneton and score cleanly with a lame.
- Scheduling Flexibility: It allows you to break up the baking process over two or more days, making sourdough baking more manageable.
While cold proofing extends the overall sourdough starter proofing time, the active hands-on time is often reduced, as the dough is simply resting in the fridge.
How to Cold Proof Your Sourdough
After completing bulk fermentation and shaping your dough, place it seam-side up in a well-floured banneton or proofing basket. Cover it loosely with a plastic bag, plastic wrap, or a damp towel to prevent the surface from drying out. Then, immediately place the banneton in the refrigerator.
The dough will continue to ferment slowly in the cold environment. The ideal cold sourdough starter proofing time varies depending on your starter's activity, the dough's hydration, and the exact temperature of your fridge. A common range is 12-18 hours for a noticeable flavor improvement, but 24-48 hours will yield even tangier results. Check the dough using visual cues and the poke test after the minimum recommended time in your recipe, and then periodically thereafter if proofing longer.
Using a Banneton for Shape and Structure During Proofing
A banneton (or proofing basket) is a baker's essential tool used during the final proofing stage. Traditionally made from rattan cane, but also available in wood pulp or plastic, bannetons are lined with flour or rice flour and hold the shaped dough.
The purpose of a banneton is twofold: it helps the dough maintain its shape as it expands during the final proof, and the material (especially rattan) wicks away a small amount of moisture from the surface of the dough, creating a desirable dry skin. This dry skin contributes to a better crust and helps achieve cleaner scoring before baking.
The Role of Bannetons in Sourdough Baking
During the final proof, shaped sourdough dough, especially high-hydration dough, is quite slack and would spread out into a disc if left on a flat surface. The banneton provides support, allowing the dough to rise upwards and outwards in a controlled manner, building vertical structure. This supported rise is crucial for achieving good height and oven spring.
The pattern of the banneton basket is often transferred to the dough's surface, which can be aesthetically pleasing. More importantly, the slight drying effect on the surface creates tension, which also aids in achieving a beautiful crust and allows for sharp, controlled cuts when scoring.
Preparing and Using a Banneton Correctly
To use a banneton, you must flour it generously to prevent the dough from sticking. Rice flour is often preferred because it doesn't absorb moisture as readily as wheat flour, reducing stickiness. You can dust the banneton directly or use a mixture of rice flour and wheat flour (e.g., 50/50). Ensure the flour gets into all the crevices of the basket weave.
After shaping your dough, place it seam-side up into the well-floured banneton. The seam will become the bottom of the loaf, and the smooth surface that was on the bottom during shaping will become the top when you invert it onto your baking surface. Cover the banneton to prevent drying and place it in your desired proofing environment (room temperature or refrigerator). When ready to bake, gently invert the banneton onto parchment paper or your hot baking surface. The dough should release easily, leaving the basket pattern and a dry skin on the surface ready for scoring.
Conclusion: Mastering Sourdough Proofing
Mastering sourdough proofing is a journey of learning to read your dough and understanding the environmental factors at play. It's less about following a strict timetable and more about developing an intuition for when your dough has reached its peak fermentation potential. By paying attention to visual cues like volume increase and bubble formation, using tactile tests like the poke test, and understanding how temperature, hydration, and flour type influence the process, you gain control over your bake.
The sourdough starter proofing time is not static; it's a dynamic process influenced by many variables. Embrace the flexibility that sourdough offers, whether opting for a quick room temperature proof or a long, flavor-enhancing cold proof. Troubleshooting common issues like under- or over-proofing becomes easier once you can identify the signs. With practice, patience, and careful observation, you'll consistently achieve beautifully proofed doughs that bake into loaves with excellent structure, texture, and that signature sourdough tang. Happy baking!
Key Takeaways for Successful Sourdough Proofing
- Proofing is crucial for texture, flavor, and rise.
- Your starter's activity level directly impacts proofing speed.
- Temperature is the most significant factor affecting sourdough proofing time.
- Visual cues (volume, bubbles, texture) and tactile tests (poke test) are key indicators of readiness.
- Aim for 30-50% bulk fermentation increase and slower final proof rise.
- An under-proofed dough is dense and gummy; over-proofed is slack and can collapse.
- Cold proofing enhances flavor and makes dough easier to handle.
- Bannetons support shape and create a desirable crust.
- Consistency in your process and environment helps predict sourdough starter proofing time.
- Documenting your bakes is invaluable for learning and improvement.
Further Resources
- Consider exploring guides on building and maintaining a strong, active sourdough starter, as this is foundational to predictable proofing.
- Look into detailed explanations of gluten development and the role of autolyse or stretch and folds in strengthening your dough.
- Explore recipes specifically designed for different proofing methods, such as quick same-day bakes versus long cold proofs, to see how the sourdough starter proofing time is adjusted.
- Many online sourdough communities and forums offer opportunities to share your experiences and learn from others' troubleshooting journeys.
Frequently Asked Questions
What is sourdough starter proofing and why is it important?
Sourdough starter proofing is the process of allowing the starter to ferment and rise before using it in a recipe. This step is crucial because it ensures the starter has enough leavening power to make your bread rise properly.
How long should I proof my sourdough starter?
The proofing time varies, but generally, a starter is ready when it has approximately doubled in size and shows signs of active bubbling. This usually takes 4-12 hours at room temperature, but temperature significantly affects the timing.
What are some visual signs that my sourdough starter is ready to use?
Look for a significant increase in volume, visible bubbles throughout the starter, and a slightly domed top. A pleasant, tangy aroma is also a good indicator of readiness.
What happens if I use my sourdough starter before it's properly proofed?
If you use an under-proofed starter, your bread may be dense and flat due to insufficient leavening. The flavor might also be less complex and lack the characteristic sourdough tang.
Can I over- proof my sourdough starter, and what does that look like?
Yes, an over-proofed starter will collapse or deflate after reaching its peak. You might also notice a thin layer of liquid (hooch) on top and a sour, almost vinegary smell. While still usable, it might impart a stronger, more acidic flavor to your bread.
Final Reflection: The Dance of Patience and Precision in Sourdough Baking
Understanding the nuances of sourdough proofing is not merely about timing; it's about developing an intuitive relationship with your starter and the art of bread making itself. The seemingly simple question of "when is my sourdough ready?" unlocks a deeper understanding of fermentation, patience, and the delicate balance required to achieve a truly exceptional loaf. This journey into the world of proofing signals highlights the importance of observation and adaptation, skills crucial not just for baking, but for navigating life's complexities.
The subtle shifts in the starter's activity – the gentle rise, the characteristic bubbles, the pleasant aroma – are a testament to the living organism at work. This process, far from being a mere technical exercise, is a deeply satisfying connection to a tradition passed down through generations. Bread is the staff of life,
they say, and in the careful tending of a sourdough starter, we find a tangible link to that enduring truth. The patience required fosters a mindfulness that extends beyond the kitchen, reminding us of the importance of slow, deliberate processes in a fast-paced world.
Now, consider your own journey with sourdough. Have you experienced the frustration of a collapsed loaf or the joy of a perfectly risen masterpiece? Remember the lessons learned from each bake, the subtle adjustments made, and the growing understanding of your unique starter.
Take this knowledge and apply it not just to your baking, but to other aspects of your life. Embrace the process, trust your intuition, and allow yourself the time needed to nurture growth and achieve your goals. The art of sourdough is a metaphor for life itself – a testament to the power of patience, observation, and the beauty of embracing imperfection.
Unlock Your Sourdough's Potential: Bake the Perfect Loaf!
Thanks for taking the time to learn about proofing signals! You've now got the knowledge to confidently identify when your sourdough is ready to bake. Let's put that knowledge into action!
- Bake your best loaf yet! Use what you've learned to assess your dough and confidently place it in the oven. Pay close attention to the subtle signs – you've got this!
- Share your baking triumphs (or challenges!). Let's build a community of sourdough bakers. Post a picture of your masterpiece (or even your learning experiences!) on your favorite social media, and tag us!
- Explore advanced proofing techniques. Dive deeper into the world of sourdough by researching different proofing methods and how they affect the final product's texture and flavor.
Ready to transform your baking skills and consistently create amazing sourdough loaves?