
Understanding Yeast for Amazing Vegan Bread Results

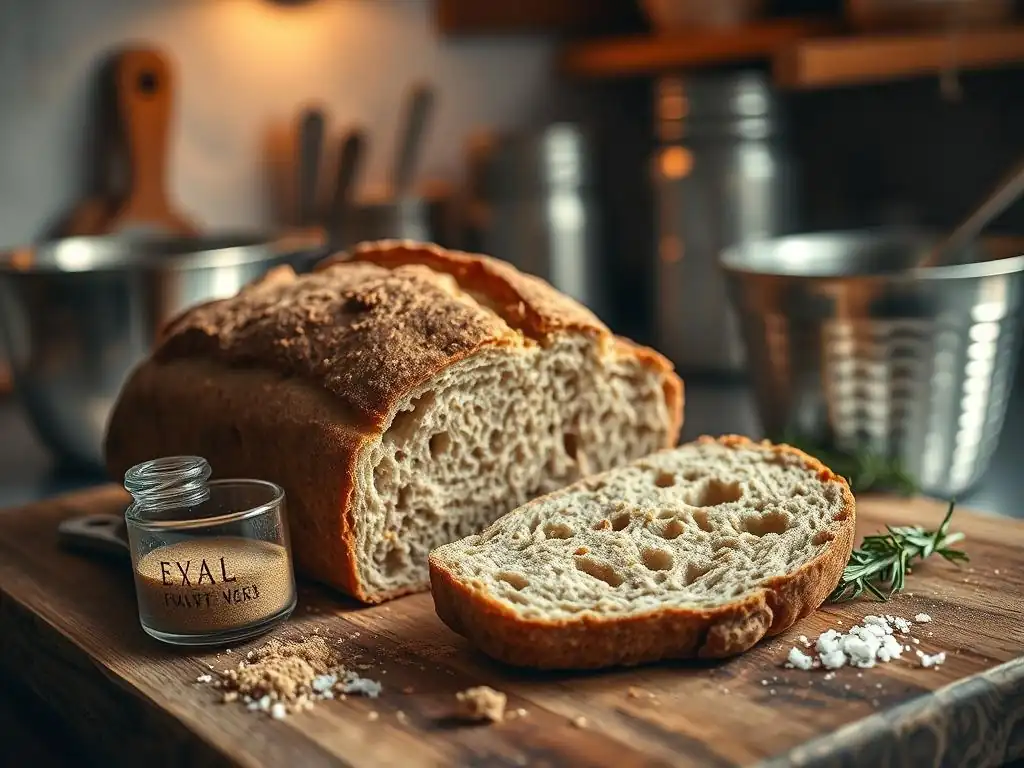
Welcome to BakeWithEase, your guide to baking brilliance! Are you ready to unlock the secrets to perfectly risen, unbelievably delicious vegan bread? We understand that yeast troubleshooting can be a challenge, especially when baking without animal products. Dive into our expert advice and say goodbye to flat loaves forever. Curious how to achieve that perfect rise? Let's get started!
- Introduction to Vegan Bread Baking and Yeast
- Different Types of Yeast for Vegan Bread Baking
- Activating Yeast for Vegan Bread: A Step-by-Step Guide
- Vegan Bread Yeast Troubleshooting: Common Problems and Solutions
- Tips for Successful Vegan Bread Baking with Yeast
- Advanced Techniques for Vegan Bread with Yeast
- Conclusion: Mastering Vegan Bread Yeast for Baking Success
-
Frequently Asked Questions
- How does yeast behave differently in vegan bread compared to traditional bread?
- What are common signs of yeast problems in vegan bread dough?
- How can I ensure my yeast is active before adding it to my vegan bread recipe?
- What types of sweeteners are best for feeding yeast in vegan bread dough?
- What are some common mistakes people make when using yeast in vegan bread baking?
- Final Reflection: The Humble Yeast, the Amazing Loaf
- Unleash Your Inner Baker: Master Vegan Bread!
Introduction to Vegan Bread Baking and Yeast
Baking delicious, fluffy vegan bread is a rewarding experience, and at the heart of many successful loaves is a tiny, powerful organism: yeast. Yeast is essential for giving bread its lift and characteristic texture. It's a living fungus that, when given the right conditions – warmth, moisture, and food (sugar) – produces carbon dioxide gas, which makes the dough rise.
For vegan bakers, understanding yeast is particularly important as some traditional bread recipes might use ingredients like milk or eggs, which can sometimes affect yeast activity or dough structure differently than plant-based alternatives. However, yeast itself is vegan, and mastering its use is key to achieving fantastic results in all your vegan bread projects. BakeWithEase.com is here to help you navigate the nuances of working with yeast in your plant-based baking adventures.
Why Yeast is Crucial for Vegan Bread
Yeast performs the critical function of leavening in bread. Through a process called fermentation, yeast consumes sugars present in the dough and releases carbon dioxide and ethanol. The carbon dioxide gas gets trapped within the gluten network (or the structure created by binders in gluten-free vegan breads), causing the dough to expand and rise. This rise is what gives bread its light, airy texture and volume.
Without adequate yeast activity, vegan bread would be dense, flat, and heavy – more like a cracker or hardtack than a fluffy loaf. The fermentation process also contributes significantly to the flavor profile of the bread, developing complex aromas and tastes that are characteristic of well-made loaves. Effectively managing yeast is therefore fundamental to achieving the desired texture and flavor in vegan bread.
Common Challenges in Vegan Bread Baking with Yeast
While yeast itself is vegan-friendly, working with it in plant-based recipes can sometimes present unique challenges. Ingredients commonly used in vegan baking, such as certain types of plant-based milks, fats, or alternative flours, can interact with yeast differently than their non-vegan counterparts. For instance, some plant milks might contain enzymes or preservatives that can slightly inhibit yeast activity if not used correctly.
Additionally, achieving the right dough consistency and structure without eggs can sometimes impact how well the dough holds the gas produced by the yeast. This is where understanding factors like dough hydration, gluten development (or alternative binder usage), and proper proofing techniques becomes crucial for successful vegan bread yeast troubleshooting and ensuring a good rise.
BakeWithEase.com: Your Guide to Perfect Vegan Bread
At BakeWithEase.com, we understand the passion for baking, especially the joy of creating delicious vegan treats. We are dedicated to providing clear, easy-to-follow guidance that helps bakers of all levels succeed. From selecting the right yeast for your recipe to mastering the activation process and understanding common vegan bread yeast troubleshooting scenarios, our resources are designed to empower you in the kitchen.
We offer step-by-step guides, simple recipes, and helpful tips specifically tailored for vegan baking. Whether you're making your first loaf of simple white vegan bread or tackling a more complex sourdough variation, you'll find the support you need to achieve consistently excellent results. Our goal is to make vegan bread baking accessible, enjoyable, and, most importantly, delicious.
Different Types of Yeast for Vegan Bread Baking
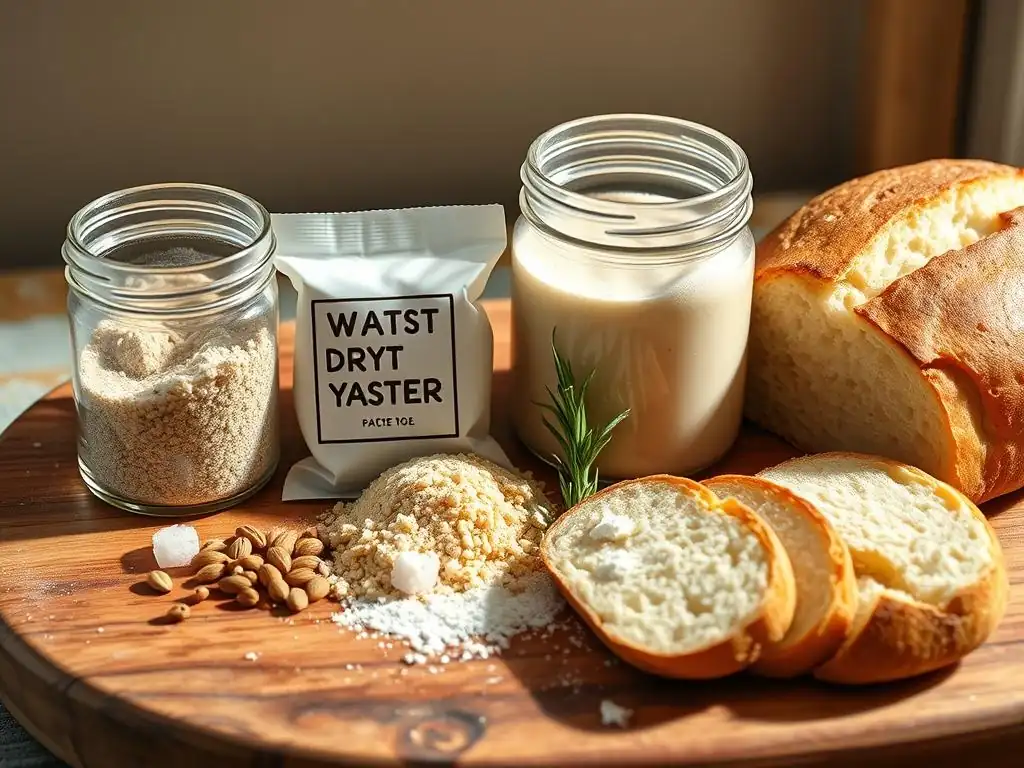
Selecting the correct type of yeast is the first step towards successful vegan bread baking. While all commercial yeasts perform the same basic function of leavening, they differ in form, how they are activated, and their speed of fermentation. Understanding these differences will help you choose the best yeast for your specific recipe and baking goals.
Most commercially available yeasts are naturally vegan, as they are typically grown on a molasses or sugar beet medium. However, it's always wise to check the packaging if you have any concerns, although this is rarely an issue with standard baking yeasts. Let's explore the most common types you'll encounter.
Active Dry Yeast: A Vegan Baker's Staple
Active dry yeast is one of the most widely available and popular types of yeast among home bakers. It consists of dormant yeast cells that are dehydrated and packaged in granules. To use active dry yeast, it typically needs to be "activated" or "proofed" in warm liquid (usually water or plant-based milk) before being added to the rest of the ingredients. This step ensures the yeast is alive and ready to work.
A standard packet of active dry yeast usually contains about 2.25 teaspoons (around 7 grams), which is sufficient to leaven about 4 cups (approximately 500 grams) of flour. It offers a steady, reliable rise and is very forgiving, making it an excellent choice for beginners tackling vegan bread yeast troubleshooting for the first time. Proofing takes about 5-10 minutes, during which the yeast should bubble and foam, indicating it's active.
Instant Yeast: Quick and Convenient Vegan Bread
Instant yeast, also known as rapid-rise or quick-rise yeast, is a more recently developed form of dry yeast. Like active dry, it's dehydrated, but the granules are smaller and porous, allowing them to absorb liquid more quickly. This means instant yeast can often be added directly to the dry ingredients without prior activation, saving time and simplifying the process.
Instant yeast is designed to work faster than active dry yeast, often resulting in shorter proofing times. This makes it ideal for recipes where you want a quicker turnaround, such as rolls or certain loaf breads. While you can proof instant yeast in liquid like active dry, it's generally unnecessary unless you want to verify its viability. Many vegan bread recipes designed for speed will call for instant yeast.
Fresh Yeast: The Traditional Option for Vegan Dough
Fresh yeast, also known as cake yeast, is a moist, perishable form of yeast that comes in compressed blocks. It is the traditional yeast used by many professional bakers and is often preferred for its subtle flavor and consistent, steady rise. Fresh yeast is highly active but also has a much shorter shelf life than dry yeasts and must be refrigerated.
To use fresh yeast in vegan bread, it should be crumbled and dissolved in warm liquid (around 80-90°F or 27-32°C) before being added to the other ingredients. Approximately 1 ounce (28 grams) of fresh yeast is roughly equivalent to 2.25 teaspoons (7 grams) of active dry or instant yeast. While it requires more careful handling and storage, fresh yeast can yield excellent results and is worth trying if you can find it and plan to bake frequently.
Nutritional Yeast: Adding Flavor, Not Rise (Clarification)
It's important to clarify the difference between baking yeast and nutritional yeast, as both are commonly found in vegan pantries. Nutritional yeast is a deactivated yeast, meaning the yeast cells are no longer alive and capable of leavening. It is typically sold as flakes or powder and is used purely for its savory, cheese-like flavor and nutritional content (often fortified with B vitamins).
Adding nutritional yeast to your vegan bread dough will contribute flavor and nutrition but will not make the bread rise. It serves a completely different purpose than active, instant, or fresh baking yeast. If your vegan bread isn't rising, double-check that you used a leavening yeast and not nutritional yeast! This is a simple but critical point in vegan bread yeast troubleshooting.
Activating Yeast for Vegan Bread: A Step-by-Step Guide
Activating, or proofing, yeast is a simple process that ensures your yeast is alive and ready to make your vegan bread rise. While instant yeast often doesn't require this step, it's essential for active dry yeast and a good practice even for instant if you want to confirm its viability. For fresh yeast, dissolving it in liquid is part of the process.
This step is particularly useful in vegan bread yeast troubleshooting. If your yeast doesn't activate, you know the problem lies with the yeast itself or the activation conditions, not with other ingredients or techniques later in the process.
Preparing the Yeast Mixture: Water Temperature Matters
For active dry yeast, the ideal water temperature is typically between 105°F and 115°F (40°C and 46°C). Water that is too cold won't wake up the yeast, while water that is too hot can kill it. Think of it like a warm bath – just right for the yeast to become active. For fresh yeast, a slightly cooler temperature range of 80-90°F (27-32°C) is often recommended.
Measure the specified amount of warm water or plant-based milk into a small bowl. Add a pinch of sugar (about 1 teaspoon per packet of yeast) – this provides food for the yeast to start multiplying and becoming active. Then, sprinkle the yeast over the liquid. Do not stir immediately; let it sit for a minute or two to absorb some of the liquid. This initial hydration is key.
Proofing Yeast: Ensuring Viability for Vegan Recipes
After sprinkling the yeast and letting it sit briefly, gently stir the mixture until the yeast is dissolved or mostly dissolved. Set the bowl aside in a warm, draft-free place. Within 5 to 10 minutes, the mixture should become foamy, bubbly, or frothy on the surface. This indicates that the yeast is alive and actively producing carbon dioxide.
**Task List: Checking Yeast Viability**

*   [ ] Measure liquid to correct temperature (105-115°F for active dry, 80-90°F for fresh).
*   [ ] Add a pinch of sugar.
*   [ ] Sprinkle yeast over liquid; let sit 1-2 minutes.
*   [ ] Stir gently.
*   [ ] Place in warm spot.
*   [ ] Observe for foam/bubbles within 5-10 minutes.
*   [ ] If foamy, yeast is good! Proceed with recipe.
*   [ ] If no foam, yeast is likely dead or inactive. Discard and start again with new yeast.
If your yeast mixture does not show signs of activity after 10-15 minutes, the yeast may be old or dead, or the water temperature was incorrect. In this case, it's best to discard the mixture and start over with fresh yeast and correctly tempered liquid. Using inactive yeast will result in a flat, dense vegan bread.
Troubleshooting Yeast Activation Issues in Vegan Dough
Encountering issues during yeast activation is a common part of vegan bread yeast troubleshooting. The primary culprits are usually yeast viability, water temperature, or the presence of inhibitory substances. As mentioned, if the yeast doesn't foam, it's likely dead. This could be due to age (check the expiration date! ), improper storage (heat or moisture can kill yeast), or exposure to very hot liquid during activation.
If you're certain your yeast is fresh and stored correctly, re-check your water temperature with a thermometer. Even slightly too hot water can be detrimental. Some sources suggest that high concentrations of salt or sugar added directly to the activation liquid can also inhibit yeast, though this is less common when following standard recipes that add these later. Always use the specified temperature range to give your yeast the best chance to thrive.
Vegan Bread Yeast Troubleshooting: Common Problems and Solutions
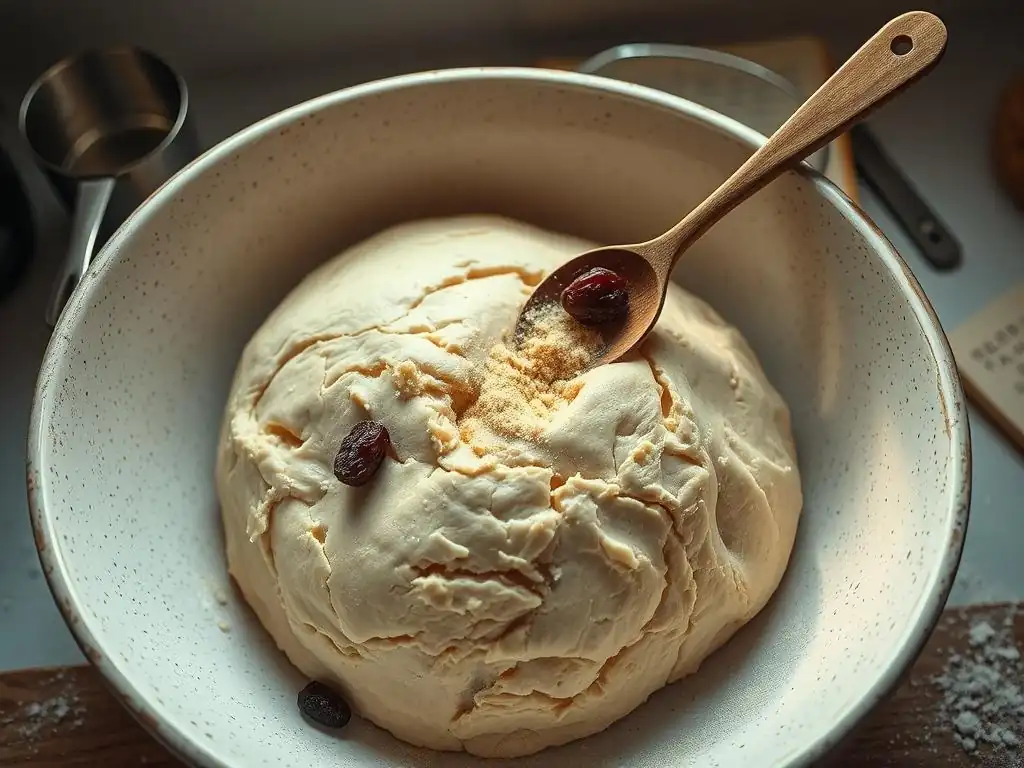
Even experienced bakers encounter issues with yeast from time to time. When baking vegan bread, understanding the common problems related to yeast activity can help you quickly diagnose and fix issues, leading to better results. This section focuses specifically on vegan bread yeast troubleshooting.
Let's break down the most frequent complaints: dough that won't rise, bread that turns out dense, and loaves that end up flat. Each problem often points to specific yeast-related issues or factors influencing yeast activity in a vegan dough environment.
Dough Not Rising: Potential Causes and Remedies
Perhaps the most frustrating issue in bread baking is when your dough simply refuses to rise. This lack of activity is a clear sign that your yeast isn't doing its job. Identifying the root cause is the first step in vegan bread yeast troubleshooting.
Several factors can contribute to this, ranging from the yeast itself to the conditions it's subjected to in the dough. Don't despair; most of these issues are easily identifiable and preventable with a little knowledge.
Expired Yeast: Checking the Expiration Date
The most straightforward reason for inactive yeast is that it's old. Yeast is a living organism, and like any living thing, it has a shelf life. Using yeast past its expiration date significantly reduces its viability. While it might still show some activity, it often won't be vigorous enough to properly leaven a loaf of vegan bread.
Always check the "Best By" or expiration date on your yeast package before using it. If it's past the date, or if you're unsure how long it's been open, it's best to buy a fresh packet. Storing yeast properly (in an airtight container in the refrigerator or freezer for dry yeast) can extend its life, but age is still a primary factor in diminished activity, leading to common vegan bread yeast troubleshooting needs.
Incorrect Water Temperature: Avoiding Too Hot or Too Cold
As discussed in the activation section, temperature is paramount for yeast activity. If the liquid used to activate your yeast (or added directly to the dough with instant yeast) is too cold, the yeast will be sluggish and may not activate sufficiently. If it's too hot, you risk killing the yeast cells entirely.
Use a thermometer to ensure your liquid is within the recommended range (105-115°F / 40-46°C for active dry, potentially slightly cooler for instant or fresh). This is a fundamental step in avoiding major vegan bread yeast troubleshooting headaches. If you're mixing dough in a stand mixer, be aware that friction can slightly warm the dough; ensure your initial liquid temperature accounts for this.
Insufficient Sugar: Feeding the Yeast in Vegan Baking
Yeast needs food to produce gas, and that food is sugar. While flour contains some natural sugars, adding a small amount of sugar (like cane sugar, maple syrup, or agave nectar – ensure it's vegan-friendly) to your dough, especially during activation, gives the yeast a quick energy source to get started.
If your recipe lacks sufficient sugar or relies solely on the natural sugars in the flour, the yeast may struggle to ferment effectively, resulting in a slow or incomplete rise. A typical bread recipe might include 1-2 tablespoons of sugar per loaf, which is usually enough to support yeast activity without making the bread overly sweet. Ensure any sugar substitute you use is actually fermentable by yeast; some artificial sweeteners are not.
Inhibitory Ingredients: High Salt Content, Excessive Fats, or Strong Spices
Certain ingredients can inhibit yeast activity if present in high concentrations or if they come into direct contact with the yeast before it's active. Salt is a common inhibitor; while essential for flavor and controlling fermentation speed, too much salt or adding salt directly on top of the yeast can slow it down or even kill it. Most recipes call for adding salt after the yeast has been mixed with the liquid and some flour.
Excessive amounts of fat (like vegan butter or oil) can coat the yeast cells, preventing them from absorbing moisture and sugar needed for activation. Similarly, very strong spices like cinnamon or garlic can sometimes have an inhibitory effect on yeast. Always mix these ingredients thoroughly into the flour before adding the yeast mixture, or incorporate fats gradually as directed by the recipe.
Dense Vegan Bread: Addressing Texture Issues
If your vegan bread rises but turns out heavy and dense instead of light and airy, the issue might relate to how the yeast activity interacted with the dough structure or proofing process. This is another area where vegan bread yeast troubleshooting comes into play, focusing on the later stages of dough development.
Density can stem from problems like over-proofing, under-proofing, or insufficient gluten development (or lack of proper binder function in gluten-free recipes).
Over-Proofing: Recognizing and Preventing Over-Proofing
Over-proofing occurs when the dough is allowed to rise for too long. The yeast consumes all the available sugars and produces a maximum amount of gas. If left longer, the gluten structure (or binder network) that holds the gas bubbles can weaken and collapse. When this dough is baked, it lacks the structure to support itself and often collapses or results in a dense, heavy loaf.
Signs of over-proofed dough include a dough that has risen dramatically and then started to sink slightly, a strong, overly alcoholic smell, and a dough that feels very soft and doesn't spring back when poked gently. To prevent this, follow recipe proofing times but also learn to judge readiness by feel – the poke test is your friend.
Under-Proofing: Allowing Adequate Rise Time
Conversely, under-proofing means the dough hasn't been given enough time to rise sufficiently. The yeast hasn't had the opportunity to produce enough carbon dioxide to properly leaven the dough. When baked, the dough will have limited oven spring (the final burst of rising in the oven) and will result in a dense, tight crumb.
Proofing time depends on factors like yeast amount, dough temperature, and ambient temperature. A typical first rise might take 1-2 hours at room temperature (around 70-75°F or 21-24°C), but colder temperatures will require longer. Ensure your dough has roughly doubled in size (for the first rise) or significantly increased in volume (for the second rise, often in the loaf pan) before baking.
Gluten Development: Utilizing Gluten-Free Binders Like Psyllium Husk or Flaxseed Meal
In traditional bread, the elastic network of gluten is crucial for trapping the gas produced by yeast. In vegan bread, particularly those using gluten-free flours, achieving adequate structure is vital. If the dough structure isn't strong enough, the gas produced by the yeast will simply escape, leading to a dense loaf despite active yeast.
For gluten-free vegan bread, incorporating effective binders like psyllium husk, flaxseed meal (when mixed with water to form a gel), or commercial gluten-free bread blends with added gums is essential. These binders mimic some of the functions of gluten, helping to create a network that can hold the gas. Ensure you use the correct ratios recommended for these binders in vegan recipes to support the yeast's work effectively.
Flat Vegan Bread: Preventing Lack of Rise
A flat loaf is often a symptom of insufficient overall rise, which can be caused by several underlying issues related to yeast activity or dough handling. While similar to dense bread, a flat loaf specifically indicates a significant lack of vertical expansion.
Troubleshooting flat vegan bread involves looking at the amount of yeast used, the dough's hydration level, and even the baking environment.
Insufficient Yeast: Using the Right Amount
Simply not using enough yeast for the amount of flour can be a reason for a flat loaf. Recipes are carefully calibrated to include the correct ratio of yeast to flour to achieve the desired rise within a specific timeframe. If you've halved the recipe but didn't adjust the yeast proportionally, or if you accidentally measured incorrectly, the yeast may not be able to produce enough gas to lift the dough adequately.
Always double-check the recipe's specifications for yeast quantity. If you're substituting yeast types (e.g., using active dry when instant is called for), remember that the conversion rate is approximately 1:1 by weight, but you might need slightly more active dry by volume (about 25% more) or adjust proofing times.
Dough Hydration: Balancing Moisture Content
Dough hydration refers to the ratio of water (or other liquids) to flour in the dough. Very wet doughs can be challenging to handle and may not hold their shape well, potentially spreading outwards rather than rising upwards, leading to a flatter loaf. Conversely, excessively dry dough can be too stiff for the yeast to effectively expand the gluten (or binder) network.
Finding the right hydration level is key. Most standard loaf breads have a hydration between 60% and 70%. Wetter doughs (75%+) often require more careful handling, like using stretch and folds instead of kneading, and may be baked in a loaf pan or Dutch oven to help support their structure during the rise and bake. Adjust liquid slightly based on your flour and environment, aiming for a dough that is soft and pliable but not overly sticky.
Oven Temperature: Ensuring Proper Baking Temperature
While yeast activity primarily happens before the oven, the oven temperature plays a crucial role in the final rise (oven spring) and setting the bread's structure. If the oven is not preheated properly or is running at a lower temperature than specified, the yeast may die off too slowly, or the crust may set too early, inhibiting the final burst of rise.
Ensure your oven is fully preheated to the correct temperature before placing the bread inside. Using an oven thermometer is highly recommended, as many home ovens are inaccurate. The high heat of the oven initially causes the yeast to produce a final surge of gas before it dies, and it also helps the dough structure set quickly, locking in the volume achieved during proofing.
Tips for Successful Vegan Bread Baking with Yeast
Beyond troubleshooting specific issues, adopting good practices can significantly improve your success rate when baking vegan bread with yeast. These tips cover everything from ingredient selection to technique and storage, helping you prevent problems before they start.
Incorporating these habits into your baking routine will make working with yeast feel less daunting and more intuitive, leading to consistently delicious vegan loaves.
Using Vegan-Friendly Sugar for Yeast Activation
As mentioned, yeast needs sugar to activate and ferment. While many sugars are naturally vegan (like granulated cane sugar – although some is processed with bone char, check for vegan certification if this is a concern, or opt for organic or beet sugar), ensuring the sugar you use is suitable for yeast is key.
Most common sugars like granulated sugar, brown sugar, maple syrup, agave nectar, and molasses work well. These are simple sugars that yeast can readily consume. Avoid using artificial sweeteners or sugar alcohols, as yeast cannot ferment these. A small amount, typically 1-2 teaspoons per packet of yeast or per loaf, is sufficient for activation and initial fermentation.
Optimizing Gluten Development in Vegan Dough
For vegan bread made with wheat flour, proper gluten development is essential for creating an elastic structure that can trap the gas produced by the yeast. This is achieved through kneading – either by hand or with a stand mixer. Kneading aligns the gluten proteins, forming a strong, stretchy network.
Kneading times vary by recipe and method, but a general guideline is 8-10 minutes by hand or 6-8 minutes in a stand mixer on medium speed. You can test for sufficient gluten development using the "windowpane test": take a small piece of dough and gently stretch it. If you can stretch it thin enough to see light through it without tearing, the gluten is well-developed. For gluten-free vegan bread, focus on properly hydrating and mixing your chosen binders (like psyllium husk) to create a cohesive, gas-trapping structure.
Creating a Warm Environment for Proofing
Yeast is most active in warm, moist environments. The ideal temperature range for rising dough is typically between 70°F and 85°F (21°C and 30°C). Drafts or cold spots can slow down or even halt yeast activity, leading to long or incomplete rises, a common trigger for vegan bread yeast troubleshooting.
To create a good proofing environment, you can:
- Place the covered dough in a slightly warm oven that is turned off (often with the light on, which provides enough warmth).
- Place the covered dough in a microwave (turned off) with a cup of hot water.
- Place the covered dough on top of a warm appliance, like a refrigerator.
- Use a proofing box or a bread machine's proofing setting.
Ensure the dough is covered with a damp cloth or plastic wrap to prevent a dry skin from forming, which can restrict the rise.
Storing Yeast Properly for Long-Term Use
Proper storage is critical for maintaining yeast viability and preventing future vegan bread yeast troubleshooting headaches related to inactive yeast. Dry yeast (active dry and instant) should be stored in an airtight container away from heat, light, and moisture.
For longer storage, especially once opened, dry yeast is best kept in the refrigerator or freezer. When stored in the freezer, it can remain viable for several months, sometimes even up to a year past its printed date. Simply let it come to room temperature for about 15-30 minutes before using. Fresh yeast is highly perishable and must be stored in the refrigerator and used within 1-2 weeks of purchase.
Advanced Techniques for Vegan Bread with Yeast
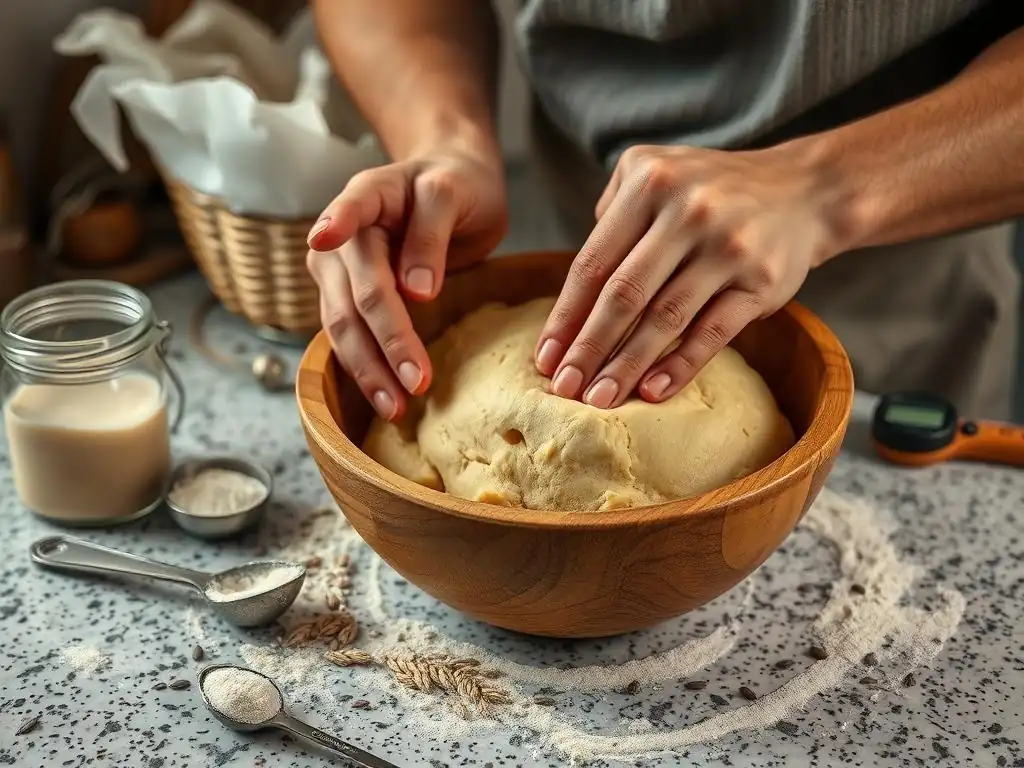
Once you've mastered the basics of using yeast in vegan bread and feel confident with common vegan bread yeast troubleshooting, you might want to explore more advanced techniques that can elevate your baking. These methods often involve longer fermentation times or the addition of ingredients that enhance flavor and texture.
Exploring these techniques can open up a whole new world of delicious vegan bread possibilities, from tangy sourdoughs to richly flavored loaves.
Using Sourdough Starter in Vegan Bread
Sourdough baking relies on a "starter," which is a living culture of wild yeast and bacteria (lactobacilli) in a flour and water mixture. Sourdough starters are naturally vegan. Using a portion of active sourdough starter alongside commercial yeast (a hybrid method) or relying solely on the starter can add a wonderful tangy flavor and unique texture to vegan bread.
Maintaining a healthy, active sourdough starter is a skill in itself, requiring regular feeding. When using a starter, the fermentation process is slower than with commercial yeast alone, often involving longer proofing times (e.g., an overnight rise in the refrigerator). This extended fermentation develops more complex flavors. Many classic sourdough recipes are easily adaptable to be fully vegan by simply omitting non-vegan additions like dairy or eggs.
Adding Flavor Enhancers to Vegan Bread Dough
Beyond the basic flour, water, yeast, and salt, countless ingredients can be added to vegan bread dough to enhance flavor and texture. Incorporating these can transform a simple loaf into something truly special.
Examples include:
- Herbs and Spices: Dried rosemary, thyme, garlic powder, onion powder, or even a pinch of smoked paprika.
- Seeds and Grains: Flax seeds, sesame seeds, sunflower seeds, or cooked grains like quinoa or oats for added texture and nutrition.
- Dried Fruits and Nuts: Raisins, cranberries, walnuts, or pecans for sweeter or richer loaves.
- Vegetables: Finely grated carrot, zucchini, or mashed potato can add moisture and softness.
- Vegan Cheese or Nutritional Yeast: For a savory, cheesy flavor profile.
When adding large quantities of these ingredients, be mindful that they can sometimes affect dough hydration or structure. Adjust liquid slightly if needed, and ensure they are evenly distributed.
Experimenting with Different Flours for Vegan Baking
While all-purpose or bread flour provides a reliable base for vegan bread due to their gluten content, experimenting with different flours can significantly alter the flavor, texture, and nutritional profile of your loaves.
Consider incorporating:
- Whole Wheat Flour: Adds nutty flavor, fiber, and a denser texture. Often used in combination with white flour.
- Spelt Flour: An ancient grain with a slightly sweet, nutty flavor. Its gluten is more fragile than modern wheat, so it requires gentler handling.
- Rye Flour: Creates dense, flavorful loaves. Contains less gluten than wheat, often used in combination with wheat flour or requires specific techniques.
- Alternative Flours (Gluten-Free): Rice flour, oat flour, almond flour, buckwheat flour, etc., used with binders like psyllium husk for gluten-free vegan bread yeast troubleshooting challenges.
Each flour absorbs liquid differently and impacts yeast activity and dough structure. Start by substituting a small percentage of the base flour and gradually increase as you become familiar with the results. This experimentation is part of the fun of mastering vegan bread baking.
Conclusion: Mastering Vegan Bread Yeast for Baking Success
Understanding how yeast works and how to troubleshoot common issues is fundamental to baking consistently amazing vegan bread. We've covered the different types of yeast available, the crucial process of activation, and detailed solutions for problems like dough not rising, dense bread, and flat loaves – key areas for vegan bread yeast troubleshooting.
Remember that successful baking is a combination of understanding ingredients, techniques, and being patient. Don't be discouraged by setbacks; each loaf, successful or not, is a learning opportunity.
Recap of Key Yeast Troubleshooting Tips
To recap the most important points for vegan bread yeast troubleshooting:
- Check Yeast Viability: Always proof active dry yeast or check the date/storage for instant yeast.
- Control Temperature: Use the correct liquid temperature for activation and provide a warm environment for proofing.
- Feed the Yeast: Ensure enough fermentable sugar is available in the dough.
- Mind Inhibitors: Be cautious of high salt or fat concentrations directly contacting the yeast early on.
- Proof Correctly: Avoid both under-proofing (not enough rise) and over-proofing (collapse and density).
- Develop Structure: Ensure adequate kneading for wheat-based dough or proper binder usage for gluten-free.
- Measure Accurately: Use the correct amount of yeast and liquids.
- Preheat Oven: Ensure the oven is hot enough for good oven spring.
By keeping these points in mind, you'll be well-equipped to handle most yeast-related issues in your vegan bread baking.
Further Resources for Vegan Bread Baking on BakeWithEase.com
Ready to put your yeast knowledge into practice? BakeWithEase.com offers a wealth of resources to support your vegan bread baking journey.
Explore our collection of simple, delicious vegan bread recipes, designed with clear instructions for bakers of all levels. Find detailed guides on specific techniques, ingredient substitutions, and more advanced topics like working with sourdough. We aim to be your comprehensive resource for mastering the art of baking, making it easy and enjoyable every step of the way. Keep practicing, keep learning, and enjoy the delicious results of your homemade vegan bread!
Frequently Asked Questions
How does yeast behave differently in vegan bread compared to traditional bread?
Vegan bread often lacks the gluten-enhancing fats found in dairy and eggs. This means the yeast needs extra support, such as proper hydration and potentially added gluten, to create a strong structure.
What are common signs of yeast problems in vegan bread dough?
Look for signs like slow or no rise, a dense and gummy texture, or a sour and unpleasant smell. These indicate the yeast may be inactive or struggling.
How can I ensure my yeast is active before adding it to my vegan bread recipe?
Always proof your yeast in warm water with a pinch of sugar. If it foams up within 5-10 minutes, it's active and ready to use. Inactive yeast should be discarded.
What types of sweeteners are best for feeding yeast in vegan bread dough?
While sugar works, maple syrup or agave nectar are also good choices for vegan baking. These provide the necessary sugars for the yeast to thrive.
What are some common mistakes people make when using yeast in vegan bread baking?
Using water that is too hot or too cold can kill or inhibit the yeast. Also, over-kneading the dough can damage the gluten structure, especially in vegan recipes.
Final Reflection: The Humble Yeast, the Amazing Loaf
Understanding the nuances of yeast is not merely a technical skill for vegan bakers; it's the key to unlocking consistently delicious, satisfying bread. Mastering yeast fermentation translates directly into the difference between a dense, disappointing loaf and a light, airy masterpiece – a difference that elevates the entire vegan baking experience. This is especially crucial in vegan baking, where the absence of eggs and dairy requires a deeper understanding of how yeast interacts with other ingredients to achieve optimal rise and texture.
The journey of understanding yeast has profoundly impacted my own baking, transforming it from a frustrating trial-and-error process into a creative and rewarding endeavor. It's a journey of observation, patience, and a growing appreciation for the microscopic organisms that are the foundation of so many culinary traditions. The more you know about yeast, the more you appreciate the magic it creates.
This simple statement encapsulates the profound shift in perspective I've experienced, moving from a place of frustration to one of informed confidence and delight.
Now, it's your turn. Don't let yeast be a mystery that holds you back from achieving your vegan bread dreams. Experiment, observe, and learn from each bake. Embrace the challenges, celebrate the successes, and remember that even the smallest detail in your approach – the temperature of your water, the freshness of your ingredients – can significantly impact the final result. The path to perfect vegan bread is paved with understanding, and the rewards are truly worth the effort. So, grab your flour, your yeast, and embark on your own baking adventure!
Unleash Your Inner Baker: Master Vegan Bread!
Thanks for diving into the world of yeast and vegan baking! You've just unlocked a key ingredient to creating truly amazing loaves. Now, let's put that knowledge into action.
- Bake your dream vegan loaf: Try out one of the recipes inspired by what you learned today. Experiment with different flours or add-ins – the possibilities are endless! This is your chance to truly personalize your baking.
- Share your baking journey: Show off your creations and inspire others! Tag us on social media with your results – we'd love to see them.
- Deepen your knowledge: Explore our other resources on vegan baking techniques to further improve your skills.
What unique flavor combination will you create with your newfound yeast expertise?