
Meringue Troubleshooting Guide: Common Problems Solved for Perfect Results

Welcome to BakeWithEase, your partner in creating baking magic! Ever found yourself staring at a deflated, weeping, or stubbornly soft meringue? Don't despair! Unlock the secrets to achieving meringue perfection with our comprehensive Meringue Troubleshooting Guide. We'll explore common problems and provide simple solutions, ensuring your next meringue is a showstopper. Ready to conquer your meringue fears and bake with confidence? Let's get started!
- Meringue Troubleshooting Guide: Common Problems Solved
- Understanding Meringue Challenges: A Baker's Guide
- Problem 1: Weeping Meringue (Meringue Beading)
- Problem 2: Soft or Soggy Meringue
- Problem 3: Cracked Meringue
- Problem 4: Collapsed Meringue
- Problem 5: Grainy Meringue
- Problem 6: Meringue Not Stiff Enough
- Meringue Baking Tips: Preventing Future Problems
- Frequently Asked Questions
- Final Reflection: The Sweet Science of Meringue Mastery
- Unlock Your Meringue Mastery: Bake the Perfect Kiss!
Meringue Troubleshooting Guide: Common Problems Solved
Understanding Meringue Challenges: A Baker's Guide
Meringue, that ethereal cloud of whipped egg whites and sugar, is a staple in many desserts, from delicate pavlovas to fluffy pie toppings and crisp cookies. While seemingly simple, achieving perfect meringue can sometimes feel like a delicate balancing act. Many bakers encounter frustrating issues like weeping, cracking, or failure to stiffen. Understanding the common pitfalls is the first step towards mastering this delightful confection. This guide will help you identify why your meringue might be misbehaving and provide practical solutions to fix common problems.
Successfully troubleshooting meringue issues requires a foundational understanding of its basic composition and the science behind whipping egg whites. Egg whites are primarily protein and water. When whipped, the proteins unfold and trap air bubbles, creating foam. Sugar stabilizes this foam, preventing it from collapsing. Heat then dries and sets the structure. Disruptions at any stage – from improper whipping to incorrect baking temperature or humidity – can lead to disappointing results. But don't worry, fixing meringue issues is often simpler than you think once you know the cause.
Why Meringue Fails: Identifying Root Causes
Meringue failures often stem from fundamental errors in preparation or baking conditions. One primary culprit is the presence of fat, even a tiny speck of egg yolk or grease on equipment, which prevents the egg whites from whipping properly and achieving stable volume. Another common issue relates to sugar: not adding it correctly, using the wrong type, or failing to dissolve it fully can lead to grainy or unstable meringue. Temperature plays a critical role too; both the egg whites themselves and the oven temperature are vital for success.
Environmental factors like humidity can also significantly impact meringue. High moisture in the air makes it difficult for meringue to dry out properly in the oven, leading to soft or sticky results. Furthermore, rushing the process, whether it's not whipping the egg whites to the correct stage or cooling the baked meringue too quickly, can cause structural problems like collapse or cracking. Identifying these root causes is the first step to finding the right meringue fix common problems strategy for your specific situation.
Common Meringue Problems and Solutions: Quick Overview
Bakers encounter a variety of issues when working with meringue. Some of the most frequent complaints include meringue that "weeps" or beads with sugary syrup, meringue that remains soft and sticky instead of becoming crisp, or meringue that develops unsightly cracks during baking or cooling. Other problems involve meringue collapsing after being piped or baked, having a gritty texture, or simply failing to whip up to a sufficient volume and stiffness.
Fortunately, for most common meringue problems, there are straightforward solutions. Often, adjustments to mixing technique, ingredient temperatures, sugar type, baking time, or oven temperature can make a dramatic difference. Understanding the science behind each issue allows you to implement the correct fix. For instance, weeping is often related to sugar dissolution and baking, while softness usually points to underbaking or moisture absorption. We'll delve into specific fixes for each common problem in the following sections, helping you confidently fix meringue issues.
Problem 1: Weeping Meringue (Meringue Beading)
Weeping meringue, also known as beading, is characterized by small droplets of sugary syrup appearing on the surface of the baked meringue after it has cooled. While the meringue itself might be cooked through, these sticky beads are visually unappealing and can affect the texture. This problem is particularly common with meringues baked on top of pies or tarts.
The appearance of these sugary tears is essentially the sugar separating from the egg white structure. This happens when the sugar isn't fully dissolved into the egg whites during whipping or when the meringue is baked at too high a temperature or too quickly, causing the sugar to crystallize and push moisture out. Addressing the cause is key to a successful meringue fix common problems approach for weeping.
Why Does Meringue Weep? Causes of Meringue Beading
The primary reason for meringue weeping is undissolved sugar. If the sugar granules don't fully melt into the egg white foam during the whipping process, they can later crystallize and leach moisture out, forming beads on the surface. This is especially likely if granulated sugar is added too quickly or if the meringue isn't whipped long enough after adding the sugar. Using superfine or caster sugar, which has smaller crystals, can sometimes help, but proper technique is still essential.
Another significant factor is the baking environment. Baking meringue at too high a temperature or for too short a time can cause the exterior to set before the interior is fully dried and the sugar is properly stabilized. The rapid heating can cause the protein structure to contract and expel moisture and undissolved sugar. High humidity during baking or cooling can also exacerbate the issue by preventing proper drying. For a reliable meringue fix common problems strategy regarding weeping, focus on both sugar technique and baking conditions.
How to Fix Weeping Meringue: Solutions for a Dry Finish
Preventing weeping starts with ensuring your sugar is completely dissolved. Add sugar gradually, a tablespoon or two at a time, while the mixer is running, giving the egg whites time to incorporate it fully before adding more. Once all the sugar is added, continue whipping for several minutes until the meringue is glossy and you can no longer feel any grit when you rub a small amount between your fingers. This ensures the sugar is dissolved and the meringue is stable.
Adjusting baking time and temperature is also crucial. Meringues should ideally be baked at a low temperature (often between 200°F and 250°F, or 90°C and 120°C) for a longer period. This slow drying process allows the sugar to fully stabilize within the protein matrix without causing rapid contraction and weeping. For a pie topping, baking until the peaks are lightly golden and the meringue is set through helps prevent beading. For meringue cookies, this low and slow bake is essential for a crisp, dry interior and a bead-free surface.
Proper Sugar Dissolution: The Key to Preventing Weeping
Achieving proper sugar dissolution is arguably the most critical step in preventing meringue weeping. Using superfine or caster sugar is often recommended because its smaller crystal size dissolves more readily than standard granulated sugar. However, even with superfine sugar, adding it slowly is paramount. Add the sugar one or two tablespoons at a time while the mixer is running on medium-high speed, waiting about 30 seconds between additions. This allows the egg white proteins to absorb the sugar gradually.
After all the sugar has been added, continue whipping the meringue for a substantial amount of time – often 5 to 10 minutes, depending on the mixer and batch size. The meringue should become very thick, glossy, and smooth. A simple test is to rub a tiny bit of meringue between your thumb and forefinger; it should feel completely smooth, with no gritty sugar crystals present.
If you feel grit, keep whipping until it's gone. This diligent process ensures the sugar is fully incorporated and less likely to separate later, offering a great meringue fix common problems approach for weeping.
Baking Time and Temperature: Adjusting for Optimal Results
The baking process for meringue is less about 'baking' in the traditional sense and more about 'drying out' the protein structure. Baking at too high a temperature (e.g., above 300°F) will cause the meringue to cook too quickly on the outside, trapping moisture inside and often leading to weeping or cracking. The ideal temperature range for drying meringue is typically between 200°F and 250°F (90°C and 120°C).
The baking time will vary significantly depending on the size and thickness of the meringue. Small meringue cookies might take 60-90 minutes, while a large pavlova could take 2-3 hours or even longer. The key is to bake until the meringue feels dry and crisp to the touch and lifts easily from the baking sheet. For pie toppings, bake until the peaks are set and lightly browned. Using a low temperature for a long duration ensures the meringue dries evenly throughout, stabilizing the sugar and preventing weeping. This slow bake is a fundamental meringue fix common problems technique.
Humidity Control: Minimizing Moisture Absorption
Humidity is the nemesis of dry, crisp meringue. High moisture in the air, whether during baking or cooling, can be absorbed by the hygroscopic sugar in the meringue, leading to stickiness and potential weeping. If you live in a humid climate, this can be a significant challenge. While you can't control the weather, you can take steps to minimize humidity's impact.
Baking meringue on a dry day is ideal. If that's not possible, consider using a low oven temperature for an extended period, even after the meringue appears done, to ensure maximum dryness. After baking, it's best to leave the meringue in the turned-off oven with the door propped slightly ajar.
This allows it to cool down gradually in a dry environment, preventing it from absorbing ambient moisture as it cools. Storing baked meringues in an airtight container immediately after they are completely cool is also essential to protect them from humidity. Managing humidity is a key meringue fix common problems strategy.
Problem 2: Soft or Soggy Meringue
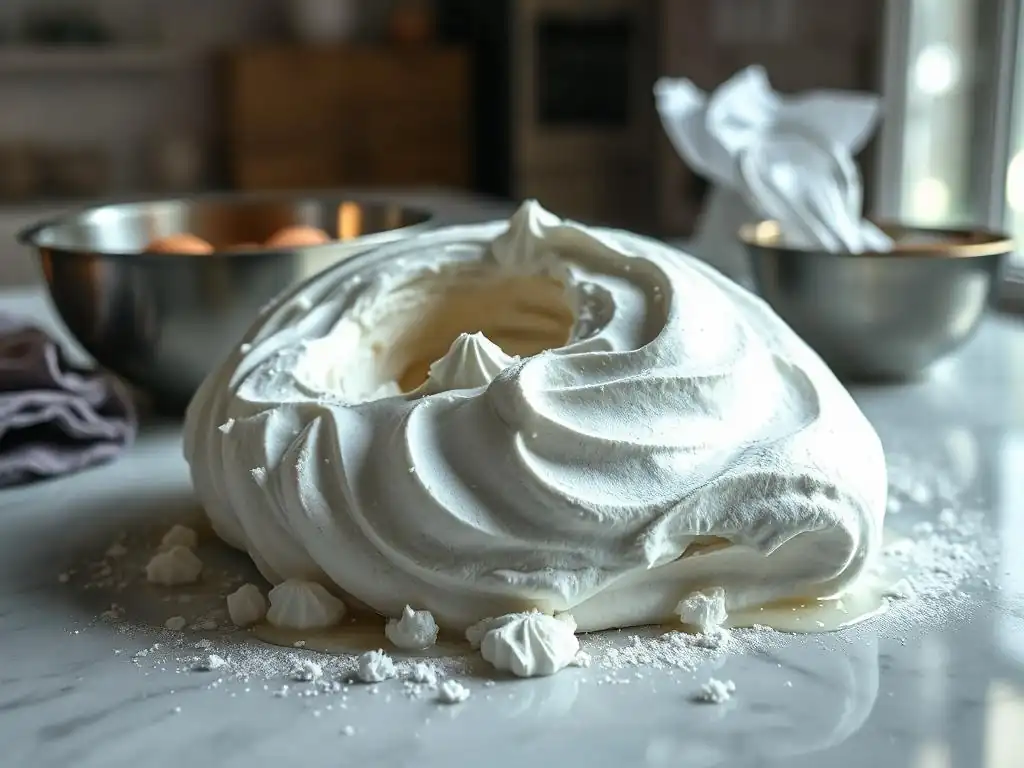
You've gone through the effort of whipping and shaping your meringue, baked it, and yet, instead of a crisp, delicate bite, you're met with a soft, chewy, or even soggy texture. This is a common disappointment, particularly when aiming for meringue cookies or pavlovas that should have a distinct crispness on the outside.
Softness in meringue usually indicates that it hasn't been dried out sufficiently during the baking process. It can also be caused by absorbing moisture from the environment after baking. Achieving that signature crisp texture requires careful attention to baking temperature, time, and proper storage. Learning how to get a crisp meringue is a vital meringue fix common problems skill.
Causes of Soft Meringue: Underbaked or Incorrectly Prepared
The most frequent cause of soft or soggy meringue is underbaking. Meringue doesn't just need to be cooked; it needs to be dried. If the oven temperature is too high, the outside might brown and seem done, but the inside remains moist and soft. Conversely, if the temperature is too low but the time is too short, the meringue won't have enough time to dry out completely.
Incorrect sugar ratios can also contribute to softness. Too little sugar relative to egg white can result in a less stable foam that doesn't dry as well. Using liquid flavorings (like extracts) excessively without adjusting for the added moisture can also impact the final texture. Finally, exposing baked meringue to humid air will cause it to absorb moisture and lose its crispness quickly. Understanding these causes helps in implementing the right meringue fix common problems approach.
Achieving a Crisp Meringue: Baking Techniques for a Firm Texture
To achieve a delightfully crisp meringue, think low and slow. Baking at a low temperature, typically between 200°F and 250°F (90°C and 120°C), for an extended period is crucial. This allows the moisture within the meringue to evaporate slowly without burning the exterior. The exact time will depend on the size and thickness of your meringue pieces.
Monitoring the meringue towards the end of the baking time is important. It should feel light and dry to the touch and lift easily from the baking surface. For larger meringues like pavlovas, the center might remain slightly soft and chewy, which is often desired, but the shell should be firm and crisp. Proper cooling is also essential; allowing the meringue to cool completely within the turned-off oven helps it maintain its dry texture. These techniques are fundamental to a successful meringue fix common problems strategy for softness.
Oven Temperature and Timing: Precise Baking for Crispy Meringue
Precise oven temperature and adequate baking time are non-negotiable for crispy meringue. A standard guideline for small meringue cookies is to bake them at around 225°F (107°C) for 1 to 1.5 hours, or until they are firm and dry. For larger forms, the time increases significantly. The goal is to gently evaporate the water content.
If your oven runs hot, you might need to use an oven thermometer to ensure the temperature is accurate and potentially lower the temperature slightly. Baking until the meringue is easily removable from the parchment paper is a good indicator of doneness. If it sticks, it likely needs more time to dry out. Don't rush this step; insufficient drying time at the correct temperature is a primary reason for soft meringue. Mastering this timing and temperature is a key meringue fix common problems technique.
Sugar Ratio: The Importance of Correct Proportions
The ratio of sugar to egg white is critical for both stability and texture in meringue. While recipes vary, a common ratio for crisp meringue cookies is approximately 1 part egg white to 2 parts sugar by weight (e.g., 100g egg whites to 200g sugar). This high proportion of sugar contributes to the meringue's structure and helps it dry out into a crisp form.
Using too little sugar can result in a less stable foam that is prone to collapsing and may not dry into a crisp texture. Conversely, using too much sugar can make the meringue overly sweet and potentially lead to weeping if not properly dissolved. Adhering to tested recipes or using a standard ratio provides the best foundation for achieving a crisp meringue. Getting the ratio right is a foundational meringue fix common problems step.
Storing Meringue Properly: Preventing Moisture Absorption
Once baked and cooled, meringue is highly susceptible to absorbing moisture from the air. Even a short exposure to humidity can turn a perfectly crisp meringue soft and sticky. Therefore, proper storage is essential to maintain its texture.
Baked meringues should be stored in an airtight container at room temperature as soon as they are completely cool. Avoid storing them in the refrigerator, as the cold environment often contains moisture that the meringue will absorb. If you live in a very humid climate, you might even consider adding a food-safe desiccant packet to the container, though this is usually only necessary for very long-term storage or extreme conditions. Sealing them away from moisture is a crucial meringue fix common problems step.
Problem 3: Cracked Meringue
Cracked meringue can mar the appearance of a beautiful dessert. Large cracks running across the surface of a pavlova shell or small fissures appearing on meringue cookies are frustrating, even if the texture inside is correct. While sometimes a rustic look is acceptable, preventing excessive cracking is often desired.
Cracking typically occurs due to rapid changes in temperature or uneven expansion/contraction during baking and cooling. Understanding these thermal dynamics is key to keeping your meringue smooth and intact. Preventing cracks is a key aspect of effective meringue fix common problems strategies.
Why Meringue Cracks: Potential Causes and Prevention
One of the main culprits behind meringue cracking is temperature shock. Baking at too high a temperature can cause the outside of the meringue to set and harden too quickly while the inside is still expanding. As the inside continues to expand, it puts stress on the already rigid exterior, leading to cracks. Similarly, removing meringue from a hot oven into a cool room too quickly can cause a rapid contraction that results in cracking.
Another factor can be the consistency of the meringue itself. If the egg whites were overbeaten to the point of becoming dry or curdled, the structure can be brittle and more prone to cracking during baking. Uneven piping or spreading can also create thin spots that are more susceptible to cracking. Addressing these issues is vital for a successful meringue fix common problems approach.
Preventing Meringue Cracks: Techniques for a Smooth Finish
To prevent meringue cracks, focus on gentle handling and gradual temperature changes. Baking at a low temperature (as recommended for crispness and preventing weeping) helps the meringue dry out slowly and evenly, minimizing stress on the structure. Avoid opening the oven door frequently during baking, as this causes temperature fluctuations.
Crucially, allow the meringue to cool down very gradually. The best method is often to turn off the oven once baking is complete and leave the meringue inside, possibly with the oven door propped open slightly, until the oven is completely cool. This slow transition from hot to cool prevents the rapid contraction that causes cracking. Proper egg white consistency is also important; whip to stiff peaks, but stop before the meringue looks dry or separated. These techniques are fundamental to a successful meringue fix common problems strategy for cracks.
Gradual Cooling: Avoiding Temperature Shock
Gradual cooling is perhaps the most effective technique for preventing meringue cracks. The rapid temperature drop experienced when moving a hot meringue directly from the oven to a cool countertop is a major cause of stress on the delicate structure.
Instead, once your meringue is baked and dry, turn off the oven and leave the meringue inside. You can prop the oven door open slightly with a wooden spoon to facilitate air circulation and speed up the cooling process slightly, but the key is that the meringue remains in a warm environment that cools down slowly. Leave it undisturbed until the oven is at room temperature. This slow, gentle cooling allows the meringue to contract gradually and evenly, significantly reducing the risk of cracks. This is a crucial meringue fix common problems technique.
Proper Egg White Beating: Achieving the Right Consistency
The consistency of your whipped egg whites before adding sugar can also influence the likelihood of cracking. While you need stiff peaks for stable meringue, overbeating the egg whites can make them brittle. Egg whites that are whipped too far will start to look dull, grainy, or even separated.
Whip egg whites until they reach stiff, glossy peaks. When you lift the whisk, the meringue should stand straight up without drooping, and the surface should be smooth and shiny, not rough or curdled. If you reach this stage before adding all the sugar, pause the whipping until you are ready to add the next addition. Learning to recognize perfectly whipped egg whites is essential for preventing a brittle structure that is prone to cracking, a key meringue fix common problems skill.
Problem 4: Collapsed Meringue
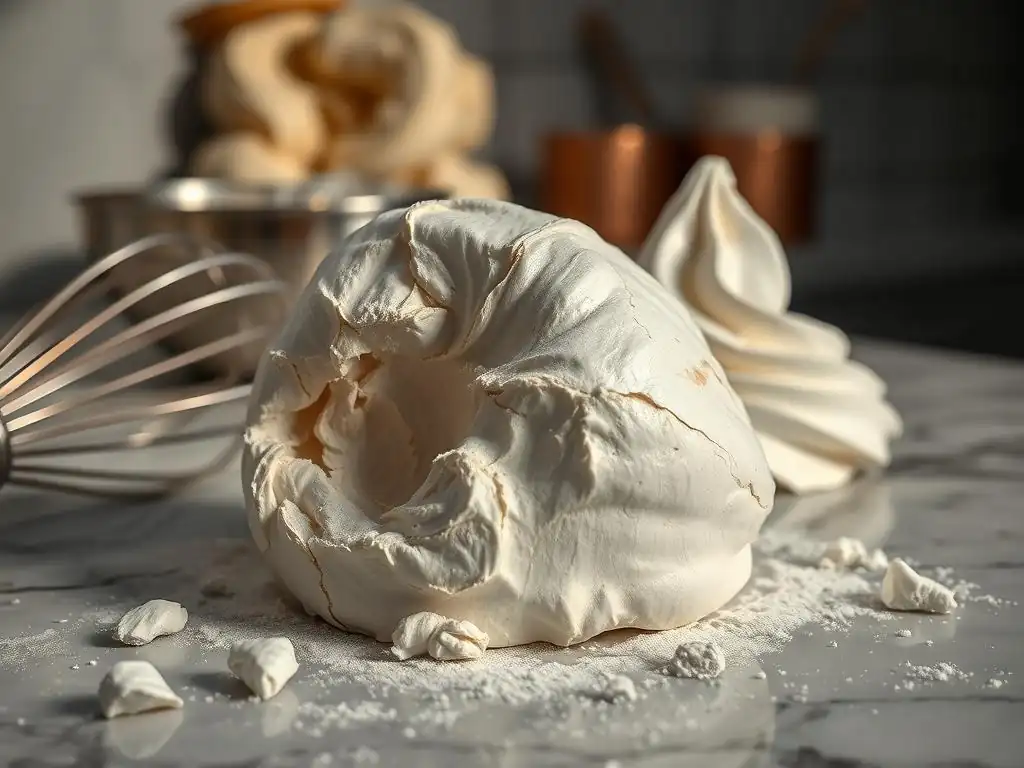
Few things are more disheartening than seeing your beautifully piped or spread meringue deflate, either before baking, during baking, or shortly after it comes out of the oven. Collapsed meringue lacks volume and structure, resulting in a flat, dense, or sad-looking result instead of the airy cloud you intended.
Collapse is usually a sign that the egg white foam was not stable enough to support itself or withstand the baking process. This instability can stem from various issues during the whipping or preparation stages. Understanding what makes meringue stable is key to preventing deflation and mastering how to fix common meringue problems.
Understanding Meringue Collapse: Reasons for Deflation
Meringue collapse can happen for several reasons, all related to the stability of the egg white foam. The most common cause is underwhipping the egg whites; if they don't reach stiff peaks, the air bubbles trapped within the proteins aren't strong enough to hold their shape, especially once the weight of the sugar is added or heat is applied.
Another major culprit is the presence of fat or oil. Even a tiny amount of egg yolk, grease on your bowl, or oil on your whisk can prevent the egg whites from forming a stable foam, leading to immediate or eventual collapse. Overmixing after adding sugar can also break down the protein structure, causing deflation. Finally, rapid temperature changes or removing meringue from the oven too early before the structure is set can also cause it to shrink or collapse. Addressing these issues is vital for a successful meringue fix common problems approach.
How to Prevent Meringue Collapse: Maintaining Volume and Structure
Preventing meringue collapse requires careful attention to the whipping process and the stability of the foam. Ensuring your equipment is scrupulously clean and free of any grease is the first critical step. Even a microscopic film of fat can ruin your efforts.
Whipping the egg whites to the correct stage – stiff, glossy peaks – is paramount. This creates a strong protein matrix capable of holding the trapped air. Stabilizers like cream of tartar or a tiny amount of acid (like lemon juice or vinegar) can help strengthen the protein bonds and make the foam more resilient, reducing the likelihood of collapse.
Adding sugar gradually and continuing to whip until it's fully dissolved further stabilizes the structure. Gentle handling, especially when folding in other ingredients if applicable, also helps preserve the volume. Mastering these steps is fundamental to a meringue fix common problems strategy for collapse.
Stabilizing Egg Whites: Cream of Tartar and Other Techniques
To give your meringue extra insurance against collapse, consider using a stabilizer. Cream of tartar, a fine white powder (potassium bitartrate), is a popular choice. A small pinch (about 1/8 teaspoon per large egg white) added to the egg whites at the foamy stage helps to lower the pH, strengthening the protein network and allowing the egg whites to whip up faster and achieve a more stable, voluminous, and resilient foam.
Other acidic ingredients like a few drops of fresh lemon juice or white vinegar can serve a similar purpose, though cream of tartar is often preferred for its consistent results and lack of added flavor. These stabilizers help the protein chains bond more effectively, creating a structure that is less likely to deflate, particularly crucial when dealing with larger meringues or humid conditions. Incorporating a stabilizer is a smart meringue fix common problems technique.
Achieving Stiff Peaks: The Key to Stable Meringue
Whipping egg whites to the proper stiff peak stage is the single most important factor in preventing meringue collapse. Soft peaks, where the meringue slumps over when the whisk is lifted, indicate that the protein structure isn't strong enough to support itself.
Stiff peaks are achieved when the meringue stands straight up when the whisk is lifted. The meringue should be thick, smooth, and glossy. If using a stand mixer, the meringue will gather inside the whisk. Be careful not to overbeat past this stage, as the meringue can become dry and lose stability, which can also lead to problems. Knowing exactly when to stop whipping is a skill that comes with practice, and it's essential for a stable meringue that won't collapse. This is a foundational meringue fix common problems skill.
Folding Techniques: Gentle Incorporation of Ingredients
While most meringues are simply egg whites and sugar, some recipes, like pavlova, involve folding in other ingredients such as cornstarch (for a soft interior) or vanilla extract. When adding these, the folding technique is critical to maintain the volume achieved during whipping.
Use a large spatula and a gentle motion to incorporate additional ingredients. Cut down through the center of the meringue and scoop up the mixture from the bottom, folding it over the top. Rotate the bowl and repeat until the ingredients are just combined. Overmixing or stirring vigorously at this stage will deflate the air from the meringue, leading to a flat result. Gentle handling is key to preserving the airy structure you worked hard to create, a vital meringue fix common problems tip.
Problem 5: Grainy Meringue
A perfectly baked meringue should have a smooth, melt-in-your-mouth texture. However, sometimes meringues turn out grainy or gritty, with noticeable sugar crystals throughout. This unpleasant texture is a clear sign that something went wrong during the sugar incorporation phase.
Graininess indicates that the sugar did not fully dissolve into the egg white foam. This can happen for several reasons related to the type of sugar used, how quickly it was added, or insufficient mixing time. Fixing this common meringue problem involves ensuring complete sugar dissolution.
Identifying Grainy Meringue: Causes of an Undesirable Texture
The primary cause of grainy meringue is undissolved sugar crystals. When you whip egg whites and add sugar, the sugar needs to dissolve into the moisture present in the egg whites. If the sugar is added too quickly, or if the meringue isn't whipped for long enough after adding the sugar, the crystals won't fully melt.
Using coarse granulated sugar can make dissolution more difficult compared to finer sugars. Cold egg whites also dissolve sugar less effectively than room temperature egg whites. Finally, sometimes the meringue isn't mixed vigorously enough or for a sufficient duration to allow the sugar to fully incorporate and dissolve into the protein structure. Addressing these causes is vital for a successful meringue fix common problems approach to graininess.
Achieving Smooth Meringue: Tips for a Silky Finish
To achieve a smooth, non-grainy meringue, the focus must be on ensuring complete sugar dissolution. This starts with the type of sugar you use and continues with your mixing technique.
Using superfine or caster sugar is highly recommended, as its smaller crystal size dissolves much more easily and quickly than standard granulated sugar. Even with superfine sugar, adding it gradually while whipping is crucial. Add it one or two tablespoons at a time, allowing each addition to be incorporated before adding the next. After all the sugar is added, continue whipping for several minutes until the meringue is thick, glossy, and feels completely smooth when rubbed between your fingers. Patience during this final whipping stage is key to a silky texture and a great meringue fix common problems strategy.
Fine Sugar vs. Granulated Sugar: Making the Right Choice
The type of sugar you use can significantly impact the final texture of your meringue. Standard granulated sugar has relatively large crystals that take longer to dissolve in the limited moisture of egg whites. If not given enough time or agitation, these crystals will remain intact, resulting in a grainy texture.
Superfine sugar (also known as caster sugar in some regions) has much smaller crystals. These smaller crystals dissolve significantly faster and more easily into the egg white foam, making it much simpler to achieve a smooth, non-grainy meringue. While it might cost slightly more, using superfine sugar is often the easiest way to avoid a grainy texture and is a recommended meringue fix common problems tip. If you only have granulated sugar, you can process it briefly in a food processor or clean coffee grinder to make it finer, but be careful not to turn it into powdered sugar.
Proper Mixing Techniques: Avoiding Over-Mixing
Proper mixing is essential for dissolving the sugar and achieving a smooth meringue. While you need to whip the egg whites to stiff peaks and ensure the sugar is dissolved, it is possible to over-mix meringue, although this typically leads to other issues like brittleness or loss of stability rather than graininess per se. The key for smoothness is sufficient mixing after adding the sugar.
Add the sugar slowly, a little at a time, while the mixer is running at medium-high speed. This gradual addition allows the sugar to start dissolving immediately. Once all the sugar is incorporated, continue whipping at medium-high speed.
This is the stage where the meringue develops its glossiness and smooth texture as the sugar dissolves. Whip until the meringue looks very shiny and stiff and, crucially, feels smooth with no grit when tested. Don't stop whipping until the sugar is fully dissolved – this is the critical step for a smooth, non-grainy meringue and a vital meringue fix common problems strategy.
Problem 6: Meringue Not Stiff Enough
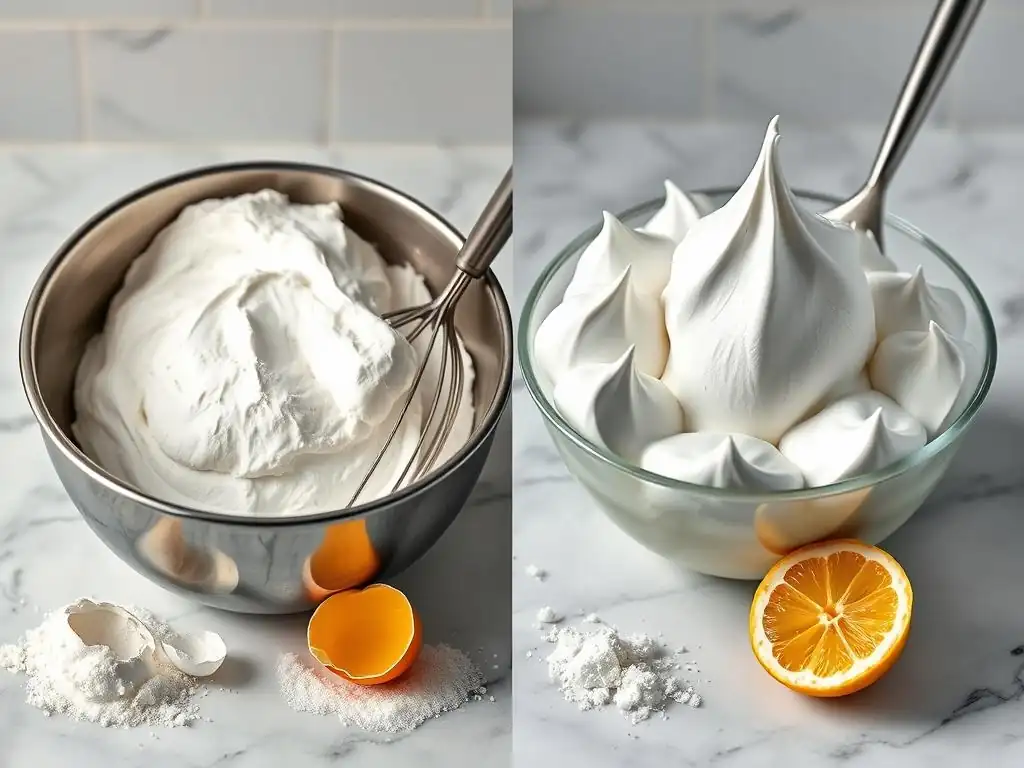
You're whipping away, expecting those beautiful, upright stiff peaks, but your meringue remains soft, floppy, or simply won't hold its shape. This is a common frustration, especially for beginners, as achieving stiff peaks is foundational for most meringue recipes.
Meringue that fails to stiffen properly is usually due to factors inhibiting the egg whites from forming a stable foam. This can range from external contaminants to the temperature of the egg whites themselves or issues with the whipping process. Learning how to achieve stiff peaks is a crucial meringue fix common problems skill.
Reasons for Weak Meringue: Inability to Form Stiff Peaks
The most common reason for meringue failing to reach stiff peaks is the presence of fat. Even a tiny speck of egg yolk or residual grease on your mixing bowl or whisk can prevent the egg white proteins from unfolding and trapping air effectively. Fat inhibits the formation of the protein network necessary for a stable foam.
Other factors include using extremely fresh egg whites (older egg whites tend to whip up better, though this is less critical than fat), using cold egg whites directly from the refrigerator (room temperature egg whites whip to a higher volume more quickly), or insufficient whipping time or speed. Using incorrect equipment, such as a plastic bowl which can harbor grease, can also be a factor. Addressing these issues is fundamental to a successful meringue fix common problems approach.
Achieving Stiff Peaks: A Step-by-Step Guide
Achieving stiff peaks requires careful preparation and technique. Start with clean, dry equipment. Use a glass or metal bowl (avoid plastic). Carefully separate your egg whites, ensuring absolutely no yolk gets into the whites. Even a drop of fat can ruin your meringue.
Begin whipping the egg whites on medium speed until they become foamy. At this stage, you can add a stabilizer like cream of tartar if using. Increase the speed to medium-high and continue whipping until soft peaks form (when the whisk is lifted, the peaks curl over). Begin adding the sugar gradually, a tablespoon or two at a time, while continuing to whip.
Once all the sugar is added, increase the speed to high and whip until stiff, glossy peaks form. The meringue should stand straight up when the whisk is lifted and look smooth and shiny. Patience and observing the meringue's texture are key steps in this meringue fix common problems guide.
Egg White Temperature: Room Temperature vs. Cold
The temperature of your egg whites can impact how easily and quickly they whip up. While you can whip cold egg whites, it generally takes longer to achieve volume and stiff peaks compared to using egg whites that are at room temperature.
Egg whites at room temperature (around 68-72°F or 20-22°C) have lower surface tension, allowing the proteins to unfold and trap air more easily. This results in a more voluminous and stable foam that whips up faster. To bring eggs to room temperature quickly, place the whole eggs in a bowl of warm (not hot) water for 5-10 minutes before separating. While not strictly necessary, using room temperature egg whites is a helpful tip for consistently achieving stiff peaks and is a valuable meringue fix common problems technique.
Cleanliness of Equipment: Ensuring Fat-Free Tools
This point cannot be stressed enough: cleanliness is paramount when whipping egg whites for meringue. Any trace of fat – whether from residual cooking oil, butter, or even a tiny amount of egg yolk – will prevent the egg white proteins from forming a stable foam.
Use a clean glass or metal mixing bowl and whisk attachment. Avoid plastic bowls, as they can sometimes retain a greasy film even after washing. Wash your equipment thoroughly with hot, soapy water, rinse well, and dry completely before using. Some bakers even wipe the bowl and whisk with a little lemon juice or vinegar on a paper towel before starting, as the acid helps to cut any residual grease. Ensuring your tools are spotless is the most critical step in preventing weak meringue and is the foundational meringue fix common problems strategy.
Meringue Baking Tips: Preventing Future Problems
Moving beyond troubleshooting specific issues, adopting best practices can significantly reduce the likelihood of encountering common meringue problems in the first place. Consistency in technique, understanding your ingredients, and paying attention to your environment are key to success.
By implementing reliable methods from the start, you build a strong foundation for perfect meringue every time. This section summarizes essential tips that encompass the lessons learned from fixing common meringue issues, providing a proactive approach to meringue mastery.
Best Practices for Perfect Meringue Every Time
Achieving consistently perfect meringue involves mastering a few core principles. Always start with clean, fat-free equipment. Use egg whites that are carefully separated, ensuring no yolk contamination. Consider using room temperature egg whites for easier whipping.
Add sugar gradually, allowing it to dissolve completely, and continue whipping until the meringue is glossy and forms stiff peaks. Use a low oven temperature (200-250°F or 90-120°C) for a long duration to dry the meringue slowly. Allow the meringue to cool gradually inside the turned-off oven. Finally, store baked meringues in an airtight container to protect them from humidity. Following these best practices is the most effective way to avoid needing to fix common meringue problems.
Troubleshooting Checklist: Quick Reference for Meringue Success
Keep this quick checklist handy next time you're making meringue or encounter an issue. It summarizes the key points for preventing and fixing common meringue problems:
- Cleanliness: Is all equipment perfectly clean and fat-free?
- Egg Whites: Are they free of yolk? Are they at room temperature (optional but helpful)?
- Stabilizer: Did you add cream of tartar or acid (optional)?
- Whipping: Did you whip to stiff, glossy peaks? Did you add sugar gradually?
- Sugar Dissolution: Is the meringue smooth, with no grit (rub test)? Did you use superfine sugar (optional)?
- Baking Temperature: Is the oven temperature low (200-250°F or 90-120°C)?
- Baking Time: Did you bake long enough for the meringue to be dry and crisp?
- Cooling: Did you cool the meringue gradually in the turned-off oven?
- Storage: Is the baked meringue stored in an airtight container?
- Humidity: Is the environment particularly humid? (Adjust bake time/storage accordingly).
Reviewing these points can quickly help you identify potential issues and implement the correct meringue fix common problems strategy for beautiful, stable, and delicious meringue.
Frequently Asked Questions
What are the most common reasons for a meringue not stiffening?
Several factors can contribute. These include fat contamination in the bowl or utensils, eggs that are not fresh, and insufficient whipping time. Ensuring cleanliness and fresh ingredients is crucial.
My meringue is weeping. What could be causing this?
Weeping, also known as syneresis, happens when liquid separates. This is often due to undissolved sugar, overbaking, or high humidity.
How can I prevent my meringue from shrinking after baking?
Shrinking usually occurs because the meringue wasn't properly stabilized. Make sure to gradually add sugar while whipping and bake at a low temperature for an extended period.
Why is my meringue grainy instead of smooth and glossy?
A grainy texture typically indicates undissolved sugar. Ensuring the sugar completely dissolves while whipping is essential for a smooth meringue.
Can I fix a meringue that has collapsed?
Unfortunately, once a meringue has completely collapsed, it's difficult to fully restore it. However, you can try re-whipping it very carefully, while adding a small amount of cream of tartar, but results may vary.
Final Reflection: The Sweet Science of Meringue Mastery
The pursuit of the perfect meringue is a journey, not a destination, but this guide offers a roadmap to navigate its delightful, yet sometimes treacherous, path. Mastering the art of meringue isn't just about achieving glossy peaks; it's about understanding the delicate balance of ingredients and technique that transforms simple egg whites into airy, ethereal clouds. This understanding empowers bakers to confidently tackle even the most challenging meringue recipes.
The fragility of a meringue mirrors the delicate nature of baking itself. Each failed attempt, each cracked peak, teaches a valuable lesson about precision and patience. The best things in life are worth waiting for,
and this couldn't be truer for the perfect meringue. The journey of troubleshooting, of understanding why a meringue might weep or collapse, deepens our appreciation for the science and artistry behind this seemingly simple confection. It's a journey that connects us to generations of bakers who have perfected this technique, each contributing to the collective knowledge we now possess.
Now, armed with the knowledge gained from this guide, I invite you to embark on your own meringue adventures. Don't be afraid to experiment, to push boundaries, and to learn from your mistakes. Each meringue you create, whether perfectly glossy or slightly imperfect, is a testament to your dedication and a step closer to mastering this sweet science. Remember the lessons learned here, and let them guide you towards creating meringues that are not only visually stunning but also bursting with flavor and texture. The perfect meringue awaits!
Unlock Your Meringue Mastery: Bake the Perfect Kiss!
Thanks for joining us on this meringue adventure! You've now got the knowledge to conquer those frustrating meringue mishaps and unlock truly amazing results. Ready to put your new skills to the test?
- Whip up your dream meringue: Try the recipe variations mentioned in the article, experimenting with different flavors and techniques. This is your chance to create a meringue masterpiece!
- Share your meringue triumphs (and even your flops!): Let's build a supportive baking community. Post your creations – and any questions you have – on our BakeWithEase social media channels. We'd love to see them!
- Challenge yourself with a new meringue recipe: Use your newfound knowledge to tackle a more ambitious meringue-based dessert. Think pavlova, macarons, or even a delicate meringue cake!
What incredible meringue creation will you bake next?