
Dipping Strawberries with Tempered Chocolate: A StepbyStep Guide.

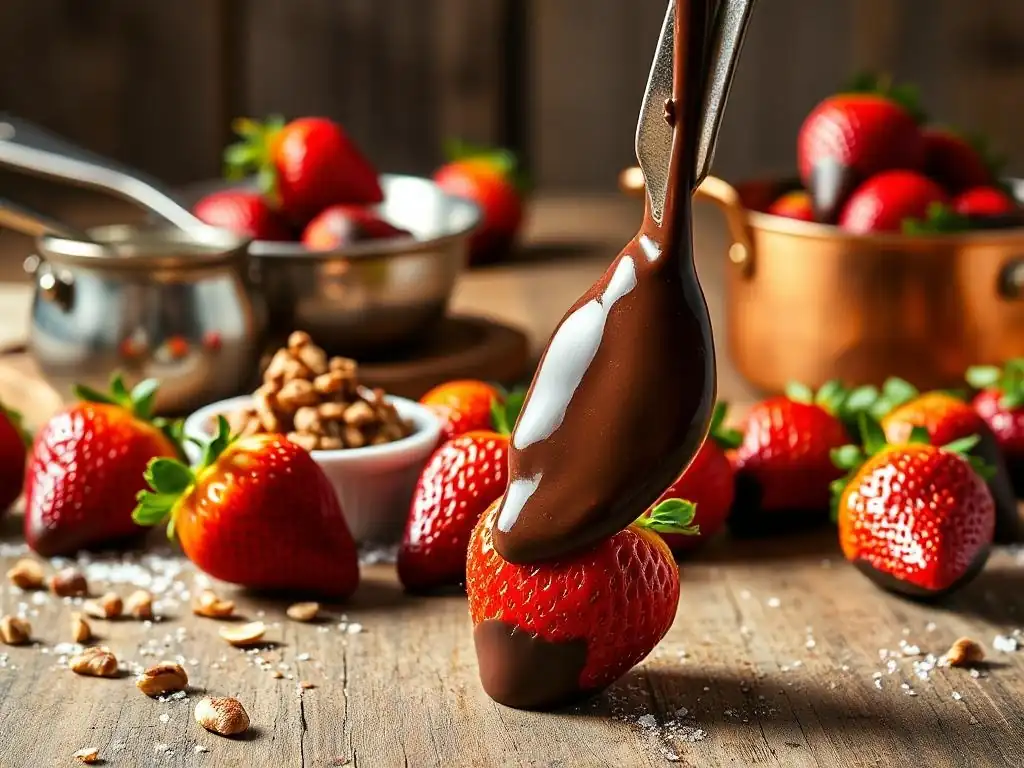
Welcome to BakeWithEase, your trusted guide to unlocking the secrets of perfect baking! Ever wondered how to achieve that flawless, glossy finish on your dipped strawberries? Our latest article dives deep into the art of tempered chocolate, offering a step-by-step guide to crafting stunning and delicious treats. Discover the techniques behind achieving perfectly tempered chocolate and elevate your baking skills – the secrets await just below!
- Dipping Strawberries with Tempered Chocolate: A Step-by-Step Guide for Perfect Results
- Introduction to Chocolate-Covered Strawberries: A Classic and Elegant Treat
- Preparing for Your Tempered Chocolate Strawberry Dipping Recipe
- Step 1: Mastering Chocolate Tempering for Perfect Strawberries
- Step 2: Preparing the Strawberries for Chocolate Dipping
- Step 3: The Art of Dipping Strawberries in Tempered Chocolate
- Step 4: Decorating Your Chocolate-Covered Strawberries
-
Step 5: Setting and Storing Your Tempered Chocolate Strawberries
- Best Practices for Setting Tempered Chocolate Properly: Room Temperature Setting on Parchment Paper
- How to Store Chocolate-Covered Strawberries to Maintain Freshness: Refrigerate in a Single Layer in an Airtight Container
- Troubleshooting Common Problems: Preventing Chocolate Bloom and Avoiding Soft Chocolate
- Step 6: Serving and Enjoying Your Chocolate-Dipped Strawberries
- Advanced Techniques: Taking Your Chocolate Strawberry Dipping to the Next Level
- Troubleshooting Your Tempered Chocolate Strawberry Dipping Recipe
- Conclusion: Mastering the Art of Tempered Chocolate Strawberry Dipping
-
Frequently Asked Questions
- What is tempered chocolate and why is it important for dipping strawberries?
- What type of chocolate is best for dipping strawberries?
- Can I use chocolate chips instead of couverture chocolate for tempering?
- What if my tempered chocolate starts to thicken or seize up while I'm dipping?
- How long will dipped strawberries last, and how should I store them?
- Final Reflection: The Enduring Allure of Perfectly Tempered Chocolate
- Unleash Your Inner Chocolatier!
Dipping Strawberries with Tempered Chocolate: A Step-by-Step Guide for Perfect Results
Introduction to Chocolate-Covered Strawberries: A Classic and Elegant Treat
Chocolate-covered strawberries are a universally loved confection, combining the fresh, slightly tart flavor of ripe strawberries with the rich, decadent taste of chocolate. They are perfect for special occasions like Valentine's Day, anniversaries, or simply as a delightful homemade treat. While seemingly simple, achieving a professional-looking result with a shiny, snap-able chocolate shell requires a specific technique: chocolate tempering. Untempered chocolate will result in a dull finish, streaks (bloom), and a soft texture that melts too easily in your hands.
Mastering the art of dipping strawberries with tempered chocolate elevates this simple dessert from good to extraordinary. This guide will walk you through the entire process, focusing on the crucial tempering step which is key to the perfect tempered chocolate strawberry dipping recipe. We'll cover everything from selecting the best ingredients and equipment to the dipping process, decoration, and storage, ensuring your homemade chocolate-covered strawberries are not only delicious but also visually stunning with that desirable glossy finish and satisfying snap.
Preparing for Your Tempered Chocolate Strawberry Dipping Recipe
Before you even think about melting chocolate, proper preparation is paramount. Having all your ingredients and equipment ready and organized streamlines the process and significantly reduces the chances of errors, especially when working with the sensitive nature of tempered chocolate. Think of it like mise en place in cooking – everything in its place – which is essential for a successful tempered chocolate strawberry dipping recipe.
Taking the time to prepare thoroughly ensures a smooth workflow. This includes measuring ingredients, setting up your workspace, and having all necessary tools within reach. A chaotic setup can lead to rushed decisions or spills, which are particularly problematic when dealing with molten chocolate that requires precise temperature control. A well-prepared environment allows you to focus on the technique, especially the critical step of tempering the chocolate for dipping strawberries.
Gathering Your Ingredients for Chocolate-Covered Strawberries
The quality of your ingredients directly impacts the final taste and appearance of your chocolate-covered strawberries. You'll need two main components: fresh strawberries and high-quality chocolate. For a batch of roughly 1 pound (about 20-25 medium strawberries), you'll typically need about 12 to 16 ounces of chocolate. This amount provides enough depth in your dipping container to fully submerge the strawberries easily.
When selecting chocolate, it's crucial to choose couverture chocolate, which is specifically formulated for tempering due to its higher cocoa butter content (typically 32-39%). Avoid using chocolate chips or standard baking chocolate as they often contain stabilizers that prevent proper tempering and result in a waxy, less desirable finish. You can use dark, milk, or white couverture chocolate, depending on your preference. For instance, Valrhona, Callebaut, or Guittard are popular brands known for their quality couverture chocolates suitable for your tempered chocolate strawberry dipping recipe.
Essential Equipment for Tempering Chocolate and Dipping Strawberries
Having the right tools makes the tempering and dipping process much smoother and more successful. Here is a checklist of essential equipment you'll need:
- [ ] Double boiler or a heatproof bowl that fits snugly over a saucepan (ensure the bottom of the bowl doesn't touch the water)
- [ ] Medium saucepan for heating water
- [ ] Digital thermometer (infrared or probe) for accurate temperature monitoring - this is critical for tempered chocolate
- [ ] Rubber spatula or spoon for stirring the chocolate
- [ ] Shallow dish or bowl for dipping (wide enough to accommodate a strawberry)
- [ ] Parchment paper or wax paper
- [ ] Baking sheet or tray to lay the dipped strawberries on
- [ ] Paper towels for drying strawberries
Optional but helpful tools include chocolate-dipping tools (like forks or skewers) and a small offset spatula for smoothing or decorating. Using a digital thermometer is non-negotiable for a successful tempered chocolate strawberry dipping recipe, as precise temperatures are key to achieving proper temper and that beautiful, glossy finish.
Step 1: Mastering Chocolate Tempering for Perfect Strawberries
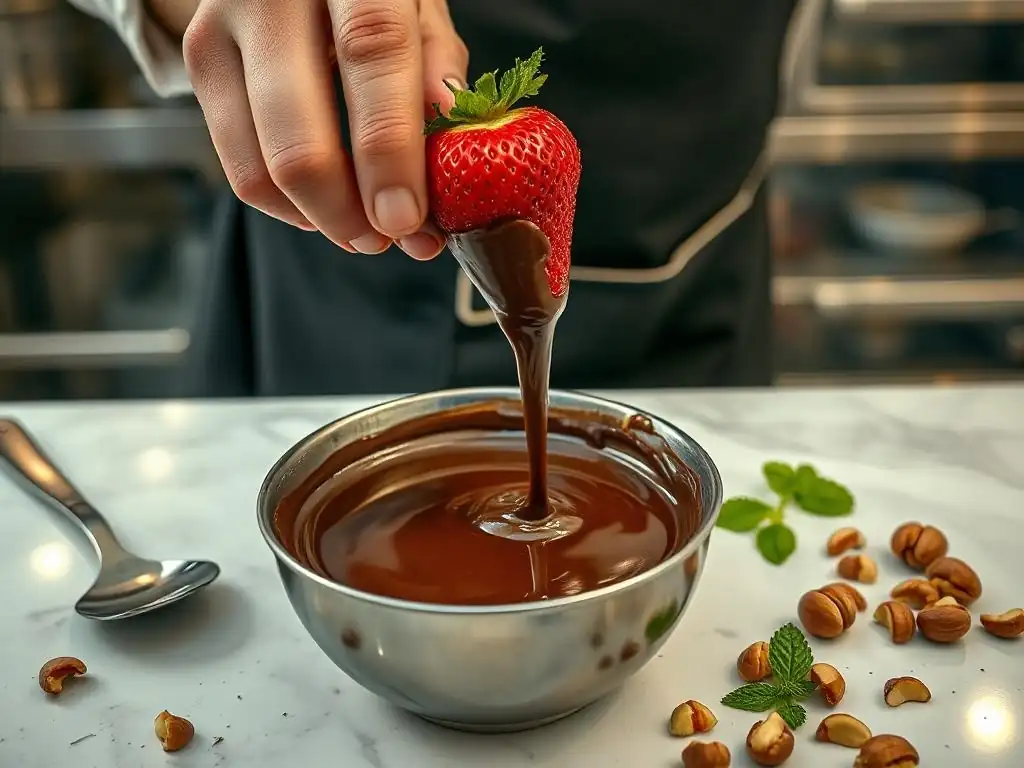
Tempering chocolate is the most critical step in creating professional-quality chocolate-covered strawberries. It involves carefully melting and cooling chocolate to specific temperatures to stabilize the cocoa butter crystals. This process gives the chocolate its desired properties: a smooth, glossy finish, a firm texture that snaps when broken, and resistance to melting at room temperature or developing unattractive white streaks (bloom).
Without proper tempering, your chocolate coating will be dull, soft, and prone to melting quickly. Imagine the disappointment of picking up a beautiful chocolate-covered strawberry only for the chocolate to immediately melt all over your fingers! Tempering ensures that the chocolate sets correctly, providing a stable and appealing coating for your fruit, making the tempered chocolate strawberry dipping recipe truly shine.
Understanding the Importance of Tempering Chocolate
At a microscopic level, cocoa butter contains various types of crystals. When chocolate is melted and cooled randomly, these crystals form in an unstable structure, leading to bloom (fat or sugar crystals migrating to the surface) and a soft, dull texture. Tempering is the process of gently melting the chocolate and then cooling it down while agitating, which encourages the formation of stable 'Beta V' crystals. These stable crystals are what give properly tempered chocolate its desirable characteristics.
Think of it like building a house: untempered chocolate is built with mismatched, unstable bricks, while tempered chocolate uses perfectly formed, interlocking bricks. The stable structure is resistant to temperature fluctuations within a certain range, maintaining its integrity, shine, and snap. This is why mastering tempering is fundamental to any successful tempered chocolate strawberry dipping recipe; it's the difference between a homemade treat that looks and feels professional versus one that looks amateurish.
Choosing the Right Chocolate for Dipping Strawberries: Using High-Quality Couverture Chocolate
As mentioned earlier, the type of chocolate you use is just as important as the tempering process itself. High-quality couverture chocolate is formulated with a higher percentage of cocoa butter compared to standard baking chocolate or chocolate chips. This higher cocoa butter content is what allows the chocolate to temper properly and achieve that desirable fluidity needed for dipping and that beautiful, shiny finish.
Using chocolate with insufficient cocoa butter, like most chocolate chips (which often contain stabilizers to help them hold their shape during baking), will make successful tempering extremely difficult, if not impossible. Brands like Callebaut, Valrhona, or Ghirardelli Professional range offer excellent couverture options suitable for your tempered chocolate strawberry dipping recipe. For dark chocolate, look for something around 60-70% cocoa content; for milk, around 30-40%; and for white, ensure it's true white chocolate made with cocoa butter, not just vegetable fats.
A Detailed Guide to Tempering Chocolate: The Seed Method
The seed method is a common and reliable way to temper chocolate at home. It involves melting most of the chocolate and then adding finely chopped solid chocolate (the "seed") to cool it down and introduce stable cocoa butter crystals.
Here’s how to do it using dark chocolate as an example:
- Melt: Chop your couverture chocolate into small pieces. Place about 75% of the chocolate in your heatproof bowl over a saucepan with about an inch of simmering (not boiling) water. Ensure the water doesn't touch the bottom of the bowl. Stir constantly with a rubber spatula until the chocolate is completely melted and reaches a temperature between 113°F and 122°F (45°C and 50°C). Remove the bowl from the heat.
- Seed: Add the remaining 25% of finely chopped solid chocolate (your "seed" chocolate) to the melted chocolate. Stir continuously. The goal here is for the added chocolate to melt using the heat of the already melted chocolate while simultaneously cooling the overall mixture. Keep stirring until the chocolate cools and thickens slightly.
- Cool: Continue stirring until the chocolate reaches the correct working temperature. For dark chocolate, this is typically between 88°F and 90°F (31°C and 32°C). For milk chocolate, it's usually 86°F to 88°F (30°C to 31°C), and for white chocolate, 82°F to 84°F (28°C to 29°C). Use your digital thermometer to check the temperature frequently. If a few small pieces of seed chocolate haven't melted by the time the chocolate reaches the working temperature, you can carefully remove them.
- Test: To test if your chocolate is in temper, dip the tip of a knife or a piece of parchment paper into the chocolate. It should set within 2-3 minutes at room temperature and appear glossy and streak-free. If it sets quickly with a shine, it's tempered and ready for dipping strawberries! If it remains soft or dull, you may need to gently reheat it slightly (a few degrees) and stir more vigorously, or add a bit more seed chocolate and stir, then re-test.
# Tempering Temperature Ranges (Approximate)

| Chocolate Type | Melting Temp (approx.) | Working Temp (approx.) |
| :------------- | :--------------------- | :--------------------- |
| Dark Chocolate | 113°F - 122°F (45°C-50°C) | 88°F - 90°F (31°C-32°C) |
| Milk Chocolate | 105°F - 113°F (40°C-45°C) | 86°F - 88°F (30°C-31°C) |
| White Chocolate| 100°F - 110°F (38°C-43°C) | 82°F - 84°F (28°C-29°C) |
Maintaining the working temperature while dipping is crucial. If the chocolate cools too much, it will fall out of temper. You can keep it warm by placing the bowl back over the warm water (off the heat) for brief periods, or using a warming pad set to a very low temperature, ensuring it stays within the target working temperature range.
Step 2: Preparing the Strawberries for Chocolate Dipping
While tempering the chocolate is key to the coating's success, the preparation of the strawberries themselves is vital for both the appearance and the longevity of your chocolate-covered treats. Properly prepared strawberries ensure the chocolate adheres smoothly and prevents issues like water seeping out and causing the chocolate to seize or bloom.
Taking meticulous care during this stage might seem minor, but it significantly impacts the final outcome of your tempered chocolate strawberry dipping recipe. A wet strawberry is the enemy of perfectly tempered chocolate, leading to a host of problems down the line.
Selecting the Freshest Strawberries for Optimal Flavor: Look for Bright Red, Firm Strawberries with Fresh Green Caps
The best chocolate-covered strawberries start with the best strawberries. Choose berries that are fully ripe, bright red all over, and firm to the touch. Avoid any with white or green spots (unless it's near the stem, which is fine), bruises, or soft spots, as these can affect both flavor and texture. The green caps (calyx) should look fresh and vibrant, not wilted or brown, indicating the strawberry's freshness.
Strawberries are highly perishable, so plan to make your chocolate-covered treats soon after purchasing them. Ideally, dip them the same day you buy them for the freshest taste. Larger strawberries tend to be easier to dip and handle, but medium ones work perfectly fine for your tempered chocolate strawberry dipping recipe.
Washing and Drying Strawberries for Chocolate Coating Adhesion
Washing strawberries is necessary to remove dirt and pesticides, but getting them completely dry afterward is absolutely critical for dipping in tempered chocolate. Even a tiny amount of water can cause tempered chocolate to seize (become thick, grainy, and unusable) or prevent it from adhering properly to the fruit.
Gently rinse the strawberries under cool running water while they are still in their caps. Avoid soaking them, as they can absorb excess water. After rinsing, lay them out in a single layer on paper towels.
Tips for Preventing Soggy Chocolate-Covered Strawberries: Pat Dry Thoroughly and Avoid Refrigeration Before Dipping
After washing, the most important step is thorough drying. Pat each strawberry individually with paper towels, paying special attention to the area around the stem and cap where water can collect. Ensure there is no visible moisture on the surface. Some bakers even recommend letting them air dry for an hour or two after patting them dry to ensure all residual moisture has evaporated.
Crucially, avoid refrigerating the strawberries before dipping if possible. Cold strawberries can cause the tempered chocolate to set too quickly and unevenly, leading to a thicker, less smooth coating and potentially pulling the chocolate out of temper. Room temperature strawberries allow the chocolate to flow and coat more smoothly. If you must wash them ahead of time and refrigerate, bring them back to room temperature for at least 30-60 minutes before beginning your tempered chocolate strawberry dipping recipe.
Step 3: The Art of Dipping Strawberries in Tempered Chocolate
With your chocolate perfectly tempered and your strawberries clean and dry, you are ready for the fun part: the dipping! This step requires a steady hand and a bit of patience to achieve a smooth, even coating without excess chocolate pooling at the bottom.
Dipping is where your preparation pays off. Working with properly tempered chocolate and dry, room-temperature strawberries makes this stage significantly easier and more successful, leading to beautifully finished chocolate-covered strawberries.
Techniques for Achieving a Smooth and Even Chocolate Coating
Hold a strawberry by its green cap. Submerge the strawberry completely into the tempered chocolate, rotating it gently to ensure full coverage. The depth of your chocolate in the dipping container is important here; use a deep, narrow container if dipping many strawberries, or a smaller, deeper bowl if doing a smaller batch to ensure you have enough depth.
Lift the strawberry out of the chocolate, holding it vertically over the bowl to allow excess chocolate to drip back in. Gently scrape the bottom tip of the strawberry against the rim of the bowl to remove any drips or pools of chocolate. This helps create a clean edge and prevents a thick "foot" from forming when the strawberry sets.
- Hold strawberry by the cap.
- Submerge completely in tempered chocolate.
- Rotate gently for even coverage.
- Lift and let excess drip back into the bowl.
- Scrape bottom tip against rim to remove drips.
Avoiding Common Dipping Mistakes: Preventing Air Bubbles and Uneven Coverage
Several issues can arise during dipping. Air bubbles can form on the surface of the chocolate. To avoid these, dip the strawberry smoothly and lift it out slowly. If you see bubbles, you can gently pop them with a toothpick before the chocolate sets. Uneven coverage often happens if the chocolate is too cool (falling out of temper) or if the strawberry is not fully submerged or rotated properly. Ensure your chocolate remains within its working temperature range throughout the process.
Another common mistake is rushing the dripping process. Allowing sufficient time for the excess chocolate to drip off is crucial for a clean finish and preventing a thick, unappealing layer of chocolate. A few extra seconds of patience here makes a big difference in the final look of your tempered chocolate strawberry dipping recipe.
Double Dipping for a Thicker Chocolate Layer: When and How to Re-Dip After Initial Set
Some people prefer a thicker chocolate coating on their strawberries. This can be achieved by double dipping, but it requires the first layer of chocolate to be partially or fully set before the second dip. If you dip a wet chocolate layer into more chocolate, you'll create a messy, uneven finish.
After the first dip, place the strawberry on your parchment-lined tray and let the chocolate set for about 5-10 minutes, or until it is firm but not fully hard. Then, re-dip the strawberry into the tempered chocolate, following the same technique as the first dip. The slightly set first layer provides a stable base for the second coat. Remember that double dipping will use more chocolate and create a richer treat, perfect for a truly indulgent tempered chocolate strawberry dipping recipe.
Step 4: Decorating Your Chocolate-Covered Strawberries

Once dipped, chocolate-covered strawberries offer a fantastic canvas for creativity. Adding decorations can elevate their appearance and add complementary textures and flavors. The key is to apply decorations while the chocolate is still wet, before it fully sets.
Decorating allows you to personalize your tempered chocolate strawberry dipping recipe and make your treats visually stunning. From simple drizzles to elaborate coatings, the possibilities are vast.
Creative Decoration Ideas for Dipped Strawberries: Chopped Pistachios, Toasted Coconut, and Gold Leaf
The options for decorating dipped strawberries are limited only by your imagination. Some popular choices include:
- Finely chopped nuts like pistachios, almonds, or hazelnuts
- Toasted coconut flakes
- Sprinkles (jimmies, nonpareils, coarse sugar)
- Edible glitter or gold dust
- Crushed cookies or graham crackers
- A drizzle of a different type of chocolate (e.g., white chocolate drizzle over dark)
- Sea salt flakes (especially good with dark chocolate)
Consider the flavor pairings; sea salt enhances dark chocolate, while toasted coconut pairs wonderfully with milk chocolate. Chopped pistachios add a lovely green color and crunch. These additions not only add visual appeal but also introduce new textures and flavors to your tempered chocolate strawberry dipping recipe.
Applying Decorations Before the Chocolate Sets
Timing is crucial when applying decorations. You must add them immediately after dipping the strawberry and before the tempered chocolate begins to harden. Have your chosen decorations ready in shallow dishes or small bowls next to your dipping station.
After scraping the excess chocolate off the dipped strawberry, gently roll or dip the desired portion of the strawberry into your decoration of choice. Alternatively, you can hold the strawberry over the decoration and sprinkle it on. Aim for even coverage where desired. Then, place the decorated strawberry gently onto the parchment paper to set.
Using Different Types of Chocolate for Decoration: White Chocolate Drizzle Over Dark Chocolate Coating
A classic and elegant decoration is drizzling one type of tempered chocolate over a set base layer of a different type. For example, dark chocolate-covered strawberries look stunning with a zigzag drizzle of white chocolate.
To do this, first dip and set your strawberries in dark chocolate. While they are setting, temper a small amount of white chocolate. Transfer the tempered white chocolate to a piping bag with a very fine tip, or simply use a spoon or fork to drizzle it back and forth over the set dark chocolate strawberries. You can create straight lines, zigzags, or abstract patterns. Let the drizzle set completely before handling the strawberries further. This technique adds a sophisticated touch to your tempered chocolate strawberry dipping recipe.
Step 5: Setting and Storing Your Tempered Chocolate Strawberries
Proper setting and storage are the final steps to ensure your tempered chocolate-covered strawberries maintain their beautiful appearance, snap, and freshness. Mishandling this stage can lead to problems like chocolate bloom or condensation.
Following best practices for setting and storage protects the integrity of the tempered chocolate and keeps your strawberries delicious for as long as possible, maximizing the enjoyment of your tempered chocolate strawberry dipping recipe.
Best Practices for Setting Tempered Chocolate Properly: Room Temperature Setting on Parchment Paper
The best environment for tempered chocolate to set is at cool room temperature, ideally between 65°F and 70°F (18°C and 21°C). Place the dipped strawberries in a single layer on a baking sheet lined with parchment paper. Parchment paper prevents the chocolate from sticking as it sets.
Avoid placing them directly in the refrigerator immediately after dipping, as the rapid temperature change can sometimes cause condensation to form on the strawberry surface under the chocolate, potentially leading to bloom or a soft texture. Allow them to set at room temperature for at least 20-30 minutes, or until the chocolate is firm to the touch and releases easily from the parchment paper. In warmer environments, you might need to move them to a cool pantry or a briefly chilled room after the initial room-temperature set.
How to Store Chocolate-Covered Strawberries to Maintain Freshness: Refrigerate in a Single Layer in an Airtight Container
Chocolate-covered strawberries are best enjoyed fresh, ideally within 24-48 hours. Due to the high moisture content of the strawberries, they will eventually start to break down, even when covered in chocolate. For storage beyond immediate serving, they should be refrigerated.
Once the chocolate is completely set at room temperature, transfer the strawberries to an airtight container. Place them in a single layer, if possible, or separate layers with parchment paper to prevent them from sticking together or getting damaged. Store the container in the refrigerator. This helps preserve the freshness of the strawberries and maintains the temper of the chocolate.
Troubleshooting Common Problems: Preventing Chocolate Bloom and Avoiding Soft Chocolate
Chocolate bloom (white streaks or patches) is a common issue, usually caused by improper tempering or storing in fluctuating temperatures. Fat bloom looks powdery and is caused by cocoa butter crystals migrating to the surface, while sugar bloom looks grainy and is caused by moisture dissolving and recrystallizing sugar. Proper tempering minimizes fat bloom risk, and keeping moisture away (thoroughly drying strawberries, airtight storage) minimizes sugar bloom risk.
Soft chocolate coating after setting is almost always a sign that the chocolate was not properly tempered or was stored in too warm an environment. If your chocolate is soft, it likely fell out of temper. Unfortunately, once dipped, there's no way to re-temper the chocolate on the strawberry. The best solution is to ensure your initial tempering process is correct and that the strawberries are stored properly. If you encounter bloom or soft chocolate, you can still eat them, but they won't have the desired snap or appearance from your tempered chocolate strawberry dipping recipe.
Step 6: Serving and Enjoying Your Chocolate-Dipped Strawberries
Serving chocolate-dipped strawberries is the culmination of your efforts. Presenting them beautifully enhances the experience, and knowing how to pair them can elevate the enjoyment of this classic treat made with your perfected tempered chocolate strawberry dipping recipe.
Whether for a special occasion or a simple indulgence, presentation matters. Taking a moment to arrange them thoughtfully adds a touch of elegance to your homemade creation.
Creative Presentation Ideas for Chocolate-Covered Strawberries: Serving on Decorative Platters with Fresh Mint Leaves
Arrange your set chocolate-covered strawberries on a decorative platter or tiered stand. Consider using contrasting colors for visual appeal – dark chocolate strawberries on a light plate, or a mix of dark, milk, and white chocolate varieties.
Garnish the platter with fresh mint leaves; their vibrant green provides a beautiful contrast to the rich chocolate and red strawberries. You can also use edible flowers or a dusting of cocoa powder around the edge of the platter. For gifting, arrange them in a decorative box lined with tissue paper.
Pairing Suggestions for Chocolate-Covered Strawberries: Pair with Champagne or Freshly Brewed Espresso
Chocolate-covered strawberries pair wonderfully with various beverages. A classic pairing is with chilled champagne or sparkling wine, where the bubbles and acidity cut through the richness of the chocolate.
For non-alcoholic options, a freshly brewed espresso or a strong black tea can be a delightful complement. The bold flavors of the coffee or tea stand up well to the intensity of the chocolate. A glass of milk or a sweet dessert wine also makes for a pleasant pairing with your exquisite tempered chocolate strawberry dipping recipe creations.
Advanced Techniques: Taking Your Chocolate Strawberry Dipping to the Next Level
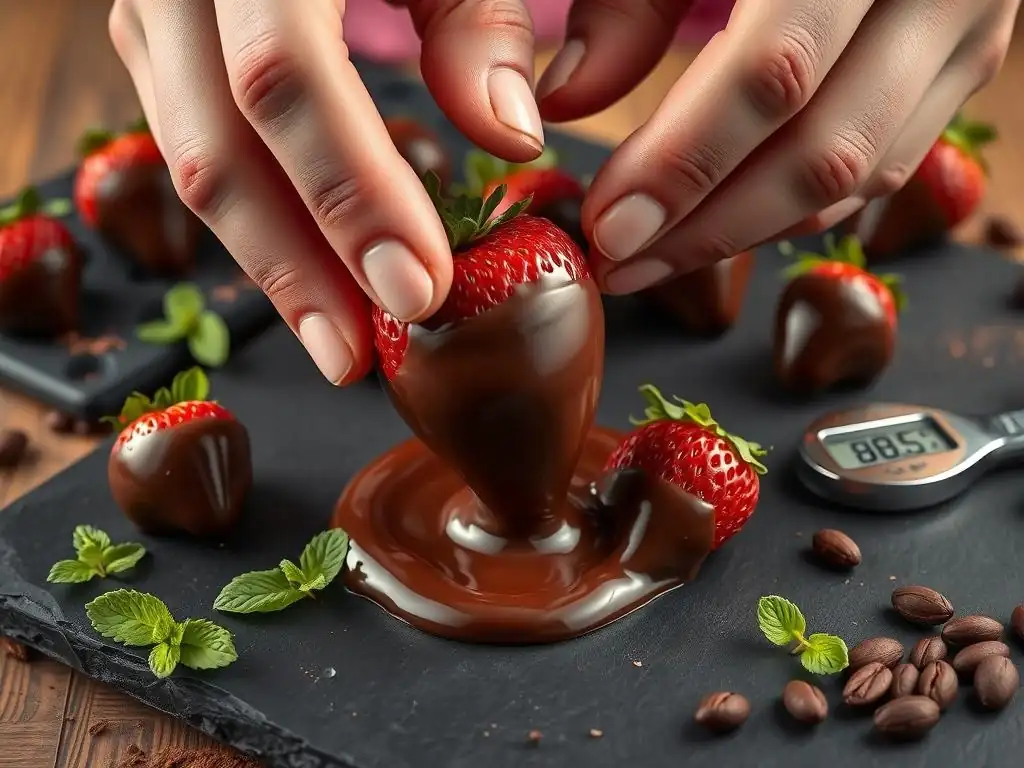
Once you've mastered the basic tempered chocolate strawberry dipping recipe, you can explore more advanced techniques to create truly unique and impressive confections. These methods build upon the foundational skills you've learned.
Pushing the boundaries allows for greater creativity and personalization. Experimenting with different flavors and techniques can turn a simple chocolate-covered strawberry into a gourmet delight.
Experimenting with Different Chocolate Flavors and Pairings: Using Ruby Chocolate or Adding Sea Salt
Beyond dark, milk, and white, explore other types of chocolate. Ruby chocolate, with its natural pink hue and slightly tart, fruity flavor, offers a unique twist. It tempers similarly to white chocolate (around 82-84°F working temperature). Dipping strawberries in ruby chocolate creates a visually stunning and flavorful treat.
Consider adding flavorings directly to your tempered chocolate (use oil-based flavorings, as water-based will cause seizing). A drop of orange extract or a pinch of cayenne pepper can add an unexpected depth of flavor, particularly to dark chocolate. Sprinkling flaky sea salt (like Maldon) over dark chocolate-dipped strawberries just before they set is a popular and delicious pairing.
Creating Chocolate-Covered Strawberry Bouquets for Gifting
Chocolate-covered strawberry bouquets are a popular and impressive gift. To create one, you'll need skewers or wooden sticks. Insert a skewer into the stem end of each strawberry before dipping. Hold the skewer while dipping and scraping excess chocolate.
Once dipped and decorated, stand the skewers upright in a tall glass or vase lined with floral foam or sand to allow the chocolate to set completely. Once set, you can arrange the skewers like flowers in a decorative container, adding tissue paper or cellophane fillers to complete the bouquet. This transforms your tempered chocolate strawberry dipping recipe into a beautiful, edible gift.
Adding Edible Glitter and Other Special Effects: Using Edible Gold Dust or Colored Sugar Crystals
For truly show-stopping strawberries, incorporate edible glitters, dusts, or colored sugar crystals. Edible gold or silver dust can be applied with a small brush to the set chocolate for a touch of luxury. You can cover the entire strawberry or highlight specific areas.
Colored sugar crystals or sanding sugars applied while the chocolate is wet add sparkle and texture. Consider using colors that complement the occasion, like red and green for holidays or pastels for spring. You can also use edible food coloring specifically designed for chocolate (oil-based) to tint white tempered chocolate vibrant colors before dipping, creating brightly colored chocolate-covered strawberries for themed events.
Troubleshooting Your Tempered Chocolate Strawberry Dipping Recipe
Even with careful planning, issues can sometimes arise when working with tempered chocolate. Knowing how to identify and address common problems can save your batch and help you learn from the experience.
Troubleshooting is part of the learning process in mastering any baking technique, including your tempered chocolate strawberry dipping recipe. Being prepared for potential issues helps you react effectively.
Common Mistakes and How to Fix Them: Resolving Grainy Chocolate and Uneven Coatings
- Grainy Chocolate: This is often a sign of seized chocolate, usually caused by contact with water or overheating. If the entire batch is grainy and thick, it's likely seized and cannot be fully recovered for dipping. You can sometimes salvage seized chocolate for baking by stirring in a bit of vegetable oil or melted cocoa butter, but it won't temper properly for dipping strawberries. Prevention is key: ensure all equipment is bone dry and avoid overheating during melting.
- Uneven Coatings: This can happen if the chocolate is too cool (falling out of temper), too thick (not enough cocoa butter or overheated), or if the strawberry isn't fully submerged or properly drained. If the chocolate is too cool, gently reheat it back to the working temperature range while stirring. If it seems too thick, ensure you are using high-quality couverture chocolate. Practice your dipping technique to ensure full, even coverage and proper draining.
Achieving the Perfect Snap and Shine Every Time: Proper Tempering and Cooling Techniques
The ideal tempered chocolate should have a beautiful, glossy shine and break with a clean snap. If your chocolate is dull, streaky, or soft, it wasn't properly tempered or didn't set correctly.
- Dullness/Streaks (Bloom): This indicates the chocolate is out of temper. The cocoa butter crystals didn't align correctly. Re-temper the chocolate from scratch. Ensure you hit the correct melting and cooling temperatures precisely and stir consistently during the cooling phase.
- No Snap/Soft: Again, a sign of improper tempering or setting too slowly in a warm environment. Ensure your chocolate is within the correct working temperature range when dipping. Allow the dipped strawberries to set at a cool room temperature (65-70°F) on parchment paper. Avoid putting them in a warm room or humid environment to set. If your environment is warm, you might need to use a climate-controlled space or a cool pantry. Proper execution of the tempered chocolate strawberry dipping recipe steps is essential for that coveted snap.
Conclusion: Mastering the Art of Tempered Chocolate Strawberry Dipping
Dipping strawberries with tempered chocolate is a rewarding culinary skill that results in a delightful and elegant treat. While it requires attention to detail, particularly during the tempering process, the outcome—glossy, snap-able chocolate coating on fresh, sweet strawberries—is well worth the effort.
By following this step-by-step guide, focusing on quality ingredients, precise temperatures for tempering, thorough strawberry preparation, and proper setting techniques, you can confidently create beautiful, professional-looking chocolate-covered strawberries right in your own kitchen. Practice makes perfect, so don't be discouraged if your first batch isn't flawless. Each attempt will bring you closer to mastering this classic tempered chocolate strawberry dipping recipe and impressing your friends and family with your skills.
Frequently Asked Questions
What is tempered chocolate and why is it important for dipping strawberries?
Tempering chocolate is the process of stabilizing the cocoa butter in chocolate. This results in a smooth, glossy finish and a satisfying snap, preventing the chocolate from being dull or blooming (developing white streaks).
What type of chocolate is best for dipping strawberries?
While you can use any type, high-quality dark chocolate or semi-sweet chocolate generally provides the best flavor and coating. Milk chocolate is sweeter and may not set as firmly.
Can I use chocolate chips instead of couverture chocolate for tempering?
Yes, you can use chocolate chips, but they often contain stabilizers that can make them more difficult to temper. Couverture chocolate, designed for tempering, is generally recommended for best results.
What if my tempered chocolate starts to thicken or seize up while I'm dipping?
This usually means the chocolate is getting too cold. Gently and slowly reheat the chocolate in a double boiler or microwave in short intervals, stirring constantly, to bring it back to the correct temperature range.
How long will dipped strawberries last, and how should I store them?
Dipped strawberries are best enjoyed the same day they're made, but they can be stored in the refrigerator for up to 24 hours. Store them in a single layer on parchment paper to prevent sticking.
Final Reflection: The Enduring Allure of Perfectly Tempered Chocolate
The art of tempering chocolate, once a culinary mystery, is now within everyone's reach, transforming simple strawberries into decadent delights. This accessible guide has demystified the process, empowering home cooks to create professional-quality treats with readily available ingredients and straightforward techniques. The satisfaction of perfectly dipped, glossy strawberries is a testament to the power of precision and patience in the kitchen.
The enduring appeal of chocolate-covered strawberries lies not just in their deliciousness, but in their ability to elevate any occasion. From romantic evenings to celebratory gatherings, these simple confections speak volumes about care and attention to detail. They represent a commitment to crafting something beautiful and delicious, a small act of love and indulgence. There is no sincerer love than the love of food.
- George Bernard Shaw. This quote, while not directly about chocolate-dipped strawberries, speaks to the inherent connection between food and affection, a connection perfectly embodied in this simple yet elegant dessert.
Now, I invite you to take what you've learned and experiment! Don't be afraid to try different types of chocolate, add sprinkles, or even drizzle melted white chocolate for an extra touch of elegance. The possibilities are endless, and the journey of mastering the art of tempered chocolate is a rewarding one. Remember the feeling of perfectly smooth, glossy chocolate coating a juicy strawberry – that's the magic you can now create anytime you wish. Go forth and delight yourself and others with your newfound chocolate-dipping expertise!
Unleash Your Inner Chocolatier!
Thanks for joining us on this delicious journey into the art of perfectly tempered chocolate-dipped strawberries! We hope you've picked up some valuable tips and tricks. Now it's time to put your newfound skills to the test.
- Dive right in and create your own decadent strawberry masterpiece! Use your favorite chocolate and get creative with toppings. Remember those tempering techniques? They'll make all the difference!
- Share your stunning creations with us! Tag us on social media and show off your perfectly dipped strawberries. We'd love to see your results!
- Challenge a friend to a chocolate-dipping duel! See who can create the most elegant and delicious strawberries. (Friendly competition is always fun!)
Ready to transform ordinary strawberries into extraordinary treats? What unique flavor combination will you create?