
Why Your Chocolate Needs Tempering: Shine, Snap, and Stability Explained.

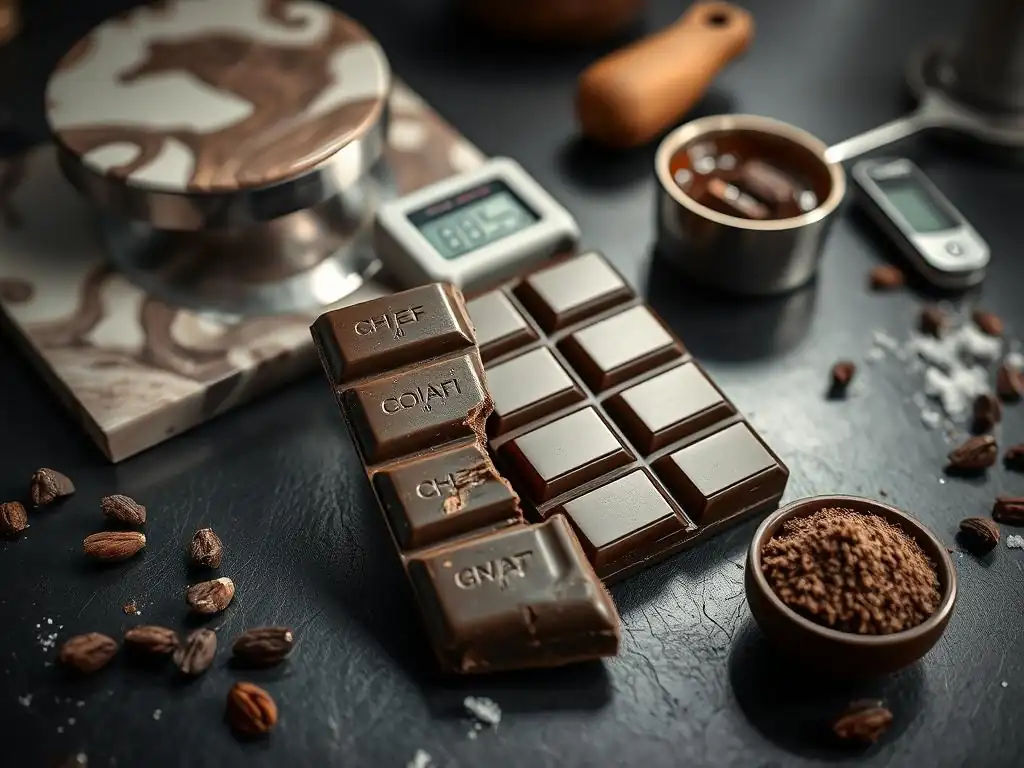
Welcome to BakeWithEase, your kitchen companion on the journey to baking brilliance! Ever wondered why some chocolate creations gleam with a professional sheen and snap perfectly, while others are dull and melty? Dive into our world of baking secrets as we unravel the mystery of chocolate tempering basics. Discover how mastering this essential technique elevates your desserts from good to gorgeous, ensuring that perfect shine, satisfying snap, and unwavering stability. Ready to unlock the secrets to chocolate perfection? Let's get started!
- Understanding Chocolate Tempering: The Basics Explained
- The Science Behind Chocolate Tempering: Polymorphism and Crystal Formation
- The Benefits of Properly Tempered Chocolate: Shine, Snap, and Stability
- Methods for Tempering Chocolate: A Comparison
- Step-by-Step Guide to Seed Tempering: A Practical Demonstration
- Troubleshooting Common Chocolate Tempering Problems
- Beyond the Basics: Applications of Tempered Chocolate
- Mastering Chocolate Tempering: Tips and Tricks for Success
- Conclusion: Unlock the Potential of Chocolate Through Proper Tempering
- Frequently Asked Questions
- Final Reflection: The Enduring Allure of Perfectly Tempered Chocolate
- Unlock Your Chocolate's Full Potential!
Understanding Chocolate Tempering: The Basics Explained
Chocolate tempering is often seen as a daunting task, but understanding the fundamentals unlocks the key to working with chocolate like a professional. At its heart, tempering is a process of carefully controlling the temperature of chocolate to manipulate the structure of its cocoa butter crystals. When done correctly, it transforms dull, brittle chocolate into a glossy, snappy, and stable confectionery dream. This foundational technique is crucial for anyone looking to move beyond simple melting and achieve beautiful, professional results in their chocolate creations.
Mastering the chocolate tempering basics explained here will empower you to create everything from shiny dipped strawberries to perfectly molded bonbons. Without tempering, melted chocolate cools into a soft, crumbly mess with an unappealing appearance. The process of tempering ensures that the cocoa butter within the chocolate solidifies into a specific, stable crystalline form, which is responsible for all the desirable qualities we associate with high-quality chocolate. It's a vital skill for any aspiring or experienced baker working with real chocolate.
What is Chocolate Tempering and Why is it Important?
Chocolate tempering is the process of heating, cooling, and then slightly reheating chocolate to create a stable crystalline structure in the cocoa butter. Think of it as organizing the cocoa butter molecules into a specific pattern. When chocolate is simply melted and allowed to cool, the cocoa butter solidifies into various unstable crystal forms, resulting in a dull, streaky appearance and a soft, crumbly texture that melts easily in your hands. This is why a simple melted chocolate bar doesn't behave the same way as a professionally coated truffle.
The importance of tempering lies in achieving the desired physical properties of finished chocolate products. Properly tempered chocolate will have a beautiful, high-gloss shine, a satisfying snap when broken, and will resist melting at room temperature, making it much more stable and pleasant to handle and eat. It also prevents "bloom," the unsightly gray or white streaks and patches that can appear on the surface of untempered or improperly stored chocolate. For professional-looking results and a superior eating experience, understanding why and how to temper is non-negotiable.
Chocolate Tempering Basics Explained: Achieving the Perfect Crystal Structure
The core concept behind chocolate tempering basics explained is controlling the formation of cocoa butter crystals. Cocoa butter is polymorphic, meaning it can solidify into different crystal structures (typically six are identified, labeled Forms I through VI), each with a different melting point and stability. When chocolate is melted, all these crystals are broken down. The tempering process involves cooling the chocolate to a specific temperature range where the most stable and desirable crystal form, known as Beta (specifically Form V), is encouraged to form.
Once a sufficient amount of stable Beta crystals have formed, the chocolate is gently reheated slightly. This careful reheating step melts away the less stable crystal forms that may have also developed during cooling, leaving behind predominantly the desired Beta crystals. These Beta crystals solidify into a tight, uniform matrix when the chocolate cools, giving it its characteristic shine, snap, and resistance to melting. Achieving this precise balance of temperature and crystal formation is the essence of successful chocolate tempering basics explained.
Untempered vs. Tempered Chocolate: A Visual Comparison
The difference between untempered and tempered chocolate is immediately obvious upon visual inspection and handling.
- Untempered Chocolate:
- Appears dull, matte, or streaky (often with gray or white patches known as bloom).
- Is soft and melts quickly when touched.
- Breaks with a soft crumble rather than a clean snap.
- Can be difficult to remove from molds.
- Has a shorter shelf life before bloom appears.
- Tempered Chocolate:
- Has a beautiful, smooth, and glossy surface.
- Is firm and resistant to melting at room temperature (typically around 20-22°C or 68-72°F).
- Breaks with a distinct, sharp snap.
- Contracts slightly as it cools, making it easy to release from molds.
- Is stable and resistant to bloom when stored correctly.
This stark contrast highlights why mastering the chocolate tempering basics explained is essential for achieving professional-quality results and ensuring your chocolate creations are not only delicious but also visually appealing and stable.
The Science Behind Chocolate Tempering: Polymorphism and Crystal Formation
Delving into the science behind chocolate tempering reveals the fascinating behavior of cocoa butter. This unique fat is the key component responsible for chocolate's texture and melting characteristics, and its ability to crystallize in multiple forms is what makes tempering necessary. Understanding this polymorphism helps demystify the process and explains why precise temperature control is so critical. It's not just magic; it's applied food science.
The science of chocolate tempering basics explained revolves around guiding cocoa butter into its most stable crystalline structure. When cocoa butter cools from a melted state, its triglyceride molecules can arrange themselves in different ways. These different arrangements result in crystals with varying densities, melting points, and stabilities. The goal of tempering is to promote the formation of a specific type of crystal that provides the desired physical properties for finished chocolate.
The Role of Cocoa Butter in Chocolate Tempering
Cocoa butter is the fat component extracted from cocoa beans, and it's the star player in chocolate tempering. Unlike most fats, which solidify into a single crystal form, cocoa butter is polymorphic, meaning it can form multiple distinct crystal structures. These structures, often labeled Forms I through VI, are stable at different temperature ranges and have different melting points, ranging from below room temperature up to around 36°C (97°F). The proportion of cocoa butter in chocolate (typically ranging from 25% to over 35% in dark chocolate) significantly impacts how easily it can be tempered.
When chocolate is melted, all existing cocoa butter crystals are destroyed. As it cools, new crystals begin to form. The rate of cooling and the temperature achieved dictate which crystal forms are created. Simple cooling allows a chaotic mix of unstable forms (like Form I, II, III, IV) to develop, which are soft and melt easily. Tempering is the deliberate process of guiding the cocoa butter to solidify predominantly into the most stable and desired crystal form, Form V (Beta prime), which melts sharply just below body temperature, contributing to chocolate's characteristic mouthfeel.
Understanding the Different Crystal Forms of Cocoa Butter
Cocoa butter can exist in at least six recognized crystalline forms, often referred to as polymorphs. Here's a simplified breakdown of the primary forms relevant to chocolate tempering:
- Form I (Alpha): Very unstable, melts around 17°C (63°F). Forms when chocolate cools very quickly.
- Form II (Gamma): Unstable, melts around 23°C (73°F). Also forms with rapid cooling.
- Form III (Beta double prime): Unstable, melts around 26°C (79°F). Forms with slightly slower cooling than I or II.
- Form IV (Beta prime): Less stable than V, melts around 28°C (82°F). Can form during cooling, but not ideal.
- Form V (Beta prime): The desired stable form, melts around 32-34°C (90-93°F) depending on the chocolate type. Responsible for shine, snap, and stability.
- Form VI (Beta): The most stable form, melts around 36°C (97°F). Forms slowly over time from Form V during storage, leading to some types of bloom.
The tempering process is designed to avoid the formation of Forms I-IV and to primarily create Form V crystals. This is achieved by cooling the melted chocolate to a specific temperature range where Form V crystals can nucleate and grow, while keeping it warm enough to prevent excessive formation of less desirable forms.
Achieving Stable Beta Crystals: The Key to Proper Tempering
The ultimate goal of chocolate tempering basics explained is to encourage the formation and propagation of stable Form V (Beta prime) crystals. These crystals are relatively small, densely packed, and melt sharply just below average human body temperature, which contributes to the pleasant melt-in-your-mouth sensation. They also solidify into a rigid structure that gives chocolate its snap and reflects light uniformly, resulting in a glossy surface.
Achieving a high proportion of Form V crystals requires careful temperature control. The chocolate is first melted to a temperature that destroys all crystal memory (typically 45-50°C or 113-122°F). Then, it's cooled to a working temperature range (e.g., 31-32°C for dark chocolate, 29-30°C for milk, 28-29°C for white). This cooling allows Form V crystals to form. Finally, it's gently reheated just enough to melt any remaining unstable crystals (like Form IV) while leaving the stable Form V crystals intact. This precise temperature management is the secret to successful chocolate tempering basics explained.
The Benefits of Properly Tempered Chocolate: Shine, Snap, and Stability
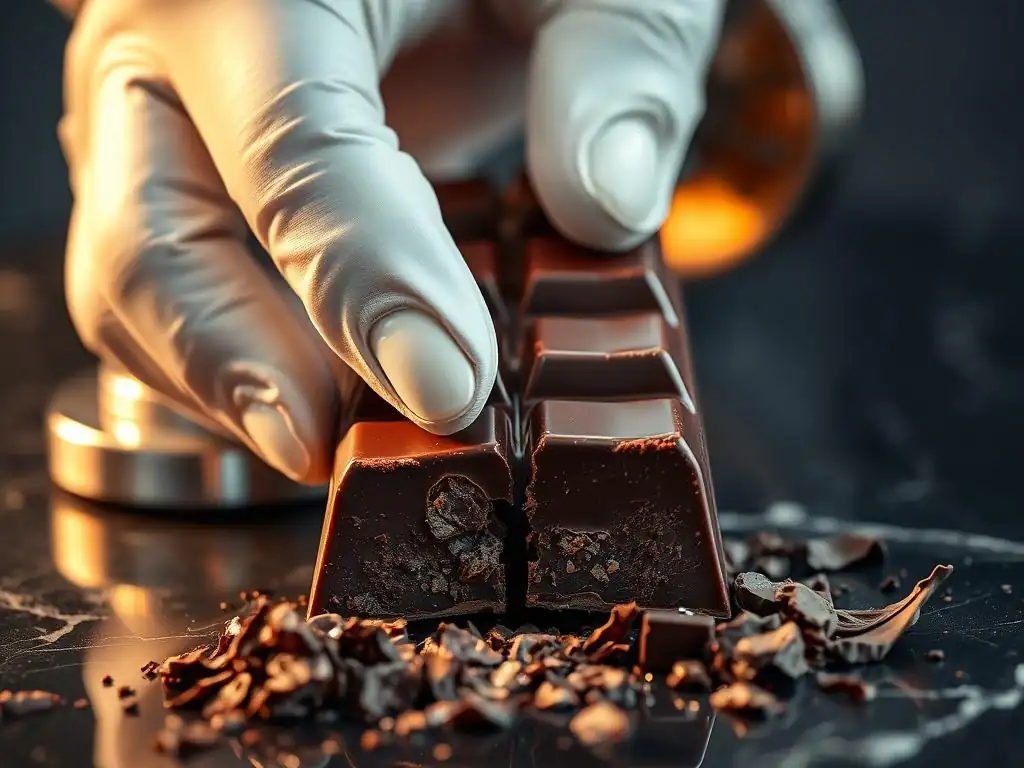
Tempering chocolate isn't just an extra step; it's transformative. The effort put into controlling those cocoa butter crystals pays off dramatically in the finished product's quality. Three primary benefits stand out: a stunning visual appeal (shine), a satisfying tactile and auditory experience (snap), and crucial functional advantages (stability and shelf life). These qualities are hallmarks of well-executed chocolate work.
Experiencing the benefits of properly tempered chocolate is why many bakers dedicate time to mastering this technique. A chocolate bar that shines like glass, breaks with a clean crack, and doesn't melt into a puddle in warm hands is a testament to the power of tempering. It elevates homemade confections from rustic treats to professional-grade delights, significantly enhancing both their presentation and handling.
Achieving a Glossy Finish: The Shine of Tempered Chocolate
One of the most striking characteristics of properly tempered chocolate is its beautiful, high-gloss shine. This isn't just for aesthetics; it's a direct result of the organized structure of the stable Form V cocoa butter crystals. When these crystals solidify correctly, they pack together tightly and uniformly. This smooth, dense surface reflects light evenly, much like a polished mirror, creating that desirable reflective finish.
In contrast, untempered chocolate, with its disorganized mix of unstable crystals, solidifies into a rougher, less uniform structure. This uneven surface scatters light rather than reflecting it, resulting in a dull or matte appearance. Sometimes, you'll see streaks or patches, which are visual signs of improper crystallization. The glossy surface achieved through tempering is a clear indicator that the chocolate's internal structure is correct and stable.
The Satisfying Snap: A Hallmark of Well-Tempered Chocolate
Beyond the visual appeal, tempered chocolate offers a distinct tactile and auditory pleasure: a clean, sharp snap when broken. This characteristic snap is another direct consequence of the stable Form V crystal structure. These crystals form a rigid, brittle matrix when solid. When force is applied, this rigid structure breaks cleanly along defined lines, producing that satisfying sound and feel.
Untempered chocolate, lacking this organized, rigid structure, is much softer and more crumbly. Instead of snapping, it tends to bend, crumble, or break unevenly with little or no sound. The presence of a good snap is a reliable indicator that the chocolate has been successfully tempered, signifying a high proportion of stable Form V crystals and a well-formed, brittle structure.
Enhanced Stability and Shelf Life: How Tempering Prevents Bloom
Proper tempering significantly enhances the stability and shelf life of chocolate by preventing bloom. Bloom refers to the unsightly gray or white film or patches that can appear on the surface of chocolate over time. There are two main types: fat bloom and sugar bloom. Fat bloom is the most common and is caused by unstable cocoa butter crystals melting and recrystallizing on the surface in larger, visible clusters (often Form VI). Sugar bloom is caused by moisture drawing sugar to the surface where it crystallizes.
Tempering primarily prevents fat bloom by ensuring that the cocoa butter is already solidified into the stable Form V. Since Form V crystals are stable at room temperature, they are much less likely to melt and migrate to the surface compared to the unstable crystals present in untempered chocolate. This stable structure maintains the chocolate's appearance and quality for a much longer period, making it suitable for storage and display. While tempering is key to preventing fat bloom, proper storage (cool, dry, stable temperature) is also essential to prevent both types of bloom.
Methods for Tempering Chocolate: A Comparison
Several methods exist for tempering chocolate, each relying on the same fundamental principles of controlled heating and cooling to achieve the desired Form V crystal structure. The choice of method often depends on the quantity of chocolate, available equipment, and personal preference. While the chocolate tempering basics explained remain constant, the execution varies.
Exploring different methods allows bakers to find the technique that best suits their needs and environment. From traditional artisanal approaches to modern technological solutions, understanding the options helps in selecting the most effective way to achieve perfectly tempered chocolate for various applications.
Seed Tempering Method: Adding Tempered Chocolate to Untempered Chocolate
The seed tempering method is one of the most popular and accessible techniques for home bakers. It relies on introducing stable Form V crystals from a piece of already tempered chocolate (the "seed") into a batch of melted, untempered chocolate. The melted chocolate is heated to a temperature that destroys all crystals, then cooled down. As it cools, the stable crystals in the seed chocolate act as templates, encouraging the surrounding melted cocoa butter to solidify into the desired Form V structure.
To perform seed tempering, you typically melt about two-thirds of your chocolate to around 45-50°C (113-122°F). Then, you stir in the remaining one-third of the finely chopped, untempered chocolate (the seed). The seed chocolate cools the melted chocolate down to the working temperature while its stable crystals initiate tempering. You continue stirring until the seed chocolate is melted and the mixture reaches the target working temperature (around 31-32°C for dark, 29-30°C for milk/white). This method is relatively simple and requires minimal specialized equipment.
Tablier Tempering (Marble Slab Method): A Classic Technique
Tablier tempering, also known as the marble slab method, is a traditional technique often used by chocolatiers. It involves pouring melted chocolate onto a cool surface, typically a marble or granite slab, to rapidly cool and agitate it, promoting crystal formation. While more labor-intensive and potentially messy than other methods, it allows for precise control and observation of the tempering process.
In this method, chocolate is melted to destroy all crystals (e.g., 45-50°C). About two-thirds of the melted chocolate is then poured onto a clean, cool marble slab. Using a palette knife and bench scraper, the chocolate is spread thinly and gathered repeatedly, working it back and forth.
This action cools the chocolate quickly and encourages the formation of crystals. Once the chocolate thickens and starts to show signs of crystallization (around 26-28°C), it's scraped back into the bowl with the remaining one-third of warm, melted chocolate. The warmth of the remaining chocolate gently reheats the mass to the final working temperature, melting unstable crystals and leaving the stable ones.
Using a Chocolate Tempering Machine: Achieving Precision and Consistency
For those who work with chocolate frequently or in larger quantities, a chocolate tempering machine offers the highest level of precision and consistency. These machines automate the heating, cooling, and holding process, taking the guesswork out of achieving the correct temperatures and maintaining the chocolate in temper for extended periods. They often use controlled heating and cooling elements along with agitation to ensure uniform tempering.
Tempering machines typically involve setting the desired temperature profile for the specific type of chocolate being used. The chocolate is melted in the machine's basin, then cooled automatically to the crystallization temperature, and finally held at the working temperature. Some machines use a seeding method internally, while others rely on controlled cooling curves. While a significant investment, a tempering machine is invaluable for high-volume production or situations where maintaining temper for long periods is necessary, simplifying the chocolate tempering basics explained through automation.
Step-by-Step Guide to Seed Tempering: A Practical Demonstration
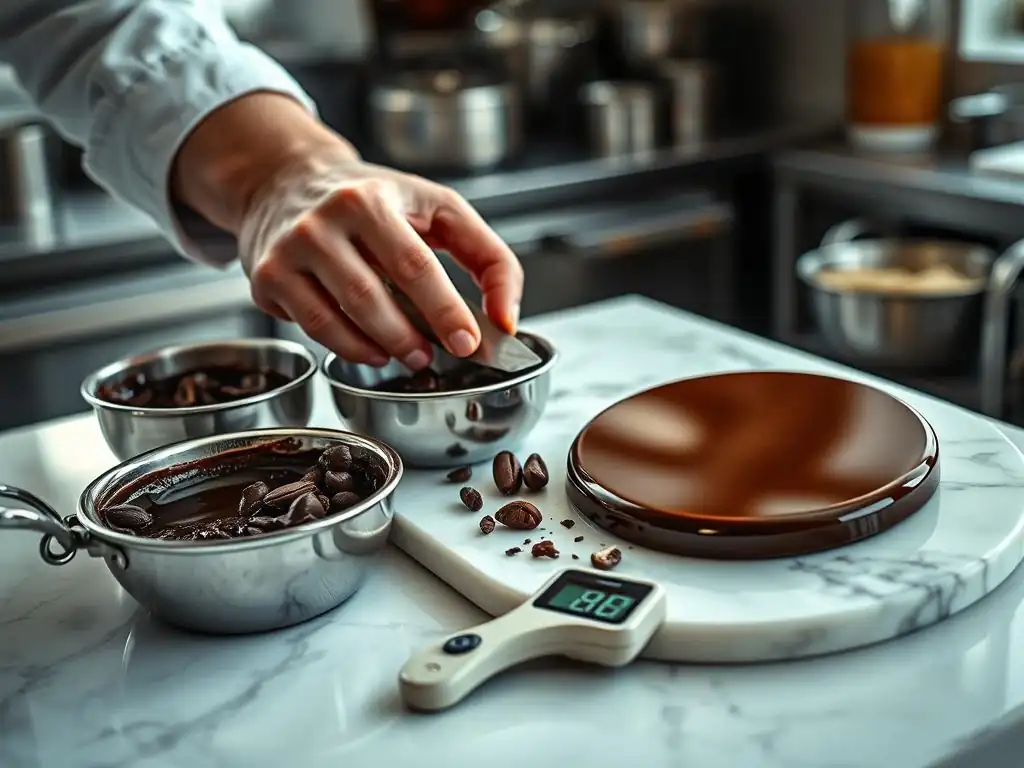
Seed tempering is an excellent method for home bakers to practice the chocolate tempering basics explained. It's relatively straightforward and requires minimal equipment: a bowl, a double boiler or microwave, a spatula, and a thermometer. Following these steps carefully will significantly increase your chances of success in achieving perfectly tempered chocolate.
This practical guide focuses on the seed method due to its accessibility. By breaking down the process into manageable steps, you can confidently tackle chocolate tempering and unlock its potential for your baking and confectionery projects. Remember that temperature accuracy is key, so a reliable thermometer is your best friend here.
Melting the Chocolate: Preparing for Tempering
The first step in seed tempering is to completely melt your chocolate to eliminate any existing crystal memory. Chop your chocolate finely and place about two-thirds of it in a heatproof bowl set over a pot of simmering water (a double boiler) or in a microwave-safe bowl. When using a double boiler, ensure the bottom of the bowl does not touch the water. Heat gently, stirring frequently, until the chocolate is fully melted and smooth.
Using a thermometer, check the temperature of the melted chocolate. For dark chocolate, aim for around 45-50°C (113-122°F). For milk or white chocolate, a slightly lower temperature like 40-45°C (104-113°F) is often sufficient, as they contain milk solids which can scorch more easily. Remove the bowl from the heat (or microwave) once the chocolate is completely melted and has reached the target temperature.
Adding the Seed Chocolate: Introducing Stable Crystals
Once the chocolate is fully melted and has reached its initial melting temperature, it's time to cool it down and introduce the stable crystals. Add the remaining one-third of the finely chopped, untempered chocolate (your "seed") to the melted chocolate in the bowl. Begin stirring continuously with a spatula. The goal here is for the heat from the melted chocolate to melt the seed chocolate, while the cooler seed chocolate simultaneously cools the overall mass.
Continue stirring until all the seed chocolate has melted and the temperature of the mixture drops to the working temperature range. This is where the magic of chocolate tempering basics explained happens – the stable crystals in the seed are encouraging the melted cocoa butter to solidify into the correct Form V.
Checking the Temper: The Lip Test and Visual Inspection
Checking if your chocolate is in temper is crucial before using it. The working temperature range is a guide, but the ultimate test is how the chocolate behaves as it cools. For dark chocolate, the working temperature is typically 31-32°C (88-90°F). For milk chocolate, it's around 29-30°C (84-86°F), and for white chocolate, it's 28-29°C (82-84°F).
A simple way to check temper is the "lip test": dab a small amount of chocolate on your lip or wrist. It should feel slightly cooler than your skin (not warm). A more reliable method is the "spatula test": dip the tip of a metal spatula or knife into the chocolate and let it sit at room temperature (ideally around 20-22°C or 68-72°F).
Properly tempered chocolate should set evenly and become firm and non-sticky within 3-5 minutes, developing a matte finish initially before hardening with a slight sheen. If it remains soft, streaky, or doesn't set quickly, it's likely not in temper and needs to be re-tempered.
Maintaining the Temper: Keeping Your Chocolate in Working Condition
Once your chocolate is in temper and at the correct working temperature, you need to maintain it while you use it. The tempered chocolate will remain workable as long as its temperature stays within the narrow working range. If it cools down too much, it will start to solidify; if it heats up too much, the stable Form V crystals will melt, and you'll lose the temper.
To maintain temper, you can return the bowl briefly to the double boiler (off the heat) for just a few seconds at a time, stirring constantly, or use a heat gun on a low setting from a distance, or place the bowl on a warming pad specifically designed for chocolate. Continuously monitor the temperature with your thermometer and stir the chocolate frequently to ensure even heating.
If the chocolate becomes too cool and thick to work with but is still in temper, gently warm it back up to the higher end of its working temperature range. If it goes above the working range and loses temper, you'll need to repeat the tempering process from the initial melting step.
Troubleshooting Common Chocolate Tempering Problems
Even when following the chocolate tempering basics explained, things can sometimes go wrong. Dealing with issues like seizing, bloom, or over-tempering is part of the learning process. Understanding the causes of these problems makes them easier to fix or prevent in the future. Don't be discouraged if your first attempt isn't perfect; chocolate tempering takes practice.
Identifying the signs of common problems early can save your batch of chocolate. With a little patience and knowledge of how to react, you can often rescue your chocolate and get back to creating delicious confections.
Chocolate Seizing: Causes and Solutions
Chocolate seizing is a common and frustrating problem where melted chocolate suddenly transforms from a smooth, fluid state into a thick, lumpy, and unworkable paste. The primary culprit is the introduction of even a tiny amount of water or steam. Water causes the sugar particles in the chocolate to clump together, surrounded by fat, creating a seize. High heat can also sometimes cause seizing by burning the milk solids or sugar, but water is the most frequent cause.
If your chocolate seizes, it's usually because moisture got into it (perhaps from condensation from a double boiler or a wet utensil) or it was overheated. Unfortunately, seized chocolate cannot typically be returned to a usable state for tempering and coating applications. However, it's not entirely wasted!
You can sometimes rescue seized chocolate by stirring in a tablespoon or two of hot oil (like vegetable or canola oil) or melted cocoa butter per cup of seized chocolate. This will thin it out, but it will never regain its temper and is best used for applications where temper isn't needed, like making brownies or chocolate sauce. Prevention is key: ensure all equipment is completely dry and use gentle, indirect heat.
Dealing with Chocolate Bloom: Preventing and Reversing It
Chocolate bloom refers to the appearance of gray or white streaks or patches on the surface of chocolate. As discussed, there are two types: fat bloom and sugar bloom. Fat bloom is caused by improper tempering or temperature fluctuations during storage, leading to the migration and recrystallization of cocoa butter on the surface. Sugar bloom is caused by moisture on the surface dissolving sugar, which then recrystallizes as white spots when the moisture evaporates.
Preventing bloom is much easier than reversing it. Proper tempering (ensuring Form V crystals) and stable storage conditions (cool, dry, consistent temperature between 15-18°C or 59-64°F) are the best defenses against both types of bloom. If chocolate has bloomed, especially fat bloom, you can sometimes melt it down and re-temper it.
Since bloom is often just a cosmetic issue related to crystal structure on the surface, melting and re-tempering will destroy the old crystals and allow you to form new, stable ones. Sugar bloom, however, involves actual sugar crystals on the surface and cannot be fixed by re-tempering; the texture will remain grainy.
Over-Tempering Chocolate: How to Fix It
Over-tempering can occur if you cool the chocolate down too much during the tempering process or work it for too long at a low temperature. This can lead to the formation of too many crystals, causing the chocolate to become thick, sludgy, or set up too quickly while you're trying to work with it. It might also result in a poor final shine or texture.
If your chocolate becomes too thick or starts setting prematurely while you're tempering it (especially during the cooling phase of the seed or marble method), it likely means you've over-crystallized it. To fix this, you need to gently warm the chocolate back up slightly to melt some of the excess crystals. Carefully heat the chocolate just a few degrees, stirring constantly, until it thins out and reaches the upper end of its working temperature range (e.g., 32°C for dark).
Be careful not to overheat it and melt the desired Form V crystals. If you accidentally heat it too much and lose the temper entirely, you'll need to start the tempering process over from the initial melting step.
Beyond the Basics: Applications of Tempered Chocolate
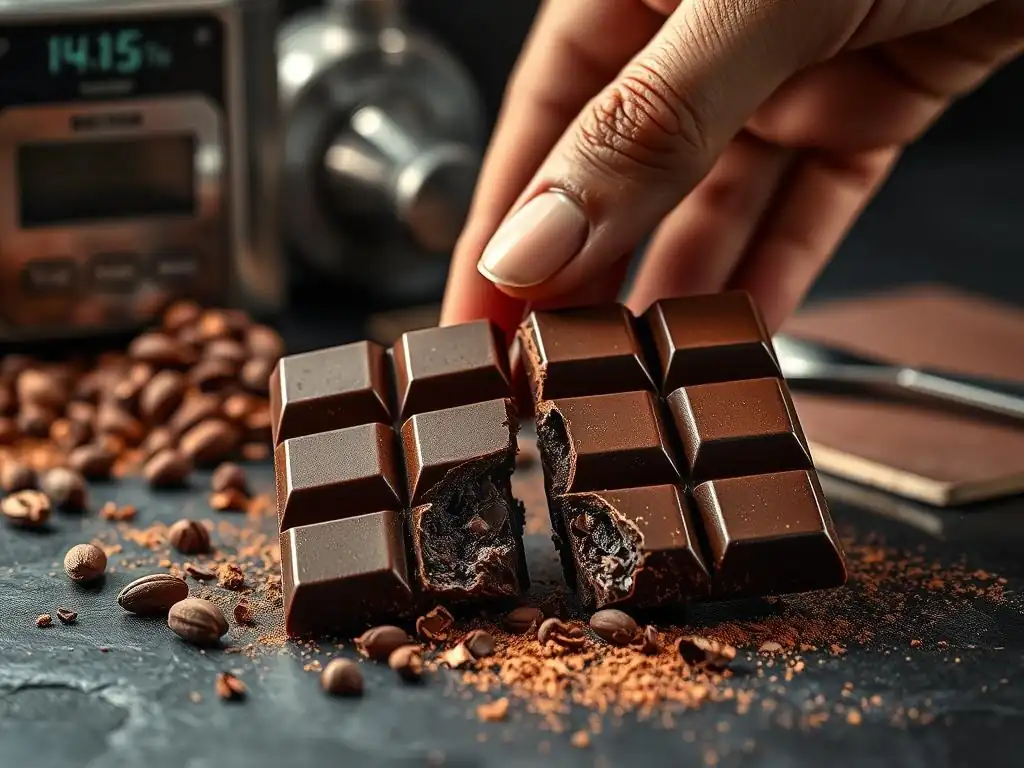
Once you've mastered the chocolate tempering basics explained, a world of confectionery possibilities opens up. Tempered chocolate is essential for creating a wide array of professional-looking and stable treats that wouldn't be possible with untempered chocolate. Its unique properties make it ideal for applications requiring a hard, shiny coating or molded shapes.
From elegant desserts to homemade candies, tempered chocolate elevates your creations. Its ability to set firmly and release cleanly from molds, coupled with its appealing finish, makes it the preferred medium for many advanced chocolate techniques.
Using Tempered Chocolate for Dipping and Coating
One of the most common uses for tempered chocolate is for dipping and coating various items, such as strawberries, pretzels, cookies, or truffles. The temper ensures that the chocolate sets quickly and firmly onto the item, creating a smooth, glossy shell that is resistant to fingerprints and melts cleanly in the mouth.
When dipping, it's crucial to maintain the chocolate within its working temperature range. If it cools down too much, it will become too thick to dip properly and the coating will be uneven. If it gets too warm, it will lose its temper. Dipped items should be placed on parchment paper to set at cool room temperature or briefly in the refrigerator (just until set, about 5-10 minutes) to achieve the best shine and snap.
Creating Chocolate Decorations and Garnishes
Tempered chocolate is perfect for making delicate and intricate chocolate decorations and garnishes. Its ability to set firmly and hold its shape once cooled allows you to create elements like chocolate curls, fans, shards, or piped designs. Melted tempered chocolate can be spread thinly on parchment paper and then shaped, cut, or curled before it fully hardens.
For more detailed decorations, tempered chocolate can be piped using a pastry bag with a fine tip onto parchment or acetate sheets to create patterns, letters, or lace-like designs. Once set, these decorations are firm and can be carefully peeled off and used to adorn cakes, pastries, or plates. The clean break of tempered chocolate also makes it easy to create sharp-edged shards or geometric shapes by simply breaking a thin sheet of set chocolate.
Making Chocolate Candies and Confections
Molding chocolate candies and confections, such as bonbons, chocolate bars, or figurines, absolutely requires tempered chocolate. Tempered chocolate contracts slightly as it cools and solidifies into its stable Form V structure. This contraction allows the finished candy to pull away from the mold walls, making it easy to release with a clean, sharp edge and a smooth, glossy surface.
Untempered chocolate, on the other hand, would stick to the mold, be difficult to remove, and the resulting candy would be dull, soft, and potentially prone to bloom. Whether you're making solid chocolate shapes, filled chocolates, or layered bars, mastering the chocolate tempering basics explained is fundamental to achieving professional-looking and stable molded confections that pop right out of the mold.
Mastering Chocolate Tempering: Tips and Tricks for Success
Becoming proficient in chocolate tempering takes practice, but armed with a few key tips and tricks, you can significantly improve your success rate. Paying attention to detail, using the right tools, and understanding the nuances of different chocolates can make the process much smoother and more rewarding.
Applying these practical tips alongside the chocolate tempering basics explained earlier will help you navigate common challenges and build confidence in your chocolate work. Consistency and patience are your greatest allies when learning this skill.
Choosing the Right Chocolate for Tempering
Not all chocolate is created equal when it comes to tempering. For best results, use high-quality couverture chocolate. Couverture chocolate contains a higher percentage of cocoa butter (typically 32-39%) compared to standard baking or eating chocolate. This higher cocoa butter content makes it more fluid when melted and easier to temper, as there's more fat to manipulate into the desired crystal structure.
Avoid using chocolate chips, as they often contain stabilizers or less cocoa butter, making them difficult or impossible to temper correctly. Look for chocolate specifically labeled "couverture" or high-quality bars with a clear cocoa butter percentage listed. Different types (dark, milk, white) have slightly different tempering temperature ranges, so be sure to know which you are working with.
Maintaining Proper Temperatures: The Importance of Accuracy
Accurate temperature control is arguably the single most critical factor in successful chocolate tempering basics explained. Even a few degrees difference can mean the difference between perfect temper and a failed attempt. Relying on guesswork or unreliable thermometers is a recipe for frustration.
Invest in a good quality, fast-reading digital thermometer. Throughout the tempering process – from initial melting to cooling and maintaining the working temperature – constantly monitor the chocolate's temperature. Stir the chocolate frequently while heating and cooling to ensure the temperature is uniform throughout the mass, not just on the surface or edges. Avoid sudden temperature changes and drafts, which can disrupt crystal formation.
Practice Makes Perfect: Refining Your Tempering Technique
Like any skill in baking or cooking, mastering chocolate tempering takes practice. Your first few attempts might not be perfect, and that's completely normal. Each type of chocolate and even different brands can behave slightly differently. Pay attention to how the chocolate looks, feels, and sets at different stages.
Don't be discouraged by failures. Re-melt and try again! With each attempt, you'll become more familiar with the process, learn to recognize the signs of chocolate in temper, and refine your technique for controlling temperature and agitation. Start with a manageable amount of chocolate (around 300-500g) for practice batches.
Alternative Tempering Techniques: Exploring Sous Vide and Microwave Methods
While the seed and marble methods are traditional, alternative techniques like sous vide and microwave tempering offer different approaches that can be convenient for home bakers. Understanding these methods expands your options for achieving tempered chocolate.
- Sous Vide Tempering: This method uses precise temperature control offered by a sous vide immersion circulator. Chop chocolate, place it in a sealed bag, and immerse it in a water bath set to the target working temperature for your chocolate type (e.g., 31.5°C for dark). Hold it there until fully melted and in temper. This method is very hands-off and precise once set up.
- Microwave Tempering: This method involves melting chocolate in short bursts in the microwave, stirring thoroughly between each burst, until most of the chocolate is melted but a few solid pieces remain. These solid pieces act as the "seed" crystals. Stir until the remaining pieces melt and the chocolate reaches the correct working temperature. This requires careful monitoring and low power settings to avoid overheating.
These alternative methods still rely on the same chocolate tempering basics explained – controlling temperature to promote stable crystal formation – but offer different ways to manage the heating and cooling process.
Conclusion: Unlock the Potential of Chocolate Through Proper Tempering
Mastering chocolate tempering is a fundamental skill that transforms the way you work with chocolate. By understanding the science behind cocoa butter crystallization and diligently controlling temperatures, you can consistently achieve chocolate with a stunning shine, a satisfying snap, and enhanced stability. The chocolate tempering basics explained in this guide provide the foundation you need to elevate your homemade confections from simple treats to impressive, professional-quality creations.
Don't let the perceived difficulty of tempering deter you. With practice, accurate tools, and a solid understanding of the principles, you'll find that achieving perfectly tempered chocolate is well within your reach. The rewards – beautiful, stable, and delicious chocolate goods – are well worth the effort.
The Importance of Mastering Chocolate Tempering for Home Bakers
For home bakers aspiring to create professional-looking desserts, molded chocolates, or dipped confections, mastering chocolate tempering is truly essential. It's the technique that separates dull, messy chocolate from shiny, crisp results. Beyond aesthetics, tempered chocolate is more durable, easier to handle, and less prone to melting at room temperature, making your creations more stable and enjoyable.
Understanding the chocolate tempering basics explained empowers you to confidently tackle recipes that require working with chocolate, from making your own chocolate bars and bonbons to applying flawless chocolate coatings. It opens up a new level of creativity and precision in your baking and confectionery endeavors, allowing you to achieve results you might have thought were only possible for professional chocolatiers.
Resources for Further Learning About Chocolate Tempering
To deepen your understanding of chocolate tempering basics explained and explore advanced techniques, numerous resources are available. Cookbooks dedicated to chocolate work often provide detailed explanations and recipes utilizing tempered chocolate. Online culinary platforms and reputable baking blogs frequently offer tutorials, videos, and troubleshooting tips.
Consider exploring resources that provide visual demonstrations of techniques like the marble slab method or using a tempering machine, as seeing the process can be very helpful. Many professional confectionery schools and workshops also offer classes specifically focused on chocolate tempering and advanced chocolate techniques. Continuous learning and practice are key to truly mastering this rewarding skill.
Frequently Asked Questions
Why is tempering chocolate important?
Tempering is crucial for achieving chocolate with a desirable shine, a satisfying snap, and stability at room temperature. Untempered chocolate can bloom, appearing dull and streaky.
What does it mean for chocolate to "bloom"?
Blooming refers to the white or grayish coating that appears on the surface of poorly tempered or improperly stored chocolate. It's caused by fat crystals separating and rising to the surface.
What are the key steps in tempering chocolate?
The basic steps usually involve heating the chocolate, cooling it while seeding, and then gently reheating to a specific working temperature. Precise temperatures vary depending on the type of chocolate.
Can you temper chocolate without a thermometer?
While challenging, it's possible with experience and careful observation. You'd rely on cues like the chocolate's viscosity and the way it sets on parchment paper, but a thermometer is highly recommended for beginners.
What happens if I don't temper my chocolate properly?
If you don't temper correctly, your chocolate will likely be soft, dull, and melt easily. It will also be prone to fat bloom and may not release cleanly from molds.
Final Reflection: The Enduring Allure of Perfectly Tempered Chocolate
The art of chocolate tempering, far from being a mere technicality, is the key to unlocking the full sensory potential of this beloved treat. A perfectly tempered chocolate bar isn't just visually appealing with its glossy sheen and satisfying snap; it's a testament to the dedication and understanding required to transform simple cocoa beans into a truly exquisite experience. This meticulous process ensures stability, preventing the dreaded bloom that can mar both the appearance and the enjoyment of even the finest chocolate.
The impact of proper tempering extends far beyond the individual chocolate bar. It speaks to a broader appreciation for craftsmanship and attention to detail, values that resonate deeply in our increasingly fast-paced world. We crave authenticity and quality, and the visible difference between well-tempered and poorly tempered chocolate serves as a powerful reminder of the importance of process and precision. The details are not the details. They make the design.
– Charles Eames. This quote perfectly encapsulates the significance of tempering, highlighting how seemingly small actions contribute to a vastly superior outcome.
Now, consider your own approach to tasks, projects, or even relationships. Are you willing to invest the time and effort required to achieve excellence? Think about the areas of your life where meticulous attention to detail could yield extraordinary results.
Perhaps it's a personal project, a professional endeavor, or even a simple act of kindness. Embrace the spirit of the chocolate temperer – the dedication to process, the pursuit of perfection, and the understanding that the journey, as much as the destination, is profoundly rewarding. Let the enduring allure of perfectly tempered chocolate inspire you to strive for excellence in all that you do.
Unlock Your Chocolate's Full Potential!
Thanks for taking the time to learn about chocolate tempering! You now understand the secrets to achieving that perfect shine, satisfying snap, and long-lasting stability in your chocolate creations. Ready to put your newfound knowledge into practice?
- Dive into our free tempering guide: We've compiled all the essential tips and tricks, including troubleshooting common problems, to ensure your next chocolate project is a masterpiece. This guide also includes videos.
- Share your tempering triumphs (or challenges!): We'd love to see your chocolate creations! Post photos on social media using #BakeWithEaseTempering and tag us.
- Try a new recipe using tempered chocolate – push your skills and experiment with different types of chocolate!
What's your favorite chocolate creation to temper, and what exciting recipe will you tackle next?