
Why Your Chocolate Has Bloom and How to Prevent It.

Welcome to BakeWithEase, your guide to baking bliss! Ever wondered why that perfectly tempered chocolate bar develops a dusty white coating? Dive in as we unravel the mystery of chocolate bloom and share essential chocolate bloom prevention tips to keep your creations looking as delicious as they taste. Ready to unlock the secrets of flawless chocolate? Let's get started!
- Why Your Chocolate Has Bloom and How to Prevent It: Bake With Ease Guide
- Understanding Chocolate Bloom: What It Is and Why It Happens
- The Impact of Bloom on Chocolate's Quality
- Chocolate Bloom Prevention Tips: Mastering Chocolate Tempering and Storage
- Advanced Bloom Prevention Strategies for Bakers
- Troubleshooting Chocolate Bloom: What to Do If It Happens
- Chocolate Bloom Prevention Tips: A Summary for Home Bakers
- Frequently Asked Questions
- Final Reflection: The Enduring Allure (and Prevention) of Chocolate Bloom
- Rediscover the Joy of Perfectly Smooth Chocolate!
Why Your Chocolate Has Bloom and How to Prevent It: Bake With Ease Guide
Welcome to the Bake With Ease guide on understanding and preventing that frustrating white or gray film that can appear on your beautiful chocolate creations! Chocolate bloom might look unappetizing, but it's a common issue, especially for home bakers. Don't worry, it doesn't mean your chocolate is ruined; it just means it's gone through some changes. Let's dive into what causes it and, more importantly, effective chocolate bloom prevention tips to keep your chocolate looking and tasting its best.
Understanding Chocolate Bloom: What It Is and Why It Happens
Chocolate bloom is the term used to describe the grayish-white film or streaks that can develop on the surface of chocolate. It's a physical change, not a sign of spoilage. While it might make your chocolate less appealing visually, it doesn't typically indicate that the chocolate is unsafe to eat. Understanding the "why" behind bloom is the first step in mastering chocolate bloom prevention tips.
What is Chocolate Bloom? Recognizing the Signs
Recognizing chocolate bloom is usually quite easy. It appears as a dusty or streaky white or gray layer on the chocolate's surface. This can range from a fine, powdery coating to larger, splotchy patches. On dark chocolate, it's often more noticeable because of the contrast, but it occurs on milk and white chocolate too.
Think of a time you've seen an older chocolate bar in a pantry or candy dish – chances are, it had this tell-tale sign. It typically lacks the shiny, smooth finish of properly stored chocolate and can sometimes feel slightly greasy or gritty to the touch, depending on the type of bloom.
Two Types of Chocolate Bloom: Fat Bloom vs. Sugar Bloom
There are two distinct types of chocolate bloom, and identifying which one you're dealing with is crucial for effective chocolate bloom prevention tips. The two types are fat bloom and sugar bloom. They look similar to the untrained eye, but their causes and remedies are different.
Fat bloom is the more common type, often caused by improper storage temperatures or temperature fluctuations. Sugar bloom, on the other hand, is caused by moisture coming into contact with the chocolate's surface. We'll explore the science behind each one in more detail.
The Science Behind Fat Bloom: Causes and Contributing Factors
Fat bloom occurs when the cocoa butter crystals within the chocolate melt and then recrystallize on the surface. This happens when chocolate is exposed to warm temperatures, even slightly above room temperature, or when it experiences temperature swings. Cocoa butter has different crystal forms (polymorphs), and the most stable and desirable form is Type V, achieved through proper tempering.
When chocolate melts, the stable crystals break down. If the chocolate cools and solidifies without being properly tempered, the cocoa butter recrystallizes into less stable forms (like Type I, II, III, or IV). These unstable crystals are larger and less uniform than the desired Type V crystals.
Over time, these unstable crystals can migrate to the surface, creating the visible white film. Temperature fluctuations accelerate this process, as repeated melting and solidifying encourages crystal migration. For example, storing chocolate at 75°F (24°C) for an extended period, or moving it repeatedly between a cool pantry and a warm kitchen counter, significantly increases the risk of fat bloom.
The Science Behind Sugar Bloom: Understanding Moisture's Role
Sugar bloom is less common than fat bloom but is directly related to moisture. It happens when moisture condenses on the surface of the chocolate, dissolving some of the sugar crystals. As the moisture evaporates, the dissolved sugar recrystallizes on the surface in larger, visible crystals.
A classic example of how this happens is taking a cold bar of chocolate directly from the refrigerator into a warm, humid room. Water vapor from the air condenses on the cold surface, just like condensation on a cold drink. This condensation dissolves the surface sugar. When the chocolate warms up and the condensation evaporates, the sugar is left behind as a dusty, white layer. Controlling humidity and avoiding sudden temperature changes are critical chocolate bloom prevention tips for sugar bloom.
The Impact of Bloom on Chocolate's Quality
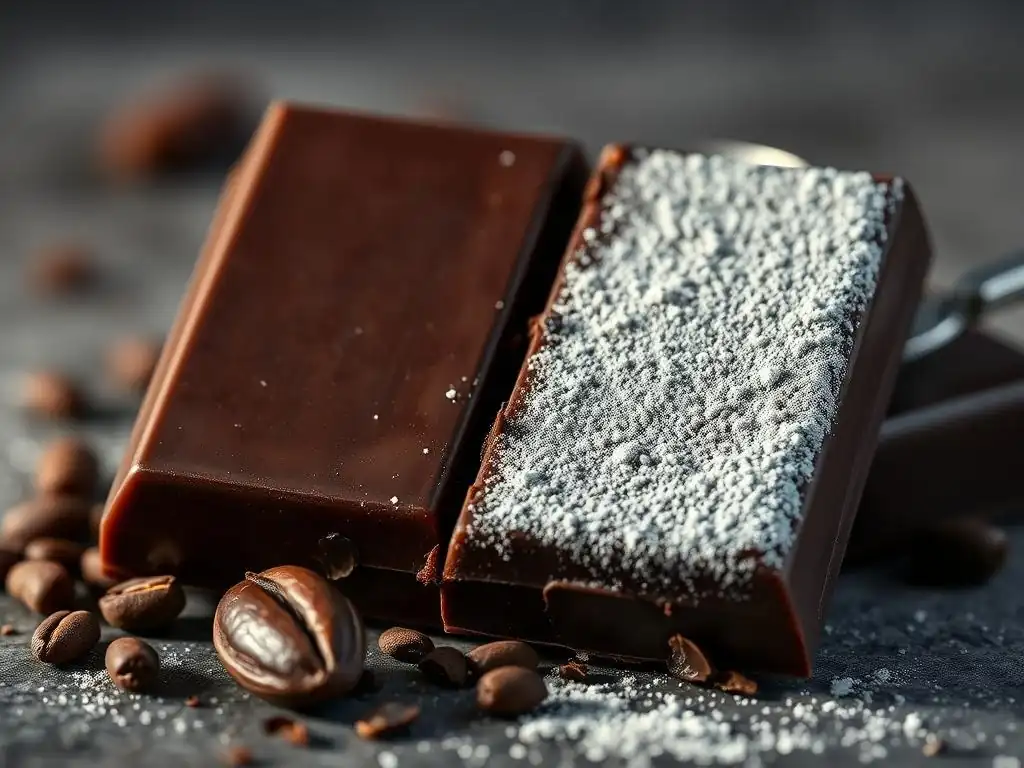
While bloom might make your chocolate look less appealing, its impact on quality is often debated. Let's look at how it affects taste and texture, and whether it's still safe to eat.
Does Chocolate Bloom Affect the Taste?
Generally, chocolate bloom does not significantly alter the inherent flavor of the chocolate itself. The chemical composition and core ingredients haven't changed in a way that introduces off-flavors. The cocoa solids and sugar are still there.
However, some people might perceive a slight difference. The visual appearance can influence perception, making the chocolate seem less appealing psychologically. Also, the changed texture (which we'll discuss next) can impact the overall mouthfeel, which is a crucial part of tasting chocolate. So, while the flavor compounds remain largely intact, the experience of eating bloomed chocolate can be less enjoyable.
Yes, chocolate bloom absolutely affects the texture. Properly tempered chocolate has a smooth, snappy texture and melts cleanly in your mouth. This is due to the uniform, small Type V cocoa butter crystals.
Bloomed chocolate, particularly fat-bloomed chocolate, has larger, unstable crystals on the surface and often throughout the chocolate. This results in a softer, crumbly texture and a less satisfying "snap" when broken. Sugar bloom creates a gritty texture on the surface because of the larger sugar crystals. Neither offers the luxurious mouthfeel of well-tempered, bloom-free chocolate.
Is Bloomed Chocolate Safe to Eat?
Absolutely! Despite its appearance, bloomed chocolate is perfectly safe to consume. Neither fat bloom nor sugar bloom indicates spoilage or the presence of harmful bacteria. They are purely cosmetic issues resulting from changes in the physical structure of the cocoa butter or sugar crystals.
You might not want to use bloomed chocolate for dipping or molding where appearance and snap are critical, but it's perfectly fine for melting and using in recipes like brownies, cookies, or ganache, where the texture will be transformed anyway.
Chocolate Bloom Prevention Tips: Mastering Chocolate Tempering and Storage
Preventing chocolate bloom is all about controlling temperature and moisture. Implementing good practices in tempering and storage are the most effective chocolate bloom prevention tips you can follow.
The Importance of Proper Chocolate Tempering for Bloom Prevention
Tempering is the single most important step in preventing fat bloom in chocolate used for coatings, molding, or dipping. Tempering involves carefully melting, cooling, and then slightly reheating chocolate to encourage the cocoa butter to crystallize into that stable Type V form. This creates a strong, stable crystal structure that is much less likely to melt and recrystallize on the surface under normal conditions.
Untempered or improperly tempered chocolate is highly susceptible to fat bloom because it contains unstable cocoa butter crystals that readily migrate to the surface. Investing time in learning proper tempering techniques is one of the best chocolate bloom prevention tips for achieving professional-looking results.
Understanding Chocolate Tempering Temperatures
Achieving the correct temperatures is critical for successful tempering. These temperatures vary slightly depending on the type of chocolate:
- Dark Chocolate:
- Melt: 115-122°F (46-50°C)
- Cool/Seed: 80-82°F (27-28°C)
- Reheat/Working: 88-91°F (31-33°C)
- Milk Chocolate:
- Melt: 113-120°F (45-49°C)
- Cool/Seed: 78-80°F (26-27°C)
- Reheat/Working: 86-88°F (30-31°C)
- White Chocolate:
- Melt: 105-113°F (40-45°C)
- Cool/Seed: 77-79°F (25-26°C)
- Reheat/Working: 84-86°F (29-30°C)
Using a reliable thermometer is essential to hitting these precise temperature ranges, as even a few degrees off can result in improper crystallization and lead to bloom later.
Mastering Tempering Techniques: Seeding, Tabliering, and Microwave Methods
There are several common methods for tempering chocolate, each aiming to introduce stable cocoa butter crystals (seeds) into the melted chocolate to guide its crystallization.
- Seeding Method: Melt two-thirds of the chocolate, then stir in the remaining one-third (finely chopped) off the heat. The solid chocolate "seeds" contain stable crystals that encourage the melted chocolate to crystallize correctly as it cools. Continue stirring until the chocolate reaches the working temperature. This is a popular method for home bakers.
- Tabliering (Marble Slab) Method: Melt all the chocolate. Pour two-thirds onto a cool marble or granite surface. Work it back and forth with a spatula or bench scraper until it cools and starts to thicken (reaching the cooling temperature range). Scrape the cooled chocolate back into the bowl with the remaining melted chocolate and stir until it reaches the working temperature. This method requires practice but yields excellent results.
- Microwave Method: This method is convenient for smaller amounts. Melt chocolate in short bursts (30 seconds), stirring well after each, until about two-thirds melted. Continue stirring off heat using the residual heat to melt the remaining chocolate until it reaches the correct working temperature. This method relies on not fully melting all the crystals initially, allowing them to act as seeds.
Experimenting with these techniques will help you find the one that works best for you, significantly improving your chocolate bloom prevention tips toolkit.
Controlling Moisture: Key to Preventing Sugar Bloom
While tempering handles fat bloom, preventing sugar bloom is all about managing moisture. Sugar is hygroscopic, meaning it attracts and absorbs moisture from the air. When this moisture interacts with the chocolate surface, sugar bloom is the result.
Avoiding direct contact with water and protecting chocolate from humid environments are fundamental chocolate bloom prevention tips for sugar bloom.
Humidity's Impact on Chocolate
High humidity is a major culprit for sugar bloom. When the air is saturated with moisture, it's much more likely to condense on the surface of chocolate, especially if the chocolate is cooler than the ambient air. This is particularly problematic in humid climates or during certain seasons.
Storing chocolate in a dry environment is key. Kitchens, while convenient, can be humid, especially near sinks or during cooking. Consider a pantry or cupboard away from sources of moisture and heat.
Protecting Chocolate from Condensation
The most common cause of condensation on chocolate is moving it from a cold environment (like a refrigerator or freezer) to a warmer one. The cold surface causes water vapor in the warmer air to condense.
To prevent this, if you must refrigerate or freeze chocolate, allow it to come to room temperature slowly while still in its packaging. This allows the chocolate to warm up gradually, preventing condensation from forming on its surface. For example, if taking chocolate from a 40°F (4°C) fridge into a 70°F (21°C) room, leave it in its sealed container for several hours until it reaches room temperature before opening.
Proper Chocolate Storage: Maintaining Quality and Preventing Bloom
Even perfectly tempered chocolate can bloom if not stored correctly. Implementing good storage practices is a non-negotiable part of effective chocolate bloom prevention tips.
Ideal Storage Temperature for Chocolate
The ideal temperature range for storing chocolate is generally between 60°F and 70°F (15°C and 21°C). Consistency is more important than hitting an exact number within this range. Avoid temperatures above 75°F (24°C), as this is where cocoa butter starts to melt, significantly increasing the risk of fat bloom.
Avoid storing chocolate near heat sources like ovens, sunny windows, or the top of refrigerators (which often radiate heat). A cool, dark pantry or cupboard is usually the best spot.
Best Practices for Wrapping and Sealing Chocolate
Proper wrapping protects chocolate from moisture, odors, and air, all of which can degrade its quality and contribute to bloom.
Always store chocolate in airtight packaging. If the original packaging isn't resealable, wrap the chocolate tightly in plastic wrap, then place it in a zip-top bag or an airtight container. This barrier prevents moisture from reaching the surface and also keeps the chocolate from absorbing strong odors from other foods, which it can easily do.
Choosing the Right Storage Containers
For storing chocolate, especially smaller pieces or leftovers, airtight containers are your best friend. Glass jars with tight-fitting lids or high-quality plastic containers with secure seals work well.
Avoid storing chocolate in cardboard boxes alone, as they offer no barrier against moisture or odors. Ensure containers are clean and completely dry before placing chocolate inside.
Advanced Bloom Prevention Strategies for Bakers
Beyond the basics of tempering and storage, a few more advanced considerations can help minimize bloom risk, especially when working with chocolate in complex recipes.
Choosing High-Quality Chocolate for Baking
The quality of the chocolate you start with can influence its susceptibility to bloom. Higher quality chocolates, especially couverture chocolate, are made with a higher percentage of cocoa butter and are typically processed to have more stable fat crystals initially.
While even the best chocolate can bloom if mishandled, using chocolate specifically designed for baking and tempering (like couverture) can give you a better starting point than compound chocolate (which uses vegetable oils instead of cocoa butter and doesn't require tempering). Investing in good ingredients is a valuable chocolate bloom prevention tip.
Adjusting Recipes to Minimize Bloom Risk
Sometimes, the recipe itself can inadvertently increase bloom risk, particularly recipes involving moisture contact or temperature fluctuations.
Consider recipes that require tempering chocolate for coatings or decorations. Ensure you are using a reliable recipe with clear tempering instructions. When adding chocolate to warm liquids (like ganache), ensure the liquid isn't too hot, as overheating the chocolate can break its temper. If making items that will be stored in the refrigerator (like chocolate-covered strawberries), temper the chocolate properly and explain to recipients the importance of letting them warm slightly at room temperature before serving to avoid condensation and subsequent sugar bloom.
Troubleshooting Chocolate Bloom: What to Do If It Happens
So, despite your best efforts and diligent chocolate bloom prevention tips, you find some bloom on your chocolate. Don't despair! There are options.
Can You Fix Bloomed Chocolate?
For fat bloom, sometimes you can "fix" the chocolate by re-tempering it. Since fat bloom is a crystallization issue, melting the chocolate completely and then carefully going through the tempering process again can realign the cocoa butter crystals into the stable Type V form, restoring its shine and snap. This works best if the bloom is relatively minor and the chocolate hasn't been subjected to extreme heat repeatedly.
Sugar bloom, however, cannot be fixed by re-tempering. Melting and re-solidifying the chocolate won't change the size and distribution of the sugar crystals on the surface. Once sugar bloom occurs, the gritty texture will remain.
Using Bloomed Chocolate in Recipes: Creative Solutions
Even if you can't restore its pristine appearance, bloomed chocolate is perfectly usable in many baking applications.
- Melting: Bloomed chocolate melts just fine. Use it in recipes where the chocolate is fully melted and incorporated, such as:
- Brownie batter
- Chocolate cake batter
- Chocolate sauces or syrups
- Ganache (though ensure you don't overheat the cream/liquid)
- Hot chocolate
- Chopping: Chop bloomed chocolate and use it as chocolate chips in cookies, muffins, or scones. Once baked, the appearance of the original bloom won't matter.
- Flavor: Use it anywhere you need chocolate flavor but appearance isn't critical. Think fillings, frostings, or even just snacking if you don't mind the texture!
Don't let bloomed chocolate go to waste! It still contributes delicious chocolate flavor to your baked goods.
Chocolate Bloom Prevention Tips: A Summary for Home Bakers
Mastering chocolate bloom prevention tips will elevate your baking and ensure your chocolate creations look as good as they taste. Remember, it's primarily about controlling temperature and moisture.
Here's a quick recap to keep your chocolate bloom-free:
Quick Checklist for Avoiding Chocolate Bloom
- [ ] Always temper chocolate properly when using it for coating, dipping, or molding.
- [ ] Store chocolate in a cool, dry place, ideally between 60-70°F (15-21°C).
- [ ] Avoid storing chocolate near heat sources or in humid environments.
- [ ] Protect chocolate from sudden temperature changes, especially moving from cold to warm.
- [ ] Allow refrigerated or frozen chocolate to warm up slowly in its sealed packaging.
- [ ] Store chocolate in airtight containers or wrap it tightly to protect from moisture and odors.
- [ ] Use high-quality chocolate designed for baking when possible.
- [ ] Be mindful of temperature when incorporating chocolate into warm liquids in recipes.
By following these simple chocolate bloom prevention tips, you can significantly reduce the chances of encountering that unwelcome white film.
Resources for Further Learning about Chocolate Tempering
To deepen your understanding of chocolate tempering and refine your skills, consider exploring resources like:
- Detailed guides on the science of chocolate crystallization.
- Video tutorials demonstrating the seeding, tabliering, and microwave tempering methods.
- Books specifically focused on chocolate work and confections.
- Online forums or communities where bakers share tips and troubleshooting advice.
Mastering chocolate bloom prevention tips is a valuable skill for any baker. Happy baking!
Frequently Asked Questions
What exactly is chocolate bloom and what does it look like?
Chocolate bloom is a whitish or grayish coating that appears on the surface of chocolate. It's due to either fat bloom or sugar bloom, making the chocolate look less appealing.
What are the primary causes of fat bloom in chocolate?
Fat bloom is primarily caused by improper storage or temperature fluctuations. When chocolate gets too warm, the cocoa butter melts and recrystallizes on the surface, creating that white coating.
How does sugar bloom differ from fat bloom?
Sugar bloom happens when moisture comes into contact with the chocolate surface. The sugar dissolves, and when the moisture evaporates, it leaves behind a sugary residue that looks like bloom.
What are some simple chocolate bloom prevention tips for home bakers?
To prevent bloom, store chocolate in a cool, dry place at a consistent temperature. Avoid drastic temperature changes and keep chocolate wrapped tightly to prevent moisture exposure.
Can chocolate with bloom still be used for baking?
Yes, chocolate with bloom is generally safe to eat and use in baking. The bloom affects the appearance and texture but doesn't impact the flavor significantly when melted.
Final Reflection: The Enduring Allure (and Prevention) of Chocolate Bloom
The fight against chocolate bloom isn't just about aesthetics; it's about preserving the sensory experience of a truly exceptional chocolate. A seemingly minor imperfection, bloom significantly impacts the enjoyment of high-quality chocolate, reminding us that even the simplest details can dramatically alter our perception of a beloved treat.
The impact of chocolate bloom extends beyond individual disappointment; it speaks to the larger conversation surrounding food quality, preservation, and the appreciation of artisanal craftsmanship. The subtle nuances of texture and flavor, so carefully cultivated by chocolatiers, can be easily compromised by improper storage or handling. The pleasure of chocolate is not simply a matter of taste, but a complex interplay of texture, aroma, and visual appeal.
This quote highlights the holistic nature of the chocolate experience, one that bloom unfortunately disrupts. Understanding bloom prevention, therefore, becomes a crucial step in appreciating the artistry and dedication behind fine chocolate.
Now, consider your own chocolate consumption. Think about the last time you encountered a bloom-covered bar. Did it diminish your enjoyment? I challenge you to apply the knowledge gained from this article to your own chocolate-loving habits. By understanding the causes of bloom and implementing the simple preventative measures outlined, you can ensure that every bite of your favorite chocolate is a moment of pure, unadulterated delight. Let's savor the experience, together.
Rediscover the Joy of Perfectly Smooth Chocolate!
Thanks for taking the time to learn about chocolate bloom – we hope you now feel empowered to avoid those unsightly white patches! Ready to put your newfound knowledge into practice?
- Master the art of tempering: Try our easy-to-follow tempering guide (we'll link it in the comments!) to ensure your next batch of chocolates is flawlessly smooth and shiny. This is the key to preventing bloom!
- Share your chocolate-making triumphs (or challenges!): Post a picture of your perfectly tempered chocolates (or your bloomed learning experience!) on social media and tag us! Let’s build a community of chocolate enthusiasts together.
- Explore our chocolate recipe collection: Discover new and exciting ways to use your perfectly tempered chocolate with our extensive range of delicious recipes.
Ready to create your most beautiful chocolates yet? What's your favorite type of chocolate to work with?