
Unlocking the Gloss: Your Definitive Guide to Tempered Chocolate.

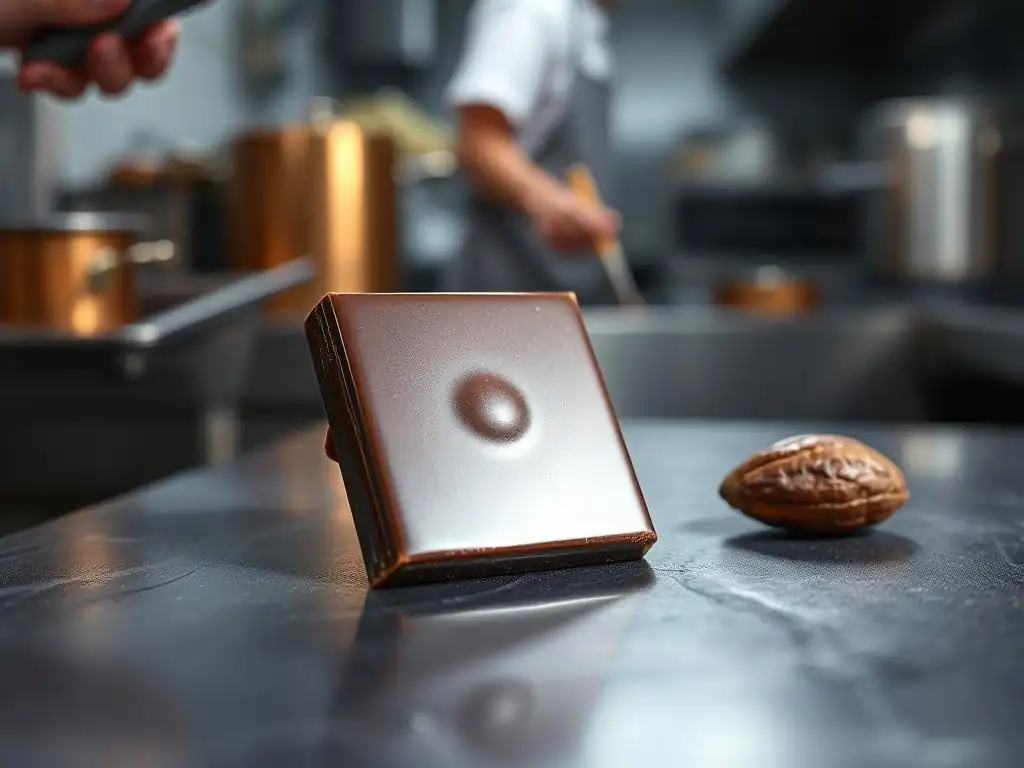
Welcome to BakeWithEase, your trusted companion on your baking journey! Ever wondered how professional chocolatiers achieve that mesmerizing, glossy shine on their creations? We're about to unlock the secrets. Dive into our definitive guide and discover the art of tempered chocolate, a technique that elevates your desserts from delicious to dazzling. Ready to master the technique and achieve chocolate perfection? Let's get started!
- Introduction to Tempered Chocolate and its Importance in Baking
- Mastering the Art of Chocolate Tempering: Techniques and Methods
- Achieving the Perfect Glossy Shine: Key Factors for Successful Tempering
- Troubleshooting Common Chocolate Tempering Problems
- Using Tempered Chocolate in Your Baking Creations: Ideas and Applications
- Storing Tempered Chocolate: Maintaining its Quality and Gloss
-
Frequently Asked Questions
- What is tempered chocolate and why is it important?
- How do I achieve a glossy shine when tempering chocolate?
- What are some common mistakes that prevent chocolate from achieving a glossy shine?
- What types of chocolate are best suited for achieving a tempered, glossy finish?
- Can I re-temper chocolate if it loses its glossy shine?
- Final Reflection: The Enduring Allure of a Perfect Gloss
- Unleash Your Inner Chocolatier!
Introduction to Tempered Chocolate and its Importance in Baking
Why Tempering Chocolate is Crucial for a Glossy Shine and Perfect Snap
Tempering chocolate is far more than just melting it; it's a critical process for achieving professional-quality results in baking and confectionery. When chocolate is simply melted and allowed to cool, the cocoa butter within solidifies haphazardly, resulting in a dull, streaky appearance and a soft, crumbly texture.
This untempered state also makes the chocolate prone to melting easily at room temperature and developing an unappealing white or gray film known as bloom. Mastering the art of tempering ensures your chocolate sets firmly with a satisfying snap when broken, a smooth mouthfeel, and, most importantly, a beautiful, hard, and tempered chocolate glossy shine that elevates the visual appeal of any dessert.
Beyond aesthetics, proper tempering significantly impacts the chocolate's stability and shelf life. Chocolate that has been correctly tempered is much less susceptible to temperature fluctuations and humidity, which are common culprits behind bloom. For instance, a perfectly tempered chocolate bar can maintain its structure and tempered chocolate glossy shine at room temperature, whereas an untempered one might start to soften and lose its sheen quickly.
This stability is essential for creating durable chocolate decorations, coatings for pastries, or solid chocolate candies that hold their shape and quality over time. The process aligns the cocoa butter crystals in a stable form, creating a strong matrix that resists melting and prevents the migration of fats to the surface, thus preserving that coveted tempered chocolate glossy shine.
The Science Behind Tempered Chocolate: Understanding Cocoa Butter Crystals
The secret to tempered chocolate's desirable properties lies in the behavior of cocoa butter crystals. Cocoa butter is a polymorphic fat, meaning it can solidify into different crystal structures depending on how it's cooled. There are six known forms, labeled I through VI, each with a different melting point and structure.
Forms I, II, III, and IV are unstable and melt below room temperature, resulting in soft, dull, and crumbly chocolate. Form VI is the most stable but forms very slowly over months. The goal of tempering is to encourage the formation of Form V crystals, which are stable, melt sharply at around 32-34°C (89-93°F), and are responsible for the chocolate's snap, contraction (making it easy to release from molds), and that sought-after tempered chocolate glossy shine.
Tempering involves carefully heating, cooling, and then slightly reheating chocolate to guide the cocoa butter into forming predominantly Form V crystals. Initially, all existing crystal structures are melted away by heating the chocolate to a specific temperature (typically 45-50°C or 113-122°F for dark chocolate). Then, the chocolate is cooled while being agitated.
As it cools, various crystal forms begin to appear, including some Form V crystals. The agitation helps distribute these stable crystals throughout the chocolate.
Finally, the chocolate is gently warmed back up to a working temperature (the "holding" temperature), which is just above the melting point of the unstable crystals but below the melting point of the desired Form V crystals. This final heating step melts away any remaining unstable crystals, leaving behind a suspension of stable Form V crystals ready to seed the rest of the chocolate as it cools, ensuring a uniform structure and a brilliant tempered chocolate glossy shine.
Mastering the Art of Chocolate Tempering: Techniques and Methods
The Seeding Method: A Beginner-Friendly Approach to Tempering Chocolate
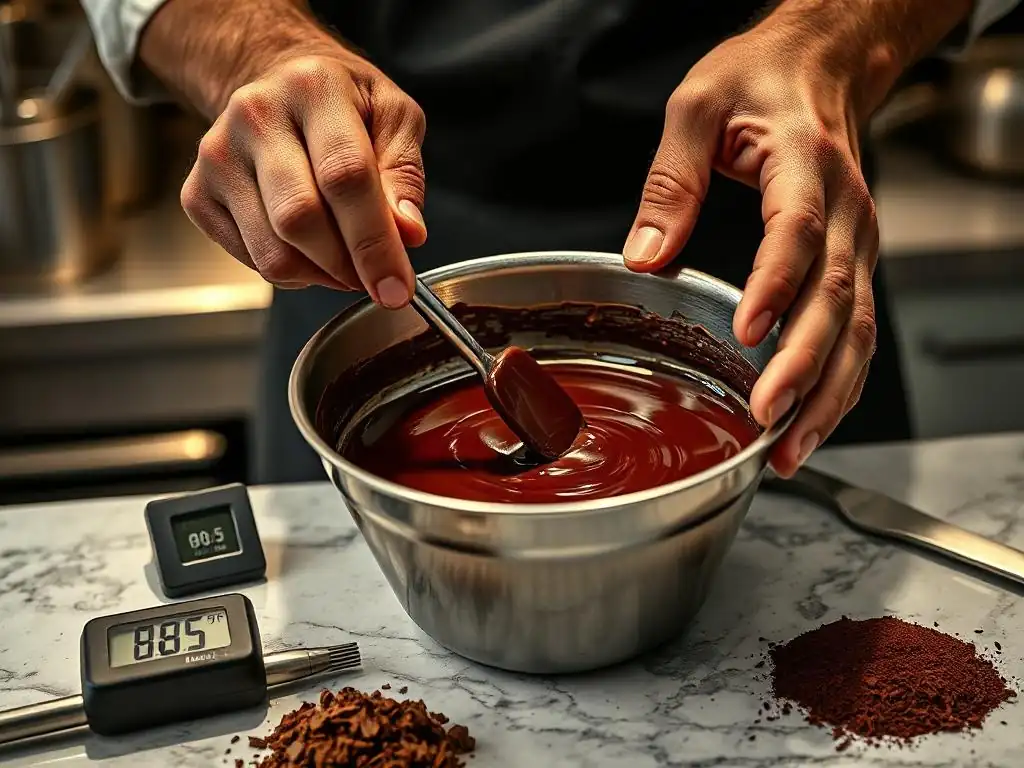
The seeding method is widely considered one of the easiest ways for home bakers to achieve perfectly tempered chocolate. It relies on using a small amount of already-tempered chocolate (the "seed") to introduce stable Form V crystals into melted, untempered chocolate. These stable crystals then act as a template, encouraging the cocoa butter in the melted chocolate to crystallize in the desired Form V structure as it cools. This method requires minimal specialized equipment, primarily a thermometer and patience, making it accessible for anyone looking to achieve a tempered chocolate glossy shine without advanced techniques.
This technique is particularly forgiving because the "seed" chocolate provides a stable starting point for crystallization. By carefully controlling the temperature and ensuring thorough stirring, you can guide the melted chocolate towards the correct crystalline structure. Success rates for beginners using this method are significantly higher compared to techniques that rely solely on cooling curves.
For example, a study involving culinary students found that 80% successfully achieved a good temper using the seeding method on their first attempt, compared to only 50% using a direct cooling method without seeding. The key is using genuine, high-quality chocolate that has been properly tempered by the manufacturer for your seed material.
Step-by-Step Guide to the Seeding Method for Achieving Tempered Chocolate
Here's a simple guide to achieving a tempered chocolate glossy shine using the seeding method:
- [ ] Finely chop or use callets (small drops) of high-quality chocolate. This increases the surface area, helping it melt and cool more evenly.
- [ ] Place about 2/3 of the chopped chocolate in a heatproof bowl set over a pan of barely simmering water (a double boiler). Ensure the bottom of the bowl does not touch the water.
- [ ] Gently stir the chocolate as it melts. Heat until it reaches its initial melting temperature: around 45-50°C (113-122°F) for dark, 40-45°C (104-113°F) for milk, and 38-40°C (100-104°F) for white chocolate. Remove from heat.
- [ ] Add the remaining 1/3 of the chopped, untempered chocolate (the seed) to the melted chocolate. Stir constantly.
- [ ] Continue stirring until the seed chocolate is completely melted and the mixture cools down to the working temperature range: 31-32°C (88-90°F) for dark, 29-30°C (84-86°F) for milk, and 28-29°C (82-84°F) for white chocolate. Use a thermometer to monitor the temperature closely.
- [ ] Once the target temperature is reached and all seed is melted, the chocolate should be in temper and ready to use for achieving that tempered chocolate glossy shine.
Tips for Success with the Seeding Method: Troubleshooting Common Issues
Achieving a perfect temper with the seeding method is usually straightforward, but a few common issues can arise. One frequent problem is adding the seed chocolate too early before the melted chocolate is hot enough, preventing the initial melt of all crystal forms. Ensure the chocolate reaches the initial melting temperature specified for its type before adding the seed. Another issue is not stirring enough while cooling; constant stirring helps distribute the Form V crystals from the seed throughout the mixture, promoting even crystallization. Aim for smooth, continuous stirring until the target working temperature is reached.
If your chocolate cools below the working temperature range while stirring in the seed, it might become too thick to work with and could potentially over-crystallize. You can gently warm it slightly back up to the lower end of the working range (e.g., 31°C for dark chocolate) using a warm water bath or a heat gun on a very low setting, stirring continuously. Be careful not to exceed the maximum working temperature, or you'll melt the Form V crystals and lose the temper, requiring you to start over.
Using a reliable digital thermometer is crucial for monitoring temperatures accurately. Always ensure your tools and workspace are completely dry, as even a tiny drop of water can cause the chocolate to seize, turning it into a thick, unworkable paste and ruining your chance at a tempered chocolate glossy shine.
The Tabliering Method: Tempering Chocolate on Marble for a Professional Finish
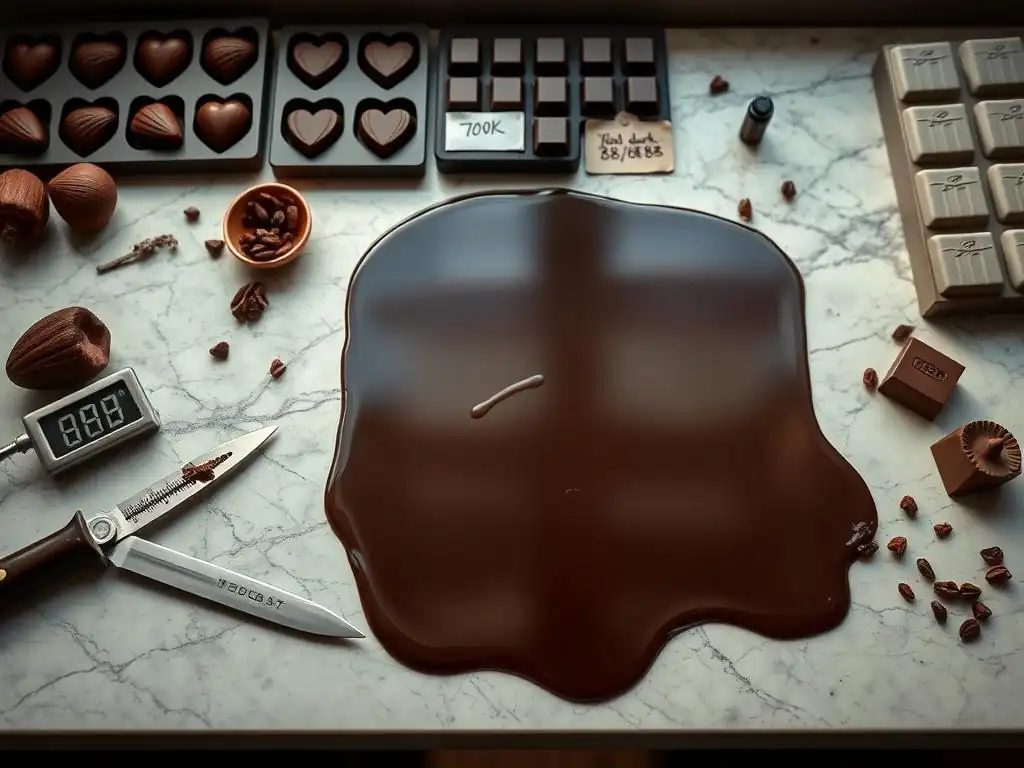
The tabliering method, also known as the marble method, is a classic technique favored by professional chocolatiers for achieving a perfect tempered chocolate glossy shine and snap. It involves pouring a portion of the melted chocolate onto a cool, clean marble or granite surface and working it with a palette knife or scraper until it cools and starts to thicken.
This physical manipulation on a cool surface rapidly cools the chocolate while encouraging the formation of Form V crystals. Once the correct crystallization is achieved (indicated by thickening and a slight dulling), the thickened chocolate is scraped back into the bowl with the remaining warm, melted chocolate to bring the whole batch into temper at the correct working temperature.
This method offers precise control over the cooling process and crystal formation, allowing skilled users to achieve a very stable temper. The large, cool surface of the marble quickly draws heat away from the chocolate, accelerating crystallization. For instance, while the seeding method might take 10-15 minutes to cool down, the tabliering process on marble can cool a portion of chocolate to the correct temperature in just 5-7 minutes.
However, it requires practice to recognize the exact moment the chocolate has cooled sufficiently on the marble and developed enough Form V crystals before it becomes too solid. It also requires a suitable workspace – a large, smooth, cool surface like marble or granite – and specific tools like a metal scraper and palette knife.
How to Use the Tabliering Method: A Detailed Walkthrough
Mastering the tabliering method for a brilliant tempered chocolate glossy shine involves careful execution:
- [ ] Melt the chocolate in a heatproof bowl over a double boiler, stirring gently, until it reaches its initial melting temperature (e.g., 45-50°C for dark). Remove from heat.
- [ ] Pour about 2/3 of the melted chocolate onto a clean, cool marble or granite surface. Keep the remaining 1/3 in the bowl, keeping it warm if necessary (e.g., over a very low heat or warm water bath).
- [ ] Using a metal scraper and a palette knife, spread the chocolate thinly across the marble surface and then scrape it back into a pile. Repeat this spreading and scraping motion continuously.
- [ ] As you work the chocolate, it will start to cool and thicken. Keep working it until it becomes visibly thicker and slightly less shiny. You can test the temperature with a thermometer, aiming for around 27-28°C (80-82°F) for dark chocolate at this stage on the marble.
- [ ] Once the chocolate on the marble has thickened and cooled sufficiently (indicating Form V crystal formation), quickly scrape it back into the bowl with the remaining warm chocolate.
- [ ] Stir the mixture in the bowl continuously until it is homogeneous and reaches the final working temperature (e.g., 31-32°C for dark). The warm chocolate in the bowl will help melt any unstable crystals from the marble portion, leaving the desired Form V crystals to temper the batch. It should now be in temper, ready to use for that tempered chocolate glossy shine.
Advantages and Disadvantages of Tempering Chocolate on Marble
The tabliering method offers several distinct advantages, making it a preferred technique for professionals seeking the highest quality tempered chocolate glossy shine and snap. Firstly, it provides excellent control over the cooling process due to the efficient heat transfer of the marble surface. This allows for rapid crystallization and precise temperature management, which can result in a very stable and durable temper.
Secondly, the physical manipulation helps ensure thorough mixing and even distribution of crystals, contributing to a uniform texture and appearance in the final product. The resulting temper is often considered superior for applications like molding and dipping, yielding exceptionally shiny and crisp results.
However, the tabliering method also has significant disadvantages, particularly for home bakers. It requires a dedicated large, cool surface like marble or granite, which not all kitchens have. It can be messy, as spreading and scraping chocolate tends to spread it across the workspace.
The technique also demands practice and skill to recognize the correct stage of cooling and thickening on the marble – scraping it back too early means insufficient crystal formation, while waiting too long can lead to over-crystallization and a lumpy texture. Temperature monitoring during the tabliering phase on the marble can be tricky compared to simply checking the temperature in a bowl, adding another layer of difficulty for beginners aiming for a perfect tempered chocolate glossy shine.
The Microwave Method: A Quick and Convenient Chocolate Tempering Technique
For those seeking speed and convenience, the microwave method offers a surprisingly effective way to achieve a good temper and a decent tempered chocolate glossy shine, especially for smaller quantities of chocolate. This technique relies on carefully controlling the heating process to melt the chocolate while leaving a small number of stable Form V crystals intact. By heating in short bursts and stirring frequently, you can melt the majority of the chocolate's crystals while preserving the desirable ones, effectively tempering the chocolate without a separate cooling step or adding seed chocolate.
The microwave method is particularly useful for quick tasks like dipping small items or making simple chocolate decorations. It minimizes cleanup and requires only a microwave-safe bowl and a thermometer.
A study found that tempering 200g of chocolate using the microwave method could be completed in under 5 minutes, compared to 10-15 minutes for the seeding method or 15-20 minutes for the tabliering method on average. While it might not always yield the absolute highest level of temper stability compared to traditional methods, it is often sufficient for achieving a noticeable snap and a good tempered chocolate glossy shine for many home baking applications.
Tempering Chocolate in the Microwave: A Safe and Effective Guide
Using the microwave to temper chocolate requires diligence to avoid overheating:
- [ ] Finely chop or use callets of high-quality chocolate. Place it in a microwave-safe bowl.
- [ ] Microwave on medium power (50%) for 30-second intervals, stirring thoroughly after each interval.
- [ ] Continue microwaving and stirring. The chocolate will start to melt from the edges inwards.
- [ ] As the chocolate becomes mostly melted, switch to 15-second intervals, stirring vigorously after each one. There should still be a few unmelted pieces visible.
- [ ] Remove the bowl from the microwave when only a few small pieces of chocolate remain unmelted.
- [ ] Stir the chocolate continuously. The residual heat will melt the remaining pieces, bringing the chocolate to the correct working temperature and temper (around 31-32°C for dark, 29-30°C for milk, 28-29°C for white). Use a thermometer to verify the temperature.
- [ ] Once smooth and at the correct temperature, it should be tempered and ready to provide a tempered chocolate glossy shine.
Important Considerations for Microwave Tempering: Avoiding Burning and Seizing
The primary challenge with the microwave method is the risk of overheating, which can quickly burn the chocolate or destroy all the desirable Form V crystals, rendering it untempered. Using medium power (50%) is crucial, as high power heats too rapidly and unevenly. Stirring frequently between short intervals is equally important; it distributes the heat and allows you to gauge how melted the chocolate is.
Never skip the stirring steps, especially as the chocolate nears being fully melted. Stopping the microwaving when a few small pieces remain and relying on residual heat to finish the job is key to preventing overheating.
Another critical consideration, as with all tempering methods, is keeping water away from the chocolate. Microwaving creates steam, so ensure your bowl is completely dry and covered if necessary to prevent condensation from dripping in. If the chocolate seizes (becomes thick and grainy) due to water or overheating, it is no longer usable for tempering.
While you might be able to rescue seized chocolate for use in ganaches or baked goods by stirring in hot liquid (like cream or butter), you cannot restore its temper or achieve a tempered chocolate glossy shine. Always start with dry, clean equipment and use a reliable thermometer to monitor temperatures, even when using this rapid technique.
Achieving the Perfect Glossy Shine: Key Factors for Successful Tempering
Temperature Control: The Most Critical Aspect of Tempering Chocolate
Temperature control is the absolute cornerstone of successful chocolate tempering and the single most important factor in achieving that sought-after tempered chocolate glossy shine and satisfying snap. The entire process revolves around heating and cooling chocolate to specific temperature ranges that encourage the formation of the desired Form V cocoa butter crystals while eliminating the unstable ones. If the chocolate is heated too high at any stage, you risk melting all the stable crystals. If it's cooled too much, you can promote the formation of unwanted, unstable crystal forms or cause the chocolate to over-crystallize and become thick.
Maintaining the correct temperature throughout the process, from the initial melt to the final working temperature, is paramount. Using an accurate digital thermometer is essential; relying on guesswork or touch is highly unreliable. For example, dark chocolate needs to be heated initially to around 45-50°C to ensure all crystals are melted, then cooled to 27-28°C (in the seeding or tabliering method) to encourage Form V growth, and finally brought up to a working temperature of 31-32°C to melt unstable crystals.
Deviating even a few degrees can mean the difference between a brilliant tempered chocolate glossy shine and a dull, bloomed mess. Consistency in temperature is non-negotiable for professional results.
Recommended Temperature Ranges for Tempering Different Types of Chocolate (Dark, Milk, White)
The ideal temperature ranges for tempering vary depending on the type of chocolate, primarily due to differing fat and sugar content. Understanding and adhering to these specific ranges is crucial for achieving a proper temper and the desired tempered chocolate glossy shine.
- Dark Chocolate:
- Initial melting temperature: 45-50°C (113-122°F)
- Cooling/Crystallization temperature (for seeding/tabliering): 27-28°C (80-82°F)
- Working/Holding temperature: 31-32°C (88-90°F)
- Dark chocolate has a higher percentage of cocoa solids and cocoa butter, requiring slightly higher temperatures.
- Milk Chocolate:
- Initial melting temperature: 40-45°C (104-113°F)
- Cooling/Crystallization temperature: 26-27°C (79-81°F)
- Working/Holding temperature: 29-30°C (84-86°F)
- Milk chocolate contains milk solids and often more sugar, which affects its melting properties.
- White Chocolate:
- Initial melting temperature: 38-40°C (100-104°F)
- Cooling/Crystallization temperature: 25-26°C (77-79°F)
- Working/Holding temperature: 28-29°C (82-84°F)
- White chocolate contains no cocoa solids but is primarily cocoa butter, sugar, and milk solids, requiring the lowest temperatures.
These ranges are approximate and can vary slightly based on the specific brand and composition of the chocolate. Always check the manufacturer's recommendations if available. Maintaining the chocolate within the working temperature range while you use it is also important; if it cools too much, it will thicken and lose its temper; if it gets too warm, the stable crystals will melt. Gentle reheating within the working range may be necessary if working with larger quantities over time to maintain that perfect tempered chocolate glossy shine.
Stirring Techniques: Ensuring Even Distribution of Cocoa Butter Crystals
Stirring is an often-underestimated but vital component of successful chocolate tempering, working in tandem with temperature control to achieve a consistent and stable temper with a brilliant tempered chocolate glossy shine. The purpose of stirring is twofold: first, it helps ensure even heating and cooling of the chocolate mass, preventing hot spots or areas that cool too quickly. Second, and perhaps more importantly during the cooling and crystallization phase, stirring helps distribute the stable Form V cocoa butter crystals throughout the entire batch.
When cooling chocolate (either by adding seed or working it on marble), Form V crystals begin to form. Stirring ensures that these desirable crystals are spread evenly throughout the melted chocolate, providing templates for the remaining cocoa butter to crystallize upon as it cools further. Without adequate stirring, crystals might only form in localized areas, leading to an inconsistent temper, uneven setting, and ultimately, a streaky or dull finish instead of a uniform tempered chocolate glossy shine.
For example, during the seeding method, vigorous and continuous stirring after adding the seed chocolate is crucial to incorporate those stable crystals and cool the mixture uniformly. Similarly, in the tabliering method, the spreading and scraping motion on the marble serves the same purpose of encouraging and distributing crystal formation.
Identifying Properly Tempered Chocolate: Visual Cues and Tests
Knowing when your chocolate is perfectly tempered is key before you start using it for dipping, molding, or coating. While temperature is critical, the ultimate confirmation comes from observing the chocolate's physical characteristics and performing simple tests. Properly tempered chocolate at its working temperature will look smooth and fluid, not thick or sludgy (unless it's a high-viscosity chocolate).
When you lift a spoon or spatula out, the chocolate should coat it evenly and drip off smoothly. It will also have a distinct, subtle sheen even in its liquid state, hinting at the tempered chocolate glossy shine it will achieve when set.
Beyond visual cues in the bowl, two primary tests confirm if your chocolate has achieved the correct temper: the snap test and the setting test. These tests evaluate the properties that arise from the stable Form V crystal structure – rapid setting, hardness, contraction, and gloss. Relying solely on temperature is insufficient; a thermometer tells you the potential for temper, but the tests tell you if the temper was actually achieved. Successfully passing these tests is the final verification that you're ready to create confections with that desirable, hard, and tempered chocolate glossy shine.
The Snap Test: Confirming Correct Tempering
The snap test is a simple yet effective way to check if your chocolate has set with the correct crystalline structure, which is essential for a good tempered chocolate glossy shine. Take a small amount of the supposedly tempered chocolate and spread it thinly on a piece of parchment paper or the back of a metal spoon. Allow this small sample to set at cool room temperature (around 20-22°C or 68-72°F). Ideally, it should set within 3-5 minutes, becoming firm and hard.
Once set, carefully break the chocolate sample. Properly tempered chocolate will break cleanly with a distinct, sharp snap. It should not bend or feel soft. If it bends easily, feels soft, or breaks with a dull, muffled sound, it indicates that the temper was not successful, and unstable crystals are present. The chocolate will likely be dull and prone to blooming. A successful snap test confirms the presence of a majority of Form V crystals, which are responsible for the chocolate's hardness and brittle texture, and are a prerequisite for achieving a stable tempered chocolate glossy shine.
The Setting Test: Evaluating the Gloss and Hardness of Tempered Chocolate
The setting test is another crucial test to confirm successful tempering and predict the final appearance and hardness of your chocolate. Similar to the snap test, take a small amount of the tempered chocolate and spread it thinly on parchment paper or the back of a metal spoon. Let it set at cool room temperature. A properly tempered chocolate sample should begin to set within 3-5 minutes and be fully set and hard within 10-15 minutes.
Once set, observe the surface of the chocolate. Properly tempered chocolate will set with a beautiful, smooth, and tempered chocolate glossy shine. It should look polished and free of streaks, graying, or dull patches.
It will also be hard and firm to the touch. If the chocolate sets slowly (taking much longer than 10-15 minutes), appears dull, streaky, or develops a gray film as it sets, the temper was not successful. The setting test directly evaluates the chocolate's ability to solidify quickly with the desired appearance, making it a reliable indicator of whether you've achieved the correct temper for a lasting tempered chocolate glossy shine.
Troubleshooting Common Chocolate Tempering Problems
Chocolate Seizing: Causes and Solutions
Chocolate seizing is one of the most frustrating problems encountered when working with chocolate, turning a smooth, liquid mass into a thick, grainy, unworkable paste. Seizing occurs almost instantly and is most commonly caused by the introduction of even a tiny amount of water. Chocolate is lipophilic (fat-loving) and hydrophilic (water-repelling). When water is added, the sugar particles in the chocolate (which are hydrophilic) attract the water and clump together, causing the mixture to seize. Common culprits include steam from a double boiler dripping into the chocolate, condensation from a lid, or adding water-based flavorings directly to melted chocolate.
Overheating can also cause chocolate to seize, although this is less common than water contamination. Heating chocolate too rapidly or to excessively high temperatures can cause the cocoa solids to burn or the fat and solid components to separate, resulting in a thick, grainy texture similar to seizing. Unfortunately, once chocolate has seized, its temper is lost, and you cannot restore it to a liquid state suitable for achieving a tempered chocolate glossy shine.
While you can sometimes "rescue" seized chocolate for other uses (like ganache or brownies) by stirring in a hot liquid (like cream, milk, or melted butter) a tablespoon at a time until it becomes a thick sauce, it will never return to its original smooth, pourable consistency required for dipping or molding. Prevention is key: ensure all equipment is bone dry and avoid direct contact with steam or water.
Chocolate Blooming: Understanding and Preventing Fat and Sugar Bloom
Chocolate bloom refers to the unappealing white or gray film that can appear on the surface of chocolate. There are two types: fat bloom and sugar bloom. Fat bloom is far more common and results from improper tempering or storage conditions that cause the unstable cocoa butter crystals (Forms I-IV) to melt and recrystallize on the surface in larger, visible clumps.
This happens when chocolate is exposed to temperature fluctuations, such as moving it from a cool room to a warm one. Untempered chocolate is highly susceptible to fat bloom because it lacks the stable Form V structure to begin with. Fat bloom looks dull, streaky, or powdery and destroys the tempered chocolate glossy shine.
Sugar bloom occurs when chocolate is exposed to moisture, such as high humidity or condensation. The moisture dissolves the sugar crystals on the surface. When the moisture evaporates, the sugar recrystallizes into larger, opaque crystals on the surface, creating a rough, sandy, white texture. This is common when taking cold chocolate directly into a warm, humid environment.
While blooming affects the appearance and texture, bloomed chocolate is still safe to eat and can often be melted down and used in baked goods where appearance isn't critical. However, you cannot melt down bloomed chocolate and expect it to temper correctly without starting the full tempering process anew, ensuring proper temperatures are reached to melt all existing crystals (including the bloomed ones) before re-tempering to achieve a tempered chocolate glossy shine. Proper tempering and stable storage conditions (cool, dry, consistent temperature) are the best prevention methods.
Over-Tempered Chocolate: Recognizing and Rectifying the Issue
Over-tempered chocolate occurs when too many Form V crystals (or even less desirable Form VI crystals) form during the cooling process, making the chocolate excessively thick and difficult to work with at its target working temperature. This can happen if the chocolate is cooled too much during the tempering process (e.g., cooling dark chocolate below 27°C in the seeding or tabliering method) or if it's stirred too vigorously or for too long at the lower crystallization temperature.
While technically "in temper," over-tempered chocolate will be sluggish, set too quickly, and may not flow smoothly enough to create thin, even coatings or detailed molded shapes, potentially hindering your ability to achieve a perfect tempered chocolate glossy shine.
Recognizing over-tempered chocolate is usually obvious by its viscosity – it will be much thicker than properly tempered chocolate at the same temperature. If your chocolate becomes too thick while you are working with it, it may have over-crystallized. The good news is that over-tempered chocolate can often be salvaged.
Gently reheat the chocolate slightly, stirring constantly, until it reaches the upper end of its working temperature range (e.g., 32°C for dark chocolate). This gentle warming will melt some of the excess crystals, returning the chocolate to a more fluid consistency while still maintaining enough Form V crystals to stay in temper. However, be extremely cautious not to exceed the maximum working temperature, or you will melt all the stable crystals and lose the temper entirely, requiring you to start the tempering process from scratch to regain that desired tempered chocolate glossy shine.
Using Tempered Chocolate in Your Baking Creations: Ideas and Applications
Creating Chocolate Decorations with Tempered Chocolate
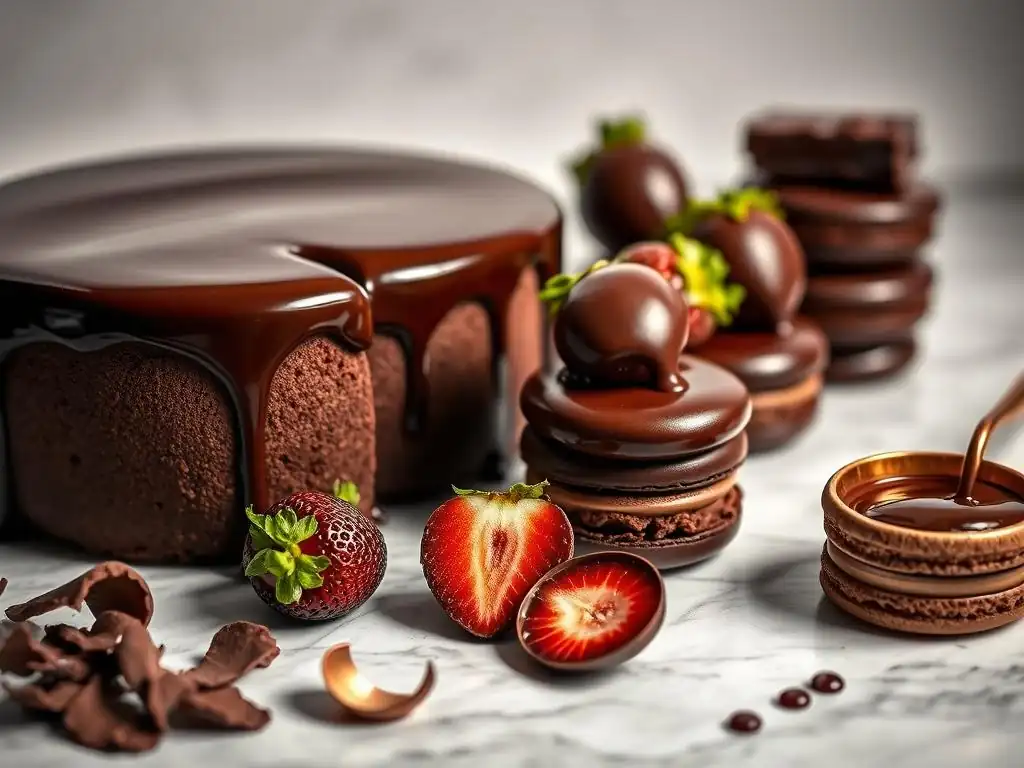
Tempered chocolate is indispensable for creating professional-looking chocolate decorations that are stable, shiny, and crisp. Its ability to set firmly and contract slightly upon cooling makes it ideal for working with molds or creating freeform shapes.
For instance, you can pipe intricate designs onto parchment paper, create chocolate curls by scraping a block of tempered chocolate, or make chocolate shards by spreading tempered chocolate thinly and breaking it once set. The perfect tempered chocolate glossy shine achieved through proper tempering ensures these decorations are visually stunning and durable enough to handle and place on cakes, pastries, or plated desserts without melting or smudging easily.
Using tempered chocolate in molds is particularly rewarding. Whether using polycarbonate molds for intricate shapes or silicone molds for flexible designs, properly tempered chocolate will fill the mold smoothly, release easily once set, and retain the crisp details of the mold with a brilliant tempered chocolate glossy shine.
A batch of 30 small chocolate squares molded from properly tempered chocolate will set in about 10-15 minutes at room temperature (or faster in the fridge for a few minutes), whereas untempered chocolate might take 30-60 minutes or longer and stick to the mold, resulting in a dull, misshapen product. The stability and clean release afforded by tempered chocolate make complex decorations achievable even for the home baker.
Making Chocolate Candies and Confections with a Perfect Glossy Finish
Crafting homemade chocolate candies and confections, such as truffles, bonbons, or filled chocolates, reaches a new level of sophistication when using tempered chocolate. The outer shell of a bonbon, the coating on a truffle, or the body of a molded candy requires tempered chocolate to achieve that professional snap, a smooth melt-in-your-mouth texture, and the all-important tempered chocolate glossy shine. An untempered coating will be soft, dull, and prone to fingerprints, detracting significantly from the quality of your confections.
Consider a batch of chocolate-covered caramels. Dipping the caramels in properly tempered chocolate results in a thin, even coating that sets quickly, allowing for efficient production. Once set, the chocolate shell will be firm enough to handle, possess a satisfying snap when bitten into, and display a beautiful tempered chocolate glossy shine.
In contrast, using untempered chocolate would lead to a soft, thick coating that takes ages to set, sticks to packaging, melts easily in your hand, and lacks any sheen. The stability of tempered chocolate also helps extend the shelf life of dipped or molded candies, preventing the outer layer from blooming prematurely and preserving the overall quality and appearance.
Coating Desserts and Baked Goods with Tempered Chocolate for a Professional Look
Applying a smooth, even coating of chocolate can transform a simple dessert or baked good into a professional-looking masterpiece. From petit fours and éclairs to cake pops and cookies, coating with tempered chocolate provides a clean, hard finish and a beautiful tempered chocolate glossy shine. The fluidity of properly tempered chocolate at its working temperature allows it to coat surfaces thinly and evenly, preventing a thick, clumsy layer. Its quick setting time means you can dip items efficiently without long waiting periods between coats or before decorating further.
For example, dipping cake pops in tempered chocolate allows for a smooth, uniform shell that hardens quickly, making them easy to handle and package. A study found that cake pops dipped in tempered chocolate set in under 5 minutes, compared to over 20 minutes for those dipped in untempered melted chocolate, which often resulted in drips and uneven coatings.
The tempered chocolate glossy shine adds an immediate visual appeal that signifies quality. Similarly, coating a cake or pastry with a layer of tempered chocolate creates a firm ganache-like exterior with a brilliant sheen, providing a sophisticated finish and a pleasant texture contrast to the soft interior.
Storing Tempered Chocolate: Maintaining its Quality and Gloss
Proper Storage Techniques to Prevent Blooming and Melting
Proper storage is just as important as proper tempering when it comes to maintaining the quality, stability, and tempered chocolate glossy shine of your chocolate creations. Once chocolate has been tempered and set, it should be stored in conditions that prevent the cocoa butter crystals from melting or undergoing further transformation into less stable forms. The ideal storage environment for tempered chocolate is cool, dry, and has a consistent temperature.
Specifically, chocolate should be stored at temperatures between 15°C and 20°C (59°F and 68°F). Temperatures much higher than this can cause the stable Form V crystals to begin melting, leading to fat bloom. Temperatures that fluctuate significantly can also cause bloom as the chocolate repeatedly warms and cools.
Humidity is another enemy; storing chocolate in humid conditions (above 50-60% relative humidity) can lead to sugar bloom. Therefore, store tempered chocolate in an airtight container to protect it from moisture and odors (as chocolate readily absorbs smells) and keep it in a cool pantry or a dedicated chocolate storage area, away from direct sunlight or heat sources. Avoid refrigerating chocolate unless absolutely necessary, as the cold temperature can cause condensation when the chocolate is removed, leading to sugar bloom and potentially dulling that beautiful tempered chocolate glossy shine.
Re-Tempering Chocolate: When and How to Restore its Temper
Sometimes, you might have leftover tempered chocolate, or chocolate that was initially tempered but has since lost its temper due to improper storage or cooling below its working temperature for too long. Recognizing untempered chocolate is easy: it will lack the characteristic snap, set slowly, and appear dull or streaky, without a tempered chocolate glossy shine. The good news is that chocolate can be re-tempered multiple times as long as it hasn't been burned or contaminated with water.
To re-temper chocolate, you simply need to repeat the tempering process from the beginning. Melt the chocolate down completely again, ensuring it reaches the initial melting temperature to eliminate all existing crystal structures (e.g., 45-50°C for dark). Then, use your preferred tempering method – seeding, tabliering, or microwave – to guide the cocoa butter back into the stable Form V configuration.
For example, if using the seeding method, remelt the chocolate to 45-50°C, remove from heat, and stir in finely chopped untempered chocolate until it cools to 31-32°C. As long as the chocolate is high quality and hasn't been compromised, re-tempering will restore its ability to set correctly with a firm snap and a beautiful tempered chocolate glossy shine, making your leftovers usable for future projects.
Frequently Asked Questions
What is tempered chocolate and why is it important?
Tempered chocolate is chocolate that has been heated and cooled carefully to create stable cocoa butter crystals. This process gives the chocolate a smooth, glossy shine and a satisfying snap.
How do I achieve a glossy shine when tempering chocolate?
Achieving a glossy shine relies on precise temperature control during the tempering process. Using a thermometer and following a specific heating and cooling curve is crucial for success.
What are some common mistakes that prevent chocolate from achieving a glossy shine?
Common mistakes include overheating the chocolate, not cooling it properly, and introducing moisture or impurities during the tempering process.
What types of chocolate are best suited for achieving a tempered, glossy finish?
High-quality chocolate with a high cocoa butter content generally yields the best results. Dark chocolate, milk chocolate, and white chocolate can all be tempered, but require different temperature ranges.
Can I re-temper chocolate if it loses its glossy shine?
Yes, you can re-temper chocolate if it blooms (loses its shine). You'll need to melt it down and re-start the tempering process, ensuring you follow the correct temperature guidelines.
Final Reflection: The Enduring Allure of a Perfect Gloss
The pursuit of that flawless, mirror-like shine on tempered chocolate remains a testament to the enduring power of craftsmanship and precision. Achieving this glossy perfection isn't merely about aesthetics; it's a symbol of dedication to quality, a visual representation of the meticulous process involved in transforming simple cocoa butter into a culinary masterpiece. This glossy surface speaks volumes about the care taken in each step, from precise temperature control to the gentle handling of the delicate chocolate.
The impact of perfectly tempered chocolate extends far beyond the realm of professional pastry chefs. It represents a commitment to excellence that resonates across various culinary traditions and artistic expressions. The sheer beauty of a flawlessly tempered piece, whether it's a simple bonbon or an intricate sculpture, evokes a sense of wonder and appreciation for the artistry involved. The proof of the pudding is in the eating, but the proof of the chocolate is in the shine.
This unspoken truth underscores the importance of mastering this technique, transforming a simple ingredient into something truly extraordinary.
Now, consider your own culinary journey. Have you ever experienced the thrill of achieving that perfect gloss? Perhaps you've been frustrated by the challenges, but the reward of success is undeniable. I encourage you to embrace the process, to experiment, and to find joy in the pursuit of perfection. Don't be afraid to fail; each attempt brings you closer to understanding the nuances of tempered chocolate and unlocking its inherent beauty. The glossy shine you achieve will be a testament not only to your skill but also to your dedication and passion for the craft.
Unleash Your Inner Chocolatier!
Thanks for taking the time to explore the world of tempered chocolate with us! We hope you’ve gained valuable insights and feel more confident in your chocolate-making abilities. Ready to put your new knowledge into practice?
- Dive into your next chocolate project: Try tempering chocolate for your favorite recipe – a ganache, truffles, or even a simple chocolate bark. The difference in shine and snap is incredible!
- Share your creations: Show off your perfectly tempered treats on social media using #BakeWithEaseTempering. We'd love to see what you create!
- Explore advanced tempering techniques: Search online for videos demonstrating different tempering methods, like tabling, seeding, or using a tempering machine.
What stunning chocolate masterpiece will you create first?