
Adding Simple Fondant Details to Your Birthday Cake

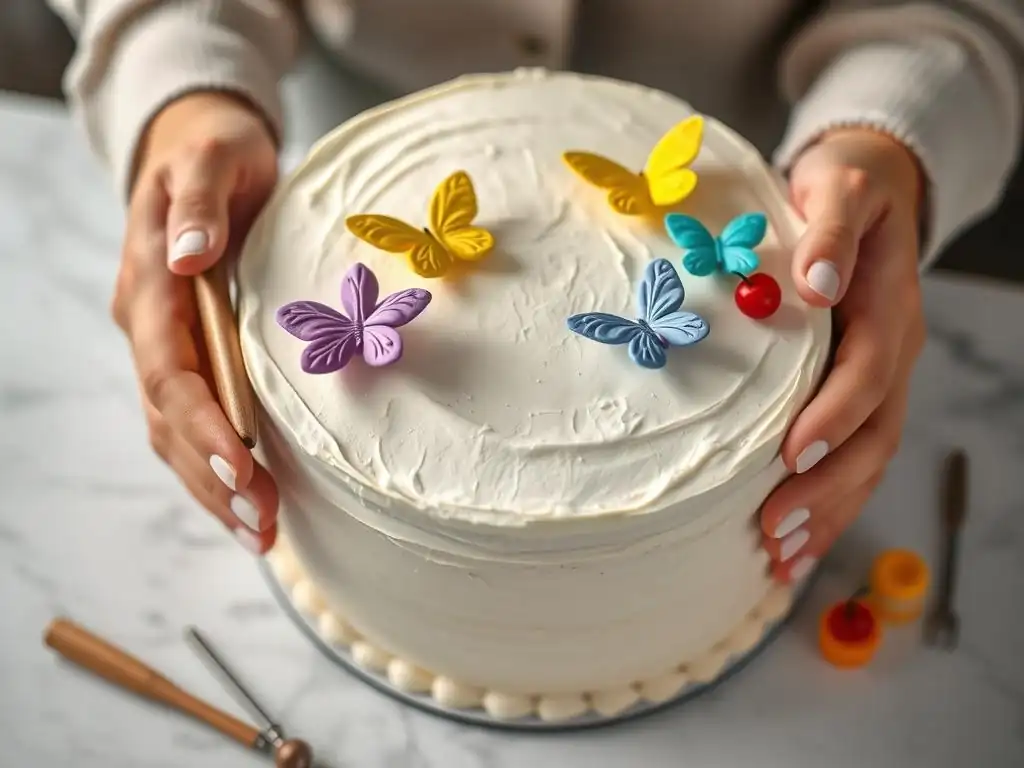
Welcome to BakeWithEase, your secret ingredient to baking success!
Ever dreamed of adding those professional-looking details to your cakes, but felt intimidated by fondant? Fear not! This week, we're demystifying the process with our guide to easy fondant cake details, showing you how to elevate your creations with minimal effort. Discover the simple techniques that will transform your next birthday cake (or any cake!) into a stunning masterpiece. Ready to impress? Let's get baking!
- Bake With Ease: Elevate Your Birthday Cake with Easy Fondant Details
- Gathering Your Supplies for Fondant Cake Decorating
- Step-by-Step Guide: Creating Easy Fondant Cake Details
- Easy Fondant Cake Detail Ideas for Beginners
- Tips and Tricks for Perfect Fondant Cake Decorations
- Beyond the Basics: Elevating Your Fondant Cake Skills
- Conclusion: Mastering Easy Fondant Cake Details with Bake With Ease
-
Frequently Asked Questions
- How can I achieve a smooth fondant finish on my cake?
- What's the easiest way to color fondant for birthday cake decorations?
- What are some simple fondant decorations suitable for a beginner baker?
- How do I prevent fondant decorations from cracking or drying out?
- What's the best way to attach fondant decorations to a buttercream-frosted cake?
- Final Reflection: Embracing Creativity with Easy Fondant Cake Details
- Unleash Your Inner Cake Artist!
Bake With Ease: Elevate Your Birthday Cake with Easy Fondant Details
Decorating a birthday cake is a joyous part of any celebration, and adding details with fondant can transform a simple cake into a showstopper. Many people believe working with fondant is complicated or requires advanced skills, but that's not true! With the right approach and a few basic tools, you can easily add stunning, professional-looking touches to your homemade birthday cakes. This guide is designed to walk you through the simple steps and techniques for creating easy fondant cake details that will impress your guests and make your cake truly unique.
From vibrant colors to playful shapes and elegant borders, fondant offers incredible versatility for cake decoration. We'll cover everything you need to get started, from gathering your supplies to simple step-by-step instructions for popular decorations like bows and cutouts. You'll discover that adding easy fondant cake details is not only achievable but also a fun and rewarding process that allows your creativity to shine. Get ready to turn your birthday cake visions into delicious reality!
Why Choose Fondant for Birthday Cake Decorating?
Fondant is a fantastic medium for decorating birthday cakes because of its smooth finish and ability to be molded and shaped into intricate designs. Unlike buttercream, which can be sensitive to temperature and difficult to sculpt precisely, fondant holds its shape beautifully once set. This makes it ideal for creating sharp edges, flat surfaces, and detailed figures or embellishments that stand out on your cake. It provides a clean, polished look that is often associated with professional bakery cakes.
Furthermore, fondant can be easily colored using gel food coloring, allowing for vibrant hues that are difficult to achieve with other icings. It's also relatively forgiving for beginners; mistakes can often be smoothed out or re-rolled. This durability and flexibility make it a go-to choice for adding specific design elements like letters, numbers, or themed decorations that need to maintain a precise form throughout the party. Learning to apply easy fondant cake details opens up a world of creative possibilities for personalizing your celebrations.
The Beauty of Easy Fondant Cake Details: A Beginner's Guide
Creating easy fondant cake details is all about breaking down designs into simple shapes and techniques. You don't need to cover the entire cake in fondant to make a big impact. Even small additions like dots, stripes, simple flowers, or cutouts can add significant visual interest and personality. The beauty lies in their simplicity and how they complement the cake's overall design, often paired with buttercream or ganache.
For beginners, focusing on techniques like using cookie cutters for shapes, rolling small balls or logs, or cutting simple ribbons is key. These methods require minimal skill but yield impressive results. For example, pressing a small circle cutter into rolled fondant creates perfect dots, which can be arranged in countless patterns. Rolling thin ropes of fondant and twisting them together forms a simple yet elegant border. These easy fondant cake details build confidence and provide a foundation for more complex designs later on.
Gathering Your Supplies for Fondant Cake Decorating
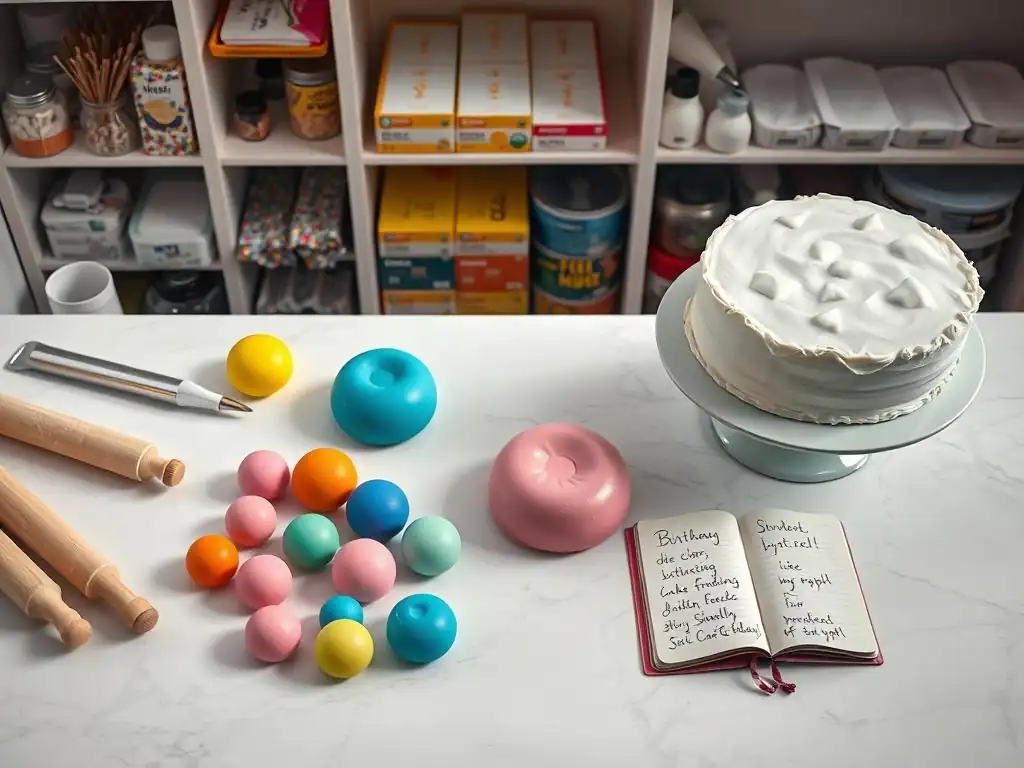
Before you dive into shaping and applying fondant, having the right tools and materials ready is crucial. Working with a clean, organized space will make the process much smoother and more enjoyable. Think of this stage as preparing your artist's palette and brushes; the right equipment makes the job significantly easier and helps you achieve those clean, professional-looking easy fondant cake details you're aiming for.
Gathering everything beforehand prevents interruptions mid-task, especially since fondant can dry out if left exposed for too long. You'll need your fondant, coloring if desired, a clean surface, and specific tools designed for working with this pliable medium. Don's skip this preparation step – it's fundamental to successfully adding easy fondant cake details to your birthday masterpiece.
Essential Fondant Tools for Cake Decoration: A Checklist
Having a few basic tools makes working with fondant much more efficient. You don't need a professional kit to get started with easy fondant cake details, but these items are highly recommended:
- Non-stick mat or surface: A silicone mat or a surface dusted lightly with cornstarch or powdered sugar prevents fondant from sticking.
- Rolling pin: A non-stick rolling pin is best. Ensure it's smooth and clean.
- Sharp knife or craft blade: For precise cutting of shapes or straight lines.
- Pizza cutter or rotary cutter: Excellent for cutting straight strips for borders or ribbons.
- Cookie cutters: Various shapes and sizes are invaluable for quick and easy cutouts.
- Small offset spatula: Useful for lifting and placing delicate fondant pieces.
- Fondant smoother: A flat, smooth tool to press fondant onto the cake or smooth surfaces.
- Cornstarch or powdered sugar: For dusting your surface and tools to prevent sticking.
- Edible adhesive: Water, clear vanilla extract, or edible glue to attach fondant pieces.
- Small brush: For applying adhesive.
Having these tools readily available streamlines the process of creating easy fondant cake details. For example, using a pizza cutter ensures your borders are uniformly wide, while cookie cutters guarantee perfectly shaped stars or hearts every time. Investing in these basics will make your fondant decorating journey much less frustrating and more rewarding.
Choosing the Right Fondant for Easy Cake Details
There are several types of fondant available, and choosing the right one can impact your experience, especially when you're learning to make easy fondant cake details. Pre-made fondant is highly recommended for beginners. It's ready to use straight from the package, saving you the time and effort of making it from scratch, which can be tricky to get the consistency just right. Look for brands known for their pliability and good taste.
Rolled fondant is the most common type used for covering cakes and making decorations. It's smooth and elastic, making it easy to roll thin and shape. Some fondants are specifically formulated for sculpting, which might be slightly firmer, but a standard rolled fondant is perfectly suitable for most easy fondant cake details like cutouts, bows, and borders. Consider taste as well; some brands offer better flavor than others. Reading reviews or trying a small package first can help you find a fondant you enjoy working with and eating!
Preparing Your Cake for Fondant Accents
Before applying any easy fondant cake details, your cake needs to be properly prepared. While fondant can be applied directly over a crumb-coated cake, for details and accents, it's often applied to a cake that has already been frosted, typically with buttercream or ganache. The frosting acts as an adhesive, helping the fondant elements stick securely to the cake surface. Ensure your frosting is smooth and chilled firm for the best results.
If you are placing small details like dots or stars directly onto a frosted cake, the chilled frosting provides a stable base. For larger elements like ribbons or cutouts, you might need a slightly damp surface (using a brush with a tiny bit of water or edible glue) on the frosting to ensure strong adhesion. Make sure the frosted cake has had time to set in the refrigerator, ideally for at least 30-60 minutes, before you start adding your easy fondant cake details. This prevents dents or smears in your base frosting as you work.
Step-by-Step Guide: Creating Easy Fondant Cake Details
Now for the fun part – actually making and applying your easy fondant cake details! This section walks you through the fundamental steps involved in coloring, shaping, and attaching simple fondant elements to your birthday cake. These techniques are foundational and can be adapted to create a wide variety of decorations, proving that impressive results are within reach for any home baker.
We'll start with coloring, a crucial step for vibrant designs, then move on to shaping some popular easy fondant cake details like simple bows and cutouts. Finally, we'll cover how to apply these decorations securely to your cake. Follow these steps carefully, and you'll be well on your way to adding beautiful, easy fondant cake details that enhance your cake's festive appeal.
Step 1: Coloring Your Fondant for Birthday Cake Designs
Coloring fondant allows you to match your decorations to your party theme or create vibrant, eye-catching details. Gel food coloring is the best choice for fondant as it's concentrated and doesn't add excess liquid, which can alter the fondant's consistency. Start with a small amount of color – you can always add more, but you can't take it away! Knead the color into a piece of white fondant until the color is uniform.
To color fondant, take a portion you plan to use and place a small drop or a tiny amount on it using a toothpick. Fold the fondant over the color and begin kneading it like dough. Wear gloves to protect your hands from staining. Continue kneading and adding tiny amounts of color until you achieve your desired shade.
For deeper colors, this might take a few minutes of kneading. A standard ratio might be starting with 1 small drop of gel color per 50-100 grams of fondant, adjusting as needed. Ensure the color is fully incorporated with no streaks before shaping your easy fondant cake details.
Step 2: Shaping Simple Fondant Elements: Simple Fondant Bows
Creating a simple fondant bow is easier than it looks and adds a classic, elegant touch to a birthday cake. You'll need rolled fondant (any color), a knife or pizza cutter, and a small amount of edible adhesive. Start by rolling your fondant evenly to about 1/8 inch (approx. 3mm) thickness. This thickness provides enough structure for the bow loops to hold their shape without being too heavy.
Cut strips of fondant about 1 inch (approx. 2.5cm) wide. The length of the strips will determine the size of your bow loops – for a medium bow, try strips about 4-5 inches (approx. 10-13cm) long. Take one strip, twist it in the center, and bring the ends together to form a loop. Secure the ends together with a tiny dab of edible adhesive.
Repeat for the second loop. For the center knot, cut a small, shorter strip (about 2 inches long). Wrap this strip around the twisted center of the two loops, securing with adhesive on the back. Let the bow dry slightly on its side or supported by crumpled paper towels to help it hold its shape before placing it on the cake. These easy fondant cake details add a lovely dimension.
Step 3: Applying Fondant Cutouts to Your Cake: Techniques for Adhesion
Applying fondant cutouts, like stars, hearts, or numbers made with cookie cutters, is a straightforward way to add easy fondant cake details. Once you've rolled your colored fondant to about 1/8 inch thickness, press your chosen cookie cutter firmly into the fondant. Wiggle the cutter slightly before lifting to ensure a clean cut. Carefully lift the cutout using a small offset spatula or your fingers, being careful not to stretch or distort the shape.
To attach the cutout to your frosted cake, you need a little edible adhesive. The simplest adhesive is water; use a small brush to lightly dampen the back of the fondant cutout. Don't use too much water, or it will make the fondant slimy. Alternatively, you can use clear vanilla extract or a purpose-made edible glue.
Gently press the cutout onto the desired location on your chilled, frosted cake. Hold it in place for a few seconds to ensure it adheres. For larger or heavier cutouts, a slightly stronger adhesive or supporting the piece until it sets might be necessary to ensure your easy fondant cake details stay put.
Step 4: Creating Fondant Borders and Ribbons: A Simple Technique
Fondant borders and ribbons are classic easy fondant cake details that add a finished look to the base or top edge of your cake. A simple ribbon border is created by cutting long, straight strips of fondant. Roll your fondant to an even thickness, typically around 1/8 inch (approx. 3mm). Use a pizza cutter or a ruler and sharp knife to cut strips of your desired width and length. For a standard cake border, strips about 1.5 to 2 inches wide are common.
Measure the circumference of your cake to determine the length needed. You might need multiple strips joined together. To join strips, lightly dampen the ends with edible adhesive and press them together firmly, smoothing the seam. To apply the border, start at an inconspicuous spot on the back of the cake.
Lightly dampen the area of the cake where the ribbon will go (if using buttercream, the slight dampness helps adhesion). Carefully wrap the fondant strip around the cake, pressing it gently onto the surface as you go. Overlap the ends slightly at the back and trim neatly with a sharp knife for a seamless look. This technique for easy fondant cake details provides a clean, professional edge.
Easy Fondant Cake Detail Ideas for Beginners
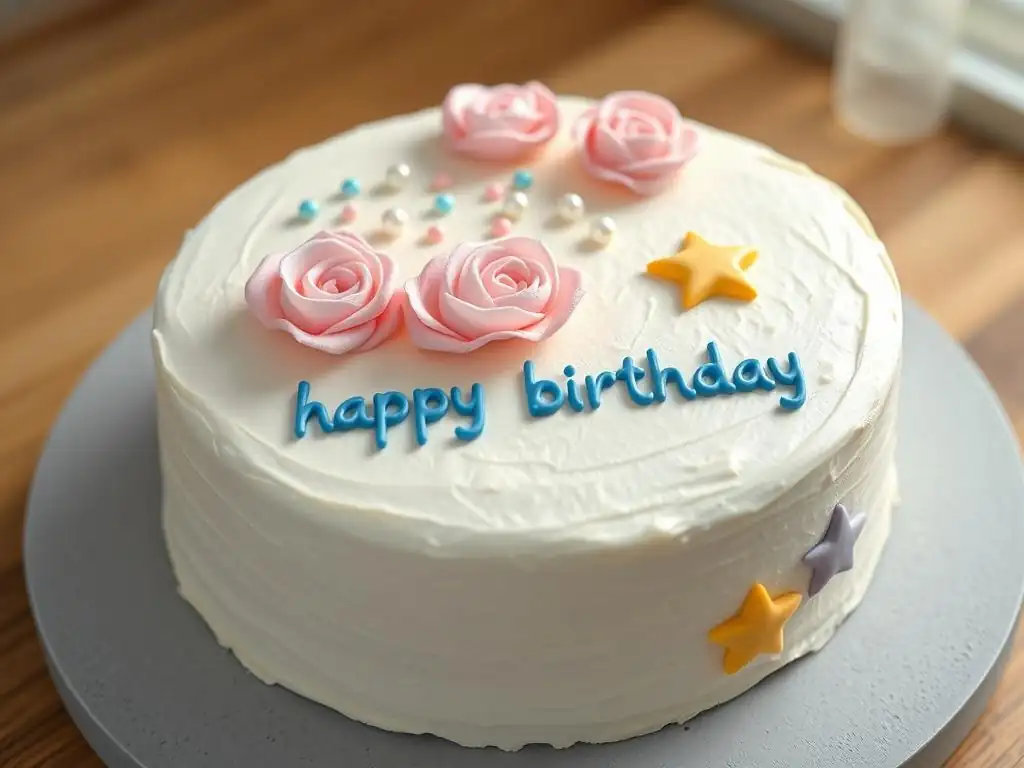
Once you've mastered the basic techniques of cutting, shaping, and applying, a world of easy fondant cake details opens up. You can combine simple shapes, colors, and techniques to create a variety of decorations suitable for any birthday theme. Don't feel limited to just one type of decoration; mixing and matching different easy fondant cake details adds visual interest and personality to your cake.
Here are a few specific ideas and quick tutorials for popular easy fondant cake details that are perfect for beginners. Each one uses fundamental skills and minimal specialized tools, proving that impressive results are within reach. Get inspired and start experimenting with these simple yet effective decorating concepts to enhance your next birthday cake.
Simple Fondant Flowers for Birthday Cakes: A Tutorial
Creating simple fondant flowers is a delightful way to add easy fondant cake details. A basic daisy or five-petal flower is a great starting point. Roll out fondant (white or a desired color) thinly, about 1/16 inch (approx. 1.5mm). Use a small flower-shaped cookie cutter or even just a circle cutter. If using a circle cutter, cut out a circle, then use a smaller circle cutter or the end of a piping tip to cut out five notches around the edge, leaving a small circle in the center.
For a slightly more shaped look, you can gently soften the edges of the petals using a ball tool or even the tip of your finger, pressing lightly on a foam pad or soft surface. For the center, roll a tiny ball of contrasting colored fondant or use yellow sprinkles. Attach the center to the flower with a tiny dot of edible adhesive.
Let the flowers dry for a few hours or overnight on a curved surface (like crumpled foil or an egg carton) to give them a natural shape before placing them on the cake. These easy fondant cake details add a charming, whimsical touch.
Creating Fondant Lettering for Personalized Cakes
Personalizing a birthday cake with a name or message using fondant lettering is a popular and achievable easy fondant cake detail. You can achieve this in a few ways. The simplest method for beginners is using letter cutters. Roll fondant to an even thickness (around 1/8 inch). Press the letter cutters firmly into the fondant. If the fondant sticks, try dusting the cutter or the fondant surface lightly with cornstarch. Carefully pop the letters out.
Alternatively, for a more freehand look or if you don't have cutters, you can roll thin ropes of fondant (about 1/8 inch diameter) and shape them into letters by hand. Use a sharp knife to trim ends and join pieces. Place the letters on a piece of parchment paper laid out in the desired arrangement to ensure spacing and alignment before transferring them to the cake.
Attach the letters to the cake using a small amount of edible adhesive on the back of each letter. Using a ruler or straight edge can help ensure your easy fondant cake details, like lettering, are applied in a straight line.
Easy Fondant Shapes: Circles, Squares, and Triangles!
Basic geometric shapes like circles, squares, and triangles are incredibly versatile easy fondant cake details. They can be used to create modern patterns, polka dots, checkerboards, or even simple abstract designs. All you need are basic cookie cutters or a sharp knife and a ruler. Roll out fondant to a consistent thickness, anywhere from 1/16 inch to 1/4 inch depending on the desired look.
Use circle cutters of various sizes for polka dots or bubble patterns. Cut strips and then squares or rectangles for a tiled effect. Cut strips and then slice diagonally to create triangles. The key is consistency in size and shape for a clean look. Once cut, these shapes are easy to apply using edible adhesive. Arrange them in repeating patterns, randomly scattered, or aligned neatly. These simple easy fondant cake details prove that even basic forms can create striking visual effects with minimal effort.
Tips and Tricks for Perfect Fondant Cake Decorations
Working with fondant has its quirks, but a few simple tips can help you avoid common frustrations and ensure your easy fondant cake details turn out beautifully. Understanding how fondant behaves and how to handle it properly is key to achieving smooth, crack-free decorations that hold their shape. These pieces of advice are gathered from experienced bakers and will make your fondant journey much more successful.
From preventing dryness to proper storage and troubleshooting, these tips cover essential aspects of working with fondant for adding easy fondant cake details. Keep them in mind as you work, and you'll find that handling fondant becomes much more manageable and enjoyable, leading to better results on your birthday cakes.
Preventing Fondant Cracking and Drying: Essential Tips
Fondant can dry out surprisingly quickly when exposed to air, leading to cracks and a less pliable texture that makes shaping difficult. This is a common issue when creating easy fondant cake details. The most important tip is to keep any fondant you are not actively working with well-wrapped. Use plastic wrap, pressing it directly onto the surface of the fondant to eliminate air pockets, then store it in an airtight container or zip-top bag.
When working with fondant, work relatively quickly, especially in dry or warm environments. If your fondant starts to feel stiff, you can try kneading it briefly to warm it up and make it more pliable.
If it seems truly dry, you can try adding a tiny amount of vegetable shortening or a drop of glycerin (specifically for fondant) and kneading it in, but be cautious not to add too much. If the fondant is very dry and cracking significantly, it might be best to discard that piece and get fresh fondant from your properly stored supply to ensure your easy fondant cake details are smooth.
Storing Leftover Fondant for Future Cake Projects
Properly storing leftover fondant ensures you can use it for future easy fondant cake details or other baking projects, saving money and reducing waste. The key is airtight storage to protect it from air and moisture. Once you've finished your decorating session, gather any unused fondant. Knead it briefly to make sure it's smooth and pliable.
Wrap the fondant tightly in plastic wrap. Make sure there are no air bubbles trapped against the surface of the fondant. Then, place the plastic-wrapped fondant into an airtight container or a heavy-duty zip-top bag, squeezing out as much air as possible before sealing. Store the container at room temperature in a cool, dry place, away from direct sunlight. Do not refrigerate or freeze standard rolled fondant, as this can negatively affect its texture. Stored correctly, fondant can last for several months, ready for your next batch of easy fondant cake details.
Troubleshooting Common Fondant Problems: A Quick Guide
Even with careful preparation, you might encounter a few common issues when working with fondant, particularly when adding easy fondant cake details. Don't worry – most problems have simple solutions.
- Fondant is sticking: If fondant is sticking to your work surface or tools, lightly dust the surface/tools with cornstarch or powdered sugar. Use sparingly, as too much can dry out the fondant.
- Fondant is too stiff/hard to knead: It might be cold or slightly dry. Warm it gently by kneading it with your hands. If very stiff, add a tiny amount of vegetable shortening and knead.
- Fondant is too soft/sticky: This can happen in warm, humid conditions. Knead in a little bit of powdered sugar or cornstarch, or chill the fondant briefly in the refrigerator (just for 5-10 minutes).
- Fondant is cracking while rolling: This usually means it's too dry. See the tips on preventing drying.
- Fondant details won't stick to the cake: Ensure you're using enough edible adhesive (water, extract, or glue) and applying it to a chilled, stable surface. Hold the piece in place for a few moments.
Addressing these issues quickly helps ensure your process for creating easy fondant cake details remains smooth and successful.
Beyond the Basics: Elevating Your Fondant Cake Skills
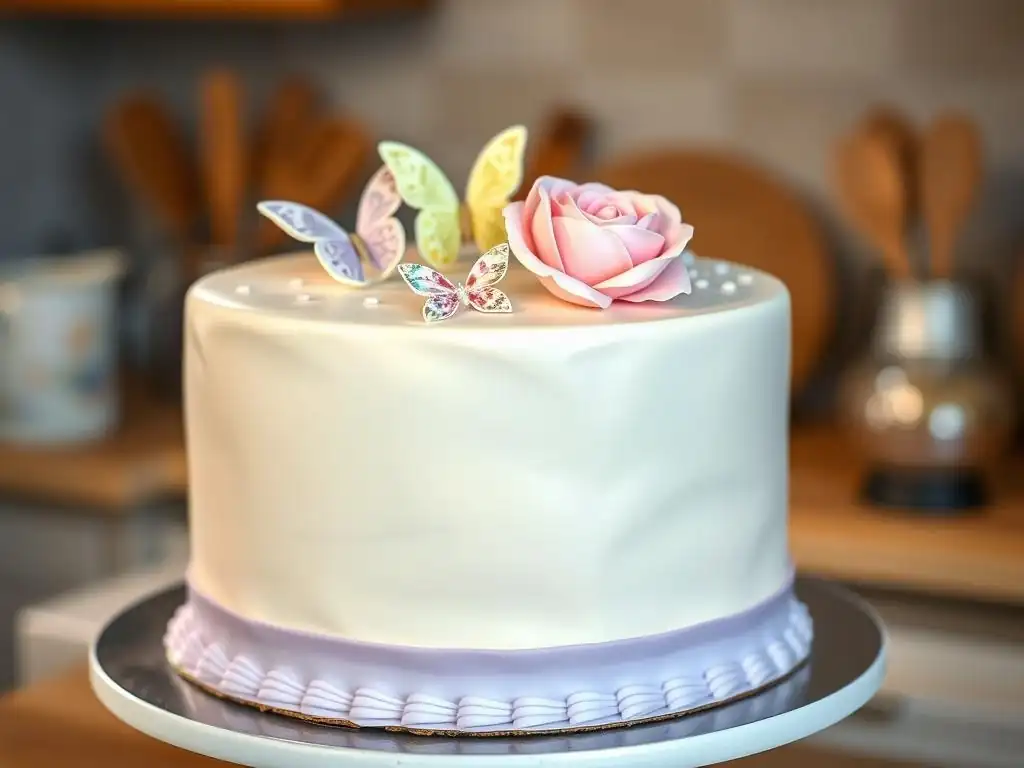
Once you feel comfortable creating easy fondant cake details using basic techniques, you might want to explore ways to add even more sophistication to your designs. These methods build upon the foundational skills you've learned and allow for more intricate and artistic expressions on your birthday cakes. You don't need to jump into complex sculpting immediately; these techniques offer a gradual step up.
Experimenting with different tools and mediums can open up new possibilities for texture, detail, and visual appeal. These advanced techniques for easy fondant cake details can take your cake decorating to the next level, allowing for truly customized and memorable creations.
Using Fondant Molds for Intricate Designs
Fondant molds are fantastic tools for quickly creating detailed and consistent shapes, adding intricate easy fondant cake details without needing sculpting skills. Molds come in countless designs, from pearls and chains to lace patterns, flowers, and figurines. To use a mold, lightly dust it with cornstarch (tap out the excess) or brush with a tiny amount of shortening.
Press a piece of fondant firmly into the mold, ensuring it fills all the cavities completely. Use an offset spatula or a straight edge to scrape off any excess fondant from the back, making it flush with the mold. Carefully flex the mold to release the fondant shape. For best results, especially with delicate molds, you can chill the filled mold in the freezer for a few minutes before attempting to release the fondant. This makes the fondant firm and less likely to distort. Using molds is an efficient way to add impressive-looking easy fondant cake details repeatedly.
Painting and Dusting Fondant for Added Detail
Adding color and dimension to your dry fondant details through painting or dusting is a wonderful way to enhance their realism and visual appeal. This technique is applied after the fondant details have been shaped and have dried slightly. For painting, you can use edible gel colors diluted with clear alcohol (like vodka or lemon extract) or edible paint specifically made for confectionery. Use fine brushes to apply color for details or wash over surfaces.
For dusting, use edible luster dusts or petal dusts applied with a dry brush. Luster dusts add shimmer, while petal dusts provide matte colors and are excellent for shading flowers or adding blush to figures. Apply dusts lightly, building up color gradually. You can also mix dusts with alcohol to create edible paint. These techniques allow you to add subtle shading, metallic accents, or vibrant pops of color to your easy fondant cake details, making them truly stand out.
Combining Fondant with Other Cake Decorating Techniques: Swiss Meringue Buttercream
Fondant details don't have to be the only decoration on your cake; they often look stunning when combined with other mediums like buttercream or ganache. Swiss Meringue Buttercream, known for its silky smooth texture and less sweet taste compared to American buttercream, provides an excellent base for applying easy fondant cake details. Its firm but not hard surface allows fondant elements to adhere well.
You can cover your cake smoothly with Swiss Meringue Buttercream and then add fondant cutouts, borders, or figures on top. The contrast in textures and finishes – the smooth matte of the fondant against the soft swirl or smooth surface of the buttercream – creates visual interest. For example, a cake frosted in light blue Swiss Meringue Buttercream could be decorated with white fondant clouds and a yellow fondant sun using simple cutters. Combining these techniques allows you to leverage the strengths of each medium, creating cakes that are both beautiful and delicious, featuring lovely easy fondant cake details.
Conclusion: Mastering Easy Fondant Cake Details with Bake With Ease
Adding easy fondant cake details to your birthday cakes is a rewarding way to personalize your celebrations and elevate your baking skills. As you've seen, it doesn't require years of practice or expensive equipment to achieve beautiful results. By starting with basic techniques like coloring, cutting shapes, and simple molding, you can create stunning decorations that look impressive and taste great.
Remember to work with fresh, pliable fondant, keep unused portions well-wrapped, and have your essential tools ready. Practice makes perfect, so don't be discouraged if your first attempts aren't flawless. Each cake you decorate will teach you more about handling the medium and refining your approach to creating easy fondant cake details. With a little patience and creativity, you'll soon be adding custom fondant touches to all your birthday cakes, making every celebration uniquely special. Keep baking with ease and exploring the sweet possibilities!
Frequently Asked Questions
How can I achieve a smooth fondant finish on my cake?
A smooth fondant finish requires a well-crumb-coated cake and a properly kneaded fondant. Use a fondant smoother to remove any air bubbles and achieve a professional-looking surface. Don't forget to dust your work surface with powdered sugar to prevent sticking.
What's the easiest way to color fondant for birthday cake decorations?
Gel food coloring is the best option for coloring fondant. Add small amounts at a time and knead thoroughly to distribute the color evenly. Avoid liquid food coloring, as it can make the fondant too sticky. Remember to wear gloves to avoid staining your hands!
What are some simple fondant decorations suitable for a beginner baker?
Simple fondant decorations include cut-out shapes, like stars or hearts, made with cookie cutters. You can also create fondant ribbons or bows. Another easy option is to use fondant molds to create intricate designs.
How do I prevent fondant decorations from cracking or drying out?
To prevent fondant from cracking, store it in an airtight container at room temperature when not in use. When attaching decorations to your cake, use a small amount of water or edible glue. Avoid placing fondant in the refrigerator as this can cause condensation and make it sticky.
What's the best way to attach fondant decorations to a buttercream-frosted cake?
For buttercream-frosted cakes, lightly dampen the back of the fondant decoration with water or edible glue. This will help it adhere to the frosting. Gently press the decoration onto the cake and hold it in place for a few seconds until it sticks firmly.
Final Reflection: Embracing Creativity with Easy Fondant Cake Details
In a world where personalization and creativity reign supreme, the art of adding easy fondant cake details has never been more relevant. As we celebrate milestones and special occasions, the desire to create something unique and memorable drives us to explore new techniques in cake decorating. The simplicity and versatility of fondant allow anyone, regardless of skill level, to transform a basic cake into a stunning centerpiece that reflects personal style and sentiment.
The influence of fondant in cake decorating extends beyond mere aesthetics; it fosters a sense of community and shared experience among bakers and enthusiasts alike. As we gather to celebrate, the cakes we create often become a symbol of love and effort, connecting us to our loved ones in profound ways. Baking is both an art and a science, a way to express love and creativity.
This sentiment resonates deeply in our culture, reminding us that the act of creating something beautiful can be just as rewarding as the final product itself.
As you embark on your own cake-decorating journey, I invite you to reflect on the joy that comes from crafting something special. Consider how easy fondant details can elevate your creations and inspire those around you. Whether you're celebrating a birthday, an anniversary, or just a simple gathering, let your imagination guide you and remember that every cake tells a story. So roll out that fondant, embrace your creativity, and make your next cake a celebration of both flavor and artistry!
Unleash Your Inner Cake Artist!
Thanks for taking the time to learn how to add those adorable fondant details! We hope you now feel confident and inspired to create truly stunning cakes. Ready to put your new skills to the test?
- Craft your masterpiece! Try adding the fondant details you learned about to your next cake – even a simple one will look amazing! Experiment with different colors and designs.
- Share your creations! Post a picture of your decorated cake on social media and tag us – we'd love to see your beautiful work!
- Challenge yourself: Find a new fondant technique online and try it out! The possibilities are endless.
What exciting fondant design will you tackle next?