
The Impact of Mixing Methods on Gluten Development

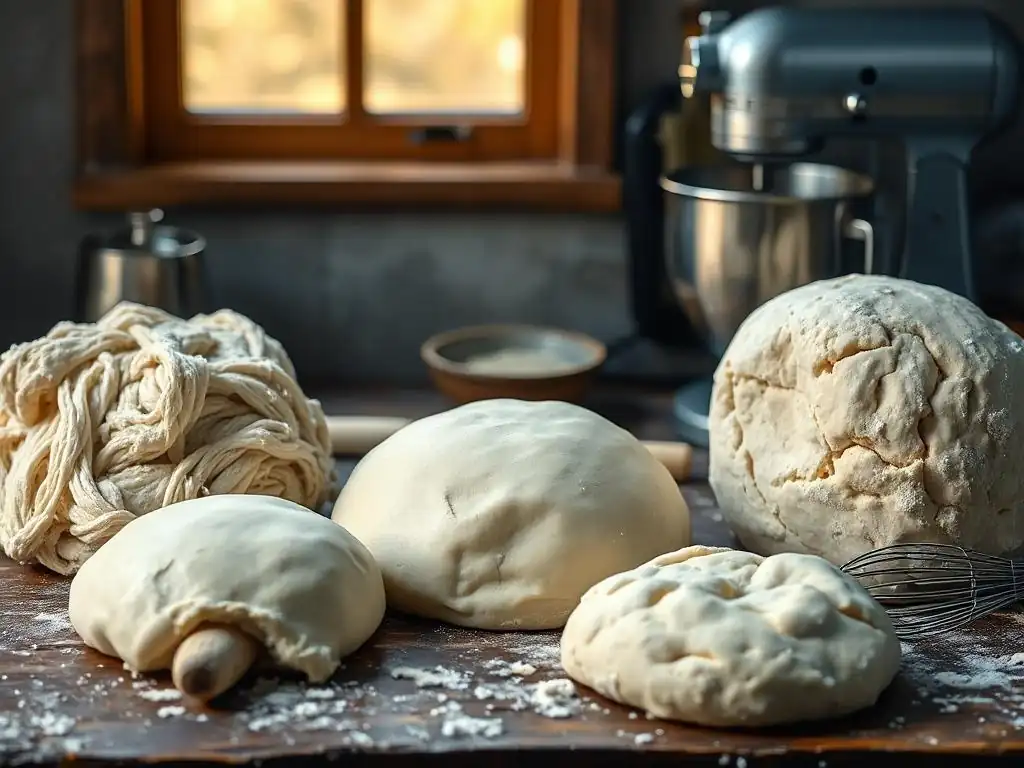
Welcome to BakeWithEase, your ultimate guide to unlocking baking brilliance! Ever wondered how different mixing techniques truly impact the structure and texture of your baked goods? Dive into our in-depth exploration of how mixing affects gluten development, a crucial element in creating everything from chewy breads to delicate pastries. Discover the secrets to mastering mixing methods and elevate your baking game today!
- Introduction to Gluten Development and Mixing Techniques in Baking
- Different Mixing Methods and Their Effects on Gluten
- Factors Influencing Gluten Development During Mixing
- Optimizing Gluten Development for Different Baked Goods
- Troubleshooting Gluten Development Issues
- Advanced Techniques for Gluten Manipulation
- Conclusion: Mastering Gluten Development Through Mixing for Baking Success
- Frequently Asked Questions
- Final Reflection: The Ever-Evolving Dance of Gluten and Technique
- Unleash Your Inner Baker: Master Gluten Development!
Introduction to Gluten Development and Mixing Techniques in Baking
Understanding Gluten: The Foundation of Baked Goods
Gluten is often talked about in baking, but what exactly is it? It's a complex network formed primarily by two proteins found in wheat flour: gliadin and glutenin. When you combine flour with water and add mechanical energy through mixing, these proteins link together, creating elastic and extensible strands. Think of it like building a microscopic scaffolding within your dough or batter.
This protein scaffolding is absolutely fundamental to the structure of many baked goods, particularly breads. The gluten network provides the dough with elasticity, allowing it to stretch and expand as yeast produces carbon dioxide gas during fermentation and baking. It also provides structure and chewiness, holding the final shape and preventing collapse. Without sufficient gluten development in many recipes, you'd end up with dense, flat, or crumbly results instead of light, airy loaves or tender cakes.
The Role of Mixing in Gluten Formation
Mixing is the catalyst that brings the gluten proteins to life. Simply adding water to flour starts the hydration process, but it's the physical action of mixing – whether by hand, stand mixer, or food processor – that aligns the gliadin and glutenin proteins and encourages them to bond into a strong, cohesive network. The energy from mixing essentially "works" the dough, developing the gluten strands.
Different levels of mixing intensity and duration are required depending on the desired outcome for your baked good. A vigorous, long knead is necessary to develop strong gluten for a chewy artisan bread, enabling it to trap gas and achieve a significant rise. In contrast, a gentle, minimal mix is preferred for delicate cakes or pastries where excessive gluten development would lead to toughness instead of tenderness. Mastering gluten development mixing techniques baking is key to controlling the final texture.
BakeWithEase: Mastering Gluten Development for Perfect Baking
At BakeWithEase, we believe understanding the science behind baking makes the process more enjoyable and successful. Gluten development is one of those crucial scientific principles that directly impacts your results. Learning how mixing methods influence this development empowers you to achieve the perfect texture every time, whether you're aiming for a light, airy loaf or a tender biscuit.
This article will guide you through the various mixing methods used in baking and explain how each one affects the gluten network. We'll explore factors like hydration and flour type, look at how to optimize gluten for different types of baked goods, troubleshoot common issues, and even touch on advanced techniques. By the end, you'll have a clearer understanding of gluten development mixing techniques baking and be better equipped to tackle any recipe with confidence.
Different Mixing Methods and Their Effects on Gluten
Hand Mixing: A Traditional Approach to Gluten Development
Hand mixing, or kneading by hand, is perhaps the most traditional and tactile way to develop gluten. It involves physically working the dough by stretching, folding, and pressing it against a surface. This manual action forces the gluten proteins to align and bond, gradually building strength and elasticity in the dough. It's a method that allows the baker to feel the dough evolve, sensing the gluten network developing as the dough becomes smoother, less sticky, and more pliable.
While labor-intensive, hand mixing offers a unique connection to the baking process and excellent control over gluten development. You can feel the dough's resistance and adjust your technique based on its texture, ensuring you don't overwork it. For smaller batches or recipes where a very specific level of delicate gluten development is desired, hand mixing can be ideal. It's a fundamental gluten development mixing techniques baking skill to learn.
Advantages of Hand Mixing for Gluten Control
One of the primary advantages of hand mixing is the direct feedback you receive from the dough. You can feel how sticky or dry it is, how much resistance it offers, and when it starts to become smooth and elastic. This allows for precise control over the mixing time and intensity, helping you avoid both undermixing and overmixing, especially when you're still learning to recognize the signs of proper gluten development. For instance, you can easily stop kneading the moment the dough passes the windowpane test, ensuring optimal gluten strength for that specific recipe.
Hand mixing is also incredibly versatile and requires no special equipment beyond your hands and a clean surface. It's perfect for small batches or when you want to practice feeling the dough's texture change. Many bakers find the rhythmic process of kneading by hand meditative and satisfying. It's a fundamental skill that translates well to understanding dough consistency regardless of the method used later.
Disadvantages of Hand Mixing: Time and Consistency
Despite its benefits, hand mixing can be significantly more time-consuming and physically demanding than using mechanical mixers. Developing strong gluten for a loaf of bread might take 10-15 minutes of vigorous kneading by hand, whereas a stand mixer could achieve the same result in 6-8 minutes. This can be a barrier for bakers with limited time or physical constraints.
Another potential disadvantage is consistency, particularly for novice bakers. Achieving the exact same level of gluten development batch after batch can be challenging by hand, as the intensity and duration of kneading might vary. While experienced bakers develop a strong intuition, beginners might find it harder to judge when the dough is perfectly developed compared to using a timer and specific speed settings on a stand mixer.
Stand Mixer Methods: Speed and Efficiency in Gluten Formation
Stand mixers revolutionized home baking by automating the mixing and kneading process, significantly reducing the time and effort required to develop gluten. Using a dough hook attachment, a stand mixer applies consistent mechanical action to the dough, efficiently aligning the protein strands. This method is particularly beneficial for recipes requiring significant gluten development, such as enriched bread doughs, brioche, or bagels, where hand kneading would be very demanding.
The speed settings on a stand mixer allow you to control the intensity of the mixing. Lower speeds typically initiate the process, bringing the ingredients together, while medium speeds are often used for the bulk of the kneading and gluten development. High speeds are rarely used for dough as they can overheat the dough and potentially overwork it very quickly. Learning how to use your stand mixer effectively is a key gluten development mixing techniques baking skill for modern bakers.
Using a Stand Mixer for Different Doughs: A Guide
The stand mixer is incredibly versatile, but the technique varies depending on the type of dough. For lean bread doughs (flour, water, yeast, salt), medium speed (typically speed 2 on most mixers) for 6-8 minutes is often sufficient to develop strong gluten, resulting in a smooth, elastic dough. For enriched doughs containing butter, eggs, or sugar (like challah or brioche), you might start incorporating ingredients on low speed, then increase to medium for kneading, often for 8-12 minutes, sometimes adding fat gradually after initial gluten development begins.
For softer doughs or batters where minimal gluten development is needed, like cake batter or quick bread dough, the paddle attachment is used on low speed, often just until ingredients are combined. Overmixing these can lead to tough results. Understanding the specific requirements of each recipe and using the appropriate attachment and speed is vital for optimizing gluten development with a stand mixer.
Overmixing and Undermixing: Avoiding Common Stand Mixer Mistakes
While efficient, stand mixers make it easier to either overmix or undermix dough if you're not paying attention. Undermixing with a stand mixer means the gluten network hasn't fully formed; the dough might still be shaggy, sticky, and lack elasticity. This will result in a dense crumb and poor rise in baked goods. You can usually fix this by continuing to mix for a few more minutes until the dough smooths out and becomes elastic.
Overmixing, however, is harder to correct and is a common pitfall, especially with high-hydration doughs or when mixing for too long at high speeds. Overworked dough becomes tight, loses elasticity, might tear easily, and feels sticky yet somehow resistant. The gluten strands break down instead of strengthening. Baked goods made from overmixed dough often have a tough, dense texture. Paying attention to visual cues and dough feel, or using tests like the windowpane test, is crucial to avoid overmixing. A dough thermometer can also help, as excessive mixing generates heat, which can degrade gluten.
Food Processor Mixing: A Quick and Powerful Gluten Developer
The food processor, typically using the metal blade attachment, offers a surprisingly fast method for developing gluten, especially for certain types of dough. Its powerful, rapid action can bring dough together and develop gluten in a fraction of the time compared to hand mixing or even a stand mixer. This method is particularly effective for doughs with a lower hydration level or those where speed is essential to keep ingredients cold, like some pastry doughs or certain quick bread recipes.
The high speed of the blade creates intense friction and rapid movement of the dough mass. This quickly hydrates the flour and aligns the gluten proteins. While incredibly fast, this speed also requires careful monitoring to prevent overmixing and overheating, which can happen in mere seconds. It's a powerful gluten development mixing techniques baking tool but requires precision.
When to Use a Food Processor for Dough
Food processors excel at making doughs that benefit from quick mixing and minimal handling. Pie crusts and other pastry doughs are prime candidates; the processor can quickly cut cold butter into the flour while developing just enough gluten for structure without toughness. Some scone and biscuit recipes also work well. Certain types of bread dough, particularly those with lower hydration, can be mixed and kneaded in a food processor in under a minute.
However, it's less suitable for very wet or high-hydration doughs, which can strain the motor and become a sticky mess. It's also not ideal when you need to add ingredients gradually or incorporate additions like nuts or fruits without breaking them down completely. Its strength lies in speed and efficiency for specific dough types.
Potential Pitfalls of Food Processor Mixing: Heat and Texture
The primary risks when using a food processor for dough are generating too much heat and overmixing. The rapid blade action creates friction, which can quickly warm up the dough. For pastries where keeping the fat cold is crucial for flakiness, this heat is detrimental. Monitoring the dough temperature is important.
Overmixing happens extremely fast in a food processor. A dough that needs only 30-60 seconds of processing can become overdeveloped if you let it run for just a few seconds too long. Overmixed dough from a food processor can become tough and rubbery. It's essential to use short pulses or process for very brief, timed intervals and check the dough frequently to avoid these issues. The speed and power require a vigilant approach.
No-Knead Methods: Minimal Mixing, Maximum Gluten Development
The "no-knead" method, popularized by Jim Lahey, seems counterintuitive to the idea that mixing develops gluten. However, it demonstrates that time and hydration can achieve significant gluten development with minimal mechanical effort. This technique typically involves combining flour, water, yeast, and salt with just a brief stir – often less than a minute – until no dry flour remains. The dough is then left to rest for a long period, often 12-18 hours, usually at room temperature.
During this long, slow fermentation, the water has ample time to fully hydrate the flour. The gluten proteins absorb the water and, over many hours, naturally align and form a network with minimal physical intervention. The yeast activity also contributes to the dough's structure and flavor. This method highlights that hydration and time are powerful gluten development mixing techniques baking factors, even in the absence of vigorous kneading.
The Science Behind No-Knead Gluten Formation
The key scientific principle behind no-knead dough is extended hydration and enzymatic activity. With a high hydration level (often 75-80% water relative to flour weight) and a long resting period, water molecules have ample time to penetrate the flour particles and fully hydrate the gluten-forming proteins (gliadin and glutenin). This hydration is the first crucial step in gluten formation.
Over the many hours of rest, enzymes naturally present in the flour, called proteases, also play a role. While high levels of protease can degrade gluten, in the controlled environment of a no-knead dough, they can help relax the gluten network initially, allowing for easier manipulation later. More importantly, the slow interaction of water and protein allows the gluten network to form organically, driven by the proteins' natural tendency to bond when hydrated, rather than being forced into alignment by mechanical action.
Tips for Successful No-Knead Baking
Success with no-knead dough relies heavily on temperature and time. Using the right amount of yeast (often a very small amount, like 1/4 teaspoon for a standard loaf) is crucial for the long fermentation. Room temperature is also important; too cold and the fermentation (and thus gluten development) will be too slow; too warm and it can ferment too quickly, potentially degrading the gluten. Aim for a consistent room temperature, ideally around 70-72°F (21-22°C).
Using a heavy pot, like a Dutch oven, preheated in the oven, is essential for achieving a good crust and structure in many no-knead bread recipes. The trapped steam in the pot during the initial baking phase allows the dough to expand fully before the crust sets, resulting in a better rise and texture, even with minimal initial mixing. Patience is key – resist the urge to check or handle the dough too much during its long rest.
Factors Influencing Gluten Development During Mixing
Hydration Levels: The Water's Role in Gluten Strength
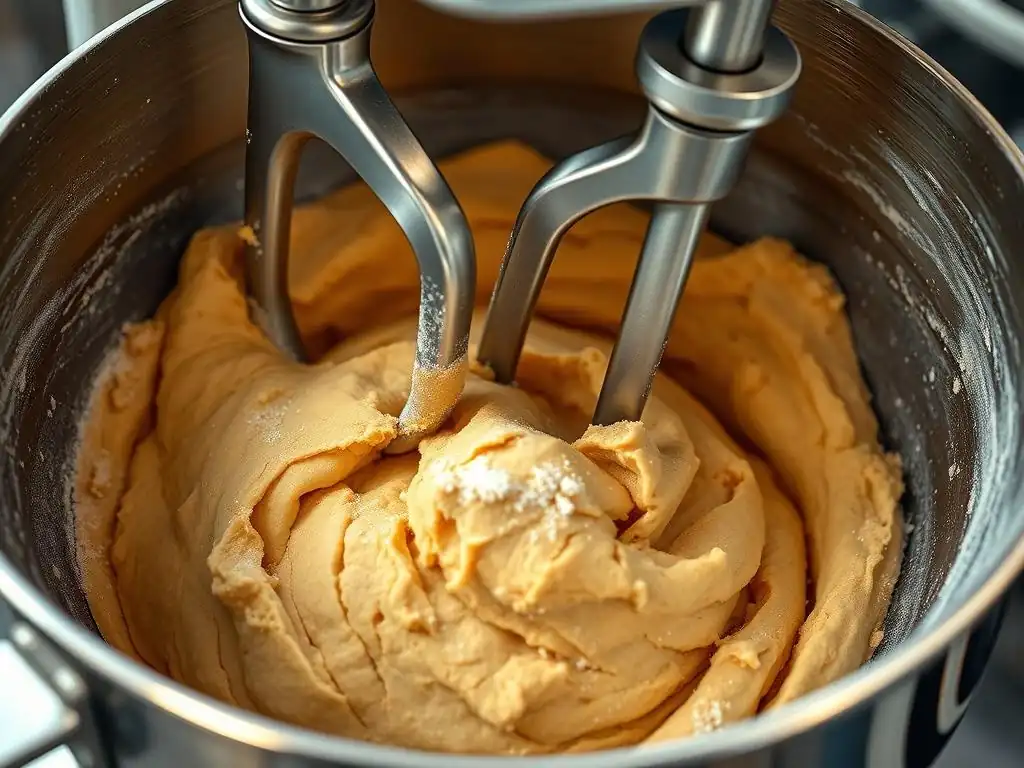
Water is absolutely essential for gluten development; without it, the proteins remain dormant. The amount of water in a dough or batter, known as hydration, significantly impacts how gluten forms and the dough's consistency. Higher hydration doughs (those with a higher percentage of water relative to flour, say 70% or more) are typically stickier and looser but allow for more extensive gluten development because the protein strands can move and link more freely in the wetter environment.
Conversely, lower hydration doughs (50-60% hydration) are stiffer and require more mechanical energy (more kneading) to develop gluten fully. The limited water makes it harder for the proteins to move and bond. While high hydration can lead to a more open crumb structure in bread, it also requires careful handling due to stickiness. Finding the right hydration for a recipe and understanding how it affects gluten development is a core aspect of gluten development mixing techniques baking.
Flour Type: Protein Content and Gluten Potential
Not all flours are created equal when it comes to gluten. The type of flour you use directly determines the potential for gluten development based on its protein content. Hard wheat flours, like bread flour, have a higher protein content (typically 12-14%) and are ideal for baking where strong gluten is desired, such as artisan bread or pizza dough. Their higher protein means more gliadin and glutenin are available to form that robust network.
Soft wheat flours, like cake flour (around 8-10% protein) or pastry flour (9-11% protein), have lower protein content. They are better suited for baked goods where tenderness is key, like cakes, cookies, biscuits, and pastries. Using a low-protein flour inherently limits the amount of gluten that can be developed, making it easier to achieve a tender crumb even with some mixing. Understanding flour types is fundamental to controlling gluten development.
Dough Temperature: Controlling Gluten Activity
Dough temperature plays a significant, often underestimated, role in gluten development and overall dough behavior. Warm temperatures (typically 75-80°F or 24-27°C) encourage enzymatic activity and yeast fermentation, which can indirectly influence gluten. While moderate warmth can help relax the dough and make it easier to work, excessive heat generated during mixing (especially with mechanical mixers) can actually weaken the gluten structure by denaturing the proteins or increasing protease activity too much.
Conversely, cold temperatures slow down enzymatic activity and fermentation, resulting in slower gluten development during bulk fermentation. This can be beneficial in some cases, like retarding dough in the refrigerator for a longer, more flavorful rise, which also allows gluten to develop gradually. Keeping ingredients cold is also critical for pastries to limit gluten development and achieve flakiness. Maintaining the correct dough temperature specified in a recipe is vital for predictable gluten development and dough handling.
Mixing Time: Finding the Sweet Spot for Optimal Gluten
The duration of mixing is a direct determinant of how much gluten develops. As you mix, the gluten network strengthens over time, becoming more elastic and smooth. However, there's an optimal point. Undermixing leaves the gluten network weak and underdeveloped, resulting in a dough that tears easily and produces dense, poor-rising baked goods. For instance, a bread dough mixed for only 2 minutes in a stand mixer will likely be shaggy and inelastic.
Overmixing, on the other hand, can cause the gluten strands to break down after they've reached peak development. This leads to a dough that feels tight yet sticky, loses its elasticity, and may even become liquidy with prolonged mixing. Baked goods from overmixed dough are often tough or rubbery. Finding the "sweet spot" – the right mixing time for the specific dough type, hydration, and mixing method – is crucial for achieving optimal gluten development, whether you're hand kneading for 10 minutes or using a stand mixer for 7.
Fat Content: How Fat Affects Gluten Formation
Fats, such as butter, oil, or shortening, interfere with gluten development. They work by coating the flour particles and the developing gluten strands, preventing the gliadin and glutenin proteins from bonding as effectively with water and each other. This is why recipes high in fat, like pastries, cookies, and rich cakes, tend to be tender and crumbly rather than chewy or elastic.
The amount and type of fat, as well as when it's added during mixing, influence its impact. Adding softened butter or oil at the beginning of mixing will coat the flour more thoroughly, significantly inhibiting gluten development.
Adding cold, solid fat (like in pie crusts) limits its ability to coat flour until it melts during baking, allowing some minimal gluten development while creating steam pockets for flakiness. In enriched bread doughs, butter is often added after some initial gluten development has occurred to allow the network to begin forming before being partially inhibited by the fat, resulting in a tender crumb with decent structure.
Optimizing Gluten Development for Different Baked Goods
Bread Dough: Developing Strong Gluten for Structure
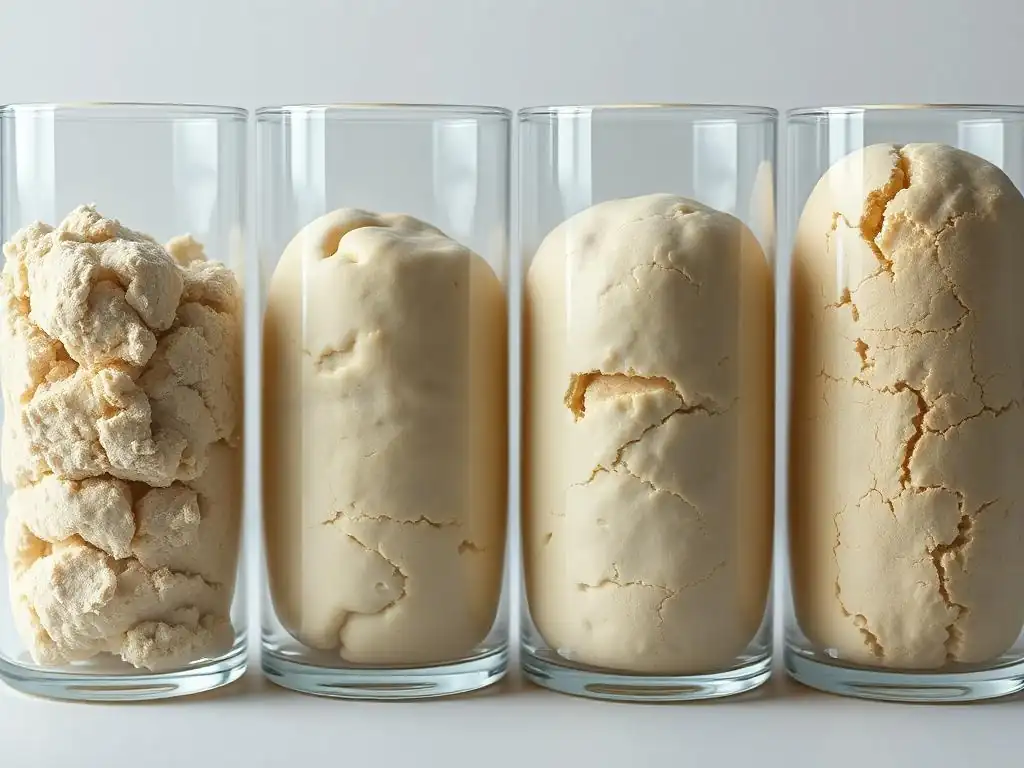
For most types of bread, the goal is to develop a strong, elastic gluten network. This network is what traps the carbon dioxide gas produced by the yeast, allowing the dough to rise and create an open, airy crumb structure. Without sufficient gluten strength, the dough wouldn't be able to hold its shape during fermentation and baking, resulting in a flat, dense loaf. Gluten development mixing techniques baking are most critical here.
Achieving strong gluten in bread dough typically involves vigorous mixing or kneading, either by hand or machine, for a significant period. The dough needs to be worked until it becomes smooth, elastic, and passes the windowpane test. This process aligns the protein chains, creating a resilient structure capable of expanding dramatically. Hydration level is also a major factor; higher hydration doughs often require a slightly different mixing approach (like stretch and folds) but can yield a more open crumb due to the freedom of movement for gluten strands.
Windowpane Test: Assessing Gluten Strength in Bread Dough
The windowpane test is a classic method used by bakers to determine if bread dough has been sufficiently kneaded and the gluten is well-developed. To perform the test, take a small piece of dough (about the size of a golf ball) and gently stretch and pull it with your fingers. The goal is to stretch it into a thin membrane without it tearing.
If the dough can be stretched thin enough that you can see light through it – forming a "windowpane" – without breaking, the gluten is well-developed and strong enough for bread baking. If it tears easily before becoming thin, it needs more kneading. This tactile test is a more reliable indicator of gluten development than simply relying on time or a recipe's specified mixing duration, as factors like flour type and hydration affect kneading requirements.
Cake Batter: Gentle Mixing for Tender Crumbs
In contrast to bread, cake baking aims for a tender, soft, and sometimes crumbly texture, not chewiness or elasticity. Therefore, the goal for cake batter is to minimize gluten development. Cake flour, with its low protein content, is often preferred for this reason. The mixing method is designed to combine ingredients and create aeration (incorporating air into butter and sugar, or whisking eggs) without overworking the flour once it's added.
Typical cake mixing methods, like the creaming method or reverse creaming method, involve incorporating the dry ingredients last and mixing only until they are just combined and no dry streaks remain. Overmixing cake batter after the flour is added is a common mistake that activates too much gluten, resulting in a tough, rubbery cake texture instead of the desired light and tender crumb.
Preventing Over-Development of Gluten in Cakes
Several techniques help prevent excessive gluten development in cakes. Using a low-protein flour, as mentioned, is a primary strategy. Ensuring all ingredients are at room temperature helps them emulsify smoothly, requiring less mixing time once the flour is added. The creaming method itself helps; creaming butter and sugar creates air pockets, and adding eggs emulsifies the batter, providing structure that relies less on gluten.
When adding dry ingredients, mixing on low speed and stopping as soon as the flour is incorporated is crucial. Some recipes even call for folding in the dry ingredients by hand to ensure minimal mixing. Adding fat, like butter or oil, also inhibits gluten formation; recipes higher in fat tend to be more tender. By implementing these simple gluten development mixing techniques baking principles, you can ensure your cakes are wonderfully tender.
Pastry Dough: Minimizing Gluten for Flakiness
Pastries like pie crusts, scones, and biscuits rely on visible layers and flakiness, not chewiness. This flakiness is created by layers of fat (usually cold butter or shortening) separated by layers of dough. As the pastry bakes, the fat melts, and the water in the fat turns to steam, puffing up the layers. Excessive gluten development would make the dough elastic and tough, preventing these distinct, flaky layers from forming.
Therefore, the primary goal when making pastry dough is to keep ingredients cold and handle the dough as little as possible to minimize gluten development. The mixing process focuses on incorporating the fat into the flour in specific ways (like cutting in cold butter) rather than developing a strong protein network.
The Importance of Cold Ingredients in Pastry
Using cold ingredients, especially cold fat (butter or shortening) and ice water, is paramount in pastry making to limit gluten development and promote flakiness. Cold fat remains in solid pieces within the dough. During baking, these cold pieces melt and create steam, separating the dough layers and creating flakiness. If the fat is warm or creamed, it coats the flour particles too thoroughly, inhibiting flakiness and encouraging gluten formation.
Cold temperatures also slow down the hydration of flour and the activation of gluten. Working quickly with cold hands and on a cold surface further helps maintain the low temperature of the dough. The mixing method (like cutting in butter with a pastry blender, fingers, or a food processor using pulses) is specifically designed to distribute the cold fat while adding just enough liquid to bring the dough together with minimal mixing, ensuring tender, flaky results by limiting gluten development.
Pizza Dough: Achieving the Perfect Balance of Strength and Stretch
Pizza dough requires a unique balance of gluten development. It needs enough strength to be stretched thin without tearing and to hold the weight of toppings, but also enough extensibility (stretchiness) to be easily shaped. Too little gluten results in a dough that tears when stretched, while too much can make it spring back like a rubber band.
Achieving this balance involves moderate to good gluten development, often through kneading, combined with sufficient resting time (fermentation). The kneading builds the initial strength, and the resting period allows the gluten network to relax and become more extensible, making the dough easier to shape. Hydration levels also play a role; higher hydration pizza doughs can be trickier to handle but often result in a lighter, airier crust.
Specific Mixing Techniques for Pizza Dough
Pizza dough is typically mixed and kneaded until it is smooth and elastic, similar to bread dough, but often aiming for a slightly less developed state initially if a long cold fermentation is planned. Stand mixers are popular for their efficiency, kneading the dough with a dough hook on medium speed for 6-10 minutes. Hand kneading is also effective, taking around 10-15 minutes.
Many pizza makers incorporate a period of rest after initial mixing (autolyse) or during bulk fermentation (stretch and folds) to further develop and relax the gluten. A long, slow cold fermentation in the refrigerator (24-72 hours) is a common technique used to improve both flavor and dough handling. This slow process allows the gluten to develop naturally over time and the dough to become very extensible, making it easy to stretch into a large, thin circle without tearing, embodying effective gluten development mixing techniques baking for this specific application.
Troubleshooting Gluten Development Issues
Dough is Too Strong: Overmixing and Solutions
If your dough feels excessively tight, resists stretching, and keeps springing back aggressively, it's likely been overmixed. This means the gluten network has become too developed and potentially started to break down, losing its elasticity. Overmixed dough can be difficult to shape and often results in a tough, dense texture after baking.
The best solution for overmixed dough is usually time. Allow the dough to rest for a significant period (30 minutes up to several hours, depending on the severity). This rest allows the gluten strands to relax. Gentle stretch and folds during the rest period can also help realign the proteins without further stressing them. If you are making bread, you might need to accept a slightly denser crumb than initially planned. For cakes or pastries, there's little remedy once overmixed; prevention by careful, minimal mixing is key.
Dough is Too Weak: Undermixing and Remediation
Undermixed dough feels shaggy, possibly sticky, lacks elasticity, and tears easily when stretched – it won't pass the windowpane test. The gluten network hasn't fully formed or strengthened, meaning the dough won't hold its shape or trap gas effectively during rising and baking. This leads to flat, dense, or heavy baked goods.
Fortunately, undermixing is usually fixable. Simply continue mixing or kneading the dough. If using a stand mixer, return it to medium speed. If hand kneading, resume the process. Keep mixing until the dough becomes smooth, elastic, and passes the windowpane test (for bread dough). For batters, mix gently for a few more seconds until no dry streaks remain. It's much easier to add more mixing time than to fix overmixing.
Sticky Dough: Hydration Imbalance and Fixes
Sticky dough is often a sign of a hydration imbalance – too much water relative to the flour, or insufficient gluten development to absorb the water. While some high-hydration doughs are intentionally sticky, excessive stickiness that makes the dough unmanageable is usually an issue. It can prevent the gluten from developing properly as the strands can't link effectively in a saturated environment, or it can happen if the dough is undermixed and the flour hasn't fully absorbed the liquid.
If your dough is too sticky and you suspect it's not just a high-hydration recipe, you can try adding a small amount of flour, a tablespoon at a time, while continuing to mix or knead until the dough reaches the desired consistency. Be cautious not to add too much flour, which can make the dough dry and tough. Alternatively, if the issue is likely undermixing, continue kneading; as the gluten develops, the dough will become less sticky and more manageable as it absorbs the liquid.
Dense Baked Goods: Gluten Issues and Prevention
Dense baked goods – breads that are heavy and don't rise well, or cakes that are tough and rubbery – are frequently the result of issues with gluten development. In bread, density is often caused by undermixing, leading to a weak gluten network unable to support the rise. In cakes, density or toughness usually stems from overmixing, which develops too much gluten for a tender crumb.
Preventing density requires understanding the role of gluten in the specific baked good. For bread, ensure adequate kneading and proofing time to develop a strong, active gluten network. Learn to recognize the signs of properly developed dough (smooth, elastic, passes windowpane test). For cakes and pastries, focus on minimal mixing once the flour is added, using low-protein flours, and incorporating fat properly to inhibit gluten development. Mastering gluten development mixing techniques baking specific to each recipe type is the best prevention.
Advanced Techniques for Gluten Manipulation
Autolyse: Enhancing Gluten Development Before Mixing
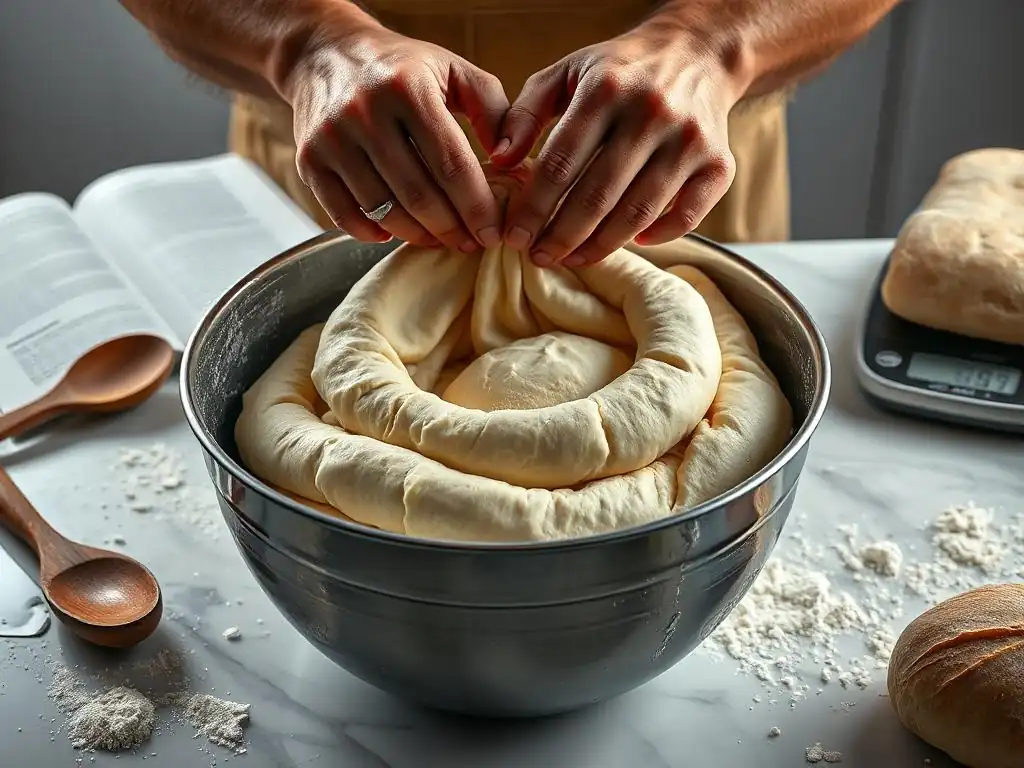
Autolyse (pronounced auto-leez) is a simple technique used primarily in bread making to improve dough handling and gluten development with less effort. It involves mixing only the flour and water from a recipe together and letting them rest for a period, typically 20 minutes to an hour, before adding the salt and yeast and beginning the main kneading phase. Some bakers include a very small amount of the total yeast during the autolyse.
During this resting period, the flour fully hydrates, and enzymatic activity begins to break down complex starches into simpler sugars (food for the yeast later) and also helps relax the gluten proteins. This initial hydration and relaxation mean that when you do add the salt and yeast and start kneading, the gluten develops much faster and more easily. The dough becomes smoother and more extensible from the start, requiring less mechanical work to reach optimal development.
Benefits of Autolyse for Bread Baking
Implementing an autolyse step offers several advantages. Firstly, it makes the dough easier to knead, whether by hand or machine, reducing the overall mixing time needed to develop strong gluten. This can be particularly helpful for high-hydration doughs which can be sticky to handle. By allowing the flour to fully hydrate, it also reduces the chance of dry pockets in the finished dough.
Secondly, autolyse can lead to improved dough structure and volume in the final loaf. The relaxed gluten is often more extensible, allowing for a better rise. It can also contribute to a more open crumb structure. Finally, by reducing the active kneading time, it minimizes the oxidation of carotenoid pigments in the flour, which helps preserve some of the flour's natural color and flavor compounds, leading to a more flavorful crust and crumb.
Lamination: Creating Layers of Gluten and Fat
Lamination is an advanced technique used for pastries like croissants, puff pastry, and danishes. It involves creating numerous thin layers of dough separated by layers of cold fat (usually butter). This is achieved by repeatedly folding and rolling a block of dough and butter. Each fold creates more layers; for example, a simple letter fold (folding the dough into thirds) triples the layers with each turn. Multiple turns (like 3 or 4) result in hundreds or even thousands of alternating dough and butter layers.
While the goal in lamination is flakiness, the dough layers still contain gluten. The mixing of the initial dough is typically minimal to limit gluten development. However, the subsequent rolling and folding process does contribute to aligning the gluten strands within each thin dough layer. The key is that these dough layers are kept separate by the fat layers, preventing the gluten network from becoming a cohesive, tough mass throughout the entire pastry.
Lamination Techniques for Croissants and Puff Pastry
The specific technique varies slightly between pastries. For puff pastry, a simple dough of flour and water is made, and a large block of cold butter is enclosed within it. The dough is then rolled and folded (e.g., letter folds or book folds) multiple times with rest periods in between to keep the butter cold and the gluten relaxed. Croissant dough is an enriched dough containing yeast, milk, sugar, and butter in the dough itself, but it also involves enclosing a block of butter and performing similar rolling and folding steps.
Success in lamination relies on keeping the dough and butter cold and maintaining consistent thickness during rolling. This ensures the butter remains solid and creates distinct layers. Resting the dough in the refrigerator between folds is crucial to relax the gluten, making the dough easier to roll thin without tearing and preventing excessive spring-back, which would disrupt the layers. Mastering lamination is a complex but rewarding gluten development mixing techniques baking skill.
Tangzhong Method: Improving Dough Hydration and Softness
The Tangzhong method, originating in Asia, is a technique that involves cooking a small portion of the flour and liquid (usually milk or water) into a thick paste or roux before adding it to the main dough ingredients. This paste, known as Tangzhong or Yudane (when using water), is typically made by whisking together 5-10% of the recipe's flour with 5 times its weight in liquid and heating it to 65°C (149°F) until it thickens. It is then cooled and added to the rest of the ingredients.
Cooking the flour in liquid gelatinizes the starches. These gelatinized starches can absorb and retain significantly more liquid than uncooked flour. When the Tangzhong is added to the dough, it introduces this extra moisture in a stable form. The dough made with Tangzhong can therefore handle a higher hydration level without being excessively sticky, and it holds onto this moisture better throughout the baking process.
How Tangzhong Impacts Gluten Structure
The Tangzhong method indirectly impacts gluten structure and dough properties. By locking in more moisture within the gelatinized starches, the Tangzhong makes more free water available to the gluten-forming proteins initially, potentially aiding hydration. However, the primary effect is on the dough's ability to hold moisture. This increased internal moisture leads to a softer, more pliable dough that is often easier to knead and handle despite its higher hydration.
Crucially, the extra moisture retained by the Tangzhong results in baked goods that are exceptionally soft, moist, and have a longer shelf life compared to those made with standard methods. The soft texture is partly due to the increased moisture preventing the gluten network from drying out and becoming rigid. While the Tangzhong itself doesn't fundamentally change how the gluten network forms during kneading, it creates an environment within the dough that supports a softer, more tender final crumb structure by enhancing moisture retention, making it a valuable gluten development mixing techniques baking variation for soft rolls and breads.
Conclusion: Mastering Gluten Development Through Mixing for Baking Success
Choosing the Right Mixing Method for Your Recipe
As we've explored, the impact of mixing methods on gluten development is profound and dictates the final texture of your baked goods. There is no single "best" method; the ideal approach depends entirely on the recipe's requirements and your desired outcome. For chewy, structured breads, hand kneading or a stand mixer is typically necessary to build a strong gluten network. For tender cakes and pastries, minimal mixing with low-protein flour is key to limiting gluten.
Consider the type of baked good, the required level of gluten development, the hydration of the dough, and the protein content of your flour when deciding on your mixing strategy. Also, think about your equipment and time constraints. Hand mixing offers control and feel, stand mixers provide speed and consistency, and food processors offer rapid results for specific doughs. No-knead methods leverage time and hydration for minimal effort. Understanding these relationships is fundamental to gluten development mixing techniques baking effectively.
Experimenting with Gluten Development Techniques
Baking is both a science and an art, and experimentation is a vital part of the learning process. Don't be afraid to try different mixing methods for similar recipes (e.g., hand-kneading vs. stand mixer for a basic bread) to see how the dough feels and how the final product differs. Adjusting hydration levels slightly or trying techniques like autolyse or Tangzhong can open up a world of textural possibilities.
Pay close attention to your dough as you mix – feel its texture, watch how it changes, and use tests like the windowpane test for bread. Keep notes on what worked and what didn't. Each batch provides valuable insights into how ingredients and techniques interact to develop gluten. Through mindful practice and experimentation, you'll build intuition and skill.
BakeWithEase: Continued Learning in the Art of Baking
Mastering gluten development mixing techniques baking is a significant step in becoming a more confident and capable baker. It moves you beyond simply following instructions to understanding the underlying principles that make recipes work. At BakeWithEase, we are dedicated to providing you with the knowledge and resources to deepen your understanding of baking science and improve your skills.
Continue to explore recipes, try new techniques, and don't be discouraged by outcomes that aren't perfect initially. Every attempt is a learning opportunity. By focusing on how your mixing method influences gluten, you gain greater control over texture and consistency, leading to more successful and satisfying baking experiences. Keep practicing, keep exploring, and keep baking with ease!
Frequently Asked Questions
What is gluten development and why is it important in baking?
Gluten development is the process of forming a protein network from glutenin and gliadin found in flour. This network provides structure and elasticity to baked goods, influencing texture and rise.
How do different mixing techniques affect gluten development?
Different techniques, such as kneading or the muffin method, impact gluten development differently. Intense mixing leads to strong gluten, while gentle mixing results in a more tender crumb.
What are some common mixing methods used in baking?
Common methods include creaming, rubbing-in, whisking, kneading, and the muffin method. Each method is suited for different baked goods depending on the desired gluten development.
How can I tell if my dough has enough gluten development?
The windowpane test is a reliable method. If you can stretch a small piece of dough thin enough to see light through it without tearing, it has sufficient gluten development.
Can you over-develop gluten while mixing?
Yes, over-mixing can lead to tough and rubbery baked goods. It's important to monitor the dough and stop mixing when it reaches the desired consistency and elasticity.
Final Reflection: The Ever-Evolving Dance of Gluten and Technique
The quest for the perfect loaf hinges on understanding gluten development, and the methods we employ to achieve it remain a crucial factor in the baking world today. The subtle nuances of mixing techniques, from the gentle folds of sourdough to the robust power of a stand mixer, directly impact the final product's texture, structure, and overall quality. This isn't just about technical precision; it's about unlocking the full potential of flour and water, transforming simple ingredients into something truly extraordinary.
The exploration of optimal gluten development techniques has profoundly shaped the baking landscape, influencing not only professional bakers but also home cooks striving for perfection. The pursuit of the ideal crumb, the perfect rise, and that satisfying chewiness continues to drive innovation and experimentation. This journey of discovery resonates deeply with me, as I've witnessed firsthand the transformative power of understanding the intricate relationship between mixing method and gluten formation. The baker's skill lies not only in the recipe but in the understanding of the ingredients and their interaction.
This quote encapsulates the essence of what we've explored throughout this article.
Consider the impact of your mixing technique on your next bake. Will you embrace the slower, more deliberate approach of hand-mixing, allowing for greater feel and control? Or will you harness the power of modern technology to achieve consistent results with a stand mixer?
The choice is yours, but the understanding of the underlying principles – the dance between gluten and technique – will empower you to create breads that are not only delicious but also reflect your own unique approach to the craft. Embrace the journey, experiment with different methods, and discover the magic that unfolds when you master the art of gluten development.
Unleash Your Inner Baker: Master Gluten Development!
Thanks for taking the time to explore the fascinating world of gluten development! You've now gained valuable insights into how different mixing methods impact your dough's structure and final bake. Ready to put your new knowledge into practice?
- Try a new mixing technique: Experiment with the folding method for a more delicate crumb, or try the slap-and-fold for a chewier crust – and let us know which one becomes your new favorite!
- Share your baking journey: Post a picture of your creation on social media and tag us – we’d love to see your gluten-developed masterpiece! Use #BakeWithEaseGluten and #GlutenMaster.
- Dive deeper into baking science: Explore our other articles on BakeWithEase.com for more tips and techniques to elevate your baking game.
So, what exciting baking project will you tackle first, armed with your newfound gluten expertise?