
Troubleshooting Uneven Browning: Fixing Your Maillard Reaction Issues

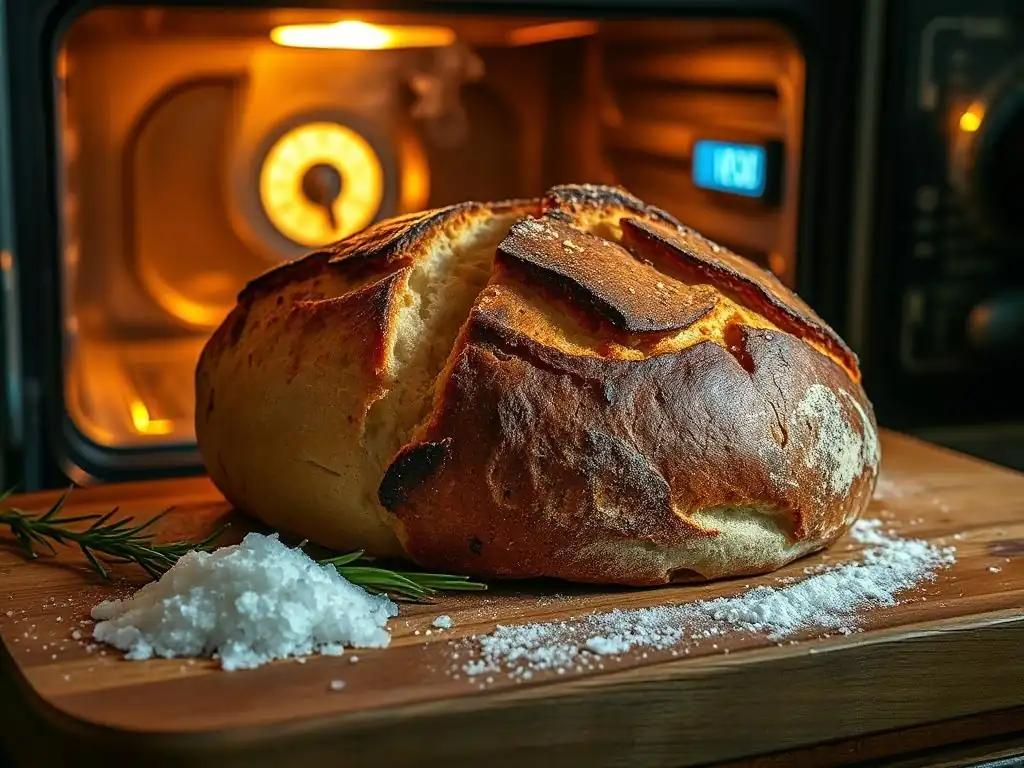
Welcome to BakeWithEase, your trusted guide to baking perfection! Are you tired of pulling out treats with frustratingly uneven browning? Unlock the secrets to achieving that golden-brown, picture-perfect finish every time. Dive into our Baking Science Deep Dive and discover proven Uneven Baking Browning Solutions that will transform your baking from frustrating to flawless. Eager to finally master the Maillard reaction and create evenly baked masterpieces? Let's get started!
- Understanding the Maillard Reaction and Browning in Baking
- Identifying the Root Cause of Uneven Browning in Your Baking
- Solutions for Achieving Even Baking Browning: A Comprehensive Guide
- Specific Troubleshooting for Common Baked Goods
- Advanced Techniques for Enhancing Browning
- Preventing Future Uneven Browning Issues: Best Practices
- Frequently Asked Questions
- Final Reflection: Mastering the Maillard Reaction: From Frustration to Flawless Baking
- Unlock Perfectly Browned Treats!
Understanding the Maillard Reaction and Browning in Baking
What is the Maillard Reaction and Why Does It Matter?
The Maillard reaction is a complex chemical process that occurs when amino acids and reducing sugars react at high temperatures, typically above 285°F (140°C). It's not just responsible for the beautiful golden-brown color on your baked goods; it also creates hundreds of new flavor compounds, contributing significantly to the aroma and taste we associate with delicious baked treats.
Think of the rich crust on a loaf of bread or the caramelized edges of a cookie – that's the Maillard reaction at work, transforming simple ingredients into complex, flavorful delights. Understanding this reaction is the first step in mastering uneven baking browning solutions.
This fascinating chemical dance is crucial for developing the depth of flavor in many baked items. Without it, bread crusts would be pale and bland, cookies would lack that satisfying chew and caramelized taste, and cakes wouldn't have that delicate outer layer. The degree to which the Maillard reaction occurs is influenced by factors like temperature, time, moisture, and the presence of specific ingredients like sugars and proteins. Achieving consistent and even browning ensures that every bite offers the same delightful texture and flavor profile, making it essential for successful baking.
The Science Behind Browning: Key Factors Affecting Color
Beyond the Maillard reaction, another process contributes to browning in baking: caramelization. This occurs when sugars are heated to high temperatures (typically above 320°F or 160°C, depending on the sugar type), causing them to break down and form new compounds that are brown and flavorful. While the Maillard reaction involves proteins and sugars, caramelization only involves sugars. Both processes often happen simultaneously in the oven, working together to create the desirable color and complex flavors in baked goods.
Several factors critically influence the rate and extent of browning. Temperature is paramount; higher temperatures accelerate both the Maillard reaction and caramelization. Moisture is also key; a dry surface promotes browning because water evaporates first, concentrating sugars and amino acids and allowing temperatures to rise.
The pH level of the dough or batter can also play a role; slightly alkaline conditions can speed up the Maillard reaction. Finally, the specific types and amounts of sugars and proteins present in your recipe directly impact how much browning can occur and at what rate, offering numerous opportunities for uneven baking browning solutions if not managed correctly.
Why Uneven Browning Occurs in Baked Goods: Common Causes
Uneven browning is a frustrating issue that often plagues bakers, turning potentially perfect creations into visually inconsistent ones. The primary reason this happens is inconsistent heat distribution. Ovens are notorious for having "hot spots," areas that are significantly hotter than others, causing parts of your baked good to brown much faster than the rest. This can lead to edges that are overdone while the center remains pale, or one side of a cake being significantly darker than the other.
Beyond oven quirks, the baking equipment itself contributes to unevenness. Dark-colored baking pans absorb radiant heat more efficiently than light-colored ones, potentially leading to darker bottoms and sides. The distribution of ingredients, particularly sugar and fat, within the dough or batter can also cause problems; areas with higher concentrations of sugar will brown and caramelize faster.
Overcrowding the oven restricts airflow, preventing heat from circulating evenly around each item. Even the consistency and moisture level of your dough or batter can contribute, with drier spots browning faster than moist ones, all highlighting the need for effective uneven baking browning solutions.
Identifying the Root Cause of Uneven Browning in Your Baking
Pinpointing the exact reason for uneven browning requires a bit of detective work. It's often a combination of factors rather than a single culprit. Start by observing where the browning is uneven – is it always in the same spot in the oven? Is it only on the bottom of your bakes? Does it happen with certain recipes but not others? These observations provide valuable clues.
Keeping a baking journal can be incredibly helpful here. Note the recipe, oven temperature used (and if you used an oven thermometer), rack position, pan type, and where the unevenness occurred. Over time, patterns will emerge, making it easier to identify the primary source of the problem and apply the right uneven baking browning solutions.
Oven Inconsistencies: Hotspots and Temperature Fluctuations
Oven hotspots are perhaps the most common cause of uneven browning. Most home ovens, even relatively new ones, have variations in temperature within the baking cavity. These variations can range from 15°F to as much as 50°F or more, depending on the oven's age, design, and calibration. Hotspots are often near the heating elements or vent areas. To test for hotspots, you can fill a baking sheet with slices of white bread and bake them in a preheated oven until they start to brown, noting which slices color fastest.
These temperature fluctuations mean that while your oven might be set to 350°F (175°C), different parts of your baking sheet or pan are experiencing slightly different temperatures. The areas exposed to higher temperatures will undergo the Maillard reaction and caramelization more rapidly, resulting in darker spots. This inconsistency in heat transfer directly leads to parts of your cookies, cakes, or bread browning faster than others, necessitating strategies to mitigate these internal oven variations and find effective uneven baking browning solutions.
Pan Material and Color: Impact on Heat Distribution
The material and color of your baking pans significantly influence how heat is transferred to your baked goods. Dark-colored pans, especially those with non-stick coatings, absorb radiant heat very efficiently. This means the bottom and sides of your bake in contact with the pan will heat up and brown much faster than the top surface, which primarily receives heat from the ambient oven air. For something like cookies, this can mean burnt bottoms while the tops are still pale.
Conversely, light-colored, shiny metal pans reflect radiant heat. They transfer heat more slowly and evenly, primarily through convection (heated air circulating in the oven). This results in gentler, more uniform browning, particularly on the bottom and sides. Using the wrong pan for a specific recipe is a frequent cause of unevenness, making pan selection a critical aspect of developing uneven baking browning solutions. For instance, a recipe developed for a light-colored pan might over-brown on the bottom if baked in a dark pan at the same temperature and time.
Ingredient Distribution: Sugar and Fat Content
The way ingredients are distributed within your dough or batter plays a surprisingly large role in achieving even browning. Sugar and fat are key players in the browning process. Sugar caramelizes directly and also participates in the Maillard reaction. Fat helps to tenderize and can also influence heat transfer. If sugar or fat are not evenly dispersed during mixing, you can end up with pockets or areas that brown much faster than others.
Consider a cookie dough with clumps of sugar or unevenly distributed butter. The areas with more concentrated sugar will brown and crisp up faster, potentially even burning, while leaner areas brown more slowly. Similarly, in a cake batter, uneven mixing can lead to variations in density and ingredient distribution, causing some parts to brown quicker than others. Ensuring thorough and proper mixing techniques is fundamental to preventing these localized browning issues and is a simple yet effective step in finding uneven baking browning solutions.
Overcrowding the Oven: Limiting Air Circulation
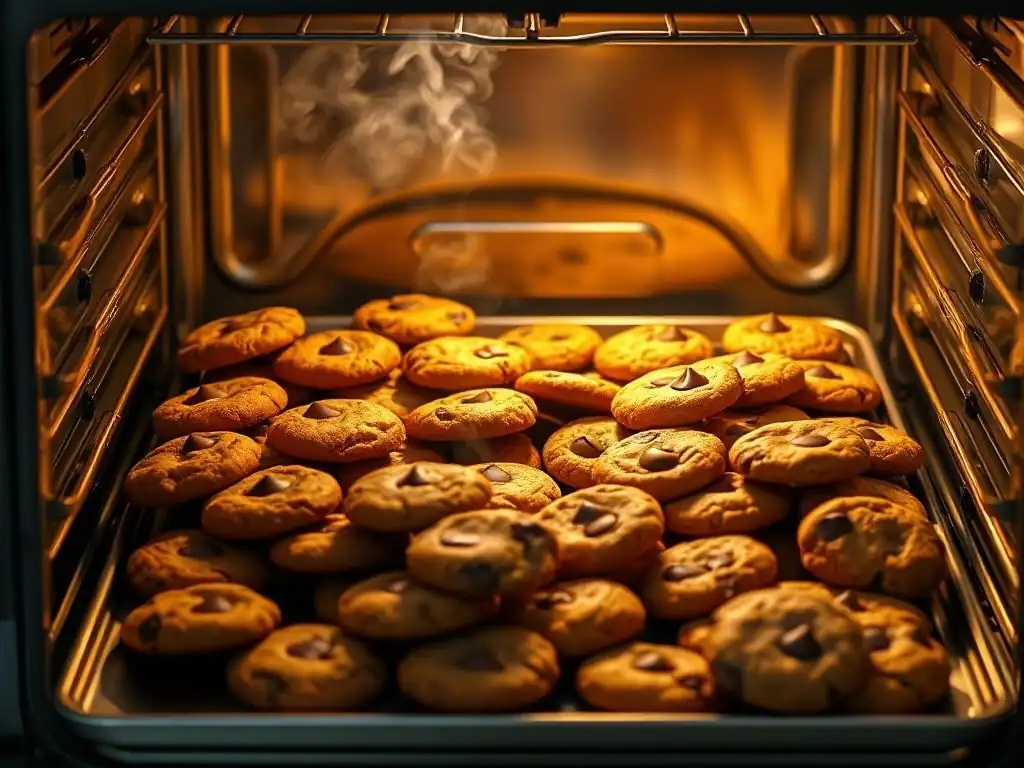
Stuffing too many items into your oven at once is a common mistake that severely hinders proper air circulation. Ovens heat primarily through convection – the movement of hot air. When pans are packed tightly together, they block the flow of this hot air, creating stagnant pockets. These areas will be cooler, resulting in slower browning, while exposed areas continue to brown normally.
Imagine baking two large sheets of cookies side-by-side with very little space between them and the oven walls. The air cannot flow freely around each cookie on both sheets, leading to uneven heat distribution across and between the sheets. This lack of airflow is a major contributor to uneven browning and significantly impacts your ability to achieve uniform results. Leaving adequate space around and between your baking pans is a straightforward way to improve airflow and implement effective uneven baking browning solutions.
Dough/Batter Consistency: Moisture Levels and Mixing
The consistency and moisture level of your dough or batter are also crucial factors influencing browning uniformity. Areas with higher moisture content will brown more slowly because the water must evaporate before the temperature can rise sufficiently for the Maillard reaction and caramelization to occur effectively. Conversely, drier spots will heat up and brown faster.
In doughs, inconsistent mixing can lead to areas with varying hydration or gluten development, affecting how moisture is held and released during baking. For batters, inadequate mixing can result in pockets of dry ingredients or uneven distribution of liquid. These inconsistencies create variations in how heat is absorbed and how browning progresses across the surface and interior of the baked good. Ensuring a homogeneous mixture before baking is a vital step in preventing uneven browning and is part of a holistic approach to uneven baking browning solutions.
Solutions for Achieving Even Baking Browning: A Comprehensive Guide
Achieving that perfect, uniform golden-brown color on your baked goods is entirely possible with the right techniques and attention to detail. It often involves addressing the common causes we've discussed, from optimizing your oven's performance to making smart choices about your equipment and ingredients. Implementing these solutions will significantly improve your baking results.
Solving uneven browning isn't about finding one magic bullet, but rather applying a combination of strategies. By understanding why unevenness happens and taking proactive steps, you can take control of the baking process. Let's dive into practical uneven baking browning solutions you can start using today to ensure every bake comes out beautifully and evenly browned.
Optimizing Your Oven for Uniform Heat
Since oven inconsistencies are a major culprit, optimizing your oven's heat distribution is a top priority for achieving even browning. This involves understanding your oven's quirks and taking steps to mitigate them. Simple practices can make a significant difference in how uniformly heat is applied to your baked goods, directly addressing a primary cause of unevenness.
Improving oven heat uniformity lays the foundation for successful, even browning. Without a relatively stable and consistent temperature environment, other efforts to fix uneven browning will be less effective. These techniques help you work with your oven's limitations and maximize its performance for baking tasks.
Calibrating Your Oven Temperature for Accuracy
Many home ovens are not calibrated perfectly and can be off by 25°F or more from the set temperature. This inaccuracy can lead to baking at a temperature higher or lower than intended, affecting browning speed. To calibrate your oven, you'll need a reliable oven thermometer. Place it in the center of your oven and preheat the oven to a standard baking temperature, like 350°F (175°C). Check the thermometer reading after the oven has preheated for at least 20-30 minutes to allow the temperature to stabilize.
If the thermometer consistently reads higher or lower than the set temperature, you may need to adjust your oven's internal calibration if it has that feature (check your oven manual) or simply remember to set your oven higher or lower accordingly. For example, if your oven runs 20°F cool, set it to 370°F (185°C) when the recipe calls for 350°F (175°C). Accurate temperature is fundamental to consistent results and is a key part of uneven baking browning solutions.
Rotating Baking Sheets for Consistent Browning
Even with a calibrated oven, hotspots can still exist. Rotating your baking sheets halfway through the baking time helps expose all sides of your baked goods to different areas of the oven, averaging out the heat exposure. For example, if the back of your oven is hotter, rotating the sheet 180 degrees ensures the front gets time in the hotter spot and the back gets time in the cooler spot.
This simple step is incredibly effective, especially when baking items directly on sheets like cookies, scones, or biscuits. A typical rotation involves turning the sheet 180 degrees; if baking on multiple racks, you might also swap the sheets between racks, moving the top sheet to the bottom and vice versa. This manual intervention is a powerful tool in combating oven hotspots and achieving more uniform color, a vital strategy among uneven baking browning solutions.
Using an Oven Thermometer for Precise Temperature Monitoring
Relying solely on your oven's built-in thermostat can be misleading, as they can be inaccurate and don't always reflect the true temperature inside the oven cavity. An independent oven thermometer provides a real-time reading of the actual air temperature. Place it somewhere visible, away from the heating elements, preferably clipped to a rack in the center of the oven.
Monitoring with an oven thermometer allows you to see if your oven is maintaining the set temperature or if it fluctuates. This information is invaluable for making adjustments. If you notice the temperature dropping significantly when you open the door or fluctuating wildly, it might indicate a need for oven service or simply a need to be more patient during preheating. Knowing the true temperature is foundational for predictable baking and is a non-negotiable step in implementing effective uneven baking browning solutions.
Investing in a Convection Oven or Using Convection Settings
Convection ovens use a fan to circulate hot air throughout the oven cavity. This forced air movement helps to equalize the temperature and eliminate hotspots, leading to much more uniform heat distribution. Convection baking often results in faster, more even browning because the moving air transfers heat more efficiently to the surface of the food.
If your oven has a convection setting, try using it for baked goods where even browning is critical, like cookies, cakes, and pastries. You may need to adjust the temperature or baking time, as convection typically bakes faster and at slightly lower temperatures (often recommended to reduce the temperature by 25°F / 15°C). While not all recipes benefit from convection (it can dry out some items), for many baked goods, it's an excellent way to achieve consistent color and is a premium solution for uneven baking browning solutions.
Choosing the Right Baking Pans for Even Heat Distribution
Selecting the appropriate baking pan is just as important as setting the correct oven temperature. Different pan materials and colors conduct and radiate heat differently, directly impacting how quickly and evenly your baked goods brown, particularly on the bottom and sides. Using the right pan for the job can prevent many common browning issues.
Understanding how your pans interact with oven heat allows you to make informed choices that contribute to more uniform results. It's not just about size and shape; the material and finish are critical factors in controlling the rate of heat transfer and are essential considerations when seeking uneven baking browning solutions.
Selecting Light-Colored Metal Pans for Even Baking
Light-colored, shiny metal pans, typically made of aluminum or aluminized steel, are excellent conductors of heat but are poor absorbers of radiant heat due to their reflective surface. This means they heat up gradually and transfer heat evenly through conduction to the bottom and sides of your bake. This results in gentle, uniform browning, reducing the risk of burnt bottoms or edges before the rest of the item is cooked through.
For recipes where even, controlled browning is desired, such as cakes, muffins, and many types of bread, light-colored metal pans are often the best choice. They promote a consistent rise and even color development throughout the entire baked good. Investing in good quality, light-colored metal bakeware is a foundational step towards achieving reliable and uniform baking results and is a key component of effective uneven baking browning solutions.
Avoiding Dark or Non-Stick Pans for Specific Recipes
Dark-colored pans, particularly those with dark non-stick coatings, absorb radiant heat much more readily than light-colored pans. This can cause the surfaces in contact with the pan to heat up significantly faster, leading to darker, sometimes burnt, bottoms and sides. While this can be desirable for achieving a crispy crust on certain items like pizzas or rustic breads baked at high temperatures, it's often detrimental for delicate items like cakes or cookies, where gentle, even browning is preferred.
If you must use a dark pan for a recipe designed for a light pan, you may need to reduce the oven temperature by 25°F (15°C) and potentially shorten the baking time to compensate for the faster heat transfer. Being mindful of the pan color and adjusting accordingly is crucial for preventing unevenness and is a practical approach to implementing uneven baking browning solutions.
Using Glass Pans with Caution and Temperature Adjustments
Glass baking dishes are another common type of bakeware, but they conduct heat differently than metal. Glass is an insulator, meaning it heats up more slowly, but once hot, it retains heat very well. Glass also allows radiant heat to pass through more easily than shiny metal but is less reflective than shiny metal. This can lead to the bottom and sides of your bake browning faster and darker than the top.
When using glass pans, especially for cakes or casseroles, it's generally recommended to reduce the oven temperature by 25°F (15°C) compared to what a recipe calls for when using a metal pan. This helps prevent the edges and bottom from becoming too dark before the center is cooked. While convenient for their ability to go from oven to table, using glass requires careful temperature management to avoid uneven browning, making temperature adjustment a necessary step when using them as part of your uneven baking browning solutions.
Mastering Ingredient Distribution for Uniform Color
The way ingredients are incorporated into your dough or batter has a direct impact on the uniformity of browning. Sugar and fat are particularly important, as they are critical for both flavor development and browning. Ensuring they are evenly dispersed prevents localized areas of rapid browning or lack thereof, contributing to a more consistent final product.
Proper mixing isn't just about combining ingredients; it's about creating a homogeneous mixture where every part behaves similarly during baking. This attention to detail during the preparation phase is a proactive measure that significantly reduces the likelihood of encountering uneven browning issues later in the oven, making it a foundational step in effective uneven baking browning solutions.
Ensuring Proper Mixing Techniques for Even Sugar and Fat Dispersion
Effective mixing is key to preventing uneven browning caused by concentrated pockets of sugar or fat. When creaming butter and sugar for cookies or cakes, ensure they are beaten together until light and fluffy, creating a uniform mixture. When adding dry ingredients, mix until just combined to avoid overdeveloping gluten, but ensure there are no pockets of unmixed flour or sugar.
For doughs, proper kneading ensures fats and sugars are evenly distributed throughout the gluten structure. Using appropriate mixing methods, whether creaming, cut-in (for pastry), or standard mixing, ensures that the components responsible for browning are spread consistently throughout the matrix. This uniformity in ingredient distribution is a critical factor in achieving uniform color and is a fundamental technique for implementing uneven baking browning solutions.
Preventing Sugar Pooling: Chilling Cookie Dough Before Baking
Cookie dough, especially those high in butter and sugar, can suffer from sugar pooling, where sugar melts and spreads faster than the rest of the dough, leading to thin, crispy edges that brown excessively while the center remains pale. Chilling cookie dough before baking is an excellent way to prevent this and promote more even browning and thickness.
Chilling solidifies the fat (butter), which slows down the spread of the cookie in the oven. It also gives the moisture in the dough time to distribute more evenly and allows the sugar granules to dissolve slightly into the liquid components. When the chilled dough hits the hot oven, the edges firm up faster, controlling spread and allowing the center to catch up in browning. Chilling for at least 30-60 minutes, or even overnight, is a highly effective method for more uniform cookies and is a key strategy among uneven baking browning solutions for this particular bake.
Maximizing Air Circulation in Your Oven
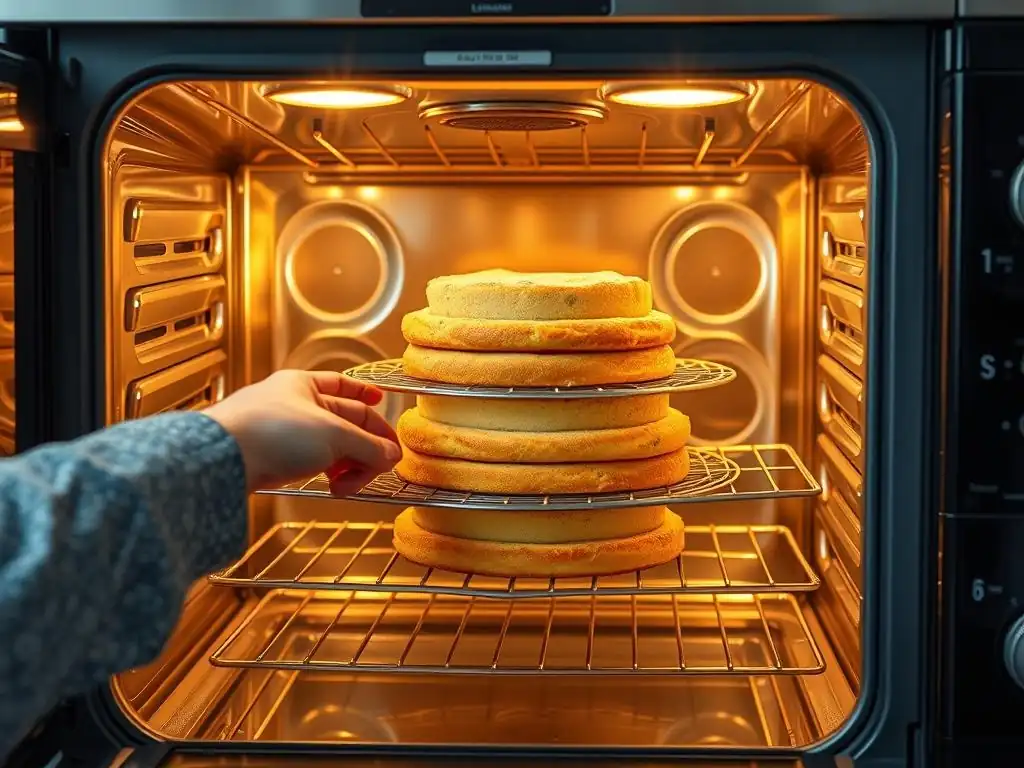
Adequate airflow around your baked goods is essential for uniform heat distribution and, consequently, even browning. Stagnant air pockets lead to uneven temperatures, causing some areas to brown slower than others. By optimizing how items are placed in the oven, you can ensure that hot air circulates freely, promoting consistent results.
Think of air circulation as the delivery system for heat in your oven. If the delivery is blocked or restricted, some areas won't receive enough heat, while others might receive too much due to proximity to heating elements or pan contact. Improving airflow is a direct way to address these inconsistencies and is a core component of effective uneven baking browning solutions.
Baking in Batches to Avoid Overcrowding
The simplest way to ensure proper air circulation is to avoid overcrowding your oven. Bake items in batches if necessary, even if it takes longer. Leave at least 1-2 inches of space between pans and the oven walls, as well as between multiple pans on the same rack. This space allows hot air to flow freely around each item, ensuring even heat exposure.
While it might be tempting to fill the oven to capacity to save time, the result is almost always unevenly baked and browned goods. Prioritizing airflow by baking in smaller batches is a fundamental practice for achieving uniform results and is a crucial step in implementing uneven baking browning solutions. Patience in baking often pays off with superior quality.
Using Baking Racks for Better Airflow
Placing baking sheets directly on the oven floor or too close to the walls restricts airflow. Using the oven racks as intended ensures that air can circulate beneath and around your baking vessel. Most ovens have multiple rack positions, allowing you to adjust placement based on what you are baking.
Using a wire cooling rack placed inside a baking sheet for items like bacon or roasted vegetables also promotes airflow around the food, allowing heat to reach all surfaces. While less common for traditional baked goods like cakes or cookies, ensuring the baking sheet or pan itself is properly positioned on an oven rack is key to leveraging the oven's convection heating and is a simple yet effective technique for promoting even browning as part of your uneven baking browning solutions.
Optimizing Oven Rack Placement for Even Browning
The position of the oven rack significantly impacts how heat is delivered to your baked goods. Heat primarily comes from the heating elements (bottom and top) and from circulating hot air. The middle rack is often considered the most neutral position, offering the most even heat distribution as it's equidistant from the top and bottom elements and typically within the optimal path of circulating air.
However, depending on your specific oven's hotspots and the type of bake, other positions might be better. For items needing more bottom browning (like pies or pizzas), a lower rack might be beneficial. For items needing more top browning (like gratins), an upper rack might work. For general baking aiming for evenness, starting on the middle rack is usually best. If baking multiple items, placing them on two racks, staggered vertically so they aren't directly above each other, also helps air circulate. Experimenting with rack placement is a practical way to refine your uneven baking browning solutions.
Addressing Dough/Batter Issues for Uniform Browning
The characteristics of your dough or batter – specifically its consistency and how it's developed – directly influence how moisture is released and how heat is absorbed during baking. Inconsistencies in these areas can lead to variations in browning. Taking steps to ensure your dough or batter is uniform before it goes into the oven is crucial for consistent results.
Issues like overly stiff batter, dry pockets in dough, or uneven gluten development can all contribute to uneven browning. Addressing these problems at the preparation stage is a proactive approach that prevents many browning issues before they even start, making it an essential part of developing effective uneven baking browning solutions.
Adjusting Liquid Content to Achieve the Right Consistency
The moisture level in your dough or batter impacts browning because water must evaporate before temperatures can rise enough for the Maillard reaction and caramelization. If your mixture is too dry in spots, those areas will brown much faster. If it's too wet, browning will be inhibited. Achieving the correct consistency specified by the recipe is vital.
Sometimes, environmental factors like humidity or even slight inaccuracies in measuring ingredients can affect consistency. If your dough feels too dry, add a tiny amount more liquid (water, milk, etc.) until it reaches the desired texture. If a batter seems too thick, a splash more liquid can help. Ensuring a consistent, homogenous consistency throughout the mixture promotes even moisture loss during baking, leading to more uniform browning. This simple adjustment is a key step in achieving smooth, even color and is part of comprehensive uneven baking browning solutions.
Allowing Dough to Rest Properly for Even Gluten Development
For yeast doughs and some other doughs, proper resting time is crucial for allowing gluten to relax and moisture to distribute evenly. If dough is not rested sufficiently, it can be tight and unevenly hydrated, leading to areas that bake and brown differently. Resting periods specified in recipes are not just for flavor development or rise; they also contribute to a more uniform structure.
For cookie doughs, chilling acts as a form of resting that allows flavors to meld and moisture to redistribute, preventing uneven spread and browning. For bread doughs, allowing adequate proofing time ensures an even, airy structure that bakes uniformly. Respecting resting and proofing times ensures the dough is in the optimal state for even heat absorption and browning, making it an important technique in achieving uniform crust color and is a key part of uneven baking browning solutions.
Preventing Dry Spots: Covering Cake Batter While Waiting to Bake
If you prepare cake batter but have to wait a few minutes before putting it in the oven (e.g., waiting for the oven to finish preheating or another batch to finish), the surface of the batter can start to dry out. This creates a thin skin which will brown much faster than the moist batter underneath, leading to unevenness on the top crust.
To prevent this, lightly cover the cake pan with plastic wrap or a clean kitchen towel while it's waiting to go into the oven. This simple step keeps the surface moist and prevents a premature skin from forming. Ensuring the batter surface remains consistently moist until baking begins helps promote uniform browning on the top of your cake, a small but effective tactic among uneven baking browning solutions.
Specific Troubleshooting for Common Baked Goods
Different types of baked goods present unique challenges when it comes to achieving uniform browning. The structure, ingredients, and typical baking methods for cookies, cakes, bread, and pies all influence where and how unevenness is likely to occur. Let's look at specific strategies tailored to these popular bakes.
While the general principles of oven calibration, pan choice, and ingredient distribution apply across the board, focusing on the specific characteristics of each type of baked good allows for more targeted and effective troubleshooting. Applying these tailored uneven baking browning solutions can make a significant difference in the appearance and quality of your favorite treats.
Cookies are particularly susceptible to uneven browning, often resulting in burnt edges and pale centers. This is frequently caused by hotspots in the oven, using dark baking sheets, or placing dough balls too close together. The high sugar and fat content also means they brown quickly once the right temperature is reached.
To fix uneven cookie browning:
- Use light-colored, shiny baking sheets.
- Bake on the middle rack.
- Rotate the baking sheet 180 degrees halfway through the baking time (e.g., after 6-8 minutes for a 12-15 minute bake).
- Leave ample space (at least 2 inches) between cookies and between the cookies and the edge of the sheet.
- Chill the cookie dough before baking to control spread and promote even thickness, which helps with uniform heat penetration and browning.
- Consider using parchment paper or a silicone baking mat, which can help insulate the bottom slightly and promote more even heat transfer. These combined efforts provide excellent uneven baking browning solutions for cookies.
Fixing Uneven Cake Browning: Strategies for Success
Cakes often suffer from uneven browning on the top (cracking, darker edges) or sides/bottom (too dark compared to the center). Causes include oven hotspots, dark pans, or the cake surface drying out before baking. The volume and density of cake batter mean heat penetration needs to be consistent throughout the bake.
To address uneven cake browning:
- Use light-colored metal cake pans.
- Ensure your oven is accurately calibrated and use an oven thermometer.
- Bake cakes typically on the middle rack.
- If baking multiple cakes, ensure there is adequate space around each pan.
- If your cake tops brown too fast before the inside is done, you can loosely tent the top with aluminum foil for the last 15-20 minutes of baking.
- Avoid opening the oven door frequently, as temperature fluctuations disrupt even baking. Implementing these tactics provides reliable uneven baking browning solutions for cakes.
Achieving Uniform Bread Crust Color: Techniques and Adjustments
Bread crust color is a result of significant Maillard reaction and caramelization. Uneven browning can result in pale spots or areas that are too dark. This is often due to inconsistent oven temperature, lack of steam in the oven (for some breads), or uneven surface moisture on the loaf.
For uniform bread crust browning:
- Ensure your oven is thoroughly preheated to the correct temperature.
- Use an oven thermometer to confirm the temperature.
- For many crusty breads, using steam in the oven (e.g., by placing a pan of hot water on the bottom rack or using a Dutch oven) helps keep the surface moist initially, promoting better oven spring and more even browning later.
- Ensure loaves are spaced adequately on the baking sheet or in the oven.
- Rotate the loaf or baking sheet halfway through baking if you notice uneven coloring. These strategies are key uneven baking browning solutions for achieving that desirable, uniform bread crust.
Troubleshooting Uneven Pie Crust Browning: Tips and Tricks
Uneven browning in pie crusts often manifests as edges browning too quickly while the center remains pale, or the bottom crust not browning sufficiently. This is frequently related to pan type, filling moisture, and the delicate nature of pastry dough.
To fix uneven pie crust browning:
- Use a glass or ceramic pie dish for better heat retention on the bottom, or a metal pan if you struggle with bottom browning.
- Protect the edges of the pie crust from over-browning by using pie shields or strips of aluminum foil crimped around the edge. Apply these shields once the edges have reached the desired golden color, typically halfway through baking.
- For soggy or pale bottom crusts, try baking the pie on a preheated baking sheet or pizza stone placed on the lowest oven rack to give it a boost of heat from underneath.
- Ensure your oven temperature is accurate. These targeted methods are effective uneven baking browning solutions for perfecting pie crusts.
Advanced Techniques for Enhancing Browning
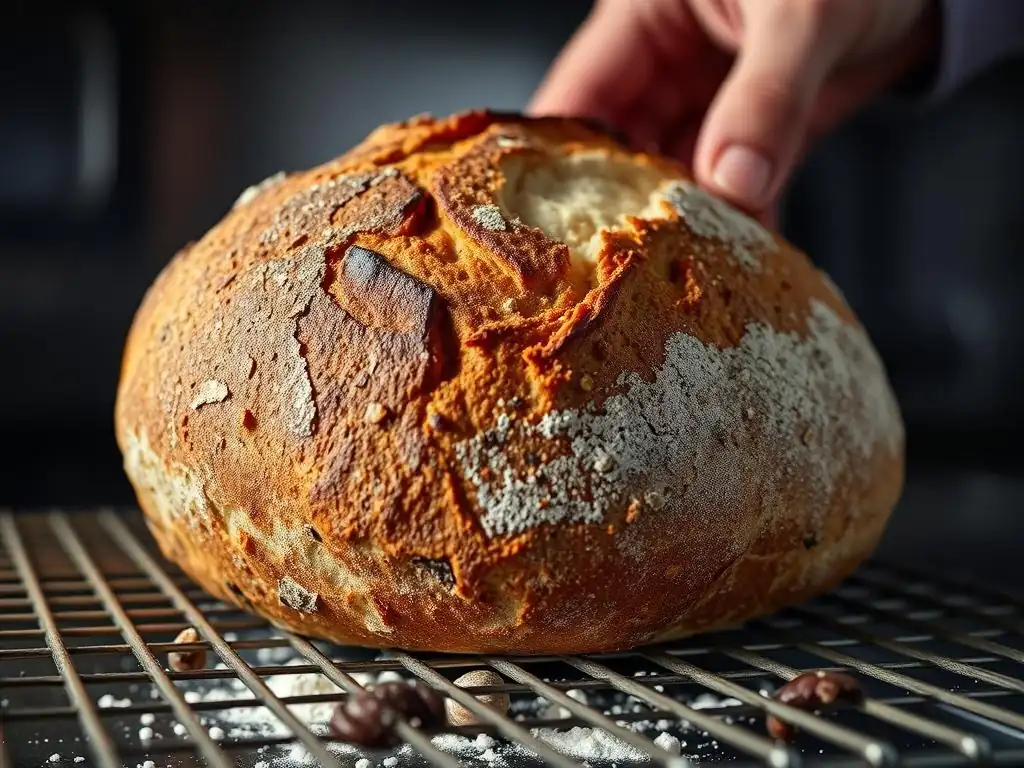
Sometimes, you might want to encourage more browning or achieve a specific finish beyond just fixing unevenness. Certain washes and applications applied to the surface of baked goods before or during baking can enhance color, shine, and even contribute to a crispier texture. These techniques offer additional control over the final appearance.
These advanced methods are particularly useful when aiming for that professional-looking finish or when a recipe specifically calls for them to achieve a desired crust characteristic. They are not always necessary for basic baking but can elevate your results and provide additional tools in your arsenal of uneven baking browning solutions.
Using Egg Washes for Enhanced Color and Shine
An egg wash is a classic technique used to give baked goods a beautiful golden color and a glossy finish. It's typically applied to bread, pastries, and sometimes pie crusts before baking. The protein and sugars in the egg contribute significantly to the Maillard reaction and caramelization on the surface.
Different egg washes yield different results:
- Whole egg + water: Good color and moderate shine.
- Egg yolk + water or milk: Richer color and more shine.
- Egg white + water: Shiny, slightly crisp finish, less color.
- Whole egg, yolk, or white alone (no liquid): Very deep color, sometimes thicker finish.
Applying the wash evenly with a pastry brush ensures uniform color development. This simple step is a powerful way to enhance the visual appeal and contribute to even browning, serving as an excellent finishing touch among uneven baking browning solutions.
Brushing with Milk or Cream for Improved Browning
If you want a softer crust and less intense browning than an egg wash provides, brushing the surface of your baked goods with milk or cream is a good alternative. The lactose (milk sugar) and proteins in milk or cream will participate in the Maillard reaction, though to a lesser extent than egg or added sugar.
Milk washes are often used on softer rolls, loaves, or scones. Whole milk or cream will provide a slightly richer color and softer crust than skim milk due to the higher fat content. Apply a thin, even layer before baking. This technique offers a subtler way to encourage browning compared to egg washes and can be a useful tool when seeking gentler uneven baking browning solutions.
Applying Sugar Syrups for a Glossy Finish
For a very shiny, slightly sticky, and sweet crust, applying a simple sugar syrup (equal parts sugar and water, heated until sugar dissolves) after baking is an option, particularly for certain types of bread or pastries. The sugar on the surface caramelizes slightly and provides a glossy sheen.
Alternatively, a diluted sugar syrup or honey can be brushed on before baking to encourage more intense browning and a crispier, sweeter crust. Be cautious when applying sugar directly before baking, as it can lead to very rapid and potentially uneven browning, even burning, if not monitored closely. When used judiciously, sugar washes can enhance both color and texture, offering a specific outcome among various uneven baking browning solutions.
Utilizing the Broiler for Controlled Browning (With Caution!)
The broiler element in your oven provides intense top-down heat, designed for quickly browning or crisping surfaces. In some cases, if the top of your baked good is significantly paler than the rest after it's fully cooked, a very brief stint under the broiler can help even out the color.
Use the broiler with extreme caution! Food under the broiler can go from perfectly golden to burnt in mere seconds. Place the item on an upper rack (but not too close to the element), keep the oven door ajar (as per your oven's manual for broiling), and watch it continuously. This is a last-resort method for correcting pale tops and requires constant vigilance, but it can be a targeted solution for specific uneven baking browning solutions related to the top surface.
Preventing Future Uneven Browning Issues: Best Practices
Consistent, even browning isn't just about fixing problems when they occur; it's about adopting habits and practices that minimize the chances of unevenness in the first place. By being proactive and paying attention to details throughout your baking process, you can achieve reliable, beautiful results batch after batch.
Developing good baking habits and understanding your equipment are the best ways to prevent future issues. These practices empower you to anticipate potential problems and take steps to avoid them, making uneven browning a rare occurrence rather than a frequent frustration.
Maintaining Consistent Baking Habits for Predictable Results
Consistency is key in baking. Use the same measuring techniques every time (e.g., scoop and level flour), follow recipes accurately, and pay attention to details like mixing times and temperatures. Variations in ingredient amounts or preparation can lead to inconsistencies in the dough or batter, which then bake and brown unevenly.
Using reliable equipment consistently also helps. If you typically use a light-colored metal pan for a certain recipe, continue using it. If you switch to a dark pan without adjusting temperature or time, you're likely to encounter unevenness. Establishing and sticking to consistent practices removes many variables that contribute to uneven results and is fundamental to applying uneven baking browning solutions effectively over time.
Regularly Checking Your Oven's Performance
Don't assume your oven is always accurate or performs the same way. Regularly check its temperature with an oven thermometer, perhaps every few months or if you notice a change in baking results. Pay attention to how quickly it preheats and if it holds a consistent temperature.
If you consistently struggle with a specific type of uneven browning (e.g., bottoms always too dark), it might indicate a heating element issue or a persistent hotspot in that area of the oven. Knowing your oven's quirks allows you to anticipate problems and apply preventative measures, making regular performance checks a valuable step in preventing future uneven baking browning solutions.
Experimenting and Documenting Your Baking Process
Become a baking scientist in your own kitchen! When you try a new recipe or encounter uneven browning, don't just get frustrated. Experiment with small adjustments in subsequent batches, such as lowering the temperature slightly, rotating the pan sooner, or trying a different rack position.
Document your experiments. Note what you changed, the result, and whether it improved the browning. This systematic approach helps you learn what works best with your specific oven, equipment, and recipes. Building this knowledge base is invaluable for consistently achieving even browning and developing personalized uneven baking browning solutions tailored to your circumstances.
Adapting Recipes Based on Your Oven and Equipment
Once you understand your oven's performance (hotspots, temperature accuracy) and how your different pans behave, don't be afraid to adapt recipes slightly. If a recipe calls for 375°F but your oven runs hot, you might bake at 360°F. If a recipe assumes a light pan but you only have a dark one, reduce the temperature by 25°F.
These aren't drastic changes, but small, informed adjustments based on your specific baking environment. Experienced bakers constantly make these subtle adaptations. Learning to read a recipe and then translate it for your own kitchen setup is a sign of baking mastery and the ultimate strategy for preventing and solving uneven baking browning solutions.
Frequently Asked Questions
Why is my baking browning unevenly?
Uneven browning is often due to uneven heat distribution within your oven. This can be caused by hot spots or a malfunctioning heating element. Consider using an oven thermometer to check for temperature variations.
What is the Maillard reaction, and how does it relate to browning?
The Maillard reaction is a chemical process between amino acids and reducing sugars that occurs at high temperatures. It's responsible for the browning and flavor development in baked goods.
How can I prevent hot spots in my oven?
You can try rotating your baking pans halfway through the baking time. Also, make sure your oven is properly calibrated and avoid overcrowding the oven, which can restrict airflow.
What type of baking pan is best for even browning?
Choose baking pans made of materials that conduct heat evenly, such as aluminum or glass. Avoid using dark-colored pans, as they can absorb more heat and lead to over-browning on the bottom.
Are there any ingredient adjustments I can make to improve browning?
Adding a small amount of sugar or milk powder to your dough can help promote browning. Ensure your ingredients are fresh and of good quality, as this can impact the Maillard reaction.
Final Reflection: Mastering the Maillard Reaction: From Frustration to Flawless Baking
The quest for perfectly browned baked goods is a universal struggle, a testament to the capricious nature of the Maillard reaction. Understanding its nuances, as explored throughout this article, isn't just about achieving aesthetic perfection; it's about unlocking the full potential of flavor and texture in your baking. Uneven browning isn't simply a cosmetic flaw; it's a symptom of underlying issues that can significantly impact the final product.
The pursuit of even browning has profoundly shaped baking traditions across cultures, influencing everything from recipe development to the design of ovens. The subtle dance between heat, moisture, and sugars is a fascinating process, and mastering it brings a deep sense of satisfaction. The Maillard reaction is not just a chemical process, it's an art form.
This quote, though not directly from a specific source, encapsulates the feeling of accomplishment that comes with understanding and controlling this complex reaction. It's a journey of continuous learning, where each bake offers a new opportunity for refinement and discovery.
Now, consider your own baking experiences. Have you noticed patterns in your uneven browning? What adjustments can you make to your technique, your ingredients, or even your equipment based on the information presented here? I encourage you to experiment, to embrace the learning process, and to find joy in the pursuit of that perfect golden-brown crust. The path to mastering the Maillard reaction is paved with delicious discoveries – go forth and bake!
Unlock Perfectly Browned Treats!
Thanks for diving into the world of Maillard reactions with us! You've now got the knowledge to conquer uneven browning and create baking masterpieces. Ready to put your new skills to the test?
- Master the art of even browning: Experiment with different baking techniques and pan materials, noting the results to refine your approach. This is your chance to become a true baking pro!
- Share your browning breakthroughs: Show off your perfectly browned creations on social media using #BakeWithEaseBrowning. Let's inspire each other!
- Dive deeper: Explore our other articles on advanced baking techniques to unlock even more culinary secrets.
What delicious treat will you bake next, now that you've mastered even browning?