
Avoiding Tough Cookies: Essential Beginner Mixing Tips


Welcome to BakeWithEase, your haven for all things baking! Are your cookies turning out tougher than you'd like? Unlock the secrets to perfectly tender treats with our essential beginner cookie mixing tips. Discover the simple tweaks that can transform your baking and say goodbye to frustrating results. Intrigued? Let's dive in and bake with ease!
- Essential Beginner Cookie Mixing Tips for Perfectly Soft Cookies
- Step-by-Step Guide to Mixing Cookie Dough Without Overworking
- Choosing the Right Mixing Tools and Equipment for Beginner Cookie Bakers
- Temperature and Timing Tips to Prevent Tough Cookies
- Common Mistakes in Beginner Cookie Mixing and How to Avoid Them
- Enhancing Cookie Softness: Additional Mixing Tips and Tricks for Beginners
- Troubleshooting Tough Cookies: How to Fix Overmixed or Dense Dough
- Conclusion: Mastering Beginner Cookie Mixing Tips for Soft, Delicious Classic Cookies.
- Frequently Asked Questions
- Final Reflection: The Sweet Science of Baking Success
- Unlock Your Inner Baker: Master Mixing Techniques Today!
Getting soft, chewy, or tender cookies is a hallmark of successful baking, especially when starting out. Many beginner bakers encounter the frustration of tough cookies, which often stems from how the ingredients are mixed. Mastering beginner cookie mixing tips is fundamental to achieving that desired texture, transforming your efforts from potentially hard discs into delightful treats. It's not just about following a recipe; it's about understanding the subtle science behind combining flour, sugar, fats, and liquids.
This guide will walk you through the crucial steps and common pitfalls of mixing cookie dough. We'll explore why certain ingredients behave the way they do when combined and how your mixing technique directly impacts the final texture. By focusing on careful handling and proper technique, you'll significantly improve your results and consistently bake soft, delicious classic cookies that everyone will love.
One of the primary culprits behind tough cookies is the overdevelopment of gluten. Flour contains proteins, primarily glutenin and gliadin. When these proteins are hydrated and agitated (through mixing), they form a network called gluten. In bread baking, gluten development is desirable as it provides structure and chewiness. However, in cookies, excessive gluten makes them tough and less tender. Think of it like kneading bread dough for too long – the more you work it, the tougher it gets.
For beginner bakers, it's easy to fall into the trap of mixing cookie dough too much, especially when trying to ensure all ingredients are perfectly combined. Each extra stir after the dry ingredients are added encourages more gluten formation. This is why many recipes emphasize mixing only until just combined. The goal is to hydrate the flour enough to come together, but not so much that a strong, elastic gluten network forms. Overmixing is perhaps the single biggest factor contributing to a tough cookie texture.
The ingredients themselves play a significant role in cookie texture, and how you handle them during mixing is critical. Flour type is a major factor; all-purpose flour, commonly used in classic cookie recipes, has a moderate protein content (typically 10-12%). Using a high-protein bread flour (often 12-14%) would inherently lead to tougher cookies due to increased gluten potential, even with careful mixing. Conversely, a lower-protein cake flour (around 8-10%) could result in more tender cookies, though it might affect spread.
Fats, like butter, shortening, or oil, are also crucial. Fats tenderize cookies by coating flour particles, inhibiting gluten development. The state of the fat matters during mixing. Creaming softened butter with sugar incorporates air, which contributes to leavening and a lighter texture. Using melted butter often results in chewier, denser cookies because it doesn't incorporate as much air and distributes differently. Sugar, too, affects texture; granulated sugar helps with spread and crispness, while brown sugar adds moisture and chewiness due to its molasses content. Understanding how these ingredients interact during your beginner cookie mixing process is key.
Achieving perfect cookie texture is less about speed and more about technique. This step-by-step guide focuses on gentle handling and understanding the purpose of each mixing stage to help beginner bakers avoid tough results. Following these steps precisely will make a significant difference in your classic cookies.
Here is a simplified workflow:
- Prepare dry ingredients.
- Cream butter and sugar.
- Add wet ingredients (eggs, vanilla).
- Combine wet and dry mixtures gently.
- Chill (if required).
Creaming butter and sugar is often the first step in many cookie recipes and is vital for texture. The goal is to beat softened butter with sugar until it becomes light and fluffy. This process achieves two things: dissolving sugar crystals slightly and, more importantly, incorporating air bubbles into the mixture. These air bubbles expand during baking, contributing to the cookie's lift and tenderness.
Using butter that is too cold won't cream properly, resulting in a dense dough. Butter that is too soft or melted won't hold air effectively. Aim for butter that gives slightly when pressed gently, usually after sitting at room temperature for 30-60 minutes.
Using an electric mixer (handheld or stand mixer) on medium speed is most effective for creaming. Beat the softened butter alone for about 30 seconds to break it up, then add the sugar. Cream together for 3 to 5 minutes, scraping down the sides of the bowl occasionally. The mixture should visibly lighten in color and increase in volume, resembling fluffy frosting. This is a crucial stage in beginner cookie mixing tips – don't cut this short! It sets the foundation for tender cookies.
How to Incorporate Dry Ingredients Gently to Avoid Gluten Overdevelopment
This is the stage where overmixing is most likely to occur and lead to tough cookies. Once you've creamed your butter and sugar and added wet ingredients like eggs and vanilla, it's time to add the dry mixture (flour, baking soda/powder, salt). The key here is minimal agitation. Overmixing at this point activates the gluten in the flour, resulting in that undesirable tough texture.
Add the dry ingredients all at once or in two additions. Mix on the lowest speed of your electric mixer, or better yet, switch to a wooden spoon or spatula. Mix just until no dry streaks of flour are visible. This usually takes only 30 to 60 seconds. A few small lumps of dough or unmixed spots are perfectly fine and will typically resolve during baking. Stopping the moment the flour disappears is a fundamental principle of beginner cookie mixing tips for tender results.
Even after mixing, how you handle the dough can affect its texture. Excessive handling or kneading after the dough comes together further develops gluten. This is particularly important for recipes that require rolling and cutting, like sugar cookies. Try to handle the dough as little as possible.
When forming cookies, whether scooping drop cookies or shaping dough for slice-and-bake, work quickly and gently. Avoid rolling the dough repeatedly or pressing it too firmly. If rolling, use minimal flour on your surface and rolling pin. For drop cookies, a cookie scoop ensures uniform size and minimizes handling. Chilling the dough, a common step in many recipes, also helps relax the gluten that did develop, contributing to a more tender cookie. Consider chilling dough for at least 30 minutes before baking.
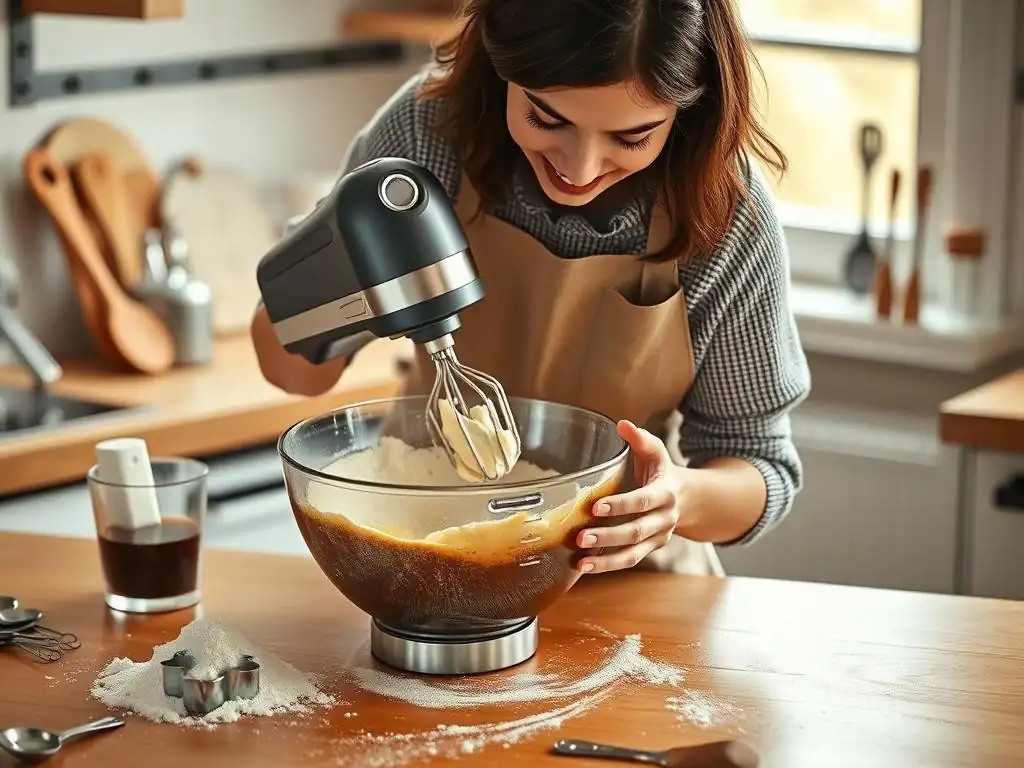
The tools you use can definitely influence your mixing process and ultimately the texture of your cookies. While elaborate gadgets aren't necessary, understanding how common tools affect the dough is part of mastering beginner cookie mixing tips.
Electric mixers, both stand mixers and handheld versions, offer significant advantages for beginner bakers, particularly during the creaming stage. A stand mixer provides consistent power and speed, making it effortless to achieve the light and fluffy butter-sugar mixture essential for tender cookies. A good creaming process with a stand mixer usually takes 3-5 minutes on medium speed. Handheld mixers are also effective but may require a bit more effort and time, perhaps 5-7 minutes of creaming.
However, when adding dry ingredients, electric mixers can be a disadvantage because they make it easy to overmix quickly. If using an electric mixer for the dry ingredients, switch to the lowest speed and mix only for a very short time ( ~30 seconds) until just combined. Often, switching to hand mixing with a spatula or wooden spoon for the final incorporation of dry ingredients is a safer bet for beginners learning cookie mixing tips, ensuring you don't accidentally overwork the dough.
How Mixing Bowls and Spatulas Influence Dough Consistency and Texture
The right mixing bowl can make the process easier and more effective. For electric mixers, a sturdy bowl (like stainless steel or glass) that fits securely is important. Bowl size matters too; ensure the bowl is large enough to accommodate all ingredients without overflowing, but not so large that your mixer attachments can't properly reach the ingredients at the bottom. A bowl that's too wide and shallow might make it harder to cream butter and sugar effectively.
A flexible rubber or silicone spatula is an indispensable tool for any beginner cookie baker. Spatulas are perfect for scraping down the sides and bottom of the bowl during mixing, ensuring all ingredients are evenly incorporated. More importantly, they are ideal for gently folding in dry ingredients by hand, which is the safest way to avoid gluten development. Unlike a stiff spoon, a flexible spatula allows you to fold the ingredients together with minimal stirring or beating, aligning perfectly with gentle beginner cookie mixing tips.
Paying attention to ingredient temperatures and mixing duration is just as important as the order of adding ingredients. These subtle details significantly impact the dough's consistency and the final cookie texture.
Ingredient temperature is a critical, yet often overlooked, factor in beginner cookie mixing. Softened butter, as mentioned, is essential for proper creaming and air incorporation. If your butter is too cold, it won't cream effectively, leading to a dense dough. If it's melted, you won't incorporate air, resulting in flat, often chewier or tougher cookies. Eggs should typically be at room temperature as well. Cold eggs can seize the creamed butter mixture, affecting its smooth consistency and potentially deflating some of the air you've incorporated.
Bringing ingredients to room temperature ensures they emulsify properly, meaning they combine smoothly and evenly. This leads to a more uniform dough, which bakes more predictably. For example, taking butter out of the fridge about 30-60 minutes before starting is usually sufficient. Eggs can warm up in about 15-20 minutes by placing them in a bowl of warm tap water. Paying attention to these temperature details is a key step for beginner cookie mixing tips focused on texture.
Knowing when to stop mixing is perhaps the most crucial skill for avoiding tough cookies. For the creaming stage (butter and sugar), aim for 3-5 minutes with an electric mixer until the mixture is light and fluffy. This is sufficient time to incorporate air without overworking the butter.
When adding dry ingredients, the ideal mixing time is much shorter: 30-60 seconds, or simply until no dry streaks of flour are visible. Do not continue mixing "just to be sure" or until the dough looks perfectly smooth. The dough should look just combined, possibly with a few small bits of dry flour still tucked away. Stopping at this point is the golden rule for beginner cookie mixing tips to prevent gluten development. Signs you might have mixed enough include the dough pulling away from the sides of the bowl (though this is more common in bread dough, it can indicate overmixing in cookie dough too) or the dough becoming very smooth and elastic. If you see these signs, stop immediately.
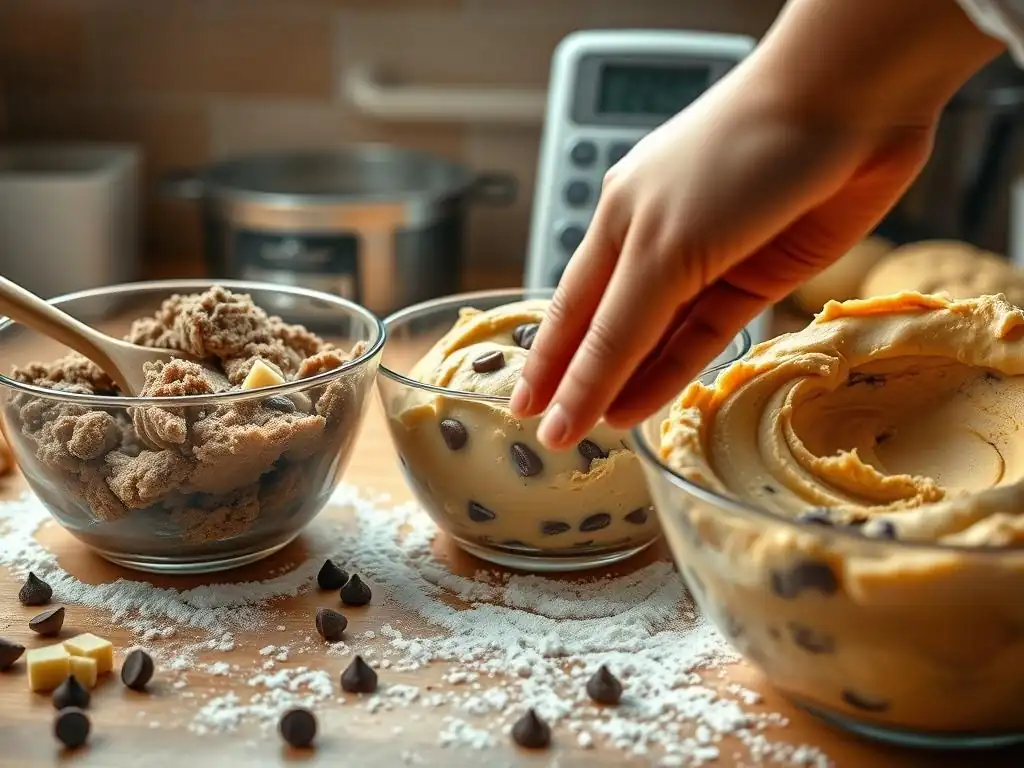
Even with the best intentions, beginner bakers can make mixing errors that compromise cookie texture. Recognizing these mistakes and learning how to prevent them is vital for baking success.
Overmixing Dough: Effects and Prevention Strategies
Overmixing is the most common mistake leading to tough cookies. As discussed, it develops gluten, making cookies dense, hard, and less tender. The effect is similar to kneading bread dough – the more you mix after adding flour, the stronger and tougher the dough becomes. Instead of spreading nicely, overmixed cookie dough might hold its shape too much during baking, resulting in thicker, cakier, and less tender cookies.
To prevent overmixing, follow these strategies:
- Mix dry ingredients only until just combined. Stop as soon as you no longer see dry flour streaks.
- Use the lowest speed if using an electric mixer for dry ingredients, or switch to hand mixing.
- Set a timer when adding dry ingredients (
30-60 secondsis often enough). - Err on the side of undermixing slightly; a few unincorporated flour patches are preferable to overdeveloped gluten.
- Educate yourself: Understand why overmixing is bad (gluten development) to reinforce the importance of gentle handling in beginner cookie mixing tips.
Baking is a science, and accurate measurements are crucial. Using too much flour is a frequent error for beginners, often resulting from scooping flour directly from the bag with the measuring cup (which compacts it, adding up to 25% more flour than needed). Excess flour leads to a drier dough and, consequently, tougher cookies because there's more protein available for gluten development and less moisture and fat to tenderize. A standard cup of all-purpose flour should weigh around 120-125 grams when measured correctly (spooned lightly into the cup and leveled).
Conversely, using too little fat or sugar can also impact texture. Fat tenderizes, so insufficient fat means less gluten inhibition. Sugar contributes to spread and moisture; too little can result in thicker, less tender cookies. Always use a kitchen scale for dry ingredients, especially flour, for the most accurate results. This simple step is one of the most impactful beginner cookie mixing tips for consistent texture.
Beyond the basic steps, a few extra techniques can help you achieve even softer, more tender cookies. Incorporating moisture and understanding how different cookie types require slightly varied mixing approaches are key.
Adding moisture can help tenderize cookies by providing liquid for leavening reactions and keeping the texture soft. Ingredients like brown sugar (which contains molasses), extra egg yolks, or even a small amount of liquid like milk or buttermilk can increase moisture content. For example, substituting some granulated sugar with brown sugar in a recipe can yield a chewier, softer cookie. A common ratio might be 1 part brown sugar to 1 part granulated sugar.
Another trick is adding a tablespoon or two of cornstarch or pudding mix to the dry ingredients. Cornstarch interferes with gluten formation and absorbs moisture, leading to a softer, more tender crumb. For a standard batch using ~2 cups of flour, adding 1-2 tablespoons of cornstarch can make a noticeable difference in softness. These are simple additions that fit well within beginner cookie mixing tips for enhanced texture.
While the core principle of avoiding overmixing dry ingredients applies broadly, some classic cookie types benefit from slight variations in mixing.
- Drop Cookies (like Chocolate Chip): These typically use the creaming method. The focus is on creaming butter/sugar well and then mixing in dry ingredients just until combined. Minimal handling after mixing is key.
- Sugar Cookies (Rolled & Cut): These also start with creaming. Because they require rolling, the dough will be handled more. Chilling the dough extensively (
at least 1 hour, or up to2-3 days) is crucial as it allows gluten to relax, making the dough easier to roll without becoming tough. - Shortbread Cookies: These often use a "reverse creaming" or simply mixing method where butter is cut into the dry ingredients before adding liquid. This coats the flour particles with fat early on, minimizing gluten development and resulting in a very tender, crumbly texture.
Understanding these subtle differences helps beginner bakers apply cookie mixing tips effectively depending on the specific recipe.
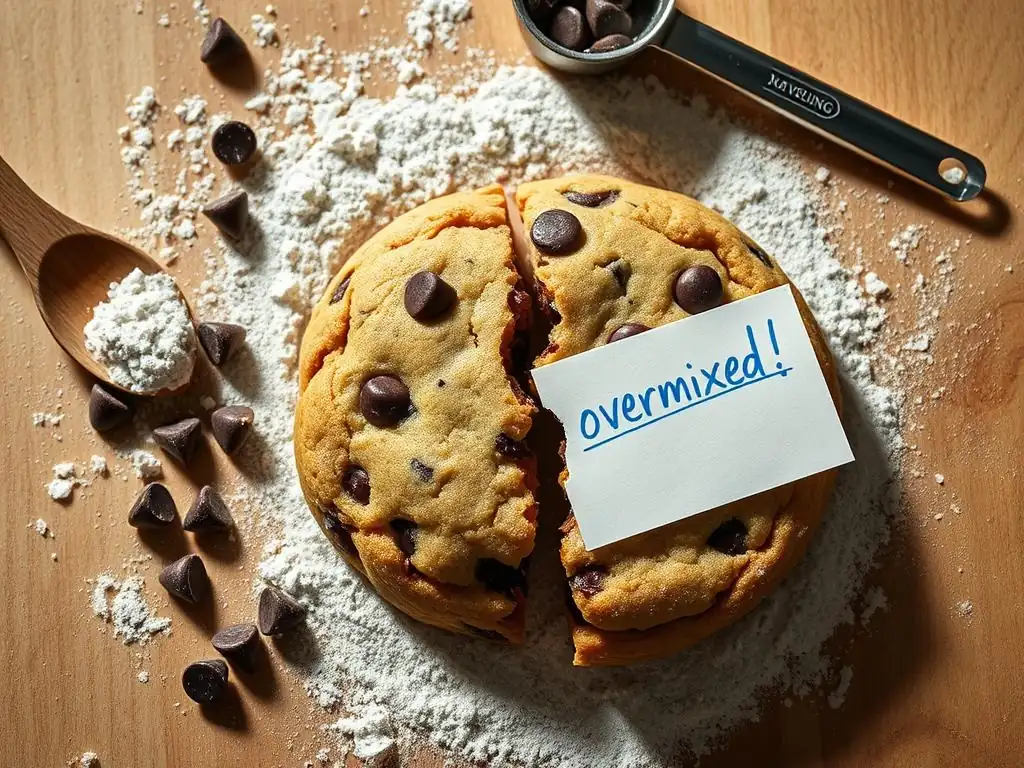
Sometimes, despite your best efforts, you might realize you've overmixed the dough or it feels too dense. Don't despair! There might be ways to salvage it, or at least learn from the experience.
If you suspect you've slightly overmixed the dough after adding the dry ingredients – maybe you mixed for a bit too long or the dough feels a little too cohesive and elastic – the best immediate action is often to stop mixing immediately. The longer the dough sits, the more the gluten network can relax.
Chilling the dough is your best friend here. Refrigerating the dough for an extended period ( at least a few hours, or even overnight) can help relax the gluten that has developed. Cold dough is also easier to handle gently when shaping. While chilling won't undo gluten development entirely, it can mitigate some of the toughness. Some bakers suggest incorporating a tiny bit more fat (like a teaspoon of melted butter or oil) or a touch of liquid, but this is risky and can alter the recipe balance significantly. Chilling is the safest and most effective rescue technique for beginner cookie mixing issues.
Unfortunately, sometimes dough is simply too far gone to be rescued effectively. If you've significantly overmixed the dough, perhaps beating it for several minutes after adding the flour, the gluten network may be too strong to relax sufficiently through chilling alone. Signs of irreparably tough dough include:
- It feels very elastic and resists being formed or rolled.
- It snaps back significantly when you try to shape it.
- It looks very smooth, like bread dough, rather than slightly crumbly or shaggy.
If your dough exhibits these characteristics, especially after trying to chill it, the resulting cookies are likely to be hard and dense regardless of baking. In such cases, it's often better to discard the dough and start fresh, applying the beginner cookie mixing tips you've learned to the new batch. Think of it as a learning experience!
Achieving soft, tender cookies is a rewarding milestone for any beginner baker. While it might seem daunting at first, mastering the key beginner cookie mixing tips discussed here will significantly improve your results. Remember the core principles: use ingredients at the right temperature, cream butter and sugar thoroughly, and most importantly, mix in dry ingredients gently and only until just combined to avoid overdeveloping gluten.
By paying attention to these simple yet crucial techniques, choosing appropriate tools, and understanding the role of temperature and timing, you'll be well on your way to baking consistently soft, delicious classic cookies. Don't be discouraged by the occasional tough batch; every attempt is an opportunity to learn and refine your skills. Happy baking!
Frequently Asked Questions
The most common mistake is overmixing the dough. Overmixing develops the gluten in the flour, resulting in a chewy, tough cookie rather than a tender one.
Mix until the ingredients are just combined. Stop mixing as soon as the flour disappears, even if there are still a few streaks.
Cake flour or pastry flour are lower in protein than all-purpose flour, which results in less gluten development and a softer cookie. Using all-purpose flour is fine, just be careful not to overmix the dough.
Yes, chilling the dough is highly recommended. It helps to prevent spreading during baking and allows the flavors to meld together, resulting in a better texture and taste.
The ideal temperature is softened but still cool. It should be pliable enough to cream with the sugar, but not so warm that it's greasy, which can affect the cookie's texture.
Final Reflection: The Sweet Science of Baking Success
Mastering the basics of cookie mixing isn't just about following a recipe; it's about understanding the fundamental principles that unlock consistently delicious results. Even seemingly simple cookies can become culinary masterpieces with the right technique, transforming a frustrating experience into a rewarding journey of baking bliss. This knowledge empowers you to confidently experiment and create your own unique cookie creations.
The impact of understanding proper mixing techniques extends far beyond just cookies. It builds a foundation for all baking endeavors, fostering a deeper appreciation for the science behind culinary arts. The best bakers are those who understand the 'why' behind the 'how.'
This simple truth resonates deeply, highlighting the importance of not just following instructions, but grasping the underlying principles that govern successful baking. It's a journey of continuous learning and improvement, where each batch of cookies brings you closer to mastering the craft.
Now, it's your turn. Don't be intimidated by the seemingly complex world of baking. Take the time to understand the techniques discussed in this article, practice consistently, and most importantly, have fun! Embrace the occasional misstep as a learning opportunity, and savor the sweet rewards of your efforts. The journey to becoming a confident baker begins with a single, perfectly mixed cookie – and you have all the tools you need to succeed.
Unlock Your Inner Baker: Master Mixing Techniques Today!
Thanks for taking the time to explore the world of baking with us! You've just learned some essential mixing techniques that will dramatically improve your baking results. Now it's time to put your new skills into action!
- Try a new recipe immediately! Challenge yourself with a recipe you've always wanted to try, and put your improved mixing skills to the test. Notice the difference it makes in the texture and taste.
- Share your baking journey! Post a picture of your creation on social media and tag us @BakeWithEase – we'd love to see your results!
- Explore our other beginner guides: Discover more baking tips and tricks on our website to further refine your baking expertise.
Ready to transform from a baking beginner to a confident creator? What's the first recipe you're going to tackle?