
Easy NoBake Desserts: Your Beginner's Guide to Sweet Success

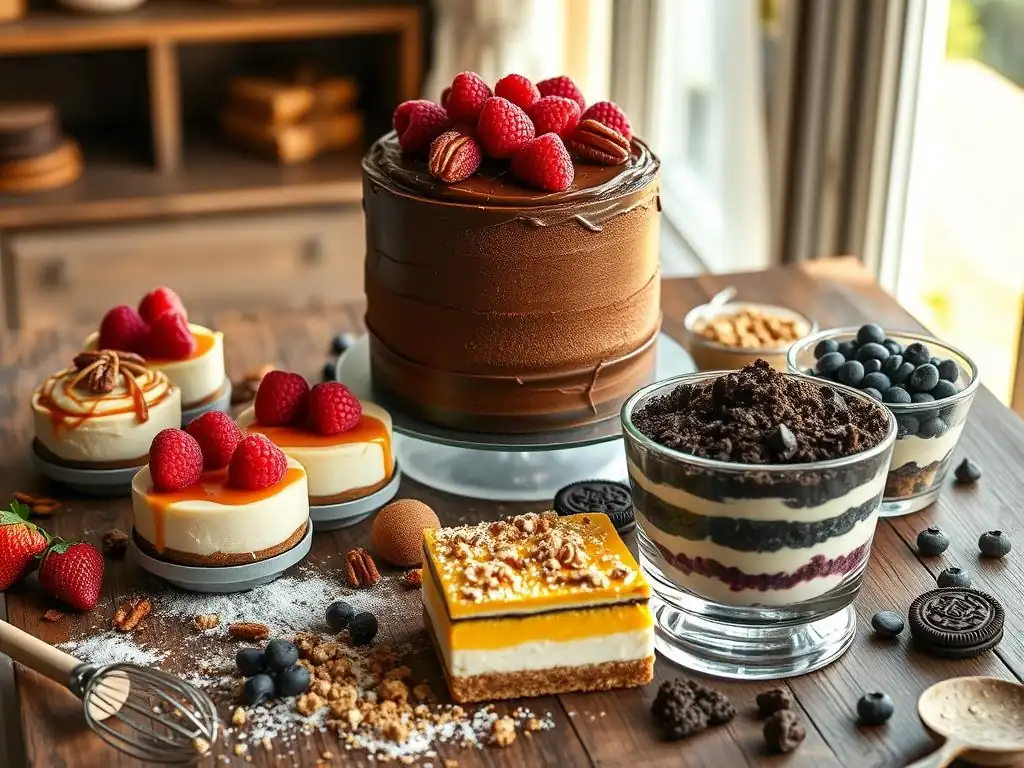
Welcome to BakeWithEase, your trusted companion on your baking journey! Ever dreamed of whipping up delectable desserts without even turning on the oven? Our guide to No Bake Desserts for Beginners is here to make that dream a reality. Discover simple, foolproof recipes and techniques that will impress your friends and family, and leave you wondering why you ever bothered with baking in the first place! Intrigued? Let's dive in and unlock the secrets to sweet success, no oven required!
- Welcome to No-Bake Baking: A Beginner's Paradise
- Understanding the Basics of No-Bake Desserts
-
Top 5 No-Bake Dessert Recipes Perfect for Beginners
- Recipe 1: Classic Chocolate Fridge Cake - No-Bake Chocolate Heaven
- Recipe 2: Simple Strawberry Parfaits - A Fruity No-Bake Delight
- Recipe 3: No-Bake Peanut Butter Bars - A Beginner's Peanut Butter Dream
- Recipe 4: Easy No-Bake Cheesecake Jars - Individual Dessert Perfection
- Recipe 5: Quick Tiramisu Cups - An Italian Classic, No Oven Required!
- Tips and Tricks for No-Bake Dessert Success
- No Bake Desserts Beginner Recipe: Troubleshooting Common Issues
- More Easy Baking Recipes for Beginners on BakeWithEase
- Conclusion: Embrace the Simplicity of No-Bake Desserts
- Frequently Asked Questions
- Final Reflection: The Sweet Simplicity of No-Bake Baking
- Unleash Your Inner Pastry Chef!
Welcome to No-Bake Baking: A Beginner's Paradise
Why Choose No-Bake Desserts for Your First Baking Adventures?
Embarking on your baking journey can feel exciting, yet perhaps a little daunting. The oven, precise temperatures, and rising agents can seem like complex hurdles. This is precisely why no-bake desserts are the perfect starting point for any beginner baker. They strip away many of the technical challenges associated with traditional baking, offering a direct path to sweet gratification without the need for an oven or complex heat management. Think of it as dipping your toes into the world of sweets without the pressure of a full dive.
Moreover, creating a delicious no bake desserts beginner recipe often requires fewer ingredients and significantly less time compared to their baked counterparts. Many can be assembled in under 30 minutes, requiring only chilling time to set. This makes them ideal for busy schedules or spontaneous sweet cravings. Plus, the risk of common baking failures like burnt bottoms or sunken cakes is eliminated, boosting confidence and making the process genuinely enjoyable. It’s about building early success and discovering the joy of creating something delicious with minimal fuss.
BakeWithEase's Commitment to Simple, Successful Recipes
At BakeWithEase, our core mission is to demystify baking and make it accessible and enjoyable for everyone, regardless of their experience level. We believe that anyone can create wonderful sweet treats with the right guidance and simple, clear instructions. Our focus on no-bake desserts for beginners perfectly embodies this philosophy, providing a gentle introduction to the art of dessert making that guarantees delightful results from your very first attempt. We break down each step, explain the 'why' behind simple techniques, and ensure our ingredient lists are easy to find at your local grocery store.
We understand that starting out can be intimidating, which is why we curate recipes specifically designed for ease and reliability. Our collection of no bake desserts beginner recipes is tested and refined to minimize potential pitfalls and maximize your chances of success. From understanding ingredient functions to mastering chilling times, we provide the foundational knowledge you need to feel confident in the kitchen. Our goal is to empower you to create impressive desserts that taste fantastic, proving that delicious results don't always require complicated steps or professional skills.
Understanding the Basics of No-Bake Desserts
Essential Ingredients for No-Bake Treats: A Beginner's Checklist
Getting started with no-bake desserts is surprisingly simple, largely because the ingredient lists are often short and familiar. You'll frequently encounter staples like crushed cookies or graham crackers for crusts, often bound together with melted butter. Cream cheese, mascarpone, or whipped cream are common bases for fillings, providing richness and structure when chilled. Sweeteners like condensed milk, powdered sugar, or even maple syrup make appearances, offering sweetness and helping with texture. Chocolate, in various forms from chips to cocoa powder, is a frequent and welcome addition.
Beyond the core structural elements, flavor comes from ingredients like fresh or frozen fruits, fruit purees, extracts (vanilla, almond, peppermint), and spices like cinnamon or nutmeg. Sometimes, a thickening agent like gelatin or cornstarch (often used in cooked fillings that are then chilled) might be needed, though many beginner recipes avoid these for simplicity, relying purely on the chilling process to set. Having a few of these common ingredients on hand means you're often just a few steps away from creating a delightful no bake desserts beginner recipe.
Key Equipment for Easy No-Bake Recipes (Spoiler: You Probably Have It!)
One of the greatest advantages of diving into no-bake desserts is that you don't need specialized or expensive equipment. The chances are high that you already own most, if not all, of the tools required. Basic mixing bowls in various sizes are essential, as are measuring cups and spoons for accuracy – crucial even in simple recipes. A sturdy spatula or wooden spoon for mixing and combining ingredients is a must-have.
For preparation, you'll likely need a way to crush cookies or crackers, which can be done easily with a rolling pin and a zip-top bag or simply by purchasing pre-crushed crumbs. A microwave or a small saucepan for melting butter or chocolate is helpful. Presentation often involves a dish or pan – anything from a pie dish, a square baking pan, or even individual glasses or jars works wonderfully.
And, of course, the most critical piece of "equipment" is your refrigerator (and sometimes your freezer) for chilling and setting the dessert. See? You're already equipped for a no bake desserts beginner recipe!
Common Mistakes to Avoid When Making No-Bake Desserts (and How to Fix Them)
Even in the simplest no-bake creations, small errors can happen. A very common mistake is not chilling the dessert for long enough. While assembly might take only minutes, the chilling time is crucial for the dessert to set properly and develop its structure. Rushing this step can result in a runny mess instead of a firm slice or scoop. Most recipes specify a minimum chilling time, often 2-4 hours, but overnight is frequently recommended for best results. If your dessert is still soft, simply pop it back in the fridge for longer.
Another pitfall can be related to the crust, particularly if using crushed cookies and butter. Using too little butter might result in a crumbly crust that doesn't hold its shape, while using too much can make it greasy and hard. Aim for a mixture that resembles wet sand when pressed. Pressing the crust firmly into the pan is also key; use the bottom of a glass or a flat measuring cup.
If your crust is too crumbly, you might try pressing it more firmly or, for future attempts, slightly increase the butter. If it's too greasy, blot excess butter with a paper towel before adding the filling. These simple adjustments can save your no bake desserts beginner recipe.
Top 5 No-Bake Dessert Recipes Perfect for Beginners
Recipe 1: Classic Chocolate Fridge Cake - No-Bake Chocolate Heaven
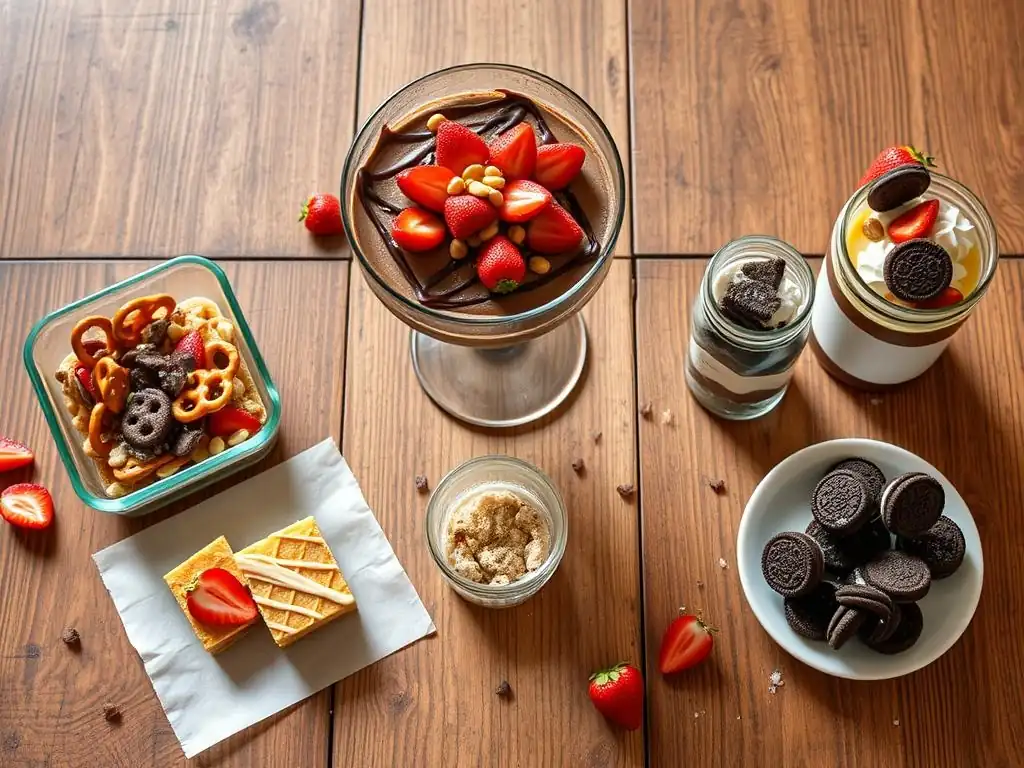
The Chocolate Fridge Cake is a beloved no-bake classic, incredibly simple and utterly delicious. It typically involves crushing digestive biscuits (or similar plain cookies) and mixing them with a rich mixture of melted chocolate, butter, and often condensed milk or golden syrup. This creates a dense, fudgy texture packed with crunchy cookie bits. It's forgiving, requires minimal precision, and the result is a decadent treat that feels far more complicated than it is. It truly is a perfect no bake desserts beginner recipe.
This dessert is fantastic because it uses pantry staples and is very adaptable. You can add nuts, dried fruit, or even candies into the mixture before chilling. Once set, it slices beautifully, making it great for sharing or individual portions. The main "cook time" is simply melting ingredients together, which is straightforward and low-risk. Chilling is the key step here, transforming the loose mixture into a firm, sliceable cake-like consistency, ready to be enjoyed straight from the refrigerator.
Ingredients You'll Need for Chocolate Fridge Cake
- 250g Digestive biscuits (or similar plain sweet cookies)
- 150g Unsalted butter
- 200g Dark chocolate (or milk chocolate, or a mix), broken into pieces
- 75g Golden syrup (or corn syrup)
- Optional: Nuts, dried fruit, marshmallows, or sprinkles
Step-by-Step Instructions: Easy Chocolate Fridge Cake Recipe
- Break the digestive biscuits into small pieces (about the size of a large coin) in a large bowl. Don't crush them too finely; you want some texture.
- In a saucepan over low heat, or in a microwave-safe bowl, gently melt the butter, broken chocolate pieces, and golden syrup together. Stir occasionally until smooth and glossy. Be careful not to overheat the chocolate.
- Pour the melted chocolate mixture over the biscuit pieces in the bowl. If using optional additions like nuts or dried fruit, stir them in now.
- Mix everything together gently but thoroughly with a spatula until all the biscuit pieces are coated in the chocolate mixture.
- Line an 8-inch (approx. 20cm) square tin or a loaf pan with baking parchment, leaving some overhang to lift the cake out later.
- Spoon the mixture into the prepared tin and press it down firmly and evenly using the back of a spoon or spatula.
- Chill in the refrigerator for at least 2-3 hours, or preferably until completely firm.
- Use the parchment paper overhang to lift the cake out of the tin. Slice into squares or bars using a sharp knife.
Recipe 2: Simple Strawberry Parfaits - A Fruity No-Bake Delight
Strawberry parfaits are the epitome of simple elegance in the no-bake dessert world. They involve layering creamy elements with fresh fruit and often a crunchy component like granola or crushed cookies. The beauty of a parfait lies in its assembly – it's more about putting ingredients together than any complex mixing or setting techniques. This makes it an incredibly forgiving and visually appealing no bake desserts beginner recipe that looks impressive with minimal effort.
The standard base for a parfait cream layer is often whipped cream, yogurt (Greek yogurt works well for thickness), or a mixture of cream cheese and whipped cream. Layering these with vibrant fresh strawberries and a textural element like crushed shortbread cookies or a simple granola creates a delightful contrast in flavors and textures. It's a refreshing, light dessert perfect for any time of year, showcasing the natural sweetness of the fruit.
Ingredients You'll Need for Strawberry Parfaits
- 250g Fresh strawberries, hulled and sliced or diced
- 250g Plain Greek yogurt or whipped cream (or a mix)
- 2-3 tbsp Powdered sugar (optional, adjust to taste)
- 1 tsp Vanilla extract
- 100g Granola or crushed shortbread cookies
Step-by-Step Instructions: Easy Strawberry Parfait Recipe
- If using Greek yogurt, whisk it in a bowl with powdered sugar (if desired) and vanilla extract until smooth. If using whipped cream, gently whisk in vanilla extract and powdered sugar if needed.
- Prepare your serving glasses or jars.
- Spoon a layer of granola or crushed cookies into the bottom of each glass.
- Next, add a layer of sliced or diced strawberries.
- Follow with a layer of the creamy yogurt or whipped cream mixture.
- Repeat the layers: granola/cookies, strawberries, and cream, until the glass is full, ending with a layer of strawberries or cream.
- Chill in the refrigerator for at least 30 minutes before serving to allow the flavors to meld.
Recipe 3: No-Bake Peanut Butter Bars - A Beginner's Peanut Butter Dream
For peanut butter lovers, these no-bake bars are an absolute dream and a fantastic no bake desserts beginner recipe. They typically feature a simple base made from crushed graham crackers or cookies mixed with melted butter, topped with a rich, creamy peanut butter filling, and often finished with a layer of melted chocolate. The combination of salty peanut butter, sweet chocolate, and a crumbly base is irresistible.
These bars are incredibly easy to assemble, requiring no baking whatsoever. The peanut butter filling is often just a mix of peanut butter, powdered sugar, and butter, sometimes with a little milk for consistency. Pressing the base into a pan, spreading the filling, and pouring melted chocolate over the top are all straightforward steps. The key to success is allowing sufficient chilling time for the layers to firm up, making them easy to slice into neat bars.
Ingredients You'll Need for No-Bake Peanut Butter Bars
- 200g Graham crackers or digestive biscuits, crushed into fine crumbs
- 100g Unsalted butter, melted
- 200g Smooth peanut butter
- 100g Unsalted butter, softened
- 200g Powdered sugar
- Optional: 1-2 tbsp milk (if filling is too thick)
- 200g Chocolate chips (milk or dark)
Step-by-Step Instructions: Easy No-Bake Peanut Butter Bar Recipe
- In a bowl, combine the graham cracker or cookie crumbs with the 100g of melted butter. Stir until the crumbs are evenly moistened.
- Press this mixture firmly and evenly into the bottom of an 8-inch (approx. 20cm) square pan lined with baking parchment. Chill in the refrigerator while you make the filling.
- In a separate bowl, beat together the softened 100g butter and the peanut butter until smooth and creamy.
- Gradually add the powdered sugar, mixing until well combined and smooth. If the mixture seems too thick, add a tablespoon or two of milk until it reaches a spreadable consistency.
- Spread the peanut butter mixture evenly over the chilled crust in the pan.
- Melt the chocolate chips in a microwave-safe bowl or over a double boiler until smooth.
- Pour the melted chocolate evenly over the peanut butter layer, spreading it to the edges.
- Return the pan to the refrigerator and chill for at least 2-3 hours, or until the chocolate layer is completely set and the bars are firm.
- Lift the bars out of the pan using the parchment paper. Slice into squares or bars using a sharp knife.
Recipe 4: Easy No-Bake Cheesecake Jars - Individual Dessert Perfection
No-bake cheesecake is a classic for a reason – it offers all the creamy indulgence of baked cheesecake without the fuss of a water bath or the risk of cracking. Making them in individual jars takes the ease a step further, eliminating the need for slicing and making portion control (or lack thereof!) simple. This format is incredibly beginner-friendly, allowing you to assemble delightful mini cheesecakes with minimal effort. It's a perfect individual no bake desserts beginner recipe.
The typical no-bake cheesecake filling involves cream cheese, sugar, and often whipped cream or condensed milk for richness and stability. Layering this creamy filling with a simple crushed cookie crust (like graham crackers or digestives mixed with butter) in small jars or glasses creates a charming and delicious dessert. You can top them with fruit, chocolate shavings, or a dollop of whipped cream right before serving, adding both flavor and visual appeal.
Ingredients You'll Need for No-Bake Cheesecake Jars
- 150g Graham crackers or digestive biscuits, crushed
- 75g Unsalted butter, melted
- 250g Cream cheese, softened
- 100g Powdered sugar
- 1 tsp Vanilla extract
- 150ml Heavy cream, whipped to stiff peaks (or 200ml condensed milk)
- Optional toppings: Fresh berries, fruit sauce, chocolate chips
Step-by-Step Instructions: Easy No-Bake Cheesecake Jar Recipe
- In a bowl, combine the crushed graham crackers or biscuits with the melted butter. Mix until evenly moistened.
- Spoon about 1-2 tablespoons of the crumb mixture into the bottom of each serving jar or glass. Press down gently with the back of a spoon.
- In a separate large bowl, beat the softened cream cheese with the powdered sugar and vanilla extract until smooth and creamy.
- Gently fold in the whipped heavy cream (or stir in the condensed milk) until the mixture is smooth and well combined. Be careful not to overmix if using whipped cream.
- Spoon or pipe the cream cheese filling over the crust layer in each jar. Fill the jars almost to the top.
- Smooth the top of the filling with a spoon or spatula.
- Chill the cheesecake jars in the refrigerator for at least 2-3 hours, or until the filling is set.
- Add optional toppings like fresh berries or fruit sauce just before serving.
Recipe 5: Quick Tiramisu Cups - An Italian Classic, No Oven Required!
Tiramisu, the classic Italian dessert, might sound intimidating, but the no-bake version is surprisingly accessible and a fantastic no bake desserts beginner recipe. The traditional method involves soaking ladyfingers in coffee, layering them with a rich mascarpone cream, and dusting with cocoa powder. The no-bake adaptation simplifies the cream and assembly, making it achievable for anyone.
This quick version often uses a simplified cream made from mascarpone cheese, sugar, and sometimes whipped cream or eggs (though beginner versions often omit raw eggs). Ladyfingers are briefly dipped in strong coffee (sometimes with a touch of liqueur, optional) and then layered with the cream in individual cups or a dish. The magic happens during chilling, as the ladyfingers soften and the flavors meld into that signature tiramisu taste.
Ingredients You'll Need for Quick Tiramisu Cups
- 150-200g Ladyfinger biscuits (Savoiardi)
- 200ml Strong black coffee, cooled
- Optional: 2 tbsp Coffee liqueur or dark rum
- 250g Mascarpone cheese, softened
- 50g Powdered sugar
- 1 tsp Vanilla extract
- 150ml Heavy cream, whipped to soft peaks
- Cocoa powder, for dusting
Step-by-Step Instructions: Easy Tiramisu Cup Recipe
- Pour the cooled coffee into a shallow dish. If using liqueur, stir it into the coffee.
- In a bowl, whisk together the softened mascarpone cheese, powdered sugar, and vanilla extract until smooth.
- Gently fold in the whipped heavy cream until the mixture is evenly combined and smooth.
- Briefly dip individual ladyfingers into the coffee mixture, one at a time. Don't let them soak for too long, or they will fall apart (just a quick dip on each side is usually enough).
- Break or cut the soaked ladyfingers as needed to fit into the bottom of your serving cups or glasses. Place a layer of soaked ladyfingers in each cup.
- Spoon or pipe a layer of the mascarpone cream over the ladyfingers.
- Repeat the layers: another layer of dipped ladyfingers, followed by another layer of cream, until the cups are full, ending with a cream layer.
- Cover the cups and chill in the refrigerator for at least 2-3 hours, or preferably longer, to allow the ladyfingers to soften and the flavors to meld.
- Just before serving, generously dust the top of each cup with cocoa powder using a sieve.
Tips and Tricks for No-Bake Dessert Success
Mastering the Art of Setting: Achieving the Perfect No-Bake Texture
The key to a successful no-bake dessert often lies in achieving the correct set. Unlike baked goods that solidify through heat, no-bake treats rely on chilling and the properties of their ingredients. Fats like butter, cream cheese, and whipped cream become firm when cold, providing structure.
Ingredients like condensed milk also thicken significantly when chilled. The primary method to ensure your dessert sets properly is simply patience – allow adequate time in the refrigerator. A minimum of 2-4 hours is common for smaller items like parfaits or jars, while larger desserts like cheesecakes or fridge cakes often benefit from chilling overnight (6-8 hours or more).
For recipes that require extra firmness, particularly those with fruit purees or liquids, some no-bake recipes for beginners might incorporate a small amount of gelatin or cornstarch. If a recipe calls for gelatin, it's usually bloomed in cold liquid first and then gently dissolved in a warm component before being mixed into the main filling.
Cornstarch is typically mixed with a liquid and heated to create a thickened sauce or pudding-like base that then sets upon cooling. Always follow the specific recipe instructions carefully when using these setting agents to achieve the desired texture – too little and it won't set, too much and it can become rubbery.
Flavor Variations: Personalizing Your No-Bake Creations
One of the joys of mastering a basic no bake desserts beginner recipe is the ease with which you can customize it to your taste. Once you have a solid base recipe, like a simple no-bake cheesecake filling or a chocolate fridge cake mix, you can start experimenting with flavor variations. This is a great way to make a recipe your own and cater to different preferences.
Consider adding different extracts beyond vanilla, such as almond, peppermint, or orange. Citrus zest (lemon, lime, orange) can brighten up creamy fillings or crusts. Swirling in fruit purees, caramel sauce, or melted chocolate adds layers of flavor and visual appeal.
You can also fold in different textural elements like chopped nuts, shredded coconut, mini marshmallows, or different types of crushed cookies. For instance, swapping graham cracker crust for crushed Oreos or gingersnaps completely changes the profile. Don't be afraid to try combinations like peanut butter and banana in a parfait, or adding a pinch of chili powder to your chocolate fridge cake for a spicy kick!
Storage Solutions: Keeping Your No-Bake Desserts Fresh
Proper storage is essential for keeping your no-bake creations delicious and maintaining their texture. Because they rely on chilling to stay set and often contain dairy, they should always be stored in the refrigerator. Use airtight containers or cover the dessert tightly with plastic wrap to prevent it from drying out, absorbing odors from the fridge, or developing a skin on the surface.
Most no-bake desserts will keep well in the refrigerator for 3 to 5 days. However, those with fresh fruit might have a slightly shorter lifespan as the fruit can break down or make other components soggy over time. Some no-bake desserts, like fudge or certain bar recipes, can also be frozen. Wrap them tightly in plastic wrap and then aluminum foil or place them in a freezer-safe container.
Frozen no-bake treats can last for 1 to 2 months. Thaw them in the refrigerator before serving. Always trust your senses – if it looks, smells, or tastes off, it's best to discard it.
No Bake Desserts Beginner Recipe: Troubleshooting Common Issues
My No-Bake Dessert Isn't Setting: What Went Wrong?
Encountering a no-bake dessert that hasn't firmed up as expected is a common frustration, especially when trying a new no bake desserts beginner recipe. The most frequent culprit is insufficient chilling time. While a recipe might give a minimum time, factors like the size and depth of your dessert, the temperature of your refrigerator, and even the specific brands of ingredients used can affect setting time. If your dessert is still too soft after the recommended time, simply return it to the fridge and give it more time, perhaps another 2-4 hours or even overnight.
Another potential issue could be incorrect ingredient ratios, particularly if you've made substitutions or approximations. For creamy fillings, the ratio of cream cheese/mascarpone to liquid (like milk or cream) and sweetener (powdered sugar) is important for structure. Too much liquid or not enough of the primary setting agent (like cream cheese or whipped cream) can prevent it from firming up. If the mixture seemed too loose before chilling, you might need to adjust the recipe next time by slightly reducing liquid or increasing the cream cheese/whipped cream. If the recipe uses gelatin, ensure it was properly bloomed and dissolved.
My No-Bake Dessert is Too Sweet/Not Sweet Enough: Adjusting the Flavor
Achieving the perfect balance of sweetness can be tricky, as individual preferences vary greatly. If your no bake desserts beginner recipe turns out too sweet, there are a few things you can do. Adding a pinch of salt can help balance sweetness, as salt enhances other flavors and can counteract an overly sugary taste. For creamy desserts, a squeeze of lemon juice or a touch of lemon zest can introduce acidity that cuts through richness and sweetness. Serving the dessert with something less sweet, like plain whipped cream or tart berries, can also help balance each bite.
If your dessert isn't sweet enough, the easiest fix is often in the topping or accompaniment. A dusting of powdered sugar, a drizzle of chocolate or caramel sauce, or serving with sweetened whipped cream can add the necessary sweetness.
For future attempts at that specific no bake desserts beginner recipe, you can simply increase the amount of sugar slightly, but do so gradually (e.g., add just 1-2 tablespoons extra at a time) until you find the level you prefer. Tasting the mixture before chilling (if safe, e.g., no raw eggs) can also help you adjust sweetness early in the process.
My Crust is Soggy: Preventing and Fixing a Soggy Crust
A soggy crust is a common issue with layered no-bake desserts, often occurring when a wet filling sits directly on a crumb base for an extended period. The moisture from the filling seeps into the crust, turning it from delightfully crisp to unpleasantly mushy. This is particularly true if the crust wasn't pressed firmly enough or if there was too much butter, which can create little pools for moisture to gather.
To prevent a soggy crust when making your no bake desserts beginner recipe, ensure you press the crumb mixture very firmly into the pan, creating a dense layer. Chilling the crust before adding the filling can also help it set and become more resistant to moisture absorption – try chilling it for at least 15-30 minutes.
A popular trick is to brush a very thin layer of melted chocolate over the chilled crust and let that set before adding the filling; the chocolate acts as a barrier. If your crust is already soggy, unfortunately, there's no easy fix for the current dessert, but implementing these preventative measures for your next attempt will make a significant difference.
More Easy Baking Recipes for Beginners on BakeWithEase
Explore Our Beginner Baking Recipe Collection
Mastering no-bake desserts is just the beginning of your baking adventure! At BakeWithEase, we have a vast collection of other easy baking recipes specifically curated for beginners. Once you're comfortable with the no-bake techniques, you might want to try simple cookies that don't require complex shaping, like drop cookies or shortbread. We also feature easy muffins and quick breads that use straightforward mixing methods and bake reliably in a standard oven.
These beginner-friendly recipes are designed to build on the confidence you've gained with no-bake treats. They introduce basic oven skills, understanding leavening agents like baking powder, and simple mixing techniques like creaming butter and sugar. Each recipe provides clear, step-by-step instructions, just like our no bake desserts beginner recipes, ensuring a smooth and successful transition into the world of baked goods. Exploring these collections will expand your repertoire and deepen your understanding of fundamental baking principles.
Advance Your Skills with Intermediate Baking Challenges
As you become more comfortable with basic baking techniques and have successfully created several no bake desserts beginner recipes and simple baked goods, you might feel ready for a slightly greater challenge. BakeWithEase offers a range of intermediate recipes designed to help you further develop your skills. These might include slightly more complex cookie types, simple layer cakes, or perhaps yeast-leavened breads like easy focaccia or pizza dough.
Intermediate recipes often introduce techniques like folding ingredients gently to maintain airiness, making simple glazes or frostings, or working with yeast. While they require a bit more attention to detail than beginner recipes, they are still presented with our signature clear instructions and helpful tips. Moving to intermediate challenges is a natural progression that allows you to expand your capabilities and create an even wider variety of delicious homemade treats, building upon the foundation of your initial no bake desserts beginner recipe successes.
Conclusion: Embrace the Simplicity of No-Bake Desserts
Embarking on your baking journey doesn't have to start with complicated techniques or intimidating ovens. No-bake desserts offer a welcoming, low-stress entry point into the world of sweet creations. They are quick to assemble, require minimal equipment, and provide almost instant gratification (after chilling!). By starting with a simple no bake desserts beginner recipe, you can build confidence, understand basic ingredient interactions, and discover the sheer joy of making something delicious with your own hands.
From creamy parfaits and decadent fridge cakes to individual cheesecake jars and classic tiramisu cups, the world of no-bake treats is diverse and full of possibilities. These recipes prove that you don't need heat to create delightful desserts. So, grab your ingredients, find a simple recipe on BakeWithEase, and experience the sweet success that comes from mastering the art of no-bake baking. It's the perfect first step towards becoming a confident baker!
Frequently Asked Questions
What exactly are no-bake desserts?
No-bake desserts are treats that don't require an oven. They rely on refrigeration or freezing to set and are perfect for beginners because they are simple and quick.
Are no-bake desserts suitable for beginner bakers?
Absolutely! No-bake recipes are designed with simplicity in mind. They usually involve minimal steps and easy-to-find ingredients, making them ideal for learning basic dessert-making skills.
What are some popular no-bake dessert options for beginners?
Common beginner-friendly options include chocolate fudge, cheesecakes, and fruit parfaits. These recipes often feature easy instructions and require minimal baking experience.
Where can I find reliable no-bake dessert recipes for beginners?
Websites like BakeWithEase.com are great resources, offering step-by-step guides and simplified recipes specifically tailored for beginner bakers looking for no-bake options.
What are the key advantages of choosing no-bake desserts?
The main advantages are convenience and speed. No-bake desserts eliminate the need for an oven, saving time and effort, and are perfect for warm weather or when you need a quick and easy treat.
Final Reflection: The Sweet Simplicity of No-Bake Baking
The accessibility of no-bake desserts is more than just a culinary convenience; it's a gateway to joyful baking for everyone. In a world often dominated by complicated recipes and intimidating techniques, these simple treats offer a refreshing alternative, proving that deliciousness doesn't require hours of oven time or advanced skills. This beginner's guide has hopefully demonstrated that anyone, regardless of their baking experience, can create stunning and satisfying desserts.
The enduring appeal of no-bake desserts lies in their ability to connect us to simpler times, fostering a sense of nostalgia and shared experience. These recipes often rely on ingredients readily available in most pantries, transforming familiar flavors into unique creations. They are perfect for sharing, sparking conversations, and creating lasting memories. As the old adage goes: The best things in life are simple.
This rings especially true when considering the ease and satisfaction derived from these delightful treats. The joy isn't just in the eating, but in the making – a process that can be incredibly therapeutic and rewarding.
Now, I invite you to embrace the sweet simplicity of no-bake baking. Try one of the recipes from this guide, or let it inspire you to experiment with your own flavor combinations. Don't be afraid to get creative, to adapt, and to most importantly, to enjoy the process. The kitchen is your canvas, and these no-bake desserts are your vibrant, delicious masterpiece waiting to be created. So, gather your ingredients, put on some music, and let the sweet journey begin!
Unleash Your Inner Pastry Chef!
Thanks for taking the time to explore the world of no-bake desserts! We hope you've discovered some delicious and surprisingly simple recipes to sweeten your day. Now it's time to put your newfound skills to the test!
- Whip up your favorite recipe: Start with one of the no-bake treats that caught your eye – it’s time to experience the sweet satisfaction firsthand!
- Share your creations: Snap a picture of your masterpiece and share it with your friends and family! Let them know how easy it was to create delicious desserts without turning on the oven.
- Challenge yourself: Try experimenting with different flavor combinations and ingredients – what unique no-bake treat will you create next?
Ready to embark on your delicious no-bake journey? What's the first no-bake dessert you're going to conquer?