
Learn to Cut Bars Cleanly: Simple Brownie Guide for Newbies

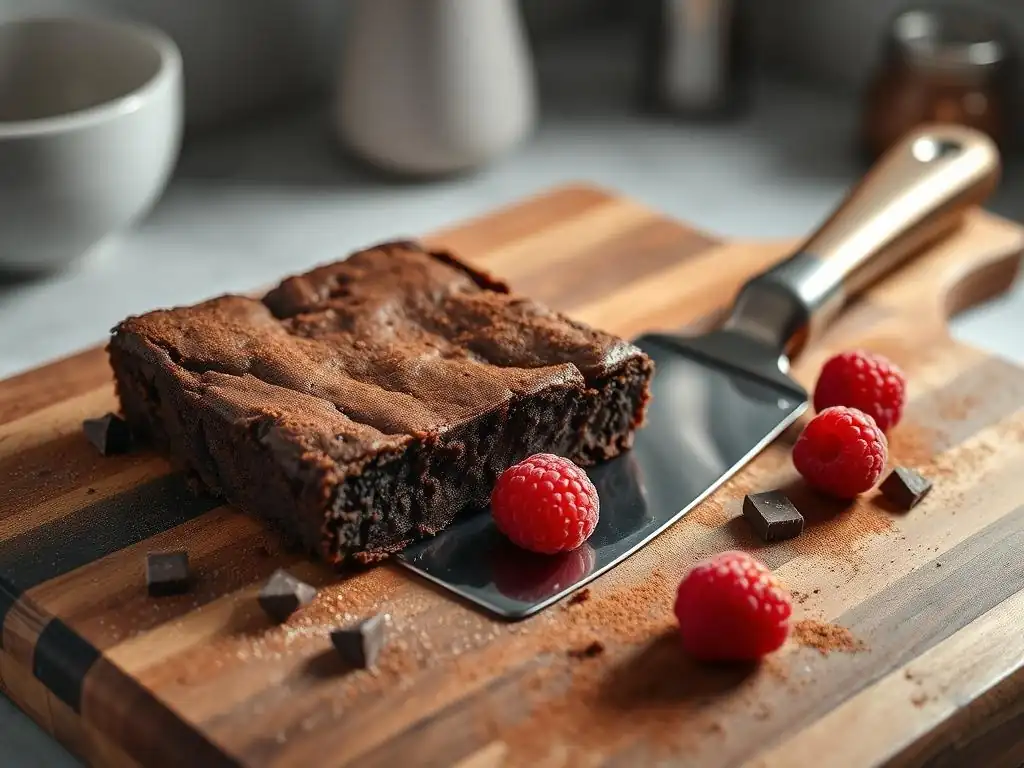
Welcome to BakeWithEase, your haven for all things baking! Ever struggled to achieve that perfect, clean cut for your brownies? We understand! Unlock the secrets to flawless, even slices with our guide on the easy brownie cutting technique below. Curious how to banish those crumbly edges forever? Keep reading to discover our simple tips and tricks that will transform your brownie presentation and elevate your baking game!
- Cutting Perfect Brownies: A Comprehensive Guide
- Achieving Professional-Looking Brownie Bars
- Essential Tools for Clean Brownie Cuts
- Cooling and Preparation for Easy Cutting
- Step-by-Step Guide to Cutting Brownies Perfectly
- Tips and Tricks for Flawless Brownie Cutting
- Troubleshooting Common Brownie Cutting Problems
- Brownie Recipes to Practice Your Cutting Skills
- Mastering the Cutting Technique: Practice and Refinement
-
Frequently Asked Questions
- How can I prevent my brownies from crumbling when I cut them?
- What's the best knife to use for cutting brownies easily?
- Should I chill my brownies before cutting them?
- What's the "hot water" trick I keep hearing about for cutting brownies?
- What if I don't have time to chill or use hot water? Is there a quicker method?
- Final Reflection: The Sweet Science of the Perfect Brownie Cut
- Unlock Your Inner Brownie Master!
Cutting Perfect Brownies: A Comprehensive Guide
Achieving Professional-Looking Brownie Bars
Why Clean Cuts Matter: Presentation and Consistency
When you've spent time baking a delicious batch of brownies, the final step of cutting them shouldn't be an afterthought. Achieving clean, sharp cuts significantly impacts the overall appeal of your baked goods. Imagine serving brownies with jagged edges and crumbling pieces versus neat, uniform squares – the difference in presentation is striking. Professional bakers and home enthusiasts alike understand that a clean cut elevates the humble brownie from a simple treat to a beautifully crafted dessert, making it look as good as it tastes.
Beyond aesthetics, consistent sizing matters for portion control and even serving. If you're selling your brownies or bringing them to a gathering, uniform pieces ensure everyone gets a similar portion. Moreover, for recipes that require precise baking times, consistent thickness across the pan contributes to even baking, which in turn can make the process of cutting brownies easier and more predictable. Mastering an easy brownie cutting technique is a key skill for any baker looking to improve their presentation.
Techniques for Achieving Uniform Brownie Squares
Achieving perfectly uniform brownie squares requires a systematic approach rather than just randomly slicing. One effective technique involves using a ruler or measuring tape to mark the desired size of your squares directly on the cooled brownie surface (gently, with the tip of a knife or a toothpick). For instance, if you want 2-inch squares from an 8x8-inch pan, you'd make marks at 2, 4, and 6 inches along both sides before cutting. This simple technique provides a visual guide, helping you cut straight lines and maintain consistent dimensions throughout the batch.
Another popular method, especially after mastering an easy brownie cutting technique, is to cut the entire batch into halves, then quarters, and then continue halving the resulting sections until you reach your desired size. This method works well for creating symmetrical pieces, provided your initial cuts are straight. For example, cutting an 8x8 pan in half yields two 4x8 rectangles.
Cutting those in half gives four 4x4 squares. Cutting those in half again results in eight 2x4 rectangles, and a final cut down the middle of each yields sixteen 2x2 squares. This progressive halving helps ensure that all pieces end up roughly the same size, making the process of cutting brownies less daunting.
Essential Tools for Clean Brownie Cuts
Choosing the Right Knife: Serrated vs. Straight Edge
The type of knife you use is perhaps the most critical factor in achieving clean brownie cuts. A common question is whether to use a serrated or a straight-edge knife. For fudgy or very moist brownies, a large chef's knife or a straight-edge carving knife often works best. The sharp, clean edge can slice through the dense texture without tearing or dragging too much. Aim for a knife with a blade length of at least 8-10 inches to allow for a single, smooth pass across the pan or a large section of the brownie.
Conversely, for cakey or brownies with lots of additions like nuts or chocolate chips, a serrated knife, like a bread knife, can sometimes be more effective. The serrations act like small saws, helping to gently cut through softer textures or hard inclusions without crushing the surrounding brownie. However, serrated knives can also create more crumbs, especially with fudgier brownies. Experimentation with your specific recipe is key to finding the best tool, but generally, a sharp, straight-edge knife is preferred for a truly easy brownie cutting technique.
Alternative Cutting Tools: Pizza Wheel, Bench Scraper, and More
While a knife is the standard, several alternative tools can also facilitate an easy brownie cutting technique. A pizza wheel, for instance, can be surprisingly effective, especially for cutting warm (but not hot) brownies or those with a firmer, slightly chewy texture. The rolling motion can create clean lines with less drag than a knife, provided the wheel is sharp. It's best used for making initial cuts across the pan before potentially using a knife for the final cuts.
Another useful tool, particularly for marking and initial straight lines on firmer brownies, is a bench scraper. While not designed for slicing through the brownie, the straight edge can be used to press down and create score marks on the surface, guiding your knife cuts. For very firm or chilled brownies, some bakers even find success using a large, sturdy metal spatula or a specialized bar cutter, which is designed specifically for cutting baked goods into uniform bars. These tools offer leverage and a straight edge, contributing to an easy brownie cutting technique that results in consistent pieces.
Preparing Your Tools: Ensuring Smooth and Precise Cuts
Even the best knife or tool won't perform well if it's not properly prepared. The most crucial step is ensuring your knife or cutting tool is clean. Residual crumbs or sticky residue from previous cuts will drag through the brownie, creating messy lines. Wipe your blade clean between every single cut for the best results. This might seem tedious, but it's the secret to those picture-perfect squares.
Beyond cleanliness, the sharpness of your tool is paramount. A dull knife will tear and push the brownie rather than slicing cleanly. Regularly sharpen your straight-edge knives. For tools like pizza wheels, ensure the blade is free-spinning and sharp. Before making the first cut, some bakers also run their knife under hot water and dry it quickly, or lightly grease the blade with cooking spray or a neutral oil. This simple preparation step creates a barrier that helps the blade glide through the brownie more smoothly, significantly contributing to an easy brownie cutting technique.
Cooling and Preparation for Easy Cutting
Cooling Brownies Completely: A Crucial Step
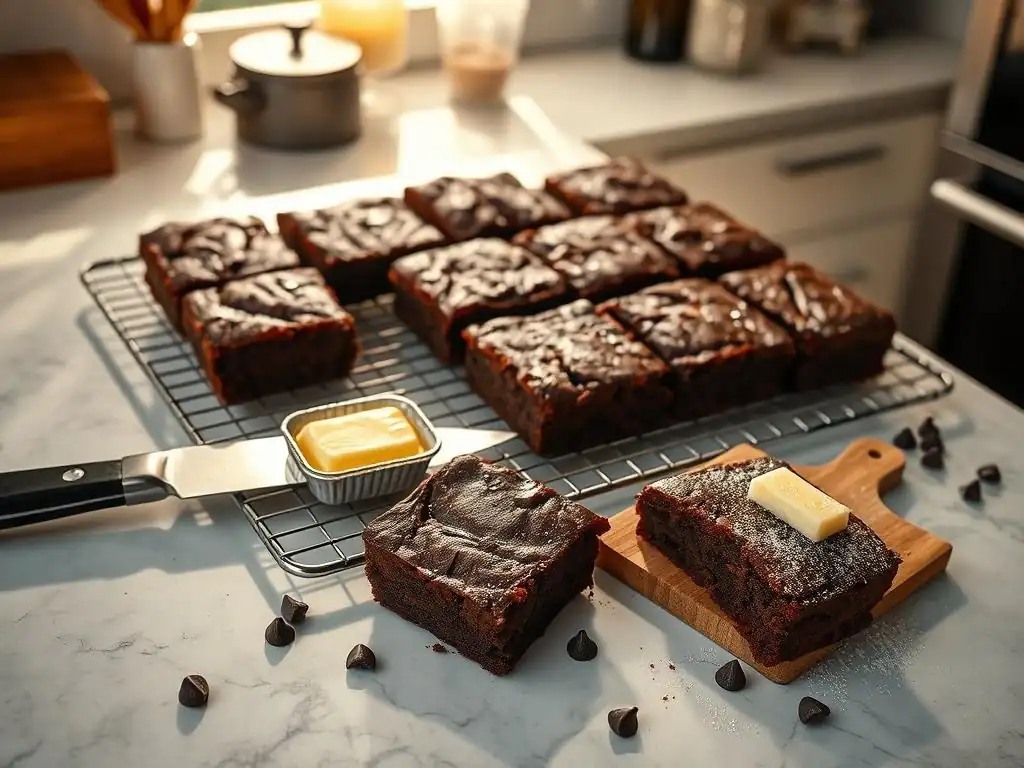
Patience is perhaps the most important ingredient when it comes to cutting brownies cleanly. Attempting to cut brownies while they are still warm is a recipe for disaster. Warm brownies are soft, gooey, and structurally unstable; cutting them will inevitably lead to crumbling, tearing, and sticking. The heat keeps the fats and sugars in a semi-liquid state, making the brownie delicate and prone to deformation under pressure.
Allowing your brownies to cool completely in the pan is non-negotiable for an easy brownie cutting technique. This means letting them sit at room temperature for at least 2-3 hours, or even longer depending on the size and depth of the pan and the ambient temperature. As the brownies cool, the fats solidify, and the structure sets, making them much firmer and easier to slice cleanly. Rushing this step is the single biggest mistake beginners make when trying to achieve neat brownie bars.
Chilling Brownies for Easier Cutting: Time and Temperature
For the absolute cleanest cuts, especially with very fudgy or gooey brownie recipes, chilling the completely cooled brownies is highly recommended. Refrigerating the brownies further solidifies the fats and tightens the texture, making them much firmer and less likely to stick to the knife. This step is particularly effective for achieving sharp edges on rich, dense brownies.
After cooling at room temperature, cover the pan (or wrap the whole brownie if you've removed it) and refrigerate for at least 30-60 minutes. For extra-fudgy brownies, chilling for 2-3 hours, or even overnight, can yield even better results. The colder temperature provides a window of time where the brownie is firm enough to cut cleanly but not so hard that it becomes difficult to slice. This chilling period is a powerful component of an easy brownie cutting technique for fudgy varieties.
Preparing the Blade: Hot Water or Cooking Spray for Smooth Cuts
Once your brownies are properly cooled and potentially chilled, preparing your cutting tool is the next step towards an easy brownie cutting technique. A common and highly effective method is to heat your knife blade before each cut. The simplest way to do this is to fill a tall glass or container with hot water (as hot as your tap goes) and dip the knife blade into it for a few seconds.
After heating, immediately wipe the blade completely dry with a clean towel. The heat helps the knife glide through the cold brownie more easily, creating a cleaner slice by slightly melting the fat just ahead of the blade. Alternatively, you can lightly coat the blade with cooking spray or a neutral oil like vegetable or canola oil. This creates a non-stick surface that helps prevent the brownie from adhering to the blade as you cut, significantly reducing drag and crumbling, making the process of cutting brownies much simpler.
Step-by-Step Guide to Cutting Brownies Perfectly
Removing Brownies from the Pan
Before you can even think about slicing, you need to get the brownie out of the pan cleanly. This is where proper pan preparation comes in. Always line your baking pan with parchment paper, leaving an overhang on two sides. This creates "handles" that allow you to easily lift the entire cooled brownie slab out of the pan before cutting. Trying to cut brownies while they are still in the pan often results in scratched pans and uneven cuts, especially along the edges.
Once the brownie is completely cooled (and possibly chilled), gently lift it out of the pan using the parchment paper overhangs. Place the entire slab onto a clean cutting board. The cutting board should be flat and stable to provide a secure surface for precise slicing. Make sure the board is large enough to hold the entire brownie comfortably. This simple step of using parchment paper and removing the brownie from the pan is fundamental to executing an easy brownie cutting technique successfully.
Trimming Edges for a Professional Look
For that bakery-style, professional appearance, consider trimming the edges of your cooled brownie slab. The edges are often slightly drier or chewier than the center and may have irregular shapes due to contact with the pan. While perfectly edible and delicious, removing about 1/4 to 1/2 inch from each of the four sides will give you a clean, straight starting point for your cuts.
Use your prepared sharp knife and make smooth, straight cuts along each edge. These trimmed pieces are often referred to as the "baker's treat" and are a perk of the job! Trimming the edges ensures that every piece you cut from the main slab will have straight, clean sides, contributing significantly to the uniform look you're aiming for. This simple step is part of refining your easy brownie cutting technique for superior results.
Slicing Techniques: Achieving Clean Cuts
With the brownie slab on the cutting board and edges trimmed (if desired), you're ready to slice. Remember the key principle: clean the blade between every cut. Heat the knife in hot water and dry it, or wipe it clean with a damp cloth and dry it, or reapply cooking spray. For a straight cut, position your knife where you want the cut to be.
Press down firmly and steadily, using a single, smooth motion if possible. Avoid a sawing motion, which can create crumbs and jagged edges, especially with fudgy brownies. For larger brownies or smaller knives, you might need to press down, lift the knife slightly, move it over, and press down again, but try to keep the line straight.
Some bakers prefer to make all the cuts in one direction first (e.g., vertically), clean the knife, and then make all the cuts in the perpendicular direction (horizontally) to create squares or rectangles. This methodical approach is crucial for an easy brownie cutting technique that yields clean lines.
Cleaning the Blade Between Cuts: Maintaining Cleanliness
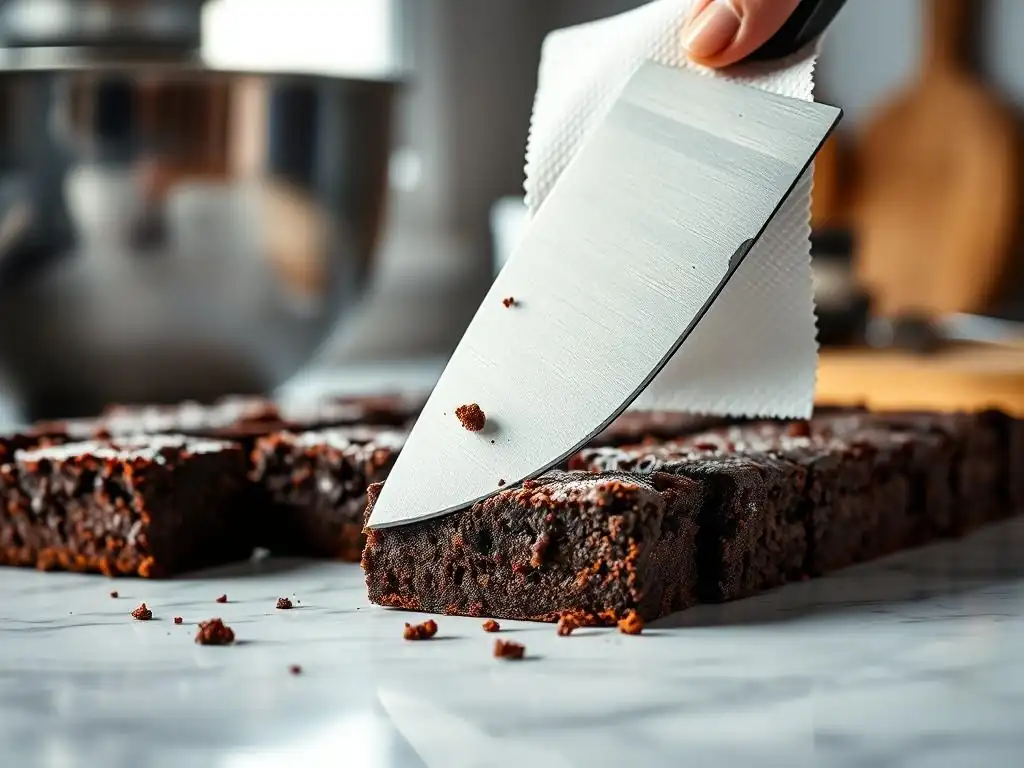
This step cannot be stressed enough: cleaning your knife blade between each and every cut is the single most effective way to achieve clean, non-sticky slices. As you cut, the rich, moist brownie will inevitably build up on the blade. This residue causes the knife to drag and stick on subsequent cuts, resulting in messy, torn edges and frustrating crumbling.
Keep a tall container of hot water and a clean towel or a supply of damp cloths and dry towels nearby. After each pass through the brownie, immediately dip the knife in hot water and wipe it completely clean and dry, or wipe it thoroughly with a damp cloth followed by a dry one.
This removes all sticky residue and prepares the blade for a smooth pass through the next section of brownie. While it adds a few seconds per cut, the payoff in terms of clean edges is immense, making this a cornerstone of any effective easy brownie cutting technique.
Achieving Uniform Brownie Sizes: Measuring and Marking
For truly uniform brownie sizes, especially for presentation or portion control, measuring and marking before you cut is essential. Don't rely solely on eyeballing it, as this often leads to progressively smaller or larger pieces as you work your way across the brownie slab. Decide on your desired piece size – common sizes range from 1.5-inch to 3-inch squares.
Use a ruler or measuring tape and a sharp paring knife or toothpick to gently score the surface of the brownie at the desired intervals. For example, if you want 2-inch squares from an 8x8-inch slab, make small marks at 2 inches, 4 inches, and 6 inches along one side. Then, using the ruler as a guide, make shallow score lines across the entire slab at these marks.
Repeat the process along the perpendicular side. These score lines provide a clear path for your knife, ensuring that each cut is accurately placed and resulting in consistently sized brownie squares. This systematic approach is key to mastering an easy brownie cutting technique for perfect portions.
Tips and Tricks for Flawless Brownie Cutting
The Dental Floss Trick: A Unique Cutting Method
Looking for a truly unique and surprisingly effective easy brownie cutting technique? Give plain, unflavored dental floss a try! This method is particularly good for very fudgy or sticky brownies where a knife might drag excessively. Take a piece of dental floss about the length of your pan.
Hold the floss taut between your hands, with one end in each hand. Position the taut floss over the brownie where you want to make the cut. Gently but firmly press the floss straight down through the brownie until it reaches the cutting board. Pull the floss straight up and through. This method creates incredibly clean, sharp lines with minimal sticking or crumbling. You'll need a new piece of floss for each cut, or at least wipe the used floss clean, but the results can be remarkably clean, making it a simple technique for cutting brownies cleanly.
Using Parchment Paper for Easy Removal and Cutting
As mentioned earlier, lining your pan with parchment paper is crucial for easy removal. But it can also aid in the cutting process itself. Once you've lifted the cooled brownie out of the pan using the parchment overhangs and placed it on a cutting board, you can sometimes leave the parchment attached while you cut.
The flat, stable surface provided by the parchment can help keep the brownie slab together, especially if it's slightly delicate. You can even use the grid lines sometimes printed on parchment paper as a rough guide for cutting, though measuring and scoring is more precise for uniformity. After cutting, the parchment also makes it easy to lift individual squares off the board without damaging them. Using parchment throughout the baking and cooling process is an integral part of an easy brownie cutting technique from start to finish.
Adjusting Baking Time for Easier Cutting: Underbaking Considerations
The texture of your brownie greatly influences how easy it is to cut. Very gooey, underbaked brownies, while delicious, are inherently more difficult to slice cleanly than those baked to a slightly firmer consistency. If your primary goal is super clean cuts, you might consider adjusting your baking time slightly.
Baking brownies just until the center is set (a toothpick inserted into the center comes out with moist crumbs attached, not wet batter) will result in a fudgy but stable texture that is much more conducive to clean slicing after proper cooling and chilling. Overbaking will result in dry, crumbly brownies that also don't cut well. Finding that sweet spot in baking time that balances fudginess with structural integrity is key. For an easy brownie cutting technique, aim for a brownie that holds its shape well once cooled.
Preventing Crumbling: Strategies for Fudgy Brownies
Fudgy brownies are prone to crumbling during cutting because of their high moisture and low flour content. The primary defense against crumbling is ensuring the brownies are completely cooled and sufficiently chilled before cutting. Cold temperatures firm up the rich, dense texture, making it less likely to crumble under the pressure of the knife.
Using a very sharp knife and cleaning it between every single cut is equally vital. A clean, sharp blade cuts cleanly through the brownie's structure rather than tearing it apart. Applying the hot water or cooking spray technique to the blade also helps the knife glide smoothly, reducing friction and preventing the brownie from breaking apart. If you're still experiencing crumbling, try the dental floss method mentioned earlier, as it creates minimal disturbance to the brownie structure, making it an easy brownie cutting technique for delicate textures.
Troubleshooting Common Brownie Cutting Problems
Dealing with Sticky Brownies: Solutions and Prevention
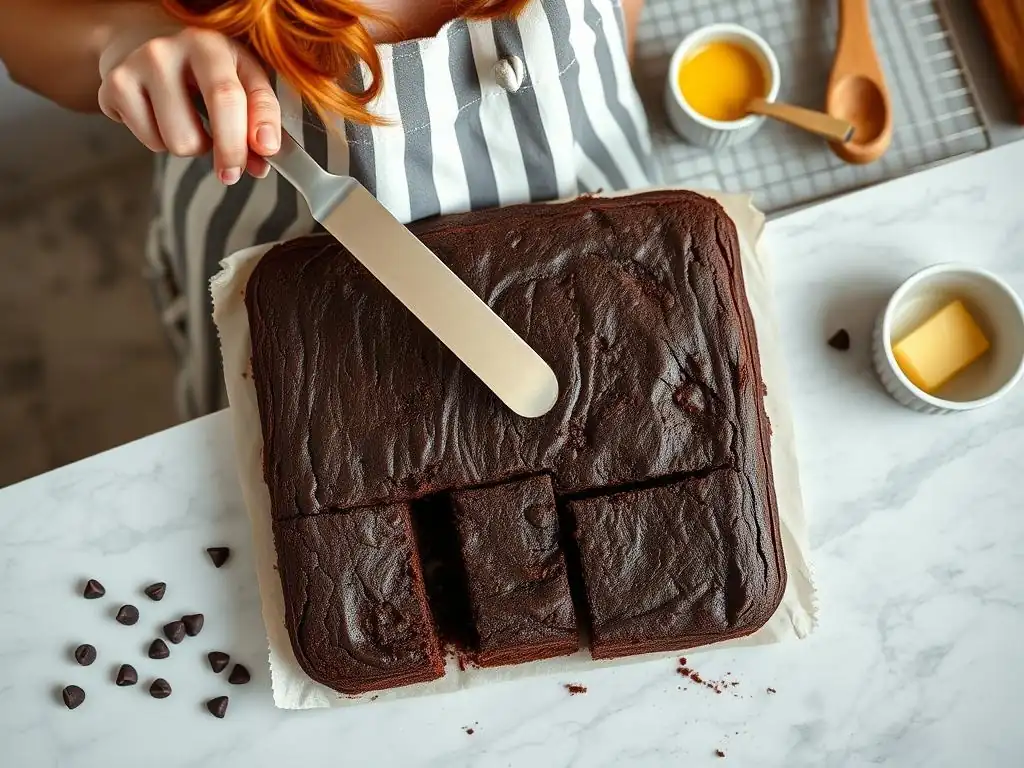
Sticky brownies are perhaps the most common challenge when trying to achieve clean cuts. Stickiness is usually a result of cutting the brownies before they are fully cooled and chilled, or using a dull or dirty knife. The best prevention is patience: always ensure your brownies have cooled at room temperature for several hours and ideally been chilled in the refrigerator for at least 30-60 minutes.
If you're still facing stickiness with properly cooled brownies, the issue is likely your cutting tool. Ensure your knife is razor-sharp. Implement the practice of cleaning the blade thoroughly with hot water and drying it between each and every cut. Alternatively, try coating the blade lightly with cooking spray or neutral oil. For extremely sticky brownies, the dental floss method is often the most effective solution, as it minimizes contact and drag. These steps are fundamental to an easy brownie cutting technique that avoids frustrating sticking.
Fixing Uneven Cuts: Techniques for Correction
Uneven cuts detract from the presentation of your brownies. This usually happens when eyeballing cuts or not using a straight guide. The primary way to fix uneven cuts is prevention through accurate marking and careful slicing. Before making any cuts, use a ruler and a scoring tool (like a paring knife tip or toothpick) to lightly mark your desired grid pattern on the cooled brownie surface.
When cutting, use these score marks as your guide. Press the knife straight down along the line, ensuring your blade is perpendicular to the cutting board. Avoid tilting the knife.
If you find your cuts are still wavering, using a long ruler or the edge of another cutting board as a physical guide alongside your knife can help maintain a straight line. While you can't perfectly fix an already unevenly cut piece, focusing on precise marking and guided slicing on the remaining uncut sections will help ensure the rest of the batch is uniform. Mastering this easy brownie cutting technique involves consistent application of measuring and guiding.
Preventing Brownies from Sticking to the Knife
Brownie sticking to the knife is a direct cause of messy, torn cuts. This problem is almost always due to residual brownie on the blade or cutting warm brownies. The solution lies in the preparation and maintenance of your cutting tool during the process.
Always start with a clean, sharp knife. After the very first cut, you must clean the blade before making the second cut. Use the hot water and towel method: dip the blade in hot water, wipe it completely dry. Repeat this between every subsequent cut. Alternatively, lightly spraying the clean blade with cooking spray before each cut creates a non-stick surface. These techniques prevent the build-up that causes sticking, allowing the blade to pass smoothly through the brownie. Implementing this habit is essential for a truly easy brownie cutting technique that results in clean, separated pieces.
Brownie Recipes to Practice Your Cutting Skills
Classic Fudgy Brownies: A Beginner-Friendly Recipe
Classic fudgy brownies are an excellent starting point for practicing your easy brownie cutting technique. Their dense, moist texture provides a good test for knife sharpness and cleaning frequency. A typical recipe involves melted chocolate and butter, minimal flour, and a higher ratio of sugar and eggs, resulting in a rich, gooey interior.
After baking a batch of classic fudgy brownies, follow the cooling and chilling steps precisely. Their inherent stickiness when warm highlights the importance of patience and chilling. Practice using the hot water method for your knife and cleaning it between cuts. The fudgy texture will quickly show you the difference a clean, sharp, and potentially warm blade makes compared to a dirty one. Mastering the cut on a fudgy brownie means you're well on your way to clean cuts on almost any brownie type.
Chocolate Chip Brownies: A Simple Variation to Try
Adding chocolate chips introduces a new element to consider when cutting: solid pieces within the soft brownie matrix. Chocolate chip brownies offer a slightly different challenge compared to plain fudgy ones. The chips can cause the knife to catch or deflect, potentially leading to uneven or jagged cuts if you're not careful.
When cutting chocolate chip brownies, a very sharp, straight-edge knife is often preferable to slice through the chips cleanly. Use a firm, steady downward pressure rather than sawing. You might feel the knife encounter a chip; try to press through it cleanly. This variation is great for practicing maintaining a straight line and consistent pressure despite encountering inclusions. Applying the easy brownie cutting technique principles of cooling, chilling, and cleaning the blade are still vital here to prevent the softer brownie parts from tearing around the chips.
Peanut Butter Swirl Brownies: Adding Complexity
Peanut butter swirl brownies add another layer of complexity due to the two different textures (brownie and swirled peanut butter) and the potential for stickiness from the peanut butter swirl. The swirl can be softer and stickier than the brownie base, making clean cuts slightly more challenging.
For peanut butter swirl brownies, ensuring thorough cooling and chilling is even more critical, especially to firm up the peanut butter swirl. A hot, clean knife is highly recommended. The heat helps slice through both the brownie and the potentially sticky peanut butter swirl smoothly. Using the measuring and scoring technique is also helpful to guide your cuts accurately through the swirled pattern. Practicing your easy brownie cutting technique on these brownies helps you handle variations in texture within a single bake.
Mastering the Cutting Technique: Practice and Refinement
Final Thoughts: Enjoying Your Perfectly Cut Brownies
Mastering the art of cutting brownies cleanly is a skill that comes with practice. It involves more than just slicing; it's a combination of proper cooling, chilling, tool preparation, and technique. Remember the key takeaways: patience is paramount – always cool and ideally chill your brownies completely. Your tools matter – use a sharp knife and prepare it with hot water or cooking spray. And most importantly, maintain cleanliness – clean your blade between every single cut.
Don't be discouraged if your first few attempts aren't perfect. Each batch of brownies offers a new opportunity to refine your easy brownie cutting technique. Pay attention to how different textures (fudgy vs. cakey, with or without additions) respond to different tools and methods. With consistent application of these steps, you'll soon be cutting beautiful, uniform brownie bars that look as incredible as they taste. Now go forth, bake, cut, and enjoy the fruits of your labor!
Frequently Asked Questions
How can I prevent my brownies from crumbling when I cut them?
The key is to let them cool completely before cutting. Also, use a sharp, thin knife and wipe it clean between each cut for cleaner lines.
What's the best knife to use for cutting brownies easily?
A thin, sharp knife or even a plastic knife is ideal. Avoid serrated knives, as they tend to tear the brownies, and remember to clean the blade after each cut.
Should I chill my brownies before cutting them?
Yes! Chilling your brownies for at least 30 minutes, or even longer, in the refrigerator allows them to firm up. This results in much cleaner cuts and less crumbling.
What's the "hot water" trick I keep hearing about for cutting brownies?
Dip your knife in hot water, then wipe it dry before each cut. The warmth helps the knife glide through the brownie, resulting in smoother, less messy cuts.
What if I don't have time to chill or use hot water? Is there a quicker method?
While chilling or using hot water produces the best results, you can still achieve decent cuts by using a sharp, thin knife and cutting with a firm, even pressure. Speed is not your friend here.
Final Reflection: The Sweet Science of the Perfect Brownie Cut
Mastering the art of the clean brownie cut isn't just about aesthetics; it's about respecting the delicious labor of love that went into creating those fudgy squares. A perfectly cut brownie elevates the entire experience, transforming a simple treat into a moment of mindful enjoyment. It's a detail that speaks volumes about the care and attention you put into both baking and presenting your creation.
The seemingly simple act of cutting a brownie has a surprising impact on the overall perception of the dessert. It's a small detail that can significantly influence the enjoyment of others, and even our own self-satisfaction. The details are not the details. They make the design.
– Charles Eames. This quote perfectly encapsulates the importance of seemingly minor aspects like a clean brownie cut in achieving a truly satisfying result. It's about presenting your work with pride, and that pride translates into a more enjoyable experience for everyone involved.
Now, I challenge you to take this newfound knowledge and apply it to your next baking adventure. Don't just bake brownies; craft them. Pay attention to the details, from the careful measurement of ingredients to the precise, clean cut that reveals the perfect, moist interior. Remember the satisfaction of a perfectly executed slice, and let that feeling inspire you to approach all your endeavors with the same level of care and attention. The result? Not just delicious brownies, but a deeper appreciation for the process and the joy of creating something beautiful.
Unlock Your Inner Brownie Master!
Thanks for joining us on this delicious journey into the world of perfectly cut brownies! We hope you've gained some valuable tips and tricks to elevate your baking game. Ready to put your new skills to the test?
- Master the perfect brownie slice: Practice your new cutting techniques and share your results – we'd love to see your perfectly portioned squares!
- Experiment with different pans and recipes: Try using a different sized pan or even a different brownie recipe to see how the cutting method adapts. What are your findings?
- Share your brownie adventures: Tag us on social media with your brownie creations! Let's build a community of brownie bakers.
What's your favorite brownie recipe and what cutting method will you use next? Let's discuss in the comments below!