
Simple Steps to Amazing NoBake Cheesecakes for Beginners

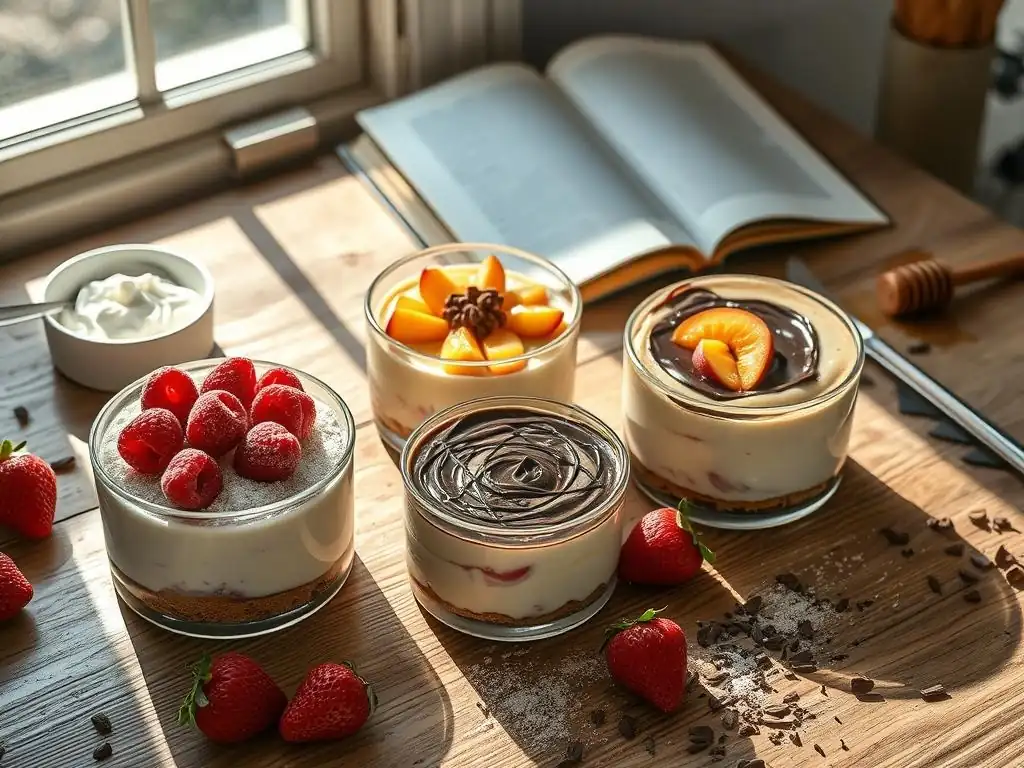
Welcome to BakeWithEase, your guide to unlocking the joys of baking! Are you ready to dive into the delicious world of desserts without even turning on the oven? Imagine creating a creamy, decadent treat that’s both impressive and incredibly easy. This week, we're focusing on no bake cheesecake recipes, and trust us, you won't believe how simple it is to achieve cheesecake perfection. Intrigued? Keep reading to discover our foolproof guide and create your own stunning no-bake masterpiece!
- Mastering No-Bake Cheesecake: A Beginner's Guide
- Introduction to No-Bake Cheesecake Simplicity
- Essential Ingredients for a Classic No-Bake Cheesecake
- Step-by-Step Guide to Making a Classic No-Bake Cheesecake
- Variations and Flavor Ideas for No-Bake Cheesecakes
- Tips and Tricks for Perfect No-Bake Cheesecakes
- Troubleshooting Common No-Bake Cheesecake Problems
- Serving and Garnishing Your No-Bake Cheesecake
- Conclusion: Enjoying Your Homemade No-Bake Cheesecake
-
Frequently Asked Questions
- What exactly is a no-bake cheesecake?
- What are the key ingredients needed for most no-bake cheesecake recipes?
- How long does a no-bake cheesecake typically need to chill in the refrigerator?
- Can I substitute ingredients in a no-bake cheesecake recipe?
- What are some common problems beginners face when making no-bake cheesecakes, and how can I avoid them?
- Final Reflection: The Sweet Simplicity of Effortless Elegance
- Unleash Your Inner Cheesecake Master!
Mastering No-Bake Cheesecake: A Beginner's Guide
Introduction to No-Bake Cheesecake Simplicity
The Allure of No-Bake Desserts
No-bake desserts hold a special place in the hearts of many, offering a delightful escape from the heat of the oven, especially during warmer months. Their appeal lies in their relative simplicity and speed compared to their baked counterparts. Imagine whipping up a delicious treat in under 30 minutes of active preparation time, needing only refrigeration to set. This ease makes no-bake options incredibly versatile for last-minute gatherings or simply satisfying a sweet craving without a lengthy baking process.
Beyond just convenience, the variety within no-bake desserts is vast. From creamy puddings and layered trifles to chilled pies and, of course, luscious no-bake cheesecakes, there's a texture and flavor profile to please everyone. These desserts often feature rich, smooth textures that are refreshing when served cold. The minimal equipment required – often just a bowl, whisk, and a pan – further enhances their accessibility for cooks of all skill levels, making them a fantastic starting point for anyone looking to explore dessert making without the complexities of baking.
Why No-Bake Cheesecakes Suit New Bakers
For those just starting their baking journey, traditional baked cheesecakes can seem intimidating. Concerns about water baths, cracked tops, and precise baking times often deter beginners. This is where no-bake cheesecake recipes shine, offering a perfect entry point into the world of creamy, decadent desserts without these common pitfalls. The process bypasses the oven entirely, eliminating worries about over-baking or achieving that elusive crack-free surface. The structure typically comes from gelatin or sometimes whipped cream and cream cheese alone, setting beautifully in the refrigerator.
Furthermore, the forgiving nature of most no-bake cheesecake recipes allows for a bit more flexibility than precise baking formulas. While measurements are still important, slight variations in mixing time or technique are less likely to result in complete failure. The primary goal is achieving a smooth, lump-free filling before chilling. This simpler process builds confidence in new bakers, proving that delightful, professional-looking desserts are well within reach. Mastering a basic no-bake cheesecake recipe can serve as a stepping stone to more complex creations down the line.
Effortless Cheesecake Creation
Creating a no-bake cheesecake is remarkably straightforward, breaking down into just a few key steps that require minimal effort. The process typically involves preparing a simple crust, usually from crushed cookies or graham crackers, mixing a creamy filling, and then allowing ample time for chilling. There's no need for specialized equipment like stand mixers (though they can be helpful) or complex temperature monitoring. A simple hand mixer or even just a whisk and some elbow grease can achieve the desired smooth consistency for the filling.
The beauty of this effortless approach is that it demystifies the idea of making a cheesecake from scratch. Instead of hours spent mixing, baking, and cooling, you're looking at perhaps 20-30 minutes of active work before the refrigerator takes over. This makes no-bake cheesecakes ideal for busy schedules or spontaneous dessert making. The simplicity of a classic no-bake cheesecake recipe allows beginners to focus on foundational techniques like achieving a smooth filling and a firm crust before tackling more intricate baked goods.
Essential Ingredients for a Classic No-Bake Cheesecake
Cream Cheese: The Foundation of Smoothness
Cream cheese is undeniably the star ingredient in any cheesecake, and no-bake versions are no exception. It provides the signature tangy flavor and rich, creamy texture that defines this beloved dessert. For the smoothest results, it's crucial to use full-fat block cream cheese, not the spreadable kind from a tub, as the block version contains less water and stabilizers that can affect the final texture when not baked. Using cream cheese that is softened to room temperature is absolutely essential; cold cream cheese will result in a lumpy filling that is impossible to smooth out.
A typical recipe for a standard 9-inch no-bake cheesecake might call for two to three 8-ounce blocks of cream cheese. Allowing these blocks to sit at room temperature for at least 30-60 minutes before mixing makes them pliable and easy to incorporate with other ingredients, ensuring a wonderfully smooth and uniform filling. This simple step prevents frustrating lumps and is key to achieving that desirable silky texture in your finished no-bake cheesecake.
Sweeteners: Choosing Between Granulated and Powdered Sugar
Sweetness is vital in balancing the tanginess of the cream cheese. Most no-bake cheesecake recipes call for powdered sugar (confectioners' sugar) rather than granulated sugar. Powdered sugar contains a small amount of cornstarch, which helps stabilize the filling and contributes to a smoother, less grainy texture. Because it dissolves instantly, it's much easier to achieve a lump-free filling compared to granulated sugar, which can remain slightly gritty when not heated.
However, some recipes might use a combination of both, or even just granulated sugar dissolved into a liquid component like melted butter for the crust or a warm gelatin mixture for the filling. For beginners focusing on ease and a smooth finish, sticking to powdered sugar for the main filling is usually the simplest and most reliable approach. The quantity will vary based on the recipe, but a common amount might be around 1 to 1.5 cups of powdered sugar for two blocks of cream cheese, adjusted to taste.
Binding Agents: Gelatin for Structure
Since there's no oven to set the structure, a binding agent is typically required to give a no-bake cheesecake its firm, sliceable consistency. Unflavored gelatin is the most common and reliable choice. When properly bloomed in cold liquid and then dissolved in hot liquid, it creates a network that solidifies as it cools, providing stability to the creamy filling. Without gelatin, the filling would likely remain too soft, more like a mousse or pudding than a firm cheesecake.
Using gelatin involves a simple two-step process: first, sprinkling the powder over a small amount of cold water or milk to "bloom" it (allowing it to absorb liquid and swell), and second, gently heating it until it is fully dissolved, usually over low heat or in a microwave. A standard recipe often uses one envelope (about 0.25 ounces or 7 grams) of unflavored gelatin, bloomed in about 1/4 cup of cold water, then dissolved. This amount is typically sufficient to set a cheesecake made with 2-3 blocks of cream cheese, ensuring it holds its shape when sliced.
Flavor Enhancers: Vanilla Extract and Lemon Juice
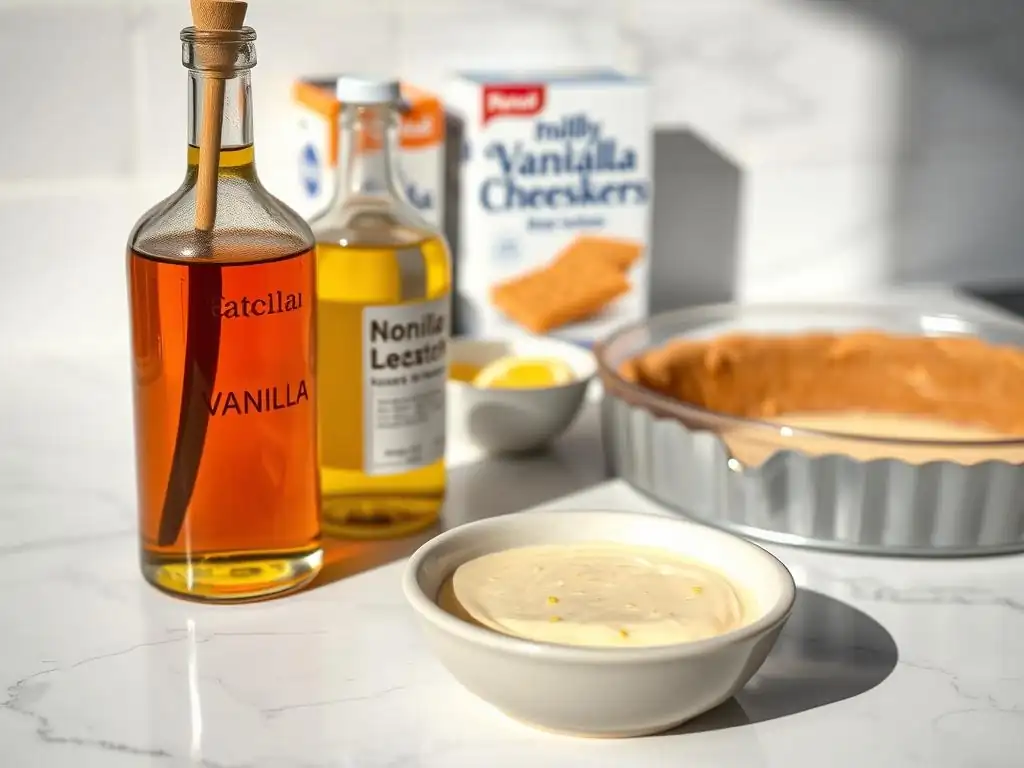
Vanilla extract is a universal enhancer in sweet recipes, and no-bake cheesecake is no exception. A good quality pure vanilla extract adds warmth and depth to the creamy, tangy base, rounding out the flavors beautifully. Just a teaspoon or two can make a significant difference in the overall aroma and taste profile. It's usually added along with the sugar and cream cheese during the mixing stage.
Lemon juice, while sometimes optional, adds a bright, zesty counterpoint to the richness of the cream cheese. A tablespoon or two of fresh lemon juice can lift the flavor, making the cheesecake taste lighter and more refreshing. It enhances the natural tanginess of the cream cheese and balances the sweetness. However, adding too much can make the filling too liquidy or overly sour, so it's best to start with a small amount and adjust if desired. Some recipes specifically call for it, particularly those aiming for a classic, slightly tart profile.
Crust Components: Graham Crackers for a Simple Base
A sturdy and flavorful crust is the perfect foundation for a no-bake cheesecake. The most classic and easiest option for beginners is a graham cracker crust. Graham crackers crush easily into fine crumbs, which then bind together beautifully with melted butter and a touch of sugar. This creates a firm base that holds its shape when sliced and provides a pleasant textural contrast to the smooth filling.
To make a graham cracker crust, you'll typically need about 1.5 to 2 cups of graham cracker crumbs (roughly one standard box of graham crackers), combined with about 1/4 to 1/3 cup of melted unsalted butter and 2-4 tablespoons of sugar. The sugar helps caramelize the crust slightly and adds flavor, while the butter is the crucial binding agent. Pressing this mixture firmly into the bottom (and sometimes up the sides) of a springform pan creates a reliable and delicious base that requires no baking, just chilling to set the butter.
Step-by-Step Guide to Making a Classic No-Bake Cheesecake
Preparing the Crust: A Simple Graham Cracker Base
The first step in many no bake cheesecake recipes is creating the base, and a graham cracker crust is wonderfully simple. It requires minimal ingredients and no baking time, just assembly and chilling. The key is getting the texture of the crumbs right and ensuring they are evenly coated with melted butter before pressing them into the pan. This forms a solid foundation that won't crumble apart when you slice the finished dessert.
Start by crushing your graham crackers into fine crumbs. A food processor makes this task incredibly quick and easy, yielding uniform crumbs in seconds. If you don't have one, you can place the crackers in a zip-top bag and crush them with a rolling pin or the bottom of a heavy pan. Aim for a fine, sand-like texture, avoiding large chunks which won't bind properly.
Achieving the Right Graham Cracker Crumble Texture
The ideal texture for your graham cracker crumbs is fine and uniform, similar to coarse sand. This consistency is crucial because it allows the crumbs to pack together tightly and evenly when mixed with butter. If the crumbs are too coarse, the crust will be loose and fall apart when you try to cut the cheesecake. Over-processing the crackers, however, isn't usually a concern; the finer, the better for binding.
Using a food processor is the most efficient way to achieve this fine texture. Simply break the graham crackers into pieces and pulse until they resemble fine crumbs. If using the bag-and-rolling-pin method, take your time to ensure all large pieces are crushed. You should end up with approximately 1.5 to 2 cups of crumbs from a standard box of graham crackers, which is typically enough for a 9-inch springform pan.
Combining Graham Cracker Crumbs with Butter and Sugar
Once your graham cracker crumbs are ready, transfer them to a medium bowl. Melt the unsalted butter – about 1/4 to 1/3 cup (around 4-5 tablespoons) is a good starting point for 1.5 cups of crumbs. Pour the melted butter over the crumbs and add 2 to 4 tablespoons of granulated sugar. The sugar adds sweetness and helps the crust brown slightly if you choose to bake it briefly (though for no-bake, it primarily adds flavor).
Stir the mixture thoroughly with a fork or spoon until all the crumbs are evenly moistened by the butter. The mixture should resemble wet sand and hold together slightly when you squeeze a small amount in your hand. This step is critical; if the crumbs aren't fully coated, the crust won't bind properly and will be crumbly. Add a little more melted butter, a teaspoon at a time, if the mixture still appears dry.
Pressing the Crust Firmly into a Springform Pan
The final step for the crust is pressing it into your chosen pan, typically a springform pan for easy release. A 9-inch springform pan is standard for many no bake cheesecake recipes. For the cleanest edges and easiest removal, you can line the bottom of the pan with a circle of parchment paper before adding the crust mixture. Pour the buttered crumbs into the pan.
Using the bottom of a flat glass or measuring cup, firmly and evenly press the crumb mixture into the bottom of the pan. You can also press some crumbs up the sides if desired, but this isn't strictly necessary for a no-bake version. The key is to compact the crumbs as much as possible to create a dense, stable base. Once pressed, place the crust in the refrigerator or freezer while you prepare the filling; chilling helps set the butter and firm up the crust before the filling is added.
Making the No-Bake Cheesecake Filling: A Detailed Walkthrough
Crafting the creamy filling is the heart of any no-bake cheesecake recipe. The goal is a smooth, luscious mixture that sets firmly yet remains wonderfully soft and rich. This process involves combining the primary ingredients – cream cheese, sweetener, and flavorings – before incorporating the binding agent that gives it structure. Precision in mixing is important here to avoid lumps and ensure a uniform texture throughout.
The main steps involve softening and mixing the cream cheese, adding sugar and flavor, preparing and adding the gelatin (if using), and ensuring everything is smoothly combined. Using room temperature ingredients is key, especially for the cream cheese, as it mixes far more easily. This detailed walkthrough will help you achieve that perfect, silky no-bake cheesecake filling.
Softening Cream Cheese for a Smooth Texture
As mentioned earlier, starting with properly softened cream cheese is paramount for a smooth no-bake cheesecake filling. Cold cream cheese is dense and firm, making it incredibly difficult to whip into a smooth consistency. Attempting to mix it cold often results in stubborn lumps that persist throughout the filling, no matter how much you mix. Softened cream cheese, on the other hand, is pliable and whips up airy and smooth.
To soften cream cheese, simply leave the unwrapped blocks on your kitchen counter at room temperature for at least 30 minutes to an hour, or until they yield easily when gently pressed. If you're short on time, you can carefully microwave the unwrapped cream cheese blocks in a microwave-safe bowl for 15-30 seconds on low power, checking frequently, until just softened but not melted. Be cautious not to overheat it.
Combining Cream Cheese with Sugar and Vanilla Extract
Once your cream cheese is perfectly softened, place it in a large mixing bowl. Add the powdered sugar and vanilla extract. A standard ratio might be two 8-ounce blocks of cream cheese with 1 to 1.5 cups of powdered sugar and 1-2 teaspoons of vanilla extract. Begin mixing these ingredients together, starting on low speed with an electric mixer to avoid a cloud of powdered sugar, then increasing the speed to medium.
Beat the mixture until it is completely smooth, creamy, and free of any lumps. This usually takes a few minutes. Scrape down the sides and bottom of the bowl occasionally with a spatula to ensure everything is thoroughly combined. The mixture should look light and airy, though not as whipped as meringue. This smooth base is essential before adding the binding agent.
Preparing and Incorporating the Gelatin Mixture
If your no-bake cheesecake recipe uses gelatin for structure, this is the step where you prepare and add it. First, "bloom" the gelatin by sprinkling one packet (about 0.25 oz) evenly over 1/4 cup of cold water in a small bowl. Let it sit undisturbed for 5-10 minutes; the gelatin will absorb the liquid and swell, becoming spongy. Do not stir it initially, just sprinkle it over the surface.
After blooming, the gelatin needs to be dissolved. Gently heat the bloomed gelatin mixture until it becomes a clear liquid. You can do this by placing the small bowl over a pan of simmering water (a double boiler method) or by microwaving it for 10-15 seconds, stirring after every few seconds, until no granules remain.
Once dissolved, let it cool slightly for a minute or two, but don't let it set. While continuously mixing your cream cheese mixture on low speed, slowly pour the warm, dissolved gelatin in a thin stream until fully incorporated. Mix for another minute to ensure it's evenly distributed.
Optional: Adding a Touch of Lemon Juice for Brightness
Adding lemon juice is an optional but highly recommended step for many classic no bake cheesecake recipes, especially if you appreciate a slight tang. Just 1 to 2 tablespoons of fresh lemon juice can significantly brighten the rich flavor of the cream cheese, preventing the dessert from tasting too heavy or overly sweet. It provides a lovely counterpoint to the sweetness and richness.
Add the lemon juice after the cream cheese, sugar, and vanilla have been mixed smooth, and typically before or after incorporating the gelatin mixture, depending on the specific recipe instructions. Mix it in gently until just combined. Taste a small amount of the filling at this stage (before adding gelatin if your recipe allows) to see if the tang level is to your liking. Remember that the flavor will mellow slightly once chilled.
Assembling and Chilling Your No-Bake Cheesecake
With the crust prepared and chilling, and the filling mixed to smooth perfection, the next step is to bring the two together and then allow the refrigerator to work its magic. Proper assembly and sufficient chilling time are crucial for the no-bake cheesecake to set correctly and achieve its desired firm texture. This stage requires patience, as the chilling process takes several hours, but the active work is minimal.
Ensure your prepared crust is firm from chilling. Gently pour the creamy filling over the crust, distributing it evenly. Smooth the top for a professional look, and then transfer the pan carefully to the refrigerator. The chilling time is non-negotiable; it's what transforms the liquid filling into a sliceable dessert.
Pouring the Filling Evenly over the Prepared Crust
Remove your chilled crust from the refrigerator or freezer. Carefully pour the prepared no-bake cheesecake filling directly over the firmly pressed graham cracker base. Start pouring in the center and let the filling spread outwards naturally. This helps prevent disturbing the crust. Ensure you get all the delicious filling out of the bowl using a spatula.
Try to distribute the filling as evenly as possible across the entire surface of the crust. If the filling is very thick, you might need to gently spread it towards the edges with a spatula. The goal is a uniform layer of filling that is level across the top of the pan. This makes for a more attractive and easier-to-slice cheesecake once set.
Smoothing the Surface for a Polished Finish
For a beautifully finished no-bake cheesecake, take a moment to smooth the top surface of the filling after pouring it into the pan. A simple offset spatula or the back of a spoon works perfectly for this. Gently spread the filling from the center towards the edges, creating a flat, smooth plane. This step is purely for aesthetics but makes the final dessert look much more professional.
Take care not to press too hard, which could disturb the crust below. Work slowly and deliberately until the surface is as smooth as you can get it. Any swirls or patterns you create at this stage will likely remain visible after chilling, so decide if you want a perfectly flat top or a slightly textured one. Once smoothed, the cheesecake is ready for its crucial chilling period.
Chilling Time: Achieving a Firm and Stable Cheesecake
Chilling is the most important step for setting your no-bake cheesecake. The binding agent, typically gelatin, needs time in a cold environment to solidify and firm up the filling. While the exact time can vary depending on the recipe and the specific ingredients used (e.g., the amount of gelatin), a minimum of 4-6 hours is usually required. For best results and the firmest possible set, chilling the cheesecake overnight is highly recommended.
Place the springform pan carefully in the refrigerator, ensuring it is on a flat surface where it won't be disturbed. Avoid placing hot items directly next to it, as this can affect the chilling process. A properly chilled no-bake cheesecake should be firm to the touch in the center and hold its shape when the pan is opened. Rushing this step is the most common reason for a runny or floppy cheesecake.
Variations and Flavor Ideas for No-Bake Cheesecakes
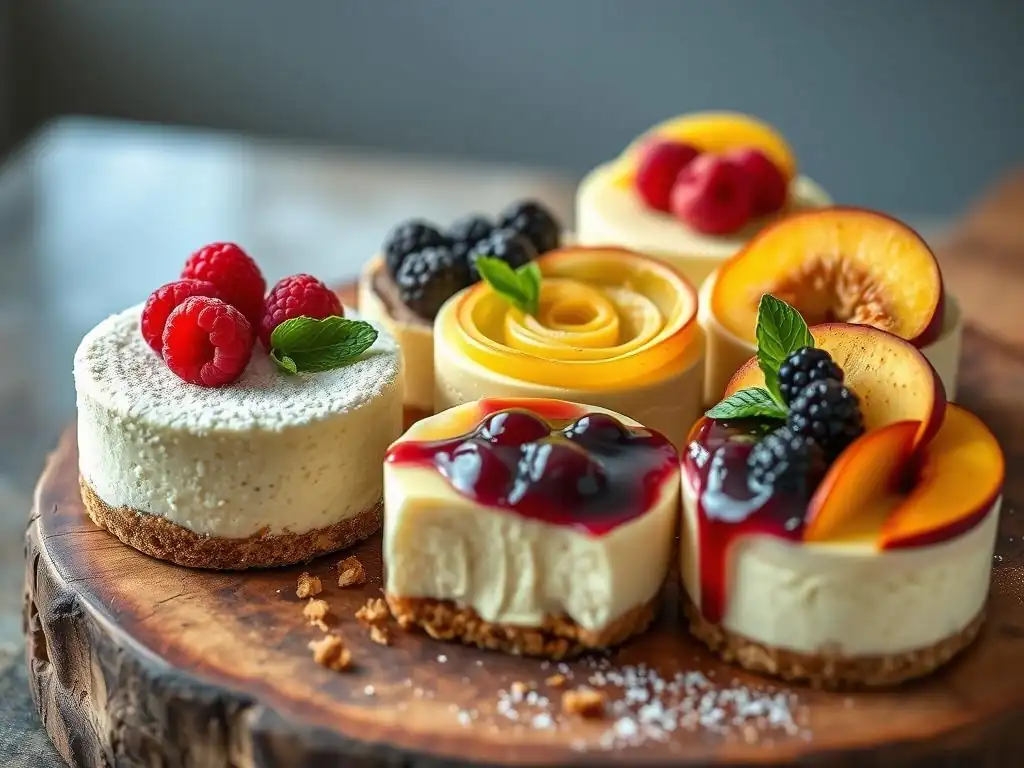
Once you've mastered the classic no-bake cheesecake recipe, the possibilities for flavor variations are nearly endless! No-bake desserts are incredibly adaptable, allowing you to infuse the creamy base with a wide range of ingredients, from fruits and chocolates to nuts and candies. This opens up a world of creative no bake cheesecake recipes to explore, catering to different tastes and occasions.
Experimenting with variations is a fun way to put your own spin on this easy dessert. You can alter the crust, the filling, or add toppings and mix-ins. Here are a few popular and delicious ideas to get you started on customizing your next no-bake creation.
Chocolate No-Bake Cheesecake: Rich and Decadent
Transforming a classic no-bake cheesecake into a chocolate lover's dream is surprisingly simple. You can incorporate chocolate into the filling by melting high-quality chocolate (like semi-sweet or dark chocolate) and folding it into the cream cheese mixture after the sugar and vanilla have been added. Ensure the melted chocolate isn't too hot when you add it, and mix it in quickly and thoroughly to prevent it from seizing.
Another approach is to use cocoa powder. Sift cocoa powder into the cream cheese and sugar mixture and blend until smooth. The amount will depend on how intense you want the chocolate flavor, but starting with 1/4 to 1/2 cup of unsweetened cocoa powder is a good range. You can also add mini chocolate chips to the filling or top the finished cheesecake with chocolate ganache or chocolate curls for extra decadence. This variation is always a crowd-pleaser.
Raspberry No-Bake Cheesecake: Fruity and Tangy
Adding fruit to your no-bake cheesecake provides a wonderful contrast to the rich creaminess. Raspberry is a fantastic choice, offering both sweetness and a pleasant tang. You can incorporate raspberry flavor in several ways. One method is to swirl raspberry puree or sauce into the plain cheesecake filling just before pouring it into the crust. Use a knife or skewer to create beautiful patterns.
Alternatively, you can blend freeze-dried raspberries into the powdered sugar before adding it to the cream cheese for a more uniform, intense raspberry flavor throughout the filling. Fresh raspberries can also be folded gently into the filling or used generously as a topping once the cheesecake is set. A simple raspberry sauce, made by simmering fresh or frozen raspberries with a little sugar and lemon juice, makes an excellent vibrant garnish.
Key Lime No-Bake Cheesecake: Tart and Refreshing
For a bright, zesty, and incredibly refreshing no-bake cheesecake, key lime is a perfect flavor profile. This variation relies heavily on fresh key lime juice, which provides a distinct tartness that sets it apart from regular lime juice. Incorporate 1/2 to 3/4 cup of fresh key lime juice (strained to remove pulp) into the cream cheese mixture along with the sugar and vanilla.
You might also add some lime zest to boost the citrus aroma and flavor. The acidity of the lime juice can sometimes affect the setting of the gelatin, so some recipes might call for a slightly increased amount of gelatin or rely more heavily on whipped cream folded into the mixture for structure. Serve chilled, garnished with whipped cream and extra lime zest or thin lime slices. This makes for a perfect light dessert.
Peanut Butter Cup No-Bake Cheesecake: A Sweet and Salty Delight
Combining the creamy richness of cheesecake with the irresistible pairing of peanut butter and chocolate results in a truly decadent no-bake treat. This variation is a favorite among those who love sweet and salty combinations. You can incorporate smooth peanut butter directly into the cream cheese filling, typically using about 1/2 to 1 cup of peanut butter for a standard recipe.
Blend the peanut butter with the softened cream cheese and sugar until smooth. You can also add chopped peanut butter cups or mini peanut butter chips to the filling. For the crust, consider using crushed chocolate cookies instead of graham crackers for an extra layer of flavor. Top the finished, chilled cheesecake with a drizzle of melted chocolate, more peanut butter, and chopped peanut butter cups for an indulgent finish. This no bake cheesecake recipe is sure to impress.
Tips and Tricks for Perfect No-Bake Cheesecakes
Achieving a perfect no-bake cheesecake is well within reach for beginners, but a few simple tips can elevate your results from good to truly great. These tricks address common challenges and help ensure your cheesecake sets beautifully, slices cleanly, and tastes amazing. Paying attention to these details can make all the difference in the texture and appearance of your final dessert.
From preparing your ingredients correctly to handling the finished product, these pointers cover key aspects of the no-bake cheesecake process. They are designed to help you avoid common pitfalls and achieve that smooth, firm, and delicious result that no bake cheesecake recipes are known for.
Preventing Cracks: Slow and Even Chilling
While baked cheesecakes are notoriously prone to cracking due to temperature fluctuations, no-bake versions generally don't crack in the same way. However, rapid temperature changes can still sometimes cause issues with setting or condensation. The most important factor for preventing any surface imperfections and ensuring a smooth set is slow and even chilling.
Place your assembled cheesecake in the refrigerator on a level shelf where it won't be bumped or tilted. Avoid putting it in the coldest spot right next to the freezer vents, which could potentially cause the edges to set too quickly compared to the center. Letting it chill for the recommended time, ideally overnight, ensures the gelatin or other binding agents have ample time to create a stable structure throughout the entire filling, resulting in a firm and smooth top surface.
Achieving the Perfect Texture: Avoiding Lumps
A key characteristic of a great no-bake cheesecake is its smooth, creamy texture, free from any grainy or lumpy bits. The primary culprit for lumps is often improperly softened cream cheese. As discussed earlier, ensure your cream cheese is at room temperature before you begin mixing. This allows it to whip up smoothly and incorporate easily with the sugar and other ingredients.
Mix the softened cream cheese and sugar thoroughly until absolutely no lumps remain before adding any liquid ingredients like melted gelatin or lemon juice. Scrape down the sides and bottom of your mixing bowl frequently to catch any unmixed portions. If using powdered sugar, sifting it before adding can help prevent small clumps from forming. Taking a few extra minutes at this stage makes a significant difference in the final texture.
Easy Release from the Pan: Parchment Paper Technique
Getting your beautiful no-bake cheesecake out of the springform pan cleanly can sometimes be tricky. The sides of the filling can stick, potentially marring the smooth edge. A simple and effective technique to ensure easy release is using parchment paper on the bottom of the springform pan.
Before adding the crust, unclip the springform pan, place a piece of parchment paper over the bottom insert, and then clip the ring back into place, trapping the parchment paper. Trim any excess paper around the edges. This creates a non-stick surface on the bottom. When it's time to serve, after chilling, run a thin knife or offset spatula carefully around the inner edge of the pan before unclipping and removing the ring. The parchment ensures the bottom releases cleanly from the base.
Storage Tips: Maintaining Freshness and Flavor
Once your no-bake cheesecake is set and ready, proper storage is essential to maintain its freshness, texture, and flavor. Since it contains dairy and isn't baked, it must be stored in the refrigerator. Cover the cheesecake tightly with plastic wrap, especially after the springform ring has been removed, to prevent it from absorbing odors from other foods in the fridge and to keep the surface from drying out.
A well-stored no-bake cheesecake will typically keep in the refrigerator for 3-4 days. If you need to store it for longer, it freezes quite well. For freezing, first chill until very firm, then wrap the cheesecake (or individual slices) tightly in plastic wrap, followed by a layer of aluminum foil. Frozen no-bake cheesecake can last for 1-2 months. Thaw it overnight in the refrigerator before serving.
Troubleshooting Common No-Bake Cheesecake Problems
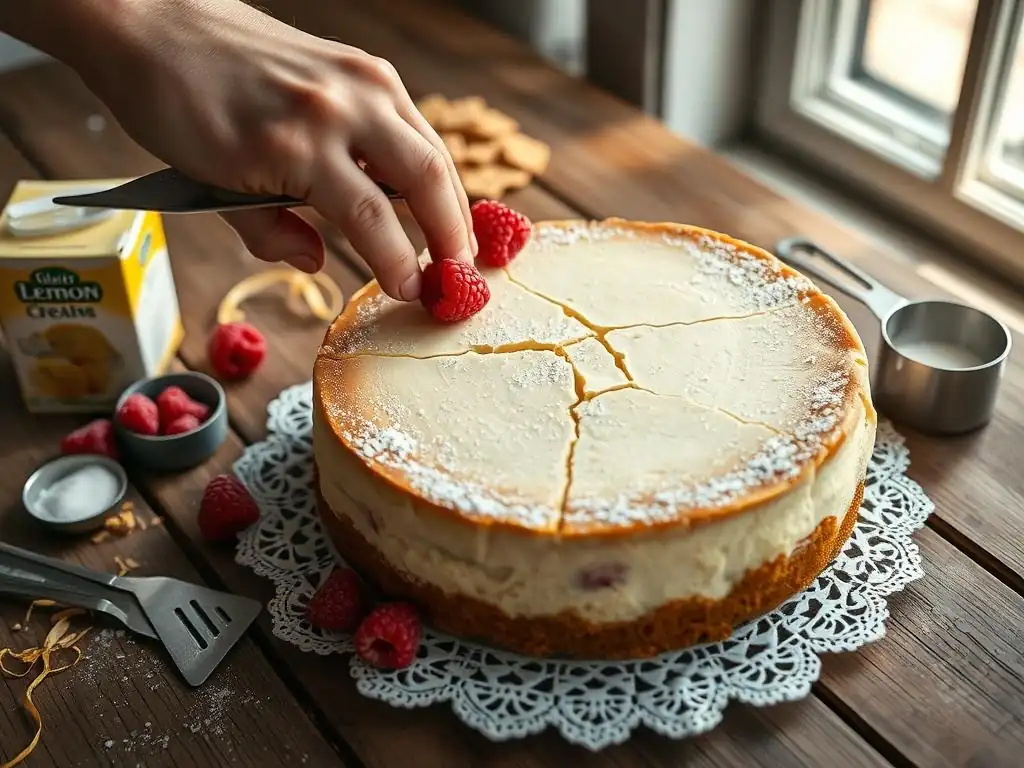
Even with simple no bake cheesecake recipes, sometimes things don't go exactly as planned. Understanding the common issues that can arise and how to fix or prevent them is part of the learning process. Don't be discouraged if your first attempt isn't absolutely perfect; troubleshooting helps you refine your technique for next time.
Most problems with no-bake cheesecakes relate to the texture of the filling or the crust. Identifying the cause makes it easier to correct it in the future. Here are some frequent issues beginners encounter and their likely solutions.
Runny Cheesecake Filling: Insufficient Gelatin
The most common problem with no-bake cheesecake filling is that it doesn't set properly and remains too runny. This is almost always due to an issue with the gelatin. The causes could include using too little gelatin for the amount of liquid/dairy, not blooming the gelatin correctly in cold water, or not dissolving the bloomed gelatin completely before adding it to the filling.
Ensure you use the correct amount of gelatin specified in the recipe (usually one packet per standard cheesecake). Double-check that you sprinkle the gelatin over cold water and let it sit for the full blooming time until it's spongy. Crucially, make sure the bloomed gelatin is completely dissolved into a clear liquid by gently heating it before slowly whisking it into the cream cheese mixture while mixing. Undissolved granules won't provide structure.
Dense Cheesecake Filling: Overmixing
While you want your cream cheese mixture to be smooth, overmixing after the initial stage can sometimes lead to a dense or heavy texture, especially if the recipe incorporates whipped cream or uses gelatin in a way that requires careful folding. If you beat the mixture too vigorously or for too long after adding the gelatin or whipped cream, you can deflate the mixture or develop the cream cheese too much, resulting in a less airy texture.
Mix the cream cheese and sugar until just smooth and combined. If adding gelatin, stream it in while mixing on low speed just until incorporated. If folding in whipped cream, do so gently with a spatula to maintain the airiness. Stop mixing as soon as the ingredients are combined. The goal is smooth and creamy, not necessarily light and fluffy (unless the recipe specifically calls for whipping).
Soggy Crust: Too Much Butter
A soggy crust is another frustrating issue, often occurring when there's too much butter relative to the amount of graham cracker crumbs. If the crumb mixture is oversaturated with butter, it won't compact into a crisp base; instead, it will become greasy and soft, especially once the moisture from the filling seeps into it.
Ensure you measure your graham cracker crumbs and melted butter accurately according to the recipe. The mixture should resemble wet sand and clump slightly when squeezed, but shouldn't be dripping with butter. If your mixture looks too wet, you can try adding a few more graham cracker crumbs to absorb the excess butter before pressing it into the pan. Chilling the crust thoroughly before adding the filling also helps the butter solidify and create a barrier.
Difficulty Removing Cheesecake: Insufficient Chilling
If you have trouble removing your no-bake cheesecake from the pan, especially the springform ring, it's often because it hasn't been chilled for long enough. The filling needs ample time to set firmly against the sides of the pan. If it's still too soft, it will stick and pull away unevenly when you try to release the ring.
Ensure you chill the cheesecake for the minimum recommended time, ideally 6 hours or, even better, overnight. Before attempting to remove the ring, run a thin, sharp knife or an offset spatula gently around the inside edge of the pan, pressing lightly against the pan side (not cutting into the cheesecake) to loosen any stuck bits. Then, slowly release the springform latch. The parchment paper trick on the bottom also greatly aids in clean removal from the base.
Serving and Garnishing Your No-Bake Cheesecake
Once your no-bake cheesecake is perfectly set and released from the pan, the final step is making it look as good as it tastes! Serving and garnishing offer another opportunity for creativity, allowing you to add extra layers of flavor and visual appeal. Simple additions can elevate a basic no bake cheesecake recipe into a showstopper dessert.
Whether you're aiming for elegant simplicity or a more elaborate presentation, these ideas can help you finish your homemade cheesecake with flair. Consider the flavor profile of your cheesecake when choosing garnishes and pairings.
Simple Garnishing Ideas: Fresh Berries, Whipped Cream
For a classic and easy garnish that complements almost any no-bake cheesecake flavor, fresh berries and whipped cream are unbeatable. A dollop or swirl of freshly whipped cream adds lightness and richness. You can sweeten the cream slightly and add a touch of vanilla extract before whipping. Pipe it around the edge of the cheesecake or place a large swirl in the center.
Fresh berries, such as strawberries, raspberries, blueberries, or a mix, add vibrant color and a burst of fresh, slightly tart flavor that cuts through the richness of the cheesecake. Arrange them artfully on top of the whipped cream or scattered across the cheesecake surface. A sprinkle of powdered sugar or a few mint leaves can add an extra touch of elegance. These simple garnishes make your no bake cheesecake recipe look instantly appealing.
Serving Suggestions: Pairing with Coffee or Dessert Wine
A slice of homemade no-bake cheesecake is a delightful treat on its own, but pairing it with the right beverage can enhance the experience. For many, a classic pairing is a cup of hot coffee. The slight bitterness and warmth of coffee provide a lovely contrast to the cold, creamy sweetness of the cheesecake. Espresso or a latte also work beautifully.
If you prefer something alcoholic, certain dessert wines can be an excellent match. A late-harvest Riesling or a Sauternes, with their balanced sweetness and acidity, can complement the richness of the cheesecake without being overpowering. For chocolate variations, a Port or a Banyuls might be a good choice. Consider the specific flavor of your no-bake cheesecake when choosing a pairing.
Conclusion: Enjoying Your Homemade No-Bake Cheesecake
Celebrate Your Baking Success!
Congratulations! You've successfully made a delicious no-bake cheesecake from scratch. Taking on a new recipe, especially something as rewarding as a cheesecake, is a fantastic achievement for any beginner baker. You've navigated the steps from preparing the crust to mixing the smooth filling and patiently chilling it to perfection.
Take a moment to appreciate your accomplishment. Whether it's your first attempt at a no bake cheesecake recipe or simply your latest creation, the satisfaction of making something so delightful with your own hands is immense. Share it with friends and family, or simply savor a slice yourself. You've proven that creating amazing desserts doesn't always require an oven or complex techniques.
Exploring Further No-Bake Dessert Options
Mastering a basic no-bake cheesecake recipe is just the beginning! The world of no-bake desserts is vast and offers countless opportunities to expand your skills and creativity. You can experiment with different crusts (like oreo cookies or shortbread), explore more complex filling flavors, or even try layered no-bake treats like parfaits or trifles.
Consider diving into other types of no-bake recipes, such as chocolate mousse, panna cotta, or various pudding-based desserts. Each offers unique textures and flavors without the need for baking. Applying the techniques you learned while making your no-bake cheesecake, like working with gelatin or creating smooth fillings, will serve you well in these new ventures. Keep exploring and have fun with it!
One of the greatest joys of baking (or no-bake making!) is sharing your creations with others. Your homemade no-bake cheesecake is sure to be a hit with friends, family, or colleagues. Bringing a slice to a gathering or simply offering dessert after dinner is a wonderful way to share your passion and skill.
Don't hesitate to talk about how you made it, especially highlighting how accessible no bake cheesecake recipes are for beginners. You might even inspire someone else to try their hand at making one! Sharing photos of your finished cheesecake online is also a fun way to connect with other dessert enthusiasts and show off your hard work. Enjoy the process and the delicious results!
Frequently Asked Questions
What exactly is a no-bake cheesecake?
A no-bake cheesecake is a cheesecake that doesn't require oven baking. It typically sets in the refrigerator due to ingredients like gelatin or chilling. It's a quicker and easier alternative to traditional cheesecakes.
What are the key ingredients needed for most no-bake cheesecake recipes?
The core ingredients usually include cream cheese, graham cracker crust, sugar, and something to help it set, like gelatin or a similar stabilizer. Flavors and toppings can be added according to preference.
How long does a no-bake cheesecake typically need to chill in the refrigerator?
Most no-bake cheesecakes require at least 4-6 hours of chilling time in the refrigerator. This ensures the cheesecake sets properly and has a firm, sliceable texture.
Can I substitute ingredients in a no-bake cheesecake recipe?
While some substitutions are possible, be cautious. Changing the stabilizing agent can affect the final texture. Always consider how the substitution will impact the overall consistency of the cheesecake.
What are some common problems beginners face when making no-bake cheesecakes, and how can I avoid them?
Common issues include a crumbly crust or a runny filling. Ensure the graham cracker crumbs are finely ground and the butter is well-mixed. Properly bloom and incorporate the gelatin to prevent a runny filling.
Final Reflection: The Sweet Simplicity of Effortless Elegance
The art of crafting a delicious no-bake cheesecake is surprisingly accessible, proving that culinary excellence doesn't always require hours of meticulous work. This article has demonstrated that with a few simple steps and readily available ingredients, anyone can create a stunning dessert that rivals those found in the finest restaurants. The ease of preparation, coupled with the impressive results, makes no-bake cheesecakes the perfect treat for both seasoned bakers and enthusiastic beginners.
The enduring appeal of cheesecake, a classic dessert enjoyed across cultures and generations, lies in its creamy texture and versatile flavor profile. Its ability to adapt to various tastes and preferences, from classic New York style to innovative fruit-infused creations, ensures its continued popularity. A slice of cheesecake is a moment of pure indulgence, a small escape from the everyday.
This sentiment perfectly encapsulates the joy and satisfaction derived from both making and sharing this delightful dessert. The simplicity of the no-bake method only enhances this experience, allowing more time to focus on the pleasure of creating and sharing something special.
Now, I invite you to embrace the simplicity and embark on your own no-bake cheesecake adventure. Don't be intimidated by the seemingly complex world of baking; this article has shown you that creating something truly delicious can be surprisingly straightforward. Choose your favorite flavor combinations, gather your ingredients, and let the process of creation bring you joy. The reward? A stunning, delicious cheesecake and the satisfaction of knowing you made it yourself. So, go ahead, unleash your inner pastry chef – your taste buds will thank you.
Unleash Your Inner Cheesecake Master!
Thanks for joining us on this delicious journey into the world of no-bake cheesecakes! We hope you've gained the confidence to create creamy, dreamy desserts with minimal effort. Ready to take the next step?
- Whip up your first masterpiece: Grab those ingredients and follow our recipe—we promise, it's easier than you think! This is your chance to impress yourself and everyone you know.
- Share your creation: Post a picture of your finished cheesecake on social media and tag us – we'd love to see your culinary triumph! Use #BakeWithEaseNoBake.
- Explore our other recipes: Discover even more simple and satisfying dessert recipes on BakeWithEase.com. Perhaps a chocolate mousse is next on your list?
So, what incredible flavor combination will you create for your next no-bake cheesecake adventure?