
From Zero to Baker: Your First Perfect Brownies

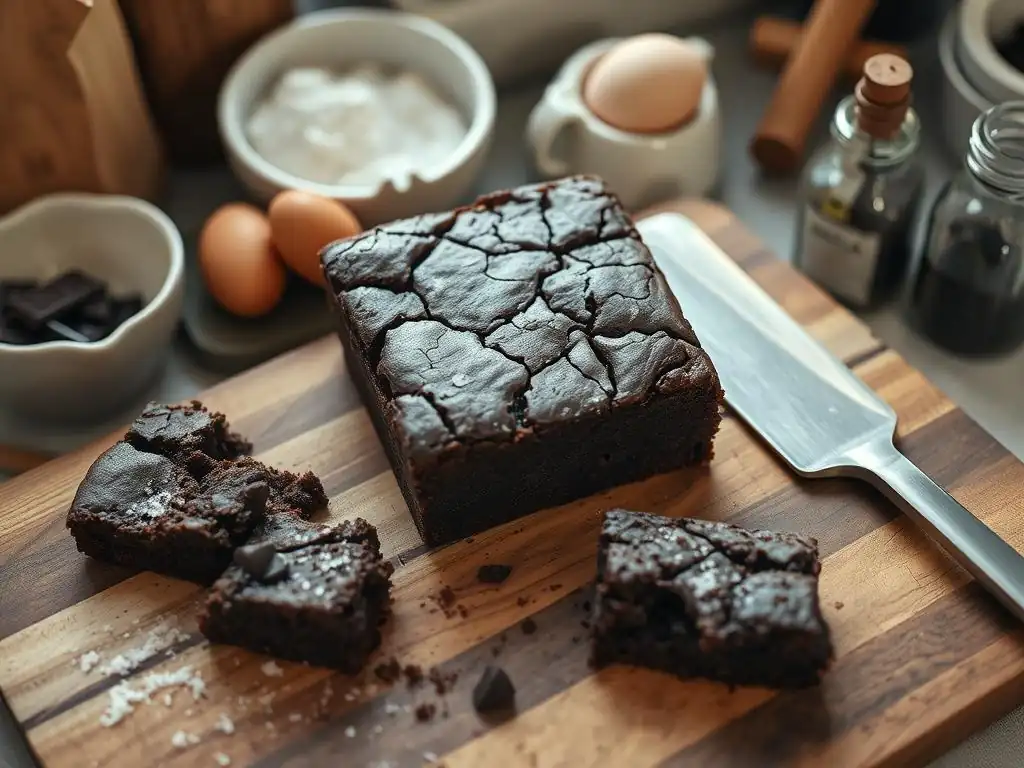
Welcome to BakeWithEase, your haven for unlocking baking brilliance! Ever dreamt of creating decadent treats without the fuss? You're in the right place. Dive in and discover how to bake with confidence, starting with our easy beginner chocolate brownies recipe. Intrigued by how simple it can be to achieve that perfect fudgy center and crackled top? Keep reading and let's transform you into a brownie master!
- Fudgy Espresso Brownies: A Beginner's Guide to Decadent Chocolate
- Baker's Delight's Guide to Rich, Fudgy Brownies
- Why This Espresso Brownie Recipe Works
- Ingredients for Your Fudgy Espresso Brownies
- Equipment You'll Need for Baking Perfect Brownies
- Step-by-Step: Baking Your Fudgy Espresso Brownies
- Tips and Tricks for the Best Fudgy Espresso Brownies
- Troubleshooting Your Fudgy Espresso Brownies
- Enjoy Your Homemade Fudgy Espresso Brownies!
-
Frequently Asked Questions
- What makes this brownie recipe "easy" for beginners?
- What are the essential ingredients for this beginner brownie recipe?
- Can I substitute any ingredients in this easy brownie recipe?
- How can I ensure my brownies have that perfect fudgy texture?
- How long should I bake these brownies, and how do I know when they're done?
- Final Reflection: The Sweetness of Success, One Brownie at a Time
- Unlock Your Inner Baker: Bake Your First Batch Today!
Fudgy Espresso Brownies: A Beginner's Guide to Decadent Chocolate
Baker's Delight's Guide to Rich, Fudgy Brownies
Welcome to the wonderful world of baking! If you're looking for an easy beginner chocolate brownies recipe that delivers amazing flavor and texture, you've come to the right place. This guide focuses on creating fudgy espresso brownies – a simple yet sophisticated twist on a classic. We'll walk you through each step, explaining the 'why' behind the ingredients and techniques, ensuring your first attempt is a resounding success. Get ready to impress yourself and others with these incredibly rich treats.
Baking brownies from scratch doesn't have to be intimidating. Our goal at BakeWithEase is to make it accessible and enjoyable for everyone. This specific easy chocolate brownies recipe for beginners is designed to minimize complexity while maximizing that sought-after dense, moist, and deeply chocolatey result. We've added a hint of espresso to elevate the chocolate flavor, making these brownies truly special. Follow along, and you'll see just how simple baking can be!
Why This Espresso Brownie Recipe Works
Perfect Texture: Dense, Fudgy, and Chewy
Achieving the ideal brownie texture is all about the right balance of ingredients, particularly the fat-to-flour ratio and the type of sugar used. This recipe leans heavily on melted butter and a significant amount of chocolate (via cocoa powder), combined with a lower proportion of flour compared to many cake-like brownie recipes. This higher fat content inhibits gluten development, resulting in that dense, fudgy interior we crave.
Furthermore, the inclusion of both granulated and light brown sugar plays a crucial role. Granulated sugar contributes to crisp edges, while light brown sugar, with its molasses content, adds moisture and a delightful chewiness throughout the brownie. The specific ratio in this easy beginner chocolate brownies recipe is calibrated to ensure that perfect trifecta: a slightly crackly top, chewy edges, and an intensely fudgy center. It's a texture profile that consistently earns rave reviews.
Simple Ingredients: Elevating Classic Brownies with Espresso
One of the beauties of this easy chocolate brownies recipe for beginners is that it relies on common pantry staples, with the simple addition of espresso powder and brewed coffee. These ingredients are readily available in most grocery stores. Using unsweetened cocoa powder ensures a deep, intense chocolate flavor, which is then amplified by the espresso. Espresso doesn't necessarily make the brownies taste like coffee; instead, it dramatically enhances the chocolate notes, making them richer and more complex, much like adding a pinch of salt enhances sweetness.
The magic happens when the espresso powder is dissolved in hot, strong brewed coffee before being added to the batter. This ensures the espresso flavor is evenly distributed and fully integrated into the chocolate base. It's a simple technique that adds a layer of sophistication to an otherwise straightforward, simple chocolate brownies recipe, proving that beginner baking can still produce incredibly flavorful results.
Step-by-Step Instructions for Foolproof Results
This beginner-friendly chocolate brownie recipe is structured with clear, step-by-step instructions designed to guide you smoothly from start to finish. We break down the process into manageable actions: melting butter, whisking dry ingredients, combining wet ingredients, gently folding, and baking. Each step is explained in detail, highlighting key points like mixing techniques and visual cues for doneness.
The sequential nature of the instructions, combined with tips on avoiding common pitfalls like overmixing, makes this recipe highly forgiving for newcomers. For example, we emphasize gently folding the dry ingredients into the wet ones to prevent developing too much gluten, which can lead to tough brownies. By following these carefully outlined steps, even someone who has never baked before can achieve delicious, fudgy results with confidence. It's truly an easy beginner chocolate brownies recipe designed for success.
Ingredients for Your Fudgy Espresso Brownies
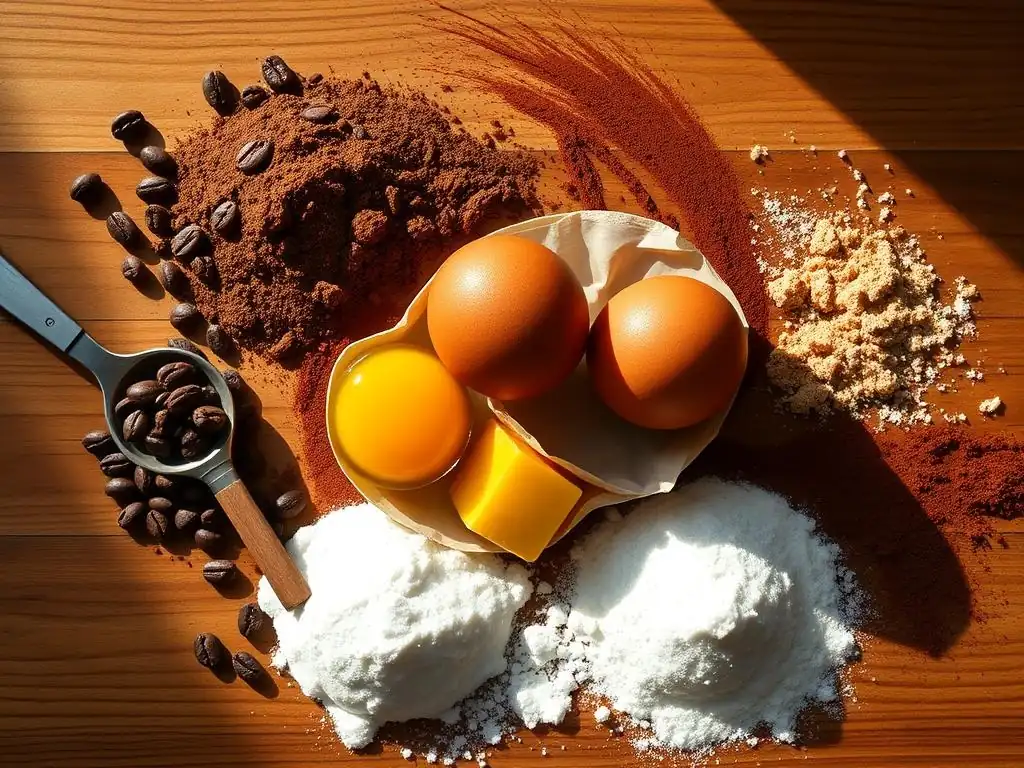
The Essential Dry Ingredients
All-Purpose Flour: Providing Structure
All-purpose flour is the backbone of most baked goods, including brownies. It provides the necessary structure to hold the brownies together. However, in fudgy brownie recipes, we use less flour relative to fat and sugar compared to cakey brownies. This limits gluten development, contributing to the dense, moist texture.
Typically, a recipe like this might call for around 1 cup of all-purpose flour for an 8x8 inch pan. Using too much flour can make your brownies dry and tough, while too little might make them fall apart. Measuring accurately, ideally by weight (around 125 grams), is crucial for consistent results in this simple chocolate brownies recipe.
Unsweetened Cocoa Powder: Deepening the Chocolate Flavor
Unsweetened cocoa powder is where the primary chocolate flavor comes from in these fudgy espresso brownies. Natural unsweetened cocoa powder (like Hershey's or Ghirardelli) is acidic and reacts with baking soda (if used) to provide lift, though this recipe relies more on eggs for leavening. Dutch-processed cocoa powder, which is neutral, provides a darker color and smoother flavor. Either can work, but natural cocoa tends to yield a slightly stronger chocolate punch here.
Using a good quality cocoa powder makes a significant difference in the final taste. This recipe often calls for around 3/4 cup of cocoa powder, contributing significantly to the rich, intense chocolate profile. It's essential for that deep, dark color and robust flavor that defines a great easy beginner chocolate brownies recipe.
Granulated Sugar: Adding Sweetness
Granulated sugar provides sweetness and helps create that desirable slightly crisp or crackly top on your brownies. When sugar dissolves during baking, it contributes to the structure and moisture retention.
In this recipe, you might use around 1 to 1.5 cups of granulated sugar, depending on desired sweetness. It works in tandem with brown sugar to achieve both sweetness and texture. The amount of sugar also affects chewiness; generally, more sugar leads to a chewier brownie.
Light Brown Sugar: Enhancing Moisture and Chewiness
Light brown sugar is key to the fudgy, chewy texture of these brownies. The molasses content in brown sugar adds moisture and creates a softer, denser crumb compared to using only granulated sugar.
Combining light brown sugar with granulated sugar, often in roughly equal parts or slightly more granulated, gives the best of both worlds: a nice top crust and a moist, chewy interior. The amount used, perhaps around 1 cup, directly impacts the chewiness and overall moisture level of this easy chocolate brownies recipe for beginners.
Salt: Balancing Flavors
Salt is a non-negotiable ingredient in baking, even in sweet recipes. It doesn't just add saltiness; it enhances all the other flavors, particularly chocolate. Just a small amount, like 1/2 teaspoon, can make the chocolate taste richer and prevent the brownies from being overly sweet or bland.
Think of salt as the flavor amplifier. Without it, the deep chocolate and espresso notes wouldn't be as pronounced. It brings balance to the sweetness and richness, making every bite more satisfying.
Espresso Powder: Intensifying Chocolate Notes
Espresso powder is the secret ingredient that elevates these from simple chocolate brownies to fudgy espresso brownies. As mentioned earlier, it acts as a flavor enhancer for chocolate. Just a tablespoon or two can dramatically deepen the chocolate flavor without making the brownies taste overtly like coffee.
It's important to use espresso powder, not instant coffee granules, as espresso powder has a more concentrated and finer flavor. Dissolving it in hot liquid ensures it integrates smoothly into the batter. This simple addition is what makes this beginner-friendly chocolate brownie recipe truly special.
The Key Wet Ingredients
Unsalted Butter: Adding Richness and Moisture
Butter is fundamental to the richness and moisture of fudgy brownies. Using melted butter contributes significantly to the dense, moist texture and helps create that signature crackly top. Unsalted butter is preferred because it gives you control over the total amount of salt in the recipe.
A typical quantity for an 8x8 pan might be around 1/2 cup (1 stick) or even 3/4 cup of melted butter. The higher the ratio of butter to flour, the fudgier the brownie tends to be. Melting the butter allows it to incorporate smoothly with the sugar and other wet ingredients, creating a glossy base for the batter.
Large Eggs: Binding and Leavening
Eggs serve multiple purposes in brownie baking: they bind the ingredients together, add richness (from the yolks), and contribute to leavening (from the whites). Using large eggs is standard in most recipes, as their size is consistent.
This recipe might call for 2 or 3 large eggs. More eggs, particularly whole eggs, tend to make brownies cakier. Using a higher ratio of eggs to flour, but fewer eggs overall than a cake, contributes to the fudgy texture while still providing enough structure to hold the brownies together.
Vanilla Extract: Enhancing Flavor
Vanilla extract is a classic flavor enhancer in chocolate baked goods. Like salt and espresso, it helps to round out and deepen the chocolate flavor. A teaspoon or two of good quality vanilla extract can make a noticeable difference.
It adds a warm, aromatic note that complements the rich chocolate and subtle espresso. Don't skip the vanilla, even though the other flavors are dominant; it plays a quiet but important supporting role in this easy beginner chocolate brownies recipe.
Strong Brewed Coffee: Boosting Espresso Flavor
Using a small amount of hot, strong brewed coffee (or hot water) to dissolve the espresso powder before adding it to the batter is crucial. The hot liquid helps the espresso powder dissolve completely and bloom, releasing its full flavor potential.
While you could technically just add espresso powder to the dry ingredients, dissolving it first ensures even distribution and a more intense flavor infusion. A few tablespoons of hot coffee work perfectly for this, seamlessly integrating the espresso into the wet ingredients.
Equipment You'll Need for Baking Perfect Brownies
8x8 Inch Baking Pan: Ideal Size for Brownies
An 8x8 inch square metal baking pan is the standard size for most brownie recipes, yielding brownies that are thick enough to be satisfyingly fudgy. A metal pan conducts heat efficiently, helping the edges set properly.
Glass or ceramic pans can be used, but they conduct heat differently and may require a slight adjustment in baking time (often longer) and temperature (sometimes slightly lower). For consistent results with this easy beginner chocolate brownies recipe, an 8x8 inch metal pan is highly recommended.
Two Mixing Bowls: Separating Wet and Dry Ingredients
Having two mixing bowls is essential for the standard baking method used in this recipe. One bowl is for whisking together the dry ingredients (flour, cocoa, sugar, salt, espresso powder), ensuring they are evenly combined.
The second bowl is used for mixing the wet ingredients (melted butter, eggs, vanilla, dissolved espresso). Separating these allows you to properly combine like ingredients before gently merging them, which is key to controlling gluten development and achieving the right texture in this easy chocolate brownies recipe for beginners.
Measuring Cups and Spoons: Ensuring Accurate Proportions
Accurate measurement is fundamental to successful baking. Using standard dry measuring cups for flour, sugar, and cocoa powder, and liquid measuring cups for wet ingredients like melted butter and coffee, is crucial.
Measuring spoons are necessary for smaller quantities like salt, espresso powder, and vanilla extract. While weighing ingredients provides the highest accuracy, using standard measuring tools carefully (like leveling off dry ingredients) is sufficient for this beginner-friendly chocolate brownie recipe.
Whisk and Rubber Spatula: Mixing Ingredients
A whisk is perfect for combining the dry ingredients and for initially mixing the wet ingredients (like beating the eggs into the butter/sugar mixture). It helps to aerate and ensure everything is evenly distributed.
A rubber spatula is indispensable for gently folding the dry ingredients into the wet. Folding, rather than vigorous stirring, minimizes gluten development, which is vital for achieving a fudgy, not tough, brownie. A spatula is also great for scraping down the sides of the bowl and transferring the batter to the pan.
Parchment Paper: For Easy Removal
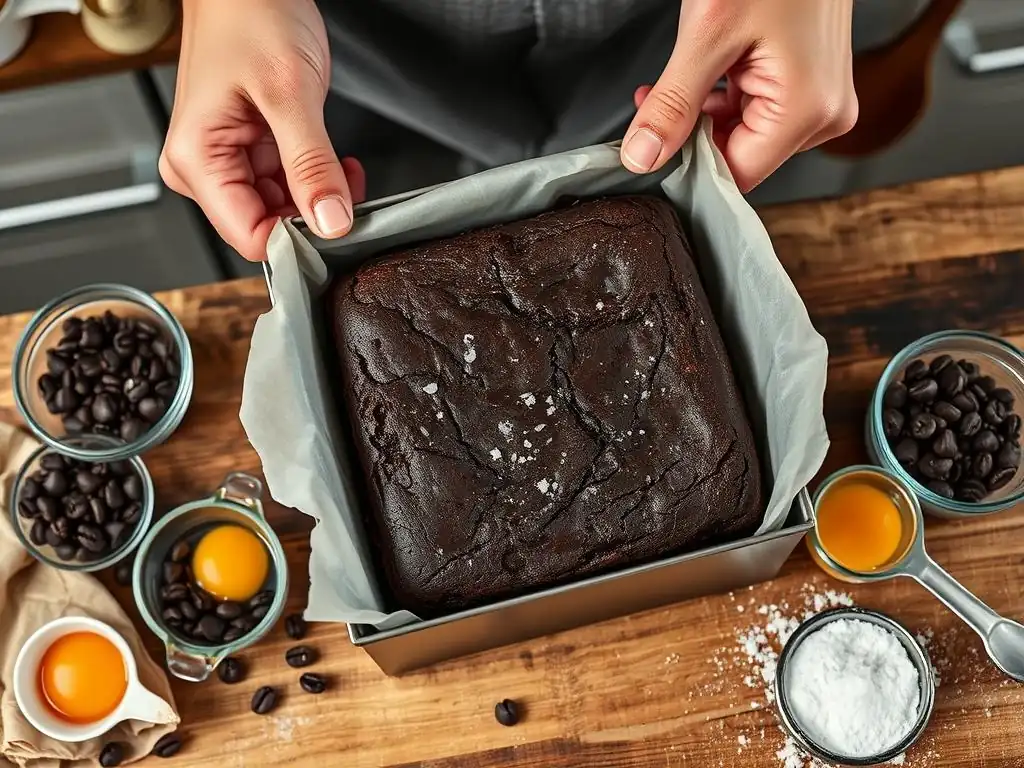
Lining your baking pan with parchment paper is a simple trick that makes removing the cooled brownies incredibly easy. Cut a piece of parchment paper to fit the bottom and extend up the sides of the pan, creating "handles."
This prevents sticking and allows you to lift the entire slab of cooled brownies out of the pan before cutting. It makes clean-up much simpler too. While not strictly necessary, using parchment paper is highly recommended for a hassle-free experience with this easy beginner chocolate brownies recipe.
Step-by-Step: Baking Your Fudgy Espresso Brownies
Step 1: Preparing the Pan and Melting Butter with Coffee
Start by preheating your oven, typically to 350°F (175°C). Line your 8x8 inch baking pan with parchment paper, leaving some overhang on the sides. Lightly grease the exposed parts of the pan if desired, though the parchment usually suffices.
In a medium saucepan or microwave-safe bowl, melt the unsalted butter. Once melted, stir in the strong brewed coffee (or hot water) and the espresso powder, whisking until the espresso powder is completely dissolved. Set this mixture aside to cool slightly.
Step 2: Whisking Together Dry Ingredients
In your first large mixing bowl, add the all-purpose flour, unsweetened cocoa powder, granulated sugar, light brown sugar, and salt. Use a whisk to thoroughly combine these ingredients, breaking up any lumps of brown sugar and ensuring the cocoa and salt are evenly distributed throughout the flour. This step is quick but important for uniform flavor and texture.
Step 3: Combining Wet Ingredients
In your second large mixing bowl, crack the large eggs. Add the vanilla extract to the eggs. Once the melted butter/coffee/espresso mixture has cooled slightly (it should still be warm but not hot enough to cook the eggs), pour it into the bowl with the eggs and vanilla. Whisk vigorously until the mixture is smooth, glossy, and well combined. This takes about 1-2 minutes of whisking. The mixture should look emulsified.
Step 4: Combining Wet and Dry Ingredients (Gently Folding)
Now comes the crucial step for texture. Pour the whisked wet ingredients into the bowl with the combined dry ingredients. Switch to a rubber spatula. Gently fold the dry ingredients into the wet until just combined. Do not overmix! A few streaks of flour are okay. Overmixing develops gluten, leading to tough, cakey brownies instead of fudgy ones. This step should take less than a minute of careful folding.
Step 5: Pouring Batter and Baking to Perfection
Pour the thick, glossy batter into the prepared 8x8 inch pan, using the rubber spatula to scrape all the batter from the bowl. Spread the batter evenly in the pan, getting into the corners.
Bake in the preheated oven. Baking time for an 8x8 pan is typically between 25 to 35 minutes, but this can vary significantly depending on your oven. You're looking for the edges to look set and slightly pulled away from the sides, while the center might still look a little soft or just set.
Step 6: Cooling and Cutting Your Fudgy Brownies
This is perhaps the hardest step: patience! Once baked, remove the brownies from the oven. Let them cool completely in the pan on a wire rack. This is essential for achieving that perfect fudgy texture; they continue to set as they cool. Cooling can take 2-3 hours.
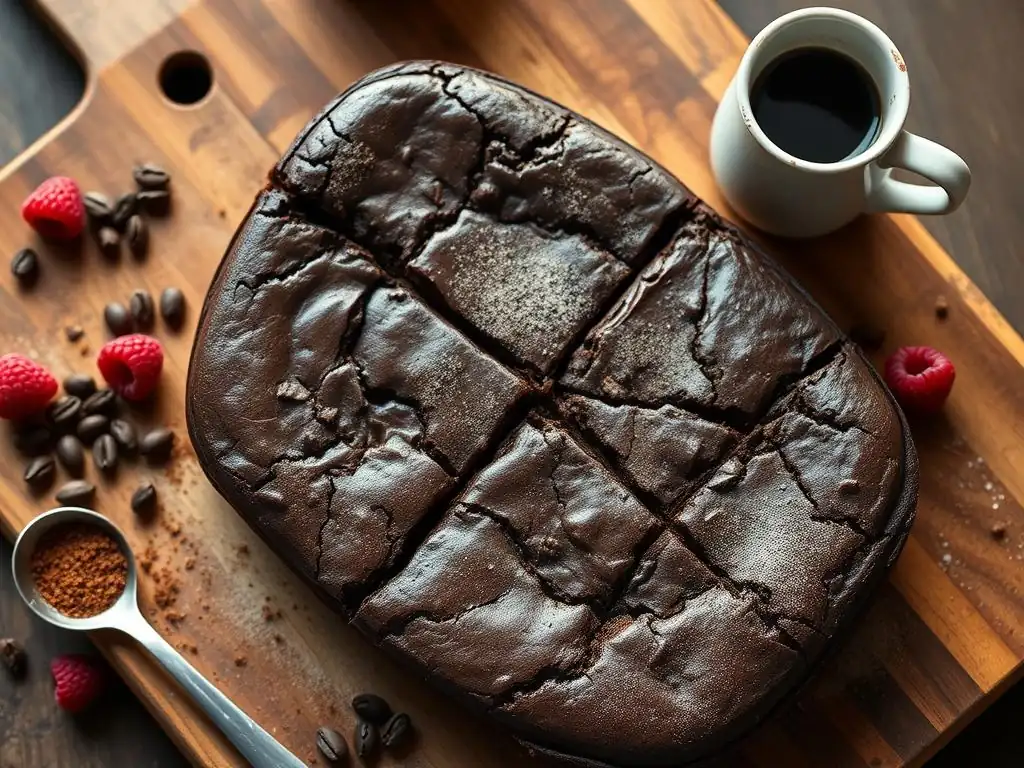
Once completely cool, use the parchment paper overhang to lift the brownies out of the pan onto a cutting board. Use a sharp knife (warming it under hot water and wiping dry between cuts helps) to slice the brownies into squares. A standard 8x8 pan yields 16 or 9 brownies, depending on how you cut them.
Tips and Tricks for the Best Fudgy Espresso Brownies
Avoiding Common Brownie Baking Mistakes
Overmixing the Batter: Leading to Tough Brownies
One of the most frequent mistakes beginners make is overmixing the batter once the wet and dry ingredients are combined. As mentioned earlier, flour contains protein that forms gluten when agitated in the presence of liquid. Excessive mixing develops this gluten network, resulting in a tough, bread-like texture rather than the desired fudgy chewiness.
To avoid this, use a rubber spatula and fold gently until just combined. Stop as soon as you no longer see large pockets of dry flour. A few small streaks are acceptable and will disappear during baking. This simple step is critical for ensuring your easy beginner chocolate brownies recipe yields perfectly fudgy results.
Overbaking: Resulting in Dry Brownies
Overbaking is another common culprit behind dry, cakey brownies. Brownies, especially fudgy ones, continue to cook slightly from residual heat after they are removed from the oven. Baking them until a toothpick comes out completely clean usually means they are already overdone.
For fudgy brownies, you want to pull them out when the edges are set but the center still looks a little soft, and a toothpick inserted into the center comes out with moist crumbs attached, not wet batter, but not completely clean either. Typically, for an 8x8 pan at 350°F, this sweet spot is often found between 28-32 minutes, but trust your visual cues and the toothpick test description provided here.
Toothpick Test: Identifying Doneness
The toothpick test is a classic method, but it needs interpretation for fudgy brownies. Insert a toothpick into the center of the pan.
- If it comes out with wet batter, the brownies need more time.
- If it comes out completely clean, they are likely overbaked for a fudgy texture.
- If it comes out with moist crumbs clinging to it, they are perfect for fudgy brownies.
This "moist crumbs" stage indicates that the batter has set but the interior is still wonderfully moist and dense. It's a key indicator to look for when making this easy beginner chocolate brownies recipe.
Customizing Your Brownies: Flavor Variations
Adding Chocolate Chunks: Increasing Chocolate Intensity
For an extra layer of chocolatey goodness, fold in about 1 cup of chocolate chips or chopped chocolate (like bittersweet or semi-sweet) into the batter just before pouring it into the pan. The chocolate chunks will melt slightly during baking, creating pockets of gooey chocolate throughout the brownies.
This is a simple way to customize your easy chocolate brownies recipe for beginners and add different textures and intensities of chocolate. Experiment with different types of chocolate for varied results!
Incorporating Walnuts or Pecans: Adding Texture
If you enjoy nuts in your brownies, fold in about 1 cup of chopped walnuts or pecans along with the chocolate chunks (or instead of). Toasting the nuts lightly beforehand can enhance their flavor and crunch.
Nuts add a delightful textural contrast to the soft, fudgy brownie base. This is a classic variation for a simple chocolate brownies recipe and adds another dimension to the eating experience.
Swirling in Caramel: Enhancing Sweetness
For a decadent twist, warm about 1/2 cup of store-bought caramel sauce until pourable. After pouring the brownie batter into the pan, dollop spoonfuls of caramel over the top. Use a knife or skewer to gently swirl the caramel into the batter.
Be careful not to over-swirl, or the caramel will disappear completely. This adds a sweet, gooey element that pairs wonderfully with the rich chocolate and subtle espresso. It's a slightly more advanced customization but still manageable for a beginner-friendly chocolate brownie recipe.
Brownie Storage: Maintaining Freshness
To keep your fudgy espresso brownies fresh, store them in an airtight container at room temperature. If properly stored, they will remain moist and delicious for 3-4 days.
For longer storage, you can refrigerate them for up to a week or freeze them (wrapped tightly in plastic wrap and then foil) for up to 3 months. Thaw frozen brownies at room temperature. Storing them correctly ensures you can enjoy your homemade easy beginner chocolate brownies recipe creations for longer.
Troubleshooting Your Fudgy Espresso Brownies
Brownies Too Dry? Possible Causes and Solutions
If your brownies turned out dry, the most likely culprits are overbaking or using too much flour.
- Overbaking: As discussed, this is very common. Next time, check for doneness a few minutes earlier and look for moist crumbs on the toothpick, not a clean one.
- Too Much Flour: Ensure you are measuring your flour correctly. Spoon the flour into your measuring cup and level it off with a straight edge; don't scoop directly from the bag, as this compacts the flour and results in using too much. Weighing flour (around 125g for 1 cup) is the most accurate method.
Adjusting your baking time and measuring technique will significantly improve the texture of your next batch of this easy chocolate brownies recipe for beginners.
Brownies Not Fudgy Enough? Adjusting Ingredients
If your brownies are more cakey than fudgy, it's often related to the fat-to-flour ratio or egg content.
- Ratio: Ensure you used the specified amount of butter and cocoa powder relative to the flour. Reducing the flour slightly (e.g., by 1-2 tablespoons) in your next batch can increase fudginess.
- Eggs: Using too many eggs or larger eggs than specified can lead to a cakey texture. Ensure you use the correct number of large eggs.
This easy beginner chocolate brownies recipe is designed for fudginess, so double-checking your measurements against the recipe is the first step if they turn out cakey.
Brownies Sinking in the Middle? Troubleshooting Tips
A sinking middle can happen for a few reasons, often related to underbaking or oven issues.
- Underbaking: If the center is still very wet when removed from the oven, it won't have enough structure to hold up as it cools and may sink. Ensure the edges are set and the toothpick test yields moist crumbs.
- Oven Temperature: An inaccurate oven temperature can cause problems. Using an oven thermometer can help verify your oven is heating correctly. If it's too low, the brownies might not set properly; if it's too high, the outside might cook before the inside.
- Opening Oven Door: Resist the urge to open the oven door frequently, especially in the first 20 minutes of baking, as this can cause temperature fluctuations that lead to sinking.
Patience and accurate oven temperature are key to preventing a sinking middle in this simple chocolate brownies recipe.
Enjoy Your Homemade Fudgy Espresso Brownies!
You've done it! You've successfully baked a batch of decadent, fudgy espresso brownies using a simple chocolate brownies recipe. Take a moment to appreciate the rich aroma and beautiful crackly top. Baking, especially starting with an easy beginner chocolate brownies recipe like this, is a rewarding experience.
Serving Suggestions
These fudgy espresso brownies are fantastic served warm or at room temperature.
- Enjoy them plain with a tall glass of milk.
- Serve warm with a scoop of vanilla ice cream – the contrast of hot and cold, fudgy and creamy, is divine.
- Drizzle with extra caramel sauce or a sprinkle of sea salt for added flair.
- Pair with a cup of coffee or, fittingly, a shot of espresso!
[ ] Slice into 16 squares for smaller portions or 9 for larger, decadent treats.
[ ] Arrange on a plate and watch them disappear quickly!
We love seeing your baking creations! If you made these fudgy espresso brownies using our easy beginner chocolate brownies recipe, share a photo on social media and tag us or use our hashtag. It's inspiring for other beginners to see what's possible.
Remember, baking is a journey, and every successful batch builds confidence. This beginner-friendly chocolate brownie recipe is just the start. Explore more easy recipes on BakeWithEase.com and keep honing your skills. Happy baking!
Frequently Asked Questions
What makes this brownie recipe "easy" for beginners?
This recipe focuses on simple ingredients and straightforward instructions, minimizing complex techniques that often intimidate new bakers. It's designed to be foolproof and result in delicious brownies every time.
What are the essential ingredients for this beginner brownie recipe?
The most essential ingredients are chocolate, butter, sugar, eggs, and flour. These form the base of the brownie and are crucial for achieving the desired texture and flavor.
Can I substitute any ingredients in this easy brownie recipe?
While substitutions are possible, they can affect the final result. For beginners, it's best to stick to the recipe. However, consider using different types of chocolate for a unique flavor profile, while maintaining the same quantity.
How can I ensure my brownies have that perfect fudgy texture?
Achieving a fudgy texture relies on using the correct ratio of ingredients and avoiding over-baking. The recipe is specifically formulated to create that gooey center that everyone loves.
How long should I bake these brownies, and how do I know when they're done?
Bake time is crucial! Typically, around 20-25 minutes is sufficient. A toothpick inserted into the center should come out with slightly moist crumbs attached, not completely clean.
Final Reflection: The Sweetness of Success, One Brownie at a Time
The journey from kitchen novice to brownie baker is more accessible than you might think. Mastering even a simple recipe like brownies can unlock a world of culinary confidence and joy. This isn't just about baking a treat; it's about embracing the process, celebrating small victories, and discovering a new creative outlet.
The impact of simple recipes like this one extends far beyond the delicious end product. Baking, especially when approached with a beginner-friendly mindset, fosters a sense of accomplishment and self-reliance. It's a tangible way to connect with tradition and create something beautiful with your own two hands. As Julia Child famously said, Find something you're passionate about and keep tremendously interested in it.
For many, that passion ignites in the kitchen, with the simple act of mixing ingredients and watching them transform into something delightful.
Now, it's your turn. Don't be intimidated by the prospect of baking. Take the leap, gather your ingredients, and experience the satisfaction of creating your own perfect batch of brownies. Remember the feeling of accomplishment, the aroma filling your kitchen, and the joy of sharing your creation with loved ones. This is more than just a recipe; it's a gateway to a world of culinary exploration and self-discovery. So, what are you waiting for? Let the baking begin!
Unlock Your Inner Baker: Bake Your First Batch Today!
Thanks for joining us on this delicious journey to brownie perfection! We hope you now feel confident and inspired to create your own amazing treats. Ready to take the next step?
- Bake those brownies! Use the recipe from the article and let your kitchen become your creative space. Don't be afraid to experiment – that's part of the fun!
- Share your creation! Snap a picture of your finished brownies and post it on social media – tag us @BakeWithEase (we'd love to see your work! ).
- Leave a comment below, sharing your favorite brownie tip or a question you may have about the process.
What secret ingredient will you add to your next batch of brownies to elevate them to legendary status?