
Achieve the Perfect Crispy Crust on Your Rustic Bread

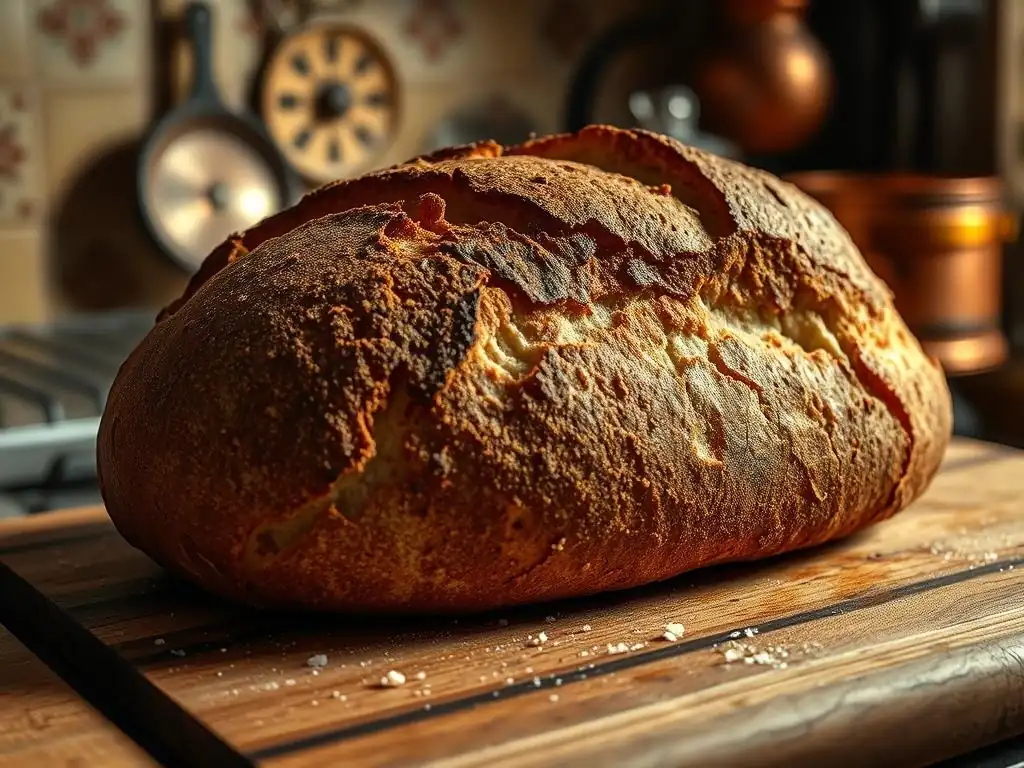
Welcome to BakeWithEase, your culinary sanctuary for all things baking!
Ever dreamt of that satisfying crack as you slice into a loaf of perfectly baked rustic bread? This article delves deep into achieving that coveted crispy crust on your rustic bread. Uncover the secrets to transforming simple ingredients into a masterpiece, and prepare to elevate your bread baking game. What crucial element are you missing? Let's find out!
- Achieve the Perfect Crispy Crust on Your Rustic Bread: A BakeWithEase Guide
- Introduction: The Allure of a Crispy Rustic Bread Crust
- Understanding the Science Behind a Crispy Crust
- Essential Techniques for a Crispy Rustic Bread Crust
- Baking Methods for Achieving Maximum Crispiness
- Step-by-Step Guide to Baking Rustic Bread with a Crispy Crust
- Troubleshooting Common Crust Problems
- Tips and Tricks for Maintaining Crust Crispiness
- Rustic Bread Recipes for a Variety of Crispy Crusts
- Advanced Techniques for Expert-Level Crispiness
- Conclusion: Mastering the Art of the Crispy Rustic Bread Crust
-
Frequently Asked Questions
- How can I achieve a crispy crust on my rustic bread at home?
- What type of flour is best for creating a rustic bread with a crispy crust?
- How does steam contribute to a crispy crust on rustic bread?
- What are some common mistakes that prevent a crispy crust on rustic bread?
- Can I still achieve a crispy crust if I don't have a Dutch oven?
- Final Reflection: The Enduring Allure of a Perfectly Crispy Crust
- Unlock Your Inner Baker: Achieve Bread Perfection!
Achieve the Perfect Crispy Crust on Your Rustic Bread: A BakeWithEase Guide
Introduction: The Allure of a Crispy Rustic Bread Crust
There's something undeniably magical about a loaf of rustic bread with a truly spectacular crispy crust. That satisfying crackle as you slice into it, the rich golden-brown hue, and the way it contrasts with the soft, airy interior – it's the hallmark of artisan baking.
Achieving that perfect crispy crust on your rustic bread might seem daunting, but it's entirely within reach for home bakers of all levels. This guide from BakeWithEase will break down the science and techniques, showing you how to consistently bake loaves with that coveted rustic bread crispy crust that will impress everyone lucky enough to share it.
This article will walk you through the essential steps, from understanding what makes a crust crispy to implementing practical methods in your own kitchen. We'll cover key concepts like steam, temperature, and shaping, providing you with the knowledge and confidence to elevate your bread baking. Get ready to transform your rustic bread from good to absolutely extraordinary, complete with that irresistible crispy rustic bread crust you've always dreamed of.
Understanding the Science Behind a Crispy Crust
Achieving a stellar rustic bread crispy crust isn't just about following a recipe; it's about understanding the fascinating science happening within your oven. Two primary processes are at play: the role of steam in allowing the crust to develop and the Maillard reaction, which creates that beautiful color and complex flavor. Without these elements working in harmony, your crust might be soft, pale, or simply not achieve that desired crispiness.
Beyond steam and color, the internal structure of the dough, specifically its gluten development, also plays a crucial role in how the crust forms and how crispy it can become. A well-developed gluten network allows the loaf to hold its shape and expand properly during baking, contributing to a thinner, more delicate crust that has the potential for maximum crispiness. Let's dive into these scientific wonders.
The Role of Steam in Crust Formation
Steam is arguably the most critical factor in achieving a thin, crispy crust on rustic bread. In the initial stages of baking, high humidity in the oven prevents the surface of the dough from drying out too quickly. If the crust dries and hardens prematurely, it restricts the oven spring – the final expansion of the loaf. This results in a denser crumb and a thicker, tougher crust that is less likely to be truly crispy.
By creating a steamy environment, you keep the dough surface pliable, allowing it to expand fully during the first 10-15 minutes of baking. As the loaf expands, the crust stretches thinly. Once the steam dissipates (or you remove the steam source), the thin, stretched crust is exposed to the dry heat, rapidly drying out and becoming brittle – the perfect condition for a crispy rustic bread crust. Think of it like blowing a balloon – the skin gets thinner as it expands.
Maillard Reaction: The Secret to Golden-Brown Perfection
The Maillard reaction is a complex chemical process that occurs when amino acids and reducing sugars react at high temperatures (typically above 300°F or 150°C). This reaction is responsible for the browning of the crust and the development of hundreds of flavor compounds that give baked bread its characteristic aroma and taste. Without sufficient heat and time for the Maillard reaction, your rustic bread crust will remain pale and lack depth of flavor and that desirable crispiness.
This reaction works hand-in-hand with achieving a crispy rustic bread crust. The high temperatures needed for the Maillard reaction also contribute to the rapid drying and hardening of the crust after the initial steamy phase. A well-browned crust, a result of a successful Maillard reaction, is often indicative of a crust that has also achieved peak crispiness. For example, baking at temperatures around 450-500°F (230-260°C) facilitates this reaction and helps develop that deep golden color and satisfying crisp.
Gluten Development and Crust Structure
Gluten, the network formed by proteins in flour when hydrated and kneaded, provides the structure for your bread. Proper gluten development creates a strong, elastic dough that can trap the gases produced by yeast or sourdough starter, leading to a well-risen loaf with an open crumb structure. This internal structure is surprisingly important for the external crispy rustic bread crust.
A well-developed gluten network allows the dough to expand significantly in the oven without collapsing. This expansion stretches the outer layer of dough thinly, as mentioned earlier. A thin crust is much more likely to become intensely crispy when exposed to dry heat than a thick one. Furthermore, the strength of the gluten helps the loaf hold its shape, which is crucial for even browning and consistent crispiness across the entire surface.
Essential Techniques for a Crispy Rustic Bread Crust
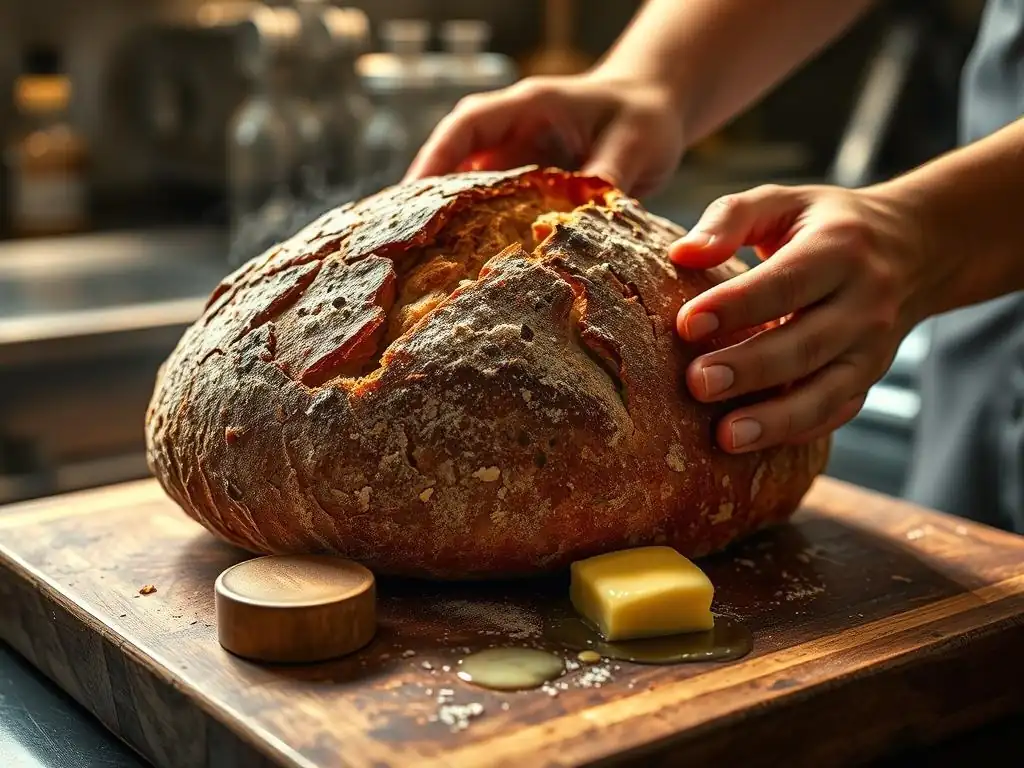
Mastering a few key techniques during the dough preparation and shaping phase is fundamental to achieving that perfect crispy crust on your rustic bread. It's not just about the baking; the groundwork is laid long before the dough hits the oven. These techniques focus on creating the right dough consistency, encouraging proper loaf structure, and controlling how the crust expands.
Implementing these techniques might require a slight adjustment to your usual baking routine, but the results in terms of a truly crispy rustic bread crust are well worth the effort. Let's explore high hydration, proper shaping, and the art of scoring.
High Hydration Dough: The Foundation for a Great Crust
High hydration refers to a dough with a relatively large amount of water compared to flour, typically 70% or more hydration (meaning 70g of water per 100g of flour). This seemingly simple ratio is crucial for a crispy rustic bread crust. Doughs with higher hydration tend to have a more open crumb structure and, critically, they promote better steam production within the loaf itself during baking.
The extra moisture in high-hydration dough evaporates rapidly when exposed to the oven's heat, contributing significantly to the steamy environment around the loaf, even before you introduce external steam. This internal steam helps keep the crust pliable longer, allowing for maximum oven spring and a thinner, more delicate crust layer. While handling high-hydration dough can be a bit stickier, techniques like stretch-and-folds or using a bench scraper make it manageable and are key steps toward achieving that crackling crispy rustic bread crust.
Proper Shaping for Optimal Crust Development
How you shape your dough profoundly impacts the final structure and, consequently, the crispy rustic bread crust. A well-shaped loaf has good surface tension, which helps it hold its form and rise upwards rather than spreading outwards during baking. This tension also contributes to a more even expansion and a thinner crust.
Techniques like creating a tight 'skin' on the outside of the dough ball or batard ensure that the energy from oven spring is directed upwards and outwards evenly. A loaf shaped too loosely might collapse slightly, leading to a thicker, uneven crust. Practicing shaping techniques, focusing on building tension without tearing the dough's surface, is vital. This tension allows for controlled expansion when scored, leading to beautiful 'ears' or breaks in the crust that become exceptionally crispy.
Scoring Techniques to Control Crust Expansion
Scoring, or making cuts on the surface of the dough just before baking, is not merely for decoration; it's a functional technique essential for achieving a beautiful and crispy rustic bread crust. As the dough experiences oven spring, it needs a weak point to expand through. If you don't score it, the crust will rupture unpredictably, often resulting in thick, uneven cracks.
Proper scoring directs the expansion, allowing the loaf to achieve its full volume and ensuring an even distribution of stress on the crust. This controlled expansion results in a thinner, more uniform crust around the loaf. For a classic rustic look and excellent crispiness, a simple single slash down the length of a batard or a cross shape on a round boule is common. The angle and depth of the cut (typically about half an inch deep) influence how the 'ear' forms, which is often the crispiest part of the crust.
Baking Methods for Achieving Maximum Crispiness
Once your dough is prepared, shaped, and proofed, the baking process itself is where the magic truly happens for that crispy rustic bread crust. The right environment and temperature are paramount. While home ovens can be unpredictable, employing specific methods can mimic the conditions of a professional bakery oven, which are designed for consistent heat and steam.
Choosing the right vessel to bake in and knowing how to effectively introduce and manage steam are key skills. Additionally, controlling the oven temperature throughout the bake ensures the crust develops properly – browning without burning and crisping without becoming too hard. Let's explore these crucial baking methods.
Baking Stone vs. Dutch Oven: Which is Best for Your Rustic Bread?
Both baking stones (or steels) and Dutch ovens are excellent tools for baking rustic bread and achieving a crispy crust, but they work in slightly different ways. A preheated baking stone provides intense heat from the bottom, promoting good oven spring. To use a stone effectively for a crispy crust, you must also introduce steam into the oven separately.
A Dutch oven, particularly a heavy cast-iron one, is often considered the easiest way for home bakers to achieve a fantastic crispy rustic bread crust. The preheated pot acts like a mini-oven, trapping the moisture released by the bread as it bakes. This creates a perfectly steamy environment around the loaf for the crucial initial phase.
After 20-30 minutes, the lid is removed, allowing the trapped steam to escape and the dry heat to crisp the crust. For many, the consistent results from a Dutch oven make it the preferred method for getting that reliable crispy crust on rustic bread.
Utilizing Steam in Your Oven: Creating a Steamy Baking Environment
Creating a steamy environment in your oven is non-negotiable for a truly crispy rustic bread crust, especially if not using a lidded vessel like a Dutch oven. The goal is to have maximum humidity during the first 10-15 minutes of baking. One common method is placing a heat-safe pan on the bottom rack of your oven while it preheats and carefully pouring boiling water into it just before loading the bread. This generates a burst of steam.
Another effective method is to use a spray bottle to mist the oven walls (avoiding the light bulb and heating elements) and the surface of the dough just before closing the oven door. Some bakers combine these techniques or use specialized steam generators. The key is to generate significant steam quickly and keep the oven door closed for the initial part of the bake to trap it. Around the 15-minute mark, the steam source is typically removed or the oven vented to allow the crust to dry and crisp up.
Temperature Control: Finding the Sweet Spot for a Crispy Exterior
Baking temperature is critical for developing a crispy rustic bread crust. Most rustic bread recipes call for a high initial temperature, often between 450°F and 500°F (230°C to 260°C). This high heat helps maximize oven spring and facilitates the rapid production of steam from the dough's moisture. Baking at a high temperature also quickly initiates the Maillard reaction, leading to good color development.
After the initial high-heat phase (typically 15-25 minutes, depending on the method and loaf size), the temperature is often reduced to around 400°F - 425°F (200°C - 220°C) to allow the interior of the loaf to bake through without the crust burning. Baking too cool initially will result in poor oven spring and a thick, soft crust. Baking too hot for too long will burn the crust before the inside is done. Finding the right temperature progression is key to a perfectly baked loaf with a stunning crispy rustic bread crust.
Step-by-Step Guide to Baking Rustic Bread with a Crispy Crust
Let's put it all together! This step-by-step guide outlines the process for baking rustic bread specifically focusing on achieving that enviable crispy crust. While specific timings and ingredient amounts will vary depending on your chosen recipe, the principles for maximizing crispiness remain the same. This guide assumes you have a basic rustic bread dough recipe ready to go.
Follow these steps diligently, paying close attention to the details regarding shaping, proofing, and especially baking with steam and temperature control. Mastering each stage contributes significantly to the final result – a beautiful, crackling crispy rustic bread crust.
Step 1: Preparing the Dough
Start with your preferred rustic bread dough recipe. Ensure your flour is high quality, ideally bread flour with a protein content around 11-13%, which contributes to good gluten development. Hydration levels should ideally be on the higher side, say 70% or more, as discussed earlier. Mix your ingredients thoroughly, ensuring no dry pockets of flour remain.
Develop the gluten network adequately through kneading or a series of stretch-and-folds over a few hours. This creates the necessary structure for the dough to hold its shape and expand properly in the oven, which is foundational for a crispy rustic bread crust. Allow the dough to bulk ferment until it has significantly increased in volume, often doubling or more, depending on the temperature and starter/yeast activity.
Step 2: Shaping the Dough for a Crispy Crust
Turn the dough out onto a lightly floured surface. Be gentle to avoid degassing it completely. The goal of shaping is to create tension on the surface of the dough while creating a defined shape (like a boule or batard). Gently pre-shape the dough into a rough ball or log and let it rest for 15-20 minutes. This allows the gluten to relax, making the final shaping easier.
For final shaping, work the dough carefully, folding and tucking edges underneath to create a tight 'skin' on the top surface. This surface tension is crucial for controlling oven spring and achieving an evenly thin crust that will crisp up beautifully. Avoid using excessive flour during shaping, as dry flour on the surface can inhibit proper crust development and scoring.
Step 3: Proofing the Dough to Perfection
Proofing (or final fermentation) is the stage where the shaped loaf rises before baking. Proper proofing is essential; under-proofed dough won't rise adequately in the oven, resulting in a dense crumb and potentially a thick crust. Over-proofed dough can collapse, leading to a flatter loaf and a less predictable crispy rustic bread crust. Proof the dough in a banneton or proofing basket, seam-side up, for the recommended time (often 1-3 hours at room temperature or longer in the refrigerator for cold fermentation).
The dough should look visibly puffy and increase in size, but not necessarily double. A good test is the poke test: gently poke the dough with a wet finger; if the indentation slowly springs back halfway, it's likely ready. If it springs back immediately, it needs more time. If it stays completely indented, it might be over-proofed. Cold proofing in the refrigerator for 12-24 hours is an excellent way to develop flavor and firm up the dough, making it easier to score and often contributing to a better crispy crust.
Step 4: Baking with Steam for a Crackling Crust
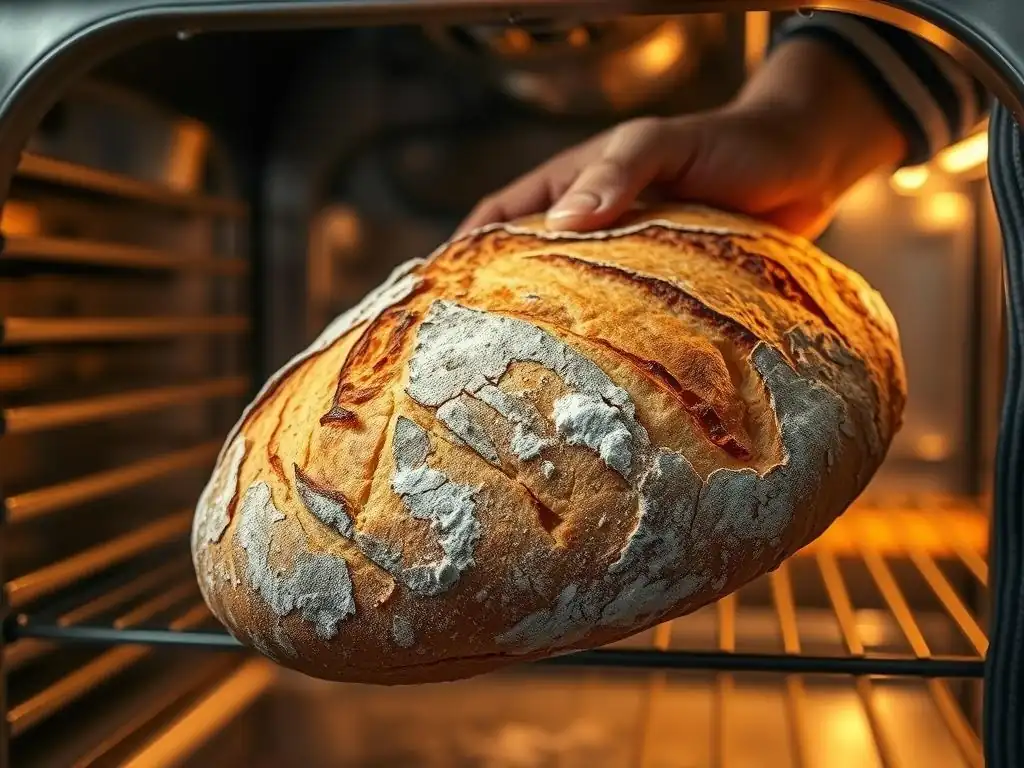
This is where you actively create the environment for a crispy rustic bread crust. Preheat your oven to a high temperature (e.g., 475°F / 245°C) with your baking vessel (Dutch oven, baking stone with steam pan) inside for at least 30-60 minutes. Carefully transfer the proofed dough to the hot vessel or stone. If using a stone, introduce your steam source immediately (boiling water in a pan, misting). If using a Dutch oven, place the lid on.
Bake at the high temperature for the initial phase (e.g., 20-25 minutes in a Dutch oven, or 15-20 minutes with external steam). This steamy environment allows maximum oven spring and keeps the crust pliable. After this time, if using a Dutch oven, remove the lid.
If using external steam, remove the steam pan and/or vent the oven. Reduce the oven temperature slightly (e.g., to 425°F / 220°C) and continue baking for another 20-30 minutes, or until the crust is a deep golden brown and the internal temperature of the loaf reaches around 205-210°F (96-99°C). The direct, dry heat in this second phase is what develops the intense crispy rustic bread crust.
Step 5: Cooling and Enjoying Your Crispy Rustic Bread
Once baked to a beautiful golden brown with a seemingly rock-hard crispy crust, immediately transfer the loaf to a wire rack. Cooling is a crucial, often overlooked, step for achieving the best texture, both inside and out. As the bread cools, moisture from the interior migrates outwards. If the bread cools on a solid surface, this moisture gets trapped, making the bottom crust soft.
Cooling on a wire rack allows air circulation around the entire loaf, ensuring that moisture can escape evenly. You will likely hear the crust 'sing' or crackle as it cools – this is a good sign of a successful crispy rustic bread crust! Allow the bread to cool completely, ideally for 1-2 hours, before slicing. Slicing too early traps steam, resulting in a gummy interior and compromising the crispiness of the crust. Patience is key!
Troubleshooting Common Crust Problems
Even with the best techniques, sometimes your crispy rustic bread crust doesn't turn out quite as planned. Don't get discouraged! Baking is a process of learning and adjustment. Most common crust problems can be diagnosed and fixed by understanding what went wrong in terms of steam, temperature, or dough handling.
Let's look at some frequent issues home bakers face when trying to achieve that perfect crispy crust on rustic bread and how to troubleshoot them. Identifying the symptom is the first step to finding the cure and getting you back on track to baking magnificent loaves.
Crust Too Soft? Identifying and Fixing the Issue
If your rustic bread crust turns out soft instead of crispy, the most likely culprit is insufficient moisture management during baking. This could mean:
- Not enough steam: The dough surface dried out too quickly, preventing full oven spring and resulting in a thicker, softer crust.
- Steam escaped too early: If using external steam, the oven door was opened too soon, or the steam source wasn't effective. If using a Dutch oven, the lid might not have been sealed properly, or it was removed too early.
- Not enough baking time at high temperature: The crust didn't have enough exposure to dry heat after the steaming phase to fully dry out and crisp up.
- Cooling on a solid surface: Moisture trapped underneath softened the bottom crust.
To fix a soft crispy rustic bread crust, ensure you are generating ample steam for the first 15-20 minutes of baking. If using external steam, try using more boiling water or sealing the oven door better. If using a Dutch oven, ensure the lid is on tight and keep it on for the recommended time (e.g., 20-25 minutes). Increase the baking time uncovered if the loaf isn't sufficiently browned and crispy. Always cool on a wire rack.
Crust Too Thick? Adjusting Your Baking Technique
A thick crust, while sometimes crispy, isn't the ideal for a classic rustic bread crispy crust. A thick crust often results from inhibited oven spring. This can happen due to:
- Under-proofing: The dough didn't have enough gas built up to expand fully in the oven.
- Insufficient steam: The crust hardened too quickly, restricting expansion.
- Poor shaping: Lack of surface tension or a loose shape prevented upward expansion.
- Incorrect scoring: Cuts were too shallow or made at the wrong angle, preventing controlled expansion.
To achieve a thinner, more delicate crispy rustic bread crust, focus on improving your proofing process and shaping techniques. Ensure the dough is adequately proofed before baking. Double-check your steam method to guarantee the crust stays pliable during the initial bake. Refine your shaping to create good surface tension. Practice your scoring – aim for cuts around half an inch deep at a slight angle (about 30-45 degrees) to encourage a good 'ear' and controlled expansion.
Crust Burning Too Quickly? Mastering Temperature Control
If your crispy rustic bread crust is getting too dark or burning before the inside of the loaf is fully baked, your oven temperature or baking time might be off. This is particularly common when trying to achieve a very dark, crispy finish. Possible reasons include:
- Oven temperature too high: The initial high heat is necessary, but it might be too high for your specific oven or loaf size.
- Baking uncovered for too long or at too high a temperature: After the steaming phase, the crust is directly exposed to dry heat, and excessive heat can burn it quickly.
- Loaf placed too close to a heating element: Direct radiant heat can cause scorching.
- Sugar in the dough: Some recipes (though less common for traditional rustic bread) might contain sugar which accelerates browning.
To prevent your crispy rustic bread crust from burning, ensure your oven thermometer is accurate – ovens can often run hotter than their dial indicates. If using a Dutch oven, keep the lid on for a sufficient time (e.g., 25-30 minutes) before removing it, allowing the internal temperature to rise safely before the crust is exposed to dry heat. When baking uncovered, reduce the temperature slightly more after the steaming phase (e.g., to 400°F / 200°C). If the top is browning too fast, you can loosely tent the loaf with aluminum foil for the remaining baking time.
Tips and Tricks for Maintaining Crust Crispiness
You've successfully baked a beautiful loaf with a perfect crispy rustic bread crust. Congratulations! Now, how do you keep it that way? A crispy crust is transient; moisture from the interior of the bread will eventually migrate into the crust, softening it over time. However, there are several ways to maximize its lifespan and even revive some of that crispiness later.
Proper storage is key, and knowing how to reheat your bread can bring back some of that initial crackle. Experimenting with different flours can also subtly impact the crust texture and its ability to stay crispy. Let's look at how to keep your crispy rustic bread crust singing for as long as possible.
Storing Your Rustic Bread to Preserve the Crust
Storing rustic bread to preserve its crispy rustic bread crust is a bit of a balancing act. You want to protect the crust from excess moisture, but you also don't want the interior to dry out too much. The worst place to store your bread is in a plastic bag or airtight container immediately after baking, as this traps moisture and quickly turns the crispy crust soft and rubbery.
The best method for the first day or two is to simply store the bread cut-side down on a cutting board or loosely wrapped in a linen or cotton bread bag. This allows the crust to breathe. For longer storage, you can wrap the cooled loaf tightly in plastic wrap and then foil and freeze it for up to a few months. Thaw wrapped at room temperature, then refresh the crust (see below).
Reheating Techniques to Revive Crispiness
If your crispy rustic bread crust has softened, you can often revive some of its crispiness with a quick reheat. The goal is to dry out the crust again without drying out the interior too much. Avoid the microwave, which will make the crust tough and chewy.
A simple and effective method is to preheat your oven to around 350°F (175°C). Place the loaf directly on the oven rack or on a baking sheet and bake for 10-15 minutes, or until the crust feels firm and crispy again. For a whole loaf, you can lightly spritz the crust with water before reheating. For sliced bread, simply toast the slices in a toaster or under a broiler until golden and crispy.
Experimenting with Different Flours for Enhanced Crust Texture
While standard bread flour is excellent for achieving a crispy rustic bread crust, experimenting with different flour types can add subtle variations in texture and flavor. Adding a small percentage (5-10%) of rye flour, for instance, can sometimes contribute to a slightly chewier crust texture. Using high-extraction flours (like Type 85 or stone-ground flours) which contain more bran and germ than refined white flour, can result in a heartier crust with a different kind of crispness.
Even the brand of flour can make a difference due to variations in protein content and milling process. Keep notes on your results when trying new flours to see how they impact your crispy rustic bread crust. Remember that using a significant percentage of low-gluten flours (like spelt or all-purpose) will generally result in a less structured loaf and potentially a softer crust compared to strong bread flour.
Rustic Bread Recipes for a Variety of Crispy Crusts
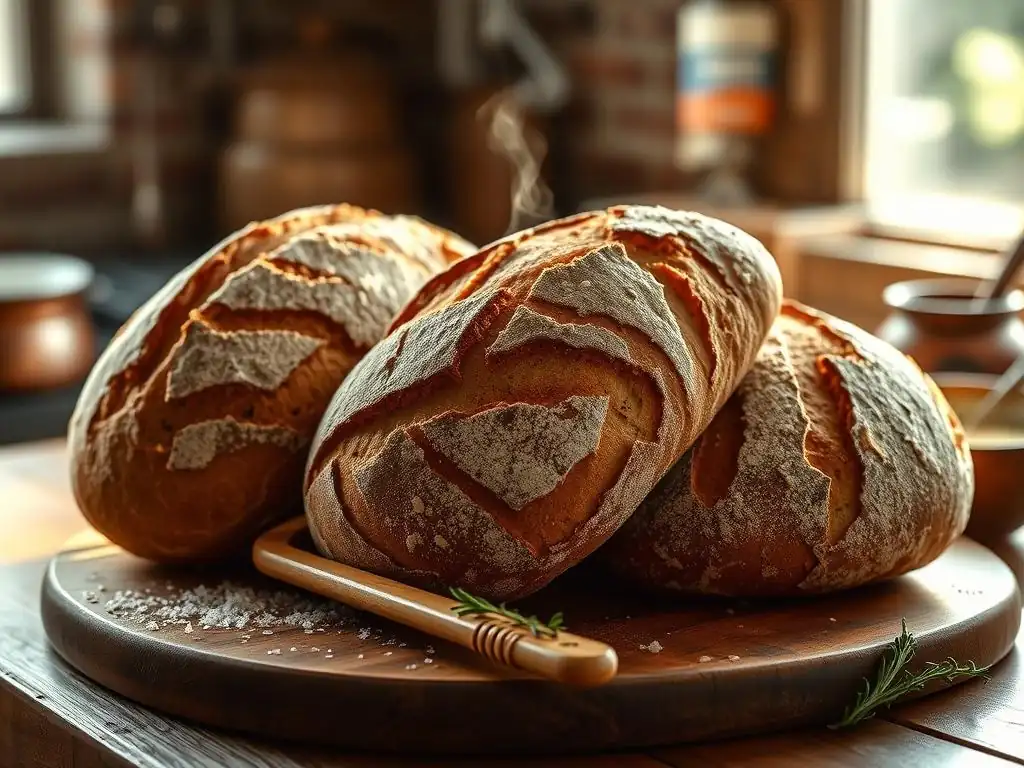
Now that you understand the science and techniques, it's time to bake! Here are descriptions of popular rustic bread types, each known for developing a wonderful crispy crust. These aren't full recipes, but rather outlines to give you an idea of the kind of dough and process involved in creating different kinds of crispy rustic bread.
Exploring these variations will help you appreciate how slight changes in ingredients or fermentation can influence the final crispy rustic bread crust and the overall loaf character.
Classic Country Loaf with a Rustic Crust
A classic country loaf is often a mix of white bread flour and a small percentage of whole wheat or rye flour, typically made with a sourdough starter (levain) or a combination of starter and commercial yeast. It usually has a moderate to high hydration (70-80%). The long fermentation time, often including an overnight cold proof, contributes to a well-developed gluten structure and complex flavor.
Baking a country loaf in a preheated Dutch oven is a very common method to ensure a consistently crispy rustic bread crust. The controlled steam environment allows the dough to achieve maximum oven spring and develop a thin, crackly crust during the second phase of baking. The resulting crust is typically robust and shatters satisfyingly when sliced.
Sourdough Rustic Bread with a Tangy, Crispy Crust
Sourdough rustic bread relies solely on a wild yeast starter for leavening. This fermentation process breaks down starches and proteins in the flour, contributing to a slightly more acidic dough. Sourdough doughs are often high hydration and benefit greatly from long, slow fermentation periods, including significant bulk fermentation and cold proofing.
The acidity in sourdough can slightly influence the Maillard reaction, sometimes resulting in a crust that browns a little differently. However, the high hydration and robust structure from the strong gluten network developed during long fermentation make sourdough ideal for achieving a deeply golden and exceptionally crispy rustic bread crust, especially when baked with ample steam. The tang of the bread pairs wonderfully with the crisp texture of the crust.
Whole Wheat Rustic Bread with a Hearty, Crispy Crust
Whole wheat rustic bread incorporates a significant portion of whole wheat flour, which contains the bran and germ in addition to the endosperm. This results in a more nutritious and flavorful loaf with a denser crumb compared to white bread. Whole wheat flour absorbs more water than white flour, so hydration percentages might seem lower numerically (e.g., 75%), but the dough can still feel quite wet.
Achieving a crispy rustic bread crust with whole wheat can be slightly different. The bran particles in the flour can sometimes interrupt the gluten network, potentially leading to a slightly less dramatic oven spring. However, with proper hydration, gentle handling, and effective steam baking (like in a Dutch oven), you can still achieve a wonderful, hearty crispy crust on whole wheat rustic bread that complements its robust flavor. The crust might have a slightly different texture due to the bran, but it can be just as satisfyingly crispy.
Advanced Techniques for Expert-Level Crispiness
For those looking to take their crispy rustic bread crust to the next level, there are a few advanced techniques that can yield even more impressive results. These methods often require more time, specific equipment, or a deeper understanding of fermentation and baking physics, but they can truly elevate your bread.
Exploring cold fermentation, the magic of a wood-fired oven, and the subtle impact of ingredients like malt extract can help you achieve an expert-level crispy rustic bread crust with enhanced flavor and appearance.
Cold Fermentation for Enhanced Flavor and Crust
Cold fermentation, or proofing the dough in the refrigerator for an extended period (12-72 hours), is a technique widely used by artisan bakers. While primarily known for developing complex flavors in the crumb, it also significantly benefits the crispy rustic bread crust. The cold temperature slows down fermentation, allowing enzymes to break down starches into simple sugars.
These increased simple sugars contribute to a more active Maillard reaction during baking, resulting in deeper browning and potentially a more intensely flavored crispy crust. Furthermore, cold dough is much firmer and easier to handle and score precisely, which aids in achieving controlled oven spring and a thinner, more uniform crust that crisps up beautifully. The firm surface also seems to react favorably to the initial burst of heat and steam.
Baking in a Wood-Fired Oven for Ultimate Crispiness
Baking rustic bread in a traditional wood-fired oven is the gold standard for many artisan bakers seeking the ultimate crispy rustic bread crust. These ovens reach incredibly high temperatures (often 800-900°F / 425-480°C) and retain heat exceptionally well. The residual heat stored in the oven's thermal mass radiates intensely, creating a unique baking environment.
As the bread is loaded into the super-hot oven, the surface is instantly exposed to intense radiant heat, causing rapid expansion and setting the crust almost immediately. The stone hearth provides powerful bottom heat. While not a steamy environment in the traditional sense, the intense heat and rapid bake often result in a thin, incredibly delicate and crispy crust with characteristic charring in spots, a hallmark of wood-fired crispy rustic bread. Replicating this precisely at home is challenging, but understanding the principles (intense initial heat) is helpful.
Adding Malt Extract for Deeper Color and Crisp
Adding a small amount of diastatic malt extract (typically 0.5% to 1% of the flour weight) to your dough can subtly enhance the crispy rustic bread crust. Diastatic malt contains enzymes (amylase) that break down starches into sugars. While flour naturally contains these enzymes, adding a little extra provides more fuel for both fermentation and, crucially, the Maillard reaction.
More available sugars on the surface of the dough lead to more vigorous browning during baking, resulting in a deeper, richer golden-brown color. This enhanced browning often correlates with a more pronounced crispy texture. Non-diastatic malt extract, which has had the enzymes deactivated, primarily adds color and a touch of sweetness without the same enzymatic effect. For maximizing the crispy rustic bread crust, diastatic malt is the key ingredient to consider.
Conclusion: Mastering the Art of the Crispy Rustic Bread Crust
Achieving the perfect crispy crust on your rustic bread is a rewarding endeavor that combines a touch of science with practiced technique. From understanding the vital role of steam and the Maillard reaction to mastering shaping, scoring, and temperature control, each step contributes to that coveted crackle and beautiful golden-brown exterior.
Remember that high hydration, proper gluten development, adequate steam during the initial bake, and sufficient dry heat towards the end are your best friends in the quest for a crispy rustic bread crust. Don't be afraid to experiment with different methods, like baking in a Dutch oven or using a baking stone with external steam. Troubleshooting is part of the journey; learn from each bake. With patience and practice, you'll consistently produce loaves with a stunning crispy rustic bread crust that tastes as incredible as it looks. Happy baking from BakeWithEase!
Frequently Asked Questions
How can I achieve a crispy crust on my rustic bread at home?
The key is high heat and moisture control. Baking at a high temperature (450-500°F) and using steam in the oven initially will help develop that desired crispy crust.
What type of flour is best for creating a rustic bread with a crispy crust?
Bread flour, which has a higher gluten content, is generally recommended. The strong gluten network helps create a chewy interior and supports a crispier crust.
How does steam contribute to a crispy crust on rustic bread?
Steam keeps the dough surface moist, allowing it to expand fully before the crust sets. This creates a thicker, crisper crust as the dough bakes in the high heat.
What are some common mistakes that prevent a crispy crust on rustic bread?
Using too little flour, not creating enough steam, or baking at a too low temperature are common mistakes. These factors prevent the crust from properly developing.
Can I still achieve a crispy crust if I don't have a Dutch oven?
Yes, you can still get a good crust without a Dutch oven. Try placing a baking stone in your oven and adding a pan of water for steam during the initial baking phase.
Final Reflection: The Enduring Allure of a Perfectly Crispy Crust
The pursuit of the perfect crispy crust on rustic bread isn't merely a culinary quest; it's a testament to the enduring power of simple pleasures. The techniques explored in this article – from the careful selection of flour to the precise control of oven temperature and steam – highlight the surprising depth and artistry involved in baking even the most seemingly basic loaf. This isn't just about achieving a pleasing texture; it's about understanding the fundamental science behind a truly exceptional crust, a knowledge that elevates the entire baking experience.
The satisfying crunch of a perfectly baked crust transcends mere taste; it's a sensory experience that connects us to generations of bakers who have perfected this craft. The aroma alone, that intoxicating blend of yeasty warmth and toasted grains, evokes a feeling of comfort and tradition. As the renowned baker, Chad Robertson, once said: Bread baking is a journey of discovery, a constant refinement of technique and understanding. The crust is the culmination of that journey, a testament to patience and precision.
This quote perfectly encapsulates the dedication and passion required to achieve that golden, shatteringly crisp exterior.
Now, consider your own baking journey. What techniques resonated most with you? What adjustments will you make to your next loaf to achieve your perfect crust? Don't be afraid to experiment, to push the boundaries of your baking skills. The path to the perfect crust is a personal one, a journey of continuous learning and refinement. Embrace the challenge, savor the process, and most importantly, enjoy the reward of that magnificent, crispy crust.
Unlock Your Inner Baker: Achieve Bread Perfection!
Thanks for joining us on this journey to bread-baking bliss! We hope you’ve gained valuable tips and tricks to elevate your rustic bread game. Now it’s time to put your new knowledge into practice!
- Bake your masterpiece: Try the techniques we discussed – experiment with different flours, hydration levels, and baking times to find your perfect crust. This is the most important step – get baking!
- Share your success (or challenges!): We’d love to see your creations! Post a picture of your perfectly crisped rustic loaf on social media and tag us – let's inspire each other.
- Dive deeper: Explore our other baking guides on the BakeWithEase website for even more delicious recipes and baking tips.
Ready to create the crispiest, most irresistible rustic bread you've ever tasted? What unique ingredient will you experiment with next?