
Getting Started with Rustic Bread: Essential Tips for Beginners

Welcome to BakeWithEase!
Are you ready to unlock the secrets of rustic bread baking and create loaves that taste like they're straight from a charming countryside bakery? Even if you're a complete beginner, our guide to rustic bread beginner tips will equip you with the knowledge and confidence to bake incredible, crusty bread at home. Discover the simple techniques and essential ingredients that separate ordinary bread from extraordinary – and prepare to impress your friends and family. Intrigued? Let's get baking!
- Welcome to Rustic Bread Baking: A Baker's Guide
- Understanding Rustic Bread: What Makes it Unique?
-
Essential Rustic Bread Beginner Tips: Your First Loaf
- Tip #1: Choosing the Right Flour for Rustic Bread
- Tip #2: Mastering the Art of Hydration in Rustic Bread Dough
- Tip #3: The Importance of Autolyse for Rustic Bread Dough
- Tip #4: Kneading Techniques for Rustic Bread: Developing Gluten
- Tip #5: Bulk Fermentation: The Heart of Rustic Bread Flavor
- Tip #6: Shaping Rustic Bread: Achieving the Desired Form
- Tip #7: Baking Rustic Bread: Temperature and Technique
- Tip #8: Cooling and Storing Your Rustic Bread
- Rustic Bread Recipes for Beginners: Step-by-Step
- Troubleshooting Common Rustic Bread Baking Problems
- Beyond the Basics: Advancing Your Rustic Bread Skills
- Enjoying Your Homemade Rustic Bread: Serving Suggestions
-
Frequently Asked Questions
- What exactly is rustic bread, and why is it so popular?
- What are the most important ingredients for baking rustic bread?
- What are some common mistakes beginners make when baking rustic bread?
- How can I achieve a nice, crusty exterior on my rustic bread?
- What type of flour is best for rustic bread, and can I use all-purpose flour?
- Final Reflection: The Enduring Charm of Rustic Bread
- Unleash Your Inner Baker: Craft Your First Rustic Loaf!
Welcome to Rustic Bread Baking: A Baker's Guide
Embarking on the journey of baking your first rustic loaf is an incredibly rewarding experience. There's a unique satisfaction that comes from transforming simple ingredients – flour, water, salt, and yeast – into a beautiful, crusty bread with a complex flavor profile. This guide is designed specifically for you, the beginner baker, offering clear, actionable rustic bread beginner tips to help you navigate the process with confidence and ease. Forget the intimidation often associated with artisan baking; we'll break down each step, ensuring your first attempt is successful and sets you up for many delicious loaves to come.
Mastering rustic bread baking isn't about perfection on the first try, but about understanding the fundamental principles and enjoying the process. We'll cover everything from selecting the right flour to creating that signature crackling crust. These essential rustic bread beginner tips will demystify techniques like hydration, autolyse, and fermentation, making them approachable and easy to follow. By the end of this guide, you'll have the knowledge and confidence to bake a fantastic rustic loaf right in your own kitchen, impressing yourself and anyone lucky enough to share a slice.
Understanding Rustic Bread: What Makes it Unique?
Defining Rustic Bread: A Baker's Perspective
From a baker's viewpoint, rustic bread embodies a return to simplicity and tradition. It typically refers to loaves made with minimal ingredients and often undergoes a longer fermentation process compared to standard sandwich bread. The focus is on developing deep flavor and achieving specific textures, particularly a substantial, often chewy crust and an open, irregular crumb (the interior structure with holes). Unlike highly uniform commercial loaves, rustic bread embraces natural variations in shape and appearance, reflecting its handmade quality.
The essence of rustic bread lies in its unpretentiousness and robust character. Think of a French Pain de Campagne, an Italian Ciabatta, or a classic country loaf. These are breads that tell a story through their texture and aroma. They are baked without the aid of excessive dough conditioners or emulsifiers, relying instead on time, temperature, and technique to develop structure and flavor. Understanding this fundamental definition is the first step in appreciating the craft of baking these wonderful loaves.
Key Characteristics of Rustic Bread: Crust, Crumb, and Flavor
The defining features of rustic bread are its distinctive crust, open crumb, and complex flavor. The crust is typically thick, dark, and often crackly, providing a satisfying contrast to the soft interior. This robust crust develops during baking, especially when using high temperatures and steam, and is crucial for both texture and flavor development. A well-baked rustic crust can range in color from golden brown to deep mahogany, often with attractive blisters.
The crumb of rustic bread is characterized by an irregular pattern of holes, known as the "alveoli." An open crumb, with varying sizes of holes, indicates good gluten development and proper fermentation. It should be moist, chewy, and slightly elastic, not dense or uniform like commercial bread. The flavor profile is often more complex than simple white bread, frequently featuring tangy notes (especially if naturally leavened or given a long, cool fermentation), nutty undertones from whole grains, and a rich, developed taste from the fermentation process. These characteristics together create the unique sensory experience that defines rustic bread.
Essential Ingredients for Authentic Rustic Bread
Authentic rustic bread relies on a few fundamental ingredients, each playing a critical role. The primary ingredient is flour, typically a high-protein bread flour which provides the necessary gluten structure. Many rustic recipes also incorporate whole wheat flour or rye flour to add depth of flavor, nutritional value, and texture. The quality of the flour significantly impacts the final loaf, so choosing a good quality bread flour is recommended for rustic bread beginner tips.
Water is equally crucial, and the ratio of water to flour (hydration) is often higher in rustic bread doughs than in standard recipes, contributing to the open crumb. Salt is essential for flavor, controlling fermentation rate, and strengthening gluten structure – don't skip it! Finally, leavening is typically achieved using commercial baker's yeast or a natural sourdough starter.
Yeast provides a reliable rise, while a sourdough starter adds a characteristic tang and contributes to a more complex flavor profile over a longer fermentation period. These simple components, combined with time and technique, are the building blocks of great rustic bread.
Rustic Bread vs. Other Bread Types: A Quick Comparison
Comparing rustic bread to other types highlights its unique qualities. Unlike soft sandwich loaves, which prioritize a tender crust and uniform, tight crumb for easy slicing, rustic bread embraces a thick, chewy crust and an irregular, open crumb. Sandwich bread often uses lower hydration doughs and shorter fermentation times, resulting in a milder flavor and softer texture suitable for fillings. Enriched breads, like brioche or challah, contain fats (butter, oil), eggs, or dairy, which make the dough richer, softer, and often sweeter, a stark contrast to the lean dough of rustic bread.
Another key difference lies in the baking method. While many breads are baked in standard loaf pans, rustic loaves are frequently baked freeform on a baking stone or steel, or within a Dutch oven. This method helps achieve the desired crust development and shape. The focus on minimal ingredients and often longer, slower fermentation in rustic bread also contributes to a more complex flavor development that is typically absent in quick-rise or highly enriched bread varieties. Understanding these distinctions helps appreciate why specific techniques are important for rustic bread beginner tips.
Essential Rustic Bread Beginner Tips: Your First Loaf
Tip #1: Choosing the Right Flour for Rustic Bread
Understanding Bread Flour and its Importance
For your first rustic loaf, using good quality bread flour is one of the most important rustic bread beginner tips. Bread flour has a higher protein content compared to all-purpose flour, typically ranging from 12% to 14%. This higher protein level means more gluten can be developed when the flour is mixed with water and kneaded. Gluten is the network that traps the gases produced by the yeast or starter, allowing the dough to rise and giving the bread its structure and chewiness – essential characteristics of a great rustic loaf.
While you can make bread with all-purpose flour, you'll find it harder to achieve the desired open crumb and robust structure typical of rustic bread. The dough might be weaker and less elastic. Opting for bread flour from a reputable brand will make handling the dough easier and significantly improve your chances of baking a successful first loaf with that signature rustic texture. Look for unbleached bread flour, as the bleaching process can sometimes weaken the gluten potential.
Exploring Whole Wheat and Rye Flours for Rustic Bread Flavor
Once you've mastered a basic white rustic loaf using bread flour, you can start experimenting with incorporating other flours to add flavor and complexity. Whole wheat flour, for instance, contains the bran and germ of the wheat kernel, contributing a nutty flavor and slightly denser texture. It also absorbs more water than white flour, which you'll need to account for in your recipe's hydration.
Rye flour is another popular addition in many traditional rustic bread recipes, particularly those from European traditions like Pain de Campagne. Rye imparts a distinct, earthy flavor and can make the crumb slightly stickier and denser, as rye protein doesn't form gluten in the same way wheat protein does. When starting out, try substituting a small percentage (e.g., 10-20%) of the bread flour with whole wheat or rye flour to introduce these flavors without drastically changing the dough's handling characteristics. This gradual approach is a good rustic bread beginner tip for exploring variations.
Tip #2: Mastering the Art of Hydration in Rustic Bread Dough
Why Hydration Matters in Rustic Bread
Hydration refers to the ratio of water to flour in your dough, usually expressed as a percentage of the flour weight. For example, a dough with 1000g of flour and 700g of water has 70% hydration (700/1000 * 100). Rustic bread doughs are often higher in hydration than many other types, typically ranging from 65% to 80% or even higher. Higher hydration contributes to a more open crumb structure and a thinner, crispier crust because there's more moisture available to turn into steam during baking.
Working with high hydration dough can feel challenging at first because it's stickier and wetter than lower hydration doughs. However, embracing this stickiness is key to achieving the desired rustic texture. Don't be tempted to add excessive amounts of extra flour during kneading or shaping, as this will lower the hydration and result in a denser loaf. Understanding the role of hydration is vital for successful rustic bread beginner tips.
How to Achieve the Perfect Dough Consistency
Achieving the "perfect" dough consistency isn't about a single fixed point, but understanding how the dough should feel at a given hydration level. For a typical rustic bread at 70-75% hydration, the dough will be shaggy and sticky initially. As you develop gluten through kneading or folding, it will become smoother and more elastic, but it will still stick to your hands and the counter. This is normal and desirable!
Resist the urge to add flour. Instead, use techniques like wetting your hands or using a bench scraper to handle the dough. As the dough rests and ferments, it will become easier to manage. A good sign of proper consistency after initial mixing and a short rest is that the dough feels hydrated and extensible, not stiff or dry. Pay attention to how the dough feels and handles, as this tactile understanding is one of the most valuable rustic bread beginner tips you'll learn.
Tip #3: The Importance of Autolyse for Rustic Bread Dough
What is Autolyse and Why Should You Do It?
Autolyse (pronounced AUTO-leez) is a simple yet powerful technique developed by Professor Raymond Calvel. It involves mixing just the flour and water for a recipe and letting the mixture rest for a period, typically 20 minutes to an hour, before adding the salt and yeast/starter and beginning the main mixing/kneading. The word comes from Greek, meaning "self-digestion." During this rest period, enzymes in the flour begin breaking down starches into sugars (which feed the yeast) and, crucially, the gluten proteins start to hydrate and align themselves naturally without mechanical work.
Performing an autolyse offers several benefits, making it a valuable rustic bread beginner tip. It allows the flour to fully hydrate, making the dough easier to mix and knead later. It kickstarts gluten development naturally, reducing the amount of manual or machine kneading required. This gentler development can lead to a more extensible dough and potentially a more open crumb structure. It also gives the dough a head start on fermentation.
Autolyse Technique: A Step-by-Step Guide
Implementing the autolyse technique is straightforward. First, weigh out your flour and water according to your recipe. In a mixing bowl, combine the flour and water and mix them together until there are no dry streaks of flour left. The mixture will look shaggy and rough – this is perfectly fine. Do not add the salt or yeast/starter at this stage.
Once combined, cover the bowl tightly with plastic wrap, a damp towel, or a lid to prevent the surface from drying out. Let the mixture rest at room temperature for the time specified in your recipe, usually between 20 minutes and 60 minutes. After the rest period, the dough will look smoother and feel more extensible. Now you can add your salt and yeast/starter and proceed with your recipe's mixing or kneading step. That's all there is to it! Incorporating autolyse is one of the effective rustic bread beginner tips for improving dough handling.
Tip #4: Kneading Techniques for Rustic Bread: Developing Gluten
Hand Kneading vs. Machine Kneading for Rustic Bread
Developing gluten is essential for rustic bread structure, and this is primarily achieved through kneading or folding. You can knead dough by hand or use a stand mixer with a dough hook. Hand kneading is a traditional method that allows you to really feel the dough and understand its development. It involves stretching and folding the dough repeatedly until it becomes smooth and elastic. For a 70% hydration dough, this might involve some initial sticky stages before it comes together.
Machine kneading is faster and requires less physical effort, especially for wetter doughs. A stand mixer can effectively develop gluten in about 8-12 minutes on a medium speed, depending on the mixer and dough. However, it's easy to over-knead with a machine, which can damage the gluten structure. Whether you choose hand or machine kneading, the goal is the same: to create a strong, elastic gluten network that can hold the dough's shape and trap fermentation gases. For rustic bread beginner tips, try both methods to see which you prefer.
Effective Kneading Strategies for Strong Gluten Development
Regardless of whether you hand knead or machine knead, the aim is to develop the gluten until the dough passes the "windowpane test." To perform this test, take a small piece of dough, gently stretch and pull it with your fingers. If you can stretch it into a thin membrane that you can see light through without it tearing easily, the gluten is well-developed. If it tears quickly, it needs more kneading.
For hand kneading, techniques like the stretch-and-fold method are excellent for high-hydration doughs. Instead of traditional push-and-fold kneading, you simply wet your hands, grab one edge of the dough, stretch it upwards, and fold it over the center. Rotate the bowl and repeat several times. Rest the dough for 10-15 minutes, then repeat the sequence.
This gentle process develops gluten over time without excessive stickiness. For machine kneading, start on a low speed to combine ingredients, then increase to medium until the dough clears the sides of the bowl and passes the windowpane test. These strategies are crucial rustic bread beginner tips for achieving the right dough structure.
Tip #5: Bulk Fermentation: The Heart of Rustic Bread Flavor
Understanding Bulk Fermentation and its Role
Bulk fermentation, also known as the first rise, is arguably the most critical stage for developing the flavor and structure of rustic bread. This is the period after the dough has been mixed and kneaded (and potentially autolysed) but before it is divided and shaped into its final form. During bulk fermentation, the yeast or starter consumes sugars in the flour, producing carbon dioxide gas (which makes the dough rise) and organic acids and other compounds that contribute significantly to the bread's aroma and complex flavor profile.
The duration and temperature of bulk fermentation greatly influence the final loaf. A longer, slower fermentation, especially at cooler temperatures (like in the refrigerator), allows for more complex flavors to develop. A typical room-temperature bulk fermentation might take 2-4 hours, while a cold fermentation in the fridge could last 12-24 hours or even longer. The dough should increase significantly in volume, often doubling or even tripling, depending on the recipe and conditions. Understanding this process is key among rustic bread beginner tips.
Monitoring and Adjusting Fermentation Time
Monitoring your dough during bulk fermentation is essential, as the time required can vary based on ambient temperature, the activity of your yeast/starter, and the dough's hydration. Don't rely solely on the clock; learn to read the dough. A good visual cue is that the dough has increased significantly in volume and looks bubbly. Another test is the "poke test": gently flour your finger and poke the dough about half an inch deep.
If the indentation slowly springs back only halfway, the dough is ready. If it springs back immediately, it needs more time. If it stays completely indented, it might be over-proofed.
If your kitchen is warm, fermentation will happen faster; if it's cool, it will take longer. You can adjust by placing the dough in a slightly warmer or cooler spot. For example, placing the bowl in an oven with the light on can provide a warm environment (around 75-80°F or 24-27°C). Alternatively, a cooler room or even the refrigerator can slow things down. Learning to monitor and adjust is a vital rustic bread beginner tip that improves with practice.
Tip #6: Shaping Rustic Bread: Achieving the Desired Form
Basic Shaping Techniques for Rustic Loaves
Shaping is where you transform your fermented dough into the final loaf shape, ready for its final rise and baking. The goal is to create tension on the surface of the dough, which helps it hold its shape and contributes to a good oven spring (the final expansion in the oven).
Common shapes for rustic bread include rounds (boules) and ovals (batards). For a boule, gently gather the edges of the dough towards the center, flip it over, and use your hands to cup the dough and pull it towards you on an unfloured surface (or lightly floured if very sticky), rotating it to create a tight skin on top.
For a batard, gently shape the dough into a rough rectangle, fold the top third down to the center, then the bottom third up over the top fold, pressing gently. Then, fold the dough in half lengthwise and seal the seam by pressing with the heel of your hand or pinching. Roll the dough back and forth gently to create an even oval shape. These basic shaping techniques are fundamental rustic bread beginner tips for giving your loaf structure.
Tips for Handling Sticky Dough
Working with the high-hydration dough typical of rustic bread can make shaping feel challenging because it tends to be sticky. The key is to use minimal flour on your work surface and hands, just enough to prevent excessive sticking without drying out the dough or interfering with the surface tension you're trying to create. A bench scraper is your best friend here – use it to lift and move the dough, and to help create tension during shaping by pulling the dough towards you.
Another effective technique is to wet your hands slightly instead of flouring them, or work on a lightly damp surface (though this requires practice). Alternatively, some bakers prefer working on a lightly floured surface but use a bench scraper to keep the dough from spreading and help tuck it under to build tension. Don't panic if the dough sticks a bit; it's expected. Practice makes perfect, and learning to manage sticky dough is a key rustic bread beginner tip.
Tip #7: Baking Rustic Bread: Temperature and Technique
Oven Temperature and Baking Time Guidelines
Baking rustic bread at high temperatures is crucial for achieving that signature crust and maximizing oven spring. Most rustic bread recipes call for baking in a very hot oven, typically between 450°F and 500°F (230°C to 260°C). Preheating your oven adequately is vital – allow at least 30-60 minutes for your oven and any baking surface (like a baking stone or Dutch oven) to reach the target temperature. Baking time varies depending on the size of the loaf and the exact temperature, but a typical 1-2 pound loaf might bake for 30-50 minutes.
A good indicator that your bread is done is its internal temperature, which should reach around 200-210°F (93-99°C). You can check this using an instant-read thermometer inserted into the center of the loaf. The crust should also be deeply colored, ranging from golden to dark brown. Don't be afraid of a dark crust; it contributes significantly to the flavor. These temperature and time guidelines are essential rustic bread beginner tips for a successful bake.
Creating Steam for a Perfect Crust
Creating steam in the oven during the initial phase of baking is one of the most critical rustic bread beginner tips for achieving a thin, crisp, and well-expanded crust. Steam keeps the surface of the dough moist for the first 15-20 minutes of baking. This moisture prevents the crust from setting too early, allowing the loaf to expand fully before the crust hardens. Once the steam dissipates, the high heat then dries the surface, allowing it to develop that beautiful color and crackle.
The most effective way for home bakers to create steam is by baking the bread inside a preheated Dutch oven or covered pot. The lid traps the moisture released by the dough itself, creating a steamy environment. After about 15-20 minutes, you remove the lid to allow the crust to brown. If you're baking on a baking stone or steel, you can create steam by placing a tray of hot water or ice cubes on a rack below the bread just as you load the loaf into the oven. Use caution when adding water to a hot oven.
Tip #8: Cooling and Storing Your Rustic Bread
Proper Cooling Techniques for Optimal Texture
Once your rustic bread comes out of the oven, the hardest part is waiting! However, proper cooling is just as important as the baking itself for achieving the best texture and flavor. As the bread cools, residual heat continues to cook the interior, and moisture redistributes throughout the crumb. Cutting into a loaf too soon can result in a gummy or doughy texture inside, even if the crust is perfect.
Always cool your rustic bread on a wire rack, allowing air to circulate around the entire loaf. This prevents the bottom crust from becoming soggy and ensures even cooling. A standard-sized loaf should cool for at least 1-2 hours, or until it is completely cool to the touch. Patience during this cooling period is a vital, often overlooked, rustic bread beginner tip that significantly impacts the final result.
Best Practices for Storing Rustic Bread
Rustic bread is best enjoyed fresh, ideally within a day or two of baking. To store it, avoid plastic bags, as they trap moisture and will soften the crust, which is a key characteristic of rustic bread. The best way to store a rustic loaf is to wrap it in a clean linen towel or place it cut-side down on a cutting board. This allows the crust to remain relatively crisp while protecting the cut surface from drying out too quickly.
If you need to store the bread for longer, you can freeze it. Allow the loaf to cool completely, then wrap it tightly in plastic wrap and then in aluminum foil or a freezer bag. Frozen rustic bread can last for several months. To enjoy, thaw it at room temperature and, for best results, reheat it in a hot oven (around 350°F or 175°C) for 10-15 minutes to revive the crust. These simple storage methods help preserve the quality of your homemade rustic bread.
Rustic Bread Recipes for Beginners: Step-by-Step
Simple Rustic Bread Recipe: A Great Starting Point
Embarking on your first rustic loaf is exciting! Here is a straightforward recipe designed with rustic bread beginner tips in mind, focusing on simplicity and reliability. This recipe uses commercial yeast for a predictable rise and a moderate hydration level (around 70%) that's manageable for beginners. The key is following the steps and observing your dough.
- Ingredients:
- 500g Bread Flour
- 350g Water (around 70°F or 21°C)
- 10g Salt
- 1g Instant Dry Yeast (about 1/4 teaspoon)
- Instructions:
- In a large bowl, whisk together the flour and yeast.
- Add the water and mix with a spoon or your hands until a shaggy dough forms and no dry flour remains. This is your initial mix.
- Cover the bowl and let rest for 20-30 minutes (autolyse, optional but recommended).
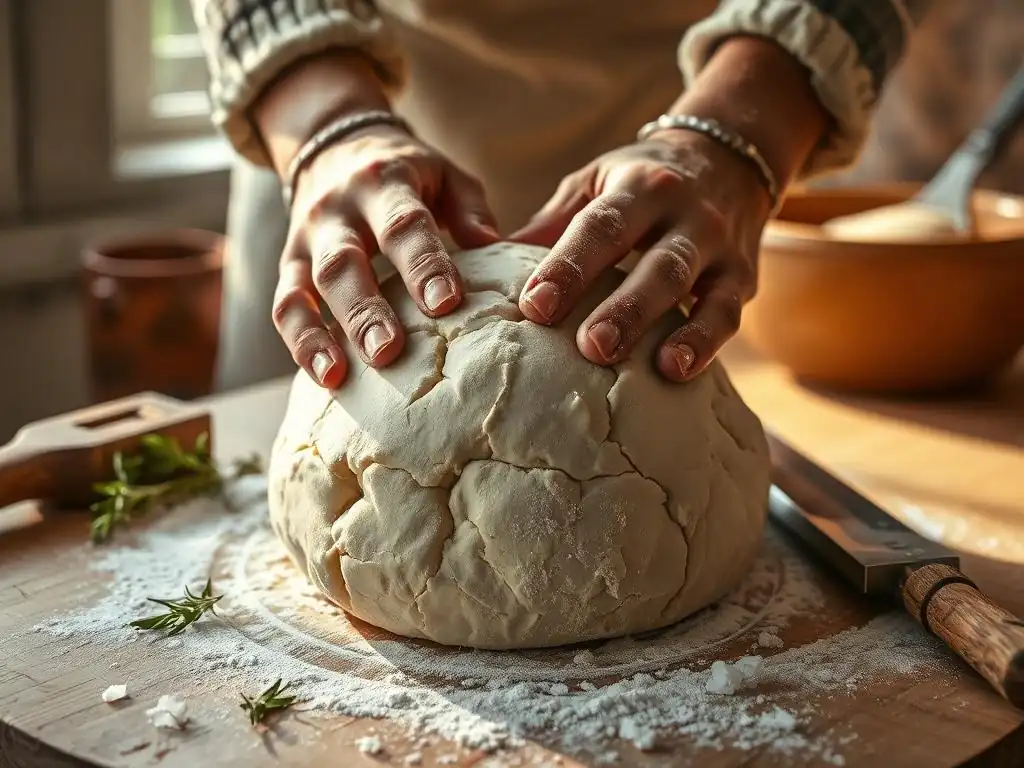
- Sprinkle the salt over the dough. Mix by hand, pinching and folding the dough for 2-3 minutes to incorporate the salt. The dough will become more cohesive.
- Perform 3-4 sets of stretch-and-folds over the next 1.5 to 2 hours, with 30 minutes rest between sets. Wet your hands, grab the edge of the dough, stretch it up, and fold it over the center. Rotate the bowl and repeat 3-4 times per set.
- Allow the dough to bulk ferment at room temperature (around 70-75°F or 21-24°C) for a total of 2-3 hours, or until it has increased significantly in volume and looks bubbly. The poke test should show a slow return.
- Gently turn the dough out onto a lightly floured surface. Shape into a boule or batard, creating surface tension.
- Place the shaped dough seam-side up in a floured proofing basket (banneton) or a bowl lined with a floured towel.
- Proof at room temperature for 45-60 minutes, or until it passes the poke test (indentation springs back halfway). Alternatively, cold proof in the refrigerator for 8-12 hours for more flavor development.
- Preheat your oven to 475°F (245°C) with a Dutch oven or baking stone inside for at least 30 minutes.
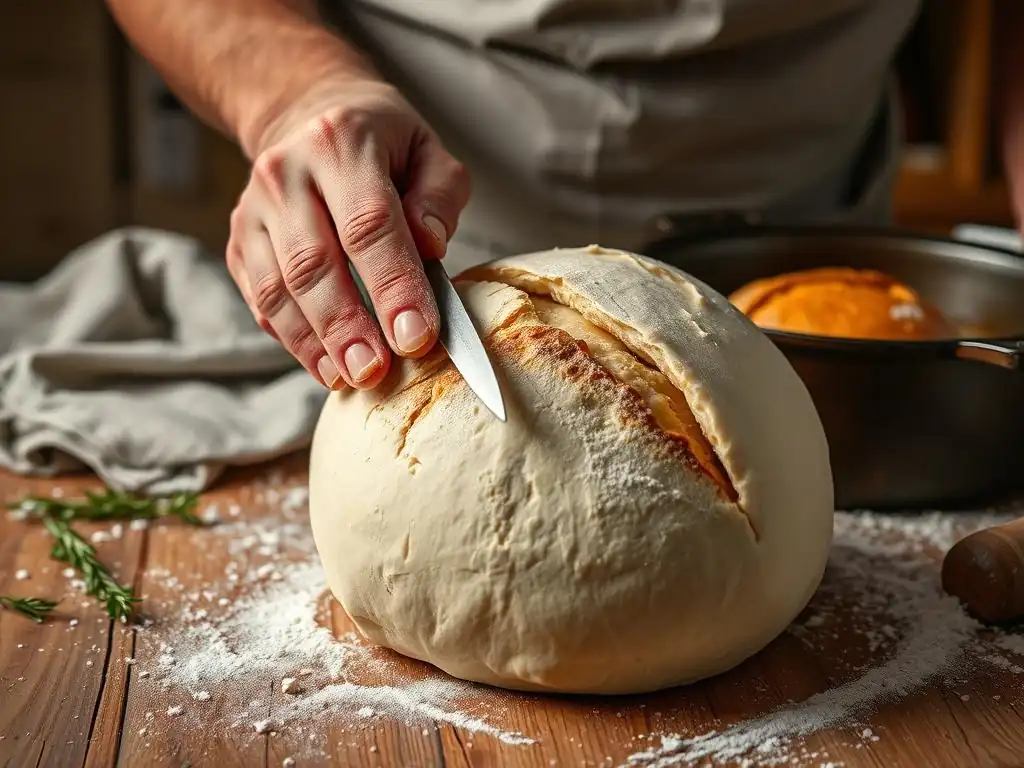
- If using a Dutch oven, carefully invert the dough into the hot pot, score the top with a sharp knife or razor blade, cover, and bake for 20 minutes. If using a stone, transfer the dough onto the stone, score, and create steam.
- After 20 minutes (or once the crust is set if using a stone), remove the lid from the Dutch oven (or remove steam source) and continue baking for another 20-25 minutes, or until the crust is deeply golden brown and the internal temperature is 200-210°F (93-99°C).
- Carefully remove the bread from the oven and cool on a wire rack for at least 1-2 hours before slicing.
This recipe incorporates several key rustic bread beginner tips and techniques, providing a solid foundation for future baking adventures.
Variations and Adaptations: Experimenting with Flavors (Adding Herbs, Olives, or Cheese)
Once you're comfortable with the basic rustic bread recipe, you can easily adapt it to create delicious variations. Adding flavor enhancers transforms your simple loaf into something special. One common method is to incorporate additions during the final stages of mixing or during the first set of stretch-and-folds.
For example, you could add 1-2 tablespoons of finely chopped fresh rosemary or thyme to the dough along with the salt. Olives are another fantastic addition; use about 1/2 to 1 cup of pitted, chopped olives (like Kalamata or Castelvetrano) for this recipe size. Drain them well before adding. Hard or semi-hard cheeses like grated Parmesan, Gruyère, or sharp cheddar (about 1/2 cup) can also be folded in. Be mindful that additions like cheese might slightly affect the dough's hydration and browning. These simple adaptations are excellent rustic bread beginner tips for expanding your repertoire.
Troubleshooting Common Rustic Bread Baking Problems
Common Mistakes and How to Avoid Them
As a beginner baker, you're bound to encounter a few challenges, but recognizing common pitfalls is the first step to avoiding them. One frequent mistake is adding too much flour during mixing, kneading, or shaping because the dough feels sticky. This lowers the hydration and results in a dense, heavy loaf instead of the desired open crumb. Remember that high-hydration dough is sticky; use water on your hands or a bench scraper instead of excess flour.
Another common issue is under-fermentation or over-fermentation. If your dough doesn't rise sufficiently or the crumb is dense, it might not have fermented long enough or your yeast wasn't active. If the dough collapses when you shape it or has a very strong, unpleasant sour smell (beyond a pleasant tang), it might be over-proofed. Pay attention to the dough's volume increase and use the poke test to gauge readiness. Following the specific times and visual cues in reliable rustic bread beginner tips recipes helps avoid these issues.
Dealing with Sticky Dough
Sticky dough is a hallmark of high-hydration rustic bread, so learning to manage it is crucial. The key is to minimize the amount of flour you add beyond the recipe's specification. Instead of flouring everything heavily, try using a small amount of water on your hands and bench scraper when handling the dough. This prevents sticking without incorporating extra flour into the dough.
Working on a clean, non-porous surface like granite or stainless steel can also help. If your counter is sticky, a light mist of water or a tiny bit of oil can be more effective than flour. A bench scraper is indispensable for lifting, folding, and portioning sticky dough. Embrace the stickiness as a sign of potentially good hydration! With practice, you'll learn the right touch for handling these wetter doughs, a valuable skill among rustic bread beginner tips.
Preventing a Flat Loaf
A flat loaf can be disappointing, but it's a common issue with rustic bread beginner tips and usually stems from one of a few causes. The most frequent reasons are insufficient gluten development, under-proofing, or over-proofing. If gluten isn't developed enough through kneading or folding, the dough lacks the structure to hold its shape and trap gas, leading it to spread outwards rather than rise upwards.
Under-proofed dough is dense and doesn't expand much in the oven, resulting in a small, potentially flat loaf. Over-proofed dough, on the other hand, has exhausted its rising power; the gluten structure weakens, and the dough collapses, leading to a flat, dense loaf. Ensuring proper gluten development (check with the windowpane test) and accurately judging the bulk fermentation and final proofing stages using visual cues and the poke test are your best defenses against a flat loaf. Also, ensure your shaping technique creates good surface tension.
Addressing a Dense or Gummy Crumb
A dense or gummy crumb is another common problem that beginner rustic bread bakers face. This can be caused by several factors, including insufficient fermentation, under-baking, or slicing the loaf before it has cooled completely. If the dough didn't ferment long enough during the bulk rise or final proof, it won't develop the open, airy structure characteristic of rustic bread, resulting in a tight, dense crumb.
Under-baking is a major culprit for gummy texture. Even if the crust looks good, the interior might not have reached a high enough temperature to set properly. Always check the internal temperature (200-210°F or 93-99°C) to confirm doneness. Finally, cutting into hot bread traps steam and moisture, leading to a gummy center. Always allow the bread to cool completely on a wire rack for at least 1-2 hours before slicing. Patience is key to avoiding a gummy crumb, making proper cooling an essential rustic bread beginner tip.
Beyond the Basics: Advancing Your Rustic Bread Skills
Exploring Different Rustic Bread Styles (Miche, Pain de Campagne, Baguettes)
Once you've mastered a basic rustic loaf, a world of variations opens up. You can explore specific traditional rustic bread styles, each with its own characteristics and techniques. A Miche is a large, round loaf, often made with a mix of white and whole wheat or rye flours, typically using a sourdough starter and undergoing a very long fermentation. Pain de Campagne, or "country bread," is similar, often a boule or batard shape, also frequently made with mixed flours and sourdough, known for its balanced flavor and robust crust.
Baguettes, while often associated with refined white flour, can also be made in a more rustic style with a touch of whole wheat or rye. They are characterized by their long, thin shape, incredibly crispy crust, and open crumb. Each style presents new challenges and learning opportunities, from managing larger dough masses for a Miche to mastering the shaping and scoring of Baguettes. Exploring these variations is a natural next step for rustic bread beginner tips enthusiasts looking to grow.
Working with Sourdough Starters in Rustic Bread
Transitioning from commercial yeast to a sourdough starter is a significant step in advancing your rustic bread skills. Sourdough starters are natural leavening agents, a symbiotic culture of wild yeast and lactic acid bacteria. Using a starter imparts a characteristic tangy flavor and contributes to a more complex aroma and texture in the bread. It requires nurturing and understanding the starter's activity, as fermentation times will vary more than with commercial yeast.
Incorporating sourdough involves feeding your starter to ensure it's active, then using a portion of it (the 'levain' or 'preferment') in your dough. Sourdough fermentation is typically slower than yeast fermentation, allowing for longer flavor development. You'll need to learn to read your starter's readiness and adjust fermentation times based on its activity and ambient temperature. While it adds complexity, mastering sourdough is incredibly rewarding and central to many traditional rustic bread styles.
Advanced Shaping Techniques for Rustic Bread
Beyond the basic boule and batard, there are advanced shaping techniques that can enhance the appearance and structure of your rustic loaves. Tension is key, and mastering techniques that build strong surface tension is crucial for maximizing oven spring and achieving beautiful shapes. Learning to handle very high hydration doughs (80%+) effectively requires practice and specific techniques like the "coil fold" or "slap and fold" method, which develop gluten with minimal handling on the counter.
More intricate shaping can include creating rolls, braiding loaves, or shaping specific regional breads. Scoring (lame or razor blade cuts on the surface before baking) also becomes an art form, controlling expansion and adding visual appeal. Learning different scoring patterns and how they affect the bake is part of advancing your skills. Exploring these techniques adds flair and precision to your rustic bread baking journey.
Enjoying Your Homemade Rustic Bread: Serving Suggestions
Pairing Rustic Bread with Food and Drinks
Your freshly baked rustic bread is a culinary delight on its own, but it also pairs wonderfully with a wide variety of foods and drinks. Its robust crust and open crumb make it perfect for soaking up sauces or serving alongside hearty meals. Serve thick slices with soups and stews, like French Onion soup or a rich beef stew. It's also the ideal accompaniment to pasta dishes, perfect for "scarpetta" (sopping up the sauce).
Consider serving it with cheese and charcuterie boards; the bread's texture and flavor complement salty meats and creamy or tangy cheeses beautifully. For drinks, rustic bread pairs well with a glass of red wine, a crisp beer, or even just a simple glass of water to appreciate its pure flavor. Thinking about these pairings is a fun part of the rustic bread beginner tips experience.
Using Rustic Bread in Recipes (Croutons, Bread Pudding, Bruschetta)
Even day-old rustic bread can be transformed into delicious dishes, preventing waste and extending its enjoyment. Its sturdy texture makes it ideal for croutons; simply cube the slightly stale bread, toss with olive oil and seasonings, and bake until crisp. These homemade croutons are far superior to store-bought and perfect for salads or soups.
Rustic bread is also excellent for bread pudding, both sweet and savory. Its ability to absorb liquid without becoming completely mushy creates a wonderful texture in baked puddings. For a quick and easy appetizer, slice the bread, toast it lightly, rub with garlic, drizzle with olive oil, and top with fresh tomatoes and basil for classic bruschetta. These recipes ensure that every crumb of your hard-earned rustic bread is savored.
Frequently Asked Questions
What exactly is rustic bread, and why is it so popular?
Rustic bread is generally defined as a simple, artisanal bread with a hearty texture and often a slightly sour flavor. Its popularity stems from its easy preparation and delicious taste.
What are the most important ingredients for baking rustic bread?
The core ingredients are simple: flour, water, salt, and yeast (or a sourdough starter). The quality of these ingredients, especially the flour, significantly impacts the final result.
What are some common mistakes beginners make when baking rustic bread?
Over-mixing the dough is a frequent error, leading to a tough loaf. Another mistake is not allowing enough time for proofing, which is crucial for proper development.
How can I achieve a nice, crusty exterior on my rustic bread?
Baking at a high temperature and using steam during the initial baking stage are key. A Dutch oven is excellent for trapping steam and creating a beautiful crust.
What type of flour is best for rustic bread, and can I use all-purpose flour?
Bread flour, with its higher protein content, is generally recommended for its gluten development. While all-purpose flour can be used, the bread will likely have a softer texture.
Final Reflection: The Enduring Charm of Rustic Bread
The simple act of baking rustic bread connects us to a rich culinary history, and its enduring appeal in today's fast-paced world speaks volumes about our desire for authenticity and connection. More than just a loaf of bread, it represents a journey – a journey from flour to fragrant, crusty perfection that offers a tangible reward for effort and patience. This journey, though seemingly simple, offers profound lessons in mindfulness and the satisfaction of creating something beautiful with your own hands.
The influence of rustic bread extends far beyond the kitchen table; it's a symbol of handcrafted quality in a world increasingly dominated by mass production. It reminds us of the importance of slowing down, appreciating the process, and savoring the simple pleasures. As the renowned baker, Chad Robertson, once said, Bread baking is a metaphor for life. It's about patience, attention to detail, and the understanding that sometimes things don't go as planned, but the journey is just as important as the destination.
This sentiment perfectly encapsulates the spirit of rustic bread baking and its broader cultural significance.
Now, I invite you to consider your own journey. Perhaps you've already embarked on your rustic bread adventure, or maybe this article has sparked a newfound interest. Regardless, remember the lessons learned: embrace the process, don't be afraid to experiment, and most importantly, enjoy the journey. The aroma of freshly baked rustic bread, the satisfying crackle of the crust, and the taste of something truly homemade – these are rewards that extend far beyond the simple act of baking. So, gather your ingredients, preheat your oven, and begin your own delicious adventure.
Unleash Your Inner Baker: Craft Your First Rustic Loaf!
Thanks for taking the time to explore the wonderful world of rustic bread baking! We hope you've gained valuable insights and feel inspired to create your own delicious loaf. Ready to take the next step?
- Bake your first rustic bread today! Use what you've learned to follow your favorite recipe (or try a new one!). We'd love to hear about your experience.
- Share your baking journey on social media using #BakeWithEaseRustic and tag us – we'd love to see your creations!
- Explore our extensive recipe collection for more rustic bread inspiration and variations.
So, what unique twist will you add to your first perfect rustic loaf? Let us know in the comments below!