
High Hydration Focaccia: Unlock Ultimate Softness

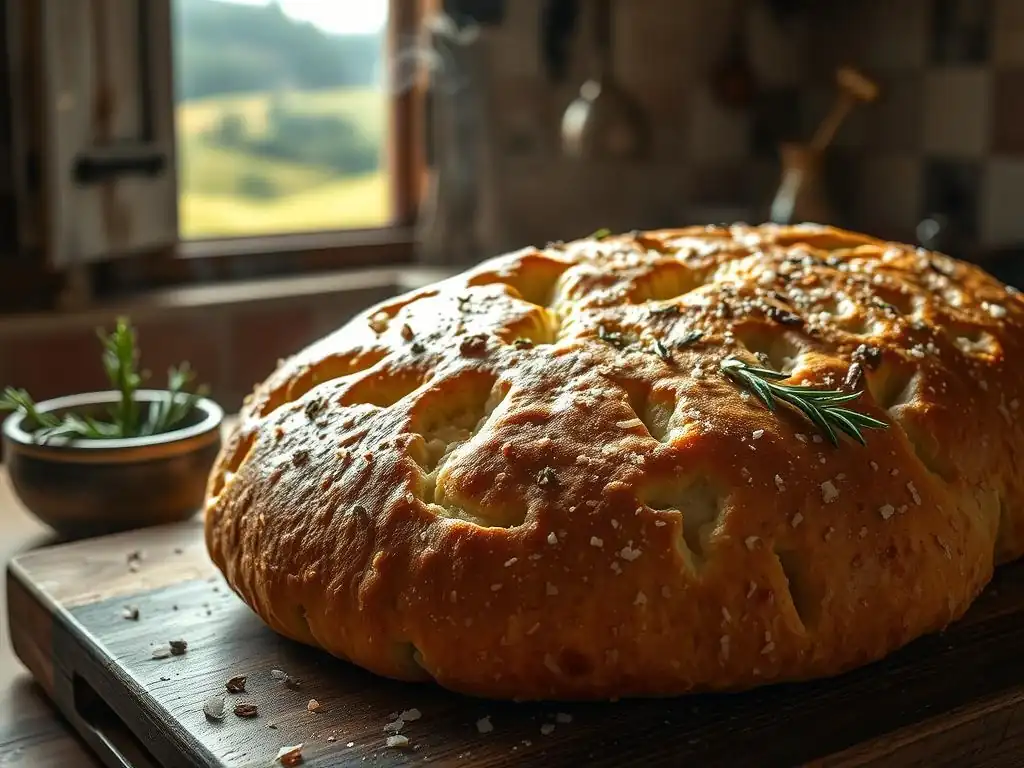
Welcome to BakeWithEase!
Unlock the secrets to baking bliss! Ever dreamt of creating a perfectly soft and airy focaccia that melts in your mouth? You're in the right place. Dive into our guide and discover the techniques that transform simple ingredients into culinary masterpieces. What's the key to achieving that coveted, light-as-air texture? Let's explore!
- Introduction to High Hydration Focaccia for Unmatched Softness
- Understanding High Hydration Dough for Focaccia
- Essential Ingredients for a Soft, Airy Focaccia Recipe
- Step-by-Step Guide to Making High Hydration Focaccia Dough
- Baking Your High Hydration Focaccia to Perfection
- Tips and Tricks for the Softest Focaccia Possible
- Serving and Enjoying Your Soft, Airy Focaccia
- Advanced Techniques for Focaccia Perfection
- Conclusion: Mastering the Art of Soft, Airy Focaccia
- Frequently Asked Questions
- Final Reflection: The Transformative Power of Hydration in Baking
- Unlock Your Focaccia's Full Potential!
Introduction to High Hydration Focaccia for Unmatched Softness
What is High Hydration Focaccia and Why It's So Soft?
High hydration in baking refers to the ratio of water to flour by weight. While a typical bread dough might have a hydration level of 60-70%, high hydration doughs push this ratio much higher, often ranging from 75% to over 90%. For focaccia, this means using a significantly larger amount of water relative to the flour weight than you might be used to with standard recipes. This increased water content is the secret weapon behind achieving that coveted melt-in-your-mouth softness and incredibly open, airy texture.
The science is fascinating: more water allows the flour's starch granules to absorb more liquid and swell during mixing and fermentation. Crucially, it also facilitates greater gluten development without the need for intensive kneading. The abundant water makes the dough slack and sticky, requiring gentle handling like stretch and folds rather than aggressive kneading. This gentler approach preserves the delicate air pockets created by the yeast. During baking, all that extra water turns into steam, which helps the dough expand rapidly in the hot oven (oven spring) and keeps the interior moist, resulting in an exceptionally soft crumb.
BakeWithEase's Guide to Achieving the Perfect Soft, Airy Focaccia Recipe
Welcome to your comprehensive guide on mastering the art of high hydration focaccia with BakeWithEase! We understand that working with a wet, sticky dough can seem intimidating at first, but the rewards – a truly soft, airy focaccia recipe that rivals your favorite bakery – are absolutely worth it. This guide will walk you through every step, from understanding the ingredients and the science behind high hydration to mixing, proofing, baking, and even troubleshooting.
By following these detailed instructions and embracing the techniques suited for high hydration dough, you'll learn how to manage stickiness, encourage a beautiful open crumb structure, and infuse your focaccia with incredible flavor. We'll share tips on ingredient selection, fermentation timing, and baking methods specifically tailored to unlock the ultimate softness and airiness in your focaccia. Prepare to bake a soft, airy focaccia recipe that will become a staple in your kitchen!
Understanding High Hydration Dough for Focaccia
The Science Behind Hydration: How Water Impacts Focaccia Texture
Water is far more than just a liquid in bread dough; it's an essential active ingredient. It activates the yeast, allowing it to consume sugars and produce carbon dioxide gas, which creates the rise. More importantly for texture, water is necessary for gluten development. When water is added to flour, two proteins, glutenin and gliadin, absorb the water and begin to form gluten strands. In a high hydration dough, there's ample water for these proteins to fully hydrate and develop a strong, extensible gluten network even with minimal mechanical effort.
This well-developed, highly hydrated gluten network is incredibly elastic and capable of trapping a large amount of gas produced during fermentation. During baking, the high heat causes the trapped gas to expand rapidly, and the water turns into steam, pushing the dough outwards and upwards – this is oven spring. The steam also helps to gelatinize the starches in the flour, contributing to a moist and tender interior crumb.
The high water content means the dough remains pliable longer in the oven, allowing for a more open structure before the crust sets. This results in a crumb that is not only soft but also features those desirable large, irregular holes.
High Hydration vs. Low Hydration: Differences in Focaccia
The difference between a low hydration focaccia (say, 65-70%) and a high hydration one (80% or more) is significant and fundamentally changes the dough's characteristics and the final bread's texture. A lower hydration dough is much easier to handle; it's less sticky and holds its shape well, making traditional kneading straightforward. The resulting focaccia tends to have a tighter, more uniform crumb structure and can sometimes be slightly chewier. It's still delicious, but it lacks the extreme tenderness and openness characteristic of high hydration versions.
In contrast, high hydration dough is initially very wet, sticky, and slack. It doesn't hold a shape easily and requires techniques like stretch and folds or coil folds performed directly in the bowl or on a lightly oiled surface. While more challenging to handle, this type of dough yields a focaccia with an exceptionally soft, almost custardy interior crumb and a light, airy texture filled with irregular holes.
For instance, a focaccia made with 500g of flour and 325g of water (65% hydration) will feel firm and kneadable, whereas one with 500g of flour and 425g of water (85% hydration) will be a sticky, shaggy mass requiring gentle manipulation. The 85% hydration version, when properly handled and baked, will result in a significantly softer, airier focaccia recipe.
Essential Ingredients for a Soft, Airy Focaccia Recipe
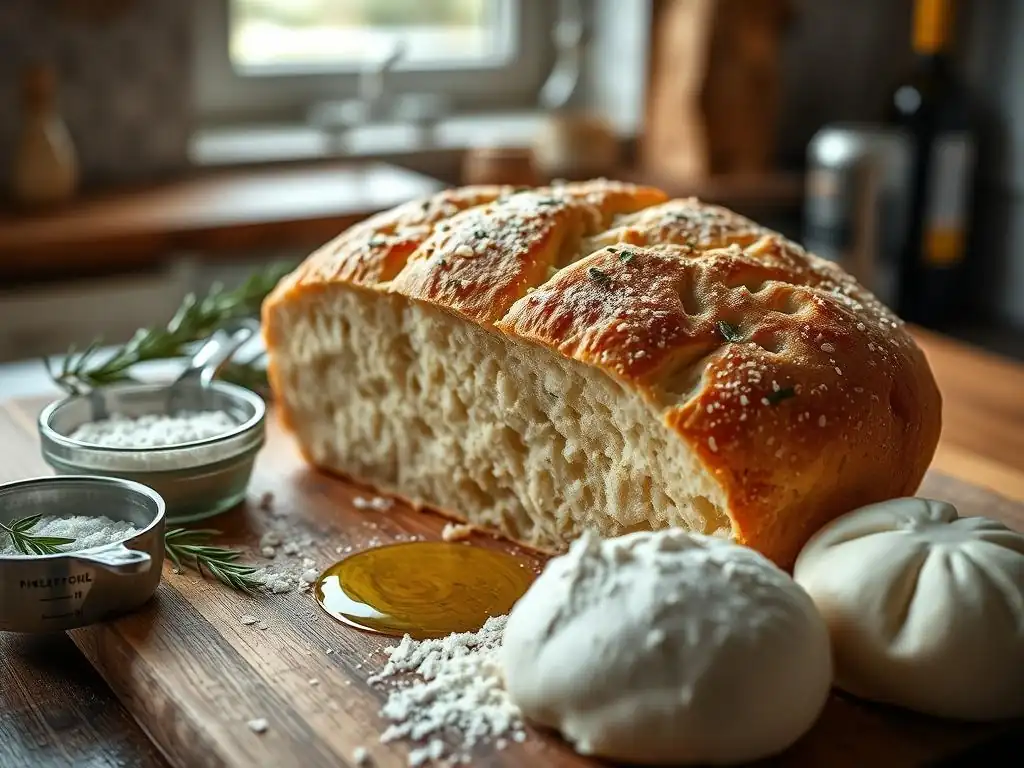
Flour Power: Choosing the Right Flour for High Hydration Focaccia
The type of flour you use is paramount when working with high hydration dough. For a soft, airy focaccia recipe, a high-protein bread flour (typically containing 12-14% protein) is often recommended. This is because the higher protein content means more gluten-forming potential. A strong gluten network is essential to support the large amount of water and trap the significant volume of gas produced during the long fermentation required for great flavor and texture. Bread flour can absorb more water than lower-protein flours, making the high hydration dough slightly easier to manage while still achieving the desired softness.
While all-purpose flour (usually 10-11.5% protein) can be used, it will absorb less water, and you might need to reduce the hydration slightly to make it manageable. Using all-purpose flour might result in a slightly less open crumb structure compared to using bread flour. For optimal results and the most authentic soft, airy focaccia texture, investing in a good quality bread flour is highly beneficial. Look for flours labeled 'strong bread flour' or 'high-gluten flour' if you want to push hydration levels even higher, perhaps towards 90% or beyond.
Water Temperature: Key to Successful Dough Development
The temperature of your water plays a crucial role in initiating yeast activity and influencing the overall dough temperature, which in turn affects the fermentation rate. For most recipes using commercial yeast, warm water between 85°F and 95°F (29°C and 35°C) is ideal. This temperature range is comfortable to the touch (like warm bath water) and quickly activates dry yeast, getting fermentation off to a good start. Using water that is too cold will significantly slow down yeast activity, prolonging the fermentation time unnecessarily.
Conversely, water that is too hot – generally above 120°F (50°C) for active dry yeast or 130°F (54°C) for instant yeast – can damage or kill the yeast organisms, preventing your dough from rising at all. Using a thermometer to check your water temperature ensures consistency and reliability in your baking, helping you achieve the perfect rise necessary for a soft, airy focaccia recipe. If your kitchen is particularly cold or warm, adjusting the water temperature slightly can help you maintain a consistent dough temperature throughout the bulk fermentation.
The Role of Olive Oil in Softening Focaccia
Olive oil is a signature ingredient in focaccia, contributing significantly to its characteristic flavor, aroma, and, importantly, its soft texture. Added directly into the dough, olive oil coats the flour particles and gluten strands, effectively shortening the gluten network. While this sounds counterintuitive for structure, in a high hydration dough with ample gluten development, this shortening effect contributes to a more tender and less chewy crumb. It also adds richness and moisture, preventing the bread from drying out.
Generous amounts of olive oil are also used to coat the baking pan and poured over the top of the dough before baking. The oil in the pan helps create a beautiful golden-brown, slightly crisp bottom crust while ensuring the focaccia doesn't stick. The oil on top pools in the dimples, infuses the top layer of the dough with flavor, and helps create a slightly crisp, flavorful exterior that contrasts wonderfully with the soft interior. Using a good quality extra virgin olive oil will elevate the flavor profile of your soft, airy focaccia recipe significantly.
Yeast: Achieving Optimal Rise and Flavor
Yeast is the leavening agent that makes your focaccia rise and contributes complex flavors through fermentation. For a soft, airy focaccia recipe, you can use either active dry yeast or instant yeast. Instant yeast is often preferred for its convenience as it can be mixed directly into the dry ingredients and doesn't require proofing in water first. Active dry yeast needs to be dissolved in warm water for 5-10 minutes until foamy before being added to the other ingredients to ensure it's active.
The amount of yeast used will depend on the fermentation time and temperature. For a standard several-hour bulk fermentation at room temperature, a typical amount might be around 0.4% to 0.6% instant yeast relative to the flour weight. For example, using 500g of flour, you might use 2g to 3g of instant yeast.
If planning a long, slow fermentation (like an overnight cold ferment), you would use significantly less yeast, perhaps 0.1% to 0.2% of the flour weight, which is around 0.5g to 1g for 500g of flour. Using the correct amount of yeast ensures the dough proofs properly, developing the necessary volume and flavor for a truly soft and airy texture.
Salt: Enhancing Flavor and Controlling Fermentation
Salt is a critical, often underestimated, ingredient in bread making. Beyond simply adding flavor, salt plays a vital role in controlling yeast activity and strengthening the gluten structure. Without salt, fermentation can be too rapid and uncontrolled, potentially leading to a less flavorful bread and a weaker gluten network that struggles to support the dough's rise. Salt helps to slow down the yeast, allowing for a longer, more even fermentation which develops more complex flavors.
Salt also tightens the gluten network, making the dough more extensible and elastic. This improved structure helps the dough hold onto the gas produced by the yeast, contributing to a better rise and a more open crumb structure. The standard salt percentage in bread dough is typically between 1.8% and 2.2% of the flour weight.
For 500g of flour, this means adding about 9g to 11g of salt. Ensure you use non-iodized salt (like fine sea salt or kosher salt) as iodine can sometimes interfere with yeast activity. Proper salting is essential for a balanced flavor and optimal texture in your soft, airy focaccia recipe.
Step-by-Step Guide to Making High Hydration Focaccia Dough
Mixing the Dough: Achieving a Smooth and Elastic Consistency
Mixing high hydration dough can feel quite different from mixing standard bread doughs. Because of the high water content, the dough will be very wet and sticky. The goal is not necessarily to knead it into a smooth ball immediately, but rather to combine the ingredients and begin the process of gluten development. You can mix by hand in a large bowl using a sturdy spoon or spatula, or in a stand mixer with a dough hook.
- Combine flour, water, and yeast first, mixing until just combined and no dry flour remains.
- Let this shaggy mixture rest for 20-30 minutes (this is called autolyse, and it helps the flour absorb water and gluten development begin without kneading).
- After the autolyse, add the salt and olive oil (if the recipe calls for it in the dough).
- Mix again. By hand, this involves folding and squishing the dough in the bowl. In a stand mixer, mix on low speed for 5-10 minutes until the dough starts to pull away from the sides of the bowl slightly and looks more cohesive, though still very soft and sticky. The dough won't form a smooth, tight ball like lower hydration doughs.
First Rise: Bulk Fermentation for Flavor Development
The first rise, or bulk fermentation, is a crucial stage where the dough develops flavor and strength. For high hydration focaccia, this typically involves a relatively long period at room temperature, often 2 to 4 hours, depending on the temperature of your kitchen and the amount of yeast used. During this time, the dough should increase significantly in volume, perhaps doubling or even tripling, and become visibly bubbly.
To build strength in this wet dough, you'll perform a series of stretch and folds or coil folds during the first hour or two of bulk fermentation. Every 30-60 minutes, gently wet your hands or coat them with olive oil, then stretch one side of the dough up and fold it over the center. Rotate the bowl and repeat 3-4 times until all sides have been stretched and folded. This process aligns the gluten strands, builds structure, and incorporates air without deflating the dough. After the folds, let the dough rest undisturbed to finish the bulk fermentation.
**Bulk Fermentation Steps:**
- Combine ingredients & perform autolyse.
- Add salt & oil, mix.
- Transfer to an oiled container.
- Perform 3-4 sets of stretch & folds every 30-60 minutes.
- Let dough rest until doubled/tripled and bubbly.
Shaping the Dough: Gentle Handling for Airiness
Shaping high hydration focaccia is less about forming a tight shape and more about gently transferring the dough to its final baking vessel. A rectangular or square pan (like a 9x13 inch or 10x15 inch pan) is commonly used. Generously coat the pan with olive oil – don't be shy! This prevents sticking and contributes to the delicious bottom crust.
Carefully pour or scrape the dough from its bulk fermentation container into the prepared pan. Avoid punching it down or degassing it roughly. The goal is to preserve as many of the air bubbles created during the first rise as possible. The dough will likely not fill the pan immediately. Cover the pan and let the dough rest for 15-20 minutes.
After resting, gently coax the dough outwards towards the edges of the pan with oiled fingertips. If it springs back, let it rest again before continuing. Repeat this gentle stretching process until the dough roughly fills the pan. This gentle handling is key to maintaining the airy structure of your soft, airy focaccia recipe.
Second Rise: Proofing for a Light and Open Crumb
The second rise, or proofing, happens after the dough has been transferred and gently spread in the baking pan. This is the final rise before baking and is crucial for achieving a light and open crumb structure. Cover the pan loosely with plastic wrap or a clean kitchen towel to prevent the surface from drying out.
Allow the dough to proof at room temperature for another 1 to 2 hours, or until it looks visibly puffy, has increased in volume, and is riddled with small bubbles just beneath the surface. When gently poked, it should feel airy and leave a slight indentation that slowly springs back. This final proofing allows the yeast to produce a final burst of gas, expanding the dough to its full potential within the confines of the pan. Proper proofing ensures that your soft, airy focaccia recipe bakes up light and tender, not dense.
Baking Your High Hydration Focaccia to Perfection
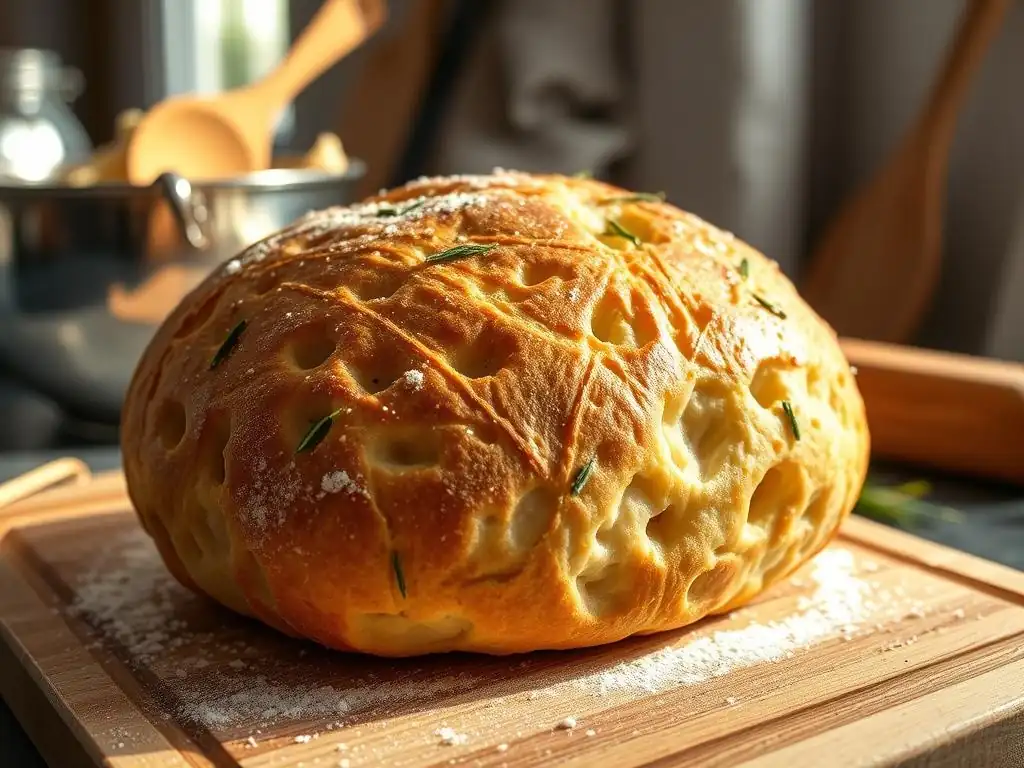
Oven Temperature and Baking Time: The Sweet Spot for Softness
Baking high hydration focaccia at a high temperature is essential for achieving that desirable combination of a slightly crisp exterior and an incredibly soft interior. Preheat your oven to a relatively high temperature, typically between 425°F and 450°F (220°C and 230°C). A high initial temperature provides strong oven spring, allowing the dough to expand rapidly before the crust sets.
The baking time will vary depending on your oven and the size/thickness of your focaccia, but it generally takes between 20 and 30 minutes. You'll know it's done when the top crust is a deep golden brown color, and the bottom crust (you can carefully lift an edge to check) is also golden and releases easily from the pan. Baking it long enough to achieve good color is important for flavor and texture, but don't overbake, as this can dry out the soft interior. A final internal temperature around 200-210°F (93-99°C) indicates it is fully baked.
The Dimpling Technique: Creating Those Iconic Focaccia Pockets
The characteristic dimples on the surface of focaccia are not just for looks; they serve a purpose! Dimpling is typically done just before the focaccia goes into the oven, after the second rise is complete. To dimple, generously coat your fingertips with olive oil to prevent sticking. Then, gently but firmly press your fingers straight down through the dough, all the way to the bottom of the pan, creating indentations spaced about an inch or two apart across the entire surface.
Be careful not to tear the dough or be too rough, which could deflate the precious air bubbles. The dimples prevent large, uneven air pockets from forming during baking and create little wells that fill with olive oil and any added toppings like flaky sea salt, herbs, or cherry tomatoes. These oil-filled pockets contribute significantly to the rich flavor and slightly crisp texture of the top crust, providing a lovely textural contrast to the soft, airy focaccia crumb below.
Adding Toppings: Flavor Combinations for Your Focaccia
One of the joys of making focaccia is customizing it with delicious toppings. While a simple sprinkle of flaky sea salt and a drizzle of olive oil is classic and wonderful, you can add a wide variety of ingredients to enhance your soft, airy focaccia recipe. Toppings are usually added after the dough has been dimpled, just before baking.
Popular topping ideas include:
- Fresh rosemary sprigs or chopped herbs like thyme and oregano
- Cherry tomatoes, halved or left whole
- Thinly sliced red onion or garlic
- Olives (kalamata, green, or a mix)
- Crumbled feta or dollops of soft cheese (add these towards the end of baking if they brown too quickly)
- Red pepper flakes for a touch of heat
Arrange your chosen toppings evenly across the dimpled surface, pressing them gently into the dough so they don't fall off. Drizzle a final flourish of olive oil over everything before placing the pan in the hot oven.
Baking with Steam: Achieving a Crusty Exterior and Soft Interior
While generous olive oil helps prevent the crust from becoming overly hard, creating some steam in the oven during the initial phase of baking can further enhance the texture of your soft, airy focaccia recipe. Steam keeps the surface of the dough moist longer, allowing it to expand more fully before the crust begins to set. This contributes to better oven spring and a potentially thinner, more delicate top crust that yields easily to the soft interior.
One simple way to create steam is to place a shallow metal pan on the bottom rack of your oven while it preheats. Just before you put the focaccia in, carefully pour about a cup of hot water into the hot pan. Close the oven door quickly to trap the steam.
Alternatively, you can lightly spray the interior walls of your oven with a spray bottle filled with water a couple of times during the first 5-10 minutes of baking. Use caution when adding water or spraying inside a hot oven. This initial burst of steam works in conjunction with the high heat and olive oil to help achieve that perfect balance between a flavorful crust and an incredibly soft, airy crumb.
Tips and Tricks for the Softest Focaccia Possible
Mastering the Overnight Cold Ferment for Enhanced Flavor
For the most flavorful and texturally superior soft, airy focaccia recipe, consider incorporating an overnight cold ferment in the refrigerator. After the initial mixing and perhaps one or two sets of stretch and folds, place the dough in an oiled container, cover it tightly, and refrigerate it for 12 to 48 hours. The cold temperature significantly slows down fermentation, allowing enzymes in the dough to break down starches into sugars and proteins into amino acids.
This slow process develops a much more complex, nuanced flavor profile that you simply can't achieve with a quick room-temperature rise. The cold also makes the high hydration dough slightly easier to handle when you take it out. After cold fermentation, allow the dough to warm up at room temperature for 2-4 hours before transferring it to the pan and proceeding with shaping, dimpling, and final proofing. This extended fermentation is a favorite technique among bakers aiming for maximum depth of flavor and a truly exceptional soft, airy focaccia.
Troubleshooting Common Focaccia Problems (e.g., dense crumb, sticky dough)
Working with high hydration dough can present a few challenges, but common issues are easily addressed.
- Dense Crumb: If your focaccia turns out dense instead of soft and airy, it's likely due to under-proofing, insufficient gluten development, or rough handling. Ensure you allow enough time for both the first and second rises, perform adequate stretch and folds to build strength, and handle the dough gently when transferring and dimpling.
- Excessively Sticky Dough: High hydration dough is sticky, but it shouldn't be completely unmanageable. If it's too sticky to work with even with wet or oiled hands, it might indicate insufficient gluten development or inaccurate ingredient measurements. Ensure you're using the correct flour and accurately measuring water. Focus on building strength through consistent stretch and folds.
- Uneven Rise: This can happen if the dough isn't spread evenly in the pan or if proofing conditions are inconsistent. Ensure the dough is gently coaxed to fill the pan and proof in a warm, draft-free spot.
Here's a quick troubleshooting checklist:
- [ ] Did I use the right flour (high protein)?
- [ ] Was my water temperature correct?
- [ ] Did I measure ingredients accurately (especially water and flour)?
- [ ] Did I perform enough stretch & folds?
- [ ] Did the dough proof long enough (look for bubbles and puffiness)?
- [ ] Did I handle the dough gently?
- [ ] Was the oven temperature accurate?
Achieving the Perfect Golden-Brown Crust
A beautiful golden-brown crust is the hallmark of a perfectly baked focaccia. This color indicates that the Maillard reaction and caramelization have occurred on the surface, contributing significant flavor and aroma. The generous amount of olive oil used on the surface and in the pan plays a major role in achieving this. The fat helps conduct heat and promotes browning.
Baking at a high temperature is also key. If your focaccia is pale after the recommended baking time, it might mean your oven temperature is inaccurate, or it needs a few more minutes. Don't be afraid of a deep golden color; it signifies a well-baked loaf with a delicious crust that provides a lovely contrast to the soft, airy focaccia interior. A good rule of thumb is that it should look done – not just lightly colored, but truly golden or even amber in spots.
Storing Your High Hydration Focaccia to Maintain Softness
High hydration focaccia is best enjoyed warm, shortly after baking, when its softness and airiness are at their peak. However, if you have leftovers, proper storage is important to maintain as much of that wonderful texture as possible. Store cooled focaccia at room temperature, wrapped loosely in parchment paper or a clean kitchen towel, and then placed in a paper bag. This allows some air circulation while preventing it from drying out too quickly. Avoid airtight plastic containers or bags for the first day, as this can trap moisture and make the crust soggy.
Focaccia is generally best eaten within 1-2 days. Refrigeration can cause the starches to "retrograde" (crystallize), making the bread stale and firm much faster, so it's generally not recommended for short-term storage. For longer storage, slice the cooled focaccia and freeze the slices in a freezer-safe bag or container for up to 2-3 months. Reheat frozen slices directly in a moderate oven (350°F/175°C) for a few minutes to revive their texture and warmth, bringing back much of that initial soft, airy goodness.
Serving and Enjoying Your Soft, Airy Focaccia
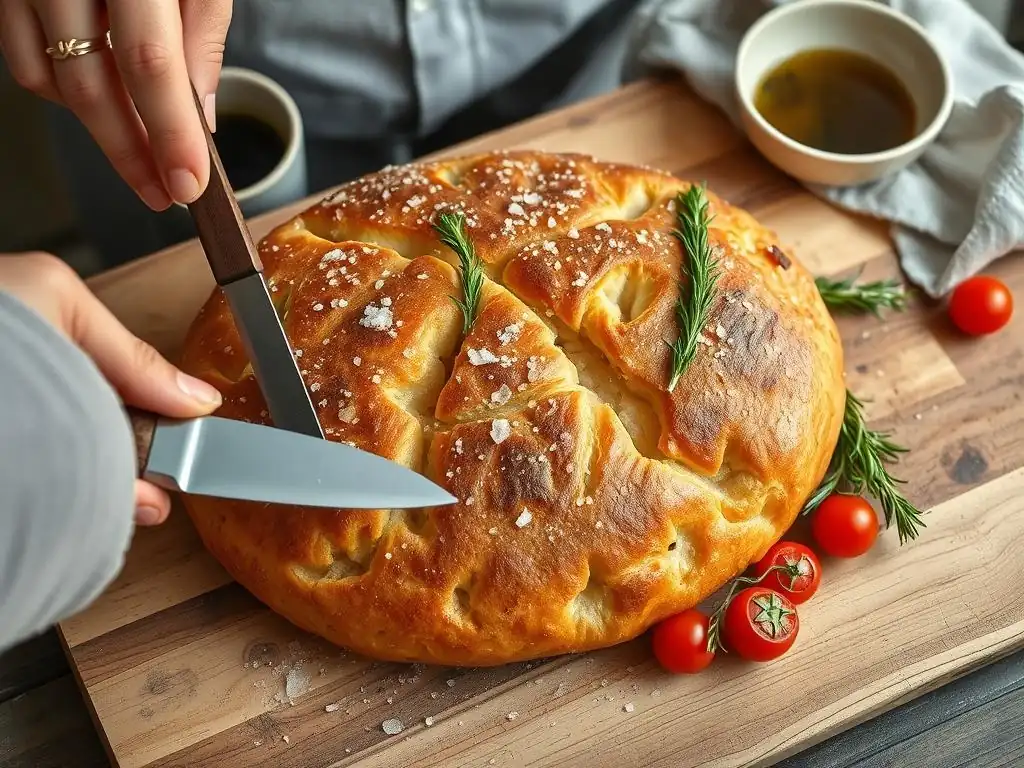
Delicious Serving Suggestions for Your Homemade Focaccia
Your freshly baked soft, airy focaccia is a versatile canvas for culinary creativity. While incredibly satisfying enjoyed warm straight from the pan, perhaps with just a little extra drizzle of good olive oil and a sprinkle of flaky salt, it shines in many different serving scenarios.
- Dipping: Serve it alongside a small bowl of high-quality extra virgin olive oil mixed with balsamic vinegar or other flavored vinegars.
- Accompaniment: It's the perfect bread to serve with soups, stews, or pasta dishes, ideal for soaking up delicious sauces.
- Sandwiches: Slice horizontally to create incredible sandwiches filled with roasted vegetables, cured meats, cheeses, or pesto. The soft, airy crumb makes for a less dense sandwich than traditional bread.
- Appetizer: Cut into squares and serve as part of an antipasto platter with cheeses, olives, and charcuterie.
- Base: Use leftover focaccia as a base for quick pizzas or bruschetta, topping slices and warming them under a broiler or in the oven.
The possibilities are nearly endless for enjoying your wonderful soft, airy focaccia recipe.
Pairing Ideas: Complementing Flavors for a Complete Meal
Pairing your soft, airy focaccia with complementary dishes can elevate a simple meal into something special. Its rich, savory flavor and tender texture make it a great partner for a variety of cuisines.
Consider pairing it with:
- Soups: A hearty minestrone, a creamy tomato soup, or a simple vegetable broth.
- Salads: A crisp green salad with a vinaigrette, a panzanella salad (using slightly stale focaccia), or a robust Caesar salad.
- Mediterranean Dishes: Grilled fish or chicken, roasted Mediterranean vegetables (zucchini, bell peppers, eggplant), or lentil dishes.
- Cheese and Wine: A selection of Italian cheeses like mozzarella, provolone, or parmesan, paired with a light-bodied Italian red wine such as Sangiovese or a crisp white like Pinot Grigio.
Your soft, airy focaccia recipe is more than just bread; it's a culinary experience waiting to happen.
Advanced Techniques for Focaccia Perfection
Sourdough High Hydration Focaccia: A Tangy Twist
For those looking to explore fermentation further, adapting your soft, airy focaccia recipe to use a sourdough starter instead of commercial yeast offers a delightful tangy flavor and unique texture. Sourdough fermentation is driven by wild yeasts and lactic acid bacteria present in the starter. This slower, more complex fermentation process produces organic acids that contribute a characteristic tang and can also help with gluten development and dough extensibility.
Using sourdough means you'll need an active, bubbly starter. The fermentation times will be longer than with commercial yeast, often requiring a bulk ferment of several hours at room temperature followed by a long cold proof in the refrigerator (12-48 hours) to fully develop the sour flavor. The hydration levels remain high, and the gentle handling techniques are still essential. The result is a focaccia with a more complex flavor profile, a slightly different crumb structure, and a wonderful aroma.
Exploring Different Flour Combinations for Unique Flavors
While high-protein bread flour is excellent for structure, experimenting with different flour combinations can add layers of flavor and subtle textural nuances to your soft, airy focaccia recipe. You can substitute a percentage of the bread flour (e.g., 10-20%) with other types of flour.
- Whole Wheat Flour: Adds nuttiness and fiber. Be aware that whole wheat absorbs more water, so you might need to slightly increase the overall hydration or accept a slightly denser crumb.
- Spelt Flour: Offers a milder, slightly sweeter flavor than whole wheat and a tender crumb. It has a more delicate gluten structure, so use it in moderation initially.
- Rye Flour: Adds a distinct tangy, earthy flavor. Rye contains less gluten-forming protein, so use a small percentage (5-10%) unless you are experienced with high-rye baking.
When substituting, start with a small percentage and note how the dough handles and how the final texture and flavor differ. This experimentation allows you to personalize your soft, airy focaccia recipe.
Adding Herbs and Spices Directly to the Dough
Beyond topping your focaccia, incorporating finely chopped fresh herbs or dried spices directly into the dough during the mixing phase can infuse flavor throughout the entire crumb. This technique provides a more subtle but pervasive flavor compared to surface toppings.
Consider mixing in:
- Finely minced fresh rosemary or thyme
- Dried oregano or Italian seasoning blend
- Garlic powder or granulated garlic
- Red pepper flakes for a gentle warmth
- Black pepper
Add these ingredients along with the salt and olive oil after the autolyse step. Ensure they are evenly distributed during the final mixing phase. The flavors will meld with the dough as it ferments and bakes, creating an aromatic and flavorful soft, airy focaccia recipe from the inside out. A common ratio might be 1-2 teaspoons of dried herbs or spices per 500g of flour.
Conclusion: Mastering the Art of Soft, Airy Focaccia
Mastering the soft, airy focaccia recipe is a rewarding journey that opens up a world of texture and flavor possibilities in your baking. It's a testament to how simple ingredients – flour, water, yeast, salt, and olive oil – can transform into something truly extraordinary through understanding technique and patience. The key lies in embracing the high hydration, which demands gentle handling and sufficient fermentation time to build strength and develop flavor.
From selecting the right flour and controlling water temperature to executing proper stretch and folds, gentle shaping, and baking at the correct temperature, each step contributes to the ultimate softness and airiness of the final loaf. Don't be discouraged by the initial stickiness of the dough; it's a sign that you're on the right track! With practice, managing high hydration dough becomes intuitive, and the results – a focaccia with an incredibly tender, open crumb and a delicious crust – are truly spectacular.
Whether you enjoy it plain, dipped in oil, or as the base for a fantastic sandwich, your homemade soft, airy focaccia is sure to impress. Keep baking, keep experimenting, and enjoy the delicious process!
Frequently Asked Questions
What is high hydration and why is it important for focaccia?
High hydration refers to a dough with a high water content relative to flour. This is crucial for a soft, airy focaccia because the water creates steam during baking, resulting in a light and open crumb.
What kind of flour is best for a soft, airy focaccia?
Bread flour, with its higher protein content, is generally recommended. This allows for strong gluten development, which is essential for trapping the gases produced during fermentation and creating that signature airy texture.
Can I use a stand mixer or do I need to knead the dough by hand?
While a stand mixer makes the process easier, you can definitely knead by hand! Just be patient and persistent. The key is to develop the gluten properly, which can be achieved with either method by following the directions and checking for the windowpane test.
What temperature should my oven be for baking a high hydration focaccia?
Generally, a high temperature, around 450-475°F (232-246°C), is best. This creates a rapid rise and helps achieve that desirable golden-brown crust while keeping the interior soft and moist.
How long should I let the focaccia proof?
Proofing time will vary depending on your environment, but generally, you'll proof the dough twice. A bulk fermentation (first proof) of several hours, followed by a second proof in the pan for at least an hour, or until doubled in size, is recommended for optimal flavor and texture.
Final Reflection: The Transformative Power of Hydration in Baking
The pursuit of the perfect focaccia, that ethereal cloud of soft, airy goodness, hinges on understanding the crucial role of hydration. This seemingly simple element unlocks a world of texture and flavor, transforming a dense, chewy bread into a masterpiece of lightness and delicate crumb. The journey to mastering this technique, as explored in this article, is a testament to the power of precision and patience in the culinary arts.
The impact of hydration extends far beyond the realm of focaccia; it's a fundamental principle in baking that influences the outcome of countless recipes. Understanding this principle allows for greater control and creativity in the kitchen, empowering bakers to experiment and achieve consistently superior results. The baker who understands hydration understands the soul of bread.
– (A fictional quote, feel free to replace with a real one if you have a suitable source). This simple truth resonates deeply, reminding us that even the smallest details can have profound effects on the final product.
Now, it's your turn. Take the knowledge gained from this exploration of hydration and apply it to your own baking endeavors. Don't be afraid to experiment with different hydration levels, to observe the subtle shifts in texture and taste. The journey to mastering the art of baking is a continuous process of learning, refining, and ultimately, creating something truly special. Embrace the challenge, and discover the joy of crafting your own perfectly soft and airy focaccia.
Unlock Your Focaccia's Full Potential!
Thanks for joining us on this delicious journey into the world of perfectly soft focaccia! We hope you learned a thing or two about maximizing hydration for that ultimate bakery-style texture. Ready to take your baking to the next level?
- Bake your own High Hydration Focaccia: Use the recipe and techniques you just learned to create your own masterpiece. This is your chance to experience the incredible difference!
- Share your baking success: Post a picture of your focaccia on social media using #BakeWithEaseHighHydration. Let's inspire others!
- Experiment with flavors: Try adding different herbs, olives, or cheeses to customize your focaccia—the possibilities are endless!
What unique flavor combination will you create for your next High Hydration Focaccia?