
The Easiest NoKnead Whole Wheat Bread Recipe

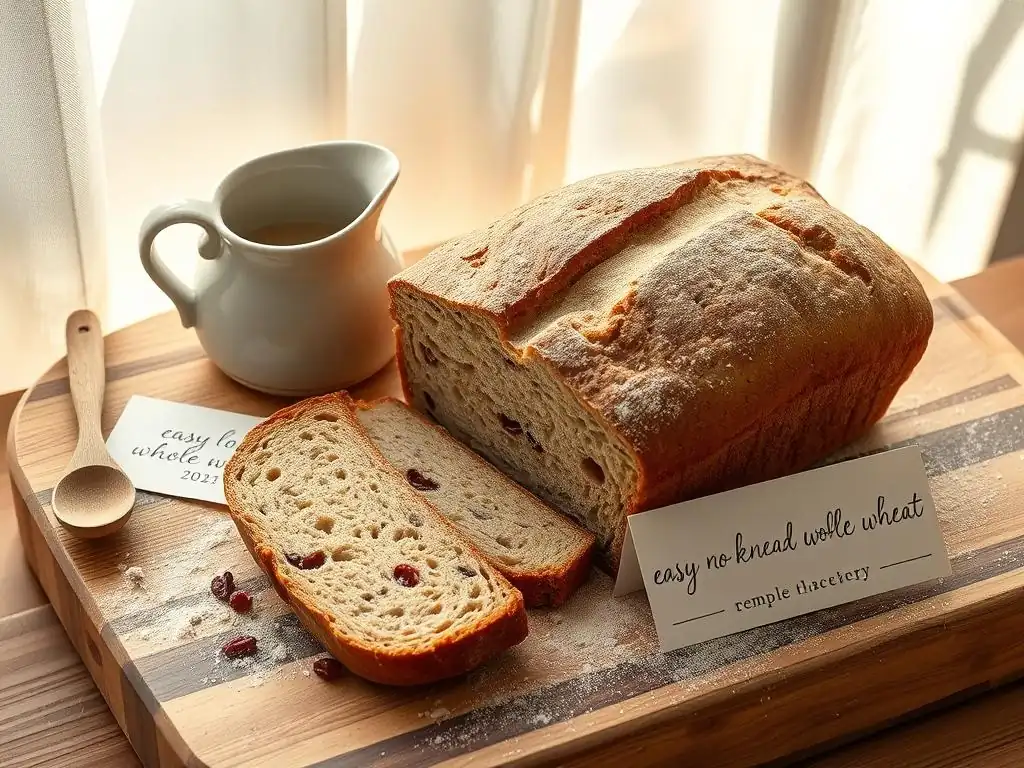
Welcome to BakeWithEase, your trusted companion on your baking journey! Ever dreamt of effortlessly crafting wholesome, delicious bread at home? Discover the secrets to baking our Easy No Knead Whole Wheat bread - a recipe so simple, it practically bakes itself. Intrigued? Let's unlock the magic of effortless bread baking, one delicious loaf at a time! Prepare to be amazed by how easy it is to create bakery-quality bread in your own kitchen...
- BakeWithEase Presents: Effortless Whole Wheat Bread
- Why Choose No-Knead Whole Wheat?
- Gather Your Ingredients for Easy Whole Wheat Bread
- Step-by-Step: Making Easy No-Knead Whole Wheat Bread
- Tips for Baking Perfect No-Knead Whole Wheat Bread
- Serving and Storing Your Homemade Whole Wheat Bread
- Mastering the Art of Baking: Beyond No-Knead
- Frequently Asked Questions
- Final Reflection: The Humble Loaf and the Joy of Simple Baking
- Unleash Your Inner Baker: Bake the Perfect Loaf Today!
BakeWithEase Presents: Effortless Whole Wheat Bread
Discover the Simple Joy of Homemade Bread
There's a unique satisfaction that comes from baking your own bread, filling your home with that comforting aroma and knowing exactly what ingredients went into it. For many, the idea of traditional bread baking, with its extensive kneading and precise timing, can seem daunting. This often leads aspiring bakers to shy away from trying their hand at creating a simple loaf. However, the no-knead method completely transforms this perception, making homemade bread accessible to everyone, regardless of experience level.
This easy no knead whole wheat recipe is specifically designed to remove the intimidation factor. By relying on time rather than intensive labor, it allows the dough to develop structure and flavor on its own. You simply mix the ingredients, let time do its magic, and bake. It's a forgiving process that yields consistently delicious results, proving that you don't need to be an expert baker to enjoy warm, crusty whole wheat bread straight from your oven. It's a perfect starting point for anyone wanting to explore the world of baking with minimal effort.
Why Choose No-Knead Whole Wheat?
The Benefits of No-Knead Baking for Whole Wheat
The no-knead method is particularly well-suited for whole wheat flour, which can sometimes be trickier to work with than all-purpose flour. Whole wheat flour contains bran and germ, which can interfere with gluten development, making traditional kneading more challenging to achieve a light, airy texture. The extended, slow fermentation characteristic of the no-knead technique allows the gluten network to develop naturally over time, resulting in a surprisingly open crumb structure and a wonderful depth of flavor without any strenuous effort on your part.
Furthermore, this simple technique minimizes handling of the dough. Less handling is often beneficial when working with whole wheat, helping to prevent the loaf from becoming dense. The long rest period also allows complex flavors to develop as the yeast works slowly, breaking down starches. This passive approach requires very little active time – perhaps 10-15 minutes spread over two days – making it ideal for busy schedules. It truly simplifies the process of baking a hearty, flavorful whole wheat loaf.
Healthier Bread, Easier Process: A Perfect Combination
Choosing whole wheat bread offers significant nutritional advantages over bread made with refined flours. Whole wheat flour retains the entire grain kernel – the bran, germ, and endosperm – which means it's packed with fiber, vitamins, minerals, and antioxidants. A standard slice of commercially produced whole wheat bread can contain around 2-3 grams of fiber, contributing significantly to your daily intake goals, while white bread often has less than 1 gram. Baking your own ensures you get the maximum benefit of these nutrients.
Combining the health benefits of whole wheat with the simplicity of the easy no knead whole wheat method is a winning formula. You don't have to compromise on nutrition for convenience. This recipe provides a straightforward path to a healthier, homemade alternative to store-bought loaves, which can sometimes contain added sugars or preservatives. Enjoying a slice of this bread means savoring a delicious, wholesome food made with minimal effort and maximum goodness.
Gather Your Ingredients for Easy Whole Wheat Bread

Simple Ingredients, Exceptional Flavor
One of the beauties of this easy no knead whole wheat bread recipe is its reliance on just a few pantry staples. You don't need a long list of specialized flours or dough conditioners. The magic happens through the interaction of whole wheat flour, water, salt, and yeast over time. Using good quality ingredients will enhance the final product, but even standard supermarket versions will yield a delicious loaf. The simplicity of the ingredient list makes this recipe incredibly accessible and cost-effective.
The minimal ingredients also mean less measuring and less room for error. This recipe strips bread baking down to its essentials, allowing the natural flavor of the whole wheat flour to shine through, complemented by the subtle tang developed during the long fermentation. It's a testament to the fact that complex flavors don't always require complex components; often, the best results come from simple elements handled correctly.
Ingredients: 3 cups Whole Wheat Flour, 1.5 cups Warm Water, 1.5 tsp Salt, 0.5 tsp Instant Yeast
Here are the simple ingredients you'll need for your easy no knead whole wheat bread:
- [ ] 3 cups Whole Wheat Flour
- [ ] 1.5 cups Warm Water (around 100-110°F or 38-43°C)
- [ ] 1.5 teaspoons Salt
- [ ] 0.5 teaspoon Instant Yeast
These quantities are designed for a standard loaf, typically yielding about 8-10 slices. The ratio of water to flour here is approximately 50% hydration, which results in a relatively firm dough that is easy to handle, perfect for beginners tackling their first whole wheat no-knead loaf. Ensure your water is warm, not hot, as excessively hot water can kill the yeast.
Step-by-Step: Making Easy No-Knead Whole Wheat Bread
Preparing the Dough: The No-Knead Method
Combine the ingredients in a large bowl. Add the 3 cups of whole wheat flour, 1.5 teaspoons of salt, and 0.5 teaspoon of instant yeast. Give them a quick whisk to distribute evenly. Then, pour in the 1.5 cups of warm water. Using a wooden spoon or a spatula, mix everything together until there are no dry spots of flour remaining. The dough will be shaggy and sticky – this is exactly what you want for an easy no knead whole wheat dough. Do not overmix; just ensure all ingredients are incorporated.
Cover the bowl tightly with plastic wrap or a damp kitchen towel. The key here is to create a seal that prevents the dough from drying out during its long rest. Place the bowl in a warm, draft-free spot in your kitchen. Room temperature (around 70-75°F or 21-24°C) is ideal for the initial fermentation. This simple mixing step takes only about 5 minutes of active time before you let the magic happen.
First Rise: Patience is Key to Flavor
The first rise, also known as bulk fermentation, is where the no-knead method truly shines. Leave the covered dough to rest for a minimum of 12 hours, or ideally up to 18 hours, at room temperature. During this long period, the yeast slowly ferments the sugars in the flour, producing carbon dioxide gas that makes the dough rise and, crucially, developing complex flavors and strengthening the gluten structure without any manual kneading.
You will notice the dough will likely double in size and the surface may show small bubbles. This extended fermentation is vital for both the texture and the characteristic slightly tangy flavor of a no-knead loaf, especially with whole wheat. Resist the urge to rush this step; the longer rest within the recommended window contributes significantly to the success and deliciousness of your easy whole wheat bread.
Shaping the Dough: Simple Techniques for a Rustic Loaf
After the long fermentation, the dough will be bubbly and might look a bit deflated when you uncover it. Lightly flour a clean work surface. Gently scrape the dough out of the bowl onto the floured surface using a spatula or dough scraper. Avoid punching the air out aggressively; you want to preserve as much of the gas created during the rise as possible. The dough will be loose and sticky, but the flour on your hands and the surface will help make it manageable.
Fold the edges of the dough towards the center a few times to form a rough ball or round shape. You don't need to be precise; the goal is just to create a little surface tension. This simple folding helps give the loaf some structure for baking. This entire shaping process should take less than 2 minutes, keeping the easy no knead whole wheat philosophy intact.
Second Rise: Achieving the Perfect Texture
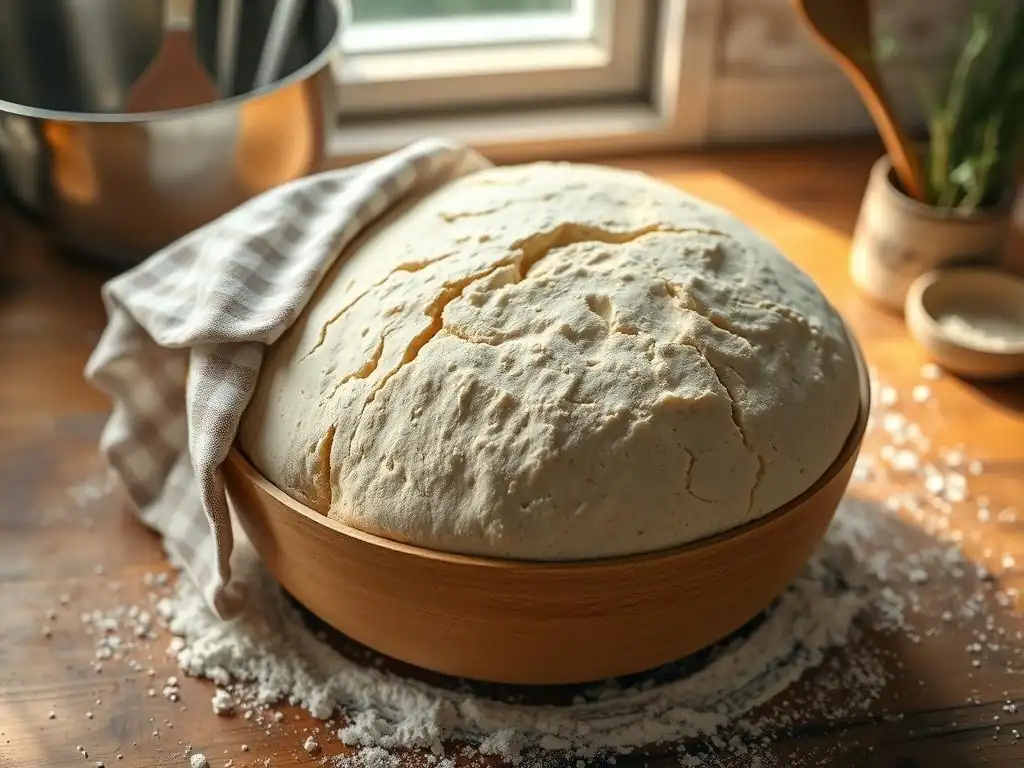
Now it's time for the second, shorter rise. You can place the shaped dough seam-side down into a proofing basket (banneton) that has been generously floured with rice flour (which helps prevent sticking) or into a bowl lined with a floured kitchen towel. Cover the dough again. This second rise allows the dough to recover from shaping and build up a little more volume before baking.
Let the dough rise for about 30-60 minutes. While it's rising, this is the perfect time to preheat your oven and your baking vessel. You're looking for the dough to look slightly puffed up but not fully doubled again. This shorter proof helps ensure a good oven spring when it bakes.
Baking Your Easy Whole Wheat Loaf: Temperature and Time
Preheat your oven to a high temperature, typically 450°F (230°C). It is highly recommended to bake this easy no knead whole wheat bread in a heavy, lidded pot like a Dutch oven. Place the empty pot with its lid in the oven as it preheats for at least 30 minutes. This super-heats the pot, which is crucial for creating a great crust.
Carefully remove the hot pot from the oven using oven mitts. Gently invert the risen dough into the hot pot (you may need to use the parchment paper or towel you proofed it on to help transfer). Score the top of the loaf with a sharp knife or razor blade if desired (a simple 'X' or a single slash works).
Quickly place the lid back on the pot and return it to the oven. Bake with the lid on for 30-35 minutes. Baking covered traps the steam released by the dough, creating a humid environment that allows the crust to expand fully before hardening.
After the initial covered bake, carefully remove the lid. The loaf should look pale but significantly risen. Reduce the oven temperature slightly if recommended by your oven's performance (sometimes to 425°F or 220°C) and continue baking uncovered for another 10-15 minutes, or until the crust is a deep golden brown and the internal temperature reaches around 200-210°F (93-99°C) when measured with an instant-read thermometer. This final uncovered period develops the crispy, beautiful crust.
Tips for Baking Perfect No-Knead Whole Wheat Bread
Achieving a Crispy Crust: Secrets Revealed
A hallmark of great no-knead bread is a wonderfully crispy crust, and there are a few key factors that contribute to this. The most important is baking at a high temperature, ideally in a preheated Dutch oven or similar lidded pot. Preheating the pot to 450°F (230°C) creates immediate intense heat around the dough, causing it to spring up quickly and the outer layer to start setting.
Baking the loaf covered for the first 30-35 minutes is equally vital. The trapped steam keeps the surface of the dough moist and pliable, allowing it to expand fully before the crust forms. Once the lid is removed for the final 10-15 minutes, the dry, hot air of the oven hits the now-expanded loaf, evaporating the surface moisture and creating that desirable crackly, golden-brown crust. Ensuring the loaf is baked through to an internal temperature of 200-210°F (93-99°C) also helps dry out the crumb near the crust, contributing to its crispness.
Troubleshooting Common No-Knead Bread Issues
Even with an easy no knead whole wheat recipe, you might encounter a few common snags. If your dough doesn't rise much during the long fermentation, the most likely culprits are inactive yeast or water that was too hot or too cold. Ensure your yeast is fresh (check the expiry date!) and your water is warm, around 100-110°F (38-43°C). If the dough is too sticky to handle after the first rise, don't be afraid to use a bit more flour on your hands and work surface during shaping, but avoid incorporating excessive amounts into the dough itself.
Another issue could be a dense loaf. This can happen if the dough didn't ferment long enough, if you handled it too roughly during shaping (punching out all the air), or if the oven wasn't preheated sufficiently, especially the pot. Ensure your first rise is the full 12-18 hours and your pot is screaming hot before adding the dough. Baking uncovered for too short a time can result in a pale, soft crust; bake until it's a deep golden brown. Patience and proper temperature are your best friends for a successful easy whole wheat bread.
Variations and Add-Ins: Customize Your Loaf
This easy no knead whole wheat recipe is a fantastic base for experimentation. Once you've mastered the basic loaf, you can easily customize it with various add-ins. For a seedy bread, try incorporating 1/4 to 1/2 cup of seeds like sunflower, pumpkin, flax, or sesame seeds into the dough along with the dry ingredients. Toasting the seeds lightly before adding them can enhance their flavor.
You can also add dried fruits like cranberries or raisins, or chopped nuts like walnuts or pecans, for added texture and flavor. A small amount of honey or molasses (1-2 tablespoons) can be added to the warm water to slightly sweeten the loaf and give it a richer color. Just remember that adding extra ingredients might slightly affect the dough's hydration and rise time, but this forgiving recipe is generally quite adaptable to your creative additions.
Serving and Storing Your Homemade Whole Wheat Bread
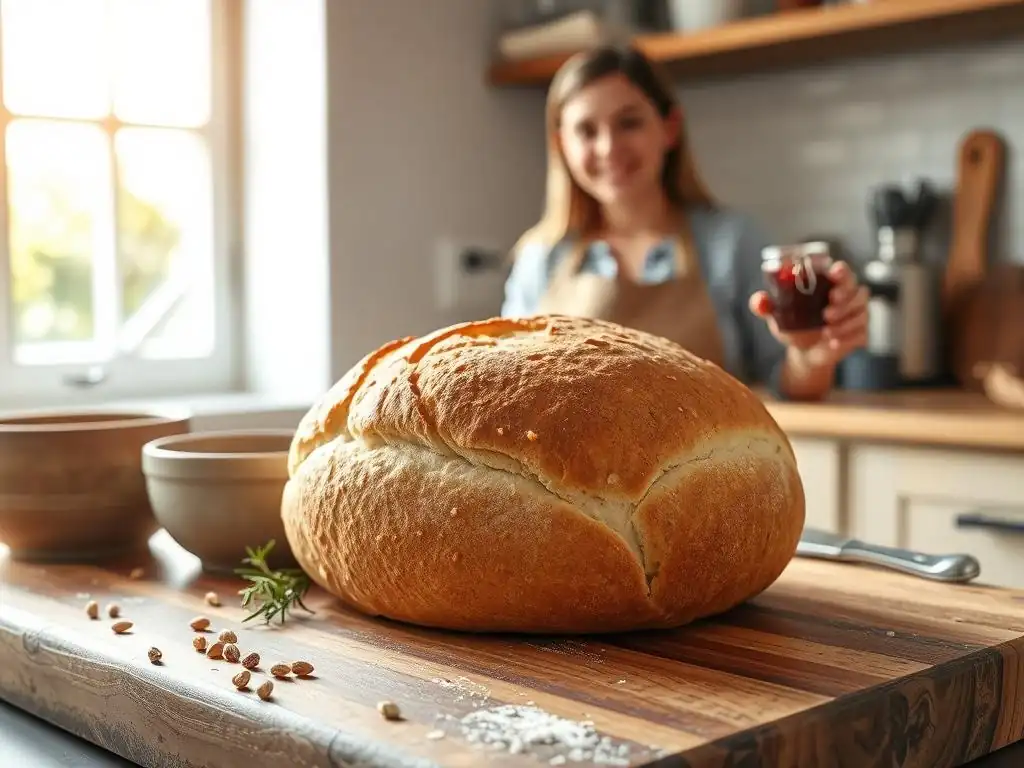
Enjoying Freshly Baked Bread
There's nothing quite like slicing into a warm loaf of homemade easy no knead whole wheat bread. The aroma, the texture, the taste – it's a simple pleasure. Allow the bread to cool on a wire rack for at least 30-60 minutes after taking it out of the oven before slicing. Slicing too early can result in a gummy texture inside because the internal structure is still setting.
Serve warm slices with butter, jam, or your favorite spread. It's also fantastic for sandwiches, toast, or alongside soups and stews. The slightly dense yet tender crumb and the hearty flavor of the whole wheat make it incredibly versatile. Share it with family and friends; the effortlessness of this recipe makes it easy to bake often and enjoy fresh bread regularly.
Storing for Optimal Freshness
To keep your easy whole wheat bread fresh, store it correctly. Once completely cooled, the best way to store it is at room temperature. Avoid refrigerating bread, as this can actually make it go stale faster due to a process called starch retrogradation.
For short-term storage (1-2 days), simply place the cut side down on a cutting board or store the whole loaf in a paper bag. For longer storage (up to 3-4 days), wrap the cooled loaf tightly in plastic wrap or beeswax wrap, or place it in a bread box or airtight container. If you won't finish the loaf within a few days, slicing it and freezing the slices in a freezer bag is an excellent option. Frozen slices can be quickly toasted straight from the freezer, giving you that fresh-baked taste anytime.
Mastering the Art of Baking: Beyond No-Knead
Exploring Other Whole Wheat Bread Recipes
While this easy no knead whole wheat recipe is a fantastic starting point and a staple for its simplicity, the world of whole wheat bread baking is vast and rewarding. Once you feel comfortable with this method, you might be interested in exploring other techniques that offer different textures and flavors. Recipes involving a short kneading time, using a stand mixer, or incorporating sourdough starter can yield loaves with different crumb structures, crust characteristics, and deeper fermentation flavors.
Consider trying recipes with different hydration levels – a wetter dough can often result in a more open, airy crumb, though it can be stickier to handle. Experimenting with different types of whole wheat flour (like hard red spring or soft white whole wheat) or blending whole wheat with other flours (like spelt or rye) can also open up new dimensions of flavor and texture. Each method and variation offers a unique baking experience and a delicious result, building upon the fundamental skills you've gained with this easy no knead whole wheat technique.
Exploring Other Bread Recipes on BakeWithEase.com
Frequently Asked Questions
What exactly makes this recipe "no-knead"?
This recipe eliminates the need for traditional kneading by utilizing a long, slow fermentation process. The time and moisture do the work for you, developing the gluten naturally, creating a delicious and easy bread.
Is this recipe truly "easy" for beginner bakers?
Yes, it is! The recipe features simple instructions and readily available ingredients. The "no-knead" method simplifies the process, making it very approachable for beginners.
Why use whole wheat flour in a "no-knead" bread?
Whole wheat flour adds a nutty flavor and increased fiber to the bread. This recipe is formulated to handle whole wheat's density, creating a lighter, more flavorful loaf compared to some traditional whole wheat recipes.
How long does the dough need to rise?
The dough requires a long, slow rise, typically 12-18 hours at room temperature. This extended fermentation is crucial for developing flavor and a good texture, and allows for gluten development without kneading.
What equipment do I need to bake this "easy no-knead whole wheat" bread?
You'll need a large bowl, a Dutch oven or oven-safe pot with a lid, and basic measuring tools. A Dutch oven is essential for trapping steam and creating a crusty exterior, but is often the only specialized equipment required.
Final Reflection: The Humble Loaf and the Joy of Simple Baking
The ease of making delicious, wholesome bread shouldn't be a culinary secret. This recipe proves that crafting a perfect loaf of whole wheat bread doesn't require hours of kneading or specialized equipment. In a world increasingly focused on convenience, rediscovering the simple pleasures of baking – and the satisfaction of creating something nourishing from scratch – is more important than ever.
The enduring appeal of homemade bread transcends mere sustenance; it's a connection to tradition, a symbol of comfort, and a testament to the power of simple ingredients transformed. Bread is the staff of life,
a phrase often repeated, speaks to its fundamental role in human history and culture. This recipe, in its simplicity, allows us to reconnect with that history, to appreciate the process, and to share the resulting joy with loved ones. It's a small act of creation that brings immense satisfaction.
Now, I invite you to try this recipe. Don't be intimidated by the "whole wheat" label; this recipe makes it approachable. Take your time, savor the process, and experience the profound satisfaction of creating something delicious and healthy with your own hands. The aroma alone is worth the effort, but the taste? That's the reward that will keep you coming back for more. Let this be your starting point for a deeper connection with the art of baking and the simple pleasures of life.
Unleash Your Inner Baker: Bake the Perfect Loaf Today!
Thanks for taking the time to explore our easy no-knead whole wheat bread recipe! We hope you learned how simple and rewarding baking can be. Ready to transform your kitchen into a fragrant bakery?
- Bake your own loaf: Grab those ingredients and follow the recipe – you'll be amazed at how delicious and satisfying homemade bread is!
- Share your baking journey: Snap a picture of your finished loaf and share it with us on social media – tag #BakeWithEase and inspire others!
- Try a variation: Experiment with different seeds, herbs, or even add some dried fruit to create your signature bread.
So, what delicious adventure will your first no-knead loaf take you on?