
How to Bake Sourdough Pumpernickel Bread

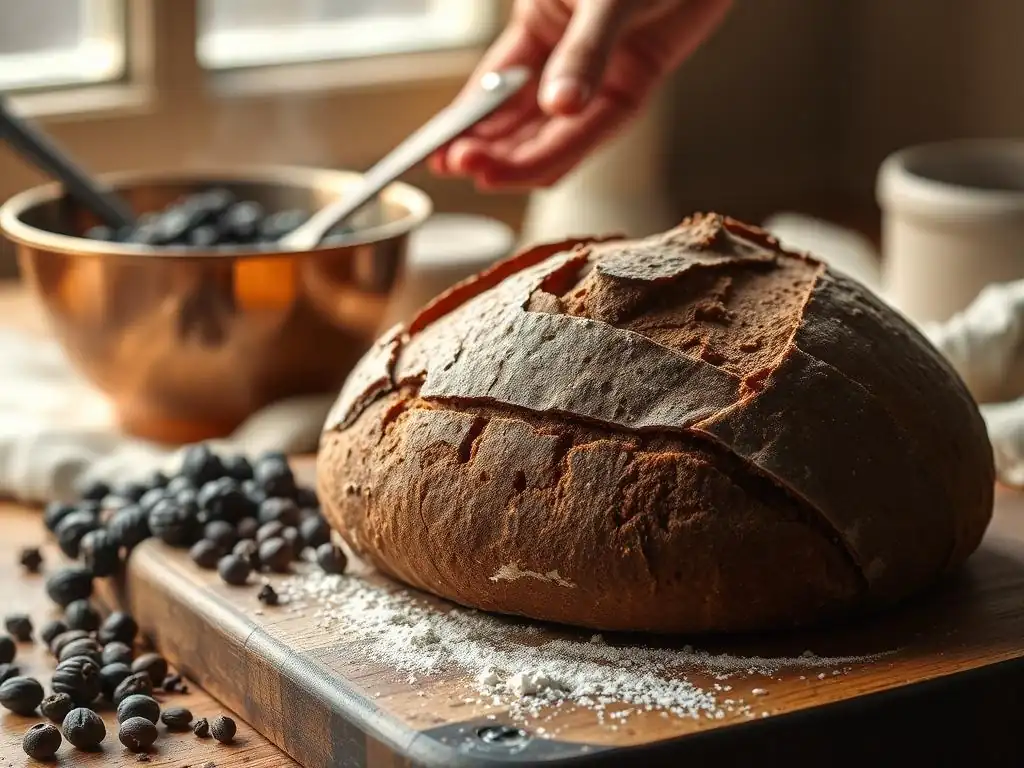
Welcome to BakeWithEase, your trusted guide to unlocking the delicious world of baking! Ever dreamt of creating that perfect, deeply flavorful loaf? Then you're in the right place. Get ready to embark on a rewarding baking adventure with our easy sourdough pumpernickel bread recipe. Discover the secrets to achieving that rich, dark crust and satisfying chew, and prepare to impress your friends and family. Curious to learn how? Let's get baking!
- Easy Sourdough Pumpernickel Bread Recipe: BakeWithEase Guide
- Introduction: Mastering Sourdough Pumpernickel at Home
- Understanding Sourdough Pumpernickel: Ingredients and Equipment
- Step-by-Step: Baking Your Easy Sourdough Pumpernickel Bread
- Tips and Tricks for Perfect Sourdough Pumpernickel
- Storing and Serving Your Sourdough Pumpernickel
- Conclusion: Enjoying Your Homemade Sourdough Pumpernickel Bread
-
Frequently Asked Questions
- How long does it take to make sourdough pumpernickel bread from start to finish?
- What makes sourdough pumpernickel bread different from regular pumpernickel bread?
- Can I substitute ingredients in the easy sourdough pumpernickel bread recipe?
- What is the best way to store sourdough pumpernickel bread to keep it fresh?
- Why is my sourdough pumpernickel bread dense and not rising properly?
- Final Reflection: The Unexpected Joys of Sourdough Pumpernickel
- Unleash Your Inner Baker: Craft the Perfect Pumpernickel!
Easy Sourdough Pumpernickel Bread Recipe: BakeWithEase Guide
Introduction: Mastering Sourdough Pumpernickel at Home
Welcome to BakeWithEase: Your Guide to Baking Delicious Bread
Welcome to BakeWithEase, your friendly corner of the internet dedicated to making baking accessible and enjoyable for everyone. Whether you're just starting your baking journey or looking to perfect specific techniques, we're here to guide you through the process. Our mission is to demystify complex recipes and help you create delicious baked goods right in your own kitchen. This guide will walk you through crafting a delightful easy sourdough pumpernickel bread recipe, a loaf known for its deep flavor and satisfying texture.
Baking sourdough pumpernickel might sound intimidating, especially if you're new to sourdough, but with our step-by-step approach, you'll find it's quite achievable. We break down each stage, from understanding the unique ingredients to mastering the fermentation process and achieving that perfect dark crust. By the end of this guide, you'll have the confidence and knowledge to bake this hearty, flavorful bread that’s perfect for sandwiches or simply enjoyed with butter. Let's get started on your journey to creating a fantastic homemade pumpernickel loaf.
Why Bake Sourdough Pumpernickel? Flavor and Texture Explained
Sourdough pumpernickel bread offers a unique and deeply satisfying flavor profile that sets it apart from many other loaves. Its characteristic taste comes primarily from the high proportion of rye flour used, often combined with dark molasses or other sweeteners and sometimes coffee, which contribute to its rich color and complex, slightly sweet, and earthy notes. The sourdough fermentation process adds a pleasant tang that complements the rye beautifully, creating a balance of flavors that is both robust and nuanced.
Beyond flavor, the texture of sourdough pumpernickel is distinctively dense and moist, yet not heavy or gummy when baked correctly. This texture is a result of the rye flour, which behaves differently than wheat flour due to its lower gluten content. While a typical wheat loaf might have large, open holes, pumpernickel has a tighter crumb. An easy sourdough pumpernickel bread recipe aims to maximize moisture retention and develop a tender crumb structure through careful hydration and fermentation, resulting in a bread that slices cleanly and holds up wonderfully to various toppings.
Understanding Sourdough Pumpernickel: Ingredients and Equipment
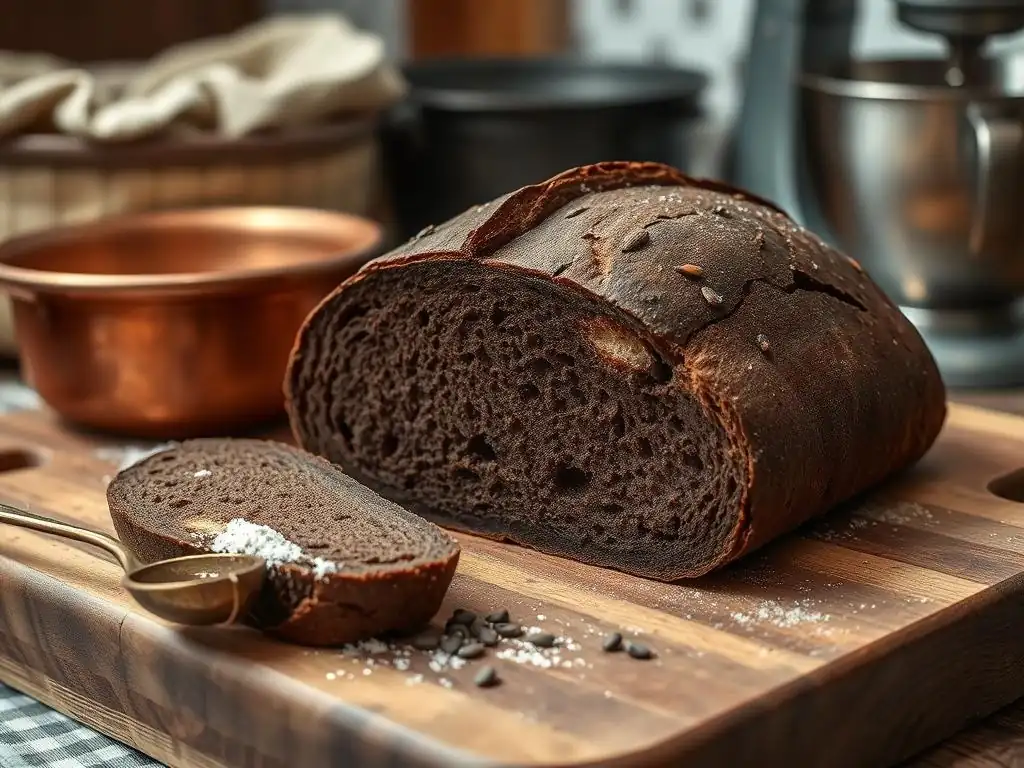
Essential Ingredients for Authentic Pumpernickel
Rye Flour: The Key to Pumpernickel's Distinct Flavor
Rye flour is the cornerstone of any authentic pumpernickel bread recipe, contributing its signature color, flavor, and texture. Unlike wheat flour, rye contains less gluten, meaning doughs made with high percentages of rye are stickier and denser. There are different types of rye flour, including light, medium, and dark, with dark rye being the most common for traditional pumpernickel due to its rich color and stronger flavor profile. A typical pumpernickel might use a blend, perhaps 60-80% dark rye with some bread flour to aid structure.
The quality and freshness of your rye flour significantly impact the final bread. Aged rye flour, for example, can sometimes lead to doughs that are difficult to handle. Aim for freshly milled or recently purchased dark rye flour from a reputable source. The pentosans in rye flour also play a crucial role in moisture retention, contributing to the characteristic moist crumb of pumpernickel. Using a high percentage of quality rye flour is essential for achieving that deep, earthy flavor and dense, yet tender, texture that defines this bread.
Sourdough Starter: Cultivating Your Own
A healthy, active sourdough starter is fundamental to baking any sourdough bread, including an easy sourdough pumpernickel bread recipe. The starter, a mix of flour and water fermented by wild yeast and bacteria, provides the leavening for the bread while also developing complex flavors through the production of organic acids. For pumpernickel, a mature and vigorous starter is particularly helpful in lifting the dense rye dough. You can cultivate your own starter from scratch or obtain a portion from a fellow baker.
Maintaining your starter involves regular feeding with flour and water, typically at a 1:1:1 ratio by weight (starter:water:flour). A starter is ready for baking when it has doubled or tripled in volume within 4-6 hours after feeding and shows numerous bubbles. You can test its readiness with the float test: drop a small spoonful into water; if it floats, it's active enough. Using a robust starter ensures proper rise and contributes the essential sourdough tang that balances the richness of the rye.
Molasses and Coffee: Adding Depth and Color
Molasses is a traditional ingredient in many pumpernickel recipes, serving multiple purposes. It provides sweetness, contributes to the bread's signature dark brown color, and adds a layer of deep, slightly bitter complexity that complements the rye flavor profile beautifully. Dark molasses is typically preferred for its stronger flavor and color contribution. Just a few tablespoons in a loaf can make a significant difference in both appearance and taste.
Similarly, brewed coffee is often used as part of the liquid in pumpernickel dough. Like molasses, it deepens the color of the crumb and crust. Furthermore, coffee subtly enhances the earthy notes of the rye flour and the tang of the sourdough, adding another dimension to the overall flavor. Using strong brewed coffee instead of just water for a portion of the liquid is a common technique to achieve that authentic pumpernickel depth and richness.
Caraway Seeds: The Traditional Pumpernickel Spice
Caraway seeds are arguably the most iconic spice associated with pumpernickel bread, providing a distinct aromatic and slightly peppery flavor. These small seeds are typically added whole directly into the dough during mixing. Their flavor is potent, so the amount used can be adjusted to personal preference, but they are essential for that classic pumpernickel taste.
While caraway is traditional, some recipes might incorporate other spices like fennel or anise for variations, but caraway remains the standard. The seeds not only contribute flavor but also a pleasant texture contrast within the dense crumb. For an authentic easy sourdough pumpernickel bread recipe, don't skip the caraway seeds – they are key to achieving the characteristic aroma and taste that so many associate with this hearty rye loaf.
Equipment Needed for Baking Sourdough Pumpernickel
Dutch Oven or Baking Stone: For Optimal Crust
To achieve a fantastic crust on your easy sourdough pumpernickel bread, using a Dutch oven or a baking stone with steam is highly recommended. A preheated Dutch oven creates a contained environment that traps steam released from the dough during the initial stages of baking. This steam keeps the surface moist, allowing the loaf to expand fully before the crust sets, resulting in a lighter crumb and a beautifully browned, crisp crust. A 5-quart or larger Dutch oven is typically suitable for a standard loaf.
Alternatively, baking on a preheated baking stone or steel can also yield excellent results, especially when combined with a method for generating steam in your oven. This could involve placing a tray of hot water on a rack below the stone or adding ice cubes to a hot pan. The intense heat from the stone helps create a good oven spring and a crisp bottom crust. Both methods aim to replicate the conditions of a professional bread oven, which is crucial for achieving a well-baked loaf with a desirable crust.
Banneton Basket: Shaping Your Loaf
A banneton basket, also known as a proofing basket, is a valuable tool for shaping and proofing your sourdough pumpernickel loaf. These baskets, typically made from cane or wood pulp, are dusted with flour (often rice flour to prevent sticking) and provide structure to the dough during its final rise. The basket helps the dense pumpernickel dough maintain its shape as it proofs, preventing it from spreading outwards before baking.
Using a banneton also allows you to easily invert the dough onto your baking surface. The spiral pattern from a cane banneton can also impart an attractive design on the crust, though this is less prominent on the dark surface of pumpernickel. Choose a size appropriate for your loaf weight, commonly around 8-10 inches in diameter for a 1kg loaf. Properly flouring the banneton is key to ensuring your dough releases easily.
Kitchen Scale: Precise Measurements for Success
Precision is paramount in baking, especially when working with sourdough and high-hydration doughs like pumpernickel. Using a kitchen scale to weigh your ingredients ensures accuracy, which is far more reliable than volume measurements (cups and spoons), as flour density can vary significantly. A digital kitchen scale that measures in grams is ideal and widely accessible, often available for $20-40.
Weighing ingredients, including flour, water, starter, and even smaller additions like salt and molasses, guarantees you are using the correct ratios specified in your easy sourdough pumpernickel bread recipe. This consistency helps ensure predictable results batch after batch, leading to better dough handling, fermentation, and ultimately, a perfectly baked loaf. Investing in a good kitchen scale is one of the most impactful steps you can take to improve your baking success.
Step-by-Step: Baking Your Easy Sourdough Pumpernickel Bread
Step 1: Preparing Your Sourdough Starter
Feeding Your Starter for Optimal Rise
Before you begin mixing your sourdough pumpernickel dough, ensure your sourdough starter is active and vigorous. This typically means feeding it 4-12 hours before you plan to mix, allowing it time to become bubbly and reach its peak activity. A standard feeding ratio is 1:1:1 by weight – one part starter, one part water, and one part flour. For example, you might feed 50 grams of starter with 50 grams of warm water (around 80°F or 27°C) and 50 grams of flour (often a mix of bread flour and rye or whole wheat).
After feeding, leave the starter at room temperature (ideally 70-75°F or 21-24°C) in a clear container so you can monitor its progress. It should show significant activity, with bubbles forming throughout and on the surface, and it should roughly double or triple in size within the feeding period. Using your starter when it is at or just past its peak ensures it has the necessary leavening power to lift the relatively dense pumpernickel dough, which is crucial for a good crumb structure.
Testing Starter Activity: The Float Test
A simple and effective way to confirm your sourdough starter is ready for baking is the float test. This test assesses the gas production within the starter, indicating its readiness to leaven bread. To perform the test, gently scoop a small amount of your recently fed starter with a spoon – you want a piece from the top that hasn't been disturbed too much – and drop it into a glass of room temperature water.
If the starter is active and full of gas, it will float on the surface of the water. This means it's light and airy enough to make your dough rise. If it sinks to the bottom, it likely needs more time to ferment and build up gas, or it might need a few more consistent feedings to strengthen. Performing the float test gives you confidence that your starter is ready to tackle the job of leavening your easy sourdough pumpernickel bread recipe.
Step 2: Mixing the Pumpernickel Dough
Combining Ingredients: Wet and Dry
Mixing the dough for an easy sourdough pumpernickel bread recipe begins by combining the wet ingredients with the dry ingredients. In a large mixing bowl, you'll typically whisk together the flours (rye and any wheat flour), salt, and caraway seeds. In a separate bowl or directly with the flours, you'll combine the active sourdough starter, warm water (or coffee), and molasses. The temperature of the liquid is important; around 80-85°F (27-29°C) is often ideal as it helps the dough temperature reach a good range for fermentation, typically aiming for a final dough temperature around 75-78°F (24-26°C).
Pour the wet mixture into the dry ingredients and mix using a sturdy spoon or a stand mixer with a dough hook until just combined. Rye doughs are notoriously sticky, and they don't develop gluten in the same way wheat doughs do, so vigorous kneading is less necessary. Focus on incorporating all the ingredients until no dry pockets of flour remain. The dough will be quite sticky and dense compared to a typical wheat dough, which is perfectly normal for pumpernickel.
Autolysing the Dough: Enhancing Texture
Autolysis is a simple technique that can significantly improve the texture and handling of sourdough dough, even those with high percentages of rye. After the initial mixing of flour and liquid (including the starter, but often excluding salt and sometimes molasses), let the mixture rest for 20-60 minutes. During this rest period, the flour absorbs the liquid more fully, and enzymatic activity begins to break down proteins, starting gluten development without any manual effort.
For a sourdough pumpernickel dough, autolysis helps the rye flour hydrate properly and makes the subsequent folding steps easier, despite the inherent stickiness. After the autolyse period, you'll add the remaining ingredients, such as salt and molasses, and mix them in thoroughly. This resting step contributes to a smoother dough and can lead to a more open (for a rye dough) and tender crumb structure in the final easy sourdough pumpernickel bread recipe loaf.
Step 3: Bulk Fermentation (First Rise)
Folding the Dough: Developing Strength
Bulk fermentation, or the first rise, is a crucial period where the sourdough starter works to leaven the dough and develop flavor. During this stage, which might last anywhere from 3 to 6 hours at room temperature (around 70-75°F or 21-24°C) depending on your starter's activity and ambient temperature, you'll perform a series of folds. Because rye dough is less elastic than wheat dough, the folding technique is slightly different; you are less focused on gluten development and more on building structure and incorporating air.
Perform 3-4 sets of stretch and folds or coil folds during the first 1-2 hours of bulk fermentation, spaced 30-45 minutes apart. Lightly wet your hands to prevent sticking. For a stretch and fold, gently stretch a portion of the dough up and fold it back over itself.
Rotate the bowl and repeat several times. For a coil fold, lift the dough from the middle with wet hands, allowing the ends to fold underneath. These folds help distribute the yeast and bacteria, build some tension, and equalize the dough temperature, contributing to a better rise in your easy sourdough pumpernickel bread recipe.
Monitoring Dough Volume and Air Pockets
Throughout bulk fermentation, it's important to monitor the dough's progress. While a wheat dough might double in volume, rye doughs are denser and typically won't show such dramatic growth. Look for an increase in volume of about 30-50% for a high-rye pumpernickel. You should also observe the formation of small bubbles on the surface and throughout the dough when looking at the sides of the container.
Poke a wet finger gently into the dough; it should slowly spring back but leave a slight indentation (the "poke test"). If it springs back immediately, it needs more time. If it collapses easily, it might be over-fermented. Keeping track of time and temperature is key, but visual cues and the poke test are your best indicators of when bulk fermentation is complete and the dough is ready for shaping for your easy sourdough pumpernickel bread recipe. Over-fermenting can lead to a gummy texture and overly sour flavor.
Step 4: Shaping the Pumpernickel Loaf
Pre-Shaping for Roundness
After bulk fermentation, gently turn the dough out onto a lightly floured surface. Rye doughs are sticky, so use minimal flour and handle the dough gently to avoid degassing it too much. The goal of pre-shaping is to create some initial tension and make the final shaping step easier. For a boule (round) loaf, gently coax the dough into a rough round shape using a bench scraper or your hands, pulling the edges underneath to create a taut surface.
Allow the pre-shaped dough to rest for 15-20 minutes, uncovered. This short rest period, called the bench rest, allows the dough to relax after handling, making it more pliable for the final shaping. Skipping this step can make the dough resistant and difficult to shape effectively, leading to a loaf that doesn't hold its form well during proofing and baking. This brief pause is a simple yet effective technique for improving the outcome of your easy sourdough pumpernickel bread recipe.
Final Shaping and Placing in Banneton
The final shaping step is where you give the dough its final form before proofing. For a boule, gently flatten the rested dough into a rough circle. Then, fold the sides into the center like an envelope, or pull the top edge down to the middle, then the bottom edge up, and finally bring the sides together, creating tension on the surface as you seal the seams. You can also use a bench scraper to tuck the dough under, creating a tight skin on top. The goal is a smooth, taut surface and a sealed bottom seam.
Generously flour your banneton basket, preferably with rice flour which is less likely to be absorbed by the dough. Carefully transfer the shaped loaf into the banneton, seam-side up if you plan to bake seam-side down, or seam-side down if you will invert it to bake seam-side up (allowing the natural seams to open). Ensure the dough fits snugly but not too tightly in the basket. The banneton provides crucial support for the relatively soft rye dough during proofing, helping it maintain its shape for your easy sourdough pumpernickel bread recipe.
Step 5: Proofing the Dough (Second Rise)
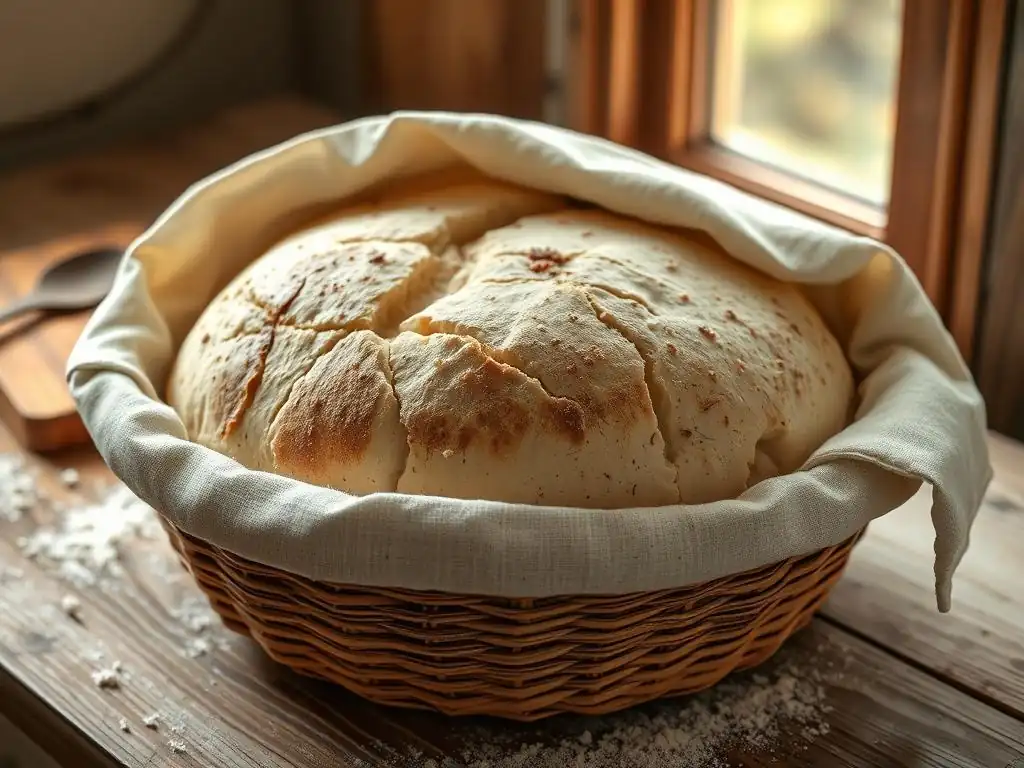
Cold Proofing in the Refrigerator: Developing Flavor
Cold proofing in the refrigerator is the preferred method for developing complex flavors in sourdough bread, including pumpernickel. Place the banneton with the shaped dough inside a plastic bag or cover it tightly with plastic wrap to prevent drying. Refrigerate at a temperature between 38-40°F (3-4°C) for a minimum of 8-12 hours, and often up to 24 hours or even longer. This slow, cold fermentation significantly enhances the sourness and overall depth of flavor in the bread.
The cold also slows down the yeast activity considerably while allowing the lactic acid bacteria to continue producing acids, which contribute to both flavor and the dough's structure. While the dough won't increase dramatically in volume in the fridge, it will become slightly puffier and more relaxed. Cold proofing makes the dough easier to handle and score just before baking. This extended fermentation is a key reason why homemade sourdough pumpernickel often has a more profound taste than commercially produced versions.
Room Temperature Proofing: A Faster Option
If you're short on time, you can proof your sourdough pumpernickel dough at room temperature for the second rise, although this will result in a less complex flavor compared to cold proofing. After shaping, place the dough in the floured banneton and cover it. Let it proof at room temperature (around 70-75°F or 21-24°C) for approximately 1-3 hours. The exact time will depend heavily on the ambient temperature and the dough's temperature.
Monitor the dough closely during room temperature proofing. It should become visibly puffier and feel soft and airy when gently poked (the poke test should show a slow spring back, leaving a small indentation). Be careful not to overproof, as this can lead to a loaf that collapses in the oven or has a dense, gummy texture. Room temperature proofing is a viable option for an easy sourdough pumpernickel bread recipe when time is of the essence, but for maximum flavor development, cold proofing is superior.
Step 6: Baking the Sourdough Pumpernickel
Preheating Your Dutch Oven or Baking Stone
Properly preheating your oven and baking vessel is critical for achieving a good oven spring and a beautiful crust on your easy sourdough pumpernickel bread. If using a Dutch oven, place it with the lid inside your oven and preheat to a high temperature, typically between 450-475°F (230-245°C), for at least 45-60 minutes. This ensures the cast iron is thoroughly heated, providing a strong initial burst of heat to the dough.
If using a baking stone or steel, place it on a rack in the oven and preheat to the same temperature for the same amount of time. You'll also need to prepare your steam setup if not using a Dutch oven. The high heat from the preheated surface helps the dough expand rapidly before the crust sets, leading to a better rise and crumb structure. Do not shorten the preheating time; it's essential for a successful bake.
Scoring the Loaf: Controlling Expansion
Just before placing the dough into the hot oven, you need to score it. Scoring involves making shallow cuts on the surface of the loaf using a sharp razor blade (called a "lame") or a very sharp knife. These cuts serve a crucial purpose: they control where the dough expands during oven spring. Without scoring, the crust would likely tear unpredictably as the dough expands internally from the heat.
For pumpernickel, simple scores are often best. A single slash across the top, a cross shape, or parallel lines are common. The depth of the score should be about 1/4 to 1/2 inch deep. Scoring allows the steam to escape in a controlled manner and helps achieve a better shape and rise. Work quickly but confidently when scoring the cold dough from the refrigerator, as this will make the cuts cleaner. Proper scoring contributes significantly to the final appearance and structure of your easy sourdough pumpernickel bread recipe.
Baking Temperature and Time: Achieving a Dark Crust
Baking sourdough pumpernickel typically involves baking at high heat initially to achieve good oven spring, followed by a period at a slightly lower temperature to ensure the interior is cooked through and the crust develops its characteristic dark color. If using a Dutch oven, bake the loaf, covered, at 450-475°F (230-245°C) for the first 20-25 minutes. This covered period traps steam, mimicking a steam injection oven, which is vital for crust development and expansion.
After the initial covered bake, remove the lid and reduce the oven temperature to around 425-450°F (220-230°C). Continue baking for another 25-35 minutes, or until the crust is deeply browned and the internal temperature of the loaf reaches 200-210°F (93-99°C). The total bake time for a 1kg loaf is typically 45-60 minutes. The dark color is key to pumpernickel; don't be afraid of a dark crust, as this contributes to the flavor.
Step 7: Cooling and Slicing Your Pumpernickel
Allowing the Bread to Cool Completely
Once your easy sourdough pumpernickel bread is baked, it's absolutely essential to let it cool completely on a wire rack before slicing. This is perhaps the most challenging step for impatient bakers! While the bread is cooling, residual heat continues to cook the interior, and moisture redistributes throughout the loaf. Slicing into a hot loaf will result in a gummy, dense texture because the internal structure hasn't fully set.
A standard-sized loaf of pumpernickel typically needs to cool for at least 2-4 hours, and ideally longer, especially for a high-rye content loaf which holds more moisture. The loaf should feel cool to the touch before you attempt to slice it. Patience during this cooling period is rewarded with a much better texture and overall eating experience from your homemade pumpernickel.
Slicing and Enjoying Your Homemade Pumpernickel
After the long wait, your easy sourdough pumpernickel bread is ready to be sliced and enjoyed! Use a sharp serrated bread knife for clean cuts through the dense crumb and sturdy crust. Slice the loaf to your desired thickness. The aroma released as you cut into the bread is one of the most satisfying parts of the baking process.
Pumpernickel is incredibly versatile. Its rich flavor pairs wonderfully with strong cheeses, smoked meats, or pickled fish. It also makes a fantastic base for open-faced sandwiches. Many people enjoy it simply toasted with butter. Take a moment to appreciate the texture, the deep color, and the complex flavors you've created through the sourdough process. Enjoy the fruits of your labor!
Tips and Tricks for Perfect Sourdough Pumpernickel
Troubleshooting Common Pumpernickel Baking Problems
Dense Bread: Causes and Solutions
One of the most common issues when baking pumpernickel, especially for beginners, is a dense or gummy crumb. This can stem from several factors. An inactive sourdough starter is a primary culprit; if your starter wasn't vigorous enough, it wouldn't produce sufficient gas to leaven the heavy rye dough. Ensure your starter passes the float test or shows significant activity before mixing.
Another cause of density can be under-fermentation, either during the bulk rise or the final proof. Make sure your dough increases by the recommended volume (30-50% for pumpernickel) and passes the poke test. Over-handling the dough during shaping can also knock out too much precious air. Finally, slicing the bread before it has completely cooled is a sure way to end up with a gummy texture. Allowing it to cool for several hours is crucial for a proper set.
Sour Taste: Balancing Acidity
While a pleasant tang is characteristic of sourdough, sometimes the flavor can become overly sour or acidic. This is often related to fermentation temperature and duration. Longer, cooler bulk ferments (below 70°F or 21°C) tend to favor the production of acetic acid, which results in a sharper, more vinegary sourness. Warmer bulk ferments (75-80°F or 24-27°C) encourage lactic acid production, which yields a milder, yogurt-like tang.
If your bread is too sour, try adjusting your bulk fermentation temperature to be slightly warmer. You can also try reducing the total fermentation time slightly, or adjusting your starter feeding ratio to be higher (e.g., 1:2:2 or 1:3:3 starter:water:flour) which can make the starter less acidic before it's used. Experimenting with these factors can help you achieve the perfect balance of tang in your easy sourdough pumpernickel bread recipe.
Crust Issues: Achieving Perfect Color and Texture
Issues with the crust on sourdough pumpernickel can range from not getting dark enough to being too hard or not expanding properly. If your crust isn't dark enough, ensure you are using dark rye flour and incorporating molasses and potentially coffee into the dough, as these contribute significantly to the color. Also, make sure your oven is accurately calibrated and that you are baking at a sufficiently high temperature, especially during the uncovered phase.
A hard or thick crust can result from insufficient steam during the initial baking phase. Using a preheated Dutch oven or generating ample steam in your oven is essential for a tender crust that can expand properly. If the crust tears unpredictably instead of opening along your scores, the dough might be under-proofed, or your scores weren't deep enough. Achieving the ideal crust involves the right ingredients, proper hydration, effective steam, and correct scoring for your easy sourdough pumpernickel bread recipe.
Flavor Variations: Experimenting with Pumpernickel
Adding Different Spices: Anise, Fennel
While caraway seeds are traditional, you can easily experiment with other spices to create unique variations of your easy sourdough pumpernickel bread recipe. Anise seeds offer a distinct licorice-like flavor that pairs well with rye. Fennel seeds provide a slightly sweeter, aromatic taste. You can use these spices in addition to or instead of caraway, adjusting the quantity based on how pronounced you want the flavor to be.
A common approach is to use a mix, perhaps a tablespoon of caraway and a teaspoon of anise seeds per loaf. Toasting the seeds lightly in a dry pan before adding them to the dough can help release their aromatic oils and intensify their flavor. Exploring different spice combinations allows you to personalize your pumpernickel and discover new favorite variations.
Incorporating Raisins or Dried Fruit
Adding dried fruit, such as raisins or currants, is a popular variation that introduces sweetness and chewiness to the dense pumpernickel crumb. The sweetness of the fruit complements the earthy rye and the tang of the sourdough beautifully. Typically, about 1/2 to 1 cup of raisins or dried fruit is added to the dough during the mixing stage.
Soaking dried fruit in warm water, coffee, or even rum for 15-30 minutes before adding it to the dough can help plump them up and prevent them from absorbing moisture from the dough during baking, which can lead to a drier crumb around the fruit. Ensure the fruit is well-drained before incorporating it. This simple addition can transform a classic pumpernickel into a delightful sweet and savory loaf.
Storing and Serving Your Sourdough Pumpernickel
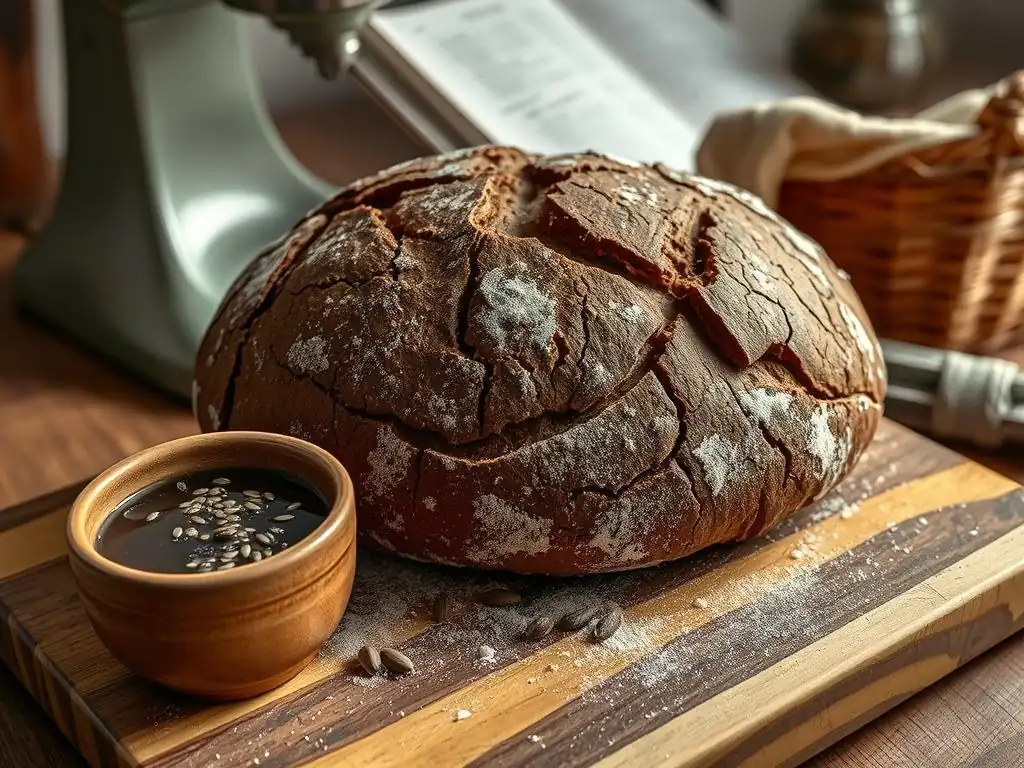
Proper Storage Techniques for Freshness
Proper storage is key to keeping your homemade easy sourdough pumpernickel bread fresh and delicious for as long as possible. Because of its dense, moist crumb, pumpernickel tends to stay fresh longer than many other bread types. Once completely cooled, store the loaf at room temperature.
Avoid refrigerating bread, as this can actually make it go stale faster due to a process called starch retrogradation. The best way to store pumpernickel is wrapped in a clean linen towel, a paper bag, or placed in a bread box. For longer storage, slice the cooled loaf and freeze the slices in an airtight bag or container. Frozen pumpernickel can last for several months and can be easily toasted directly from the freezer.
Serving Suggestions: Pairing with Cheese, Meat, and More
Sourdough pumpernickel bread's robust flavor profile makes it an excellent companion for a wide variety of foods. It pairs exceptionally well with strong, flavorful cheeses like sharp cheddar, aged gouda, or cream cheese. Its density holds up perfectly to hearty toppings.
Consider serving it with smoked salmon, pastrami, corned beef, or other cured meats. The tang of the sourdough and the earthiness of the rye provide a wonderful contrast to rich or salty foods. It's also delicious with pickled vegetables or sauerkraut. Don't forget simple pleasures like toasting a slice and topping it with butter and a sprinkle of salt. Get creative and explore your favorite pairings with your homemade easy sourdough pumpernickel bread recipe loaf.
Conclusion: Enjoying Your Homemade Sourdough Pumpernickel Bread
The Satisfaction of Baking Your Own Bread
There's a unique sense of accomplishment and satisfaction that comes from baking a loaf of bread from scratch, especially one as characterful as sourdough pumpernickel. From nurturing your starter to mixing the dough, witnessing the fermentation, shaping the loaf, and finally pulling that dark, fragrant bread from the oven – each step is rewarding. Holding the warm, heavy loaf you created with your own hands is a truly wonderful feeling.
Beyond the process, the taste of homemade pumpernickel is unparalleled. The depth of flavor achieved through the sourdough process and the careful selection of ingredients simply can't be replicated by mass-produced bread. Sharing a slice of your easy sourdough pumpernickel bread recipe loaf with friends and family, knowing the effort and care that went into it, makes the experience even more special.
BakeWithEase: Continuing Your Baking Journey
We hope this guide has demystified the process of baking sourdough pumpernickel and encouraged you to try this rewarding recipe. Baking is a journey of continuous learning and experimentation, and every loaf offers an opportunity to refine your skills. Don't be discouraged if your first attempt isn't perfect; even experienced bakers have challenges sometimes.
At BakeWithEase, we are committed to providing you with clear, easy-to-follow resources to help you succeed in your baking endeavors. Whether you want to explore other sourdough recipes, delve into pastry, or master cakes, we have guides and tips for every baker. Keep practicing, keep experimenting, and most importantly, keep enjoying the process of bringing delicious baked goods to life in your kitchen. Happy baking!
Frequently Asked Questions
How long does it take to make sourdough pumpernickel bread from start to finish?
The entire process, including active time and fermentation, typically takes around 24-36 hours. This is due to the sourdough starter needing time to rise and develop flavor.
What makes sourdough pumpernickel bread different from regular pumpernickel bread?
Sourdough pumpernickel uses a sourdough starter as its leavening agent, providing a tangy flavor and chewier texture. Regular pumpernickel often uses commercial yeast.
Can I substitute ingredients in the easy sourdough pumpernickel bread recipe?
While some substitutions are possible, be mindful of the impact on texture and flavor. For example, substituting flours can significantly alter the bread's structure.
What is the best way to store sourdough pumpernickel bread to keep it fresh?
Store it in an airtight container at room temperature or, for longer storage, slice and freeze. Properly stored, it can stay fresh for several days.
Why is my sourdough pumpernickel bread dense and not rising properly?
This could be due to a weak sourdough starter, under-proofing, or not enough moisture in the dough. Ensuring a strong starter and proper proofing are crucial.
Final Reflection: The Unexpected Joys of Sourdough Pumpernickel
The art of baking sourdough pumpernickel, once considered a niche pursuit, is experiencing a remarkable resurgence, proving that even seemingly complex recipes can be accessible and deeply rewarding. This isn't just about creating a delicious loaf; it's about connecting with a centuries-old tradition and finding a surprising source of calm and creativity in the kitchen.
The journey of crafting this dark, dense, and intensely flavorful bread has been a personal one, revealing the profound satisfaction found in nurturing a sourdough starter and patiently guiding the dough through its transformation. The process itself, with its rhythmic kneading and watchful waiting, offers a meditative quality that's often lost in the rush of modern life. The best things in life are worth waiting for,
and this couldn't be truer for sourdough pumpernickel. The rich, complex flavor that emerges is a testament to patience and precision, a reward that far surpasses the effort involved.
Now, I invite you to embark on your own sourdough pumpernickel adventure. Don't be intimidated by the seemingly long process; embrace the journey. Each step, from feeding your starter to shaping the loaf, is an opportunity to connect with the ingredients, the process, and ultimately, yourself. The resulting bread, a testament to your dedication, will be a delicious reward, but the true satisfaction lies in the journey itself. So, gather your ingredients, find your rhythm, and discover the unexpected joys that await you in the world of sourdough pumpernickel.
Unleash Your Inner Baker: Craft the Perfect Pumpernickel!
Thanks for joining us on this sourdough pumpernickel journey! We hope you've gained valuable insights and are feeling inspired to create something truly delicious. Ready to take your baking skills to the next level?
- Bake your own pumpernickel: We know you can do it! Use the recipe and tips from the article as your guide. Don't be afraid to experiment with different flours or additions to make it your own.
- Share your creation: Snap a photo of your beautiful loaf and share it on social media using #BakeWithEasePumpernickel. Let's inspire other bakers!
- Explore more sourdough adventures: Dive deeper into the world of sourdough with our other recipe collections on BakeWithEase.com (Though we won't tell anyone if you decide to bake another pumpernickel...)
What unique twist will you add to your next pumpernickel loaf? Let us know in the comments!