
Baking Rustic Bread on a Baking Steel or Stone

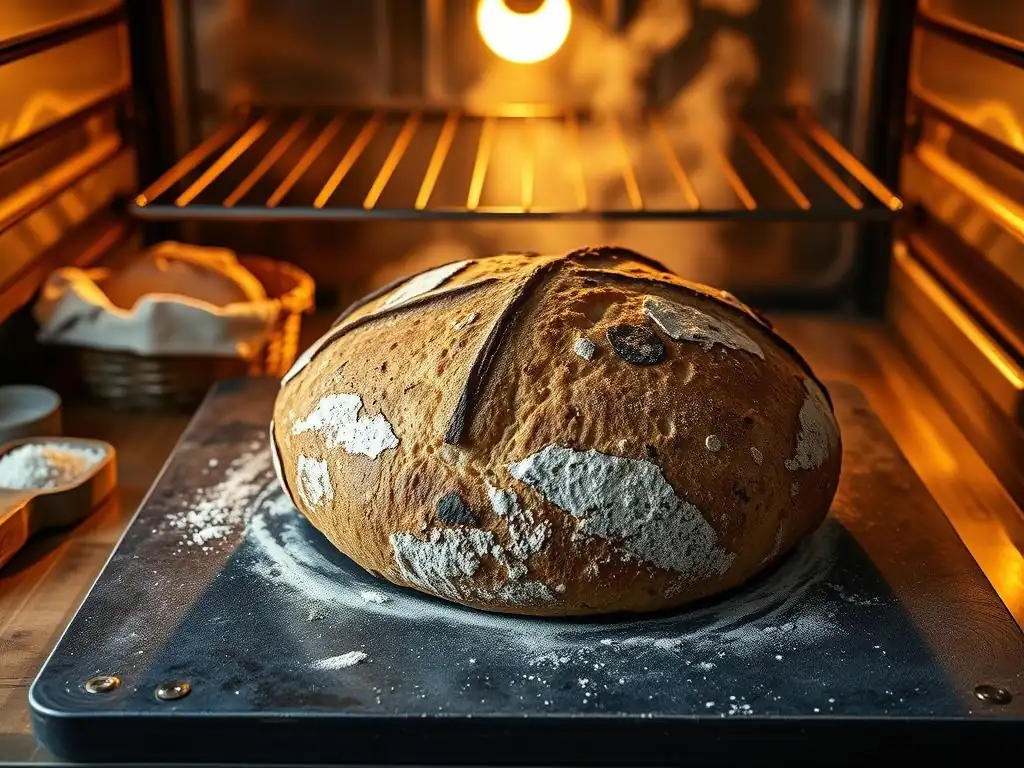
Welcome to BakeWithEase, your trusted companion on your baking journey! Ever wondered how to achieve that coveted, crispy crust and airy crumb of artisan bread at home? This article delves into the secrets of using a rustic bread baking steel (or stone!) to unlock bakery-quality results. Prepare to be amazed at how this simple tool can transform your homemade loaves, and discover the techniques that will elevate your bread baking skills to new heights. Let's get baking!
- Baking Rustic Bread on a Baking Steel or Stone: BakeWithEase Guide
- Introduction to Rustic Bread Baking with Steel and Stone
-
Understanding Baking Steels for Rustic Bread
- What is a Baking Steel and How Does it Work?
- Advantages of Using a Baking Steel for Rustic Bread Crust
- Choosing the Right Baking Steel: Thickness, Material, and Size
- What is a Baking Stone and How Does it Work?
- Advantages of Using a Baking Stone for Rustic Bread Baking
- Choosing the Right Baking Stone: Material, Shape, and Thickness
- Preparing Your Baking Steel or Stone for Rustic Bread
- Rustic Bread Recipe for Baking Steel or Stone
- Achieving the Perfect Rustic Bread Crust: Tips and Tricks
- Troubleshooting Common Rustic Bread Baking Issues
- Cleaning and Maintaining Your Baking Steel or Stone
- Advanced Rustic Bread Techniques for Baking Steel and Stone
- Conclusion: Elevate Your Rustic Bread Baking with Steel and Stone
-
Frequently Asked Questions
- What exactly is a baking steel, and why is it better than a baking stone for rustic bread?
- How do I properly preheat my baking steel for baking rustic bread?
- What type of rustic bread recipes work best with a baking steel?
- How do I prevent my rustic bread from sticking to the baking steel?
- How do I care for and clean my baking steel after baking rustic bread?
- Final Reflection: The Enduring Appeal of Rustic Bread, Perfected
- Unleash Your Inner Baker: Craft the Perfect Rustic Loaf!
Baking Rustic Bread on a Baking Steel or Stone: BakeWithEase Guide
Introduction to Rustic Bread Baking with Steel and Stone
Why Choose a Baking Steel or Stone for Rustic Breads?
Baking rustic bread at home often involves trying to replicate the intense heat and steam environment of a professional bakery oven. A key tool in achieving this is either a baking steel or a baking stone. These tools serve as thermal masses, absorbing and radiating heat efficiently, which is crucial for achieving a spectacular oven spring and a deeply caramelized, crisp crust – hallmarks of true artisan bread. Without a high-temperature surface to place your dough on, the bottom of the loaf can cook too slowly, resulting in a pale, soft crust instead of the desired dark, crackly base.
Using a baking steel or a baking stone elevates your rustic bread baking steel game significantly. They provide a consistent, high-temperature surface that immediately transfers heat to the base of your dough when it's placed in the oven.
This rapid heat transfer helps set the structure of the loaf quickly, promoting maximum expansion (oven spring) before the crust hardens. For example, a well-preheated baking steel or stone, sitting at 450-500°F (230-260°C), can initiate oven spring almost instantly upon contact, whereas a standard baking sheet might only be at the ambient oven temperature, leading to slower heat transfer and less dramatic rise.
BakeWithEase's Guide to Achieving Artisan Crust at Home
Achieving that perfect, crackly artisan crust on your rustic bread at home is a rewarding milestone for any baker. It requires not only the right dough formulation and fermentation but also the proper baking environment. At BakeWithEase, we believe that mastering the use of a baking steel or stone is a fundamental step in this journey. These tools, combined with effective steam generation, mimic the conditions found in professional deck ovens, which are specifically designed to produce breads with superior crusts and textures.
This guide will walk you through everything you need to know about using a baking steel or baking stone for your rustic bread. We'll cover the science behind how they work, help you choose the right one for your needs, detail preparation and usage, share a simple rustic bread recipe optimized for these tools, and provide essential tips for troubleshooting common issues.
For instance, understanding that a baking steel transfers heat roughly 18 times faster than a ceramic stone helps explain why it might give a slightly darker bottom crust or faster oven spring for some bakers aiming for that ultimate rustic bread baking steel result.
Understanding Baking Steels for Rustic Bread
What is a Baking Steel and How Does it Work?
A baking steel is essentially a thick plate made from solid steel, specifically designed for baking. Unlike ceramic stones, steel is an excellent conductor of heat and has a very high thermal mass, meaning it can absorb and retain a significant amount of heat from the oven. When you place your rustic bread dough directly onto a preheated baking steel, the intense heat is transferred rapidly and efficiently into the base of the loaf. This sudden burst of heat energy is what powers the initial rapid expansion of the dough, known as oven spring.
The mechanism is straightforward: as the oven heats up, the steel absorbs and stores that thermal energy. When the cooler dough makes contact, the steel releases this stored energy into the dough much faster than a conventional baking sheet or even a baking stone. This creates a powerful thermal shock to the base of the loaf, gelatinizing starches quickly and forming a solid base structure while the top and sides are still expanding. This rapid heat transfer is a key factor in achieving a robust oven spring and a beautifully blistered, crispy bottom crust on your rustic bread.
Advantages of Using a Baking Steel for Rustic Bread Crust
Using a baking steel offers several distinct advantages for baking rustic bread, particularly when it comes to crust development. Firstly, its superior heat conductivity leads to exceptional oven spring. The rapid transfer of heat into the dough causes the water within to instantly turn to steam, expanding the loaf dramatically before the crust sets. This often results in a taller, more open crumb structure. Many bakers report a noticeable difference in loaf volume when switching from a baking sheet to a steel.
Secondly, baking steels are incredibly durable. Unlike ceramic stones which can crack from thermal shock or accidental drops, a steel is virtually indestructible. You can drop it, expose it to extreme temperature changes, and it will remain intact. This durability makes it a long-term investment for your rustic bread baking steel setup. Furthermore, steel tends to create a very dark and crisp bottom crust, which is highly desirable for many rustic bread styles. The intense heat from the steel ensures the base is thoroughly baked and caramelized, providing a satisfying crunch with every bite.
Choosing the Right Baking Steel: Thickness, Material, and Size
When selecting a baking steel for your rustic bread baking, several factors come into play. Thickness is perhaps the most important, as it directly correlates to thermal mass. Steels typically range from 1/4 inch to 1/2 inch thick.
A thicker steel (e.g., 3/8" or 1/2") holds more heat and provides a more powerful heat transfer, leading to better oven spring and a darker crust, but also takes longer to preheat (potentially 60 minutes or more). A thinner steel (e.g., 1/4") heats up faster (maybe 30-40 minutes) and is lighter, which might be preferable if you struggle with weight, but offers slightly less thermal mass.
The material is typically low-carbon steel. Ensure it's food-grade and free of any coatings that aren't meant for high heat baking. Size should match your oven rack dimensions, leaving about an inch of space on all sides for air circulation. Standard sizes often fit a typical home oven (e.g., 15x15 inches or 14x16 inches). Consider the size of the loaves you typically bake; a larger steel allows you to bake bigger loaves or multiple smaller ones simultaneously, maximizing your rustic bread baking steel efficiency.
What is a Baking Stone and How Does it Work?
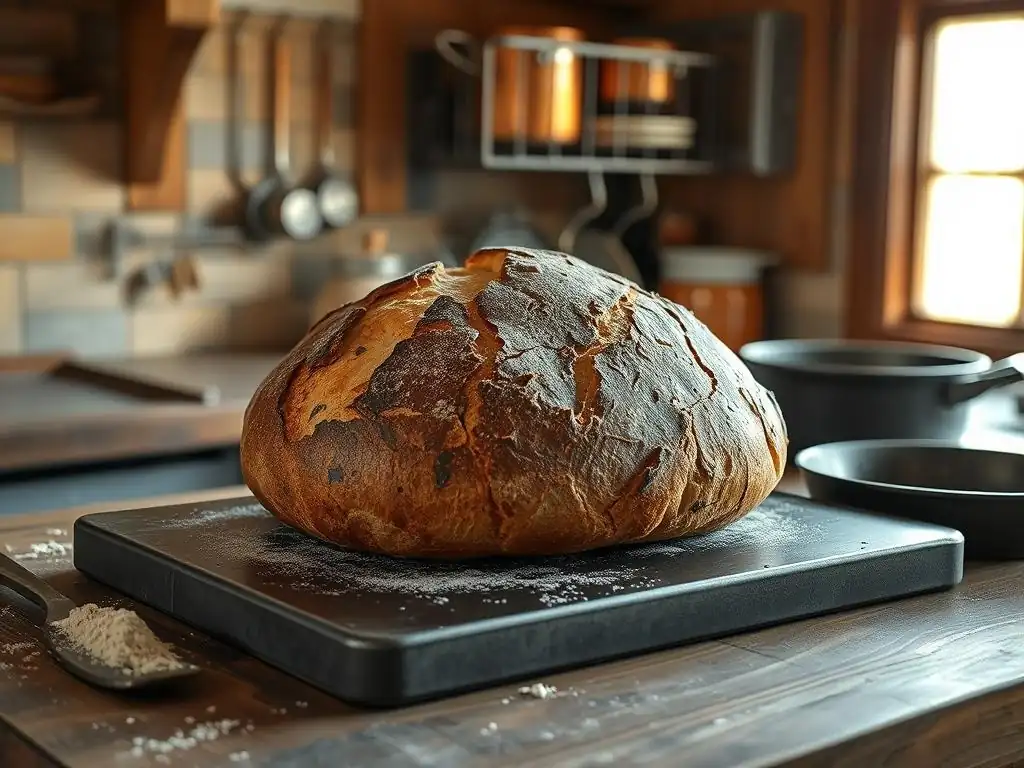
A baking stone, often made from ceramic, cordierite, or clay, is another popular tool for baking rustic bread. Like a baking steel, it functions as a thermal mass, absorbing and radiating heat within the oven. When preheated, the stone provides a hot surface for the dough, promoting heat transfer to the base of the loaf. This helps to create a crisp bottom crust and contributes to oven spring by rapidly converting water in the dough into steam.
The working principle of a baking stone is similar to a steel in that it stores heat, but ceramic materials conduct heat less aggressively than steel. This means the heat transfer is less rapid than with a steel. However, stones are often porous, which can help absorb some moisture from the bottom of the dough, potentially contributing to a drier, crisper bottom crust. The radiant heat from the stone also helps to bake the loaf evenly from the base upwards.
Advantages of Using a Baking Stone for Rustic Bread Baking
Baking stones have been a traditional choice for home bakers for many years, and they offer distinct advantages for rustic bread baking. One key benefit is their ability to absorb moisture. The porous nature of ceramic or clay stones can wick away excess moisture from the bottom of the dough as it bakes, which can contribute to a very dry and crisp bottom crust. This is a characteristic many bakers seek in artisan-style bread.
Another advantage is that stones tend to radiate heat more gently than steels. While steels provide an intense, rapid heat transfer, stones offer a more even, consistent heat over a longer period. This can be beneficial for breads that require a slightly longer bake or for bakers who prefer a less aggressive bottom crust development than a steel might provide. Additionally, stones are often lighter and less expensive than comparable baking steels, making them an accessible entry point into using a thermal mass for your rustic bread baking setup.
Choosing the Right Baking Stone: Material, Shape, and Thickness
Selecting the right baking stone involves considering the material, shape, and thickness. Cordierite is a popular material choice because it is more resistant to thermal shock than traditional ceramic or clay stones, reducing the risk of cracking when transferring the stone from a hot oven to a cooler surface or vice versa. Ceramic and clay stones are also effective but require more careful handling regarding temperature changes.
Shape and size should fit your oven dimensions, similar to a baking steel, allowing for air circulation. Rectangular stones are common and versatile for various loaf shapes. Round stones are excellent for baking boule-shaped loaves. Thickness matters for thermal mass; stones typically range from 1/2 inch to 1 inch thick. A thicker stone holds more heat and provides more stable temperature during the bake, which is beneficial when baking multiple loaves or large rustic bread loaves. Aim for at least a 3/4 inch thick stone for good performance in rustic bread baking.
Preparing Your Baking Steel or Stone for Rustic Bread
Seasoning a Baking Steel for Optimal Performance
Seasoning a baking steel is a crucial step before its first use and periodically thereafter to create a non-stick surface and protect it from rust. The process involves applying a thin layer of food-grade oil with a high smoke point, like flaxseed oil, grapeseed oil, or canola oil, and then heating the steel in the oven to polymerize the oil. Start by washing the steel thoroughly with soap and water, then dry it completely to prevent rust.
Next, apply a very thin layer of oil to all surfaces using a paper towel, wiping off any excess until it looks dry. Place the steel in a cold oven and heat it to a high temperature, typically 400-450°F (200-230°C). Bake for about an hour, then turn off the oven and let the steel cool down completely inside.
The steel will darken as the oil polymerizes, creating a hard, non-stick layer. Repeat this process 3-4 times for a good initial seasoning. This seasoned surface not only prevents your rustic bread from sticking but also protects the steel from corrosion, ensuring a long lifespan for your rustic bread baking steel.
Unlike baking steels, most ceramic or cordierite baking stones do not require traditional seasoning with oil. In fact, applying oil to a porous stone can lead to uneven browning, smoking, and potentially rancidity over time. The "seasoning" process for a baking stone happens naturally over time as you use it. Dough dust, flour, and small spills will bake onto the surface, eventually creating a dark, non-stick patina.
To prepare a new baking stone, simply wipe it clean with a dry cloth to remove any manufacturing dust. Avoid washing it with soap, as soap can be absorbed into the pores and impart off-flavors to your bread. For the first few uses, you might dust the stone generously with cornmeal or semolina flour to prevent sticking, especially when baking rustic bread with higher hydration. Over time, the stone will darken and become naturally more non-stick. Patience is key here; the best "seasoning" for a baking stone comes from repeated use in your rustic bread baking endeavors.
Heating Your Steel or Stone: Achieving the Perfect Temperature
Properly preheating your baking steel or stone is perhaps the most critical step to ensure maximum oven spring and a great crust on your rustic bread. You need to give the thermal mass enough time to absorb and stabilize at the target baking temperature. For most rustic breads baked at home, this temperature is typically between 450°F and 500°F (230°C and 260°C).
Place the steel or stone on an oven rack, usually in the upper half of the oven (the second rack from the top is a common position). Preheat your oven to the desired temperature and then leave the steel or stone in the oven for at least 45 minutes to 1 hour after the oven has reached temperature. This soak time is essential for the thermal mass to fully saturate with heat.
Using an infrared thermometer to check the surface temperature of the steel or stone can be helpful; you're aiming for a surface temperature close to your target oven temperature. This thorough preheating ensures that when your dough hits the surface, it receives the intense heat needed for that crucial initial burst of oven spring, vital for successful rustic bread baking steel or stone results.
Rustic Bread Recipe for Baking Steel or Stone
BakeWithEase's Simple Rustic Bread Recipe Overview
This BakeWithEase rustic bread recipe is designed to be straightforward yet deliver fantastic results when baked on a preheated baking steel or stone. It's a high-hydration dough, typical of many rustic loaves, which contributes to an open, airy crumb and a thin, crispy crust. The process involves a relatively short mixing time, a long bulk fermentation to develop flavor and structure, a gentle shaping, and a final proof before baking.
The key to success with this recipe on a baking steel or stone lies in the preheating and the handling of the wet dough. We'll use techniques that minimize degassing the dough during shaping and transfer, ensuring that all that lovely gas produced during fermentation contributes to oven spring. This recipe yields one medium-sized loaf, perfect for showcasing the capabilities of your rustic bread baking steel or stone setup and producing a loaf with a satisfying chew and a delightful crust.
Ingredients for Rustic Bread (Baking Steel/Stone Method)
Here are the simple ingredients you'll need for this rustic bread recipe:
- Bread Flour: 350 grams (approx. 2 ¾ cups) - Use good quality bread flour for strong gluten development.
- Whole Wheat Flour: 50 grams (approx. ⅓ cup) - Adds flavor and nutrition.
- Water: 300 grams (approx. 1 ¼ cups) - Warm (around 80-85°F or 27-29°C) for easy mixing. This gives a hydration of 75%, typical for rustic loaves.
- Salt: 8 grams (approx. 1 ½ teaspoons) - Essential for flavor and controlling fermentation.
- Instant Yeast: 2 grams (approx. ½ teaspoon) - A small amount for a slow, flavorful fermentation. Alternatively, you can use 2.5 grams active dry yeast, bloomed in a little of the warm water.
These proportions are calibrated for a dough that is wet enough to develop a great open crumb but manageable enough for home bakers using a rustic bread baking steel or stone setup. Using weight measurements for flour and water is highly recommended for accuracy in high-hydration doughs.
Step-by-Step Instructions for Baking Rustic Bread
Mixing the Dough
In a large mixing bowl, combine the warm water and instant yeast. Stir briefly to dissolve the yeast. Add the bread flour, whole wheat flour, and salt. Stir with a spoon or spatula until no dry flour remains and a shaggy dough forms. This is a wet dough, so don't expect it to pull away from the sides cleanly yet. Cover the bowl and let it rest for 30 minutes.
After the rest, perform a series of "stretch and folds". With wet hands, grab one edge of the dough, stretch it up, and fold it over the center. Rotate the bowl and repeat this process 3-4 times. Repeat the stretch and fold process two more times at 30-minute intervals. This gentle method develops gluten structure without needing extensive kneading, ideal for this rustic bread recipe.
First Rise (Bulk Fermentation)
After the stretch and folds are complete, cover the bowl and let the dough rise at room temperature (around 70-75°F or 21-24°C) for 2-3 hours, or until it has roughly doubled in size and looks bubbly. This stage, bulk fermentation, is where the majority of flavor development occurs. The dough should feel light and airy. If your kitchen is cooler, the rise might take longer, perhaps 4 hours or more. You can also perform a longer, cold bulk fermentation in the refrigerator for 8-12 hours for even deeper flavor development before proceeding to shaping.
Shaping the Dough
Turn the dough out gently onto a lightly floured surface. It will be very soft. Using a bench scraper, gently shape the dough into a rough round or oval shape, being careful not to deflate it. The goal is to create some surface tension.
If making a round loaf (boule), gently pull the sides underneath to create a tight skin on top. If making an oval loaf (batard), fold one side over two-thirds, then the other side over the first fold, and gently roll or tuck the ends to seal. Use minimal flour to avoid a dry crust. This gentle handling preserves the air bubbles created during bulk fermentation, essential for the final rustic bread baking steel or stone bake.
Second Rise (Proofing)
Place the shaped dough seam-side up into a proofing basket (banneton) that has been generously dusted with rice flour (rice flour prevents sticking better than wheat flour). If you don't have a banneton, you can proof the dough seam-side up in a bowl lined with a floured tea towel. Cover the proofing basket or bowl with plastic wrap or a reusable cover.
Let the dough proof at room temperature for 45-60 minutes, or until it looks visibly puffy but still has some resistance when gently poked (the "poke test"). For better control and easier scoring, you can also proof the dough in the refrigerator for 1-3 hours after a short 20-minute rest at room temperature post-shaping.
Scoring the Loaf
Scoring the dough just before baking is essential for controlling oven spring and creating a beautiful pattern on your rustic bread. Using a sharp razor blade (a lame is ideal) or a very sharp knife, make quick, confident cuts on the surface of the dough. For a boule, a simple cross or a square pattern is common.
For a batard, one or more long, angled cuts down the length of the loaf works well. The cuts should be about 1/2 inch deep. Scoring allows the dough to expand predictably during the intense heat of the rustic bread baking steel or stone, preventing blowouts and guiding the oven spring.
Baking on the Baking Steel or Stone
Preheat your oven with the baking steel or stone inside to 475°F (245°C) for at least 1 hour. Just before baking, invert the proofed dough onto a piece of parchment paper or a peel dusted with cornmeal. Make your scores. Carefully slide the dough (using the parchment paper as a sling or directly from the peel) onto the hot baking steel or stone in the oven.
This is also the time to introduce steam (see the next section for techniques). Bake for 20-25 minutes, or until the crust is a deep golden brown and the internal temperature reaches 205-210°F (96-99°C). The intense heat from the rustic bread baking steel or stone will give you fantastic oven spring and a crispy bottom crust.
Cooling and Slicing
Once baked, carefully remove the rustic bread from the oven using a peel or spatula and transfer it to a wire rack to cool completely. This is a critical step! Do not slice hot bread, as the internal structure is still setting, and it will result in a gummy crumb. Let the loaf cool for at least 1-2 hours. As it cools, the crust will continue to crisp up. Slicing into a fully cooled loaf will reveal the beautiful open crumb you achieved with the help of your baking steel or stone. Enjoy your homemade rustic bread!
Achieving the Perfect Rustic Bread Crust: Tips and Tricks
Steam Injection Techniques for Baking Steel/Stone
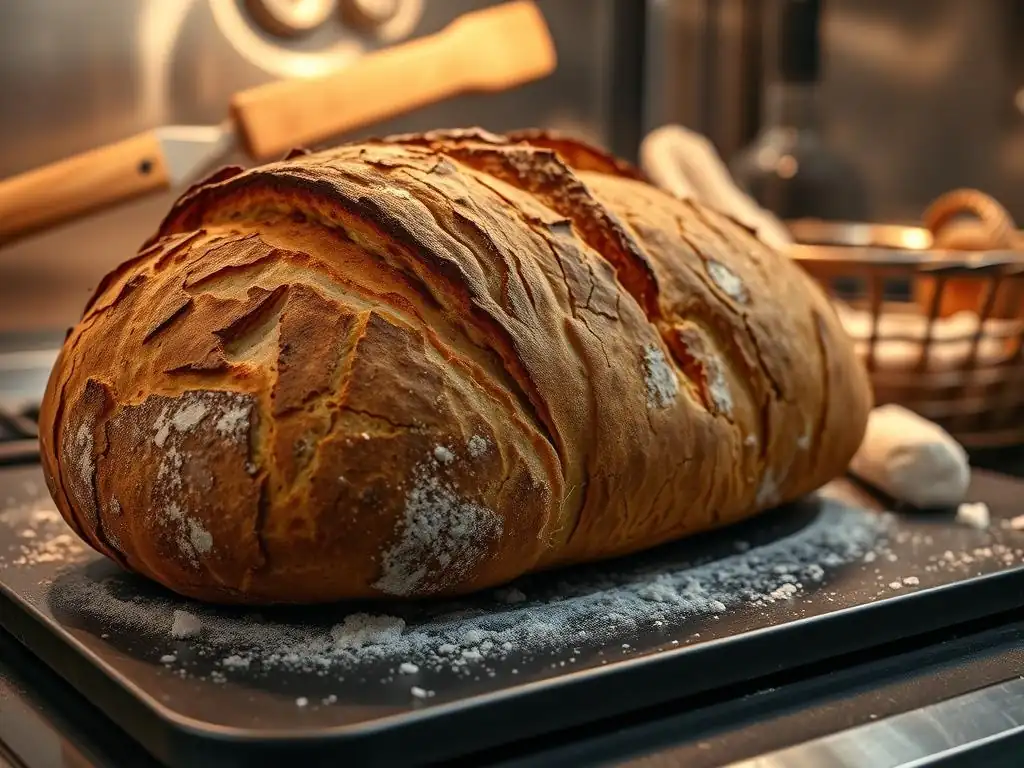
Steam is absolutely vital in the first 10-15 minutes of baking rustic bread on a steel or stone. The steam keeps the surface of the dough moist and flexible, allowing it to expand fully during oven spring. Without steam, the crust would form too quickly and restrict the loaf's rise, leading to a dense crumb and a thick, tough crust. There are several effective ways to create steam in a home oven.
One popular method is to place a cast iron pan or oven-safe tray on the rack below your baking steel or stone while preheating. Just before loading the bread, carefully pour about 1 cup of boiling water into the hot pan. This will instantly create a burst of steam.
Another common technique is to place a few ice cubes directly onto the baking steel or stone alongside the loaf immediately after loading it. As the ice melts and vaporizes on the hot surface, it creates steam. Alternatively, you can spray the oven walls generously with water using a spray bottle just before closing the door.
For the most effective steam environment, some bakers combine methods, like using a steam pan and spraying the walls. Remember to vent the oven (open the door briefly) after the first 10-15 minutes of baking to allow the steam to escape and the crust to dry out and crisp up. This controlled steam environment is a key advantage when using a rustic bread baking steel or stone.
Temperature Control for Optimal Crust Development
Precise temperature control is essential throughout the baking process for optimal rustic bread crust development. As discussed, preheating your oven and the baking steel or stone to a high initial temperature (450-500°F / 230-260°C) is crucial for maximizing oven spring and setting the base crust quickly. This initial high heat combined with steam allows the crust to develop that desirable thin, crispy texture.
After the initial steam period (typically 10-15 minutes), it's common practice to reduce the oven temperature. Lowering the temperature to around 425-450°F (220-230°C) allows the inside of the bread to cook through without the crust burning.
This two-stage temperature approach ensures you get the explosive oven spring and initial crust setting at high heat, followed by a gentler bake to finish cooking the interior. Monitoring your oven's actual temperature with an oven thermometer is highly recommended, as oven thermostats can be inaccurate, sometimes by as much as 25-50°F (15-30°C), which can significantly impact your rustic bread baking steel or stone results.
Adjusting Baking Time for Different Ovens
Baking times provided in recipes are always approximate because every oven is different. Factors like oven calibration, size, insulation, and even the type of baking steel or stone you use can affect the total baking time required for your rustic bread. For the recipe provided, the 20-25 minute baking time is a guideline. Your loaf might be done sooner or take longer.
To determine if your bread is fully baked, rely on visual cues and internal temperature. The crust should be a deep golden brown, and the bottom crust, thanks to the baking steel or stone, should be dark and firm. Tapping the bottom of the loaf should produce a hollow sound.
For the most accurate assessment, use an instant-read thermometer to check the internal temperature of the loaf; it should register between 205°F and 210°F (96°C and 99°C). If the crust is browning too quickly, you can tent the loaf loosely with aluminum foil for the remaining baking time. Pay attention to how your specific oven performs with your rustic bread baking steel or stone setup, and adjust times accordingly for consistent results.
Troubleshooting Common Rustic Bread Baking Issues
Bread Sticking to the Baking Steel or Stone
One frustrating issue in rustic bread baking is the dough sticking to the baking steel or stone. This can happen if the surface isn't properly seasoned (for steel), not adequately floured (for stone), or if the dough is underproofed and too wet when it hits the hot surface. For baking steels, ensure you have built up a good seasoning layer through repeated oiling and heating cycles. A well-seasoned steel develops a slick, non-stick surface over time, improving your rustic bread baking steel experience.
For baking stones, generous dusting with rice flour or semolina on your peel or proofing basket is key. These flours are coarser and less likely to absorb moisture from the dough, creating a barrier between the dough and the hot stone. Using parchment paper as a sling to transfer the dough onto the hot surface is also a reliable way to prevent sticking, especially for very wet doughs. While you can bake directly on the steel or stone for the crispiest bottom crust, parchment offers a safety net against sticking.
Uneven Baking and Crust Formation
Uneven baking, where one part of the crust is darker than another or the loaf rises unevenly, can occur due to several factors. Hot spots in your oven are a common culprit. Many home ovens have temperatures that vary significantly in different areas.
Using a baking steel or stone can help mitigate this somewhat by providing a large, stable thermal mass, but it won't entirely eliminate oven inconsistencies. Rotating the loaf halfway through the baking time (e.g., after 10-15 minutes when you vent the steam) can help promote more even browning, especially if you notice one side is cooking faster.
Another reason for uneven crust can be inconsistent scoring or shaping. If the dough is not shaped with even tension or the scores are not uniform in depth, the oven spring will be directed towards the weakest points, leading to asymmetrical expansion and crust development. Ensure your preheating is thorough (at least 45-60 minutes after the oven reaches temperature) so the entire surface of the rustic bread baking steel or stone is evenly hot. Using an oven thermometer to check the oven temperature throughout the cavity can also help identify major hot spots.
Dough Spreading Too Much During Baking
If your rustic bread dough spreads out into a flat disc instead of holding its shape and rising upwards during baking, it's often due to insufficient gluten development, overproofing, or poor shaping technique. A high-hydration dough requires sufficient gluten strength to hold its structure when exposed to heat. Ensure you perform enough stretch and folds or kneading during the mixing stage until the dough passes the "windowpane test" (you can stretch a small piece thin enough to see light through it without tearing).
Overproofing makes the dough's structure weak, and it collapses easily. If your dough has more than doubled in size and feels very airy and fragile when poked, it might be overproofed. Proper shaping is also critical; creating sufficient surface tension during shaping helps the loaf hold its form and directs the oven spring upwards.
Practice your shaping technique to build a tight skin on the outside of the dough. The rapid heat transfer from the baking steel or stone helps set the base quickly, which supports the loaf's structure and encourages vertical rise, aiding in preventing excessive spread for your rustic bread baking steel or stone endeavors.
Cleaning and Maintaining Your Baking Steel or Stone
Proper Cleaning Methods for Baking Steel
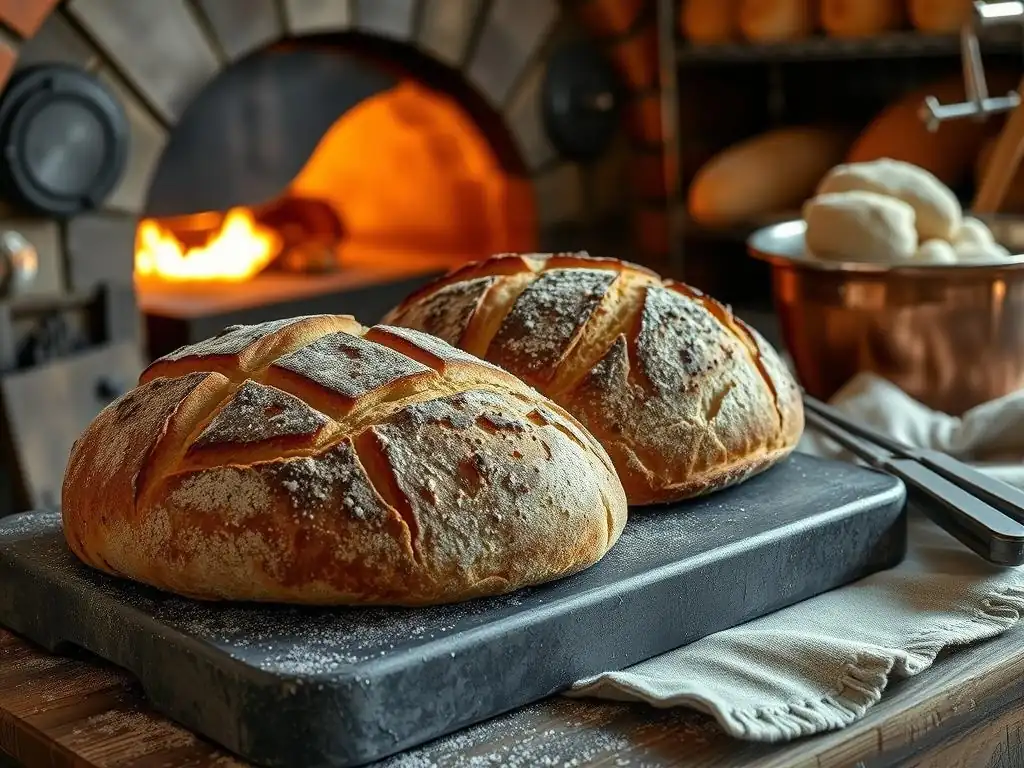
Cleaning a baking steel is relatively simple due to its non-porous surface, but it requires care to prevent rust. After the steel has cooled completely (this is crucial! ), scrape off any stuck-on food particles or dough using a metal spatula or bench scraper. For stubborn bits, you can use a stiff brush. Avoid using soap if possible, as it can strip the seasoning layer. If you must use soap, use a minimal amount and rinse quickly.
Thoroughly dry the steel immediately after cleaning. Water is the enemy of steel when it comes to rust. You can dry it with a towel and then place it in a warm oven (turned off but still warm from baking) for 10-15 minutes to ensure it's bone dry. Once dry, apply a very thin layer of food-grade oil (like grapeseed or canola) with a paper towel to all surfaces.
Wipe off any excess. This light oiling protects the seasoning and prevents rust. Store the steel in a dry place. Regular care ensures your rustic bread baking steel lasts a lifetime.
Cleaning a baking stone requires a different approach than cleaning steel, primarily because of its porous nature. Never use soap on a baking stone, as it will be absorbed and impart off-flavors. Also, avoid soaking the stone in water, as this can lead to cracking. The best way to clean a baking stone is to scrape off any baked-on dough, cheese, or toppings once the stone has cooled completely. Use a stiff brush or a metal spatula/scraper.
For more stubborn stains, you can use a dry, stiff brush or even fine-grit sandpaper to gently rub away the residue. Don't worry about stains or discoloration; a well-used baking stone will develop a dark, mottled appearance over time, which is perfectly normal and part of its natural seasoning. After scraping, simply wipe the stone clean with a dry cloth. Ensure the stone is completely dry before storing or using it again; leaving moisture can lead to cracking when heated. Proper care keeps your baking stone ready for your next rustic bread baking session.
Preventing Rust and Damage
Preventing rust on a baking steel and preventing damage (like cracking) on a baking stone are key aspects of maintenance. For baking steels, the primary defense against rust is maintaining a good seasoning layer and ensuring it is always stored completely dry. Re-season the steel periodically if you notice food starting to stick or if any rust spots appear (scrub off rust with steel wool, then re-season). Avoid cutting directly on the steel surface, as this can damage the seasoning.
For baking stones, preventing cracking is paramount. The most common causes of cracking are sudden temperature changes (thermal shock) and exposure to moisture. Always place a stone in a cold oven and let it heat up gradually as the oven preheats. Never place a cold stone into a hot oven.
Similarly, let the stone cool down completely inside the oven before attempting to clean it or move it. Avoid exposing a hot stone to cold liquids. Ensure the stone is completely dry before preheating. Following these simple rules will help you avoid damaging your rustic bread baking steel or stone.
Advanced Rustic Bread Techniques for Baking Steel and Stone
Experimenting with Different Flours for Unique Flavors
Once you're comfortable with basic rustic bread baking on your steel or stone, you can begin experimenting with different flours to introduce unique flavors and textures. While bread flour provides the necessary gluten structure for a good rise, incorporating a percentage of other flours can add complexity. For example, substituting 10-20% of the bread flour with rye flour can add a tangy, earthy note and a denser crumb. Using spelt or kamut flours can lend a slightly nutty or sweet flavor profile.
Ancient grains like einkorn or emmer can also be used, though they may require adjustments to hydration and handling due to their different gluten structures. Using a portion of stone-ground whole wheat flour instead of standard whole wheat can introduce more bran and germ, adding texture and a deeper, more rustic flavor. The high heat from the baking steel or stone is excellent for developing the crust on these varied loaves, showcasing the unique characteristics of each flour blend in your rustic bread baking steel experiments.
Adding Inclusions: Olives, Herbs, and Cheese
Adding inclusions is a fantastic way to elevate your rustic bread and make it truly your own. Common additions include olives, dried herbs (like rosemary or thyme), roasted garlic, sun-dried tomatoes, or various cheeses. When adding inclusions, it's best to incorporate them during the final stages of mixing or during the first set of stretch and folds. This distributes them relatively evenly throughout the dough.
Be mindful of the moisture content and potential impact on gluten structure. Wet inclusions like fresh olives should be well-drained. Cheeses can melt and create sticky spots. Aim for a total inclusion weight that is typically no more than 15-20% of the total flour weight to avoid compromising the dough's structure too much. The intense heat from the baking steel or stone is great for baking breads with inclusions, ensuring the base cooks through even with the added weight and moisture, resulting in a well-baked rustic bread with delicious surprises inside.
Sourdough Rustic Bread on Baking Steel or Stone
Baking sourdough rustic bread on a baking steel or stone is arguably one of the most rewarding experiences in home baking. The intense heat is perfectly suited to give sourdough's typically high-hydration dough the powerful oven spring needed for that signature open crumb and tangy crust. The process is similar to the yeasted version but replaces commercial yeast with a sourdough starter for leavening.
You'll follow the same principles: a long bulk fermentation (often 4-8 hours at room temperature or longer in the fridge), gentle shaping, and a final proof (often overnight in the fridge for convenience and flavor). Preheating your baking steel or stone to a high temperature (475-500°F / 245-260°C) and using effective steam methods are even more critical for sourdough, as it relies heavily on that initial burst of heat for its rise. The rustic bread baking steel or stone helps achieve the deep, caramelized crust and robust structure characteristic of artisanal sourdough loaves.
Conclusion: Elevate Your Rustic Bread Baking with Steel and Stone
BakeWithEase's Final Thoughts on Baking Artisan Bread at Home
Mastering the art of rustic bread baking at home is a journey, and incorporating a baking steel or stone into your process is a significant step towards achieving results that rival those from a professional bakery. These simple yet powerful tools provide the intense, consistent heat transfer necessary for developing a beautiful, crackly crust and maximizing oven spring, leading to a loaf with a superior texture and appearance. At BakeWithEase, we've seen firsthand the transformative effect these tools can have on home-baked bread, turning good loaves into truly great ones.
Whether you choose a steel for its durability and rapid heat transfer or a stone for its traditional appeal and moisture absorption, both will dramatically improve your rustic bread baking. Remember the key principles: proper preheating, using sufficient steam in the initial phase, and understanding how your specific oven interacts with your chosen tool. With practice and patience, you'll be consistently pulling beautifully baked, artisanal rustic bread with perfect crusts from your oven, thanks to the power of your baking steel or stone.
Further Resources for Rustic Bread Baking Mastery
To continue your journey in rustic bread baking mastery, BakeWithEase offers a wealth of additional resources. Explore our other articles on dough hydration, understanding gluten development, natural leavening with sourdough starters, and advanced shaping techniques. We have detailed guides on various types of rustic loaves, from classic French baguettes to hearty whole wheat boules, many of which benefit greatly from being baked on a baking steel or stone.
Consider experimenting with different steam methods to find what works best in your oven setup alongside your rustic bread baking steel or stone. Dive deeper into the science of baking, understanding how fermentation times and temperatures affect flavor. Join our community forums to share your baking successes, ask questions, and learn from other passionate home bakers. With dedicated practice and the right tools, like a preheated baking steel or stone, achieving bakery-quality rustic bread at home is well within your reach.
Frequently Asked Questions
What exactly is a baking steel, and why is it better than a baking stone for rustic bread?
A baking steel is a thick slab of steel that retains heat better than a stone. This leads to a crispier crust and more even baking in rustic breads.
How do I properly preheat my baking steel for baking rustic bread?
Preheat the steel in your oven at its highest temperature for at least one hour. This ensures it's thoroughly heated and ready to transfer heat effectively.
What type of rustic bread recipes work best with a baking steel?
Most rustic bread recipes benefit, especially those requiring high oven temperatures and a crispy crust. Think boules, batards, and other artisan loaves.
How do I prevent my rustic bread from sticking to the baking steel?
Use parchment paper underneath the dough to prevent sticking. You can also lightly dust the steel with cornmeal or semolina flour in addition to the parchment.
How do I care for and clean my baking steel after baking rustic bread?
Let the steel cool completely in the oven. Then, scrape off any debris and wipe it down with a damp cloth. A little rust is normal and can be removed with steel wool if desired.
Final Reflection: The Enduring Appeal of Rustic Bread, Perfected
The pursuit of the perfect rustic loaf transcends mere culinary skill; it's a journey into tradition, craftsmanship, and the simple pleasure of sharing freshly baked bread. The techniques explored in this article, focusing on the transformative power of a baking steel or stone, highlight the importance of understanding the nuances of heat transfer and its impact on crust development and crumb structure. This isn't just about baking bread; it's about connecting with a timeless process.
The influence of artisan bread making, and the tools that elevate it, continues to reshape our culinary landscape. We're moving away from mass-produced uniformity and embracing the imperfections and unique character of handcrafted goods. Bread is the staff of life,
a simple phrase, yet it speaks volumes about its fundamental role in our sustenance and culture. The act of baking, especially rustic bread, becomes a meditative practice, a connection to generations past who relied on similar methods to nourish themselves and their communities.
Consider the warmth radiating from your oven, the aroma filling your kitchen, the satisfying crackle of the crust as it cools. This isn't just about achieving a perfect score on a rustic bread recipe; it's about the experience, the process, and the joy of sharing the fruits of your labor. I invite you to embrace the challenge, experiment with different flours and techniques, and discover the unique satisfaction of baking your own rustic bread on a baking steel or stone. The journey is as rewarding as the destination.
Unleash Your Inner Baker: Craft the Perfect Rustic Loaf!
Thanks for joining us on this baking journey! We hope you now feel confident and inspired to create amazing rustic bread. Ready to take your baking skills to the next level?
- Bake your own masterpiece: Try the recipe from the article—we're betting your first loaf will be incredible! Adjust the recipe to your tastes, experiment with different flours, and watch your bread-making skills flourish.
- Share your success (and failures!): Post a picture of your rustic loaf on social media using #BakeWithEaseRusticBread – let's create a community of bread enthusiasts!
- Learn a new technique: Explore other baking steel/stone recipes on BakeWithEase.com to expand your bread-making repertoire.
What unique ingredient will you add to your next rustic loaf to make it truly special?