
Mastering the Stretch and Fold for Whole Wheat Dough

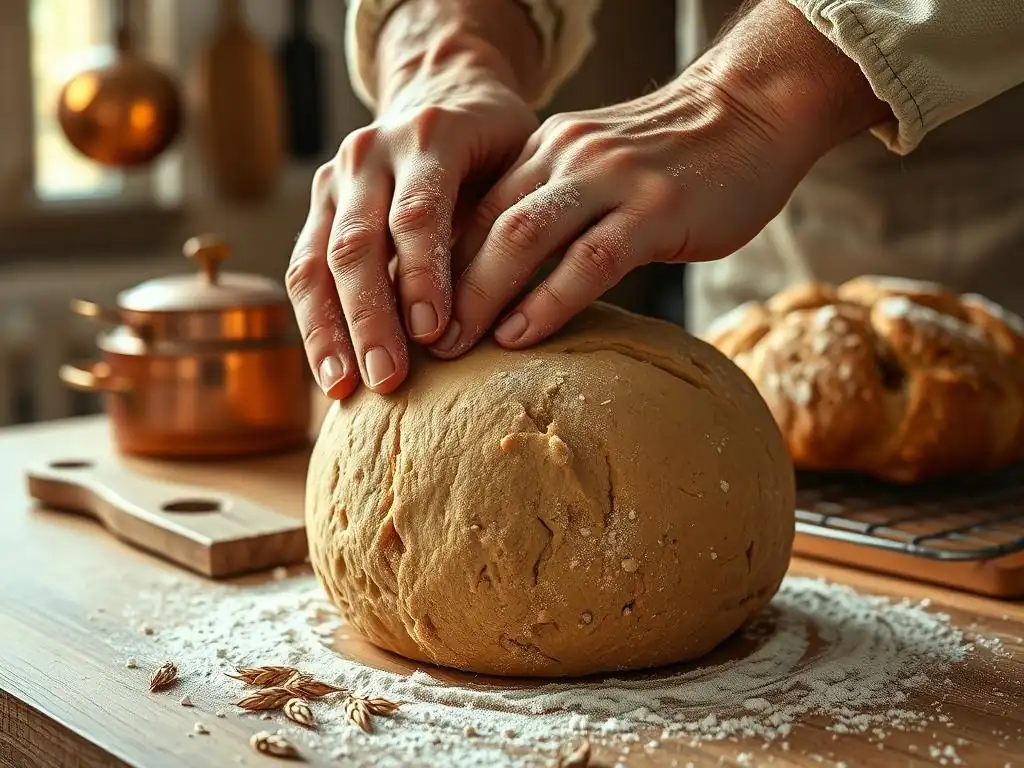
Welcome to BakeWithEase, your kitchen companion for baking success! Ever wondered how to unlock the full potential of whole wheat dough? Mastering the stretch and fold technique can dramatically improve your bread's texture and rise. Discover the secrets behind this simple yet powerful method and elevate your whole wheat baking from good to outstanding. Intrigued? Let's get started!
- Mastering the Stretch and Fold for Whole Wheat Dough: BakeWithEase Guide
- Introduction to Stretch and Fold in Whole Wheat Bread Baking
- The Science Behind the Stretch and Fold Technique
- Step-by-Step Guide to Stretch and Folding Whole Wheat Dough
- Troubleshooting Common Issues with Whole Wheat Dough and Stretch and Fold
- Advanced Stretch and Fold Techniques for Whole Wheat Bread
- Recipes that Benefit from Stretch and Fold with Whole Wheat Flour
- Tips and Tricks for Perfect Whole Wheat Dough Every Time
- The Benefits of Mastering Stretch and Fold for Whole Wheat Bakers
- Conclusion: Elevate Your Whole Wheat Baking with Stretch and Fold
-
Frequently Asked Questions
- How does the stretch and fold technique benefit whole wheat dough?
- Why is stretch and fold particularly important for whole wheat dough?
- How often should I perform the stretch and fold on my whole wheat dough?
- What does it mean if my whole wheat dough is still very sticky after multiple stretch and folds?
- Can I over-stretch and fold my whole wheat dough?
- Final Reflection: The Transformative Power of the Stretch and Fold
- Unleash Your Inner Baker: Perfect Whole Wheat Every Time!
Mastering the Stretch and Fold for Whole Wheat Dough: BakeWithEase Guide
Introduction to Stretch and Fold in Whole Wheat Bread Baking
Baking with whole wheat flour can be incredibly rewarding, producing loaves with deep flavor and satisfying texture. However, it also presents unique challenges compared to working with white flour, particularly when it comes to gluten development and dough handling. The stretch and fold technique is a gentle yet powerful method that can transform your whole wheat dough, yielding lighter, more airy loaves without the strenuous effort of traditional kneading. This guide will walk you through mastering the whole wheat dough stretch fold, helping you unlock the full potential of your baking.
Unlike the vigorous pummeling of kneading, stretch and fold involves gently extending and folding the dough over itself during bulk fermentation. This process aligns the gluten structure, building strength and elasticity progressively over time. For whole wheat dough, which often contains sharp bran particles that can interfere with gluten formation, this gentler approach is often more effective at creating a robust network capable of trapping gases produced by yeast or sourdough starter, leading to a better rise and crumb.
Why Stretch and Fold Matters for Whole Wheat Dough
Whole wheat flour, containing the bran, germ, and endosperm, behaves differently than refined white flour. The bran particles in particular can act like tiny razors, cutting through the developing gluten strands. This makes building a strong gluten network more challenging and can result in dense, heavy loaves if not handled correctly. The stretch and fold technique is particularly beneficial for whole wheat dough because it develops gluten gently and gradually, allowing the network to form without excessive stress that could tear it apart.
By performing multiple sets of stretch and folds over an extended period (typically 2-3 hours for a standard loaf), you encourage the gluten proteins to align and strengthen. This results in a dough that is more elastic and extensible, meaning it can be stretched thin without tearing and will hold its shape better during proofing and baking. A well-developed whole wheat dough structure is crucial for achieving a good oven spring and an open, desirable crumb structure in your final loaf.
Understanding Gluten Development in Whole Wheat Flour
Gluten is a protein network formed when two proteins found in wheat flour, glutenin and gliadin, combine with water and are agitated. Glutenin provides elasticity (the ability to spring back), while gliadin provides extensibility (the ability to stretch). In whole wheat flour, the total protein content is often higher than in white flour (e.g., 13-15% vs. 10-12%), but the presence of bran and germ can hinder effective gluten development.
The bran and germ absorb water and physically disrupt the forming gluten network. This is why whole wheat doughs often require higher hydration levels (sometimes 75-85% water relative to flour weight, compared to 60-70% for white flour) and benefit from longer autolyse periods (mixing flour and water and letting it rest for 30-60 minutes before adding salt and starter) to allow the flour to fully hydrate and the gluten to start forming passively.
The stretch and fold technique then takes over, actively building and strengthening this network without the destructive force that can sometimes occur with prolonged mechanical kneading, especially in home mixers which can overheat the dough.
The Science Behind the Stretch and Fold Technique
The magic of stretch and fold lies in its ability to align and strengthen the gluten network through repeated, gentle manipulation during the fermentation process. As the dough rests between folds, the gluten network relaxes slightly, and the yeast or starter continues to produce gas. When you perform a stretch and fold, you are essentially organizing the gluten strands, creating layers within the dough, and trapping the gases more effectively. This layering and strengthening is what gives the final bread its structure and airiness.
Each stretch and fold session builds upon the last. Initially, your whole wheat dough might feel shaggy and weak. After the first set of folds, it will start to feel slightly smoother and hold its shape a little better. By the third or fourth set, spaced 30-45 minutes apart, the dough should be noticeably stronger, smoother, and more elastic, passing the "windowpane test" (being able to gently stretch a small piece of dough thin enough to see light through without tearing) more easily than if it were simply left to ferment untouched.
How Stretch and Fold Improves Dough Strength and Structure
Improved dough strength is perhaps the most significant benefit of the stretch and fold technique for whole wheat dough. Strength refers to the dough's ability to resist deformation and hold its shape. A strong dough can support the weight of the loaf during proofing and baking, preventing it from spreading out into a flat disc. The stretch and fold method achieves this by aligning the gluten proteins into long, parallel strands.
Imagine the gluten network as a messy pile of spaghetti. Traditional kneading tries to organize this pile through vigorous movement. Stretch and fold, however, works more like carefully layering the spaghetti, creating a more organized and robust structure that can trap gas bubbles efficiently. This leads to a better rise during bulk fermentation and proofing, and a significant 'oven spring' when the loaf hits the hot oven, resulting in a well-risen loaf with a desirable open crumb structure, even with the challenges posed by whole wheat flour.
Stretch and Fold vs. Traditional Kneading for Whole Wheat
While traditional kneading can certainly develop gluten in whole wheat dough, the stretch and fold method often proves superior, especially for home bakers. Kneading requires significant physical effort and can be difficult to do properly by hand for the 10-15 minutes often recommended. Over-kneading, particularly in a stand mixer, can generate excessive heat which degrades gluten, or tear the delicate network being formed in whole wheat dough.
Stretch and fold, on the other hand, is much gentler and allows time (autolysis and bulk fermentation) to do some of the work. It relies on the dough's own weight and gravity to help with the stretch, and the resting periods allow the gluten to relax and strengthen passively. This makes it an ideal technique for high-hydration doughs, which are often too sticky to knead effectively, and for whole wheat doughs where preserving the developing gluten structure is key. It's less labor-intensive and often more effective at building the required strength and structure in challenging doughs.
Step-by-Step Guide to Stretch and Folding Whole Wheat Dough

Mastering the whole wheat dough stretch fold is straightforward once you understand the basic process. It's performed during the bulk fermentation phase, after the initial mixing of ingredients and often after an autolyse period and the addition of salt and starter/yeast. You'll typically perform several sets of folds over a period of 2-3 hours, depending on your recipe and ambient temperature.
Here’s a step-by-step breakdown of how to perform the stretch and fold technique on your whole wheat dough. Remember to keep your hands slightly wet or oiled to prevent sticking, as whole wheat dough can be quite tacky, especially at higher hydration levels (e.g., 78% hydration). Working on a lightly wet surface can also help.
Preparing Your Whole Wheat Dough for Stretch and Fold
Before you begin the stretch and fold process, ensure your whole wheat dough has completed its initial mixing phase. This usually involves combining flour, water, starter or yeast, and often salt, and mixing until no dry flour remains. For whole wheat, an autolyse period (mixing only flour and water and resting) of 30-60 minutes is highly recommended before adding salt and leavening. This allows the bran to soften and the flour to hydrate fully.
Once the dough is mixed and has rested (usually 30 minutes after adding salt and starter/yeast), it's ready for its first set of stretch and folds. Transfer the dough to a clean container or bowl, preferably a clear one so you can observe the changes in structure over time. Lightly grease the container with a neutral oil or wet it with water to prevent the dough from sticking to the sides during the folds. Ensure the dough is at a suitable temperature for fermentation, ideally between 75°F and 80°F (24°C - 27°C) for active fermentation.
Performing the First Stretch and Fold: The Basics
The first stretch and fold set is often the most challenging, as the whole wheat dough will likely still be quite loose and shaggy. Don't worry if it doesn't feel strong yet; this is normal. Lightly wet your hands or dip them in water. This prevents the sticky dough from clinging to you.
Reach under the dough on one side, lift it gently, and stretch it upwards. Don't force it past its natural elasticity – stretch until you feel slight resistance. Then, fold the stretched portion over the rest of the dough towards the center. Rotate the bowl 90 degrees and repeat the process: reach under, stretch upwards, and fold over.
Do this a total of four times, completing a full rotation of the bowl. This constitutes one set of stretch and folds. After the folds, the dough should be slightly tighter and more compact. Cover the dough and let it rest for 30-45 minutes.
Subsequent Stretch and Folds: Timing and Technique
After the initial 30-45 minute rest, your whole wheat dough is ready for its second set of stretch and folds. You'll likely notice a change from the first set – the dough should feel slightly stronger and smoother. Repeat the same process: wet your hands, reach under one side, stretch gently upwards, and fold over the center. Rotate 90 degrees and repeat three more times.
Continue performing sets of stretch and folds every 30-45 minutes. Most whole wheat dough recipes benefit from 3 to 5 sets. As you progress through the sets, you'll observe the dough becoming significantly smoother, stronger, and more elastic. It will hold its shape better between folds and will resist stretching more. The goal is to build enough strength for the dough to hold its shape during proofing and achieve good oven spring. The number of sets needed depends on the flour, hydration, and ambient temperature, but typically 3-4 sets over 2-3 hours is sufficient for a standard loaf.
Recognizing the Signs of a Well-Developed Whole Wheat Dough
Knowing when your whole wheat dough has sufficient gluten development from the stretch and fold process is key. After several hours and multiple sets of folds, look for these signs:
- Smoothness: The surface of the dough should appear smooth and less shaggy.
- Strength: The dough should feel resilient and hold its shape when lifted. It shouldn't spread out rapidly.
- Elasticity and Extensibility: When you try to stretch a small piece (the windowpane test), it should stretch relatively thin without tearing. While whole wheat dough may not form as transparent a windowpane as white dough due to the bran, it should still show significant development.
- Bubbles: You might see visible gas bubbles trapped near the surface, indicating active fermentation and a developing structure to hold the gas.
Task List for Stretch and Fold Progress:
- [ ] Perform 1st set of S&F (30 min rest after mixing)
- [ ] Rest 30-45 minutes
- [ ] Perform 2nd set of S&F
- [ ] Rest 30-45 minutes
- [ ] Perform 3rd set of S&F
- [ ] Rest 30-45 minutes
- [ ] Perform 4th set of S&F (Assess dough strength)
- [ ] Continue resting for bulk fermentation until dough volume increases by desired amount (e.g., 50-75%)
Troubleshooting Common Issues with Whole Wheat Dough and Stretch and Fold
Working with whole wheat dough can sometimes present challenges, but many common issues encountered during the stretch and fold process can be easily addressed. Understanding the typical behavior of this type of dough will help you identify problems early and make necessary adjustments. Don't be discouraged if your first few attempts aren't perfect; practice and observation are key to mastering the whole wheat dough stretch fold.
Common issues include dough that is too sticky to handle, dough that feels too tight or tears easily, and inconsistent texture indicating uneven gluten development. These problems often stem from hydration levels, fermentation time, temperature, or technique. By paying close attention to your dough's feel and appearance, you can learn to diagnose and correct these issues.
Dough Too Sticky: Adjusting Hydration Levels
Whole wheat flour typically requires more water than white flour due to the high absorbency of the bran and germ. However, sometimes a recipe's hydration level might be too high for your specific flour, environment, or comfort level, resulting in a dough that is excessively sticky and difficult to perform the stretch and fold on. While sticky dough is common with high hydration, too sticky means it's unmanageable.
If your whole wheat dough is sticking excessively to your hands and the bowl even with wet hands, consider reducing the hydration slightly in future bakes. A difference of just 2-3% water can significantly impact dough handling. For the current batch, try using slightly wetter hands or a thin film of oil on your hands and the work surface.
You can also incorporate a small amount of flour (a tablespoon or two at a time) during the first set of folds if absolutely necessary, but this should be a last resort as it can affect the final hydration balance. Ensuring your flour is weighed accurately (using a kitchen scale) is also crucial, as volume measurements for flour are notoriously inaccurate.
Dough Too Tight: Over-Stretching or Under-Fermenting
Conversely, if your whole wheat dough feels very tight, resists stretching significantly during the folds, or tears easily, it might be too dry (low hydration), or you might be overworking it during the stretch and fold process. Whole wheat dough can become tight if the gluten is stressed excessively before it has had sufficient time to relax and develop.
Ensure you are not forcing the stretch. Lift and stretch only until you feel gentle resistance, then fold. Don't yank or pull aggressively. If the dough is consistently tight even with gentle handling, the hydration might be too low for your flour; consider increasing the water slightly in your next batch (e.g., add 1-2% more water). Additionally, insufficient fermentation time can lead to a tight dough because the gluten hasn't had enough time to relax. Ensure your bulk fermentation environment is warm enough (75-80°F or 24-27°C is ideal) to allow proper yeast activity and gluten development.
Uneven Gluten Development: Ensuring Consistent Technique
Sometimes, you might notice that parts of your whole wheat dough feel stronger and smoother than others, indicating uneven gluten development. This can happen if the stretch and fold technique is not applied consistently to all parts of the dough during each set.
To ensure even development, make sure you are folding from all four sides (or a full rotation) during each set. Try to lift and stretch a significant portion of the dough each time, getting your hands well underneath.
If using a rectangular container, you might stretch from the four sides; if using a round bowl, imagine dividing the dough into quadrants and folding each one. Being mindful of applying the same motion and stretch to all sections of the dough during each set of the whole wheat dough stretch fold will lead to a more uniformly strong and extensible dough.
Advanced Stretch and Fold Techniques for Whole Wheat Bread
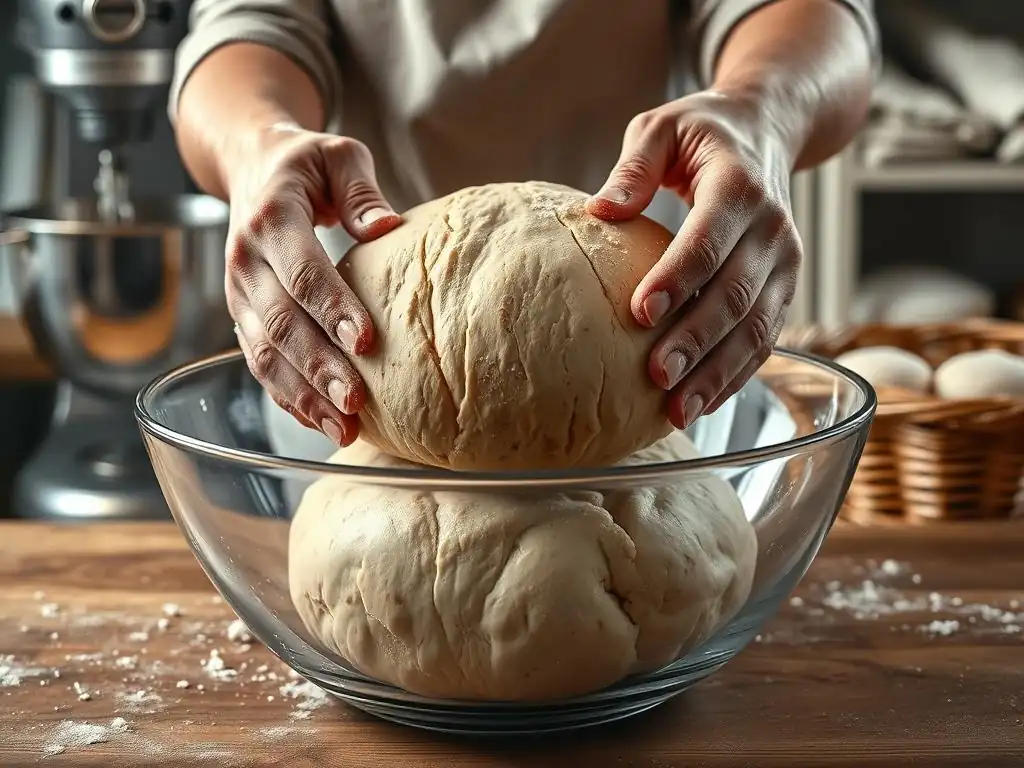
Once you're comfortable with the basic stretch and fold for whole wheat dough, you can explore more advanced techniques that can further enhance your bread's structure and incorporate delicious additions. These methods build upon the principles of gluten development and layering, offering new possibilities for texture and flavor.
Techniques like lamination provide an even more intensive way to build layers and strength, while incorporating add-ins at specific stages ensures they are distributed evenly without tearing the delicate gluten network you've worked to build. These advanced methods can take your whole wheat bread baking to the next level, resulting in loaves with exceptional crumb and visual appeal.
The Lamination Technique: A Variation on Stretch and Fold
Lamination is an advanced technique that involves gently stretching the entire dough out into a large, thin rectangle before folding it multiple times like a business letter. This creates numerous thin layers of dough. While often used for enriched doughs like croissants, a modified version can be incredibly effective for building significant strength and structure in whole wheat doughs, especially high-hydration ones (e.g., 80%+).
To laminate, after your initial mixing and perhaps one or two standard stretch and folds, gently transfer the dough onto a lightly wet or floured surface. Using wet hands and potentially a bench scraper, carefully stretch or coax the dough out into a large, thin rectangle (aim for about 1/2 inch thick). Then, fold one side inward about one-third of the way, and fold the other side over it, like folding a letter. You can then fold this rectangle in half.
This creates multiple layers. Return the dough to its container, seam-side down, and let it rest before continuing with standard stretch and folds or letting it finish bulk fermentation. This technique is typically done early in the bulk fermentation phase.
Incorporating Add-Ins During Stretch and Fold
Adding ingredients like nuts, seeds, dried fruit, or cheese to whole wheat dough can enhance flavor and texture, but incorporating them correctly is important to avoid disrupting the gluten structure. The stretch and fold phase is an ideal time to gently mix in these additions.
During the second or third set of stretch and folds, when the dough has developed some initial strength but is still pliable, spread your desired add-ins evenly over the stretched dough before folding it over. For example, if adding 100g of walnuts and cranberries to a 1kg whole wheat dough, spread about a quarter of the mix over the dough before each of the four folds in a set.
The folding action will help distribute them throughout the dough without requiring aggressive mixing or kneading that could damage the gluten network. This method ensures the add-ins are integrated smoothly into the whole wheat dough stretch fold process.
Recipes that Benefit from Stretch and Fold with Whole Wheat Flour
Many whole wheat bread recipes can be significantly improved by incorporating the stretch and fold technique. This method is particularly advantageous for recipes aiming for a lighter crumb, better oven spring, or those using high hydration levels. Here are a couple of examples where mastering the whole wheat dough stretch fold makes a noticeable difference.
By building a strong, elastic gluten network, stretch and fold helps these whole wheat loaves rise higher and develop a more open interior texture than they would with simple bulk fermentation or traditional kneading alone. It's a technique worth incorporating into your repertoire for these and many other whole wheat baking projects.
100% Whole Wheat Sandwich Bread with Honey and Molasses
A soft, yet structured 100% whole wheat sandwich bread can be challenging to achieve. Often, they turn out dense. Using the stretch and fold technique helps build the necessary strength to support the loaf's structure, resulting in a lighter, taller slice perfect for sandwiches. A typical recipe might use 400g of whole wheat flour, 320g water (80% hydration), 7g salt, 10g honey, 5g molasses, and 4g instant yeast.
After mixing and a short rest (say, 20 minutes), perform 3-4 sets of stretch and folds spaced 30-40 minutes apart over a total bulk fermentation time of about 2-2.5 hours at 78°F (25°C). The dough will transform from a sticky mass into a smooth, elastic ball that holds its shape well. This improved structure from the whole wheat dough stretch fold allows the loaf to rise beautifully in the pan during proofing and baking, yielding a soft interior and a pleasant, slightly chewy crust.
Whole Wheat Sourdough with Walnuts and Cranberries
Sourdough baking with whole wheat flour and chunky add-ins demands a robust gluten structure to support the long fermentation and the weight of the additions. The stretch and fold technique is fundamental to achieving a well-risen and open-crumbed whole wheat sourdough loaf packed with flavor. A recipe might call for 500g whole wheat flour, 375g water (75% hydration), 100g active sourdough starter, 10g salt, 75g walnuts, and 50g dried cranberries.
After mixing the dough (flour, water, starter, salt) and an autolyse period, perform 4-5 sets of stretch and folds over the first 2.5-3 hours of bulk fermentation. Incorporate the walnuts and cranberries during the 2nd or 3rd set of folds, as described in the advanced techniques section.
The stretch and fold process builds the necessary strength to encapsulate the gas produced by the sourdough starter over a bulk fermentation often lasting 4-6 hours or more. This thorough development using the whole wheat dough stretch fold method prevents the loaf from collapsing and ensures a beautiful crumb structure around the nuts and berries.
Tips and Tricks for Perfect Whole Wheat Dough Every Time

Achieving consistent results with whole wheat dough and the stretch and fold technique involves paying attention to a few key details. These tips can help streamline the process, improve your dough handling skills, and lead to more successful bakes.
Incorporating these simple practices into your routine will make the whole wheat dough stretch fold process easier and more effective, contributing significantly to the quality of your final whole wheat loaves.
Using a Dough Scraper for Easier Handling
Whole wheat dough, especially at higher hydration, can be quite sticky. A flexible dough scraper (also known as a bench scraper) is an invaluable tool during the stretch and fold process. Use it to help release the dough from the bottom and sides of your container or to gently maneuver it on a wet surface.
For instance, when performing a stretch and fold, after you lift and stretch a portion of the dough, use the scraper in your other hand to help tuck the folded part neatly onto the rest of the dough and clean up any sticky bits left in the bowl. If you're doing folds on a wet surface, the scraper is essential for lifting and turning the dough. Keeping your scraper wet along with your hands will further minimize sticking. This tool makes the stretch and fold for whole wheat dough much cleaner and less frustrating.
Maintaining Consistent Dough Temperature
Dough temperature is a critical factor influencing the rate of fermentation and gluten development. For optimal results with stretch and fold, aim for a dough temperature between 75°F and 80°F (24°C - 27°C) during bulk fermentation. Temperatures much lower will slow down fermentation and gluten development, requiring longer rest periods between folds and potentially more sets. Temperatures much higher can accelerate fermentation too quickly and potentially overproof the dough before adequate structure is built.
You can influence dough temperature by adjusting the water temperature used for mixing. A common calculation involves targeting a "desired dough temperature" by considering the ambient temperature, flour temperature, and a factor representing friction from mixing. For example, if your room and flour are 70°F (21°C) and you want a final dough temperature of 78°F (25°C), you'll need to use warmer water. Using a probe thermometer to check your dough's temperature periodically during bulk fermentation helps ensure you're on track. Consistent temperature management supports consistent results with the whole wheat dough stretch fold.
Documenting Your Stretch and Fold Process for Future Improvement
To truly master the whole wheat dough stretch fold, especially as you try different recipes or flour types, keeping simple notes can be incredibly helpful. Note down the hydration percentage, the number of stretch and fold sets performed, the time between sets, the total bulk fermentation time, the dough temperature, and how the dough felt at the beginning and end of the process (e.g., "very sticky," "smooth and elastic," "tight").
This documentation allows you to track what works and what doesn't. If a loaf turned out particularly well, you can refer back to your notes to replicate the conditions and technique. If a loaf was dense, you can analyze whether the dough felt underdeveloped during the stretch and fold phase and adjust your approach next time (e.g., add another set of folds or increase fermentation time). Learning from each bake, guided by your observations of the whole wheat dough stretch fold process, is key to continuous improvement.
The Benefits of Mastering Stretch and Fold for Whole Wheat Bakers
Mastering the stretch and fold technique for whole wheat dough offers significant advantages that translate directly into better bread. It addresses the unique challenges of whole wheat flour by promoting gentle yet effective gluten development, leading to superior results compared to methods that might be too harsh or insufficient.
By incorporating this technique into your baking routine, you'll consistently produce whole wheat loaves that are not only delicious but also possess desirable structural qualities that often elude bakers using less suitable methods. The effort invested in learning and applying the whole wheat dough stretch fold pays off in every slice.
Improved Texture and Crumb Structure
One of the most immediate and noticeable benefits of using the stretch and fold method is the improvement in the final bread's texture and crumb structure. A well-developed whole wheat dough from proper stretch and folding results in a lighter, more open interior with a network of varying-sized holes (alveoli), rather than a dense, tight crumb.
The technique aligns the gluten strands and creates layers, which efficiently trap the gases produced during fermentation. This allows the dough to expand more effectively during proofing and baking. The resulting loaf has a more pleasant chew, a less heavy feel, and a visually appealing interior – characteristics highly sought after in artisan-style whole wheat bread. The whole wheat dough stretch fold directly contributes to this enhanced texture.
Enhanced Flavor Development in Whole Wheat Bread
The stretch and fold process is performed during the bulk fermentation period, which is a critical phase for flavor development in bread, especially sourdough. By gently handling the dough during this time, you minimize disruption to the microbial activity (yeast and bacteria) responsible for creating complex flavors and aromas.
Longer, slower fermentation, facilitated by the gradual strength building of stretch and folds, allows enzymes in the flour more time to break down starches into sugars, which are then consumed by the microbes, producing organic acids and other flavor compounds. This extended fermentation, supported by the structural development from the whole wheat dough stretch fold, leads to a more nuanced, less 'flat' flavor profile in your whole wheat bread, enhancing the inherent nuttiness and depth of the whole grain.
Reduced Kneading Time and Effort
For many home bakers, the physical effort of traditional kneading can be a deterrent. Mastering the stretch and fold technique offers a much less strenuous alternative, particularly beneficial when working with potentially stiff or sticky whole wheat doughs. Instead of 10-15 minutes of continuous kneading, you perform short bursts of gentle folding interspersed with rest periods.
This not only saves physical effort but also frees up your time during the fermentation period. You can attend to other tasks while the dough rests between sets. The stretch and fold method allows the dough's natural relaxation and the biological activity of the yeast/starter to contribute significantly to gluten development, reducing the amount of intense manual labor required. It's a more relaxed and often more effective way to develop whole wheat dough compared to traditional kneading.
Conclusion: Elevate Your Whole Wheat Baking with Stretch and Fold
Frequently Asked Questions
How does the stretch and fold technique benefit whole wheat dough?
The stretch and fold technique improves dough strength and gluten development in whole wheat dough, which often lacks the same elasticity as white flour dough. This results in a lighter and more airy final product.
Why is stretch and fold particularly important for whole wheat dough?
Whole wheat flour contains bran, which can interfere with gluten formation. Stretch and fold helps to overcome this by aligning the gluten strands, leading to better structure and volume.
How often should I perform the stretch and fold on my whole wheat dough?
Generally, perform 3-4 sets of stretch and folds during the first 1-2 hours of bulk fermentation. The frequency may vary depending on the specific recipe and the dough's development.
What does it mean if my whole wheat dough is still very sticky after multiple stretch and folds?
Excessive stickiness could indicate too much hydration in the dough. Consider reducing the water slightly in your next batch or adding a little flour during the stretch and fold process.
Can I over-stretch and fold my whole wheat dough?
Yes, over-stretching can damage the gluten structure, resulting in a dense and tough bread. Observe the dough's behavior; it should become smoother and more elastic, not tear easily.
Final Reflection: The Transformative Power of the Stretch and Fold
Mastering the stretch and fold technique isn't just about achieving a perfectly risen whole wheat loaf; it's about understanding the fundamental principles of gluten development and achieving a truly satisfying baking experience. The seemingly simple act of gently stretching and folding dough unlocks a world of texture and flavor, transforming a potentially dense and heavy whole wheat bread into something light, airy, and utterly delicious. This technique, once mastered, becomes a cornerstone of confident baking.
The impact of this seemingly small technique on the home baking landscape is significant. It empowers bakers to tackle whole wheat bread, often perceived as challenging, with newfound confidence and success. The internet is awash with recipes, but the true understanding of why a technique works—the science behind the stretch and fold—is often missing. This article aimed to bridge that gap, providing not just instructions, but an understanding of the process. The best bread is made with love, patience, and a deep understanding of the ingredients.
This quote, while not directly about the stretch and fold, encapsulates the spirit of mindful baking that this technique embodies.
Now, it's your turn. Consider the next time you approach a whole wheat dough. Don't just follow a recipe; feel the dough, understand its resistance, and appreciate the transformative power of the stretch and fold. Embrace the process, learn from each loaf, and discover the joy of creating something truly special with your own hands. The journey of mastering this technique is a journey of understanding, patience, and ultimately, delicious reward.
Unleash Your Inner Baker: Perfect Whole Wheat Every Time!
Thanks for taking the time to explore the world of whole wheat baking! You've now got the tools to create incredible, healthy loaves. Ready to put your new skills to the test?
- Bake your own masterpiece! Try the stretch and fold technique with your next whole wheat loaf. Note the difference in texture and taste.
- Share your baking journey! Post a picture of your creation on social media using #BakeWithEaseWholeWheat. Let's inspire each other!
- Experiment with different flours! See how this technique works with other whole grains, like rye or spelt.
What unique twist will you add to your next whole wheat loaf?