
Baking Whole Wheat Ciabatta: Airy and Flavorful

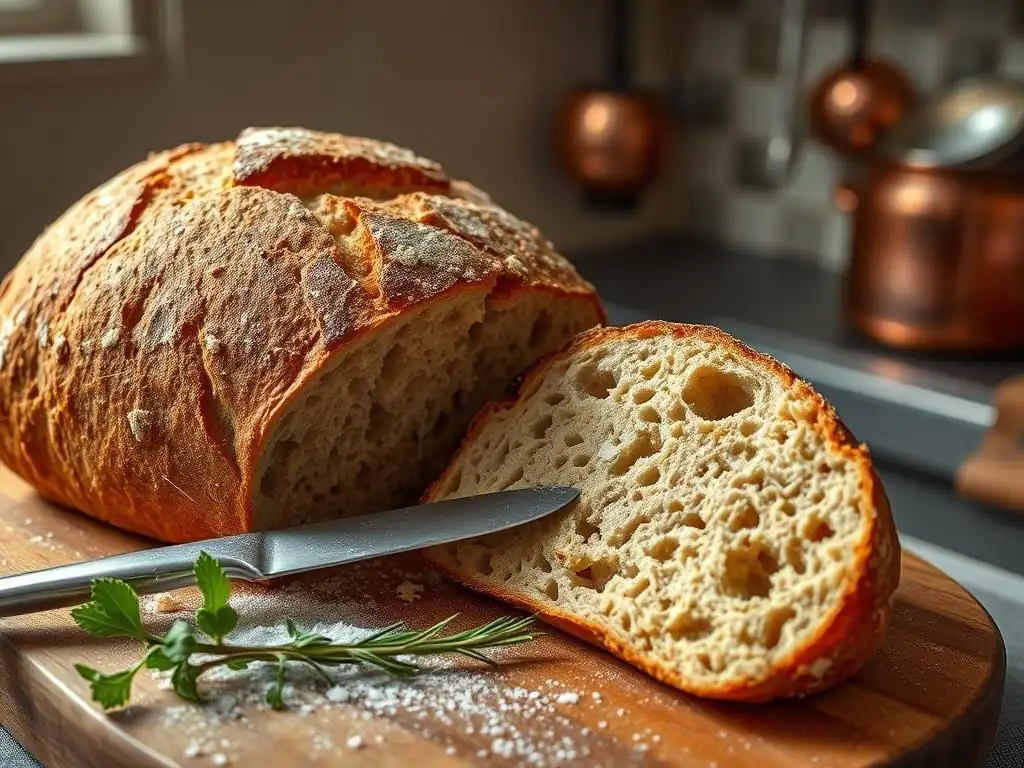
Welcome to BakeWithEase, your personal guide to baking bliss! Ever dreamed of crafting an airy and flavorful loaf of bread that's both healthy and delicious? Our new article dives deep into the secrets of achieving the perfect whole wheat ciabatta recipe. Discover the simple techniques and ingredients that will transform your baking, and leave you craving more. Intrigued? Let's unlock the secrets to rustic, homemade bread, one delicious bite at a time.
- Introduction to Whole Wheat Ciabatta Baking at BakeWithEase
- Understanding the Key Ingredients for a Perfect Whole Wheat Ciabatta Recipe
-
Step-by-Step Guide: Mastering the Whole Wheat Ciabatta Recipe
- Step 1: Preparing the Poolish (Preferment) for Enhanced Flavor
- Step 2: Mixing the Whole Wheat Ciabatta Dough
- Step 3: Bulk Fermentation: Developing Flavor and Structure
- Step 4: Dividing and Shaping the Ciabatta Loaves
- Step 5: Proofing the Whole Wheat Ciabatta Dough
- Step 6: Baking Your Whole Wheat Ciabatta
- Step 7: Cooling and Enjoying Your Homemade Ciabatta
- Tips and Tricks for Baking the Best Whole Wheat Ciabatta
- Storing Your Whole Wheat Ciabatta for Freshness
- Conclusion: Your Journey to Baking Delicious Whole Wheat Ciabatta
-
Frequently Asked Questions
- What makes whole wheat ciabatta different from regular ciabatta?
- Is this whole wheat ciabatta recipe suitable for beginner bakers?
- How can I achieve the signature airy texture of ciabatta when using whole wheat flour?
- What are some serving suggestions for whole wheat ciabatta?
- Can I substitute other types of flour in this whole wheat ciabatta recipe?
- Final Reflection: The Humble Loaf, the Endless Possibilities
- Unleash Your Inner Baker: Craft the Perfect Ciabatta!
Introduction to Whole Wheat Ciabatta Baking at BakeWithEase
Discover the Delight of Homemade Whole Wheat Ciabatta
Embarking on the journey to bake your own whole wheat ciabatta at home is a truly rewarding experience. This rustic Italian bread, known for its elongated shape, porous texture, and delightful chew, takes on a new dimension when crafted with nutritious whole wheat flour.
At BakeWithEase, we believe that even complex-sounding breads like ciabatta are accessible to home bakers with the right guidance and a reliable whole wheat ciabatta recipe. Forget the dense, heavy loaves you might associate with whole wheat; a well-executed whole wheat ciabatta is surprisingly light and airy, boasting a deep, nutty flavor that complements its characteristic open crumb.
Mastering the nuances of this particular loaf involves understanding the interaction between whole wheat flour, high hydration, and a slow fermentation process. Unlike white flour, whole wheat includes the bran and germ, which can impact gluten development and water absorption.
Our goal is to guide you through these specifics, ensuring your baking efforts result in a loaf that is not only delicious but also captures the authentic spirit of ciabatta, with its signature irregular holes and crispy crust. Get ready to transform simple ingredients into a bread that will impress your friends and family, perfect for sandwiches, dipping in olive oil, or enjoying fresh from the oven.
Why Bake Whole Wheat Ciabatta? Health and Flavor Combined
Choosing to bake a whole wheat ciabatta recipe offers a fantastic balance of robust flavor and nutritional benefits. Whole wheat flour retains more of the grain's natural fiber, vitamins, and minerals compared to refined white flour. This means each slice of your homemade ciabatta contributes positively to your daily intake of essential nutrients. For instance, a typical serving of whole wheat bread can contain around 3-4 grams of fiber, significantly higher than white bread. This added fiber not only supports digestive health but also contributes to a feeling of fullness.
Beyond the health advantages, the flavor profile of whole wheat adds a depth and complexity that is simply unparalleled in a traditional white ciabatta. The inherent nuttiness of the whole grain flour pairs beautifully with the tangy notes developed during the long fermentation, creating a bread that is both hearty and sophisticated.
Baking whole wheat ciabatta from scratch also gives you complete control over the ingredients, allowing you to avoid commercial additives and tailor the salt or even incorporate seeds for extra texture and nutrition. It's a delicious way to enjoy the benefits of whole grains while savoring the unique characteristics of one of Italy's most beloved breads.
Understanding the Key Ingredients for a Perfect Whole Wheat Ciabatta Recipe
High-Quality Whole Wheat Flour: The Foundation of Flavor
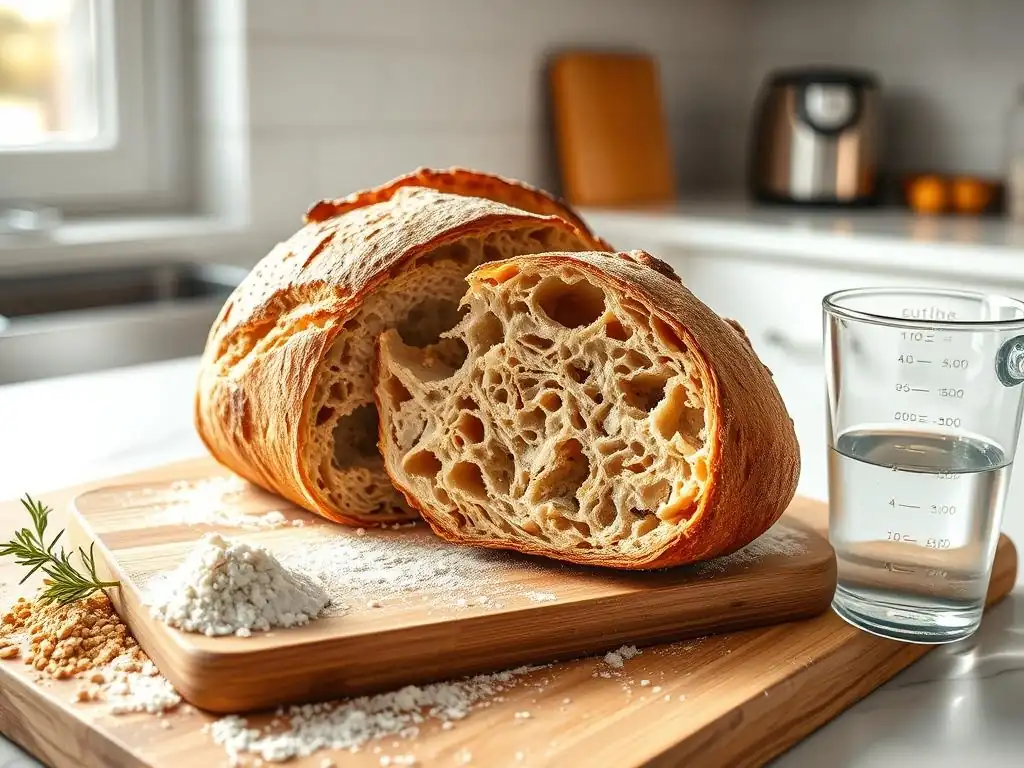
The success of any whole wheat ciabatta recipe hinges significantly on the quality of the whole wheat flour used. Whole wheat flour, by definition, contains the entire wheat kernel – the bran, germ, and endosperm – which imparts a richer flavor and higher nutritional value. When selecting flour for ciabatta, look for a high-protein variety, typically between 12% and 14% protein content. This higher protein level is crucial for developing a strong gluten network capable of supporting the high hydration characteristic of ciabatta dough and trapping the gases necessary to create that signature open crumb structure.
Using a finely milled or stone-ground whole wheat flour can also make a difference. Finely milled flour integrates more smoothly into the dough, while stone-ground flour can offer a more pronounced, rustic flavor. Be aware that the bran and germ in whole wheat flour can interfere with gluten development, requiring gentler handling and potentially longer fermentation times compared to white flour. However, with the right technique and a good quality flour, you can achieve a remarkably light and airy whole wheat loaf that celebrates the grain's full potential.
The Role of Water in Achieving Ciabatta's Open Crumb
Water is not just a hydrating agent in a whole wheat ciabatta recipe; it is a critical component that directly influences the bread's texture and structure. Ciabatta dough is known for its exceptionally high hydration levels, often ranging from 75% to as high as 90% of the flour weight.
This high water content is what contributes to the dough's wet, sticky nature, which in turn facilitates the large, irregular holes characteristic of ciabatta's open crumb. The abundance of water allows the gluten network to fully hydrate and relax, making the dough extensible and capable of trapping large pockets of carbon dioxide produced during fermentation.
Working with such a wet dough can be challenging, but it is essential for achieving the desired airy texture. The water helps to create steam within the loaf during baking, which contributes to oven spring and the development of a thin, crispy crust.
The precise amount of water needed can vary slightly depending on the specific whole wheat flour used, as different flours absorb water differently based on their protein content and milling process. Paying close attention to dough consistency rather than just the exact measurement is key, aiming for a dough that is shaggy and difficult to handle initially but develops strength through mixing and folding.
Yeast Selection: Instant vs. Active Dry for Whole Wheat Ciabatta
Yeast is the leavening agent that makes your whole wheat ciabatta rise, and choosing the right type can influence both the process and the final outcome. The two most common types used in home baking are active dry yeast and instant dry yeast. Active dry yeast typically requires activation in warm water before being added to the other ingredients. This process takes about 5-10 minutes and helps ensure the yeast is alive and active. A standard packet of active dry yeast (about 2.25 teaspoons or 7 grams) is usually sufficient for a loaf using around 500 grams of flour.
Instant dry yeast, on the other hand, can be mixed directly into the dry ingredients without prior hydration. It is generally more potent and faster-acting than active dry yeast. For a whole wheat ciabatta recipe, using instant yeast can simplify the process slightly.
Many bakers find that using a smaller amount of instant yeast (sometimes 25% less than active dry) combined with a long, slow fermentation – often involving a preferment like a poolish – yields the best flavor development and crumb structure. The choice between the two often comes down to personal preference and the specific requirements of the recipe, but both can successfully leaven a whole wheat ciabatta dough.
Other Important Ingredients: Salt and Olive Oil
While flour, water, and yeast form the core of any bread, salt and olive oil play crucial supporting roles in a whole wheat ciabatta recipe. Salt is indispensable for flavor; without it, bread tastes bland and flat. More than just seasoning, salt also helps to control the rate of yeast fermentation, preventing the dough from rising too quickly. It also strengthens the gluten structure, contributing to better dough handling and a finer crumb texture. Typically, salt is added at a rate of about 1.8% to 2% of the total flour weight in bread recipes.
Extra virgin olive oil, a staple in Italian baking, adds richness and a subtle flavor to ciabatta. While some traditional ciabatta recipes omit fat entirely, a small amount of olive oil (often around 2-5% of flour weight) can improve the dough's extensibility, making it easier to handle and contributing to a softer crumb. It also adds a pleasant aroma and a hint of the Mediterranean to your whole wheat ciabatta. Ensure you use a good quality olive oil for the best flavor results.
Step-by-Step Guide: Mastering the Whole Wheat Ciabatta Recipe
Step 1: Preparing the Poolish (Preferment) for Enhanced Flavor
Preparing a poolish is a classic technique used in many ciabatta recipes, including those for whole wheat versions, to significantly enhance the flavor and texture of the final loaf. A poolish is a liquid preferment made with equal parts flour and water by weight, plus a very small amount of yeast.
This mixture is allowed to ferment for a significant period, typically at room temperature, before being incorporated into the main dough. The long, slow fermentation allows enzymes to break down starches into sugars and yeast to produce organic acids, resulting in complex flavors and aromas that are difficult to achieve with a direct mix method.
Using a poolish is particularly beneficial in a whole wheat ciabatta recipe because it gives the yeast a head start in the presence of the bran and germ, which can sometimes slow down fermentation. The increased acidity developed in the poolish also helps strengthen the gluten structure, which is advantageous for handling a high-hydration whole wheat dough. This simple initial step, while requiring foresight, lays the foundation for a truly exceptional loaf with a more open crumb and a deeper, more nuanced flavor profile that is characteristic of artisan bread.
Mixing the Poolish: A Detailed Guide
To mix the poolish for your whole wheat ciabatta recipe, you'll need equal weights of whole wheat flour and water, and a tiny pinch of instant or active dry yeast. A common ratio might be 100 grams of whole wheat flour, 100 grams of water, and just 0.1-0.2 grams of instant yeast (or a few granules of active dry yeast). Combine the flour and water in a medium bowl, stirring with a spoon or spatula until no dry flour remains and you have a smooth, batter-like consistency. The mixture will be quite wet and sticky.
Once the flour and water are combined, sprinkle the tiny amount of yeast over the surface and stir gently to incorporate it. Cover the bowl loosely with plastic wrap or a lid, allowing air to escape. The goal is to create an environment where the yeast can slowly become active and begin the fermentation process. Using a scale for accurate measurements is highly recommended for the poolish, as the 1:1 ratio by weight is crucial for its success.
Fermenting the Poolish: Time and Temperature Considerations
The fermentation of the poolish is a critical step in developing flavor for your whole wheat ciabatta recipe. The optimal temperature for poolish fermentation is typically room temperature, roughly between 70-75°F (21-24°C). At this temperature, the poolish should ferment for a considerable amount of time, often 12 to 18 hours, or even longer depending on the yeast quantity and ambient temperature. During this period, the mixture will become very bubbly and active.
You'll know the poolish is ready when its volume has roughly doubled, the surface is covered in bubbles, and it may even show signs of starting to collapse slightly in the center. It should have a pleasant, slightly tangy aroma. If your kitchen is cooler, fermentation will take longer; if warmer, it will be faster.
Some bakers even ferment the poolish in the refrigerator for 24-48 hours to develop even more complex flavors, though it will need to come back to room temperature before mixing the main dough. Patience during this stage is key to unlocking the full potential of your whole wheat ciabatta.
Step 2: Mixing the Whole Wheat Ciabatta Dough
Once your poolish is mature and ready, it's time to mix the main whole wheat ciabatta dough. This stage involves combining the poolish with the remaining whole wheat flour, water, salt, and olive oil. Due to the high hydration, ciabatta dough is notoriously wet and sticky, making traditional kneading difficult. Many bakers opt for minimal mixing followed by a period of rest (autolyse) and then a series of stretch and folds to develop gluten gently.
Start by combining the poolish, the remaining water, and most of the remaining whole wheat flour in a large mixing bowl. Mix just until the ingredients are roughly combined and there are no dry pockets of flour. At this point, the dough will look shaggy and unorganized. Resist the urge to add more flour, even if it feels incredibly wet. This shaggy stage is perfect for the autolyse step, which follows immediately.
Combining Ingredients: Achieving the Right Dough Consistency
Achieving the right dough consistency in a whole wheat ciabatta recipe is more about feel than strict adherence to water measurements, as different flours absorb liquids differently. After combining the poolish, remaining water, and most of the flour, you should have a very wet, sticky mass. It will likely cling to the sides of the bowl and be difficult to handle by hand. This is the desired consistency before adding salt and olive oil. The dough should be hydrated enough to allow the gluten to develop into a very extensible network during subsequent steps.
If your dough feels significantly drier than a thick batter or very wet paste, you might need to adjust the water slightly (up or down by a tablespoon or two), but only after the autolyse period and before adding salt, as salt tightens the gluten. The key is embracing the wetness; this is fundamental to the open, airy crumb structure that defines ciabatta. Don't expect a smooth, elastic dough at this initial mixing stage, especially with whole wheat flour.
Autolyse: Hydrating the Flour for Better Texture
Autolyse is a simple yet powerful technique particularly beneficial for high-hydration doughs and those made with whole wheat flour, like in a whole wheat ciabatta recipe. After the initial mixing of the poolish, water, and most of the flour, cover the bowl and let the mixture rest for 20 to 30 minutes. This resting period allows the flour to fully hydrate and gives enzymes naturally present in the flour time to start breaking down proteins, which helps with gluten development.
During the autolyse, the dough becomes noticeably smoother and more pliable without any mechanical mixing or kneading. This step makes the subsequent mixing and folding much easier and contributes to a more extensible dough, which is crucial for achieving large air pockets. The salt is withheld during the autolyse because it tightens gluten and inhibits enzymatic activity, which is exactly what you want to encourage during this rest period. After the autolyse, you'll add the salt and olive oil and proceed with the main mixing or folding process.
Step 3: Bulk Fermentation: Developing Flavor and Structure
Bulk fermentation, also known as the first rise, is where the magic truly happens in a whole wheat ciabatta recipe. This is the period after all the ingredients are mixed and the dough is allowed to rise as a single mass before being divided and shaped. During bulk fermentation, the yeast produces carbon dioxide, causing the dough to expand, while also producing organic acids and other compounds that contribute significantly to the bread's flavor and aroma. This stage is crucial for developing both the structure and the characteristic tangy flavor of ciabatta.
For whole wheat ciabatta, bulk fermentation is often quite long, typically 2 to 4 hours at room temperature (around 72-78°F or 22-26°C), though it can be extended in a cooler environment. The goal isn't necessarily to double the dough in size, but rather to develop strength, elasticity, and plenty of gas bubbles. The dough should become noticeably lighter, more airy, and slightly domed, with visible bubbles forming on the surface.
The Importance of Stretch and Folds in Whole Wheat Dough
Given the high hydration and the presence of bran in a whole wheat ciabatta recipe, traditional kneading is often impractical and can damage the delicate gluten structure. Instead, a series of "stretch and folds" is employed during the bulk fermentation. This technique involves gently stretching a portion of the dough up and folding it back over the rest of the dough, rotating the bowl, and repeating the process several times. This action helps to build strength and structure in the wet dough without tearing the gluten.
Perform a set of stretch and folds every 30-45 minutes during the first 1.5 to 2 hours of bulk fermentation. Typically, 3-4 sets are sufficient. Each set involves performing the action on all sides of the dough (e.g., four folds in total per set). As you perform the folds, you'll notice the dough becoming progressively smoother, more elastic, and easier to handle, despite its stickiness. These gentle manipulations are key to developing the strong yet extensible gluten network required for that signature open crumb in your whole wheat ciabatta.
Bulk Fermentation Time and Temperature
The duration and temperature of bulk fermentation are critical factors influencing the final texture and flavor of your whole wheat ciabatta. As mentioned, a typical range at comfortable room temperature (72-78°F or 22-26°C) is 2 to 4 hours. However, the dough's activity, not the clock, is the best indicator of readiness. You're looking for significant aeration and increased volume, perhaps a 50-75% increase, rather than a full doubling. The dough should feel light and airy when gently prodded.
Lower temperatures will slow down fermentation, resulting in a longer bulk fermentation time but potentially more complex flavors. For example, fermenting at cooler room temperature (around 68-70°F or 20-21°C) might require 4-6 hours. Conversely, warmer temperatures will accelerate fermentation. It's essential to monitor the dough's progress visually and by feel, looking for a bubbly surface and a dough that has gained considerable strength and extensibility through the stretch and folds. Over-fermentation can lead to a collapsed structure, while under-fermentation results in a dense loaf.
Step 4: Dividing and Shaping the Ciabatta Loaves
Dividing and shaping ciabatta dough requires a delicate touch to preserve the precious air pockets that have developed during the long fermentation. Unlike many other bread doughs, ciabatta is not typically kneaded or handled roughly at this stage. The goal is to maintain the airy structure as much as possible while forming the dough into the characteristic elongated shape. This process is usually done on a well-floured surface because the dough remains quite sticky.
Gently turn the fermented dough out onto a generously floured countertop. Use a bench scraper to help manage the sticky dough. Avoid degassing the dough by pressing or punching it down. Instead, gently coax it into a rough rectangle. Then, using the bench scraper, divide the rectangle into the desired number of loaves. For standard-sized ciabatta, you might divide a batch made with 500g of flour into 2 or 3 pieces.
Gently Dividing the Dough to Preserve Air Pockets
The key to dividing whole wheat ciabatta dough is gentleness. After tipping the dough onto your floured surface, resist the urge to pull or stretch it excessively. Use your bench scraper to cut straight down through the dough to create your individual loaf portions. Do not try to portion it by tearing or pulling. The stickiness means you'll need ample flour on your hands and the scraper, but try not to incorporate too much extra flour into the dough itself.
Think of it less like dividing and more like cutting pieces from an airy cushion. Lift each piece carefully with the bench scraper, trying not to compress it. The irregular shapes and sizes are part of ciabatta's rustic charm, so don't strive for perfect uniformity. The internal structure, full of varying-sized bubbles, is what you are trying to protect during this step for a successful whole wheat ciabatta recipe.
Shaping Techniques for a Classic Ciabatta Look
Shaping ciabatta is less about creating tension and more about forming the pieces into rectangles while maintaining airiness. Once divided, each piece of dough should be gently stretched or patted into a rough rectangular or square shape, depending on the size of your baking surface. Some bakers simply lift each piece and gently stretch it lengthwise a bit before placing it on their proofing surface.
A common technique involves folding the dough like a business letter: fold one third of the rectangle over the center, then fold the other third over that. Then, gently pat or stretch the resulting log into a desired length and width, often about 8-12 inches long. Place the shaped loaves seam-side down (or up, depending on your proofing setup) on a well-floured couche (linen cloth) or parchment paper, ensuring space between them as they will expand during proofing. The generous flour dusting on the outside contributes to the rustic look and prevents sticking.
Step 5: Proofing the Whole Wheat Ciabatta Dough
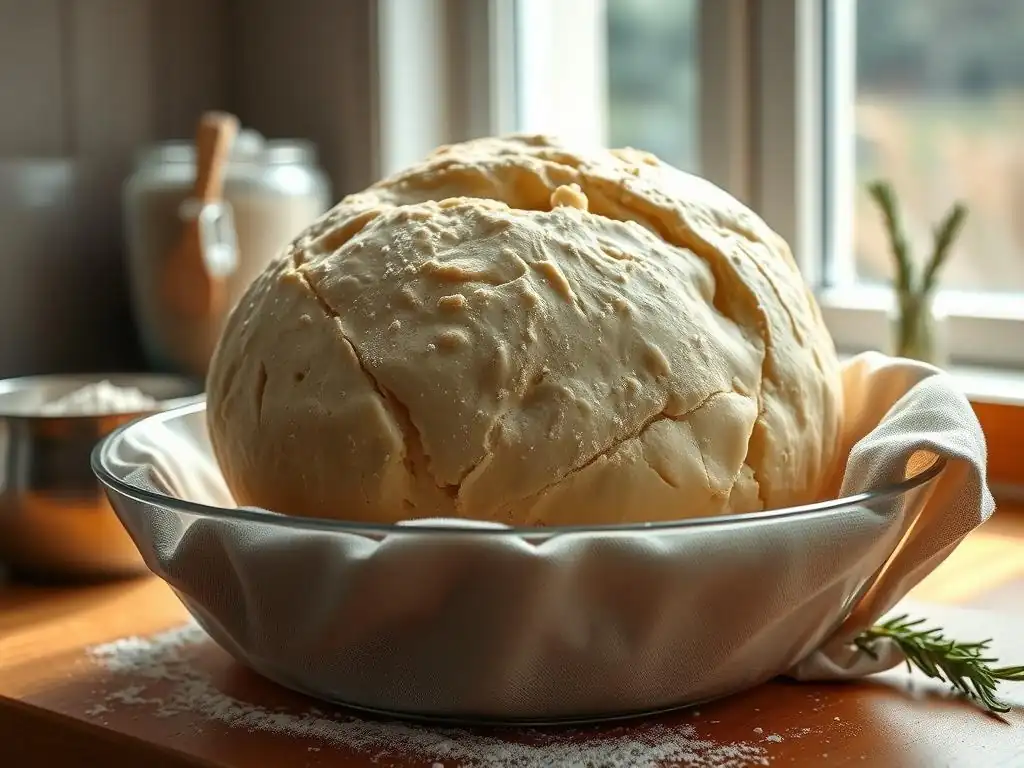
Proofing is the final rise before baking, and it's a critical step for achieving a light and airy whole wheat ciabatta. After shaping, the loaves need time to relax and expand, filling with more gas produced by the yeast. This stage is typically shorter than bulk fermentation, as the dough already has significant strength and fermentation activity. The goal is to allow the dough to become light and puffy without overproofing, which can lead to collapse in the oven.
Proofing time for ciabatta can range from 45 minutes to 1.5 hours at room temperature, depending on the temperature and how active your dough is. You'll know the dough is properly proofed when it looks visibly expanded, feels light and airy, and passes the "poke test." Proofing on a floured couche or parchment paper helps maintain the shape and prevents the delicate dough from sticking to the surface.
Optimal Proofing Conditions for a Light and Airy Loaf
Creating the right environment for proofing your whole wheat ciabatta is important. Room temperature (72-78°F or 22-26°C) is generally suitable. To prevent the surface of the dough from drying out and forming a skin, which restricts expansion, cover the loaves loosely. If using a couche, you can fold the cloth over the loaves or cover them with plastic wrap. If using parchment paper, a large plastic bag or loosely draped plastic wrap works well.
Ensuring adequate humidity can also be beneficial, though covering the dough usually suffices at room temperature. Avoid drafty areas, as sudden temperature changes can negatively impact the proofing process. The warmth allows the yeast to continue producing gas, filling the dough with the bubbles that will become the signature open crumb when baked. A properly proofed dough will feel buoyant and delicate.
The Poke Test: Knowing When Your Ciabatta is Ready to Bake
The poke test is a reliable method for determining if your whole wheat ciabatta dough is properly proofed and ready for the oven. To perform the test, gently flour your finger and lightly press it into the side of a loaf, about half an inch deep. Observe how quickly the indentation springs back.
- If the indentation springs back immediately and completely, the dough is underproofed and needs more time.
- If the indentation springs back slowly and only partially, leaving a small visible indent, the dough is likely perfectly proofed and ready to bake.
- If the indentation remains completely or collapses, the dough is overproofed. While still bakeable, an overproofed loaf may not achieve the desired oven spring and structure.
This simple test helps you gauge the readiness of your dough regardless of the exact proofing time, ensuring you bake at the optimal moment for the best texture and rise in your whole wheat ciabatta recipe.
Step 6: Baking Your Whole Wheat Ciabatta
Baking is the final stage where your patience and efforts come to fruition, transforming the proofed dough into a beautiful loaf of whole wheat ciabatta. Achieving a crispy crust and a well-set interior requires a hot oven and often the use of steam. Preheating your oven thoroughly is essential to ensure the loaf experiences maximum oven spring when it first hits the heat.
For ciabatta, a high baking temperature is standard, typically between 450°F and 475°F (230°C to 245°C). This high heat helps set the crust quickly, allowing the interior to continue expanding before the structure is fully rigid. Baking on a preheated surface, such as a baking stone or steel, further enhances oven spring by transferring heat rapidly to the base of the loaf.
Preheating Your Oven and Preparing for Baking
Proper oven preheating is crucial for baking whole wheat ciabatta. Turn your oven on at least 30-45 minutes before you plan to bake, setting it to 450-475°F (230-245°C). If using a baking stone or steel, place it in the oven during the entire preheating period to ensure it is thoroughly heated. This hot surface provides a burst of heat to the base of the loaf, promoting vigorous oven spring.
You will also need a method for generating steam in the oven during the initial part of the bake. Steam keeps the surface of the dough pliable, allowing it to expand fully before the crust hardens. Common methods include placing a tray of water on the bottom rack of the oven or adding ice cubes to a hot pan placed on the oven floor just before loading the bread. Ensure your oven is fully preheated and your steam setup is ready before gently transferring the proofed loaves.
Baking Temperature and Time for a Golden Crust
Bake your whole wheat ciabatta at a high temperature, typically 450-475°F (230-245°C), for the first 15-20 minutes, using steam. After this initial period, carefully remove the steam source and reduce the oven temperature slightly, usually to around 425°F (220°C), for the remaining baking time. This allows the crust to continue browning and crisping while the interior cooks through.
The total baking time for ciabatta usually ranges from 20 to 30 minutes, depending on the size and thickness of your loaves and your oven's characteristics. The loaves are done when they have a deep golden-brown crust and sound hollow when tapped on the bottom. If you have an internal thermometer, the center of the loaf should register around 205-210°F (96-99°C). Don't be afraid to bake to a deep color; this contributes significantly to the flavor and crust development.
Using Steam for a Crispy Crust
Using steam is perhaps the most important technique for achieving that desirable thin, crispy crust on your whole wheat ciabatta. When the dough is first placed in a hot, steamy oven, the moist environment prevents the surface from drying out and setting too quickly. This allows the dough to expand maximally during oven spring, resulting in a larger, airier loaf. As the bake progresses and the steam dissipates (or is removed), the crust dries out and hardens, forming a crisp exterior.
There are several ways to create steam in a home oven. A simple method is to place a metal tray on the bottom rack of your oven while it preheats. Just before loading the bread, carefully pour about a cup of hot water into the tray.
Another popular method is to place a cast iron pan or baking tray on the bottom rack during preheating and toss a handful of ice cubes into it right as you put the bread in. Be cautious when adding water or ice to a hot oven to avoid burns. Bake with steam for the first 15-20 minutes, then remove the steam source for the remainder of the bake.
Step 7: Cooling and Enjoying Your Homemade Ciabatta
After the beautiful golden loaves of whole wheat ciabatta emerge from the oven, the hardest part is waiting to slice into them! However, allowing the bread to cool properly is just as crucial as any other step in the process. Immediately after baking, transfer the loaves to a wire cooling rack. This allows air to circulate around the entire loaf, preventing the bottom crust from becoming soggy due from trapped steam.
Resist the temptation to cut into the bread while it's still hot. As bread cools, internal moisture redistributes, and the structure sets fully. Slicing too early can result in a gummy interior and can compromise the texture of the crumb. While the aroma is undeniably enticing, patience is key to enjoying the best possible texture and flavor from your homemade whole wheat ciabatta recipe.
Allowing the Ciabatta to Cool Completely
For optimal texture and flavor, allow your whole wheat ciabatta loaves to cool completely on a wire rack before slicing. This typically takes at least 1 to 2 hours for standard-sized loaves. During this cooling period, the internal temperature of the bread continues to drop, and moisture migrates from the interior crumb towards the cooler crust. This process is essential for the crumb structure to stabilize and for the flavors to fully develop and mellow.
Cutting into hot bread can cause the steam trapped inside to escape rapidly, resulting in a dense or gummy texture. The crust, which was crispy from the bake, can also soften prematurely. By allowing a full cool-down, you ensure a well-structured, airy crumb and a satisfyingly crisp crust, making your homemade whole wheat ciabatta a true success.
Serving Suggestions for Whole Wheat Ciabatta
Once your whole wheat ciabatta has cooled, the possibilities for enjoying it are endless! Its robust flavor and open crumb make it incredibly versatile. It is, of course, perfect for dipping in high-quality extra virgin olive oil, perhaps with a sprinkle of sea salt and some balsamic vinegar. The large holes are excellent for soaking up liquids.
Consider using thick slices for hearty sandwiches, piled high with your favorite fillings. The sturdy crust and airy interior hold up well to moist ingredients. It also makes fantastic toast, perfect for topping with avocado, tomatoes, or jam. Cut into cubes, it's the ideal bread for panzanella salad or homemade croutons. The delightful chew and flavor of your homemade whole wheat ciabatta will elevate any meal.
Tips and Tricks for Baking the Best Whole Wheat Ciabatta
Achieving an Open Crumb Structure in Whole Wheat Bread
Achieving that signature open crumb in a whole wheat ciabatta can be slightly more challenging than with white flour, but it is definitely attainable with the right techniques. The bran and germ in whole wheat flour can interfere with gluten development, so maximizing gluten strength and elasticity is paramount. This is primarily achieved through high hydration, a long fermentation period (especially using a preferment like a poolish), and gentle handling techniques like stretch and folds rather than aggressive kneading.
Ensure your flour has a high protein content (12-14%). Hydrate the dough generously (75-85% or higher). The autolyse step helps the flour absorb water and kickstarts gluten formation. The series of stretch and folds during bulk fermentation builds strength and traps air without destroying the developing structure. Finally, gentle handling during dividing and shaping, followed by proper proofing and baking with sufficient steam, all contribute to maximizing the size and distribution of air pockets for that coveted open crumb in your whole wheat ciabatta recipe.
Troubleshooting Common Ciabatta Baking Problems
Even with a great whole wheat ciabatta recipe, you might encounter challenges. If your ciabatta is dense and lacks an open crumb, potential culprits include insufficient hydration (dough was too stiff), not enough gluten development (too little mixing/folding, or low protein flour), overproofing (dough collapsed), or insufficient steam during baking. Try increasing hydration slightly in your next batch, ensure you perform enough stretch and folds until the dough shows strength, monitor proofing time carefully using the poke test, and ensure your oven is properly steamy.
If the crust is tough or not crispy, it could be due to insufficient baking time or temperature, or lack of steam. Ensure your oven is fully preheated and hot, bake until the crust is deeply colored, and use a reliable steaming method for the first 15-20 minutes. If the dough is too sticky to handle, remember ciabatta is meant to be very wet. Use generous flour on your work surface and hands, and rely on a bench scraper. With practice, handling wet dough becomes easier.
Variations: Experimenting with Flavors and Add-ins
Once you've mastered the basic whole wheat ciabatta recipe, you can easily experiment with variations to add different flavors and textures. The neutral yet nutty base of the whole wheat loaf pairs well with a variety of additions. Incorporating seeds or herbs can enhance both the nutritional profile and the sensory experience of the bread.
Consider adding ingredients during the final mixing stage or during the first set of stretch and folds. Ensure any wet additions, like roasted garlic or olives, are well-drained. Dry additions like seeds can absorb some moisture, so you might need to adjust the water slightly. Start with small amounts to see how they affect the dough handling and flavor before adding larger quantities.
Adding Seeds and Grains for Texture and Nutrition
Incorporating seeds and grains is a popular way to enhance the nutritional value and add delightful texture to your whole wheat ciabatta. Seeds such as sunflower, pumpkin, sesame, flax, and chia seeds are excellent choices. You can add them whole or lightly toasted to bring out their flavor. Grains like rolled oats, cracked wheat, or even cooked grains can also be folded into the dough.
For a batch using 500g of flour, you might add anywhere from 25g to 75g of mixed seeds or grains. Consider soaking some harder grains overnight before adding them to the dough to ensure they soften during baking. These additions not only provide beneficial fiber, healthy fats, and minerals but also create a more visually interesting and satisfying chew in your whole wheat ciabatta.
Infusing Herbs and Spices for Unique Flavor Profiles
Adding fresh or dried herbs and spices can transform your whole wheat ciabatta into a fragrant and flavorful loaf. Mediterranean herbs like rosemary, thyme, and oregano are classic choices that pair wonderfully with the nutty flavor of whole wheat. Garlic, either minced fresh or roasted, is another fantastic addition that adds depth and aroma.
For a subtle infusion, add 1-2 tablespoons of chopped fresh herbs or 1-2 teaspoons of dried herbs per 500g of flour during the final mixing. For a more intense flavor, consider infusing the olive oil used in the recipe with garlic or herbs beforehand. Spices like black pepper flakes or a pinch of red pepper flakes can add a little heat. Experiment with different combinations to find your favorite way to personalize your whole wheat ciabatta recipe.
Storing Your Whole Wheat Ciabatta for Freshness
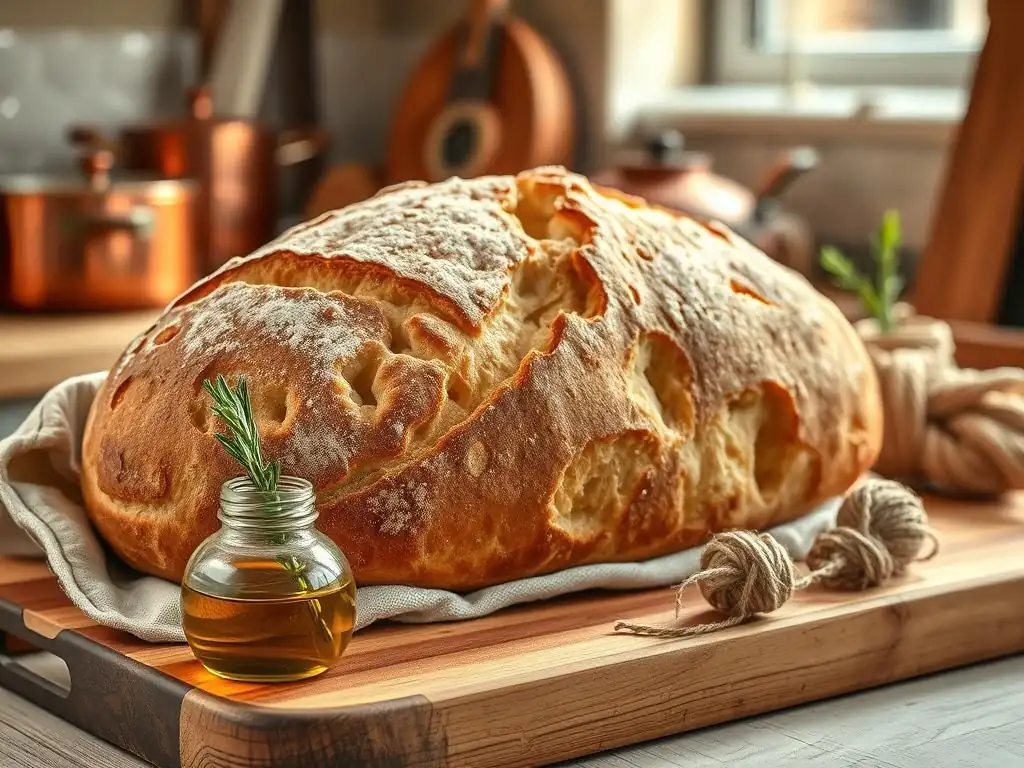
Proper storage is key to keeping your homemade whole wheat ciabatta fresh and preserving its wonderful crust and airy interior. Unlike commercially produced bread with preservatives, homemade bread has a shorter shelf life. The crispy crust is particularly susceptible to becoming soft if stored improperly.
The best way to store ciabatta for short-term use (1-2 days) is at room temperature. Avoid refrigerating bread, as this can accelerate staling. For longer storage, freezing is an excellent option that allows you to enjoy your whole wheat ciabatta for weeks to come.
Proper Storage Techniques to Maintain Crust and Texture
To keep your whole wheat ciabatta crust crispy, store it unwrapped on the cut side on a cutting board for the first day, or loosely wrapped in a paper bag. A paper bag allows air circulation, which helps maintain the crust's texture better than plastic. If you must use plastic wrap or a bread box, the crust will likely soften, but the interior crumb will stay moist longer.
For storage beyond a day or two at room temperature, or if humidity is high, consider slicing the loaf and storing slices in a resealable plastic bag or airtight container to prevent drying out, accepting that the crust will soften. However, the preferred method for longer storage that preserves quality is freezing.
Freezing Whole Wheat Ciabatta for Later Enjoyment
Freezing is an excellent way to store homemade whole wheat ciabatta while preserving its quality. Ensure the loaf is completely cooled before freezing. You can freeze the loaf whole, in halves, or sliced. For best results, wrap the bread tightly in plastic wrap, then wrap it again in aluminum foil or place it in a freezer-safe bag. This double layer of protection helps prevent freezer burn.
Frozen ciabatta can be stored for up to 2-3 months. To thaw, remove the bread from the freezer and let it thaw at room temperature, either on the counter (still wrapped) or on a wire rack. For a quick refresh and to bring back some crust crispness, you can place a thawed loaf or slices directly into a preheated oven (around 350°F or 175°C) for 5-10 minutes. This method works particularly well for whole loaves.
Conclusion: Your Journey to Baking Delicious Whole Wheat Ciabatta
Embrace the Art of Homemade Bread Baking with BakeWithEase
Baking your own whole wheat ciabatta is a rewarding process that connects you to the simple yet profound art of bread making. From nurturing the bubbly poolish to witnessing the remarkable transformation in the hot oven, every step offers a sense of accomplishment.
At BakeWithEase, we aim to demystify this process, providing you with the knowledge and confidence to create artisan-quality bread in your own kitchen. This whole wheat ciabatta recipe is more than just instructions; it's a guide to understanding the nuances of high-hydration doughs and the unique characteristics of whole grains, empowering you to bake this delicious and healthy loaf successfully.
As you continue your bread baking journey, remember that practice makes perfect. Each loaf you bake will teach you something new about dough hydration, fermentation, and the behavior of yeast. Don't be discouraged by loaves that aren't perfectly shaped or as airy as you hoped; every bake is a learning opportunity. With the techniques outlined here and a little patience, you'll soon be baking beautiful, flavorful whole wheat ciabatta loaves consistently, ready to share and enjoy.
We love seeing what our community creates! Once you've successfully baked your delicious whole wheat ciabatta using our guide, we encourage you to share your results. Tell us about your experience – what went well, any challenges you faced, and how you enjoyed your homemade loaf. Your successes and insights can inspire and help other bakers on their own journey with this whole wheat ciabatta recipe.
Whether it's a photo of your perfectly proofed dough, a shot of the gorgeous open crumb, or how you served your finished ciabatta, share your baking story. Celebrating your achievements is part of the joy of baking. We're excited to hear about your airy, flavorful whole wheat ciabatta creations and how this recipe helped you master another wonderful bread. Happy baking from BakeWithEase!
Frequently Asked Questions
What makes whole wheat ciabatta different from regular ciabatta?
Whole wheat ciabatta uses whole wheat flour, which adds a nutty flavor and increased fiber compared to regular ciabatta made with white flour.
Is this whole wheat ciabatta recipe suitable for beginner bakers?
While some baking experience is helpful, this recipe from BakeWithEase provides step-by-step instructions and easy-to-find ingredients, making it accessible to ambitious beginners. Patience is key!
How can I achieve the signature airy texture of ciabatta when using whole wheat flour?
Using a high hydration dough, proper proofing times, and gentle handling are crucial. The recipe likely emphasizes these techniques to combat the denser nature of whole wheat flour.
What are some serving suggestions for whole wheat ciabatta?
Whole wheat ciabatta is delicious for sandwiches, dipping in olive oil, or serving alongside soups and salads. Its robust flavor pairs well with a variety of foods.
Can I substitute other types of flour in this whole wheat ciabatta recipe?
While possible, substituting flours will alter the texture and flavor. It is recommended to follow the BakeWithEase recipe as written for the best results, especially when trying to achieve that classic ciabatta airiness with whole wheat.
Final Reflection: The Humble Loaf, the Endless Possibilities
The pursuit of the perfect whole wheat ciabatta is not merely a culinary endeavor; it's a journey of understanding texture, flavor, and the transformative power of simple ingredients. This recipe, designed to deliver an airy and flavorful loaf, highlights the potential of whole wheat flour, often overlooked in favor of its refined counterpart. The seemingly small act of baking can unlock a world of sensory experiences.
The enduring appeal of bread, particularly ciabatta, lies in its ability to connect us to our culinary heritage and to the simple pleasures of life. It's a testament to the enduring power of tradition, yet adaptable to modern tastes and techniques. Bread is the staff of life,
a simple phrase, yet it encapsulates the profound role bread plays in cultures worldwide, a symbol of sustenance and community. This recipe, while focused on a specific type of bread, aims to inspire a deeper appreciation for the craft of baking and the satisfaction derived from creating something delicious from scratch.
Now, consider your own kitchen. Imagine the aroma of freshly baked ciabatta filling your home, the satisfying crust giving way to a soft, airy interior. Don't be intimidated by the process; embrace the challenge. Experiment with different flours, hydration levels, and even add-ins to personalize your loaf. This recipe is a starting point, a springboard for your own culinary explorations. The journey of baking whole wheat ciabatta is a rewarding one, filled with learning, experimentation, and the undeniable joy of sharing the fruits of your labor.
Unleash Your Inner Baker: Craft the Perfect Ciabatta!
Thanks for joining us on this delicious journey into the world of whole wheat ciabatta! We hope you gained valuable insights and a newfound appreciation for this airy, flavorful bread. Now it's time to put your knowledge to the test.
- Bake your own ciabatta! This recipe is designed for success, even for beginners. Don't be intimidated – the results are worth the effort!
- Share your baking adventure: Post a picture of your creation on social media using #BakeWithEaseCiabatta and tag us! Let's inspire others to bake along.
- Explore other recipes on BakeWithEase.com for more delightful baking experiences. We have plenty of options for all skill levels.
What unique ingredient will you add to your next ciabatta loaf to elevate its flavor profile?