
The Best European Breads to Bake for Beginners

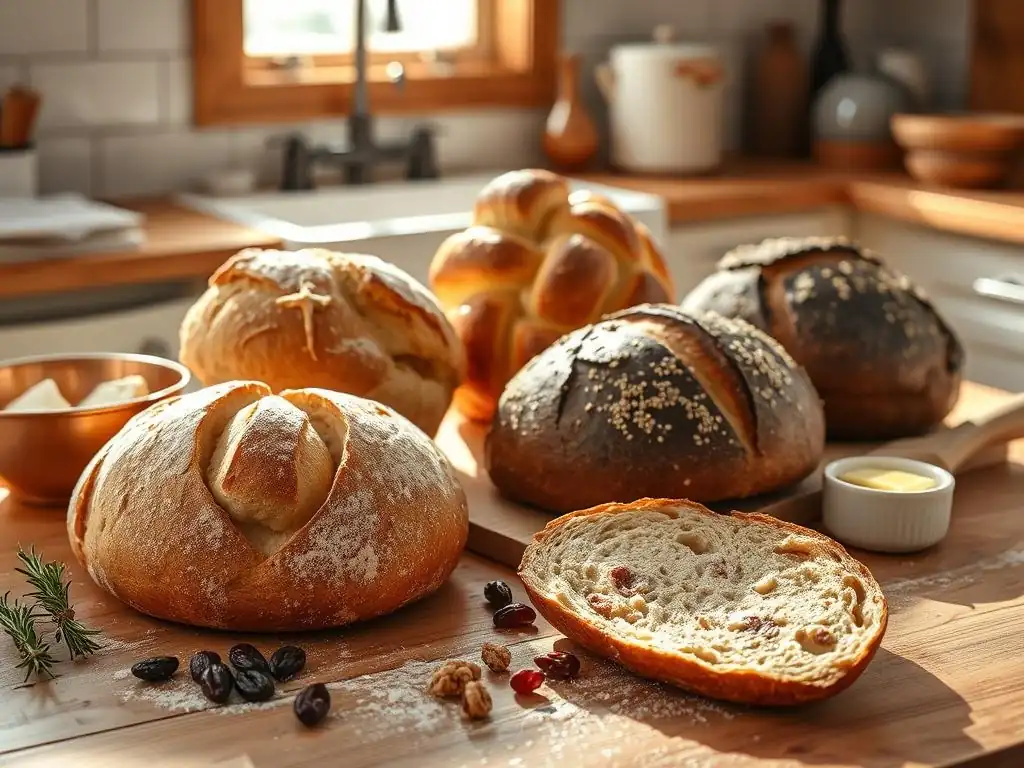
Welcome to BakeWithEase, your trusted companion on your baking journey! Ever dreamed of filling your kitchen with the irresistible aroma of freshly baked European bread? You're in the right place. Discover our collection of Easy European bread recipes designed specifically for beginners, unlocking a world of flavor and satisfaction. Curious to learn how to create authentic, crusty loaves without the fuss? Let's get baking!
- The Best European Breads to Bake for Beginners: Easy Recipes from BakeWithEase
- Introduction: Discovering Easy European Bread Recipes for Home Bakers
- Easy Italian Bread Recipes for Beginners
- Simple French Bread Recipes to Try
- German Bread Baking for Beginners: Simple Recipes
- Spanish Bread Baking: Easy Recipes
- Quick and Easy European Bread Recipes: No-Knead Options
- Tips and Tricks for Baking European Breads with Ease
- Conclusion: Expanding Your Baking Horizons with Easy European Bread Recipes
-
Frequently Asked Questions
- What makes a European bread recipe "easy" for beginners?
- Are there any specific ingredients that are commonly used in European breads?
- What are some examples of beginner-friendly European bread recipes I can find on BakeWithEase?
- How does BakeWithEase help me succeed in baking European breads?
- What if I don't have a lot of experience with baking bread? Will these recipes still work for me?
- Final Reflection: A Crusty Crumb and a Journey of Discovery
- Unleash Your Inner Baker: Start Baking European Breads Today!
The Best European Breads to Bake for Beginners: Easy Recipes from BakeWithEase
Introduction: Discovering Easy European Bread Recipes for Home Bakers
Welcome to BakeWithEase: Your Journey into Baking European Breads Starts Here
Welcome to BakeWithEase, your friendly guide to the wonderful world of baking! If you've ever dreamed of pulling a warm, crusty loaf out of your own oven, you're in the right place. Baking bread, especially those iconic European varieties, might seem daunting at first glance, but many classic loaves are surprisingly accessible for newcomers.
Our goal here is to demystify the process and introduce you to a selection of easy European bread recipes that are perfect for your first baking adventures. We'll explore simple techniques and ingredients that yield delicious results, proving that you don't need years of experience to enjoy homemade bread.
Embarking on your journey with easy European bread recipes is a rewarding experience. You'll learn fundamental baking principles that apply to countless other recipes, building confidence with each successful bake. From the satisfying feel of the dough to the incredible aroma filling your kitchen, baking bread is a truly sensory delight. We've curated this guide specifically with beginners in mind, focusing on recipes that are forgiving and require minimal specialized equipment. Get ready to discover the joy of creating authentic European flavors right in your own home with BakeWithEase!
Why European Breads are Perfect for Beginner Bakers
European breads offer a fantastic starting point for beginner bakers due to their diverse range of styles, many of which rely on simple, foundational techniques. Unlike some complex pastries, many traditional European loaves use just a few core ingredients: flour, water, yeast (or a starter), and salt.
This simplicity means there are fewer variables to manage, making it easier to understand the impact of each step, from mixing and kneading to proofing and baking. Learning to handle dough with varying hydration levels, from sturdy German rye to wet Italian ciabatta, provides valuable hands-on experience that is crucial for developing baking intuition.
Furthermore, the variety within easy European bread recipes means there's something for every learning style and preference. Some recipes, like focaccia or certain no-knead methods, require very little hands-on kneading, perfect for those intimidated by traditional dough handling. Others, like a basic French baguette or German Brötchen, introduce simple shaping techniques that are quick to master. The forgiving nature of many of these doughs allows beginners to experiment without fear of complete failure, making the learning process enjoyable and encouraging. Plus, the delicious outcome provides immediate gratification and motivation to keep baking!
Easy Italian Bread Recipes for Beginners
Focaccia: A Simple Italian Flatbread Recipe
Focaccia is perhaps one of the most approachable and rewarding easy Italian bread recipes for anyone starting out. This rustic flatbread originates from Liguria and is characterized by its dimpled surface, generous drizzle of olive oil, and often, toppings like rosemary, sea salt, or olives. The dough is typically high in hydration, meaning it uses a relatively large amount of water compared to flour, which contributes to its soft, airy texture. Unlike many other breads, focaccia dough is often mixed and then simply stretched and folded a few times rather than requiring intensive kneading, making it very beginner-friendly.
Baking focaccia at home is surprisingly straightforward. The process involves mixing the wet dough, allowing it to rise (proof) until bubbly and expanded, transferring it to a baking pan, dimpling the surface with your fingertips, adding toppings, and then baking at a relatively high temperature, often around 200-220°C (390-430°F). The high heat helps create a lovely golden crust while keeping the interior tender.
The simplicity of the method, combined with the incredible flavor and texture of the finished bread, makes focaccia a perfect introduction to easy European bread recipes. A typical focaccia might use around 300-400 grams of flour, 250-350 ml of water, a small amount of yeast (perhaps 5-7g active dry yeast), and salt.
Step-by-Step Guide to Baking Focaccia at Home
Baking a delicious focaccia at home is a simple sequence of steps. First, you'll combine your flour, salt, and yeast in a bowl. Then, gradually add warm water and a splash of olive oil, mixing until a shaggy, sticky dough forms. This is often done with a spoon or spatula, as the dough can be quite wet.
1.  Mix dry ingredients (flour, salt, yeast).
2.  Add warm water and olive oil; mix to combine.
3.  Let the dough rest for 10-15 minutes.
4.  Perform a series of stretches and folds (2-3 times over 60-90 minutes, resting 30 mins between).
5.  Transfer dough to an oiled baking pan.
6.  Allow dough to rise until doubled in size (about 1-2 hours).
7.  Generously drizzle with olive oil and dimple the surface.
8.  Add desired toppings (rosemary, sea salt, etc.).
9.  Bake at 200-220°C (390-430°F) for 20-30 minutes, or until golden brown.
Tips for Adding Flavor to Your Focaccia
One of the best things about focaccia is how easily you can customize its flavor. The classic pairing is fresh rosemary and flaky sea salt, which enhances the natural richness of the olive oil and the bread itself.
-   **Herbs:** Sprinkle fresh or dried herbs like rosemary, thyme, or oregano over the top before baking.
-   **Garlic:** Thinly slice garlic cloves and tuck them into the dimples. Roasting the garlic first adds a sweeter, milder flavor.
-   **Vegetables:** Cherry tomatoes, sliced onions, or bell peppers can be pressed into the dough.
-   **Olives:** Whole or sliced olives are a traditional and delicious addition.
-   **Cheese:** A sprinkle of Parmesan or other hard cheese can add a savory note.
Remember to be generous with the olive oil both in the dough and on top before baking – it's key to focaccia's signature texture and rich flavor. Using a good quality extra virgin olive oil makes a noticeable difference.
Ciabatta: Mastering the Rustic Italian Bread
Ciabatta, meaning "slipper" in Italian, is another iconic Italian bread known for its irregular shape, crispy crust, and incredibly open, airy interior crumb. While it might look complex, mastering a simple ciabatta recipe is achievable for beginners willing to work with a very wet dough.
The secret to ciabatta's characteristic texture lies in its high hydration (often 75-85% water to flour ratio) and a gentle handling approach that preserves the air bubbles formed during fermentation. Unlike breads that require vigorous kneading, ciabatta dough is typically mixed until just combined and then developed through a series of stretches and folds over several hours.
Baking ciabatta involves creating an environment that promotes a good oven spring and crust development. This often means baking it on a hot surface, like a baking stone or steel, and using steam in the oven during the initial baking phase. The long, slow fermentation (often 12-18 hours for the initial "poolish" or "biga" pre-ferment, followed by a few hours for the final dough) develops complex flavors and contributes to the open crumb structure.
While the dough can be sticky and challenging to handle initially, embracing its wetness and using plenty of flour on your work surface will lead to a beautiful loaf. A simple ciabatta might involve 500g flour, 375-425ml water, a pinch of yeast, and salt.
The Secret to Ciabatta's Open Crumb
The signature open, holey crumb of ciabatta is primarily a result of three factors: high hydration, long fermentation, and gentle handling.
-   **High Hydration:** The large amount of water makes the dough very slack. This slackness allows the gluten network to stretch easily, creating large pockets of air during fermentation and baking. Doughs with lower hydration are stiffer and produce a tighter crumb.
-   **Long Fermentation:** Allowing the dough to ferment slowly, often using a pre-ferment like a poolish (equal parts flour and water, fermented overnight) or biga (drier pre-ferment), develops complex flavors and strengthens the gluten structure gently. This slow process creates many tiny bubbles.
-   **Gentle Handling:** Once the dough has fermented, it's crucial not to deflate it. Shaping ciabatta involves dividing the dough and gently stretching or folding it into shape, rather than kneading or punching it down vigorously. This preserves the network of air bubbles.
Combining these elements allows the dough to capture and hold a significant amount of gas, resulting in that desirable open structure.
Beginner-Friendly Ciabatta Recipe
While traditional ciabatta can be complex, a simplified approach makes it accessible. This version often uses a slightly lower hydration and a shorter fermentation time while still aiming for a good crumb.
1.  **Mix Ingredients:** Combine warm water, a small amount of active dry yeast (e.g., 2-3g), flour (e.g., 500g), and salt. Mix until just combined into a very wet, shaggy dough.
2.  **Rest:** Let the dough rest for 20-30 minutes.
3.  **Stretch and Fold:** Perform a set of stretch and folds directly in the bowl every 30-45 minutes for 2-3 hours. Wet your hands slightly to prevent sticking.
4.  **Bulk Fermentation:** Allow the dough to rise until doubled, possibly for another 1-2 hours after the folds are complete.
5.  **Shape:** Turn the dough out onto a generously floured surface. Gently divide it into desired shapes (usually rectangles) using a bench scraper. Avoid punching or deflating.
6.  **Proof:** Place the shaped pieces on a floured baking sheet or couche and let them proof for 30-60 minutes.
7.  **Bake:** Transfer loaves to a preheated oven (around 230-240°C or 450-465°F) on a baking stone or steel, using steam for the first 10-15 minutes. Bake for 20-30 minutes until golden and crusty.
This simplified process reduces the overnight step but still yields a delicious, airy loaf, making it a great entry into baking this classic Italian bread.
Simple French Bread Recipes to Try
Baguette: A Classic French Bread Made Easy
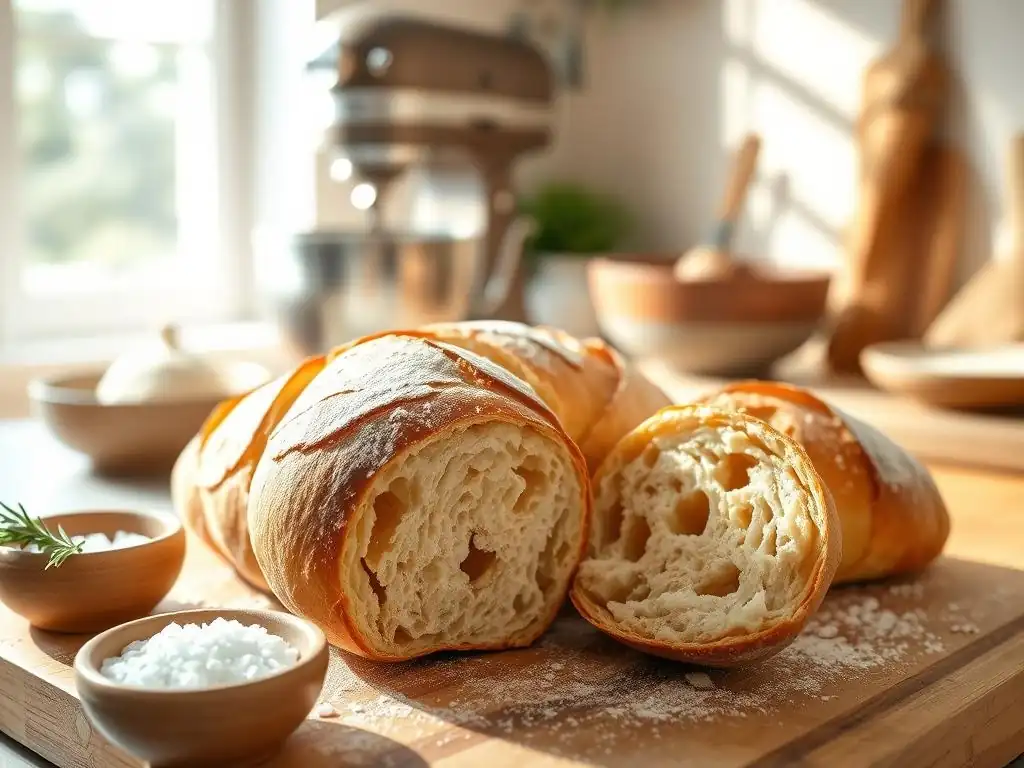
The baguette is arguably the most iconic French bread, recognized by its long, slender shape and crisp, crackly crust. While achieving the perfect artisan baguette is a lifelong pursuit for many bakers, creating a delicious, homemade version is well within reach for beginners.
The key to a good baguette lies in its simple ingredients – typically just flour, water, yeast, and salt – and mastering a few basic techniques like mixing, fermenting, shaping, and baking with steam. A standard baguette dough has a hydration level often between 70-75%, providing enough moisture for a relatively open crumb while still being manageable for shaping.
Baking baguettes successfully requires a hot oven and the creation of steam during the initial baking phase. Steam allows the crust to remain pliable for longer, enabling the loaf to expand fully (oven spring) before the crust hardens into that characteristic crisp shell. While professional bakeries have steam-injected ovens, home bakers can replicate this by placing a pan of hot water or ice cubes on the bottom rack of the oven just before loading the bread.
Shaping the long, thin loaves takes a little practice, but even imperfectly shaped baguettes taste wonderful. Learning to make baguettes is a fundamental step in mastering easy European bread recipes. A recipe for two baguettes might use about 300g flour, 210-225ml water, a few grams of yeast, and salt.
Simplified Baguette Recipe for Home Bakers
This simplified recipe focuses on the core steps needed to produce tasty baguettes without overly complex techniques.
1.  **Mix Dough:** Combine flour (e.g., 300g), salt, yeast (e.g., 2g active dry), and warm water (e.g., 220ml). Mix until a shaggy dough forms.
2.  **Knead:** Knead by hand for 5-10 minutes until the dough is relatively smooth and elastic.
3.  **Bulk Fermentation:** Place the dough in a lightly oiled bowl, cover, and let rise at room temperature until doubled (1.5-2.5 hours).
4.  **Divide and Rest:** Gently turn the dough onto a lightly floured surface, divide into 2-3 equal pieces. Shape each into a rough rectangle and let rest for 15-20 minutes.
5.  **Shape Baguettes:** Gently shape each piece into a baguette by folding the dough onto itself and sealing the seam. Roll gently to the desired length (about 12-15 inches).
6.  **Proof:** Place the shaped baguettes on a floured couche or baking sheet lined with parchment paper, separated by folds. Cover and let proof for 45-75 minutes.
7.  **Bake:** Preheat oven to 240°C (465°F) with a baking stone or steel and a steam setup (pan of hot water). Score the baguettes with a sharp blade. Transfer to the oven, add steam, and bake for 20-25 minutes until golden brown and crusty.
This method streamlines the process, making it more accessible than traditional multi-day recipes while still yielding a satisfying result.
Achieving a Crispy Crust on Your Baguette
A hallmark of a great baguette is its thin, shatteringly crisp crust. Achieving this at home requires high heat and plenty of steam.
-   **High Oven Temperature:** Baguettes are typically baked at very high temperatures, often 230-240°C (450-465°F). This intense heat helps the crust set quickly and promotes rapid expansion.
-   **Steam:** Steam is crucial during the first 10-15 minutes of baking. It keeps the surface of the dough moist, allowing the loaf to expand without the crust hardening prematurely. As the steam dissipates, the high heat then dries the surface, creating the crisp crust. Home bakers can create steam by placing a pan of hot water or ice cubes on the bottom rack of the oven just before loading the bread.
-   **Baking Surface:** Baking on a preheated baking stone or steel helps transfer heat quickly to the base of the loaf, contributing to a good crust and oven spring.
-   **Cooling:** Allowing the baguettes to cool completely on a wire rack is essential. Hot bread releases steam, and if it cools on a flat surface, the bottom crust can become soggy.
By focusing on these elements, you can significantly improve the crispness of your homemade baguettes, bringing you closer to that authentic French bakery experience.
Pain de Campagne: Rustic French Sourdough for Beginners
Pain de Campagne, or "country bread," is a staple of French bakeries, often characterized by its round shape, hearty flavor, and rustic appearance. Traditionally made with a mix of white and whole wheat or rye flour and leavened with a sourdough starter, it offers a slightly more complex flavor profile than a simple yeast loaf.
For beginners interested in exploring sourdough, a simplified Pain de Campagne recipe can be a great entry point into the world of wild yeast baking. While managing a sourdough starter requires some commitment, the actual bread-making process for a rustic loaf like this can be quite forgiving.
Baking Pain de Campagne involves developing a strong sourdough starter, incorporating it into a dough often with a hydration level around 70-75%, allowing for a relatively long bulk fermentation (several hours), a shorter final proof, and baking in a hot oven, often in a Dutch oven to replicate a professional oven environment. The mix of flours contributes to both flavor and structure. For instance, a common ratio might be 80% strong white flour and 20% whole wheat or rye flour.
The slightly higher whole grain content adds nutrients and a chewier texture compared to a pure white loaf. Learning to bake Pain de Campagne introduces beginners to the nuances of working with sourdough, a fundamental skill in many easy European bread recipes.
Easy Sourdough Starter for Pain de Campagne
Creating and maintaining a sourdough starter is the first step towards baking Pain de Campagne and other sourdough breads. It's simpler than it sounds, requiring just flour, water, and patience.
1.  **Day 1:** Mix 50g of whole wheat or rye flour with 50g of warm water in a jar. Stir until well combined, cover loosely, and leave at room temperature (ideally 20-24°C or 68-75°F).
2.  **Days 2-7 (or until active):** Discard half of the starter. Feed the remaining starter with 50g of flour (start transitioning to a mix, perhaps 25g whole wheat/rye and 25g white bread flour) and 50g of warm water. Mix well, cover, and let sit. You should start seeing bubbles and growth within a few days. Once the starter consistently doubles in size within 6-8 hours after feeding, it's active and ready to use.
3.  **Maintenance:** Once active, you can store it in the fridge and feed it once a week, or keep it at room temperature and feed it daily (discarding half each time). Use a 1:1:1 ratio of starter:flour:water for feeding (e.g., 50g starter, 50g flour, 50g water).
An active starter for Pain de Campagne should be bubbly, smell slightly tangy, and pass the float test (a small dollop floats in water).
Baking a Loaf of Pain de Campagne: A Step-by-Step Guide
Baking Pain de Campagne follows a general sourdough process, adapted for beginner simplicity.
1.  **Mix Dough:** Combine active sourdough starter (e.g., 100g), warm water (e.g., 350ml), a mix of flours (e.g., 400g strong white, 100g whole wheat), and salt (e.g., 10g). Mix until a shaggy dough forms; rest 30 minutes (autolyse).
2.  **Knead/Stretch & Fold:** Perform a series of stretch and folds (3-4 sets, 30-45 minutes apart) or gentle kneading until the dough develops some strength.
3.  **Bulk Fermentation:** Allow the dough to rise at room temperature until it has significantly increased in volume (often 50-75%) and is bubbly (3-6 hours depending on temperature and starter activity).
4.  **Shape:** Gently turn the dough onto a lightly floured surface. Shape into a round (boule) or oval (bâtard), taking care not to degas it too much.
5.  **Final Proof:** Place the shaped dough seam-side up in a floured proofing basket (banneton) or a bowl lined with a floured cloth. Proof at room temperature for 1-2 hours or in the refrigerator for 8-12 hours (cold proof develops more flavor).
6.  **Bake:** Preheat oven to 230°C (450°F) with a Dutch oven inside for 30-60 minutes. Carefully turn the dough into the hot Dutch oven, score the top, cover, and bake for 20 minutes. Remove the lid and bake for another 20-25 minutes until the crust is deep golden brown and the internal temperature is around 96°C (205°F).
Using a Dutch oven creates the necessary steam for a great crust and oven spring, making this method particularly reliable for beginners tackling sourdough.
German Bread Baking for Beginners: Simple Recipes
Brötchen: Easy German Bread Rolls
Brötchen, meaning "small bread" in German, are ubiquitous breakfast rolls known for their crisp crust and light, airy interior. They are a fantastic entry point into German bread baking for beginners because the dough is relatively easy to handle, and the rolls bake quickly. While there are countless regional variations, a basic Brötchen dough is typically made with white flour, water, yeast, and salt, sometimes with a pinch of sugar or fat. The key to their texture lies in proper kneading, proofing, and baking at a high temperature with steam.
Baking Brötchen involves creating a smooth, elastic dough through kneading (either by hand or mixer), allowing it to rise, dividing it into small portions (typically 50-80 grams each), shaping them into rounds or ovals, and then baking them in a hot oven, often around 220-240°C (430-465°F). Like baguettes, baking with steam helps achieve that desired crisp crust. The small size means they bake relatively quickly, usually within 15-20 minutes, making them a satisfying project for a morning or afternoon. These easy European bread recipes are perfect for getting comfortable with basic yeast doughs and shaping small rolls.
Baking Soft and Fluffy Brötchen
Achieving both a crisp exterior and a soft, fluffy interior in Brötchen depends on dough development and baking technique.
-   **Proper Kneading:** Develop the gluten structure sufficiently so the dough is smooth and elastic. This allows the rolls to hold their shape and expand nicely during proofing and baking.
-   **Hydration:** A dough hydration around 60-65% is typical – not too wet, not too dry – making it easy to handle and shape while yielding a tender crumb.
-   **Proofing:** Allow the dough to proof adequately but not excessively. Over-proofing can lead to a dense crumb. The rolls should look puffy but not deflated when gently poked.
-   **High Heat & Steam:** Baking at a high temperature initially with steam creates a strong oven spring and sets the crust quickly, trapping moisture inside for a soft interior.
Using a mix of all-purpose and bread flour can also help achieve the desired balance of crisp crust and soft crumb.
Variations for Brötchen: Seeds, Herbs, and More
Basic Brötchen are delicious on their own, but they are also a perfect canvas for incorporating different flavors and textures.
-   **Seeds:** Roll the tops of the shaped rolls in sesame seeds, poppy seeds, sunflower seeds, or a mix (like the German "Saatenbrötchen").
-   **Herbs:** Mix finely chopped fresh herbs like chives or parsley into the dough, or sprinkle dried herbs on top.
-   **Spices:** Add a pinch of caraway seeds or fennel seeds to the dough for a traditional German flavor.
-   **Whole Wheat:** Substitute a small portion of the white flour (e.g., 10-20%) with whole wheat or rye flour for a heartier roll.
-   **Cheese:** Add grated cheese to the dough or sprinkle on top before baking for a savory twist.
These simple variations allow beginners to experiment and personalize their easy European bread recipes.
Pretzels: A Beginner's Guide to German Pretzels
German pretzels (Brezeln) are distinctive for their chewy interior, deep brown, shiny crust, and coarse salt topping. While the shaping might look intimidating, the dough itself is a straightforward yeast dough, and the unique crust is achieved through a simple step: dipping the shaped pretzels in a food-grade lye solution (or a safer baking soda solution) before baking. This alkaline bath causes the Maillard reaction to happen rapidly during baking, giving pretzels their characteristic color and flavor. Baking pretzels is a fun project and a rewarding way to explore German bread baking for beginners.
The process involves making a relatively low-hydration dough, allowing it to rise briefly, dividing and rolling the dough into long ropes, shaping the classic pretzel knot, dipping the shaped dough into the alkaline solution, topping with salt, and then baking at a high temperature (around 200-220°C or 390-430°F) until deeply colored. While traditional recipes use lye (sodium hydroxide), which requires extreme caution, a solution made from baking soda baked at a high temperature provides a much safer alternative for home bakers that yields good results.
A typical pretzel dough might use 500g flour, 250-300ml water, a small amount of yeast, and salt.
Easy Pretzel Dough Recipe
A simple pretzel dough is a good starting point for beginners. It's firm and easy to handle, which is helpful for shaping.
1.  **Mix Ingredients:** Combine warm water (e.g., 275ml), active dry yeast (e.g., 7g), a pinch of sugar, flour (e.g., 500g), and salt (e.g., 5g). Mix until a dough forms.
2.  **Knead:** Knead the dough by hand or mixer for 8-10 minutes until smooth and elastic.
3.  **Rest:** Place the dough in a bowl, cover, and let rest for about 30-45 minutes. The dough should increase slightly in size, but not necessarily double.
This dough is less reliant on a long rise than some other bread doughs, making the process quicker and more manageable.
The Art of Shaping and Baking Pretzels
Shaping the classic pretzel knot is easier than it looks, and the baking process is key to the final product.
1.  **Prepare Baking Soda Bath (Safer Alternative to Lye):** Dissolve about 50-60g of baking soda in 1 liter of water. Bring to a simmer and let it simmer for 30-60 minutes (this converts some of the baking soda to sodium carbonate, making it more alkaline). Let cool slightly before using.
2.  **Shape:** Divide the dough into equal pieces (e.g., 8-10 pieces). Roll each piece into a long rope (about 20-24 inches). Form the classic pretzel shape by making a U-shape, crossing the ends over each other twice, and bringing them down to attach to the bottom curve.
3.  **Dip:** Carefully dip each shaped pretzel into the warm baking soda solution for 20-30 seconds, ensuring it's fully submerged. Use a slotted spoon or spatula to remove.
4.  **Top:** Place the dipped pretzels on a parchment-lined baking sheet. Sprinkle generously with coarse pretzel salt.
5.  **Bake:** Bake in a preheated oven at 200-220°C (390-430°F) for 12-18 minutes, or until they are a deep, mahogany brown.
The baking soda bath is the crucial step that gives pretzels their unique color and flavor, making this one of the more distinct easy European bread recipes you can try.
Spanish Bread Baking: Easy Recipes
Pan de Cristal: A Simple Spanish Bread Recipe
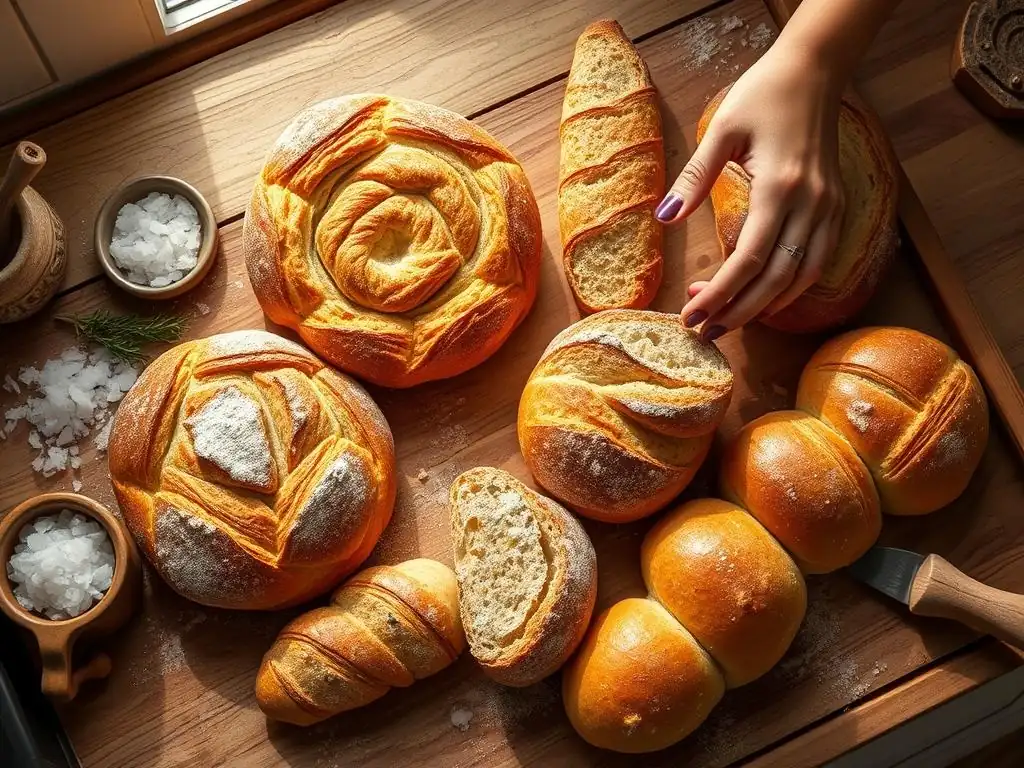
Pan de Cristal, or "crystal bread," is a relatively modern Spanish bread that has gained popularity for its incredibly light, airy, and almost translucent crumb encased in an exceptionally thin, crispy crust. Like Italian ciabatta, it is characterized by extremely high hydration, often exceeding 90% water to flour ratio. This high hydration is the main challenge and also the secret to its unique texture, making it a fascinating bread for beginners looking to push their boundaries with very wet doughs. While handling the dough can be sticky, the minimal shaping required simplifies the process.
Baking Pan de Cristal involves mixing the ultra-hydrated dough (which will resemble a thick batter more than a traditional dough), performing a series of gentle stretches and folds over several hours to develop the gluten with minimal handling, proofing, and then baking at a very high temperature, often 250-260°C (480-500°F). The high heat is essential for setting the delicate structure and achieving the signature thin crust. Due to the wetness, the dough is typically handled with wet hands or spatulas and baked in a pan or directly on a baking stone with plenty of steam.
This easy European bread recipe is less about kneading and more about managing a very loose dough. A typical recipe might use 500g strong bread flour and 450-500ml water, along with yeast and salt.
Baking Pan de Cristal at Home
Baking Pan de Cristal successfully at home focuses on managing the wet dough and using high heat.
1.  **Mix Dough:** Combine strong bread flour (e.g., 500g), salt, a tiny amount of yeast (e.g., 1-2g instant yeast), and very cold water (e.g., 475ml). Mix until just combined; the dough will be extremely wet and sticky.
2.  **Bulk Fermentation with Folds:** Let the dough rest. Perform a series of gentle stretch and folds (4-6 sets) every 30-45 minutes for 3-4 hours, wetting your hands to handle the dough.
3.  **Proof:** Transfer the dough carefully to a heavily floured surface (rice flour works well). Gently divide it into rectangles or squares. Proof on parchment paper for 60-90 minutes.
4.  **Bake:** Preheat oven to 250-260°C (480-500°F) with a baking stone or steel and steam setup. Carefully transfer the loaves (on the parchment) to the hot stone. Bake for 15-20 minutes, or until the crust is golden and crispy and the interior is very airy.
Handling this dough requires patience and acceptance of stickiness, but the resulting bread is uniquely light.
Tips for Achieving the Perfect Texture
The defining features of Pan de Cristal are its large, open crumb and incredibly thin, delicate crust.
-   **Use High-Protein Flour:** A strong bread flour with a high protein content (12-14%) is essential to develop a gluten network strong enough to support the massive amount of water.
-   **Cold Water & Long Fermentation:** Using cold water and allowing a long, slow fermentation (often aided by a cold proof in the fridge) helps manage the dough's development and build complex flavors without over-proofing.
-   **Gentle Handling:** Avoid degassing the dough during shaping and transfer. The goal is to preserve as many air bubbles as possible. Use ample flour on your work surface and hands.
-   **High Oven Temperature:** Baking at a very high temperature is crucial. It sets the crust almost instantly, allowing the interior to expand rapidly and creating those large holes.
-   **Steam:** Plenty of steam in the oven is necessary to keep the crust pliable long enough for maximum oven spring.
Mastering Pan de Cristal is a step up in complexity due to the hydration, but it's a rewarding challenge among easy European bread recipes, yielding a bread unlike any other.
Quick and Easy European Bread Recipes: No-Knead Options
No-Knead Focaccia: The Easiest Bread You'll Ever Bake
If you're looking for the absolute simplest way to bake an easy European bread recipe, the no-knead method is your best friend. No-knead focaccia takes the already straightforward focaccia process and removes the minimal stretching and folding, relying entirely on a long, slow fermentation to develop the gluten structure and flavor. This means you spend about 5 minutes mixing the ingredients, and then time (usually 12-18 hours) does all the work for you.
The process is astonishingly simple: combine flour (typically 300-400g), water (often 300-400ml for a 100% hydration dough! ), a tiny amount of yeast (perhaps 1-2g instant yeast), and salt in a bowl. Stir until just combined – it will be a very wet, shaggy mess. Cover the bowl and let it sit at room temperature for 12-18 hours until it's bubbly and has increased significantly in volume.
Then, simply scrape the dough (it will be very loose) into a well-oiled baking pan, let it rest for 30-60 minutes, drizzle with more oil, dimple, add toppings, and bake. The long fermentation not only develops gluten but also creates a wonderful depth of flavor. This is arguably the most hands-off of all easy European bread recipes.
No-Knead Crusty Bread: A Beginner's Dream
The original no-knead bread popularized by Jim Lahey is a game-changer for beginner bakers and is a fantastic example of an easy European bread recipe that delivers incredible results with minimal effort. This method produces a rustic, crusty loaf reminiscent of a French boule or Italian country bread, all without traditional kneading. It relies on a wet dough (typically around 75-80% hydration) and a long, slow fermentation (12-18 hours) to develop the gluten structure and flavor.
The process involves mixing flour (e.g., 400g), water (e.g., 300-320ml), a tiny amount of yeast (e.g., 0.5g instant yeast), and salt. Stir until just combined. Cover and let ferment at room temperature for 12-18 hours until the surface is bubbly.
The next day, scrape the dough onto a floured surface, gently fold it over on itself a couple of times, and let it rest briefly. Then, shape it into a round and let it proof for about 30-60 minutes.
The magic happens during baking: the dough is baked in a preheated Dutch oven at a very high temperature (around 230°C or 450°F), covered for the first 20-30 minutes to trap steam, and then uncovered to allow the crust to brown and crisp up. This method consistently produces a beautiful, crusty loaf that tastes like it came from a professional bakery, making it an ideal easy European bread recipe for anyone starting out.
Tips and Tricks for Baking European Breads with Ease
Essential Baking Tools for European Breads
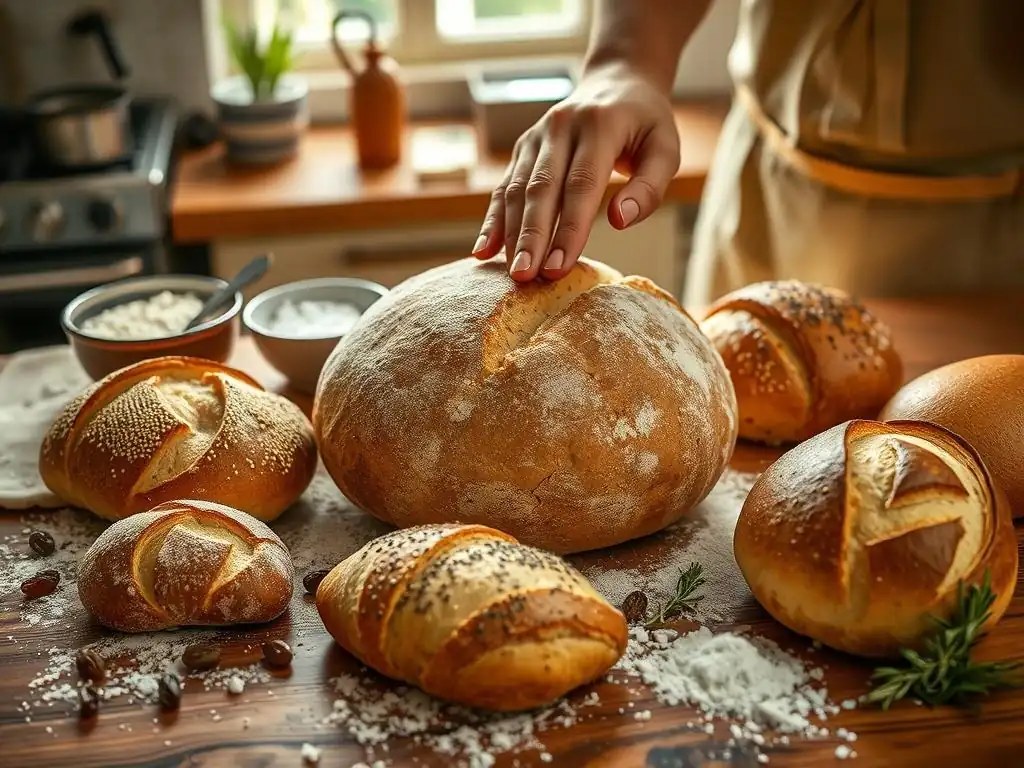
While you don't need a professional bakery setup to bake easy European bread recipes at home, a few basic tools can make the process smoother and improve your results.
-   **Kitchen Scale:** Baking bread is a science, and measuring ingredients by weight (grams) is far more accurate than using volume (cups). This consistency is key to repeatable results.
-   **Large Mixing Bowls:** You'll need bowls large enough to accommodate the dough as it doubles or even triples in size during fermentation.
-   **Dough Scraper/Bench Scraper:** Useful for dividing dough, cleaning surfaces, and handling sticky doughs like ciabatta or Pan de Cristal.
-   **Proofing Baskets (Bannetons) or Bowls with Cloth:** Bannetons help dough hold its shape during the final proof and wick away some surface moisture, aiding crust development. A bowl lined with a floured kitchen towel works well too.
-   **Baking Stone or Steel:** These conductive surfaces absorb and retain heat, providing a consistent, high temperature to the base of the loaf, which promotes oven spring and crust development.
-   **Dutch Oven:** Excellent for baking rustic loaves like sourdough or no-knead bread, as the lid traps steam, mimicking a professional steam oven.
-   **Lame or Razor Blade:** For scoring the top of the dough before baking. Scoring allows the bread to expand predictably in the oven and creates beautiful patterns.
-   **Spray Bottle or Ice Cubes:** For creating steam in your oven if not using a Dutch oven.
Investing in these tools can significantly enhance your experience baking easy European bread recipes.
Mastering Bread Baking Techniques for Beginners
Understanding a few fundamental techniques will greatly improve your success with easy European bread recipes.
-   **Kneading:** Develops the gluten network, which gives bread its structure and chewiness. For wet doughs, stretching and folding is a gentler alternative to traditional kneading.
-   **Fermentation (Rising):** This is when yeast produces gas, causing the dough to rise, and enzymes break down starches and proteins, developing flavor and structure. Proper fermentation is crucial and often takes longer than you think. Look for visual cues like doubling in size and a bubbly surface.
-   **Proofing:** The final rise after shaping. This is critical for a light, airy crumb. Proper proofing means the dough is expanded but still has structure – it should spring back slowly when gently poked.
-   **Shaping:** Giving the dough its final form. For beginners, starting with simple shapes like rounds (boules) or loaves baked in a pan is easiest. Learn to create tension on the surface for a good crust.
-   **Baking with Steam:** Essential for many European breads to achieve a thin, crisp crust and good oven spring. Steam keeps the surface soft initially, allowing the loaf to expand fully before the crust hardens.
Practice these techniques with your easy European bread recipes, and you'll see improvement with every loaf.
Troubleshooting Common Bread Baking Problems
Even with easy European bread recipes, beginners might encounter issues. Here are a few common problems and their potential solutions:
*   **Dense, heavy bread:**
    *   *Possible Cause:* Insufficient kneading or gluten development.
    *   *Solution:* Knead longer or perform more stretch and folds.
    *   *Possible Cause:* Under-proofing.
    *   *Solution:* Allow dough to rise longer until it has doubled or is properly proofed (poke test).
    *   *Possible Cause:* Too little liquid (hydration).
    *   *Solution:* Check the recipe's hydration and consider adding a little more water in future bakes.
*   **Crust is too hard or thick:**
    *   *Possible Cause:* Not enough steam during baking.
    *   *Solution:* Ensure you are using a steam method (Dutch oven, water pan, etc.) for the first part of the bake.
    *   *Possible Cause:* Baked at too low a temperature.
    *   *Solution:* Preheat oven properly and use the recommended high temperature.
*   **Bread didn't rise much in the oven (poor oven spring):**
    *   *Possible Cause:* Over-proofing.
    *   *Solution:* Reduce final proofing time. The dough should still have some spring when poked.
    *   *Possible Cause:* Not enough steam or oven not hot enough.
    *   *Solution:* Ensure oven is fully preheated and use sufficient steam.
    *   *Possible Cause:* Insufficient gluten development.
    *   *Solution:* Ensure dough was properly kneaded or folded.
*   **Dough is too sticky to handle:**
    *   *Possible Cause:* High hydration dough (like ciabatta or Pan de Cristal).
    *   *Solution:* Embrace the wetness! Use wet hands or a generous amount of flour (especially rice flour for proofing) on your work surface and tools.
Don't be discouraged by setbacks. Each bake is a learning opportunity, and troubleshooting helps you understand the process better, leading to more successful easy European bread recipes in the future.
Conclusion: Expanding Your Baking Horizons with Easy European Bread Recipes
Enjoying Your Homemade European Breads
Congratulations! You've taken your first steps into the rewarding world of baking easy European bread recipes. There's nothing quite like slicing into a warm loaf you made yourself, admiring the crumb structure, and savoring the flavor. Whether it's the airy chew of focaccia, the crisp crust of a baguette, or the rustic heartiness of Pain de Campagne, homemade bread is a simple pleasure that elevates any meal. Enjoy your creations simply with butter, use them for sandwiches, make delicious toast, or serve them alongside soups and stews. The possibilities are endless, and the satisfaction is immense.
Sharing your homemade bread with friends and family is also a wonderful experience. The effort and care you put into baking are evident in the delicious results, and it's a skill that truly brings people together. As you continue to explore easy European bread recipes, you'll find your confidence grows, and you'll be ready to tackle slightly more complex loaves and techniques. Remember that baking is a journey – enjoy the process, learn from each bake, and celebrate your successes, no matter how small.
Where to Find More Beginner-Friendly Baking Recipes at BakeWithEase
This guide is just the beginning of your baking adventure. At BakeWithEase.com, we are dedicated to providing simple, clear, and reliable recipes and techniques for bakers of all levels. Our library extends far beyond easy European bread recipes to include a wide variety of baked goods, from sweet pastries and cakes to cookies and quick breads.
Explore our website for more step-by-step guides, ingredient explanations, and helpful tips designed to make baking accessible and enjoyable. Whether you want to perfect your pizza dough, master flaky pie crusts, or delve deeper into the world of sourdough, you'll find resources tailored to beginners. We constantly add new content, so be sure to visit regularly for fresh inspiration and continue expanding your baking horizons with BakeWithEase!
Frequently Asked Questions
What makes a European bread recipe "easy" for beginners?
Easy European bread recipes typically involve simplified techniques, fewer ingredients, and shorter proofing times, making them less intimidating for new bakers.
Are there any specific ingredients that are commonly used in European breads?
Many European breads rely on basic ingredients like flour, water, salt, and yeast. Some recipes may also include olive oil or seeds for added flavor and texture.
What are some examples of beginner-friendly European bread recipes I can find on BakeWithEase?
BakeWithEase offers recipes for easy focaccia, simple ciabatta, and no-knead crusty bread that are perfect for those new to European bread baking.
How does BakeWithEase help me succeed in baking European breads?
BakeWithEase provides step-by-step guides, easy-to-find ingredients, and helpful tips to ensure your European bread baking experience is successful and enjoyable.
What if I don't have a lot of experience with baking bread? Will these recipes still work for me?
Yes! BakeWithEase focuses on simple recipes and clear instructions specifically designed for bakers of all skill levels, including absolute beginners wanting to bake easy European bread recipes.
Final Reflection: A Crusty Crumb and a Journey of Discovery
The pursuit of perfect bread, especially European-style loaves, might seem daunting, but this journey proves it's surprisingly accessible. Mastering even a few basic techniques unlocks a world of flavor and satisfaction, far exceeding the convenience of store-bought options. The recipes explored here demonstrate that creating authentic, delicious European breads at home is within everyone's reach.
The enduring appeal of bread transcends mere sustenance; it's a cultural cornerstone, a symbol of comfort, and a testament to the artistry of simple ingredients. Bread is the staff of life,
a proverb often repeated, truly captures its significance. This article, however, goes beyond the simple statement; it reveals the joy of creation, the satisfaction of a perfectly risen dough, and the shared experience of breaking bread with loved ones. The impact of these recipes extends beyond the kitchen, fostering a deeper connection to culinary traditions and the satisfaction of creating something beautiful from scratch.
Now, I invite you to roll up your sleeves and embark on your own baking adventure. Don't be intimidated by the seemingly complex techniques; each step, each knead, each rise brings you closer to a rewarding experience. Choose a recipe that sparks your interest, gather your ingredients, and let the aroma of freshly baked bread fill your home. The journey is as important as the destination, and the taste of your homemade European bread will be a delicious reward for your efforts.
Unleash Your Inner Baker: Start Baking European Breads Today!
Thanks for taking the time to explore the wonderful world of European bread baking! We hope you've discovered some delicious new recipes and gained the confidence to try something new. Now it's time to put your knowledge into practice.
- Begin with your favorite recipe from the article: Choose one bread that excites you and start baking! Don't worry about perfection – just enjoy the process.
- Share your baking journey: Post a picture of your creation on social media and tag us – we'd love to see your results! Use #BakeWithEaseEuropeanBreads to connect with other enthusiastic bakers.
- Explore a new ingredient: Try substituting a different flour or adding a unique spice to one of the recipes. You might discover your new signature bread!
What European bread are you most excited to bake first, and what unique twist will you add to it?