
Why Your Dough Tears: Advanced Troubleshooting and Prevention

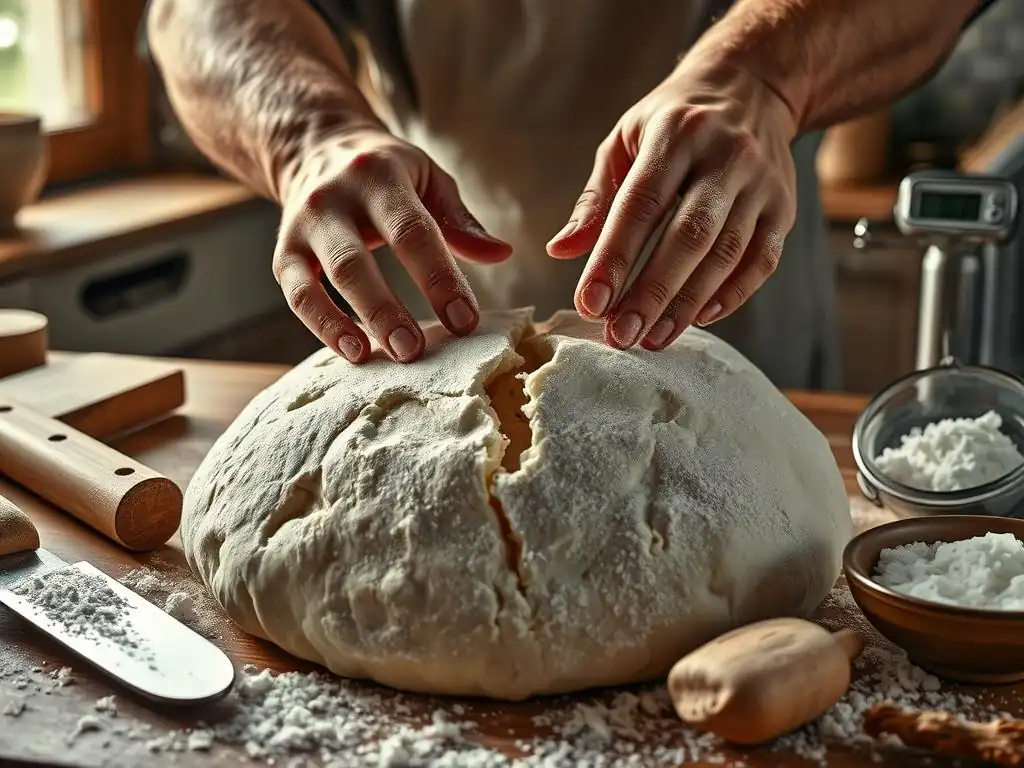
Welcome to BakeWithEase, your guide to confident baking! Ever wondered why your otherwise perfect dough stubbornly tears? You're not alone! This article dives deep into dough tearing troubleshooting solutions, providing advanced techniques and preventative measures to ensure your bread baking journey is smooth and successful. Discover the secrets to handling even the most delicate dough and say goodbye to frustrating rips and tears. Let's unlock the secrets to flawless dough together!
- Why Your Dough Tears: Advanced Troubleshooting for Pizza Dough
-
Common Causes of Pizza Dough Tearing: A Deep Dive
- 1. Insufficient Gluten Development: The Foundation of Dough Strength
- 2. Flour Quality and Type: Choosing the Right Flour for Pizza
- 3. Hydration Levels: Finding the Perfect Balance for Pizza Dough
- 4. Yeast Activity and Fermentation: Essential for Dough Integrity
- 5. Dough Handling Techniques: Avoiding Damage During Shaping
- Dough Tearing Troubleshooting Solutions: A Comprehensive Guide
- Preventing Dough Tearing: Proactive Measures for Pizza Success
- Case Study: Addressing Dough Tearing in Neapolitan Pizza
- Conclusion: Mastering Pizza Dough and Preventing Tearing
- Frequently Asked Questions
- Final Reflection: The Art and Science of Unblemished Dough
- Unleash Your Inner Baking Maestro: Conquer Dough Tears!
Why Your Dough Tears: Advanced Troubleshooting for Pizza Dough
Pizza dough is a living thing, and like any living thing, it can be sensitive. One of the most frustrating challenges for home bakers and professionals alike is when your perfectly proofed dough suddenly tears as you try to stretch it. This isn't just an aesthetic issue; tearing can lead to uneven crust thickness, poor bubble structure, and even sauce leakage during baking. Understanding why your dough tears is the first step towards achieving that perfect, pliable base every time.
Tackling dough tearing requires a deep dive into the science of baking. From the quality of your flour to the precise techniques you use for kneading and shaping, many factors contribute to the strength and elasticity of your pizza dough. This guide will walk you through the common culprits behind torn dough and provide advanced dough tearing troubleshooting solutions to help you master your pizza-making skills.
Mastering Pizza Dough Consistency
Achieving the ideal pizza dough consistency is paramount for a tear-free experience. This consistency isn't just about how wet or dry the dough feels; it's about the internal structure, specifically the gluten network. A well-developed gluten network provides the necessary elasticity and extensibility, allowing the dough to be stretched thin without breaking. Think of gluten as tiny elastic bands holding your dough together.
The journey to mastering this consistency involves understanding the interaction between flour, water, yeast, and salt, and how mechanical action (kneading) transforms these simple ingredients into a cohesive, stretchable mass. Factors like water absorption rates of flour, fermentation speed, and even ambient temperature play significant roles in developing the dough's final texture and resilience.
The Importance of Strong Gluten Development for Pizza Dough
Gluten development is the backbone of sturdy, tear-resistant pizza dough. Gluten forms when two proteins present in flour, glutenin and gliadin, combine with water and are agitated through kneading or mixing. Glutenin provides elasticity (the ability to spring back), while gliadin contributes extensibility (the ability to stretch without breaking). A strong gluten network balances these two properties perfectly.
Insufficient gluten development is a primary reason for dough tearing. If the gluten strands are weak or underdeveloped, they lack the strength to withstand the stretching process. Imagine trying to stretch a weak rubber band – it snaps easily. Similarly, dough with poor gluten development will resist stretching and tear rather than yield. Proper kneading and sufficient resting time are crucial for building this vital structure.
Common Causes of Pizza Dough Tearing: A Deep Dive
1. Insufficient Gluten Development: The Foundation of Dough Strength
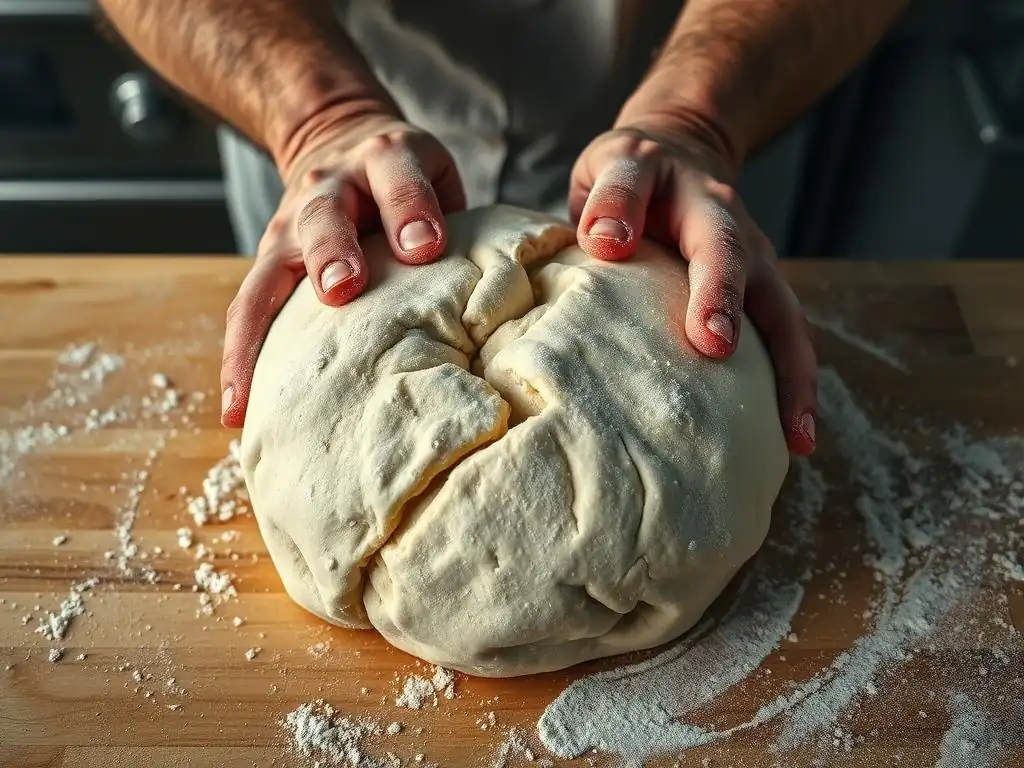
The most frequent cause of dough tearing is a weak or underdeveloped gluten network. Gluten is what gives dough its structure, elasticity, and ability to hold together when stretched. If the flour proteins haven't properly hydrated and been worked to form strong, interlocking strands, the dough will be fragile and prone to breaking under tension.
Insufficient gluten development can stem from several factors, including too short a kneading time, incorrect kneading technique, or even using flour with low protein content unsuitable for bread or pizza. Without a robust gluten structure, the dough simply lacks the internal strength needed to stretch into a thin pizza base without tearing holes.
Under-kneading: A Primary Culprit in Dough Tearing
Under-kneading is arguably the most common reason for insufficient gluten development. Kneading is the process that aligns and strengthens the gluten strands. If dough isn't kneaded long enough or with sufficient intensity, the gluten network remains weak and disorganized. This results in a dough that feels short, tears easily, and lacks the smooth, elastic texture characteristic of well-kneaded dough.
A clear sign of under-kneaded dough is its inability to pass the "windowpane test," which we'll discuss later. When you try to stretch under-kneaded dough, it will likely break quickly rather than stretching thin enough to see light through it. This lack of extensibility directly contributes to dough tearing troubleshooting solutions often focusing on improving this initial step.
Understanding Gluten's Role in Dough Elasticity
Gluten's role in dough elasticity is fundamental to preventing tearing. The developed gluten network creates a viscoelastic structure – it can stretch (extensibility) and then return somewhat to its original shape (elasticity). This balance is key. Too much elasticity without enough extensibility makes the dough spring back aggressively and resist stretching, leading to tears. Too much extensibility without elasticity makes the dough weak and unable to hold its shape.
A well-developed gluten network, achieved through proper hydration and kneading, allows the dough to stretch significantly while maintaining its integrity. It's like a finely woven fabric that can be pulled taut without unraveling. Understanding and optimizing this gluten development is central to effective dough tearing troubleshooting solutions.
2. Flour Quality and Type: Choosing the Right Flour for Pizza
The type and quality of flour you use have a significant impact on your dough's gluten development and, consequently, its susceptibility to tearing. Not all flours are created equal, especially when it comes to bread and pizza making, which require a strong gluten structure to hold their shape and withstand stretching.
Using the wrong type of flour – for instance, a low-protein cake flour instead of a high-protein bread flour – will inherently limit the potential for gluten development, no matter how well you knead. The quality of the wheat and the milling process also affect the protein content and the quality of the gluten-forming proteins.
High-Protein Flour vs. Low-Protein Flour for Pizza Dough
High-protein flours, typically labeled as bread flour or specific pizza flours (like Italian "Tipo 00"), contain a higher percentage of protein (often 12-14% or more) compared to all-purpose flour (around 10-12%) or cake flour (around 8-10%). This higher protein content means there are more glutenin and gliadin available to form gluten when hydrated and kneaded.
For pizza dough, especially styles that require significant stretching like Neapolitan or New York style, a high-protein flour is generally preferred because it allows for the development of a strong, elastic gluten network capable of stretching thin without tearing. Low-protein flours result in a weaker dough that tears easily and struggles to hold shape.
How Flour Affects Dough Strength and Tear Resistance
The protein content isn't the only factor; the quality of the protein matters too. Some flours have proteins that form stronger, more extensible gluten networks than others. Flour intended for pizza often undergoes specific milling processes to optimize these qualities. The "W" index in Italian flour classification, for example, indicates flour strength, with higher W values (like W250-W300+) being suitable for long fermentation and high hydration doughs that require significant strength and extensibility.
Using a flour with insufficient strength (low protein or low W index) for a recipe designed for a stronger flour will inevitably lead to a dough that lacks the necessary structure and tears easily. Selecting the appropriate flour based on the desired pizza style and hydration level is a critical step in preventing dough tearing.
3. Hydration Levels: Finding the Perfect Balance for Pizza Dough
Hydration refers to the ratio of water to flour in your dough recipe, usually expressed as a percentage (water weight / flour weight * 100). Finding the right hydration level is crucial because water is essential for gluten development; it allows the proteins to absorb moisture and bond. However, too much or too little water can negatively impact dough structure and contribute to tearing.
The ideal hydration varies depending on the type of flour used (high-protein flours absorb more water), the desired dough consistency, and the pizza style. For instance, a typical Neapolitan pizza dough might have a hydration of 58-65%, while some modern styles push hydration much higher (70-80%+).
Too Much Water: Weakening the Dough Structure
While water is necessary for gluten development, excessive hydration can actually weaken the dough structure. When there's too much water relative to the flour, the gluten proteins become over-hydrated and the network can become too loose and disorganized. This results in a very slack, sticky dough that is difficult to handle and lacks the cohesive strength needed to stretch without tearing.
Dough that is too wet might feel extremely pliable, but it won't have the underlying structure to support itself when pulled thin. It can feel almost soupy and will likely tear under its own weight or with minimal tension during shaping. Adjusting hydration is a key component of effective dough tearing troubleshooting solutions.
Too Little Water: Creating a Stiff and Inelastic Dough
On the other end of the spectrum, dough with insufficient hydration will be stiff, dry, and difficult to work with. If there isn't enough water, the flour proteins can't fully hydrate, and the gluten network won't develop properly. This leads to a dough that is tight, lacks extensibility, and resists stretching.
Trying to force a stiff, under-hydrated dough to stretch will almost certainly result in tearing. The gluten strands are present but haven't formed a flexible network; they are more likely to snap than stretch. Achieving the correct hydration balance is vital for creating a dough that is both strong and extensible, thus preventing tears.
4. Yeast Activity and Fermentation: Essential for Dough Integrity
Yeast activity and the subsequent fermentation process are vital for developing flavor and texture in pizza dough. Yeast produces carbon dioxide gas, which causes the dough to rise and creates the airy structure in the finished crust. However, the duration and temperature of fermentation also significantly impact the gluten structure.
Fermentation is not just about rising; it's also a maturation process for the dough. Enzymes produced during fermentation (proteases) start breaking down the gluten proteins. This controlled breakdown is necessary for the dough to become more extensible and less elastic over time, making it easier to stretch. But if fermentation goes too far, it can have detrimental effects on dough strength, leading to tearing.
Over-Proofing: Degrades Gluten and Causes Tearing
Over-proofing occurs when dough is allowed to ferment for too long or at too high a temperature. During prolonged fermentation, protease enzymes become overly active and break down the gluten network excessively. This weakens the dough structure considerably.
Over-proofed dough will often appear very puffy and may even start to collapse. When you try to stretch it, it will feel fragile, sticky, and tear very easily because the gluten network, which should provide strength and elasticity, has been significantly degraded. This is a common issue addressed by dough tearing troubleshooting solutions focused on fermentation control.
Under-Proofing: Results in Inelastic Dough Prone to Tears
Conversely, under-proofing means the dough hasn't fermented long enough. In this case, the gluten network hasn't had sufficient time to relax and become extensible. The dough will feel tight, dense, and overly elastic, springing back aggressively when you try to stretch it.
Under-proofed dough lacks the pliability needed for shaping. Attempting to stretch it will feel like fighting against a strong rubber band, and the tension will likely cause the dough to tear rather than yield into a thin disk. Proper fermentation time, tailored to the recipe and temperature, is essential for achieving a dough that stretches smoothly.
5. Dough Handling Techniques: Avoiding Damage During Shaping
Even with perfectly developed and proofed dough, improper handling during shaping can lead to tearing. The way you remove the dough from its container, degas it (if necessary), and stretch it into a pizza base significantly impacts its integrity. Rough or abrupt movements can damage the delicate gluten network you've worked hard to build.
Applying too much pressure in one spot, uneven stretching, or trying to work with dough that is too cold can all contribute to tears. Gentle, consistent technique is key to preserving the dough's structure and achieving a smooth, even crust.
Over-Stretching: Weakening Gluten Bonds
Trying to stretch the dough too quickly or too aggressively is a common cause of tearing. When you apply excessive tension, you can literally snap the gluten strands. This is particularly true if the dough is cold, under-proofed, or if the gluten network is weak.
Instead of allowing the dough's natural extensibility to guide the process, forceful stretching puts undue stress on the gluten bonds, causing them to break and resulting in holes or tears. Gentle, patient stretching is always recommended.
Incorrect Shaping Methods: Leading to Uneven Dough Thickness
Using incorrect shaping methods, such as pushing all the air to the edges too quickly or stretching unevenly, can create weak spots in the dough. If one area becomes significantly thinner than the rest too rapidly, the tension differential can cause the thinner spot to tear.
Techniques like starting from the center and gently pushing outwards, or using gravity to assist stretching, help maintain even thickness and tension across the dough, minimizing the risk of tearing. Mastering these techniques is a vital part of applying effective dough tearing troubleshooting solutions.
Dough Tearing Troubleshooting Solutions: A Comprehensive Guide
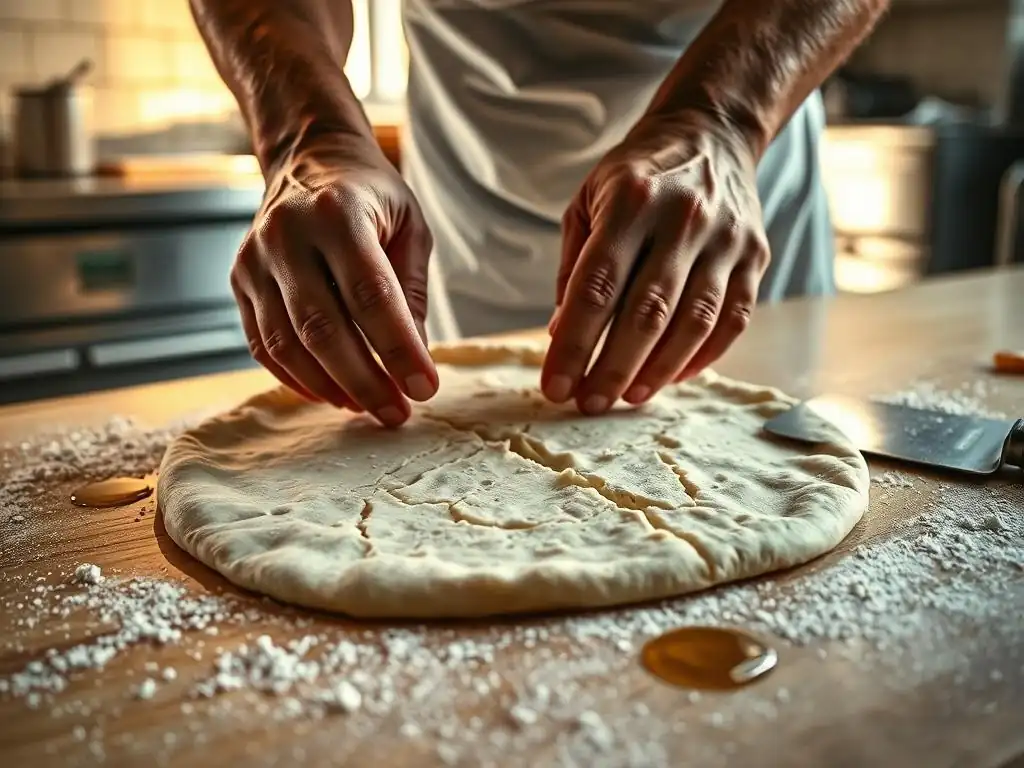
Encountering torn dough can be disheartening, but understanding the causes allows you to implement specific dough tearing troubleshooting solutions. By addressing the underlying issues, you can rescue your current dough (sometimes) and prevent future occurrences.
Here are some comprehensive strategies to fix or prevent dough tearing:
Solution 1: Improve Kneading Technique for Stronger Dough
If your dough consistently tears and feels inelastic, the primary issue is likely insufficient gluten development. Improving your kneading technique is a fundamental dough tearing troubleshooting solution. Whether kneading by hand or machine, ensure you are developing the gluten sufficiently.
- Hand Kneading: Aim for at least 10-15 minutes of active kneading until the dough is smooth, elastic, and passes the windowpane test.
- Machine Kneading: Use a dough hook on medium speed for 8-12 minutes, or until the dough clears the sides of the bowl and is smooth. Avoid very high speeds which can overheat the dough.
After kneading, allow the dough to rest. Even a short 15-20 minute rest (autolyse or bench rest) allows gluten to relax and makes the dough easier to handle and stretch without tearing.
Mastering the Windowpane Test: Assessing Gluten Development
The windowpane test is the standard method for assessing whether your dough has sufficient gluten development. To perform the test, take a small piece of dough (about the size of a golf ball). Gently stretch it outwards with your fingers.
If the dough is properly kneaded, you should be able to stretch it very thin, almost transparent, without it tearing. You should be able to see light pass through it, like looking through a windowpane. If the dough tears easily before it gets thin, it needs more kneading. This test is an indispensable tool for effective dough tearing troubleshooting solutions.
Advanced Kneading Methods: Autolyse Technique
The autolyse technique is an advanced method that can significantly improve dough extensibility and reduce kneading time, helping to prevent tearing. It involves mixing just the flour and water from your recipe and letting the mixture rest for 20 minutes to several hours before adding the salt and yeast and finishing the mix/knead.
During the autolyse rest, the flour absorbs the water fully, and enzymatic activity begins to develop the gluten network passively. This makes the dough much smoother and easier to knead when you resume. Dough prepared with an autolyse often stretches more easily with less resistance, reducing the likelihood of tears.
Solution 2: Select the Right Flour for Pizza Dough
Choosing the appropriate flour for your pizza style is a proactive step in preventing dough tearing. For most home bakers aiming for a stretchable pizza dough, using a bread flour with 12-13% protein is a good starting point. For Neapolitan style, seeking out Italian "Tipo 00" flour with a W index of 250-300+ is ideal.
Avoid using all-purpose flour for recipes requiring significant stretching, as its lower protein content (typically 10.5-11.5%) may not provide sufficient structure. Cake or pastry flour (8-10% protein) should never be used for pizza dough as they will result in extremely weak dough that tears instantly.
Experimenting with Different Flour Blends
You can also experiment with blending different flours to achieve desired characteristics and improve dough strength. For instance, blending a high-gluten flour (like vital wheat gluten, used sparingly, maybe 1-2% of total flour weight) with your regular bread flour can boost protein content and strength.
Alternatively, blending a strong bread flour with a softer "Tipo 00" can provide a balance of strength and extensibility suitable for specific pizza types. Record your results when experimenting with different flour blends to find what works best for your desired outcome and helps implement effective dough tearing troubleshooting solutions.
Understanding W (Flour Strength) and its Impact
As mentioned earlier, the 'W' index is a crucial metric in Italian flour classification, indicating flour strength. It's measured using a Chopin Alveograph and represents the dough's resistance to stretching and elasticity. Higher W values (e.g., W300) mean stronger flour capable of handling longer fermentation times and higher hydration.
- Low W (e.g., W150-180): Suitable for short fermentation doughs (1-4 hours), pastries.
- Medium W (e.g., W180-250): Suitable for medium fermentation doughs (4-12 hours), some pizza styles, rustic breads.
- High W (e.g., W250-300+): Suitable for long fermentation doughs (12-48+ hours), highly hydrated doughs, Neapolitan pizza.
Using a flour with an appropriate W index for your chosen fermentation time and hydration level is essential for preventing dough tearing. A low W flour will break down too quickly during long fermentation, while a high W flour might be too elastic and hard to stretch with short fermentation.
Solution 3: Adjust Hydration Levels for Optimal Dough Consistency
If your dough is consistently too sticky and tears because it's too slack, or too stiff and tears because it's inelastic, adjusting your hydration percentage is a key dough tearing troubleshooting solution. Start with a recipe's recommended hydration but be prepared to slightly adjust based on your specific flour and environmental conditions.
If your dough is too wet, add a small amount of flour (a tablespoon at a time) during the final stages of kneading until the dough reaches the desired consistency – tacky but not excessively sticky. If the dough is too dry, add water very gradually (a teaspoon at a time) during kneading until it becomes more pliable.
Calculating the Ideal Hydration Percentage
The "ideal" hydration percentage isn't a single number; it's a range that depends on your flour's absorption rate and your desired dough handling properties. A high-protein flour like bread flour or 'Tipo 00' with a high W value can typically handle higher hydration (60-70%+) than an all-purpose flour (55-65%).
Start with a standard recipe hydration (e.g., 60%). Observe how your specific flour absorbs the water and how the dough feels after kneading. If it feels too dry or stiff, increase hydration slightly (by 1-2%) on your next batch. If it's too wet and slack, decrease it. Keeping notes on your hydration percentage and results is helpful for refining your recipe.
Adding Water Gradually: A Controlled Approach
When mixing dough, it's often beneficial to hold back a small percentage of the water (e.g., 5-10%) initially. Mix the flour and most of the water, then gradually add the reserved water during kneading. This allows you to control the final dough consistency more precisely, as different flours absorb water differently even within the same type.
Adding water gradually ensures you don't accidentally over-hydrate the dough from the start, which can be difficult to correct without adding excessive flour and potentially altering the balance of the recipe. This controlled approach is a practical dough tearing troubleshooting solution during the mixing phase.
Solution 4: Control Yeast Activity and Fermentation Time
Managing yeast activity and fermentation time is crucial for developing a strong yet extensible gluten network. Dough tearing troubleshooting solutions often involve adjusting proofing time and temperature.
- Avoid Over-Proofing: Monitor your dough's rise. Dough that has doubled or slightly more in volume is typically ready. If it looks like it's starting to collapse or deflate, it may be over-proofed. Punching it down gently and shaping immediately might save it, but the gluten will be weakened.
- Avoid Under-Proofing: If your dough feels tight and springs back aggressively, it needs more time to ferment and relax. Let it rest at room temperature for another 30-60 minutes, or until it feels more pliable.
Consider using less yeast for longer, slower fermentation, which develops flavor and improves gluten structure without excessive enzymatic breakdown.
Understanding Dough Temperature and its Effect on Fermentation
Dough temperature is a critical factor influencing yeast activity and fermentation speed. Yeast is most active in a temperature range of 75-85°F (24-29°C). Warmer temperatures accelerate fermentation, while cooler temperatures slow it down.
An overly warm dough (e.g., above 80°F / 27°C after mixing) can ferment too quickly, leading to a rapid rise but potentially insufficient gluten maturation and increased risk of over-proofing and tearing. Conversely, very cold dough (e.g., below 70°F / 21°C) ferments slowly, which can be beneficial for flavor but requires longer proofing times to develop extensibility. Monitoring and controlling dough temperature (using water temperature adjustments or proofing in a consistent environment) is key.
Cold Fermentation: A Technique for Enhanced Flavor and Dough Strength
Cold fermentation, typically done in the refrigerator at 35-40°F (2-4°C) for 24-72+ hours, is an excellent technique for both flavor development and improving dough strength and handling. The cold temperature significantly slows yeast activity but allows enzymes (like proteases) to work slowly and steadily.
This slow breakdown of gluten proteins makes the dough more extensible over time, reducing elasticity and making it easier to stretch without tearing. Cold fermented dough often has a more complex flavor profile and a beautiful texture. It's a highly recommended method for preventing dough tearing and achieving superior pizza crust.
Solution 5: Refine Dough Handling and Shaping Techniques
Even perfect dough can be ruined by rough handling. Gentle, deliberate technique is a crucial dough tearing troubleshooting solution during the shaping phase.
- Be Gentle: Always handle your dough with care. Avoid punching it down forcefully or pulling it roughly.
- Use Flour Sparingly: Too much flour on your work surface can make the dough slide instead of stretch, leading to unevenness and tears. Use just enough to prevent sticking.
- Work from the Center Out: When shaping, start by gently pressing air from the center towards the edges, leaving a rim for the crust. Then, lift the dough and use gravity and your hands to stretch it outwards evenly.
If you encounter a small tear while shaping, you can often pinch it closed carefully before topping. For larger tears, gently fold the dough over the tear and let it rest for 5-10 minutes before attempting to reshape.
Gentle Stretching and Shaping Methods
Instead of aggressive pulling, use techniques that encourage the dough to stretch naturally. Placing the dough ball on your knuckles and letting gravity stretch it, or using a gentle patting and pushing motion from the center outwards, are effective methods.
Allow the dough to rest briefly if it starts resisting stretching and springing back too much. A 5-10 minute rest allows the gluten to relax, making subsequent stretching easier and less likely to cause tears. Patience is key when shaping pizza dough.
Using a Dough Scraper to Minimize Tearing
A simple dough scraper can be an invaluable tool for preventing tearing, especially when handling sticky dough. Use it to gently lift and fold dough during kneading or to portion dough balls without excessive handling and pulling.
When transferring dough from a proofing container to your work surface, use the scraper to loosen it gently from the sides, minimizing stress on the dough ball. This prevents initiating tears before you even begin shaping. Using tools effectively is part of mastering dough tearing troubleshooting solutions.
Preventing Dough Tearing: Proactive Measures for Pizza Success
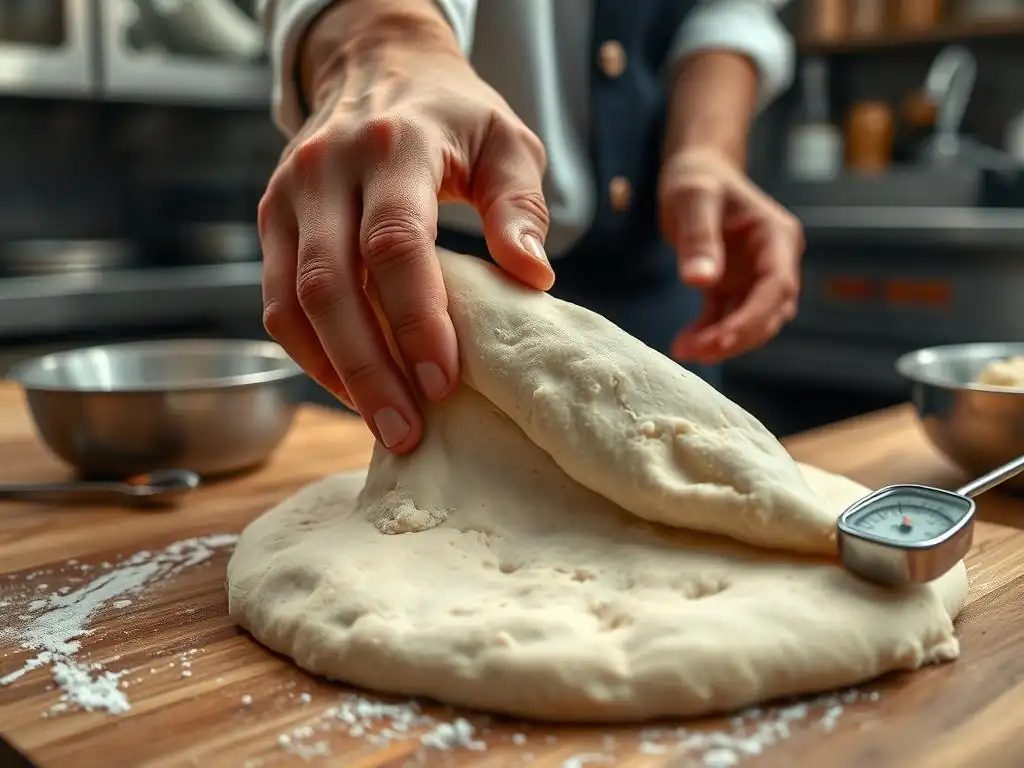
Preventing dough tearing is always better than troubleshooting it. By implementing best practices from the start, you significantly reduce the chances of encountering issues.
Implementing a Robust Recipe and Process
Start with a reliable recipe designed for pizza dough, preferably one that specifies flour type, hydration, and fermentation times. Follow the recipe instructions closely, especially regarding ingredient measurements (using a kitchen scale is highly recommended for accuracy), kneading time, and proofing conditions. Consistency in your process is key.
Don't rush the steps. Give the dough adequate time to knead properly and ferment sufficiently but not excessively. Understand that factors like room temperature and flour variations will require minor adjustments to timings.
Monitoring Dough Temperature and Humidity
Be mindful of the environment you're baking in. High humidity can make dough feel wetter, while low humidity can dry it out. Similarly, warm rooms speed up fermentation, while cool rooms slow it down. Use a thermometer to check your dough temperature, especially after mixing, to gauge fermentation speed.
Adjust proofing times based on temperature. If your kitchen is warm (e.g., 78°F / 25°C), your dough will proof faster than in a cooler kitchen (e.g., 70°F / 21°C). Consider using a proofing box or your oven with the light on to maintain a consistent temperature if needed.
Investing in Quality Baking Tools
Having the right tools can make a difference. A good stand mixer with a dough hook can ensure consistent and sufficient kneading. A kitchen scale guarantees accurate ingredient measurements, especially for flour and water. A dough scraper is invaluable for handling.
Consider a proofing container with volume markings to easily monitor your dough's rise. Investing in quality tools supports consistent results and helps you apply dough tearing troubleshooting solutions more effectively when issues arise.
Case Study: Addressing Dough Tearing in Neapolitan Pizza
The Problem: Consistent Tearing Issues with Neapolitan Pizza Dough
A home baker consistently faced dough tearing when trying to stretch their Neapolitan pizza dough. Using a recipe calling for 'Tipo 00' flour and 62% hydration with a 6-hour room temperature proof, their dough would feel tight, resist stretching, and frequently tear in the center or near the edges during shaping, despite feeling adequately kneaded. They were aiming for a thin base with a puffy rim.
The baker confirmed they were using a 'Tipo 00' flour specified for long fermentation (W280), kneading for 10 minutes in a stand mixer, and proofing at around 75°F (24°C). The dough would double in volume within the 6 hours but lacked the desired extensibility. This scenario is a classic example requiring specific dough tearing troubleshooting solutions.
The Solution: Implementing Cold Fermentation and Gentle Stretching
Based on the symptoms (tight, inelastic dough tearing despite apparent proofing), the issue pointed towards insufficient gluten relaxation and maturity for the chosen flour type and hydration, likely exacerbated by the relatively fast room temperature proofing. The recommended dough tearing troubleshooting solutions were:
- Switch to Cold Fermentation: Reduce yeast amount significantly (e.g., from 1g per 250g flour to 0.2-0.3g) and proof the dough balls in the refrigerator (38-40°F / 3-4°C) for 24-48 hours after a short initial room temperature rise (1-2 hours).
- Gentle Handling: Emphasize extremely gentle handling when removing dough from the cold and shaping. Allow cold dough to sit at room temperature for 1-2 hours before shaping to relax. Use gravity and knuckles for stretching rather than forceful pulling.
The Results: Improved Dough Strength and Reduced Tearing
After implementing cold fermentation for 24 hours, the baker noticed a significant improvement. The dough, after warming up for 1.5 hours, was noticeably more extensible and less elastic. It stretched beautifully into thin disks without tearing. The gluten network had matured properly in the cold, balancing elasticity and extensibility.
Subsequent batches using 48-hour cold fermentation showed even better results, with dough that was incredibly easy to handle and stretch. The number of torn dough balls dropped from roughly 50% to less than 5%. This case highlights how adjusting fermentation strategy, a key dough tearing troubleshooting solution, can dramatically improve dough handling and prevent tears, especially with strong flours.
Conclusion: Mastering Pizza Dough and Preventing Tearing
Understanding why your pizza dough tears is the most critical step in becoming a better pizza maker. It's rarely a single issue but often a combination of factors related to ingredients, process, and technique. By focusing on developing a strong, balanced gluten network through proper kneading, selecting the right flour, managing hydration, controlling fermentation, and employing gentle handling, you can overcome dough tearing challenges.
Implementing the dough tearing troubleshooting solutions discussed, such as mastering the windowpane test, experimenting with cold fermentation, and refining your shaping methods, will empower you to create consistently excellent pizza dough. Don't be discouraged by setbacks; each torn dough is a learning opportunity.
Your Partner in Perfect Pizza Dough
At BakeWithEase.com, we are dedicated to helping you master every aspect of baking, including the sometimes-tricky world of pizza dough. We believe that with the right knowledge and techniques, anyone can produce amazing results. Our resources are designed to simplify complex baking concepts and provide practical, actionable advice.
Whether you're new to pizza making or looking to refine your advanced techniques, we're here to support your baking journey. Explore our guides and recipes to find the inspiration and information you need to bake with ease and confidence.
Final Thoughts on Achieving Strong and Elastic Pizza Dough.
Achieving a strong, elastic pizza dough that stretches beautifully without tearing is a hallmark of skilled baking. It requires attention to detail at every stage, from selecting your flour to the final shaping. Remember that dough is sensitive to its environment and how it's treated.
Be patient with your dough and yourself. Pay attention to how the dough feels throughout the process – is it smooth, elastic, extensible? Does it pass the windowpane test? Does it feel relaxed after proofing? By observing these characteristics and applying the dough tearing troubleshooting solutions outlined here, you'll be well on your way to consistently perfect pizza dough. Happy baking!
Frequently Asked Questions
Why is my dough tearing so easily during handling?
Dough tearing usually happens because of weak gluten development. This can be caused by over-mixing, under-mixing, or using the wrong type of flour.
What role does flour type play in dough tearing?
Different flours have varying protein contents. Low-protein flours like cake flour are more prone to tearing, while high-protein flours like bread flour are more resilient due to stronger gluten formation.
How can I prevent dough tearing during kneading?
Proper kneading is crucial. Ensure you develop the gluten adequately without overworking it. Use the windowpane test to check for sufficient gluten development, stopping when the dough stretches thinly without tearing.
What are some common ingredients that can weaken dough and cause tearing?
Adding too much fat (like butter or oil) or sugar can interfere with gluten development. Also, excessive hydration can weaken the dough structure, making it more susceptible to tearing.
Can resting the dough help prevent tearing?
Yes, allowing the dough to rest (autolyse) allows the flour to fully hydrate and the gluten to relax. This results in a stronger, more extensible dough that is less likely to tear during handling.
Final Reflection: The Art and Science of Unblemished Dough
The frustrating battle against dough tearing is far more than a baking mishap; it's a crucial lesson in understanding the delicate balance of hydration, gluten development, and technique. This seemingly small issue speaks volumes about the precision and patience required in the culinary arts, impacting everything from the visual appeal of your final product to the overall texture and taste. Mastering dough handling isn't just about avoiding tears; it's about unlocking the potential for truly exceptional baked goods.
The journey from frustrating tears to flawlessly smooth dough has been a deeply personal one for me. I've learned that the seemingly simple act of kneading is a complex dance between science and intuition. The best bread is made with love and patience,
a wise baker once told me, and I've found that to be profoundly true. Understanding the reasons behind dough tearing – whether it's insufficient hydration, over-kneading, or improper handling – has not only improved my baking but also deepened my appreciation for the intricate processes involved in transforming simple ingredients into something truly magical.
Now, it's your turn. Take the knowledge you've gained here and apply it to your next baking project. Don't be discouraged by a few tears along the way; instead, view them as opportunities for learning and growth. Experiment with different hydration levels, observe the behavior of your dough, and trust your instincts. With practice and a deeper understanding of the science behind the process, you'll soon be crafting beautiful, unblemished doughs and enjoying the delicious rewards of your efforts. Embrace the challenge, and the journey to baking perfection will be all the more rewarding.
Unleash Your Inner Baking Maestro: Conquer Dough Tears!
Thanks for diving into the world of perfect dough! We hope you now feel equipped to tackle those frustrating dough tears with confidence. Ready to put your new skills to the test?
- Bake a masterpiece: Try out one of the recipes mentioned in the article, focusing on the techniques you just learned to prevent tearing. Let us know how it turns out!
- Share your success (or challenges!): Post a picture of your creation on social media and tag us @BakeWithEase – we love seeing your baking journey!
- Explore our other resources: Dive deeper into advanced baking techniques by checking out our other articles on bread making.
What unique ingredient or method are you most excited to try to achieve perfectly smooth dough?