
Fix for Flat Rolls: How to Ensure a Great Rise

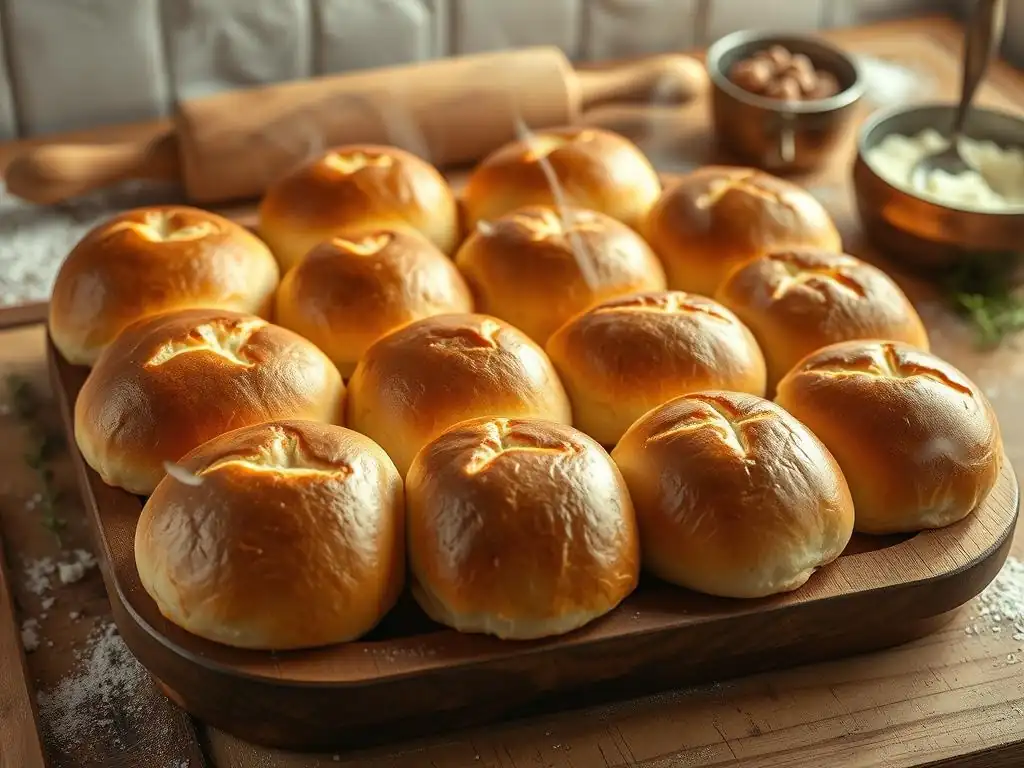
Welcome to BakeWithEase, your guide to baking bliss! Are you tired of disappointing, flat bread rolls? Discover the secrets to achieving perfectly risen bread rolls with our expert tips and techniques. Unlock the secrets to a light and airy texture and say goodbye to dense, underwhelming results. Ready to finally bake bread rolls that impress? Let's get started!
- Fix for Flat Rolls: How to Ensure a Great Rise - BakeWithEase
- Introduction: Achieving Perfectly Risen Bread Rolls at Home
-
Troubleshooting Flat Bread Rolls: Identifying the Culprits
- 1. Yeast Issues: Is Your Yeast Active and Alive?
- 2. Incorrect Water Temperature: The Goldilocks Zone for Yeast Activation
- 3. Improper Mixing and Kneading: Developing the Gluten Structure
- 4. Inadequate Proofing Time: Patience is Key to a Great Rise
- 5. Oven Temperature Issues: Baking at the Correct Heat
- 6. Dough Hydration: The Right Balance of Flour and Liquid
-
Solutions for Achieving High-Rising Bread Rolls: A Step-by-Step Guide
- Step 1: Test Your Yeast for Viability Before Baking
- Step 2: Use the Correct Water Temperature for Yeast Activation (105-115°F)
- Step 3: Knead Your Dough Properly to Develop Gluten Strength
- Step 4: Proof Your Dough in a Warm, Draft-Free Environment
- Step 5: Bake Your Bread Rolls at the Recommended Oven Temperature
- Step 6: Consider Dough Enrichment for a Softer, Higher Rise
- Advanced Tips for Baking Perfectly Risen Bread Rolls
- Conclusion: Enjoying Your Perfectly Risen Homemade Bread Rolls
-
Frequently Asked Questions
- How important is yeast quality when trying to bake perfectly risen bread rolls?
- What role does water temperature play in activating the yeast for bread rolls?
- Could over-kneading be the reason my bread rolls aren't rising properly?
- What's the best environment for proofing bread rolls to ensure a good rise?
- How does the type of flour used affect the rise of bread rolls?
- Final Reflection: The Joy of a Perfectly Risen Roll
- Unlock Your Baking Potential: Achieve Perfect Rolls Every Time!
Fix for Flat Rolls: How to Ensure a Great Rise - BakeWithEase
Introduction: Achieving Perfectly Risen Bread Rolls at Home
Baking bread rolls can be incredibly rewarding, filling your kitchen with wonderful aromas and offering a delicious treat for any meal. However, hitting that perfect, airy texture and achieving beautifully high, perfectly risen bread rolls can sometimes feel like a mystery. Many home bakers encounter the frustrating issue of rolls that spread outwards rather than rising upwards, resulting in dense, flat discs instead of fluffy delights. Don't worry, you're not alone in facing this challenge!
This guide is designed to help you troubleshoot common problems that lead to flat bread rolls and provide practical, easy-to-follow solutions. We'll walk through the science behind a good rise, identify potential pitfalls in your baking process, and equip you with the knowledge and techniques needed to consistently bake perfectly risen bread rolls that you'll be proud to share (or devour yourself!). By understanding the critical steps – from activating your yeast to the final bake – you'll unlock the secrets to achieving that ideal height and texture every time.
Why Are My Bread Rolls Flat? Understanding Common Baking Problems
Discovering a batch of flat, dense bread rolls after all your effort can be disheartening. This common issue usually stems from one or a combination of factors related to the dough's ability to rise. Leavening, primarily through yeast fermentation, is the process that creates gas bubbles within the dough, causing it to expand and lighten. If this process is hindered at any stage, the dough won't develop the structure needed to trap gas effectively, leading to a poor rise and a flat result.
Several culprits can sabotage your quest for perfectly risen bread rolls. These often involve issues with the yeast itself, the conditions under which the dough is mixed and proofed, or even the baking environment. For instance, inactive yeast simply won't produce enough carbon dioxide to inflate the dough. Similarly, improper dough development through inadequate kneading means the gluten network, which acts like a balloon holding the gas, isn't strong enough. We'll explore each of these potential problems in detail to help you pinpoint exactly what might be going wrong in your baking process.
Troubleshooting Flat Bread Rolls: Identifying the Culprits
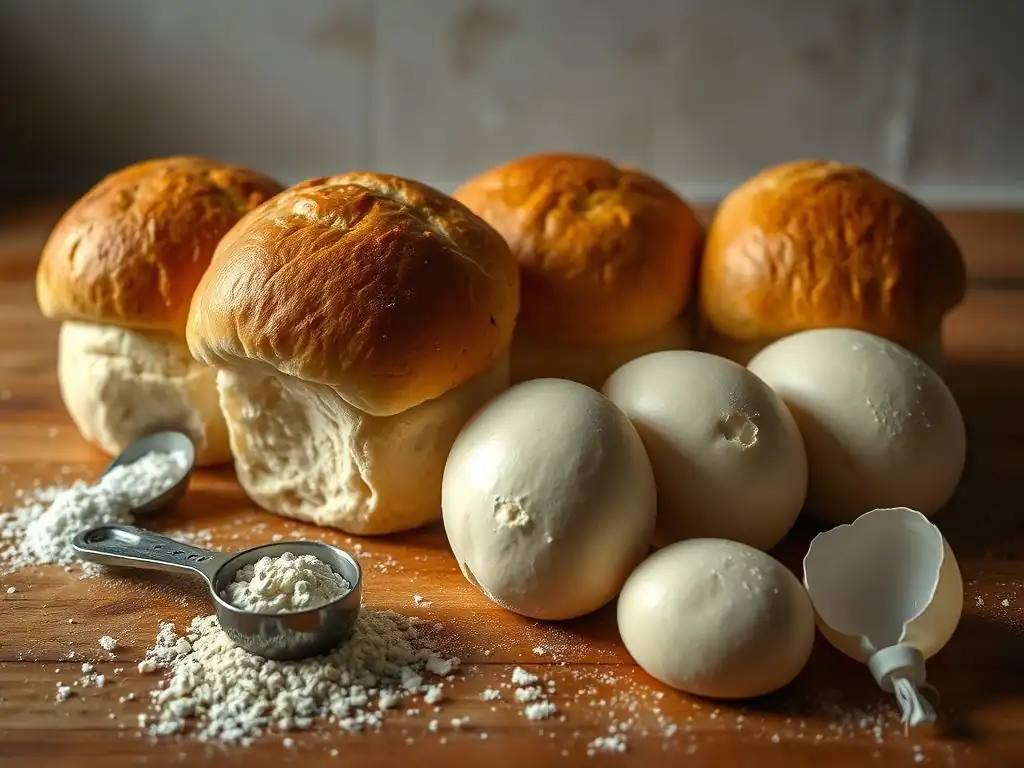
1. Yeast Issues: Is Your Yeast Active and Alive?
Yeast is the living engine that makes your bread rise. It consumes sugars in the dough and produces carbon dioxide gas and alcohol through a process called fermentation. This gas is what gets trapped in the gluten network, causing the dough to expand. If your yeast is old, dead, or simply inactive, it won't produce enough gas, and your dough will remain flat, resulting in sad, dense rolls instead of perfectly risen bread rolls.
The viability of your yeast is paramount. Yeast is a living organism and has a shelf life. While sealed packages can last for a year or two, once opened, yeast is best used within a few months, especially if stored at room temperature. Exposure to air, moisture, and heat can kill the yeast cells. Using yeast that is past its prime or improperly stored is a very common reason for failed rises.
Testing Yeast Activity: The Proofing Process Explained
Testing your yeast before adding it to the rest of your ingredients is a simple but crucial step to ensure it's active. This process, often called "proofing the yeast," involves dissolving a small amount of yeast in warm liquid (usually water) with a pinch of sugar. The sugar provides food for the yeast, and the warm water helps activate it.
Within 5 to 10 minutes, if the yeast is alive and well, the mixture should become foamy and bubbly on the surface. This foam is the carbon dioxide being released – proof that your yeast is active and ready to work its magic on your dough. If the mixture remains flat or only shows minimal activity, your yeast is likely dead or inactive, and you should discard it and use a fresh packet.
Choosing the Right Yeast: Active Dry vs. Instant Yeast
There are two main types of dry yeast commonly used by home bakers: active dry yeast and instant yeast. Active dry yeast consists of larger granules and typically needs to be proofed in warm liquid before being added to the dry ingredients, as described above. Instant yeast, on the other hand, has finer granules and a special coating that allows it to be mixed directly with the dry ingredients without prior hydration.
While both can produce perfectly risen bread rolls, instant yeast is generally more reliable and faster acting. It often gives a slightly more vigorous initial rise. If you're having trouble with active dry yeast, switching to instant yeast and ensuring it's fresh might help improve your results. Always check the expiration date on the package and store opened yeast properly in an airtight container in the refrigerator or freezer.
2. Incorrect Water Temperature: The Goldilocks Zone for Yeast Activation
The temperature of the liquid you use to activate or mix with your yeast is incredibly important. Yeast is a living organism, and like us, it thrives within a specific temperature range. Using water that is too hot or too cold can severely impact its activity, leading to a poor or non-existent rise and ultimately, flat bread rolls.
Think of it like this: water that's too cold (below 70°F or 21°C) will keep the yeast dormant, meaning it won't wake up and start producing gas. Water that's too hot, however, is even more detrimental. Temperatures above 140°F (60°C) will kill the yeast cells instantly, rendering them useless for leavening your dough. Finding the "Goldilocks zone" – not too hot, not too cold, but just right – is essential for yeast activation and achieving perfectly risen bread rolls.
Too Hot, Too Cold: How Water Temperature Affects Yeast
As mentioned, cold water inhibits yeast activity. If your water is too cool, the yeast will be very slow to wake up and ferment, potentially leading to an extended or insufficient rise. This might result in a dense crumb structure even if the dough does eventually rise a little. On the flip side, hot water is a death sentence for yeast. A classic example is using tap water that feels warm but is actually too hot; just a few degrees over the killing temperature can render your yeast inactive.
The ideal temperature range for activating active dry yeast is typically between 105°F and 115°F (40°C to 46°C). This range is warm enough to wake up the yeast without being so hot as to kill it. For instant yeast, which is often mixed directly with dry ingredients, the water (or milk) temperature can be slightly cooler, usually between 120°F and 130°F (49°C to 54°C), as the flour insulates the yeast slightly. However, sticking closer to the 105-115°F range is generally safe for both types if you're unsure.
Using a Thermometer for Accurate Water Temperature
Guessing the temperature of your water by touch is notoriously unreliable. What feels "warm" to you might be too hot or too cold for the yeast. A simple kitchen thermometer is an invaluable tool for ensuring you hit that critical temperature range every time. You don't need a fancy one; a basic digital instant-read thermometer or even an old-fashioned candy thermometer will work perfectly.
Before combining your liquid with the yeast, simply heat the water (or milk) on the stovetop or in the microwave and check its temperature with the thermometer. Aim for the target range (105-115°F for active dry, or a safe 105-115°F for instant if mixing directly). This small step eliminates a significant variable and dramatically increases your chances of successful yeast activation and ultimately, perfectly risen bread rolls.
3. Improper Mixing and Kneading: Developing the Gluten Structure
Mixing and kneading are crucial steps in bread making that develop the gluten network within the dough. Gluten is a protein structure formed when water interacts with proteins (glutenin and gliadin) in flour, and it's developed further through physical manipulation like kneading. This network provides the dough with elasticity and strength, allowing it to stretch and capture the carbon dioxide gas produced by the yeast. Without proper gluten development, the gas bubbles escape, and the dough collapses, leading to flat rolls.
Think of the gluten network as tiny, elastic balloons. As the yeast produces gas, these balloons inflate, causing the dough to rise. If the balloons are weak or not fully formed due to insufficient mixing or kneading, they can't hold the gas effectively. The dough will lack the necessary structure to support its rise during proofing and baking, resulting in a dense, heavy texture and rolls that fail to reach their potential for being perfectly risen bread rolls.
The Importance of Kneading: Building Strength for Rise
Kneading is the physical act of working the dough, either by hand or with a stand mixer. This process aligns the gluten proteins, creating long, elastic strands that give the dough its structure and chewiness. Sufficient kneading transforms a shaggy, sticky mass into a smooth, elastic, and resilient dough. You'll notice the difference as the dough becomes less sticky and more manageable the longer you work it.
Properly kneaded dough should pass the "windowpane test." To perform this test, take a small piece of dough and gently stretch it between your fingers. If you can stretch it thin enough to see light through it without it tearing, the gluten is well-developed. This elasticity is what allows the dough to expand significantly during proofing and oven spring, contributing to a light, airy crumb and high-rising rolls.
Over-Kneading vs. Under-Kneading: Finding the Balance
While under-kneading is a common cause of flat rolls, it is also possible to over-knead dough, though it's harder to do by hand than with a powerful stand mixer. Under-kneaded dough will be sticky, tear easily, and lack elasticity. It won't hold its shape well and won't rise properly because the gluten network is weak and fragmented. The resulting rolls will be dense and possibly tough.
Over-kneaded dough, on the other hand, becomes tight, stiff, and difficult to work with. The gluten strands can actually start to break down if kneaded excessively, especially at high speeds in a mixer. While less common, severely over-kneaded dough can also result in a poor rise because the structure is too tight to allow for expansion. The key is to knead until the dough is smooth, elastic, passes the windowpane test, and springs back slowly when poked – typically around 8-12 minutes in a stand mixer or 15-20 minutes by hand, depending on the dough's hydration.
Techniques for Effective Kneading: The Stretch and Fold Method
Traditional kneading involves pushing, pulling, and folding the dough. A popular alternative or supplement, especially for wetter doughs, is the "stretch and fold" method. This technique involves gently stretching a portion of the dough upwards and folding it over itself, rotating the bowl, and repeating several times. This is done at intervals (e.g., every 30-60 minutes) during the bulk fermentation (first rise).
The stretch and fold method builds gluten strength without the vigorous action of traditional kneading, which can be beneficial for creating an open, airy crumb structure often desired in perfectly risen bread rolls. It's a gentler way to develop gluten and can be particularly useful for higher hydration doughs that are too sticky to knead easily by hand. Incorporating a few rounds of stretch and folds during the first rise can significantly improve the dough's structure and its ability to rise.
4. Inadequate Proofing Time: Patience is Key to a Great Rise
Proofing, also known as fermentation or rising, is the period where the yeast is actively working, producing gas that makes the dough expand. This is a critical step for achieving light and airy bread rolls. If the dough doesn't proof long enough, the yeast won't have sufficient time to produce enough gas, and the gluten structure won't have time to relax and become pliable enough to expand fully. The result will be dense, heavy rolls with poor volume – far from perfectly risen bread rolls.
Under-proofing is a very common mistake, often due to impatience or trying to rush the process. The dough needs time in a favorable environment for the yeast to thrive and populate the dough with gas bubbles. Skipping or shortening the proofing time significantly reduces the dough's potential for expansion, leading to a tight crumb and a lack of height.
Understanding Proofing: Allowing Yeast to Work Its Magic
Proofing is essentially the "rest and rise" period for your dough. After mixing and kneading, the dough is typically placed in a warm, greased bowl, covered, and left to rise. During this time, the yeast continues its work, consuming sugars and releasing carbon dioxide. This gas gets trapped by the developed gluten network, causing the dough to visibly increase in size.
The first rise (bulk fermentation) allows the dough to double in size and develops flavor. The second rise (final proof, after shaping the rolls) is crucial for the final texture and volume of the individual rolls. Both stages are vital for achieving that sought-after light crumb and ensuring your rolls are perfectly risen bread rolls. Skipping or shortening either step will negatively impact the final product.
Factors Affecting Proofing Time: Temperature, Humidity, and Yeast Activity
The time it takes for dough to proof is not fixed; it varies significantly based on several factors. The ambient temperature is perhaps the most influential. Warmer temperatures (around 75-85°F or 24-29°C) accelerate yeast activity, while cooler temperatures slow it down. Dough might double in size in 45-60 minutes in a warm kitchen, but take 90 minutes or more in a cooler environment.
Humidity also plays a role; dough proofs slightly faster in humid conditions. The amount and activity of the yeast used will also affect the timing. More yeast generally means a faster rise. Recipes provide estimated proofing times, but it's crucial to rely on visual cues (like the dough doubling in size) rather than strictly adhering to a clock, as conditions in every kitchen are different.
Over-Proofing vs. Under-Proofing: Recognizing the Signs
While under-proofing is a common cause of flat rolls, over-proofing can also lead to issues, though sometimes resulting in a different kind of flatness. Over-proofed dough will often rise dramatically, then start to collapse slightly because the gluten structure has become too stretched and weak to hold the gas. It might also smell strongly of alcohol. When baked, over-proofed rolls often collapse further in the oven or bake up pale and dense.
Under-proofed dough, as mentioned, won't have doubled in size and will feel dense and tight. When poked gently with a finger, the indentation will spring back immediately. Properly proofed dough will have roughly doubled in size, look puffy, and when gently poked, the indentation will spring back slowly, leaving a small indentation. Learning to recognize these signs is key to timing your proofing correctly for perfectly risen bread rolls.
5. Oven Temperature Issues: Baking at the Correct Heat
The oven temperature plays a critical role in the final rise and structure of your bread rolls. The initial blast of heat when the dough enters the oven causes a phenomenon called "oven spring." This is a rapid rise that occurs as the yeast gets a final burst of activity (until it dies at around 140°F) and the gases within the dough expand rapidly before the gluten structure sets. If the oven temperature is too low, this crucial oven spring is diminished, resulting in flatter, denser rolls.
Baking at the incorrect temperature can also affect the crust development and overall texture. An oven that is too cool won't set the crust quickly enough, potentially causing the dough to spread outwards rather than upwards. Conversely, an oven that is too hot might set the crust too quickly, preventing the dough from expanding fully during oven spring, or it might burn the outside before the inside is cooked through. Accurate oven temperature is vital for achieving beautifully shaped and perfectly risen bread rolls.
Calibrating Your Oven: Ensuring Accurate Temperature
It's a surprising fact that many home ovens are not accurately calibrated to the temperature they display. An oven set to 375°F might actually be baking at 350°F or even 400°F. This discrepancy can significantly impact baking results, especially for sensitive items like bread rolls. A simple, inexpensive oven thermometer placed inside your oven is the best way to check for accuracy.
Place the thermometer in the center of your oven and preheat it to your target temperature. Check the thermometer after the oven has preheated for at least 15-20 minutes. If there's a significant difference (more than 10-15°F), you'll know to adjust your oven setting accordingly in future baking sessions. For example, if your oven thermometer reads 350°F when the dial is set to 375°F, you'll know to set it slightly higher next time to compensate.
Avoiding Sudden Temperature Changes: Preheating Thoroughly and Avoiding Opening the Oven Door
Ensuring your oven is fully preheated before you put your rolls in is essential for maximizing oven spring. Don't trust the oven's preheat beep alone; give it an extra 10-15 minutes after the beep to ensure the temperature is stable throughout the oven cavity. Placing dough in an oven that hasn't reached its target temperature will result in a slow, weak rise.
Similarly, resist the urge to open the oven door frequently while your rolls are baking, especially during the first 10-15 minutes. Each time you open the door, a significant amount of heat escapes, causing a sudden drop in temperature. This interrupts the oven spring and can negatively affect the final rise and texture. Peek through the oven window if you need to check on progress.
6. Dough Hydration: The Right Balance of Flour and Liquid
Dough hydration refers to the ratio of water (or other liquid) to flour by weight in a recipe. It's usually expressed as a percentage. For example, a dough made with 1000g of flour and 600g of water has a hydration of 60%. The level of hydration significantly impacts the dough's texture, ease of handling, and ultimately, the structure and rise of the baked goods. Incorrect hydration can contribute to flat rolls.
Dough that is too dry (low hydration, e.g., 50-55%) can be stiff and difficult to knead properly, making it hard to develop a strong gluten network. A weak gluten network cannot trap gas effectively, leading to a dense crumb and a poor rise. While easier to handle for beginners, very low hydration doughs typically result in a tighter crumb compared to higher hydration doughs.
Measuring Ingredients Accurately: Using a Kitchen Scale
Accurate measurement, especially of flour and water, is paramount for controlling dough hydration. Measuring flour by volume (using cups) is notoriously inaccurate because flour can pack down differently depending on how it's scooped and stored. A cup of flour can vary in weight by as much as 20-30 grams, which significantly alters the hydration percentage of a recipe.
Using a digital kitchen scale to weigh your ingredients, particularly flour and water, is the most reliable way to ensure consistent results. This method ensures you are using the exact ratio intended by the recipe creator, leading to predictable dough consistency and a better chance of achieving perfectly risen bread rolls batch after batch. Weighing is a fundamental technique for serious bakers.
Adjusting Hydration for Different Flour Types: Bread Flour vs. All-Purpose Flour
Different types of flour absorb liquid differently. Bread flour, which has a higher protein content (typically 12-14%), can absorb more water and develop a stronger gluten network than all-purpose flour (typically 10-12% protein). Recipes are often developed using a specific type of flour, and substituting without adjustment can impact the dough's hydration and handling.
If a recipe calls for bread flour and you use all-purpose flour without reducing the liquid slightly, the dough might be too wet and sticky, difficult to shape, and could spread during baking. Conversely, using bread flour in a recipe designed for all-purpose flour might result in a dough that feels too dry. Pay attention to the recipe's flour type and adjust the liquid by a small amount (maybe 1-2 tablespoons) if substituting, based on how the dough feels during mixing – it should be slightly sticky but manageable after kneading.
Solutions for Achieving High-Rising Bread Rolls: A Step-by-Step Guide
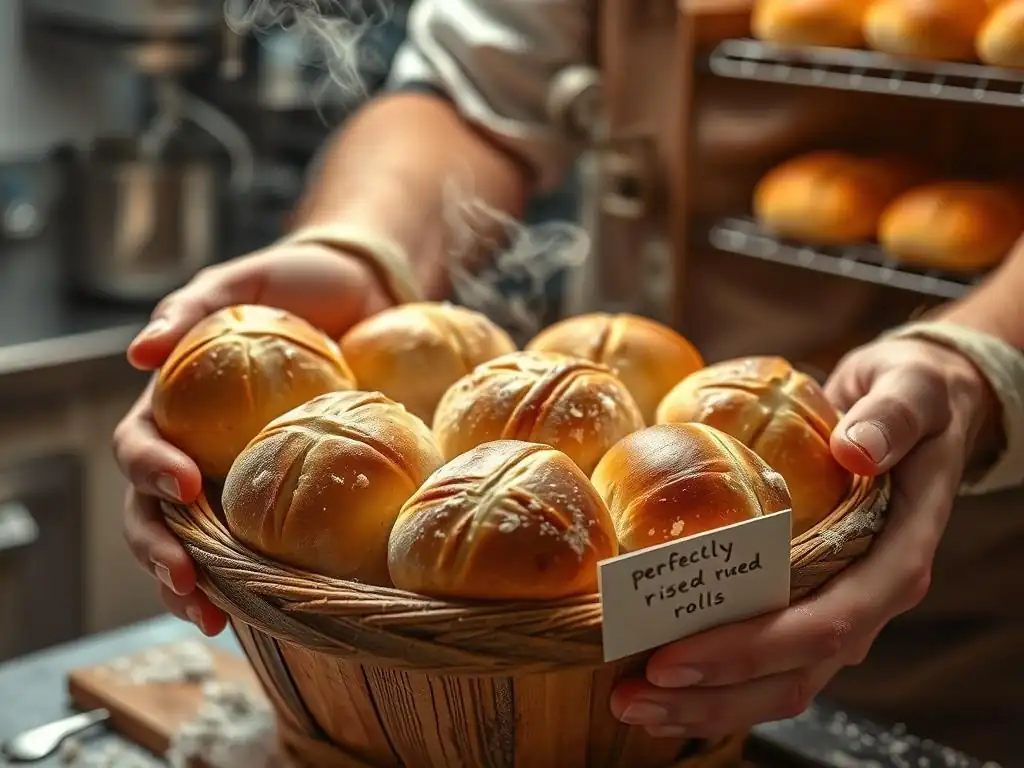
Achieving perfectly risen bread rolls consistently involves paying attention to detail at each stage of the baking process. By addressing the common issues discussed above, you can significantly improve your chances of success. Here is a structured approach focusing on key solutions.
Step 1: Test Your Yeast for Viability Before Baking
Before you even start mixing, take a moment to test your yeast. This simple step can save you from wasting time and ingredients on dough that won't rise.
Measure out the warm water (105-115°F or 40-46°C) specified in your recipe, or about 1/4 cup if the recipe doesn't have separate steps for activating yeast. Add the yeast and a pinch of sugar. Stir gently and let it sit for 5-10 minutes. You should see a foamy layer develop on the surface, indicating the yeast is active. If there's no foam or very little activity, your yeast is likely dead, and you'll need to use fresh yeast.
Step 2: Use the Correct Water Temperature for Yeast Activation (105-115°F)
Always use a thermometer to measure the temperature of your liquid when activating or mixing yeast into your dough. Aim for the sweet spot of 105-115°F (40-46°C) for active dry yeast.
Even if using instant yeast mixed directly with dry ingredients, ensuring the liquid is within a warm range (105-115°F is a safe bet) helps kickstart its activity efficiently. Avoid using water that feels hot to the touch, as this can kill the yeast. Consistent temperature control is fundamental for reliable fermentation and ultimately, perfectly risen bread rolls.
Step 3: Knead Your Dough Properly to Develop Gluten Strength
Don't cut corners on kneading! Whether by hand or mixer, ensure your dough develops a strong, elastic gluten network. Knead until the dough is smooth, less sticky, and passes the windowpane test.
- Task: Knead dough until smooth and elastic.
- Task: Perform the windowpane test: stretch a small piece; if you can see light through it without tearing, the gluten is well-developed.
If kneading by hand, this might take 15-20 minutes. In a stand mixer on medium speed, it typically takes 8-12 minutes. Proper kneading provides the structure needed to support the gas produced during fermentation, allowing your rolls to rise high.
Step 4: Proof Your Dough in a Warm, Draft-Free Environment
Create an ideal environment for your dough to rise. Yeast is most active in warm conditions, ideally between 75-85°F (24-29°C). Avoid cold or drafty spots in your kitchen.
Creating a Proofing Box: Using Your Oven with the Light On
A simple way to create a warm, draft-free proofing environment is to use your oven. Turn the oven light on (do not turn the oven itself on). The heat from the light bulb is usually sufficient to create a warm microclimate inside the oven, typically reaching around 75-85°F. Place your covered dough inside the oven with the light on and the door closed.
Monitoring Dough Rise: Looking for Doubling in Size
Rather than relying solely on the clock, watch your dough for visual cues. For the first rise (bulk fermentation), the dough is usually ready when it has roughly doubled in size. For the second rise (after shaping), the rolls are typically ready when they look significantly puffy and have increased in size, maybe by 50-75%, depending on the recipe. Gently poking the dough should leave an indentation that springs back slowly.
Step 5: Bake Your Bread Rolls at the Recommended Oven Temperature
Preheat your oven thoroughly to the temperature specified in the recipe, using an oven thermometer to verify accuracy. Most bread rolls bake between 375°F and 425°F (190°C and 220°C).
A properly preheated oven ensures maximum oven spring, giving your rolls that final push upwards. Avoid opening the oven door during the initial baking period (the first 10-15 minutes) to prevent heat loss and allow the rolls to achieve their full height and become perfectly risen bread rolls.
Step 6: Consider Dough Enrichment for a Softer, Higher Rise
Some recipes benefit from enriched doughs, which often include ingredients like milk, eggs, and fats (butter, oil). These additions can contribute to a softer texture and sometimes a more tender crumb, which can appear higher.
Adding Fat and Sugar: Enhancing Flavor and Texture
Fats like butter or oil, when incorporated into the dough during kneading, can help tenderize the crumb and improve shelf life. Sugar provides food for the yeast and also helps with browning and flavor development. While not strictly necessary for all rolls, these enrichments can enhance the overall quality and perception of a high rise.
Using Milk or Eggs: Improving Dough Structure and Rise
Using milk instead of water adds protein and fat, contributing to a softer crumb and richer flavor. Eggs add protein and fat, which strengthen the dough structure and can lead to a finer, more cake-like crumb and a slightly higher rise. These ingredients can help create a more stable dough that holds its shape and expands beautifully during baking, contributing to truly perfectly risen bread rolls.
Advanced Tips for Baking Perfectly Risen Bread Rolls
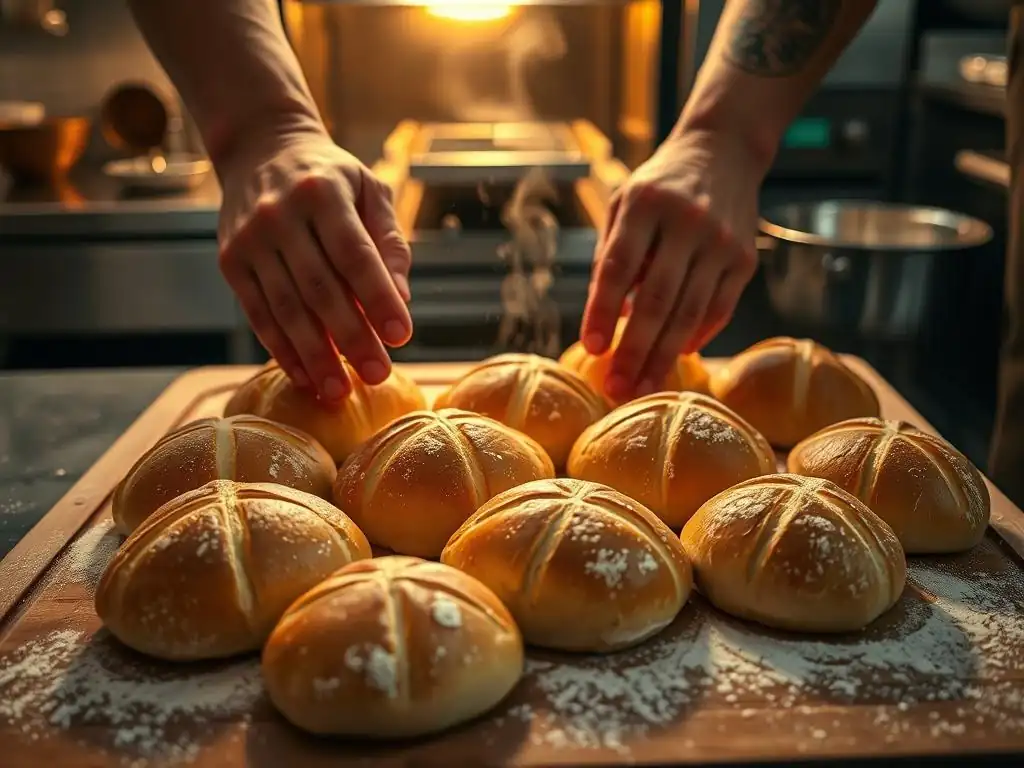
Once you've mastered the basics, a few advanced techniques can help you refine your process and achieve even better results with your perfectly risen bread rolls.
The Importance of Bench Rest: Relaxing the Gluten
After the first rise and dividing the dough into individual portions for rolls, many recipes include a "bench rest." This is a short resting period, typically 10-20 minutes, where the dough balls are covered and allowed to relax on the counter (the "bench").
This rest period is crucial because dividing and shaping the dough tightens the gluten structure again. A bench rest allows the gluten to relax, making the dough much easier to shape into smooth, uniform rolls without fighting against its elasticity. Skipping this step can make shaping difficult and can result in rolls that spring back or tear, potentially hindering their final rise.
Using a Dough Thermometer: Monitoring Internal Dough Temperature
Beyond just checking water temperature, monitoring the internal temperature of your dough during fermentation can provide valuable insight. While not essential for beginners, a dough thermometer can help you understand how ambient temperature affects fermentation speed.
Yeast activity is optimal within certain internal dough temperature ranges, typically between 75-80°F (24-27°C) for standard bulk fermentation. If your dough is consistently cooler, you know it will take longer to rise. If it's warmer, the rise will be faster. Monitoring the internal temperature helps you predict proofing times more accurately and ensures your dough is fermenting under optimal conditions for achieving perfectly risen bread rolls.
Scoring Bread Rolls: Controlling Expansion During Baking
Scoring, or making cuts on the surface of the dough just before baking, is a technique often used for loaves but can also be applied to certain types of rolls. The purpose of scoring is to create weak points on the surface of the dough, directing where the dough expands during oven spring.
Without scoring, the crust might tear randomly during baking. Scoring allows for controlled expansion, often resulting in a more symmetrical shape and sometimes facilitating a slightly higher rise by preventing the crust from restricting expansion. While not all roll recipes require scoring, for some, like crusty dinner rolls, it can enhance both appearance and rise. Use a sharp blade (like a razor blade or lame) and make quick, decisive cuts.
Conclusion: Enjoying Your Perfectly Risen Homemade Bread Rolls
Baking perfectly risen bread rolls is a skill that improves with practice and attention to detail. While encountering flat rolls can be frustrating, understanding the common causes – from inactive yeast and incorrect temperatures to improper kneading and proofing – is the first step towards consistent success. By implementing the solutions outlined in this guide, you'll be well on your way to baking beautiful, high-rising rolls every time.
Remember to test your yeast, use accurate temperatures, knead adequately to develop gluten, provide a warm environment for proofing, bake in a properly preheated oven, and measure your ingredients precisely. With these techniques in your baking repertoire, you'll transform those past flat failures into future fluffy triumphs. The journey of baking is one of learning and delicious discovery!
Celebrating Baking Success: Sharing Your Creations
There's immense satisfaction in pulling a batch of golden brown, perfectly risen bread rolls from the oven. The aroma fills your home, and the sight of their beautiful height is a reward in itself. Don't hesitate to celebrate this success! Take photos, share them with friends and family (in person or online! ), and enjoy the fruits of your labor. Baking is meant to be a joyful experience, and mastering the art of the rise is a significant milestone.
Sharing your perfectly risen bread rolls hot from the oven is one of life's simple pleasures. Whether served with butter, used for sandwiches, or enjoyed on their own, these homemade delights are a testament to your growing baking skills. Every successful batch builds confidence and encourages you to try new recipes and techniques. So, go ahead, bake those beautiful rolls, and share the deliciousness with the people around you!
Frequently Asked Questions
How important is yeast quality when trying to bake perfectly risen bread rolls?
Yeast quality is extremely important! Expired or improperly stored yeast won't activate, leading to flat, dense rolls. Always check the expiration date and perform a proof test before using.
What role does water temperature play in activating the yeast for bread rolls?
Water temperature significantly impacts yeast activation. Water that's too cold won't activate the yeast, while water that's too hot can kill it. Aim for lukewarm water between 105-115°F (40-46°C) for optimal yeast activity.
Could over-kneading be the reason my bread rolls aren't rising properly?
Actually, it's usually under-kneading that causes issues with rise. Sufficient kneading develops the gluten, which provides the structure for the rolls to trap gas and rise. Proper gluten development is key.
What's the best environment for proofing bread rolls to ensure a good rise?
A warm, humid environment is ideal for proofing. A warm oven (turned off!) or a proofing box encourages yeast activity. Cover the dough to prevent it from drying out, which will hinder the rising process.
How does the type of flour used affect the rise of bread rolls?
The type of flour significantly impacts the rise. Bread flour, with its higher gluten content, is recommended for bread rolls. It provides the necessary structure for a strong, even rise, unlike all-purpose flour which has less gluten.
Final Reflection: The Joy of a Perfectly Risen Roll
The pursuit of the perfectly risen bread roll is more than just a culinary quest; it's a testament to the power of patience, precision, and the simple magic of transforming flour and water into something truly delightful. In a world increasingly dominated by instant gratification, the slow, deliberate process of bread making offers a welcome counterpoint, a reminder of the satisfaction found in mastering a craft and savoring the fruits of one's labor.
The influence of good bread, particularly perfectly risen rolls, on our cultural landscape is undeniable. From family gatherings centered around a warm loaf to the comforting aroma that evokes feelings of home and nostalgia, bread holds a special place in our hearts. Bread is the staff of life,
a simple phrase that speaks volumes about its importance throughout history and across cultures. This seemingly simple act of baking connects us to generations past, reminding us of the enduring power of tradition and the shared human experience of creating sustenance.
Now, consider your own baking journey. Perhaps you've experienced the frustration of a deflated roll, the disappointment of a less-than-perfect rise. But remember the lessons learned in this article – the importance of proper hydration, the subtle nuances of yeast activation, the patience required for a slow, steady fermentation. Don't let setbacks discourage you; embrace the challenge, experiment with different techniques, and savor the joy of each successful rise. The perfectly risen roll awaits, a testament to your dedication and a delicious reward for your efforts.
Unlock Your Baking Potential: Achieve Perfect Rolls Every Time!
Thanks for taking the time to learn about achieving perfectly risen rolls! We hope you gained valuable insights into the secrets of a fantastic rise. Now it's time to put your newfound knowledge into practice.
- Bake a test batch today! Use your newly acquired skills to create a batch of rolls, paying close attention to the techniques discussed. Consider experimenting with a new flour type or hydration level.
- Share your baking triumphs (or challenges!) with our community. Join the conversation in the comments section below—we love to hear about your experiences!
- Try a different recipe: Challenge yourself to apply these techniques to another bread recipe, like dinner rolls or even a sourdough loaf.
Ready to experience the joy of perfectly fluffy rolls? What small adjustment will you make in your next baking project?