
GlutenFree Focaccia Recipe: Crispy Edges, Tender Center

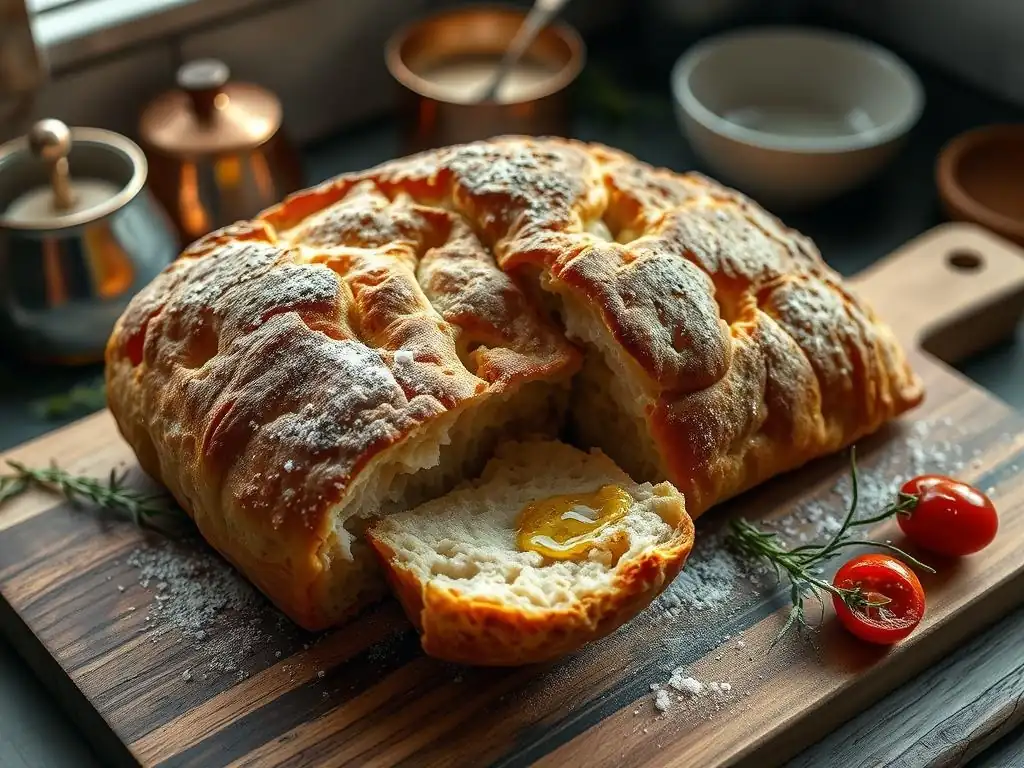
Welcome to BakeWithEase, your trusted companion on your baking journey! Ever dreamed of sinking your teeth into a perfectly airy and flavorful focaccia, even if you're gluten-free? Imagine the satisfying crackle of a golden crust giving way to a tender, chewy interior. Our guide to an easy gluten-free focaccia recipe unlocks that dream, and we're about to show you how! Curious to learn the secret to achieving focaccia perfection without the gluten? Let's get baking!
- Gluten-Free Focaccia Recipe: Crispy Edges, Tender Center - BakeWithEase
- Introduction to Gluten-Free Focaccia Baking
- Mastering the Gluten-Free Focaccia Dough: Ingredients and Preparation
- Achieving Crispy Edges and a Tender Center: The Baking Process
- Gluten-Free Focaccia Recipe: Detailed Instructions
- Gluten-Free Focaccia Topping Ideas: Elevate Your Bake
- Tips and Tricks for Baking the Best Gluten-Free Focaccia
- Serving Suggestions: Enjoying Your Homemade Gluten-Free Focaccia
- Gluten-Free Focaccia Recipe: Nutritional Information
- Conclusion: Your Journey to Gluten-Free Focaccia Mastery
-
Frequently Asked Questions
- What makes this gluten-free focaccia recipe "easy"?
- What kind of gluten-free flour blend is recommended for the best results?
- How do I achieve the signature crispy edges and tender center focaccia is known for?
- Can I add toppings to this gluten-free focaccia? If so, what are some good options?
- How long does this gluten-free focaccia stay fresh?
- Final Reflection: The Simple Joy of Gluten-Free Baking
- Unleash Your Inner Baker: Craft the Perfect Gluten-Free Focaccia!
Gluten-Free Focaccia Recipe: Crispy Edges, Tender Center - BakeWithEase
Introduction to Gluten-Free Focaccia Baking
BakeWithEase Presents: The Ultimate Gluten-Free Focaccia
Welcome to BakeWithEase, where we believe that delicious baking should be accessible to everyone, regardless of dietary needs. Today, we're diving into the wonderful world of gluten-free bread with a focus on a true Italian classic: focaccia. Many gluten-free bread recipes can be daunting, often resulting in dense or crumbly loaves. Our mission with this easy gluten-free focaccia recipe is to guide you step-by-step to achieve that perfect balance – a wonderfully crispy exterior giving way to a soft, tender interior, all without gluten.
Crafting a successful gluten-free focaccia recipe involves understanding the unique properties of alternative flours and binders. Unlike traditional wheat flour, which relies on gluten development for structure and chewiness, gluten-free doughs require careful handling and the right combination of ingredients to mimic these characteristics. We've developed this simple gluten-free focaccia method specifically for home bakers, ensuring that even if you're new to gluten-free baking, you can achieve fantastic results right in your own kitchen. Get ready to experience the joy of baking and sharing a truly remarkable gluten-free focaccia.
What Makes This Gluten-Free Focaccia Recipe Special?
What sets this gluten-free focaccia recipe apart is its simplicity and the consistent, delicious results it delivers. We've meticulously tested different flour blends and techniques to find a method that minimizes common pitfalls in gluten-free bread making, such as gummy texture or lack of rise. This recipe focuses on achieving that signature focaccia texture: a light, airy crumb contrasted with a golden, olive-oil-kissed crust that provides a satisfying crispness with every bite.
The key to this easy gluten-free focaccia lies in the careful balance of a high-quality gluten-free flour blend, the right amount of hydration, and specific proofing and baking techniques. We incorporate ingredients like psyllium husk or xanthan gum (depending on your blend) to provide structure and elasticity, mimicking gluten's role. Furthermore, our method emphasizes proper handling – no vigorous kneading needed! – and precise temperature control during baking to ensure optimal texture and flavor development. This isn't just a gluten-free focaccia recipe; it's the gluten-free focaccia recipe designed for ease and exceptional taste.
Mastering the Gluten-Free Focaccia Dough: Ingredients and Preparation
Essential Ingredients for a Delicious Gluten-Free Focaccia
Creating a fantastic gluten-free focaccia starts with selecting the right ingredients. Beyond a good quality gluten-free flour blend (more on that in the next section), you'll need standard baking staples like active dry yeast, warm water, olive oil, and salt. The warm water is crucial for activating the yeast; aim for a temperature between 105°F and 115°F (40°C to 46°C). Water that's too hot can kill the yeast, while water that's too cold won't activate it properly, leading to a dense loaf.
Olive oil is another non-negotiable component of a great focaccia, especially for this gluten-free focaccia recipe. It's used generously both in the dough and on the dough before baking. Using extra virgin olive oil will impart the best flavor. Salt, preferably fine sea salt or kosher salt, is vital for enhancing the overall taste of the bread and controlling yeast activity. Some gluten-free focaccia recipes also benefit from a touch of sugar or honey to feed the yeast and aid in browning, though this can sometimes be omitted depending on the flour blend.
Understanding Gluten-Free Flour Blends for Focaccia
The foundation of any successful gluten-free focaccia recipe is the flour blend. Not all gluten-free blends are created equal, and their composition significantly impacts the final texture. A good all-purpose gluten-free flour blend for bread typically contains a mix of starchy flours (like rice flour, tapioca starch, or potato starch) and protein-rich flours (like sorghum flour, brown rice flour, or millet flour). Look for blends that are specifically designed for baking or bread making.
Many effective gluten-free blends also include a binder like xanthan gum or psyllium husk powder. These ingredients are critical in gluten-free baking as they provide the structure and elasticity that gluten would normally offer. Psyllium husk, in particular, is often favored for bread recipes as it can create a slightly chewier texture closer to traditional bread.
If your chosen blend doesn't contain a binder, you'll likely need to add it separately according to the recipe's instructions, typically around 1 teaspoon of xanthan gum or 1-2 tablespoons of psyllium husk powder per cup of flour blend. Using the right blend is key to an easy gluten-free focaccia experience.
Step-by-Step Guide to Mixing the Perfect Gluten-Free Focaccia Dough
Mixing gluten-free focaccia dough is generally simpler than mixing wheat dough because there's no gluten to develop through kneading. The goal is simply to combine the ingredients until a cohesive, wet dough forms. Start by activating your yeast: combine the warm water, yeast, and a pinch of sugar (if using) in a large bowl. Let it sit for 5-10 minutes until it becomes frothy and bubbly, indicating the yeast is active.
In a separate bowl, whisk together the gluten-free flour blend, binder (if adding separately), and salt. Once the yeast is active, pour it into the dry ingredients. Add a couple of tablespoons of olive oil to the wet mixture. Using a wooden spoon or a stand mixer with a paddle attachment, mix on low speed until all the flour is incorporated and you have a very wet, sticky dough.
Avoid overmixing; just mix until everything is combined and uniform. The consistency should be wetter than traditional wheat bread dough, almost like a thick batter. This high hydration is crucial for a tender gluten-free focaccia recipe.
Achieving Crispy Edges and a Tender Center: The Baking Process
Proofing the Gluten-Free Focaccia Dough: Time and Temperature
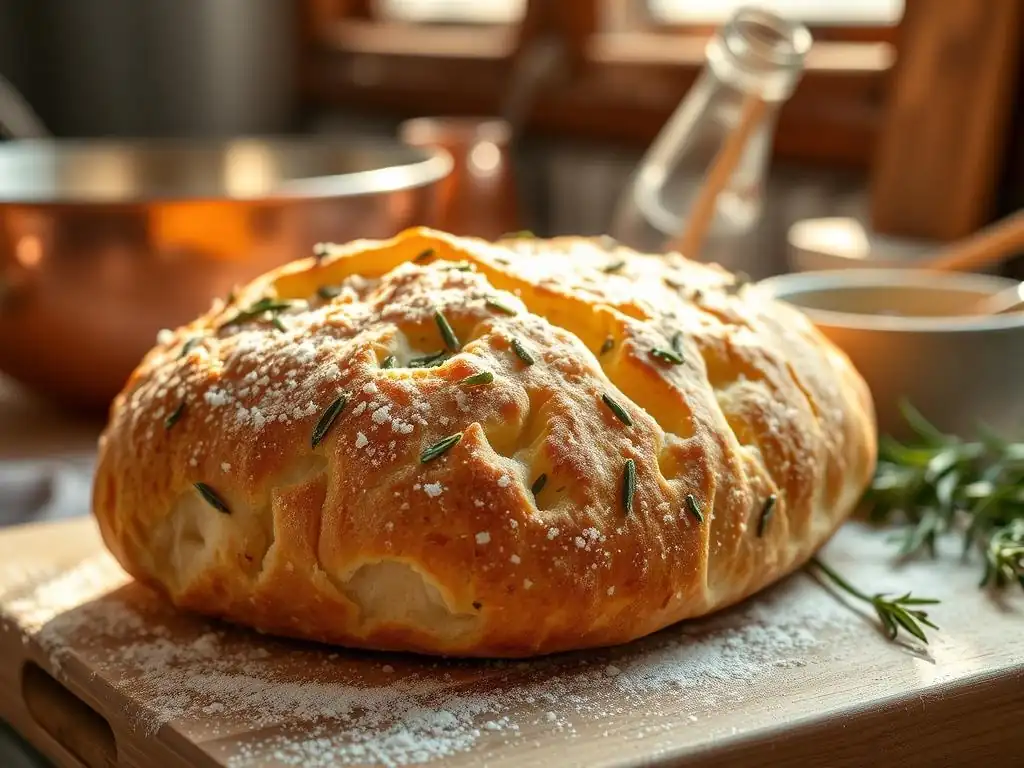
Proofing, or allowing the dough to rise, is a vital step in this easy gluten-free focaccia recipe. Unlike wheat dough which develops structure during proofing, gluten-free dough relies on the expansion caused by the carbon dioxide produced by the yeast. The ideal proofing temperature is around 75°F to 80°F (24°C to 27°C). A warm, draft-free environment is best. You can achieve this by placing the covered dough in a slightly warmed oven (turned off) or near a warm spot in your kitchen.
For the first rise, cover the bowl with plastic wrap or a damp tea towel and let it proof until it has visibly increased in size, often doubling or nearly doubling. This typically takes anywhere from 60 to 90 minutes, but the exact time can vary depending on the temperature of your kitchen and the activity of your yeast. After transferring the dough to the baking pan, a second, shorter proofing period is needed, usually 20-30 minutes, to allow the dough to relax and puff up slightly before dimpling and baking.
How to Properly Oil and Dimple Your Gluten-Free Focaccia
Proper oiling and dimpling are signature steps for any focaccia, and they are particularly important in a gluten-free focaccia recipe for achieving the desired texture and appearance. Once the dough has completed its second rise in the baking pan, generously drizzle the surface with a significant amount of olive oil – don't be shy! A standard 9x13 inch pan might require anywhere from 1/4 to 1/2 cup of olive oil spread across the surface. This oil is key to creating those coveted crispy edges and preventing the top from drying out.
Next, it's time to dimple. Lightly oil your fingertips and gently press them straight down into the dough, creating deep indentations. Space the dimples relatively close together, but avoid pressing all the way down to the bottom of the pan. These dimples serve multiple purposes: they prevent large air bubbles from forming, create pockets for the olive oil and toppings to pool, and contribute to the focaccia's characteristic rustic look. The generous oiling ensures the dimples hold their shape and the surface becomes beautifully golden and crisp during baking.
Baking Instructions: Temperature and Time for Optimal Results
Baking temperature and time are critical for turning wet gluten-free dough into a perfectly textured focaccia with crispy edges and a tender center. Preheat your oven to a relatively high temperature, typically between 400°F and 425°F (200°C to 220°C). A hot oven helps the dough rise quickly and develop a nice crust. If possible, placing a baking stone or steel in the oven while it preheats can help transfer heat efficiently to the bottom of the pan, promoting a crispier bottom crust.
The baking time for a gluten-free focaccia recipe usually ranges from 20 to 35 minutes, depending on the thickness of your dough and the oven's calibration. You'll know it's done when the top is golden brown, the edges are deep golden and crispy, and the internal temperature reaches around 200°F (93°C). If the top is browning too quickly but the interior isn't done, you can loosely tent the focaccia with foil for the remaining baking time. Allowing the focaccia to cool slightly in the pan before transferring it to a wire rack helps the structure set.
Gluten-Free Focaccia Recipe: Detailed Instructions
Recipe Card: Easy Gluten-Free Focaccia
Here is a comprehensive guide to making our easy gluten-free focaccia recipe. This recipe is designed for a standard 9x13 inch baking pan.
Yield: 1 large focaccia (approx. 12 servings) Prep time: 20 minutes Proofing time: 80-120 minutes (approx.) Bake time: 25-35 minutes
- Ingredients:
- 2 cups (475ml) warm water (105-115°F / 40-46°C)
- 2.25 teaspoons (7g) active dry yeast (one standard packet)
- 1 teaspoon granulated sugar (optional, for yeast activation)
- 4 cups (500g) all-purpose gluten-free flour blend (containing binder or add separately)
- 1-2 tablespoons psyllium husk powder OR 1 teaspoon xanthan gum (if your blend doesn't contain it)
- 2 teaspoons fine sea salt or kosher salt
- 1/4 cup + 1/4 cup (60ml + 60ml) extra virgin olive oil, divided
- Flaky sea salt, for finishing
- Optional toppings (rosemary, cherry tomatoes, garlic, etc.)
Step 1: Preparing the Dough
Begin by activating the yeast. In a large mixing bowl, combine the warm water, active dry yeast, and optional sugar. Stir gently and let it sit for 5-10 minutes until a foamy layer forms on the surface. This indicates the yeast is alive and ready. While the yeast is proofing, whisk together the gluten-free flour blend, binder (psyllium husk or xanthan gum, if needed), and salt in a separate bowl. Ensure these dry ingredients are well combined.
Step 2: First Rise (Proofing)
Once the yeast is active, pour the frothy water mixture into the bowl with the dry ingredients. Add the first 1/4 cup (60ml) of olive oil. Mix with a sturdy spoon or a stand mixer with a paddle attachment on low speed until all the flour is incorporated and you have a very wet, sticky dough. Scrape down the sides of the bowl as needed.
Cover the bowl tightly with plastic wrap or a damp kitchen towel. Place the bowl in a warm, draft-free place (ideally 75-80°F) for the first rise. Let the dough proof for 60-90 minutes, or until it has nearly doubled in size.
Step 3: Shaping and Dimpling
Generously grease a 9x13 inch baking pan with olive oil. Pour the risen dough into the prepared pan. Because the dough is sticky, you can lightly oil your hands or use a spatula to gently spread the dough evenly towards the edges of the pan. Don't force it; let it relax into the shape. Cover the pan loosely with plastic wrap or a clean tea towel.
Step 4: Second Rise
Let the dough rest in the pan for a second proofing period of 20-30 minutes. During this time, the dough will relax and puff up slightly. Towards the end of this second rise, preheat your oven to 400°F (200°C). If using toppings, have them prepped and ready.
Step 5: Baking to Perfection
Remove the cover from the pan. Drizzle the remaining 1/4 cup (60ml) of olive oil generously over the surface of the dough, ensuring good coverage. Lightly oil your fingertips and gently press them deep into the dough to create dimples. Sprinkle the entire surface generously with flaky sea salt and add any desired toppings (see suggestions below).
Bake in the preheated oven for 25-35 minutes, or until the focaccia is golden brown on top and the edges are crispy. The internal temperature should reach around 200°F (93°C). If the top browns too quickly, you can loosely tent it with foil. Once baked, carefully remove the pan from the oven. Let the focaccia cool in the pan for 5-10 minutes before transferring it to a wire rack to cool completely before slicing and serving.
Gluten-Free Focaccia Topping Ideas: Elevate Your Bake
Classic Topping Combinations for Gluten-Free Focaccia
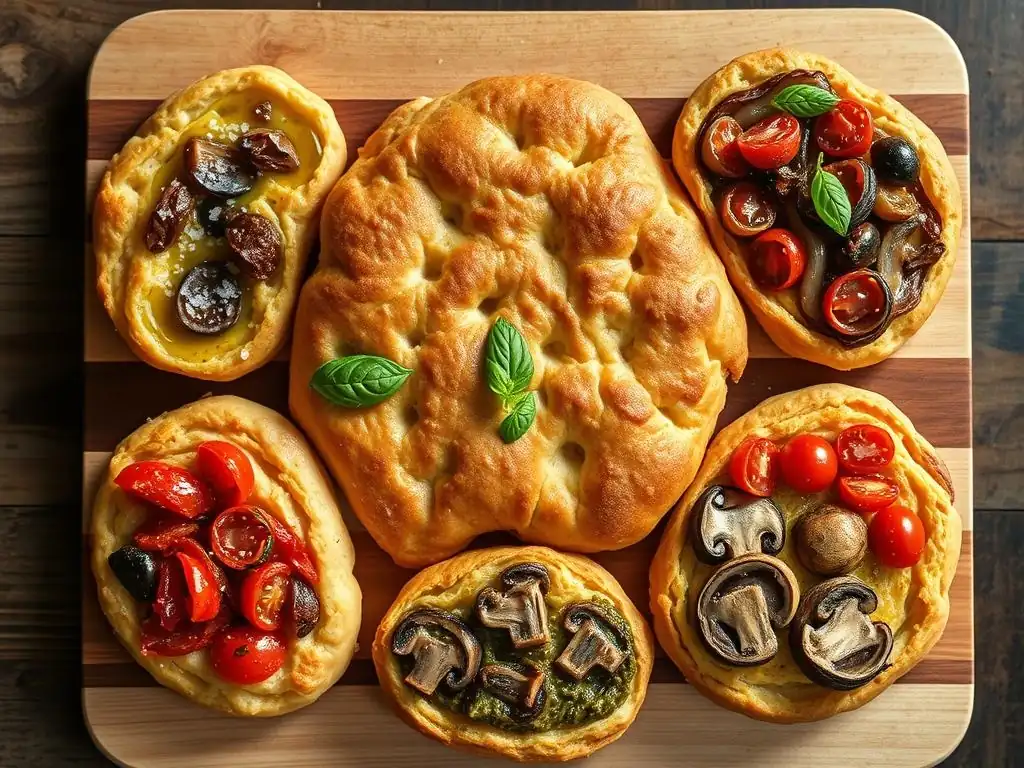
Once you've mastered the basic easy gluten-free focaccia recipe, the fun begins with toppings! The most classic combination is fresh rosemary and flaky sea salt. Simply scatter fresh rosemary sprigs or finely chopped rosemary over the dimpled, oiled dough before baking, followed by a generous sprinkle of flaky salt. This simple pairing highlights the bread's flavor and texture beautifully.
Another beloved classic involves cherry tomatoes and garlic. Halve or quarter cherry tomatoes and scatter them across the surface. Thinly slice a clove or two of garlic and tuck the slices into the dimples alongside the tomatoes. A final flourish of salt and perhaps a grind of black pepper completes this vibrant topping. The tomatoes burst slightly during baking, creating juicy pockets, while the garlic softens and becomes sweet.
Creative and Unique Gluten-Free Focaccia Topping Suggestions
Don't limit yourself to the classics! This easy gluten-free focaccia recipe is a perfect canvas for culinary creativity. Consider using caramelized onions and thyme for a sweet and savory profile. Sauté sliced onions slowly in olive oil until deeply golden and soft, then spread them over the dough before baking and sprinkle with fresh thyme leaves.
Other delicious ideas include using olives (kalamata or green), thinly sliced red onion, roasted red peppers, or even crumbled dairy-free feta cheese for a Mediterranean twist. For a slightly different flavor, try using sliced potatoes and fresh sage; parboil thin potato slices briefly before arranging them on the dough. Remember to press toppings gently into the dimples so they don't roll off during baking.
Tips for Applying Toppings to Gluten-Free Focaccia
Applying toppings correctly ensures they bake beautifully and stay in place. Always apply toppings after you have generously oiled and dimpled the dough. The oil helps hold smaller toppings like herbs and salt in place. For larger items like cherry tomatoes or olive halves, gently press them into the dimples.
Avoid overcrowding the focaccia with toppings, as this can prevent the top crust from crisping evenly. Distribute them relatively evenly across the surface. If using wet toppings like tomatoes, be aware that they might make the area directly beneath them slightly less crispy, but this can add a pleasant variation in texture. Sprinkling flaky salt after adding other toppings helps it adhere better and provides a final textural contrast.
Tips and Tricks for Baking the Best Gluten-Free Focaccia
Troubleshooting Common Gluten-Free Focaccia Baking Issues
Even with a great easy gluten-free focaccia recipe, sometimes things don't go perfectly. A common issue is a gummy texture. This can happen if the dough was too wet, not baked long enough, or cooled too quickly. Ensure your dough is wet but not soupy, bake until the internal temperature reaches 200°F (93°C), and let it cool on a wire rack. If your focaccia is dense, it might be due to inactive yeast, insufficient proofing time, or using a flour blend not suitable for bread. Check your yeast's expiry date and ensure your proofing environment is warm enough.
Another challenge can be achieving a crispy crust. This often relates to insufficient olive oil or not baking at a high enough temperature. Don't skimp on the oil! Use the specified amount or even a little more if you love extra crispy edges. Ensure your oven is fully preheated to the correct temperature. Uneven browning might indicate hot spots in your oven; rotating the pan halfway through baking can help.
Achieving the Perfect Texture: Crispy vs. Chewy
The ideal gluten-free focaccia texture is a balance: a wonderfully crispy, almost fried-like crust (especially the edges) and a light, airy, and tender interior. The key to the crispy crust lies in generous olive oil application and baking at a high temperature. The oil essentially fries the bottom and edges of the dough as it bakes. Using a dark metal pan can also help promote browning and crispiness compared to a lighter pan.
Achieving a tender and slightly chewy interior in a gluten-free focaccia recipe is primarily dependent on the hydration level and the type of binder used. The high water content keeps the crumb moist and open. Psyllium husk is generally better than xanthan gum for providing a noticeable chewiness similar to gluten. Proper proofing allows the dough to develop air pockets, contributing to a lighter crumb structure. Don't overmix the dough; gentle mixing preserves the fragile structure created by the binder.
Storing and Reheating Your Gluten-Free Focaccia
Homemade gluten-free focaccia is best enjoyed fresh, ideally warm from the oven. However, if you have leftovers, proper storage is key to maintaining quality. Once completely cooled, store the focaccia in an airtight container at room temperature for up to 2-3 days. Avoid refrigerating it, as this can dry out the bread and make it dense.
For longer storage, focaccia freezes exceptionally well. Wrap cooled focaccia tightly in plastic wrap, then in aluminum foil or place in a freezer-safe bag. It can be frozen for up to 2-3 months. To reheat, thaw frozen focaccia at room temperature. For best results, reheat slices or the entire piece in a preheated oven at 350°F (175°C) for 5-10 minutes until warmed through and the crust crisps up again. Avoid microwaving, as it will make the texture rubbery.
Serving Suggestions: Enjoying Your Homemade Gluten-Free Focaccia
Pairing Gluten-Free Focaccia with Meals
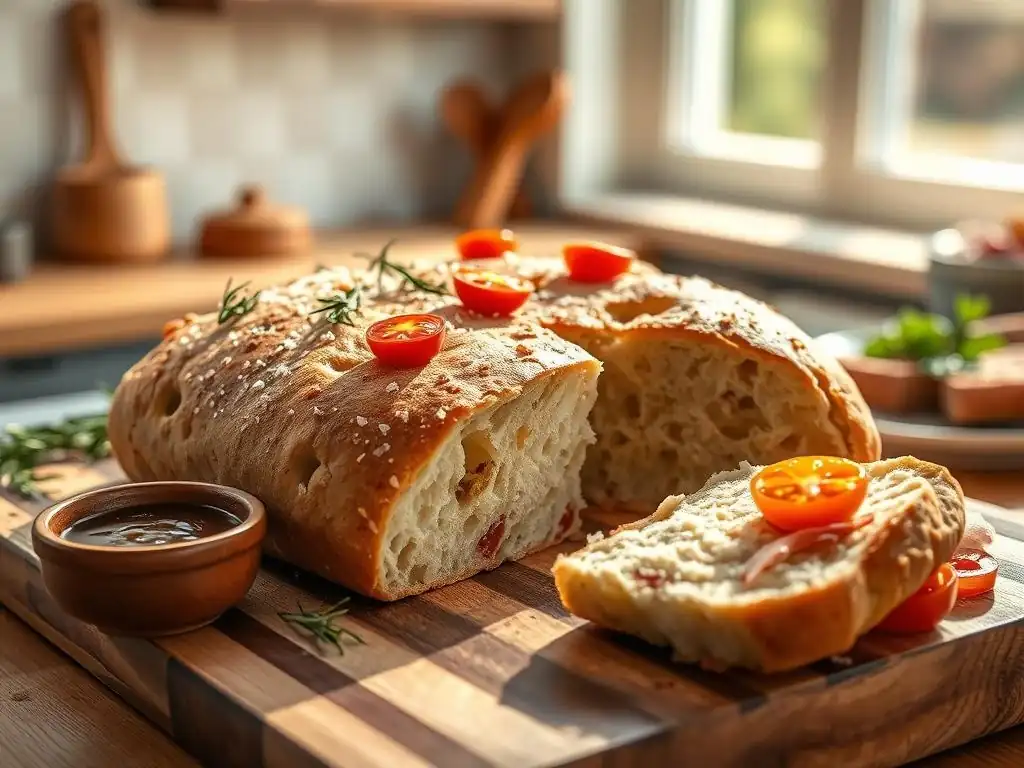
This easy gluten-free focaccia recipe is incredibly versatile and makes a wonderful accompaniment to a variety of meals. Its savory flavor and satisfying texture pair beautifully with Italian dishes. Serve it alongside pasta with marinara sauce, a robust minestrone or lentil soup, or a fresh caprese salad. The slightly chewy crumb is perfect for soaking up sauces and broths.
It's also a fantastic addition to a Mediterranean-inspired meal. Pair slices with grilled chicken or fish, a vibrant Greek salad, hummus, baba ghanoush, and marinated olives. The simple flavors of the focaccia complement the rich and fresh components of these dishes without overpowering them. Think of it as a flavorful alternative to standard gluten-free bread rolls.
Gluten-Free Focaccia as an Appetizer or Snack
Beyond being a meal accompaniment, gluten-free focaccia shines as a simple appetizer or snack. Serve warm slices with a side of high-quality extra virgin olive oil for dipping, perhaps infused with garlic or balsamic vinegar. The simplicity allows the bread's flavor to stand out.
It's also perfect for building small bites. Top pieces with prosciutto, roasted vegetables, or a dollop of ricotta cheese. Cut the focaccia into squares or strips for easy dipping into various spreads like pesto, tapenade, or roasted red pepper dip. A platter of warm gluten-free focaccia with a selection of dips and spreads is an effortless yet impressive way to entertain guests.
Gluten-Free Focaccia Recipe: Nutritional Information
Understanding the Nutritional Value of Gluten-Free Focaccia
Providing precise nutritional information for a homemade gluten-free focaccia recipe can be challenging as it varies significantly based on the specific gluten-free flour blend used, the type and amount of oil, and any added toppings. However, we can provide some general insights. Gluten-free flour blends often have a similar calorie count per serving to wheat flour blends, though the balance of carbohydrates, protein, and fiber can differ. Blends containing higher amounts of whole grains (like brown rice or sorghum) will typically offer more fiber and certain nutrients compared to blends based primarily on starches (like white rice and tapioca).
The generous amount of olive oil in focaccia contributes healthy monounsaturated fats and calories. A standard serving (perhaps 1/12th of a 9x13 inch focaccia) might contain approximately 250-350 calories, depending heavily on the oil content and toppings. The protein content will depend on the flour blend, but gluten-free breads generally have less protein than traditional wheat bread unless protein-rich flours or additives are used.
Sodium content will be influenced by the amount of salt used in the recipe and as a topping. For specific dietary needs, it's recommended to calculate the nutritional information based on the exact brands and quantities of ingredients you use.
Conclusion: Your Journey to Gluten-Free Focaccia Mastery
BakeWithEase: Your Partner in Gluten-Free Baking Success
At BakeWithEase, we are passionate about empowering you to bake confidently, especially when navigating dietary restrictions like gluten-free living. This easy gluten-free focaccia recipe is just one example of how we strive to provide clear, reliable instructions that yield delicious results. We understand that gluten-free baking can sometimes feel complex, but with the right guidance and a focus on understanding the unique properties of gluten-free ingredients, you can bake incredible bread that rivals its traditional counterparts.
Our goal is to be your trusted resource, offering tested recipes, helpful tips, and explanations that demystify the baking process. Whether you're tackling this gluten-free focaccia recipe for the first time or looking to expand your gluten-free repertoire, we're here to support your baking journey. Remember, practice makes perfect, and every bake is a learning opportunity. Don't be discouraged by minor setbacks; focus on the delicious outcome!
Enjoying Your Homemade Gluten-Free Focaccia: A Final Thought
There's a unique satisfaction that comes from pulling a warm, golden focaccia out of the oven, especially when you've successfully baked a gluten-free version with that perfect crispy-tender texture. The aroma filling your kitchen is just the beginning. Sharing a slice of your homemade easy gluten-free focaccia with friends and family is a rewarding experience, proving that gluten-free doesn't mean flavor-free or texture-compromised.
So go ahead, gather your ingredients, follow this gluten-free focaccia recipe easy guide, and get baking. Enjoy the process, savor the results, and delight in the simple pleasure of delicious, homemade bread. This gluten-free focaccia is more than just a recipe; it's an invitation to enjoy flavorful bread again.
Frequently Asked Questions
What makes this gluten-free focaccia recipe "easy"?
This recipe focuses on simple ingredients and a straightforward process, even for those new to gluten-free baking. We provide detailed, step-by-step instructions to minimize errors.
What kind of gluten-free flour blend is recommended for the best results?
We recommend a high-quality, all-purpose gluten-free flour blend that contains xanthan gum. Different blends can yield slightly different textures, so it's best to stick with one you trust and are familiar with.
How do I achieve the signature crispy edges and tender center focaccia is known for?
The high hydration level in the dough, combined with olive oil during baking, creates the crispy crust. A warm proofing environment also helps to develop a tender crumb.
Can I add toppings to this gluten-free focaccia? If so, what are some good options?
Absolutely! Fresh herbs, such as rosemary or thyme, are classic. Other great additions include sun-dried tomatoes, olives, or even a sprinkle of sea salt.
How long does this gluten-free focaccia stay fresh?
For optimal freshness, it's best to enjoy it within 1-2 days. Store it in an airtight container at room temperature. You can also freeze slices for longer storage.
Final Reflection: The Simple Joy of Gluten-Free Baking
The ease and deliciousness of this gluten-free focaccia recipe prove that embracing dietary restrictions doesn't mean sacrificing flavor or enjoyment. This simple recipe, designed for even the most novice baker, opens up a world of culinary possibilities for those following a gluten-free lifestyle, demonstrating that delicious, satisfying bread is within everyone's reach.
This recipe, for me, represents more than just a culinary achievement; it's a symbol of inclusivity and accessibility in the kitchen. It's a testament to the power of adaptation and innovation in the face of dietary needs. The process of creating something so comforting and satisfying, free from gluten, is deeply rewarding. The best things in life are simple,
a phrase often heard, rings especially true when considering the uncomplicated joy of a perfectly baked loaf of focaccia.
Now, I invite you to try this recipe. Don't be intimidated by the "gluten-free" label; embrace the challenge and experience the satisfaction of creating something delicious and healthy for yourself and your loved ones. Let this recipe be a springboard for your own culinary adventures, a reminder that even with dietary restrictions, the possibilities are endless. Share your creations, your experiences, and your own adaptations – let's build a community around the simple joy of gluten-free baking!
Unleash Your Inner Baker: Craft the Perfect Gluten-Free Focaccia!
Thanks for joining us on this gluten-free baking adventure! We hope you enjoyed learning the secrets to achieving that perfect crispy edge and tender center in your focaccia. Now it's time to put your newfound skills to the test!
- Bake your own masterpiece! Use our recipe as a springboard – experiment with different herbs, cheeses, or even roasted vegetables to create your signature focaccia. Let your creativity shine!
- Share your creation! Post a picture of your gluten-free focaccia on social media and tag us – we'd love to see your baking success!
- Consider trying a different gluten-free flour blend next time to see how it changes the texture.
Ready to transform your kitchen into a fragrant haven of freshly baked goodness? What unique flavor combination will you create for your next focaccia adventure?