
Mastering the Open Crumb of European Artisan Breads

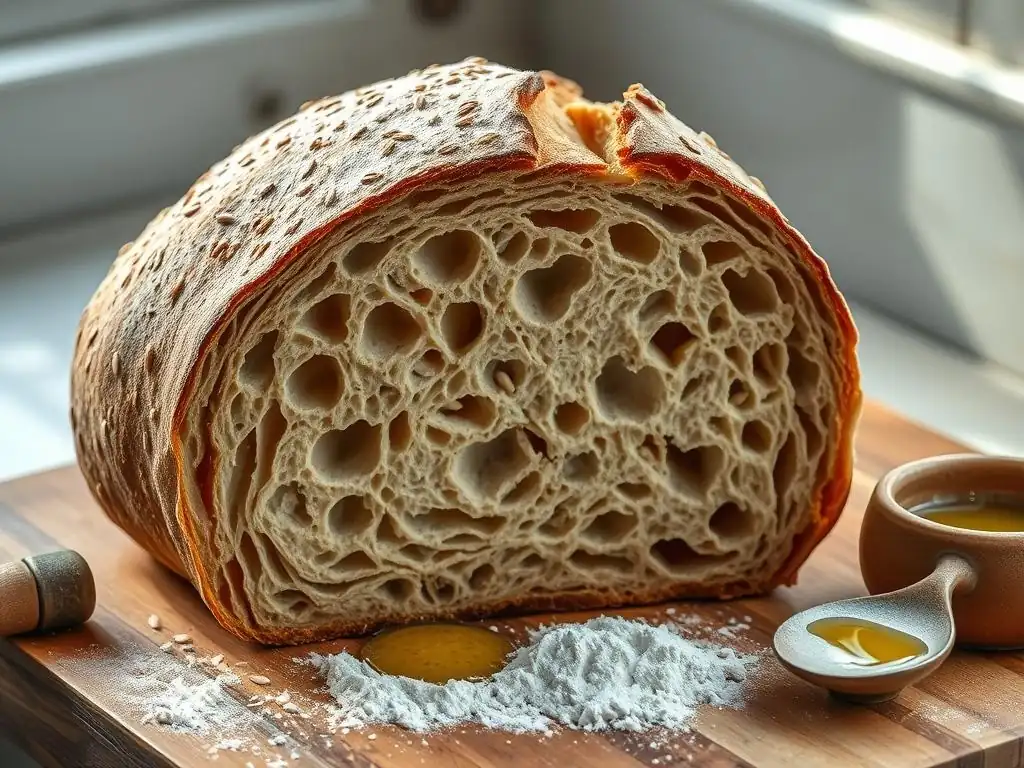
Welcome to BakeWithEase, where the joy of baking meets effortless execution! Are you ready to unlock the secrets to achieving that coveted, airy texture in your homemade loaves? Discover the art of open crumb artisan bread with our comprehensive guide. But what exactly makes an open crumb so desirable, and how can you achieve it at home? Dive in to explore our step-by-step recipe and techniques, transforming your baking from good to extraordinary.
- Mastering Open Crumb in Artisan Bread: A Guide
- Understanding Open Crumb
- Key Ingredients
- The Baking Process: Step-by-Step
- Essential Techniques
- Troubleshooting
- Open Crumb Recipe
- Regional Variations
- Advanced Techniques
-
Frequently Asked Questions
- What exactly is an open crumb in artisan bread, and why is it desirable?
- What are the most important factors for achieving an open crumb in an artisan bread recipe?
- What type of flour is best suited for an open crumb artisan bread recipe, like the ones on BakeWithEase?
- How does BakeWithEase simplify the open crumb artisan bread recipe for home bakers?
- What are some common mistakes that prevent home bakers from achieving an open crumb, and how can BakeWithEase help avoid them?
- Final Reflection: The Enduring Allure of the Open Crumb
- Unleash Your Inner Baker: Craft the Perfect Crust!
Mastering Open Crumb in Artisan Bread: A Guide
Understanding Open Crumb
Defining Open Crumb Bread
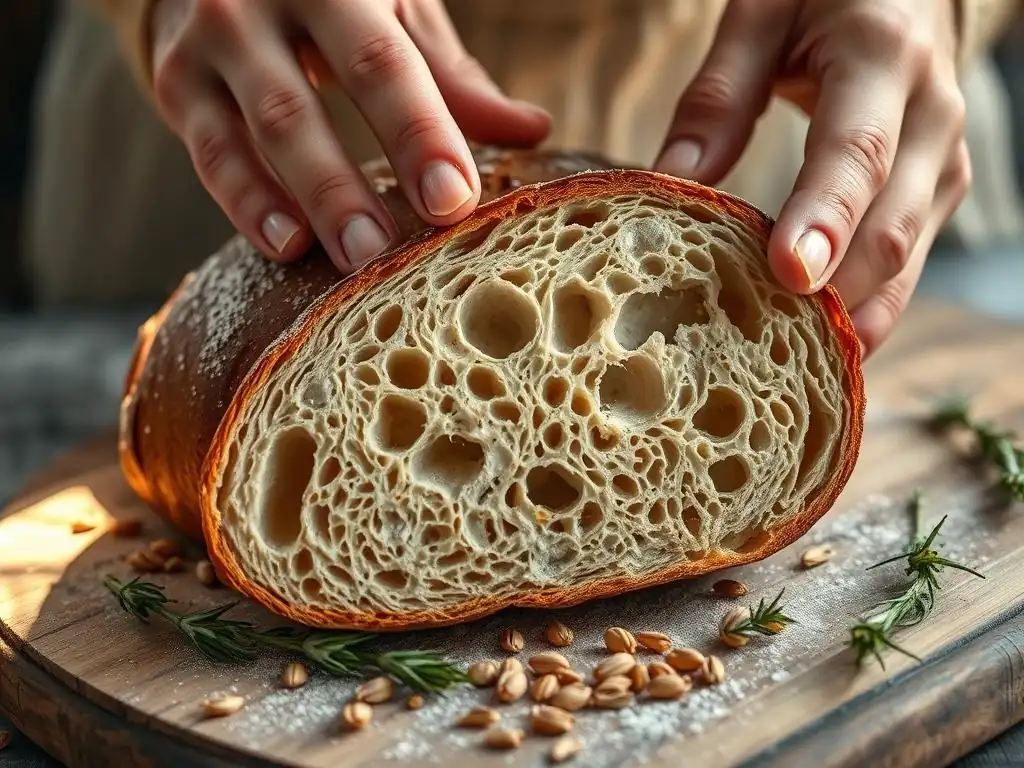
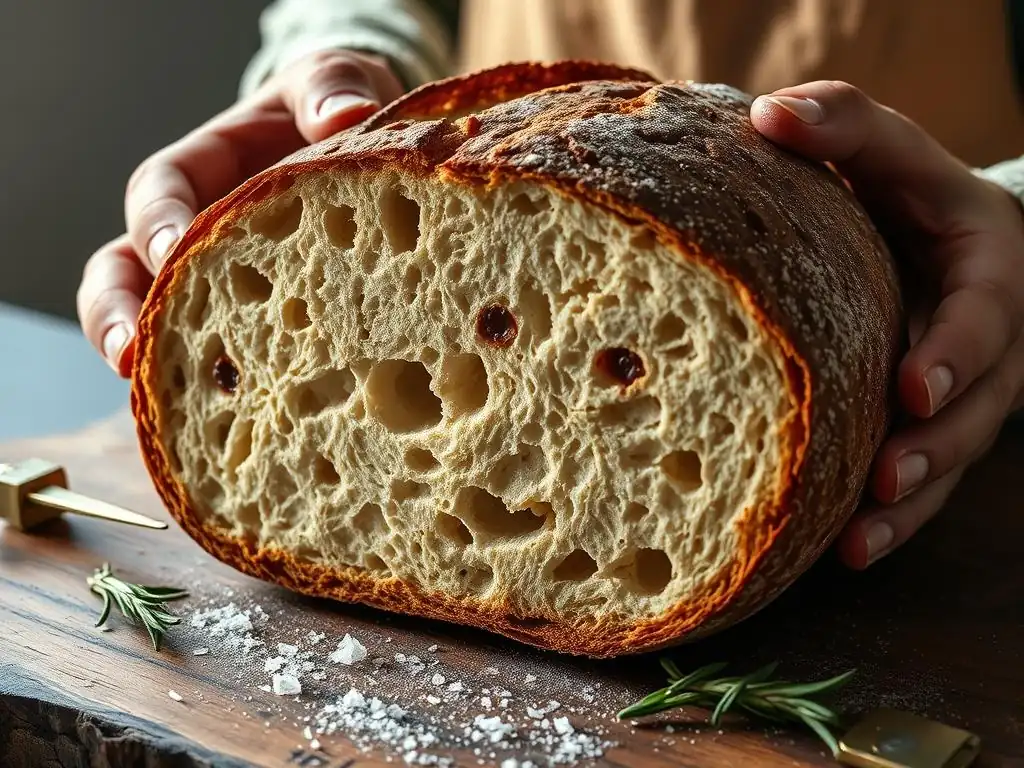
Open crumb in bread refers to the internal structure characterized by irregular, airy holes of varying sizes distributed throughout the loaf. Unlike a dense, uniform crumb often found in commercial sandwich loaves, an open crumb signifies a well-developed gluten network and successful fermentation, allowing gases to expand significantly during baking. This structure is a hallmark of many traditional European artisan breads.
Achieving a beautiful open crumb is often a goal for home bakers striving for professional-quality loaves. It's not just about aesthetics; the open structure contributes significantly to the bread's texture and flavor. A truly open crumb artisan bread recipe results in a loaf that is light yet chewy, with a pleasant mouthfeel that complements its crust. The size and distribution of the holes are key indicators of proper dough handling, fermentation time, and hydration levels.
Why Open Crumb is Desirable
The desirability of an open crumb stems from several factors that enhance the overall bread-eating experience. Texturally, it provides a delightful contrast to the crust – a crisp exterior giving way to a soft, airy interior that is satisfyingly chewy. This texture makes the bread perfect for soaking up olive oil, holding toppings, or simply enjoying on its own.
Furthermore, an open crumb is often seen as a visual indicator of quality and skillful baking. It suggests that the baker has successfully managed complex processes like high hydration doughs and long fermentation periods, which contribute not only to the structure but also to the depth of flavor. Many enthusiasts associate the open crumb with the authentic taste and texture of rustic, traditionally made breads found in bakeries across Europe.
Key Ingredients
High-Protein Flour
High-protein flour, particularly bread flour, is fundamental to achieving a robust gluten network capable of trapping gases and creating an open crumb. Gluten, formed when the proteins glutenin and gliadin in flour are hydrated and worked, provides the structure and elasticity necessary for the dough to rise and hold its shape. Bread flour typically contains 12-14% protein, significantly higher than all-purpose flour (around 10-12%) or pastry flour (around 8-10%).
Using a strong bread flour allows for higher hydration levels, which are crucial for developing an open crumb. The extra water helps the gluten strands stretch further without tearing, creating larger air pockets. While some artisan recipes might incorporate a percentage of lower-protein flours for flavor, a solid foundation of high-protein flour is essential for the structural integrity required to support that airy interior.
Water & Hydration Levels
Water plays a critical role beyond simply hydrating the flour; it activates gluten development and allows yeast to ferment sugars. High hydration levels, often ranging from 70% to 85% (meaning 70g to 85g of water per 100g of flour), are generally necessary to achieve a truly open crumb. The abundance of water makes the dough slack and sticky, which can be challenging to handle, but it's this fluidity that facilitates the formation of larger, more irregular air pockets.
Higher hydration allows for greater extensibility of the gluten network. As the yeast produces carbon dioxide gas during fermentation, this gas expands within the flexible, water-rich dough, creating the characteristic open structure. Mastering high hydration is a key skill in any open crumb artisan bread recipe, requiring specific mixing and handling techniques to manage the slack dough effectively.
Yeast: Type and Quantity
Yeast is the engine of fermentation, producing the carbon dioxide gas that inflates the dough and creates the air pockets. The type and quantity of yeast, along with fermentation time and temperature, significantly impact the crumb structure. For long, slow fermentation, which is ideal for flavor development and achieving an open crumb, small quantities of active dry yeast or instant dry yeast are typically used, often less than 0.5% of the flour weight.
Alternatively, natural leaven (sourdough starter) is a popular choice for artisan bread. A healthy, active starter, used in appropriate quantities (often 10-30% of the total flour weight), provides a slower, more complex fermentation. This slower process contributes to both flavor and the development of a strong gluten network capable of supporting an open structure. Regardless of the yeast type, proper measurement and understanding its activity level are crucial.
Salt: Role in Flavor and Gluten
Salt is a seemingly simple ingredient but plays a vital role in bread making, particularly in relation to gluten development and flavor. Typically added at 1.8% to 2.2% of the flour weight, salt strengthens the gluten network, making it more elastic and less sticky. This effect helps the dough hold its shape and trap gases more effectively, indirectly contributing to a better crumb structure.
Beyond its structural impact, salt is essential for flavor. It enhances the natural sweetness of the fermented dough and balances the complex flavors produced during fermentation. While adding salt later in the mixing process (after autolyse or initial mixing) is sometimes suggested to allow for better initial hydration and gluten relaxation, its presence is ultimately necessary for both the physical properties of the dough and the final taste of the open crumb artisan bread.
The Baking Process: Step-by-Step
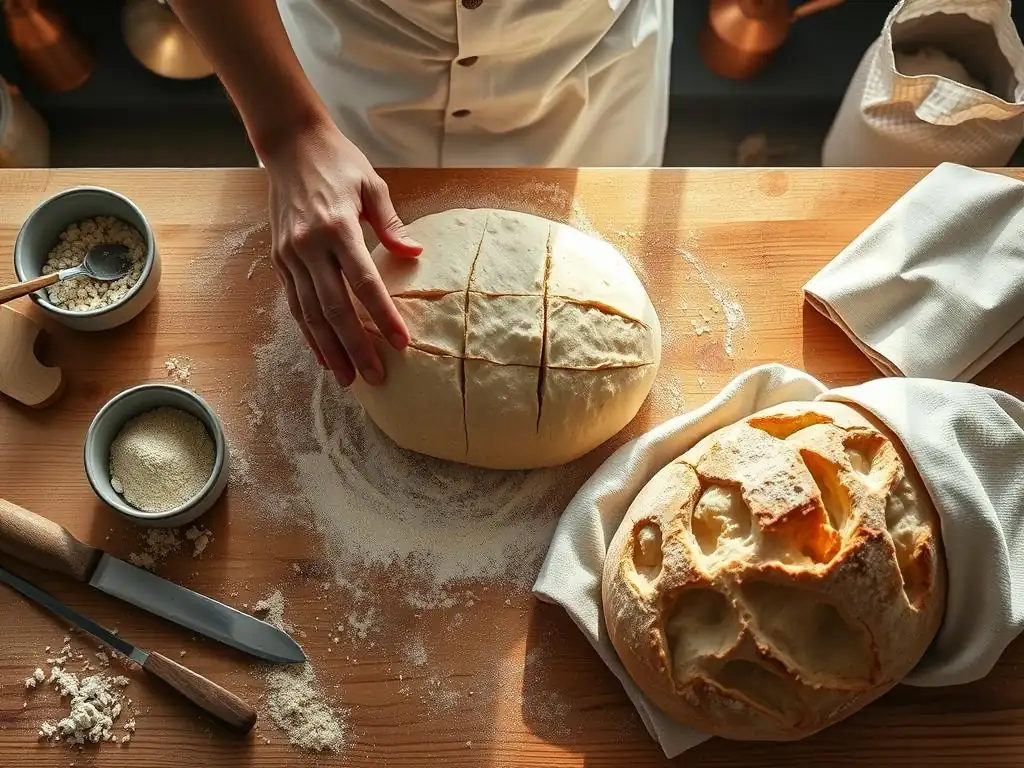
Autolyse: Flour and Water Preparation
Autolyse is a simple yet powerful technique involving mixing just the flour and water from a recipe and letting the mixture rest. This initial hydration allows the flour to fully absorb the water, initiating gluten development naturally without mechanical mixing. Typically, this rest period lasts from 20 minutes to an hour, although some bakers extend it further, especially with whole grain flours.
The benefits of autolyse include easier mixing, reduced kneading time, and improved dough extensibility. During the rest, enzymes in the flour called proteases begin to break down proteins, making the dough more pliable and easier to stretch later. This relaxed state of the dough is particularly helpful when working with high hydration mixes, contributing to a more relaxed and extensible gluten network conducive to an open crumb artisan bread.
Mixing: Gluten Development
Mixing is the stage where yeast (or starter) and salt are incorporated, and the gluten network is further developed. For achieving an open crumb, gentle but effective mixing is key. Over-mixing can lead to a tight, uniform crumb, while under-mixing results in a weak structure incapable of holding gas. Techniques like the 'stretch and fold' method or using a stand mixer on low speed are common.
The goal is to develop enough gluten strength so the dough can pass the "windowpane test" – stretching a small piece thin enough to see light through it without tearing. For high hydration doughs, achieving full gluten development often relies more on repeated folding during bulk fermentation than on intensive initial mixing. This gentle approach helps preserve the delicate gas bubbles forming, which are essential for an open crumb.
Bulk Fermentation: Flavor and Structure
Bulk fermentation, or the first rise, is a critical phase where the dough significantly increases in volume and develops flavor. This stage typically lasts several hours, often 2-4 hours at room temperature (around 70-75°F or 21-24°C), but can be much longer, even overnight, in a cooler environment or refrigerator. During this time, yeast consumes sugars, producing carbon dioxide gas and alcohol, while enzymes break down starches into more complex flavor compounds.
The duration and temperature of bulk fermentation profoundly impact the final crumb structure. Under-fermented dough will produce a dense crumb with small, uneven holes, as the gluten structure hasn't fully developed and insufficient gas has been produced. Over-fermentation can lead to a fragile structure that collapses during shaping or baking, resulting in a dense or gummy crumb. Observing the dough's increase in volume (often doubling or tripling) and its texture is crucial for determining the end of this stage.
Folding During Bulk Fermentation
Folding is a technique used during bulk fermentation, especially with high hydration doughs, to build strength and equalize dough temperature without vigorous kneading. Typically, the dough is gently stretched from the edges and folded over itself every 30-60 minutes for the first 1-2 hours of fermentation. This process aligns the gluten strands, builds tension, and redistributes the yeast and gas bubbles.
Performing 3-5 sets of folds during bulk fermentation significantly improves the dough's ability to trap gas and hold its shape, directly contributing to a more open and uniform crumb structure. The gentle nature of folding helps preserve the developing gas pockets, unlike intensive kneading which can break them down. It's a cornerstone technique in many an open crumb artisan bread recipe.
Shaping: Gentle Handling
Shaping transforms the fermented dough into its final loaf form. This step is deceptively simple but crucial for the final crumb. The key is to handle the dough gently to avoid degassing it excessively while still creating enough surface tension to help the loaf hold its shape and rise upwards during proofing and baking. Techniques vary depending on the desired loaf shape (batard, boule, baguette).
Poor shaping can collapse the delicate internal structure built during fermentation, leading to a dense layer near the crust or an uneven crumb. The goal is to organize the existing gas pockets and create a taut outer skin that provides structure during the final rise and oven spring. Minimal handling and confident movements are vital to preserving the airy interior destined to become an open crumb.
Proofing: Final Rise
Proofing, or the final rise, is the period after shaping and before baking. The shaped loaves are left to rise again, typically in proofing baskets (bannetons) or on baking sheets. This final rise allows the yeast to produce a bit more gas, slightly increasing the loaf's volume and making it lighter. The duration can range from 1-3 hours at room temperature or significantly longer (8-16 hours) in the refrigerator (cold proofing).
Proper proofing is essential for a good crumb. Under-proofed dough will have insufficient gas, leading to a dense, tight crumb and potentially blowouts during baking. Over-proofed dough, on the other hand, will have exhausted its fermentable sugars and gluten strength, causing it to collapse in the oven and result in a dense, heavy, or gummy crumb. Knowing when the dough is perfectly proofed (often judged by the "poke test") is a skill that comes with practice.
Baking: Achieving Crust and Crumb
Baking is the final transformation where the dough structure is set, the crust develops, and the internal crumb is finalized. High temperatures, typically between 450-500°F (230-260°C), are used to achieve maximum oven spring – the rapid expansion of the dough before the crust hardens. This initial burst of expansion is crucial for opening up the crumb structure.
Baking in a Dutch oven, on a baking stone, or using steam in the oven creates the ideal environment. The intense heat quickly sets the structure, while steam keeps the crust pliable longer, allowing for maximum expansion before it hardens. This combination of high heat and steam is fundamental to developing both a beautiful, crackly crust and a light, open crumb artisan bread.
Baking with Steam
Using steam during the initial phase of baking is perhaps the most critical factor for achieving a thin, crisp crust and maximizing oven spring, both of which contribute to an open crumb. Steam prevents the surface of the dough from hardening too quickly. When the crust remains flexible, the loaf can expand freely in the hot oven, allowing the internal gas pockets to enlarge significantly before the structure sets.
Methods for creating steam in a home oven include baking in a preheated Dutch oven with a lid (which traps the dough's own steam), placing a tray of hot water or ice cubes on the bottom rack of the oven, or spraying the oven walls with water. The steam is typically needed for the first 15-20 minutes of baking before being vented or the Dutch oven lid is removed to allow the crust to brown.
Essential Techniques
High Hydration Dough Management
Managing high hydration dough (70%+ water) is a core skill for achieving open crumb. These doughs are sticky and slack, requiring techniques that minimize sticking and build strength without aggressive kneading. Using wet hands or a dough scraper is essential for handling. Instead of traditional kneading, methods like stretch and folds or coil folds are employed during bulk fermentation.
These gentle folding techniques build gluten strength by aligning the protein strands and incorporating air, without compressing the dough and destroying nascent air pockets. Working with high hydration dough requires patience and practice, but mastering it unlocks the potential for that coveted light, airy, open crumb structure.
Gluten Development
Adequate gluten development is non-negotiable for an open crumb artisan bread recipe. Gluten forms the elastic network that traps the gases produced by yeast, allowing the dough to rise and create structure. Development occurs through hydration and mechanical action (mixing/kneading/folding). Underdeveloped gluten results in a dense, heavy loaf unable to hold its shape or trap gas effectively.
Achieving optimal gluten development involves choosing the right flour (high protein), ensuring sufficient hydration, and applying appropriate mechanical action – often a combination of initial mixing and subsequent gentle folding during bulk fermentation. The dough should feel extensible and elastic, capable of stretching thin without tearing, indicating a strong, well-formed gluten network ready to support an open crumb.
Understanding Fermentation
Understanding fermentation is paramount; it's the engine that drives the creation of gas and the development of complex flavors and structure. Fermentation is influenced by yeast quantity, temperature, time, and the availability of sugars. A long, slow fermentation (especially cold fermentation in the refrigerator) is generally preferred for artisan bread as it allows for greater flavor complexity and enzymatic activity that prepares the dough for a better rise and crumb.
Knowing how to read your dough – recognizing signs of under or over-fermentation (volume increase, surface bubbles, aroma, texture) – is crucial. A well-fermented dough will be lively, slightly bubbly on the surface, and significantly increased in volume, indicating it has produced ample gas and developed strength, ready to achieve an open crumb during baking.
Scoring Techniques
Scoring (lame or razor blade cuts on the dough surface before baking) serves multiple purposes: it controls where the loaf expands during oven spring, creates visually appealing patterns, and contributes to the final crumb structure. Proper scoring allows the dough to expand freely in the areas where cuts are made, preventing blowouts in weaker spots and directing the expansion upwards and outwards.
For an open crumb, scoring plays a role by allowing maximum expansion. Deep, confident cuts on a well-proofed loaf allow the dough to achieve its full potential oven spring, which in turn helps to open up the internal structure. Different scoring patterns can influence the shape and height of the final loaf, indirectly affecting the distribution of the open crumb.
Troubleshooting
Dense Crumb: Under-Fermentation
A dense, heavy crumb with small, tight holes is a common sign of under-fermentation. This occurs when the dough has not had enough time or warmth for the yeast to produce sufficient carbon dioxide gas, and the gluten network hasn't fully developed its strength and extensibility. The dough hasn't built enough internal pressure to expand significantly during proofing and baking.
To fix under-fermentation, ensure your bulk fermentation and proofing times are adequate for your ambient temperature and yeast activity. Check your recipe's guidelines, but also learn to read the dough itself – look for significant volume increase (often doubling or more) and a bubbly surface during bulk. Using a warm spot for fermentation (75-80°F or 24-27°C) can help speed things up if needed.
Tight Crumb: Over-Mixing/Proofing
A tight crumb, while sometimes appearing somewhat uniform, lacks the characteristic large, irregular holes of an open crumb. This can be caused by over-mixing the dough initially, which can tighten the gluten structure excessively, or by over-proofing, which exhausts the yeast's gas production and weakens the gluten structure, leading to collapse during baking.
If you suspect over-mixing, try reducing initial mixing time and rely more on stretch and folds during bulk fermentation. If over-proofing is the issue, shorten your final proofing time. Learn to use the "poke test" during final proofing: gently indent the dough; if it springs back immediately, it's under-proofed; if it stays indented, it's likely over-proofed; if it slowly springs back halfway, it's ready.
Large, Uneven Holes: Shaping/Gas Distribution
While large holes are desired, excessively large, cavernous, and uneven holes, often concentrated in one area with dense spots elsewhere, can indicate issues with shaping or uneven gas distribution during bulk fermentation. Poor shaping might trap large pockets of air unevenly or fail to create sufficient surface tension to support an even rise.
Ensure you are performing adequate folds during bulk fermentation (3-5 sets) to strengthen the dough and distribute gas bubbles more evenly. Pay close attention during shaping to gently degas any excessively large bubbles while organizing the dough structure and creating a taut surface. Practice gentle handling to avoid collapsing the overall structure while addressing large voids.
Open Crumb Recipe
Ingredients
Here is a simple framework for an open crumb artisan bread recipe, using baker's percentages (relative to flour weight):
- Bread Flour: 100% (e.g., 500g)
- Water: 75-80% (e.g., 375g - 400g) - Adjust based on flour absorption
- Salt: 2% (e.g., 10g)
- Instant Dry Yeast: 0.2% (e.g., 1g) - Or Active Dry Yeast, or 20% Sourdough Starter
This ratio provides a good starting point for practicing high hydration techniques. Using quality bread flour is essential for developing the necessary gluten structure. The hydration level here is high enough to encourage an open crumb without being excessively difficult for a baker new to high hydration doughs.
Instructions
- Autolyse: In a large bowl, mix flour and water until just combined. Cover and let rest for 30-60 minutes.
- Mix: Add salt and yeast (or starter) to the dough. Mix by hand (using wet hands or scraper) or stand mixer on low speed for 5-10 minutes until ingredients are incorporated and dough starts to show some strength.
- Bulk Fermentation: Place dough in a lightly oiled container. Over the next 2-3 hours (at room temp, ~75°F), perform 3-4 sets of stretch and folds every 45 minutes. Dough should increase significantly in volume and show bubbles.
- Preshape: Gently turn dough onto a lightly floured surface. Gently shape into a rough boule or rectangle. Rest for 20 minutes.
- Shape: Shape dough into final desired form (boule, batard), creating surface tension without degassing excessively.
- Proof: Place shaped dough seam-side up in a floured banneton or bowl lined with a floured cloth. Proof at room temperature for 1-1.5 hours or refrigerate for 8-16 hours. Dough should be slightly jiggly and pass the poke test.
- Bake: Preheat oven with Dutch oven or baking stone to 475°F (245°C) for at least 30-45 minutes. Carefully invert dough onto parchment paper or into the hot Dutch oven. Score the top.
- Steam: If not using a Dutch oven, create steam by adding ice cubes or hot water to a preheated tray on the oven bottom.
- Bake: Bake covered (or with steam) for 20 minutes. Remove cover (or vent steam) and reduce temperature to 450°F (230°C). Bake for another 20-25 minutes until crust is deep golden brown and internal temperature is 205-210°F (96-99°C).
- Cool: Cool on a wire rack for at least 1-2 hours before slicing. This is crucial for the crumb structure to set.
Regional Variations
Baguette
The French baguette is perhaps one of the most iconic examples of bread known for its open crumb, albeit typically with a more elongated, irregular pattern of holes. Authentic baguettes use a simple formula of flour, water, yeast, and salt, often with a relatively high hydration (70-75%). The distinctive open crumb is achieved through precise fermentation control, gentle handling during shaping to preserve gas, and baking with ample steam in a hot oven to maximize oven spring along the length of the loaf.
Achieving the signature open crumb in a baguette requires mastering dough handling, especially the delicate shaping process that stretches the dough into a long, thin cylinder while trapping air. The short baking time at high heat is also critical to setting the structure before it collapses.
Ciabatta
Italian Ciabatta, meaning "slipper," is renowned for its exceptionally wet dough (often 80% hydration or higher) and very open, irregular crumb with large, rustic holes. This high hydration is key to its characteristic texture. Ciabatta dough is minimally kneaded; its strength is built primarily through long fermentation periods and gentle folding.
The shaping of ciabatta is minimal – the wet dough is often simply divided and stretched gently before proofing. This lack of intensive shaping helps preserve the large gas bubbles formed during its long fermentation, directly contributing to its dramatically open crumb. Baking with high heat and steam is also essential.
Pain de Campagne
Pain de Campagne, or "country bread," is a classic French loaf that often features a moderately open crumb, though typically less dramatically so than ciabatta or a very airy baguette. It traditionally incorporates a mix of white and whole wheat or rye flour, often leavened with a sourdough starter or a combination of starter and commercial yeast.
The crumb of Pain de Campagne is influenced by the mixed flours and typically longer, slower fermentation periods. While aiming for openness, the presence of whole grains can sometimes result in a slightly denser crumb compared to a pure white flour loaf, but still far more open and flavorful than standard commercial bread. Its open crumb reflects a balance of structure and rustic texture.
Advanced Techniques
Poolish or Biga
Incorporating a preferment like a poolish (equal parts flour and water, fermented) or a biga (stiffer dough, fermented) is a common advanced technique in open crumb artisan bread recipes. These starters are prepared hours or even a day in advance and added to the final dough. They contribute significantly to flavor complexity through extended fermentation and can also improve dough structure.
Preferments add enzymatic activity that helps break down starches and proteins, leading to a more extensible dough capable of achieving a more open crumb. The increased acidity from the preferment can also strengthen the gluten network. Using a preferment is a step towards deeper flavor and often a more reliable open crumb.
Flour Type Experimentation
Experimenting with different types and combinations of flour can significantly impact the crumb structure. While high-protein bread flour is a staple for open crumb, incorporating small percentages of other flours can alter texture and flavor. For example, adding a small amount of finely milled whole wheat or rye flour (5-15%) can add flavor and nutrition, though they absorb more water and their bran can interfere slightly with gluten development, potentially making the crumb slightly less open unless hydration is adjusted.
Using specialty flours like Italian "Tipo 00" (for certain styles), high-extraction flours, or ancient grains will all yield different results. Understanding how different protein levels and milling processes affect hydration and gluten development allows bakers to manipulate the dough to influence the final open crumb structure while adding unique characteristics to their artisan bread.
Retarding the Dough
Retarding the dough involves placing it in a cool environment, typically the refrigerator (38-45°F or 3-7°C), for an extended period, often 8 to 48 hours, during bulk fermentation or final proofing. This significantly slows down yeast activity but allows enzymatic activity to continue, developing complex flavors and strengthening the gluten structure over time.
Cold fermentation results in a dough that is easier to handle and score. The slow fermentation process contributes to a more robust gluten network capable of trapping gas effectively. When the cold dough is transferred to a hot oven, the rapid temperature change creates significant oven spring, which is a major driver for achieving a beautiful, airy, open crumb artisan bread.
Frequently Asked Questions
What exactly is an open crumb in artisan bread, and why is it desirable?
An open crumb refers to the large, irregular holes within the bread's interior. It's desirable because it contributes to a lighter, more airy texture and often indicates a well-fermented dough.
What are the most important factors for achieving an open crumb in an artisan bread recipe?
Key factors include high hydration dough, proper gluten development through kneading or folds, and a sufficiently long fermentation period. Temperature control during fermentation is also crucial.
What type of flour is best suited for an open crumb artisan bread recipe, like the ones on BakeWithEase?
Typically, high-protein bread flour is recommended. This type of flour develops strong gluten, essential for trapping gases and creating those desirable large air pockets.
How does BakeWithEase simplify the open crumb artisan bread recipe for home bakers?
BakeWithEase provides step-by-step guides with clear instructions and focuses on using easy-to-find ingredients, demystifying the often complex process of artisan bread baking.
What are some common mistakes that prevent home bakers from achieving an open crumb, and how can BakeWithEase help avoid them?
Common mistakes include over-kneading, under-fermenting, or using incorrect hydration levels. BakeWithEase offers detailed troubleshooting tips and visual aids to help bakers overcome these challenges.
Final Reflection: The Enduring Allure of the Open Crumb
The pursuit of the perfect open crumb in artisan bread isn't merely a culinary quest; it's a testament to the enduring power of tradition and the artistry of baking. The techniques explored in this article—from meticulous sourdough cultivation to precise shaping and baking—represent a deep connection to centuries of bread-making heritage, a heritage that continues to inspire bakers worldwide. The demand for authentic, high-quality artisan bread, as evidenced by the popularity of the "open crumb artisan bread recipe" keyword, shows that this connection remains vital in our modern food landscape.
The journey to mastering the open crumb is a deeply rewarding one, mirroring the slow, deliberate process of life itself. The patience required, the attention to detail, and the profound satisfaction of witnessing a perfectly risen loaf emerge from the oven are all experiences that resonate far beyond the kitchen. As the renowned baker, Chad Robertson, once said: Bread baking is a meditation. It's a process of transformation, both of the ingredients and of the baker.
This sentiment perfectly encapsulates the transformative power of this craft, and the lasting impact it can have on both the baker and those who share in the fruits of their labor.
Now, consider your own baking journey. What elements of this process resonate most deeply with you? Perhaps it's the scientific precision of fermentation, the tactile satisfaction of kneading dough, or the simple joy of sharing freshly baked bread with loved ones. Embrace the challenge, experiment with the techniques, and allow the process of creating an open crumb to become a source of both culinary skill and personal growth. The perfect loaf awaits, but more importantly, the journey to achieve it will enrich your life in countless ways.
Unleash Your Inner Baker: Craft the Perfect Crust!
Thanks for joining us on this delicious journey into the world of European artisan breads! We hope you've gained valuable insights into achieving that coveted open crumb. Ready to put your new knowledge to the test?
- Bake your own masterpiece! Try the recipe featured in the article and experiment with different flours and techniques to perfect your crumb. This is your chance to really own the process.
- Share your success (or even your struggles!) with our community. Post a picture of your creation on social media using #BakeWithEaseCrumbChallenge and tag us! We'd love to see what you create.
- Explore more bread-making techniques on BakeWithEase.com. Dive deeper into the world of artisan baking with our comprehensive guides and tutorials.
What unique ingredient will you experiment with next to elevate your bread game?