
Quick & Easy Lavash Crackers: Crisp Perfection

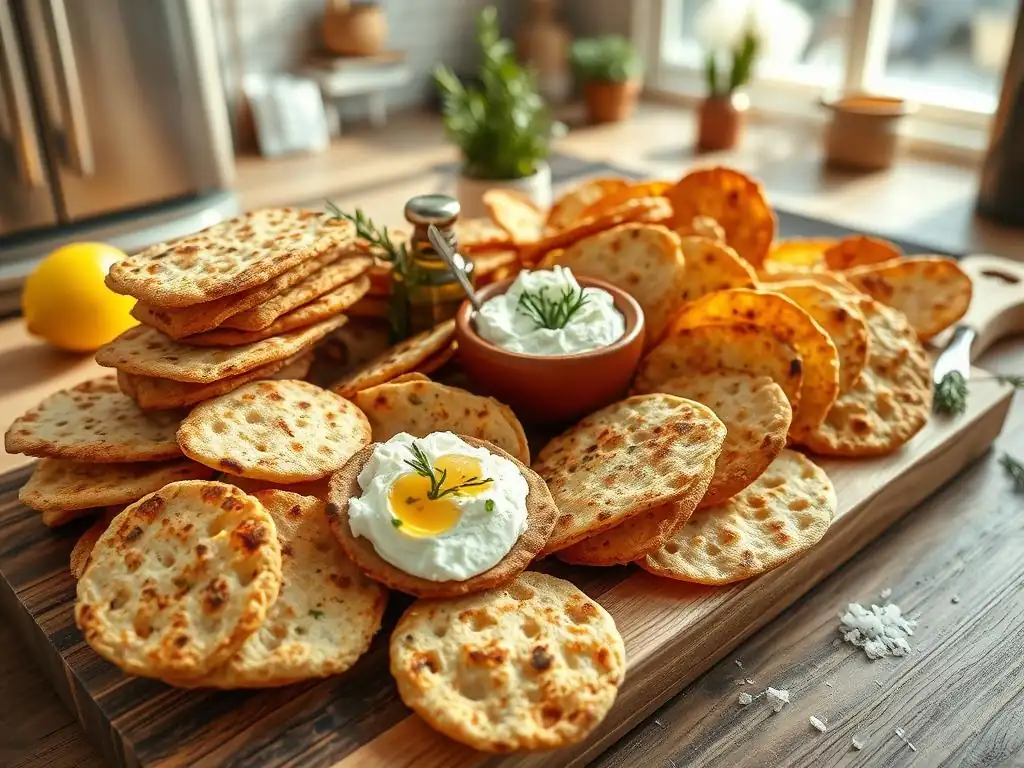
Welcome to BakeWithEase, where baking dreams become delicious realities! Ever crave that satisfying crunch of a homemade cracker, but dread the fuss? This time, we'll be delving into our article about Easy Lavash Crackers recipe tips. Discover the secrets to crafting unbelievably crisp and flavorful lavash crackers with minimal effort. Ready to transform simple ingredients into the perfect snack or appetizer? Let's get baking!
- Rosemary & Sea Salt Lavash Crackers: A Simple Delight
- Introduction to Homemade Lavash Crackers
- Easy Lavash Crackers Recipe Tips and Tricks
- Step-by-Step Guide to Baking Lavash Crackers
- Lavash Cracker Variations: Explore Flavor Possibilities
- Serving and Storing Your Homemade Lavash Crackers
- Troubleshooting Your Lavash Crackers
- Lavash Crackers: A Satisfying Snack
- Conclusion: Enjoy Your Homemade Lavash Crackers
-
Frequently Asked Questions
- What makes this lavash cracker recipe "easy" compared to other recipes?
- Can I customize the flavors of these lavash crackers?
- How should I store these lavash crackers to maintain their crispness?
- What kind of lavash bread works best for this recipe?
- What are some serving suggestions for these easy lavash crackers?
- Final Reflection: The Enduring Allure of Simple Perfection
- Unleash Your Inner Baker: Make These Crackers Today!
Rosemary & Sea Salt Lavash Crackers: A Simple Delight
Introduction to Homemade Lavash Crackers
Making your own crackers at home is a truly rewarding experience. There's a unique satisfaction in transforming simple ingredients into something wonderfully crisp and flavorful. Lavash crackers, with their thin, delicate structure, are particularly forgiving for home bakers and offer a fantastic canvas for various seasonings. Unlike some complex baking projects, lavash requires minimal ingredients and technical skill, making it an ideal starting point for anyone looking to explore homemade snacks.
This article will guide you through creating delicious rosemary and sea salt lavash crackers. We'll share easy lavash crackers recipe tips to ensure your success, covering everything from ingredient selection to achieving that perfect snap. Get ready to discover how simple it is to bake these delightful crackers that are far superior to store-bought options in both freshness and taste.
Why Bake Your Own Lavash Crackers?
Baking your own lavash crackers offers significant advantages over purchasing them. Firstly, you have complete control over the ingredients. You can choose high-quality flours, select your preferred type of salt, and ensure no unnecessary additives or preservatives are included. For example, a typical store-bought cracker might contain hydrogenated oils or artificial flavors, whereas your homemade version will be made with simple, wholesome components like flour, water, salt, and a touch of oil. This control not only enhances the flavor but also allows you to cater to specific dietary needs or preferences.
Beyond ingredient control, the freshness of homemade lavash is unparalleled. Crackers baked just hours before serving possess a crispness and aroma that pre-packaged varieties simply cannot replicate. Consider the difference between a fresh loaf of bread and one that has been on a shelf for days; the same principle applies to crackers. Furthermore, the cost savings can be notable. A small box of gourmet crackers might cost upwards of $4-$6, while a batch of homemade lavash using basic pantry staples could cost less than $1-$2 for a comparable quantity, offering substantial value over time.
The Allure of Crispy Lavash: A Baker's Delight
There's something inherently appealing about a truly crispy cracker, and lavash delivers this in spades. Its thinness is key to achieving that satisfying shatter with every bite. For bakers, mastering the crispness of lavash is a delightful challenge and a testament to understanding dough hydration and oven temperature. Unlike thicker crackers or biscuits, lavash bakes quickly, often in just 5-10 minutes, allowing for rapid iteration and learning.
The visual appeal of lavash is also part of its charm. Once baked, the crackers develop beautiful blisters and golden-brown spots, indicating their perfect crispness. The process of rolling the dough paper-thin might seem daunting, but with our easy lavash crackers recipe tips, you'll find it surprisingly achievable. Achieving that delicate balance between a dough thin enough to crisp but not so thin it tears is a rewarding skill that translates well to other flatbreads.
Easy Lavash Crackers Recipe Tips and Tricks
Making delicious lavash crackers is quite accessible, even for novice bakers. The core recipe is incredibly simple, typically involving just flour, water, salt, and a bit of fat. However, a few key techniques and considerations can elevate your lavash from good to absolutely perfect. Understanding these nuances is crucial for achieving that desirable thinness and consistent crispness that defines great lavash.
We've compiled our best easy lavash crackers recipe tips to help you navigate the process smoothly. From selecting the right flour to mastering the rolling technique, these insights will save you time and frustration, ensuring your baking session is enjoyable and results in a batch of beautifully crisp crackers ready for snacking or pairing with your favorite dips and cheeses.
Mastering the Art of Thin Lavash
Achieving thinness is perhaps the most critical step in making crispy lavash. The goal is to roll the dough as thinly as possible, ideally to a thickness of about 1/16th of an inch (around 1-2 millimeters). This extreme thinness is what allows the cracker to bake quickly and become uniformly crisp without becoming tough or chewy.
Using a pasta roller on its thinnest setting is one effective method, capable of achieving a consistent thickness across the sheet. If you don't have a pasta roller, a good old-fashioned rolling pin works perfectly, but requires a bit more effort and attention to detail.
When using a rolling pin, work on a lightly floured surface. Roll from the center outwards, rotating the dough frequently to prevent sticking and ensure even thickness. Don't be afraid to use a little elbow grease! A common mistake is not rolling it thin enough, resulting in a cracker that is more bread-like than crisp. Patience and persistence are key here. Aim to see the pattern of your work surface slightly through the dough. This level of thinness is essential for our easy lavash crackers recipe tips to yield that signature crunch.
Key Ingredients for Perfect Lavash Crackers
While simple, the quality and type of ingredients used significantly impact the final product. For the flour, all-purpose flour is standard and works well, providing a good balance of gluten for elasticity which helps with rolling. However, some bakers prefer using a mix, perhaps combining 75% all-purpose with 25% whole wheat flour for added flavor and nutrients. Using too much whole wheat initially might make the dough slightly harder to roll very thinly, but it's a great option once you're comfortable with the technique. Ensure your flour is fresh; stale flour can affect both flavor and dough performance.
Salt is another crucial ingredient. Fine sea salt or kosher salt are excellent choices. They dissolve easily into the dough and provide clean, crisp salinity. For the topping, flaky sea salt is highly recommended as it provides bursts of flavor and a pleasant texture contrast on the finished cracker.
Regarding fat, olive oil is commonly used in lavash dough and as a brush on the surface before baking. A good quality extra virgin olive oil will impart a lovely subtle flavor that complements the other seasonings. The ratio of water to flour is also vital – typically, it's around 50-60% hydration, meaning for every 100 grams of flour, you'd use 50-60 grams of water.
Step-by-Step Guide to Baking Lavash Crackers
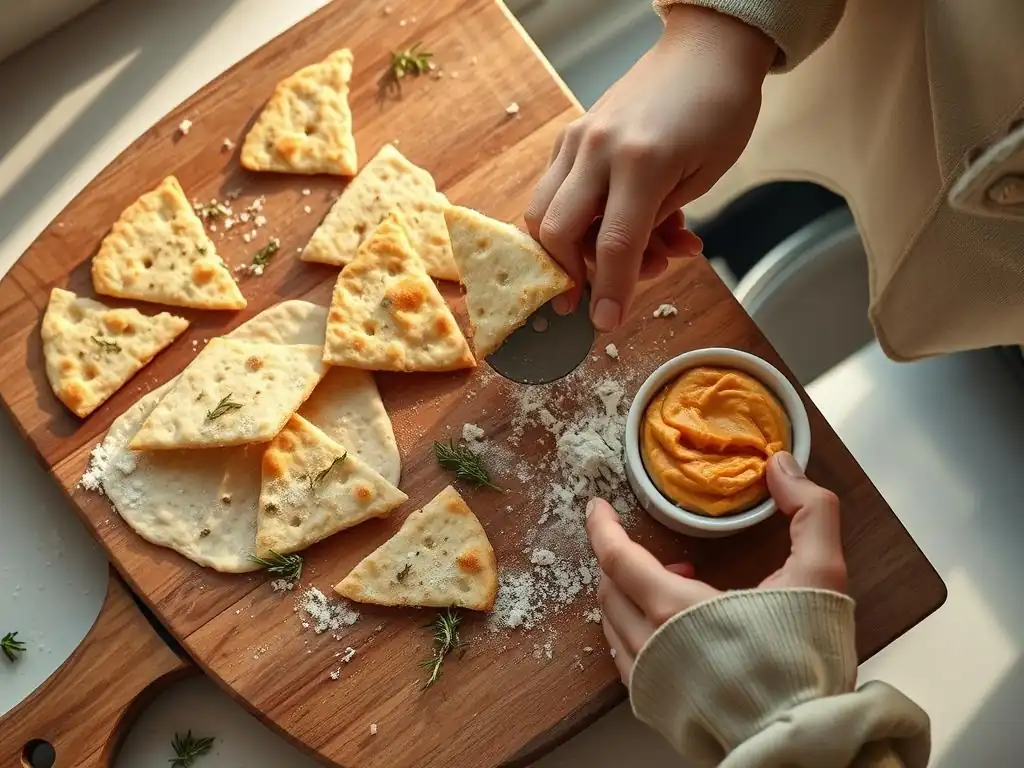
Making rosemary and sea salt lavash crackers is a straightforward process that can be broken down into simple steps. Following this guide, along with our easy lavash crackers recipe tips, will help you achieve excellent results. The entire process, from mixing the dough to pulling the crispy crackers from the oven, can often be completed within an hour, making it a perfect project for a quick snack or party preparation.
Let's walk through each stage, focusing on the techniques that ensure success. We'll cover how to mix a pliable dough, the best way to roll it out thinly, how to apply your seasonings evenly, and finally, the optimal baking conditions to achieve that coveted crisp texture.
Preparing the Lavash Dough: A Simple Recipe
The base dough for lavash is incredibly simple. You'll typically need about 200 grams of all-purpose flour, 100-120 ml of warm water, 1/2 teaspoon of fine sea salt, and 1 tablespoon of olive oil. In a medium bowl, whisk together the flour and salt. Create a well in the center and pour in the warm water and olive oil. Use a fork or spoon to initially combine the ingredients until a shaggy dough forms.
Turn the dough out onto a lightly floured surface and knead for about 5-7 minutes. The dough should become smooth, elastic, and no longer sticky. It should feel soft and pliable, similar to earlobe consistency. If it's too sticky, add a tiny bit more flour (a teaspoon at a time).
If it feels too dry, add a tiny bit more water (a teaspoon at a time). Once kneaded, cover the dough and let it rest for at least 10-15 minutes. This rest period is crucial; it allows the gluten to relax, making the dough much easier to roll out thinly later, which is a key part of our easy lavash crackers recipe tips.
Rolling Out the Lavash: Achieving the Right Thickness
This is the most critical step for achieving crispness. Divide the rested dough into smaller portions, perhaps 2-4 pieces depending on the size of your baking sheet. Working with smaller pieces is often easier for rolling thinly. Take one piece and flatten it slightly with your hand. On a lightly floured surface, begin rolling the dough using a rolling pin. Roll from the center outward, applying even pressure. Rotate the dough frequently (every few rolls) and flip it over occasionally to ensure it's not sticking and to help maintain an even thickness.
The goal is to roll the dough as thin as possible without tearing it. Aim for a thickness similar to a sheet of pasta on its thinnest setting, roughly 1-2 millimeters (about the thickness of a credit card or even thinner). As you roll, the dough will become translucent enough that you can see the surface beneath it. If the dough starts to spring back too much, let it rest for 5 minutes before continuing. Use a bench scraper or spatula to gently lift and move the dough if it starts to stick.
Seasoning Your Lavash: Rosemary & Sea Salt
Once the dough is rolled out to your desired thinness, carefully transfer it to a baking sheet lined with parchment paper. You might need to gently drape it over your rolling pin to move it. Brush the surface of the dough lightly but evenly with olive oil. This helps with crispness and adheres the seasonings.
For our rosemary and sea salt variation, finely chop fresh rosemary. Sprinkle the chopped rosemary evenly over the oiled surface. Then, generously sprinkle flaky sea salt over the dough. Flaky sea salt provides a wonderful texture and bursts of flavor. You can also add a crack of black pepper at this stage if desired. Ensure the seasonings are distributed across the entire surface so each cracker piece is flavored.
Baking Lavash Crackers: Temperature and Time
Preheat your oven to a high temperature, typically between 400°F and 425°F (200°C to 220°C). High heat is essential for baking lavash quickly and achieving maximum crispness before the dough dries out and becomes brittle or tough. Place the baking sheet with the seasoned lavash dough into the preheated oven.
Baking time will be relatively short, usually between 5 and 10 minutes, depending on your oven and how thinly you rolled the dough. Keep a close eye on the crackers as they bake. They should puff up in places and the edges will start to turn golden brown. You might see some darker brown spots or blisters, which are desirable and indicate crispness.
Achieving Crisp Perfection: Tips for a Crunchy Texture
Several factors contribute to achieving that ideal crisp texture. First, as mentioned, thinness is paramount. Dough that is too thick will result in a chewier cracker. Second, the high oven temperature ensures rapid moisture evaporation, which is key to crisping. If your oven runs cool, consider bumping up the temperature slightly.
Third, watch for visual cues. The moment the lavash is golden brown and starts to look dry and slightly brittle around the edges is usually the time to remove it. Over-baking can lead to a burnt taste, while under-baking will result in a flexible, non-crisp cracker.
If your lavash bakes unevenly, you might rotate the baking sheet halfway through the baking time. For an extra layer of crispness, some bakers turn off the oven and leave the lavash inside for a few extra minutes to cool down slowly, though this isn't always necessary if rolled thin enough. These easy lavash crackers recipe tips on baking temperature and timing are crucial for success.
Lavash Cracker Variations: Explore Flavor Possibilities
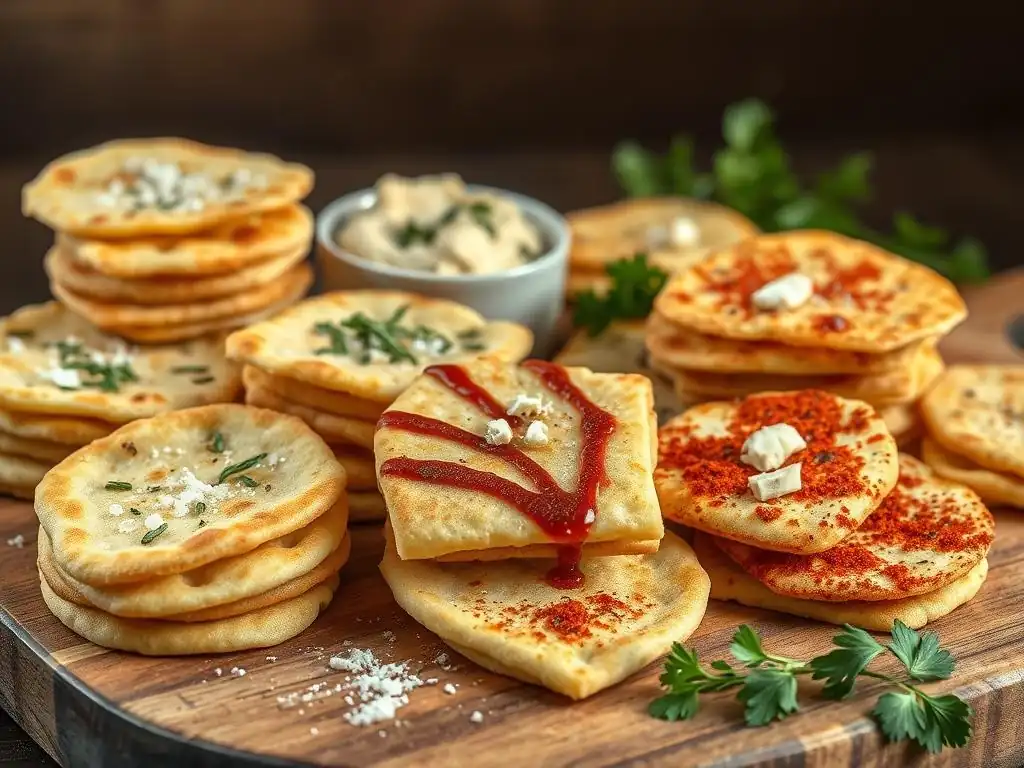
While rosemary and sea salt offer a classic and delightful flavor combination, the beauty of homemade lavash is its versatility. The simple dough serves as a perfect base for a wide array of seasonings, allowing you to customize your crackers to suit any occasion or craving. Experimenting with different herbs, spices, and toppings is part of the fun!
Here are a few popular variations that are easy to implement once you've mastered the basic rosemary and sea salt method. These ideas demonstrate how easily you can adapt the core easy lavash crackers recipe tips to create entirely new flavor profiles.
Parmesan & Black Pepper Lavash Crackers
This variation adds a savory, cheesy depth that is incredibly addictive. After brushing the rolled-out dough with olive oil, generously sprinkle freshly grated Parmesan cheese over the surface. Use a fine grater for the best coverage. Follow with a generous amount of freshly cracked black pepper. The amount of pepper is really up to your taste; some prefer just a hint, while others love a bold, peppery bite.
Bake as directed. The Parmesan cheese will melt and become slightly golden and crispy, adding a wonderful texture and salty tang that complements the pepper beautifully. This version pairs exceptionally well with tomato-based dips or served alongside pasta dishes.
Everything Bagel Seasoning Lavash Crackers
Capture the popular flavors of an everything bagel in a crispy cracker form. After oiling the dough, sprinkle a generous amount of everything bagel seasoning blend over the entire surface. This blend typically includes sesame seeds (white and black), poppy seeds, dried garlic flakes, dried onion flakes, and coarse salt.
Ensure the seasoning is evenly distributed. The oil helps the smaller seeds and flakes adhere. Bake as usual. The result is a cracker bursting with savory, aromatic flavors that are perfect for snacking on their own or serving with cream cheese-based dips or smoked salmon. This is a fantastic way to utilize pre-mixed seasonings with our easy lavash crackers recipe tips.
Gluten-Free Lavash Cracker Option: Cup4Cup Blend
For those following a gluten-free diet, lavash crackers can still be enjoyed. A reliable option is to substitute the all-purpose flour with a high-quality gluten-free all-purpose blend that contains xanthan gum, such as Cup4Cup or King Arthur Gluten-Free All-Purpose Flour. These blends are formulated to mimic the structure and elasticity of wheat flour.
When using a gluten-free blend, you might find the dough slightly less elastic and a bit more prone to tearing when rolling very thinly. You may need to roll between two sheets of parchment paper to prevent sticking and make handling easier. The hydration might also need slight adjustment; start with the amount of water specified in the recipe and add a teaspoon more if the dough feels too dry or crumbly.
Bake time might be similar, but watch closely as gluten-free flours can sometimes brown faster. The flavor profile (rosemary & sea salt, etc.) remains the same, offering a delicious gluten-free alternative following the core easy lavash crackers recipe tips.
Serving and Storing Your Homemade Lavash Crackers
Once your beautiful, crispy lavash crackers are out of the oven and cooled, it's time to enjoy them! Lavash is incredibly versatile and can be served in numerous ways. Proper storage is also key to maintaining their crispness, which is one of their main appeals.
Whether you're planning a party or just making a batch for personal snacking, knowing how to serve and store your lavash will help you get the most out of your homemade efforts.
Pairing Lavash Crackers: Dips, Cheeses, and More
Lavash crackers are excellent vehicles for a variety of dips and spreads. Their thinness makes them less likely to break than thicker crackers when scooping. They pair wonderfully with creamy dips like hummus, baba ghanoush, or spinach and artichoke dip. The rosemary and sea salt flavor is particularly good with Mediterranean-inspired dips.
They are also a fantastic addition to a cheese board. Their neutral-to-slightly-herbal flavor doesn't overpower delicate cheeses, while their crisp texture provides a nice contrast to soft or creamy varieties like brie or goat cheese. Try them with a sharp cheddar or aged gouda as well. Beyond dips and cheese, they can be broken into pieces and used as croutons for salads or soups, or served alongside curries and stews for scooping.
Storing Lavash Crackers: Maintaining Crispness
The enemy of a crispy cracker is moisture. To keep your homemade lavash crackers crisp, it's essential to store them properly in an airtight container. Once completely cooled (this is important; storing warm crackers will create condensation), place them in a rigid container with a tight-fitting lid.
Avoid storing them in plastic bags, as these can trap moisture. If you live in a humid climate, you might even consider adding a food-safe desiccant packet to the container. Stored correctly at room temperature, your lavash crackers should maintain their crispness for 3-5 days. If they start to soften slightly, you can often re-crisp them by placing them on a baking sheet in a low oven (around 300°F or 150°C) for 5-10 minutes.
Troubleshooting Your Lavash Crackers
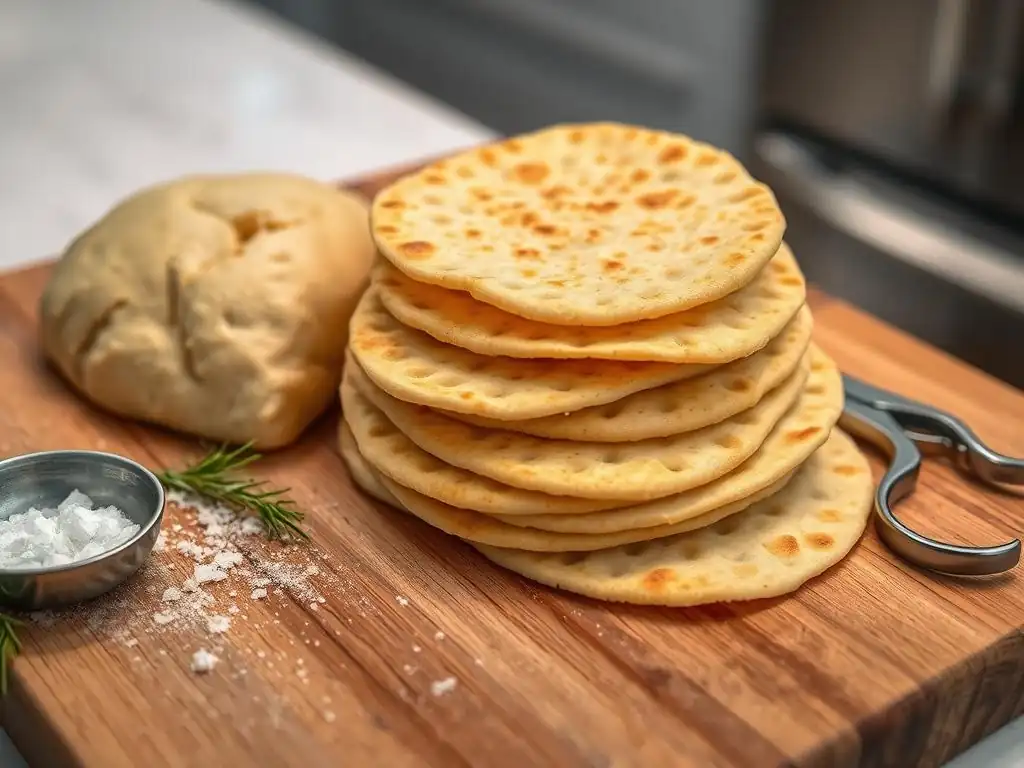
Even with the best easy lavash crackers recipe tips, baking can sometimes present challenges. Don't be discouraged if your first batch isn't perfect. Identifying common issues and knowing how to fix them will improve your results dramatically in future attempts.
Here, we address some frequent problems encountered when making lavash and provide practical solutions to help you achieve consistently excellent crackers.
Common Mistakes and How to Avoid Them
One of the most common mistakes is not rolling the dough thin enough. As discussed, this leads to a cracker that is chewy rather than crisp. To avoid this, spend adequate time rolling, aiming for that near-translucent thickness (1-2mm). Another frequent issue is uneven baking, resulting in some parts being burnt while others are still soft. This can be due to hot spots in your oven or uneven dough thickness. To mitigate this, rotate your baking sheet halfway through the baking time and try to roll the dough as uniformly as possible.
Over-seasoning or uneven seasoning is another pitfall. Too much salt can make the crackers unpleasantly strong, while clumping of herbs means some bites are overpowering and others bland. Use a light hand and spread seasonings evenly across the oiled surface before baking. Lastly, storing crackers before they are fully cooled can lead to sogginess. Always allow them to cool completely on a wire rack before transferring to an airtight container.
Dealing with Dough That's Too Sticky or Too Dry
Dough consistency is fundamental, and sometimes it can go wrong. If your dough is too sticky after kneading, it likely has too much water or not enough flour. Add flour sparingly, a teaspoon at a time, kneading after each addition until the dough is smooth and no longer sticks excessively to your hands or the work surface. Be careful not to add too much flour, as this will make the dough stiff.
Conversely, if the dough feels dry and crumbly, it needs more moisture. Add warm water, again a teaspoon at a time, kneading until the dough comes together and is smooth and pliable. The ideal dough should be soft and slightly tacky but not sticky. Environmental factors like humidity can affect how much water your flour absorbs, so slight adjustments from the recipe's specified amounts (e.g., using 110ml water instead of 100ml for 200g flour) are sometimes necessary.
Ensuring Even Baking: Tips for Consistent Results
Even baking ensures every cracker is perfectly crisp and golden. Beyond rotating the baking sheet, consider the size of your crackers. If you cut the lavash into smaller squares or irregular pieces before baking, try to make them roughly the same size and thickness so they bake at the same rate.
If your oven has significant hot spots, you might notice some areas of the sheet browning faster than others. Placing an oven stone or steel on a rack below your baking sheet can help distribute heat more evenly. Additionally, using good quality parchment paper prevents sticking and helps in achieving uniform browning on the bottom of the crackers. Remember that thinner sections will always bake faster, reinforcing the importance of uniform rolling thickness as per our easy lavash crackers recipe tips.
Lavash Crackers: A Satisfying Snack
Beyond being delicious, homemade lavash crackers offer several benefits as a snack option. They are relatively low in fat compared to many store-bought snacks and, depending on the ingredients used, can contribute positively to your diet. Their crisp texture provides a satisfying crunch that can help curb snack cravings.
Incorporating variations like whole wheat flour or adding seeds can further enhance their nutritional profile, turning a simple cracker into a more wholesome snack choice.
The Benefits of Whole Wheat Lavash
Substituting a portion of the all-purpose flour with whole wheat flour adds dietary fiber, vitamins, and minerals to your lavash crackers. Fiber is essential for digestive health and can help you feel fuller for longer. For example, replacing 50 grams of all-purpose flour with 50 grams of whole wheat flour in a batch might increase the fiber content by 2-3 grams per serving, depending on the yield.
While 100% whole wheat can sometimes make the dough harder to roll very thinly, a blend (e.g., 50% whole wheat, 50% all-purpose) works beautifully and offers a good compromise between ease of handling and nutritional benefits. Whole wheat also imparts a slightly nuttier flavor that complements many seasonings, including rosemary and sea salt.
Lavash Crackers as a Versatile Snack Option
The versatility of lavash crackers makes them an ideal snack to keep on hand. Unlike heavily flavored or very specific crackers, lavash serves as a neutral or subtly flavored base that can be paired with almost anything. This makes them suitable for a wide range of snacking occasions, from a simple afternoon bite with cheese to being the star of a party platter.
Their thin profile also makes them easy to break into bite-sized pieces, perfect for portion control or for serving to guests. Whether enjoyed plain, dipped, or topped, homemade lavash crackers are a convenient, customizable, and satisfying snack option that you can feel good about making and eating. Our easy lavash crackers recipe tips ensure they are always within reach.
Conclusion: Enjoy Your Homemade Lavash Crackers
Baking your own rosemary and sea salt lavash crackers is a simple yet rewarding endeavor. With just a few basic ingredients and techniques, you can create incredibly crisp, flavorful crackers that are far superior to anything you'll find in a store. The process is approachable for bakers of all skill levels, making it a perfect project for a quiet afternoon.
By following our easy lavash crackers recipe tips, focusing on thin rolling, proper seasoning, and high-temperature baking, you're well on your way to achieving cracker perfection. Don't hesitate to experiment with different seasonings and flours once you've mastered the basic technique.
Mastering the Easy Lavash Crackers Recipe for Years to Come
The beauty of this easy lavash crackers recipe is its foundational simplicity. Once you understand the core principles – proper dough consistency, achieving thinness, and high-heat baking – you can confidently make delicious lavash crackers again and again. It's a technique that builds confidence and provides a versatile skill set applicable to other flatbreads.
Think of this recipe as a starting point. Over time, you'll learn how your oven behaves, the ideal hydration for your flour, and how thin you can push the dough before it tears. These subtle refinements will make your lavash crackers consistently excellent, a staple in your homemade snack repertoire for years to come.
We love seeing what you bake! Once you've made your batch of rosemary and sea salt lavash crackers (or any variations), share your success! Baking is a community, and seeing others' creations provides inspiration and motivation.
Let us know how your crackers turned out, what dips or cheeses you paired them with, or any unique seasonings you tried. Happy baking, and enjoy the wonderful world of homemade lavash!
Frequently Asked Questions
What makes this lavash cracker recipe "easy" compared to other recipes?
The recipe focuses on simple techniques and readily available ingredients, minimizing steps and complexity. It's designed for bakers of all skill levels, even beginners.
Can I customize the flavors of these lavash crackers?
Absolutely! The recipe encourages experimentation. You can easily add different herbs, spices, or seeds to the lavash before baking to create unique flavor profiles.
How should I store these lavash crackers to maintain their crispness?
Store the cooled crackers in an airtight container at room temperature. This will prevent them from becoming stale and help maintain their crisp texture.
What kind of lavash bread works best for this recipe?
Any thin lavash bread will work, but plain or lightly seasoned lavash is ideal. Avoid lavash with overly strong flavors that might clash with your desired toppings.
What are some serving suggestions for these easy lavash crackers?
They're incredibly versatile! Enjoy them with dips, cheeses, soups, or salads. They also make a delicious and crunchy snack on their own.
Final Reflection: The Enduring Allure of Simple Perfection
The humble lavash cracker, a testament to the power of minimal ingredients and maximum flavor, continues to resonate in today's fast-paced culinary landscape. Its ease of preparation makes it a perfect solution for busy weeknights, while its versatility allows for endless creative adaptations, proving that sometimes, the simplest recipes offer the greatest rewards.
The enduring appeal of this recipe lies not just in its simplicity, but in its ability to transform a readily available ingredient into something truly special. It's a reminder that culinary artistry isn't always about complex techniques or exotic ingredients; often, the most profound satisfaction comes from elevating the ordinary. The best things in life are simple.
This adage rings particularly true when considering the delightful crunch and satisfying taste of these homemade lavash crackers. The process itself is a meditative one, a quiet moment of creation amidst the chaos of daily life.
Now, I invite you to consider the possibilities. Experiment with different seasonings, dips, and toppings to personalize your lavash crackers. Share this simple recipe with friends and family, and experience the joy of creating something delicious together. Remember the satisfaction of crafting something beautiful from humble beginnings – a testament to the power of simple perfection. Let the crisp snap of these crackers be a reminder to savor the small moments and find joy in the everyday.
Unleash Your Inner Baker: Make These Crackers Today!
Thanks for taking the time to explore this quick and easy lavash cracker recipe! We hope you've gained some inspiration for your next snack or appetizer. Now it's time to put your new skills to the test!
- Bake a batch of these irresistible crackers: Follow the recipe and surprise yourself (and your friends!) with how simple and delicious they are. Adjust the seasonings to create your own unique flavor combinations!
- Share your creations: Show us your lavash cracker masterpieces on social media using #BakeWithEaseLavash! We'd love to see your culinary adventures.
- Experiment with different toppings: Get creative! Try adding herbs, spices, cheeses, or nuts for a unique twist on this classic recipe.
Ready to transform your snack game? What's your favorite flavor combination for these crunchy crackers?