
Revive Stale Rolls: Tips for Freshness

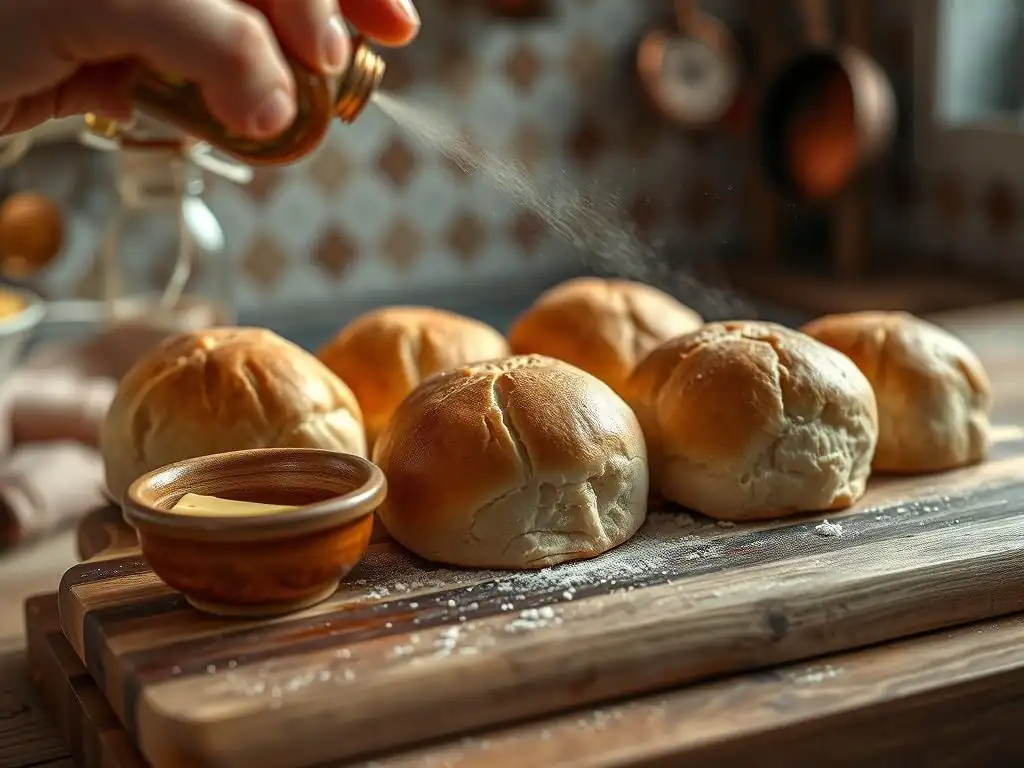
Welcome to BakeWithEase, your haven for effortless baking! Are your rolls past their prime? Don't toss them! Discover the secrets to revitalizing even the driest rolls with our simple, step-by-step guide on how to revive stale rolls. Unlock the freshness and enjoy that bakery-quality taste once more. Ready to bring your bread back to life? Let's get baking!
- Introduction: Banish Stale Bread – Reviving Rolls Made Easy
- Understanding Why Rolls Go Stale: The Science of Bread Staling
- Methods for Reviving Stale Rolls: A Baker's Guide
- Preventing Rolls from Going Stale: Proactive Baking Tips
- Troubleshooting Common Roll Revival Issues
- Beyond Revival: Creative Uses for Stale Rolls
- Conclusion: Enjoy Fresh-Tasting Rolls Every Time with BakeWithEase
- Frequently Asked Questions
- Final Reflection: The Enduring Appeal of a Perfectly Crisp Roll
- Rediscover the Joy of Fresh Bread!
Introduction: Banish Stale Bread – Reviving Rolls Made Easy
There's nothing quite like a warm, soft roll fresh from the oven. But what happens when those delicious rolls sit out for a day or two and lose their initial charm, becoming tough or crumbly? Don't despair and certainly don't toss them! Stale rolls are a common kitchen challenge, but they don't have to be a lost cause. With a few simple techniques, you can bring them back to life, restoring much of their original texture and appeal. This guide from BakeWithEase is dedicated to helping you minimize waste and maximize enjoyment from your baked goods.
Understanding how to revive stale rolls is a valuable skill for any home baker or bread lover. Instead of resigning yourself to hard, unappetizing bread, you can employ quick and effective methods that breathe new life into your rolls. Whether they're slightly firm dinner rolls or denser, larger buns, the principles of revival are often the same, focusing on reintroducing moisture and applying gentle heat. This article will walk you through the science behind staling and provide practical, step-by-step instructions on how to revive stale rolls using various methods suitable for different situations and equipment.
BakeWithEase Presents: Your Guide to Restoring Stale Rolls
Welcome to your comprehensive resource for tackling the common problem of stale bread rolls. We understand the frustration of finding your carefully baked or purchased rolls past their prime. That's why we've compiled this guide, drawing on simple yet effective baking principles to show you exactly how to revive stale rolls and make them delicious again. Our aim is to empower you with the knowledge and techniques needed to salvage your bread, ensuring that fewer rolls end up in the bin.
This guide covers everything from the scientific reasons behind staling to multiple proven methods for revival, including using water, ovens, steaming, and even the microwave for a quick fix. We'll also share our best tips for preventing rolls from going stale in the first place through proper storage and freezing techniques.
By the end of this guide, you'll be equipped to confidently tackle any stale roll situation, enjoying fresh-tasting bread rolls whenever you please. Learning how to revive stale rolls is not just about saving bread; it's about appreciating the value of your baking efforts and reducing food waste in a simple, practical way.
Understanding Why Rolls Go Stale: The Science of Bread Staling
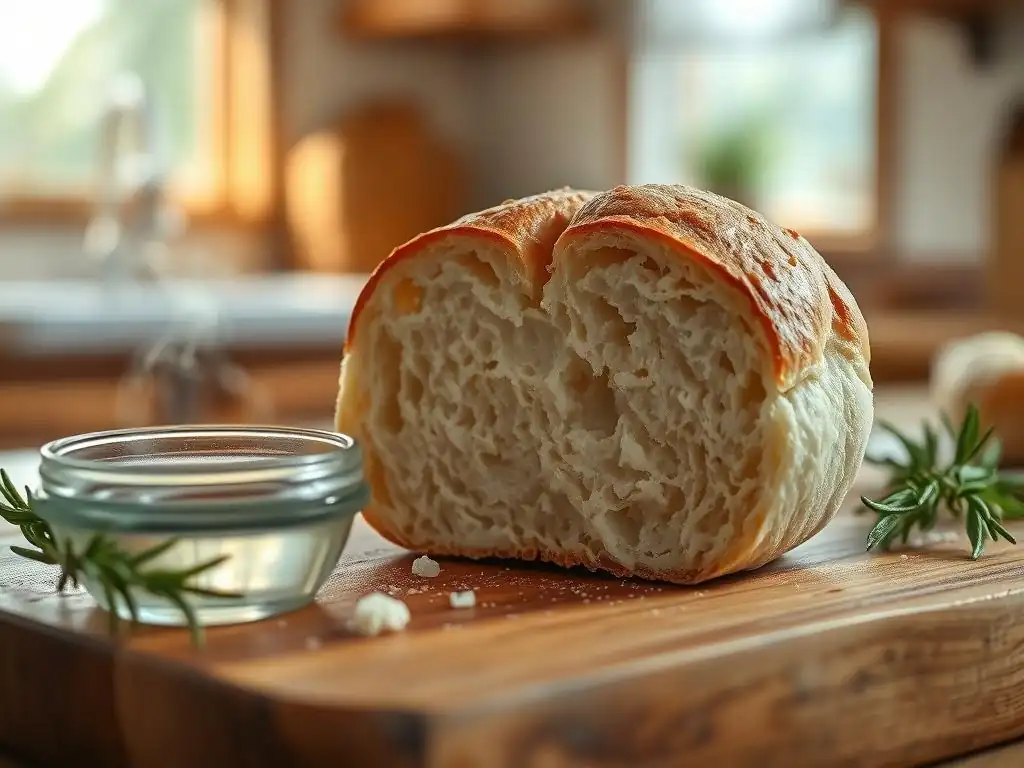
Bread doesn't just "dry out" when it goes stale, although moisture loss does play a role. The primary culprit behind the hardening and textural changes in bread is a process called starch retrogradation. This complex scientific change happens at a molecular level within the bread's structure from the moment it cools after baking. Understanding this process helps explain why certain revival methods, which involve heat and moisture, are effective in temporarily reversing the effects of staling.
As bread cools, the starch molecules within the crumb, which expanded and gelatinized during baking, begin to recrystallize. This process forces water out of the starch granules and into the surrounding gluten network, but the water becomes less mobile and available, leading to a perceived "dryness" even if the total moisture content hasn't significantly changed. The recrystallizing starch creates a more rigid structure, resulting in the hard, crumbly, or tough texture characteristic of stale bread. Knowing this scientific background is key to mastering how to revive stale rolls.
The Role of Starch Retrogradation in Roll Texture
Starch retrogradation is the fundamental reason your once-soft rolls become hard and less palatable over time. During baking, starch absorbs water and swells in a process called gelatinization. This creates the soft, airy structure of fresh bread. However, as the bread cools and ages, the amylose and amylopectin chains (types of starch molecules) in the gelatinized starch begin to reassociate into a more ordered, crystalline structure. This is retrogradation.
This reordering of starch pushes water out of the starch granules. While some of this water might migrate to the crust, making it leathery in some cases, the overall effect within the crumb is a loss of softness and flexibility. The crumb structure becomes more rigid.
Heating the bread, especially with added moisture, temporarily reverses this by causing the starch to re-absorb water and partially re-gelatinize, restoring a softer texture. However, as the bread cools again, retrogradation resumes, which is why revived rolls tend to go stale faster than they did originally. This is crucial knowledge when learning how to revive stale rolls effectively.
Environmental Factors Affecting Roll Freshness
Beyond the internal science of starch retrogradation, external environmental factors significantly influence the rate at which rolls go stale. Moisture and temperature are the two most critical elements to consider when trying to preserve or revive bread freshness. Rolls stored in dry environments will lose moisture more quickly, exacerbating the feeling of staleness caused by retrogradation. Conversely, excessive humidity can lead to mold growth, a different problem entirely.
Temperature also plays a role. Staling, or starch retrogradation, occurs most rapidly at temperatures just above freezing, specifically between 30°F and 50°F (-1°C to 10°C). This is why refrigerating bread is generally not recommended for short-term storage, as it accelerates the staling process.
Room temperature (around 68°F - 77°F or 20°C - 25°C) is usually better for a day or two. Freezing, however, slows retrogradation down significantly by immobilizing the water molecules and starch chains, making it an excellent option for long-term storage. Understanding these factors is essential for both preventing staling and successfully executing methods for how to revive stale rolls.
Methods for Reviving Stale Rolls: A Baker's Guide
Reviving stale rolls is often simpler than you might think, and there are several effective methods depending on the equipment you have available and the degree of staleness. The core principle behind most techniques is to reintroduce moisture and apply heat, which helps reverse the starch retrogradation process discussed earlier. While no method can make a week-old, rock-hard roll taste exactly like it just came out of the oven, you can achieve a surprisingly pleasant texture and warmth that makes them perfectly enjoyable again.
Choosing the right method depends on the roll's size, how stale it is, and how much time you have. A slightly firm dinner roll might need just a quick microwave burst, while a very hard, large roll might benefit more from a moist heat method like steaming or wrapping in a damp towel before baking. Experimenting with different techniques will help you discover the best approach for the specific types of rolls you typically have on hand. Let's explore the most popular and effective ways how to revive stale rolls.
Reviving Stale Rolls with Moisture: The Water Method
One of the simplest and most effective ways to tackle stale rolls, especially those that are quite hard, is by using water and heat. This method directly addresses both the lack of mobile moisture and the rigid starch structure. By lightly wetting the surface of the roll, you provide the necessary moisture that the internal starch can re-absorb when heated, helping to soften the crumb and refresh the crust. This technique is particularly good for crusty rolls like baguettes or ciabatta, but works well for softer rolls too.
The key to success with the water method is applying just the right amount of moisture – enough to penetrate the crust slightly but not so much that the roll becomes soggy. Combining this surface moisture with oven heat creates a steaming effect around the roll, which is ideal for revitalizing the texture. It's a fundamental technique in knowing how to revive stale rolls and is often the first method bakers reach for.
Step-by-Step: How to Rehydrate Stale Rolls Using Water
Here's a simple process using water and your oven to bring those stale rolls back to life. This works best for rolls that are firm but not completely rock hard.
- Preheat your oven to a moderate temperature, typically around 300-325°F (150-160°C). Lower temperatures with longer times are often gentler.
- Lightly dampen the surface of the stale roll. You can do this by holding it under a running faucet for a split second, quickly dipping it in a bowl of water, or using a pastry brush to apply water evenly. The goal is a thin film of water on the crust, not saturation.
- Place the dampened roll directly on the oven rack or on a baking sheet. Ensure there's space around the roll for even heating.
- Heat the roll for approximately 5-10 minutes. Smaller rolls might need less time, while larger or harder rolls might require closer to 10-15 minutes. Keep an eye on it – you want it heated through and slightly softened, not dried out further.
- Remove from the oven and let it cool for just a minute before serving. Enjoy your revived roll!
This method is straightforward and effective for learning how to revive stale rolls using basic kitchen tools.
Tips for Achieving Optimal Moisture Levels When Reviving Rolls
Getting the moisture level just right is crucial when using the water method. Too little water, and the starch won't rehydrate effectively; too much, and you risk a soggy crust or a waterlogged interior. The aim is to add surface moisture that turns into steam in the heat of the oven, penetrating the crust and crumb.
- Use a quick dip or light brush: For most rolls, a very quick dip under the tap (literally a fraction of a second) is sufficient. For softer rolls or buns, using a pastry brush to lightly coat the surface with water gives you more control.
- Observe the crust: You should see a thin layer of moisture on the crust, but it shouldn't be dripping wet. If you see water pooling, you've used too much.
- Consider the roll type: Crusty rolls can handle a bit more water than soft dinner rolls. Adjust your technique based on the roll's original texture.
- Check for even coverage: Ensure the entire surface that was originally the crust is lightly moistened for uniform results.
Mastering this simple wetting technique is a key step in successfully figuring out how to revive stale rolls using heat.
Using Heat to Restore Freshness: The Oven Method
The oven method is perhaps the most common and reliable way how to revive stale rolls. It works by gently heating the entire roll, which allows the recrystallized starch molecules to loosen up and re-absorb the small amount of mobile water still present in the crumb. While simply heating a dry roll can make it even harder, combining oven heat with added moisture (as in the water method) or using a moist environment within the oven yields the best results, creating steam that penetrates the bread.
This method is versatile and can be adapted for various types of rolls, from small dinner rolls to larger sandwich buns. It's particularly effective for restoring a pleasant texture to the crumb and warming the roll through, making it feel much fresher. The oven provides even, consistent heat, which is ideal for a uniform revival.
Detailed Instructions: Reviving Stale Rolls in the Oven
Here is a detailed approach to reviving stale rolls using your oven, suitable for most types of bread rolls.
- Preheat your oven. A temperature range of 300°F to 350°F (150°C to 175°C) is generally effective. Lower temperatures require slightly longer times but are less likely to over-dry the roll.
- Wrap the stale roll tightly in aluminum foil. This traps the roll's inherent moisture (and any added moisture) and creates a steaming environment inside the foil packet, which is excellent for softening the crumb.
- Place the foil-wrapped roll directly on the oven rack or on a baking sheet.
- Bake for 10-20 minutes, depending on the size and density of the roll. Smaller dinner rolls might be ready in 10-12 minutes, while larger rolls could take 15-20 minutes.
- Carefully remove the foil packet from the oven. For a slightly crisper crust (if desired), you can unwrap the roll and return it to the oven for 2-3 minutes unwrapped, but watch it closely to prevent drying.
- Let the roll cool for a minute or two before unwrapping completely and serving.
This foil-wrapping technique is a reliable way how to revive stale rolls and achieve a soft, warm result.
Temperature and Time Recommendations for Oven Reviving
Choosing the right temperature and time is key to successfully reviving rolls in the oven. Too high a temperature or too long a time can dry the roll out further, defeating the purpose.
- For slightly stale, soft rolls: Use a lower temperature, around 300°F (150°C), for about 8-12 minutes when wrapped in foil.
- For moderately stale, firmer rolls: A temperature of 325°F (160°C) for 12-18 minutes in foil is usually effective.
- For very stale, hard rolls: Use 350°F (175°C) for 15-20 minutes or even slightly longer if needed, always wrapped tightly in foil. Check for softness after the minimum time and return to the oven if necessary.
- For crusty rolls (like ciabatta or rolls with a hard crust): Consider the water method (dipping/brushing) at 325-350°F (160-175°C) for 5-10 minutes without foil for a refreshed crust, or use the foil method for a softer crust.
Always check the rolls towards the end of the recommended time. They should feel warm and slightly yielding. These guidelines provide a starting point for figuring out how to revive stale rolls effectively with heat.
The Steaming Method: A Gentle Way to Freshen Stale Rolls
Steaming is an excellent method for reviving stale rolls, especially those that are particularly dry or hard. Steam provides moist heat, which is highly effective at penetrating the bread and helping the starch molecules rehydrate and soften. This method is very gentle and less likely to dry out the roll compared to dry heat methods. It's a fantastic technique for restoring a soft, pliable texture to the crumb.
While dedicated steamers work perfectly, you don't need specialized equipment to steam bread rolls. Simple kitchen setups using a pot and a steamer basket or colander can achieve excellent results. Steaming is particularly good for softer rolls, buns, or even larger loaves that have become dry. It's a baker's secret weapon for how to revive stale rolls when maximum softness is desired.
How to Steam Stale Rolls for a Soft, Moist Texture
Steaming is straightforward and delivers wonderfully soft results. Here’s how to do it:
- Set up your steaming apparatus. This could be a pot with a steamer basket or a large pot with about an inch or two of water in the bottom and a metal colander or rack placed above the waterline. Ensure the water level is below the bottom of the steamer basket/rack.
- Bring the water in the pot to a gentle simmer over medium heat.
- Place the stale rolls in the steamer basket or colander, making sure they are not touching the water. Don't overcrowd the steamer; steam needs to circulate.
- Cover the pot tightly with a lid. If your lid isn't tight, you can wrap it in a towel before placing it on the pot to trap steam (be careful of the towel touching the heat source).
- Steam the rolls for 5-10 minutes. Smaller rolls will need less time (around 5-7 minutes), while larger or denser rolls might need closer to 8-10 minutes. You are looking for the rolls to feel soft and warm throughout.
- Carefully remove the rolls from the steamer. They will be moist on the surface initially but will dry slightly as they cool.
- Let them cool for a minute before serving.
This steaming process is highly effective for learning how to revive stale rolls and restoring their tender crumb.
Equipment Options for Steaming Bread Rolls
You have several options for steaming stale rolls, ranging from basic kitchen items to dedicated appliances.
- Pot and Steamer Basket: The most common setup. Use a pot large enough to hold a steamer basket above the water level. Bamboo steamers also work well, placed over a pot or wok of simmering water.
- Pot and Colander/Rack: If you don't have a steamer basket, you can use a metal colander that fits snugly over a pot, or place a heatproof rack inside a pot with water beneath it. Just ensure the rolls in the colander/rack are well above the water.
- Double Boiler: While typically used for melting chocolate or making sauces, a double boiler setup (a pot with simmering water and another pot or bowl nested on top) can also be used for steaming smaller rolls if covered tightly.
- Electric Steamer: If you own an electric food steamer, this is a convenient option. Just place the rolls in the steamer basket and follow the appliance's instructions.
Having one of these setups makes it easy to apply moist heat, a highly effective technique how to revive stale rolls and improve their texture.
Microwave Revival: A Quick Fix for Slightly Stale Rolls
When you're in a hurry and just need to take the edge off a slightly stale roll, the microwave can be a surprisingly effective tool. It works by exciting the water molecules within the bread, generating heat internally and temporarily softening the starch structure. However, the microwave method must be used with caution, as it's very easy to overheat the roll, which can make it rubbery or even harder than it was before. It's best suited for rolls that are only slightly firm, not completely dried out or hard.
This method is ideal for single rolls needed for a quick snack or meal. It's the fastest way how to revive stale rolls, but arguably the one that requires the most attention and practice to get right. The key is very short bursts of power.
Cautionary Notes: Microwaving Stale Rolls Effectively
Microwaving can be a quick fix, but it has potential pitfalls. Here are some important cautions:
- Use short intervals: Never microwave a roll for a long continuous period. Short bursts (like 10-15 seconds) are essential to avoid overheating.
- Add moisture: Placing a small cup or glass of water in the microwave alongside the roll can help create a humid environment, which improves the result and reduces the risk of making the roll rubbery. Alternatively, you can wrap the roll in a slightly damp paper towel.
- Results are temporary: Microwave revival is the least lasting method. The roll will likely become hard again quickly as it cools, often within minutes, sometimes even harder than before. It's best to eat the roll immediately after microwaving.
- Best for slightly stale: This method is less effective for very hard or dry rolls. It works best for rolls that are just starting to feel a bit firm.
Keeping these points in mind is vital for successfully using the microwave how to revive stale rolls without ruining them.
Microwave Time and Power Settings for Roll Revival
Getting the time and power settings right is critical for microwave revival. The goal is gentle, quick heating.
- Power Level: Using 50% power is often recommended for a more even and less aggressive heating, though full power for a very short time can also work.
- Timing:
- For a single small dinner roll: Start with 10-15 seconds on high power, or 20-30 seconds on 50% power.
- For a larger roll or bun: Try 15-20 seconds on high power, or 30-40 seconds on 50% power.
- Check and Repeat: After the initial interval, feel the roll. If it's still firm, microwave for another 5-10 seconds (or 10-15 seconds on 50% power). Repeat only if necessary, checking after each short burst. Stop as soon as it feels warm and slightly yielding.
Using these low power and short time settings, potentially with added water or a damp towel, is the best approach how to revive stale rolls using the microwave.
Preventing Rolls from Going Stale: Proactive Baking Tips
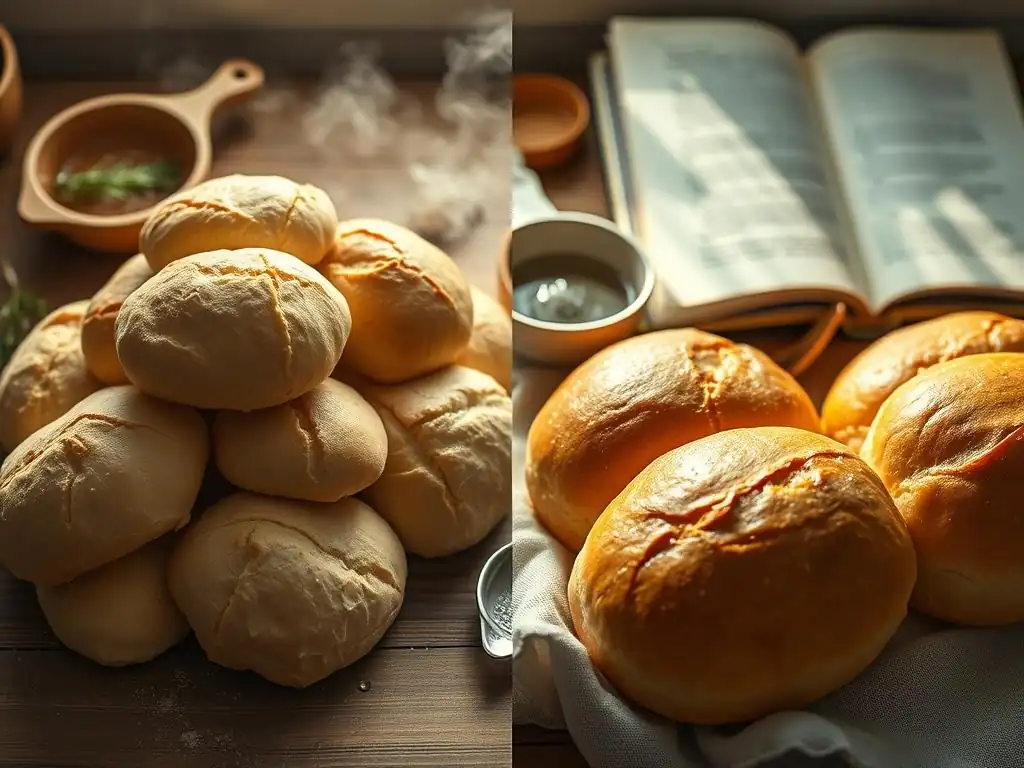
While knowing how to revive stale rolls is useful, preventing them from going stale in the first place is even better! Proper storage is the most effective way to extend the freshness and quality of your baked rolls. Staling is a natural process, but its rate can be significantly slowed down by controlling the roll's environment after it has cooled completely. This section focuses on best practices for keeping your rolls fresh for as long as possible.
Implementing good storage habits immediately after your rolls have cooled is key. Leaving them exposed to air will quickly lead to moisture loss and accelerated staling. Simple barriers and appropriate temperatures can make a big difference in preserving that desirable soft texture and pleasant crust. Let's look at the best strategies for keeping your rolls fresher, longer.
Proper Storage Techniques for Baked Rolls
Once your delicious rolls have cooled completely on a wire rack (this is important to prevent a soggy bottom crust), proper storage is paramount. Cooling allows the internal structure to set and excess steam to escape. Storing warm rolls will trap moisture and can lead to mold. The goal of storage is to slow down moisture loss and starch retrogradation while preventing mold growth.
The best storage method depends on how long you plan to keep the rolls. For just a day or two at room temperature, a simple barrier is sufficient. For longer periods, freezing is the most effective technique. Avoid refrigerating fresh bread, as this is the temperature range where staling happens fastest. Choosing the right container and location for your rolls is the first step in preventing staleness.
The Best Containers for Keeping Rolls Fresh Longer
Selecting the right container is crucial for maximizing the freshness of your rolls. The ideal container provides a balance: it should protect the rolls from drying air but also allow a little bit of air circulation to prevent moisture buildup that encourages mold.
- Paper Bags: Good for crusty rolls for short-term storage (1-2 days) if you want to preserve a crispy crust. They allow air circulation but don't prevent drying over longer periods.
- Bread Boxes: Designed specifically for bread storage, bread boxes offer a balance of containment and slight air flow. They are excellent for keeping various types of rolls fresh at room temperature for a few days.
- Plastic Bags or Airtight Containers: Best for softer rolls that you want to keep soft. They trap moisture effectively, slowing down drying. However, they can make crusty rolls lose their crispness and increase the risk of mold in humid conditions. Ensure rolls are completely cool before sealing them in plastic.
- Cloth Bread Bags: These offer some protection while allowing more breathability than plastic, a good compromise for many roll types.
Using an appropriate container significantly reduces the need to learn how to revive stale rolls frequently.
Temperature and Humidity Considerations for Bread Roll Storage
Temperature and humidity play significant roles in how quickly rolls go stale and whether mold develops.
- Room Temperature (68-77°F / 20-25°C): This is generally the best temperature range for storing most rolls for 1-2 days. It's above the temperature range where starch retrogradation is fastest.
- Refrigeration (30-50°F / -1-10°C): Avoid refrigerating bread rolls for short-term storage (less than a week). This temperature range accelerates starch retrogradation, making your rolls stale much faster than leaving them at room temperature.
- Freezing (0°F / -18°C or below): This is the best option for long-term storage (up to 3-6 months). Freezing halts the movement of water and starch molecules, effectively pausing the staling process.
- Humidity: High humidity can lead to mold growth, especially in airtight containers. Ensure rolls are completely cool before storing. Low humidity environments will cause rolls to dry out faster. A bread box or a well-sealed container in a stable room temperature environment usually provides the best balance.
Being mindful of these environmental factors helps you store rolls optimally, reducing the likelihood that you'll need to figure out how to revive stale rolls.
Freezing Bread Rolls for Long-Term Freshness
If you have more rolls than you can eat within a couple of days, freezing is by far the most effective method for preserving their quality. Properly frozen rolls can maintain their texture and flavor for several months, allowing you to enjoy them later with minimal loss of quality. Freezing essentially pauses the staling process (starch retrogradation) and prevents mold growth.
The key to successful freezing and thawing is protecting the rolls from freezer burn, which is caused by dehydration on the surface. Proper wrapping is essential. Freezing allows you to bake in larger batches without worrying about waste, as you'll always have fresh-tasting rolls ready to thaw and potentially give a quick refresh using the revival methods discussed earlier.
Freezing Techniques to Prevent Freezer Burn in Rolls
Preventing freezer burn is critical to maintaining the quality of rolls during freezing. Freezer burn results in dry, tough, discolored spots.
- Cool Completely: Ensure rolls are fully cooled to room temperature before freezing. Freezing warm rolls creates condensation inside the packaging, leading to ice crystals and freezer burn.
- Wrap Tightly: This is the most important step. Wrap each individual roll or a small group of rolls tightly in plastic wrap, pressing out as much air as possible.
- Add a Second Layer: For extra protection, place the plastic-wrapped rolls inside a resealable freezer bag or wrap them again in aluminum foil. This double layer provides better protection against the cold, dry freezer air.
- Use Quality Freezer Bags/Containers: Ensure freezer bags are specifically designed for freezing and seal tightly. Rigid freezer containers can also work, but wrap rolls first to prevent them from sticking together and protect against dehydration.
- Remove Air: When using freezer bags, press out as much air as possible before sealing.
Proper wrapping ensures that when you need to how to revive stale rolls that have been frozen, they thaw with minimal damage.
Thawing Frozen Rolls for Optimal Texture
Thawing frozen rolls correctly helps preserve their texture. Improper thawing can make them soggy or dry.
- Room Temperature Thawing: The simplest method is to remove the desired number of rolls from the freezer (keeping them wrapped initially) and let them thaw at room temperature on a counter or in a bread box. Small rolls might thaw in 1-2 hours, larger ones in 2-4 hours. Once thawed, remove the wrapping.
- Refrigerator Thawing: You can thaw rolls in the refrigerator overnight, but this is slower and, as noted before, the refrigerator temperature zone is where staling is faster. It's generally not the preferred method unless you won't be using them immediately after thawing.
- Thawing and Reviving Together: For best results, especially with crusty rolls, you can often take them directly from the freezer (remove wrapping first!) and place them in a preheated oven (around 300-325°F / 150-160°C) for 10-20 minutes, or until heated through and softened. This combines thawing and revival into one step and can yield excellent results.
- Microwave Thawing (Use Caution): The microwave can thaw rolls quickly using a defrost setting, but like microwave revival, it can easily overcook them. Use very short intervals and check frequently. It's generally not recommended for quality.
After thawing using room temperature or refrigerator methods, a quick revival step using the oven or steaming methods can significantly improve the texture, demonstrating another way how to revive stale rolls that have been frozen.
Troubleshooting Common Roll Revival Issues
Even with the best techniques, sometimes reviving stale rolls doesn't go exactly as planned. You might end up with a crust that's too hard, a crumb that's soggy, or uneven heating. These are common issues that can usually be avoided or fixed with slight adjustments to your method. Understanding the potential problems helps you refine your technique and achieve better results consistently.
Don't get discouraged if your first attempt isn't perfect. Factors like the roll's original texture, how stale it is, and the specifics of your equipment can all influence the outcome. By identifying what went wrong, you can adjust your approach for the next batch. Let's look at some typical problems encountered when learning how to revive stale rolls and how to address them.
Addressing Hard Crusts After Reviving Rolls
Sometimes, after attempting to revive a roll, especially a crusty one, the crumb softens nicely but the crust becomes excessively hard or tough. This often happens if the revival method uses too much dry heat or not enough moisture.
- Increase Moisture: If using the oven method without foil, try lightly dampening the crust with water before heating. If using foil, ensure it's wrapped tightly to trap moisture.
- Use Steam: The steaming method is excellent for softening both the crumb and the crust. If your oven method results in a hard crust, switch to steaming.
- Lower Temperature, Longer Time: In the oven, a lower temperature for a slightly longer duration can be gentler on the crust than high heat.
- Wrap After Heating: For softer rolls, sometimes wrapping them in a clean towel immediately after taking them out of the oven or steamer and letting them sit for a few minutes can help the residual steam soften the crust.
Adjusting your moisture application and heat source is key to figuring out how to revive stale rolls without creating an overly hard crust.
Dealing with Soggy or Waterlogged Rolls
Conversely, you might end up with rolls that feel damp, heavy, or even soggy after attempting revival. This usually indicates that too much moisture was applied or trapped, or the heating wasn't sufficient to allow the moisture to properly integrate or partially evaporate.
- Reduce Added Water: If using the water method, you likely applied too much water to the surface. Use a quicker dip or lighter brush next time.
- Check Foil Wrapping: If using the foil method, ensure the rolls weren't wet going into the foil, and that the foil wasn't trapping excessive condensation (this can happen if rolls weren't fully cooled before storage/freezing).
- Ensure Proper Steaming Time: While steaming adds moisture, insufficient steaming time might leave the surface too wet. However, over-steaming can also lead to a heavy texture. Stick to the recommended times.
- Quick Oven Finish: If a roll feels slightly soggy after steaming or thawing, a brief stint (2-5 minutes) in a preheated oven (350°F / 175°C) without foil can help dry out the surface slightly.
Carefully controlling the amount of external moisture and ensuring adequate heating are essential steps how to revive stale rolls without making them soggy.
Achieving Even Texture Throughout the Revived Roll
Sometimes, a revived roll might be soft in some spots but still firm in others, or the crust softens but the center remains dense. Uneven heating is the most common cause of this issue.
- Preheat Thoroughly: Ensure your oven or steamer is fully preheated to the correct temperature before adding the rolls.
- Allow Space: When heating multiple rolls, arrange them on the baking sheet or in the steamer basket with space between them. This allows heat or steam to circulate evenly around each roll.
- Adjust Time for Size/Density: Larger or denser rolls require more time for the heat and moisture to penetrate to the center. Be patient and allow sufficient heating time based on the roll's characteristics.
- Use Foil or Steaming: These methods tend to provide more even heating and moisture distribution throughout the roll compared to methods like microwaving, which can heat unevenly.
Focusing on even heat distribution and appropriate timing will help you learn how to revive stale rolls so they have a consistently soft and pleasant texture from crust to center.
Beyond Revival: Creative Uses for Stale Rolls
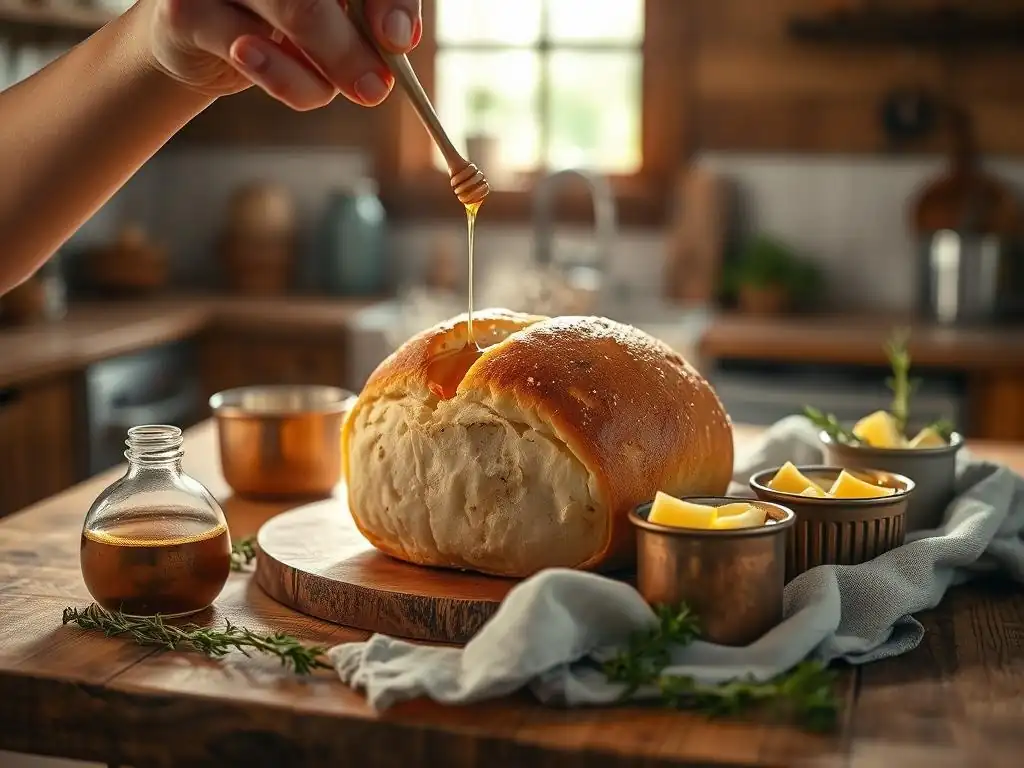
Even if you can't or don't want to revive a stale roll to eat as is, its life in the kitchen is far from over! Stale bread, including rolls, is an excellent ingredient for a variety of dishes. In fact, for some preparations, slightly dry or stale bread is actually preferred because it absorbs liquids better without becoming mushy. Repurposing stale rolls is a fantastic way to reduce food waste and create delicious new meals or components.
From savory additions to main courses to sweet desserts, stale rolls can be transformed into versatile ingredients. Thinking creatively about how to use leftover bread opens up a world of culinary possibilities. Instead of asking how to revive stale rolls, sometimes the question is what new form can these stale rolls take?
One of the most common and useful ways to repurpose stale rolls is by turning them into breadcrumbs. Homemade breadcrumbs are superior to many store-bought varieties, offering better flavor and texture. They can be used in countless ways, from coating for fried foods to binders in meatballs or meatloaf, and toppings for casseroles.
Making breadcrumbs is incredibly simple. You can make dry breadcrumbs (shelf-stable) or fresh breadcrumbs (softer, used immediately). For dry breadcrumbs, ensure the rolls are quite stale and dry. For fresh, slightly stale or even day-old rolls work well. This is a prime example of how stale rolls can become a valuable kitchen staple.
Steps for Making Dry Breadcrumbs from Stale Rolls:

1.  Ensure rolls are completely dry and hard (leave them out for a few days if necessary).
2.  Break or cut the rolls into smaller pieces.
3.  Spread the pieces in a single layer on a baking sheet.
4.  Bake in a low oven (around 250°F / 120°C) for 20-30 minutes, or until completely dried out and slightly toasted, but not browned.
5.  Let cool completely.
6.  Process the cooled, dried bread pieces in a food processor or blender until fine crumbs form. Alternatively, place in a bag and crush with a rolling pin.
7.  Store in an airtight container at room temperature for several weeks, or freeze for longer storage.
Making Croutons from Leftover Bread Rolls
Stale rolls are perfect for making flavorful, crunchy croutons, ideal for topping salads, soups, or using in stuffings. Croutons are essentially seasoned, toasted bread cubes, and their texture is best when made from bread that is a bit dry. Using stale rolls gives them a head start and ensures they crisp up beautifully in the oven or on the stovetop.
Making croutons allows for customization with herbs, spices, and oils. It's a simple process that transforms otherwise unwanted rolls into a gourmet addition to your meals.
Basic Recipe for Stale Roll Croutons:

1.  Cut stale rolls into bite-sized cubes (about 1/2 to 3/4 inch).
2.  Place cubes in a bowl and drizzle generously with olive oil or melted butter.
3.  Toss with desired seasonings: salt, pepper, garlic powder, onion powder, dried herbs like oregano, basil, or thyme, or even a sprinkle of Parmesan cheese.
4.  Spread seasoned bread cubes in a single layer on a baking sheet.
5.  Bake in a preheated oven at 350°F (175°C) for 10-20 minutes, stirring occasionally, until golden brown and crispy.
6.  Let cool completely before storing in an airtight container at room temperature for up to a week.
Stale Roll Recipes: Bread Pudding and More
Beyond breadcrumbs and croutons, stale rolls can be the star ingredient in numerous recipes. Their ability to soak up liquids makes them ideal for dishes where bread acts as a base or binder.
- Bread Pudding: A classic use for stale bread. Rolls are soaked in a mixture of milk, eggs, sugar, and flavorings (like vanilla, cinnamon, or fruit) and then baked. The stale texture helps the bread absorb the custard without becoming mushy. This works for both sweet and savory versions.
- Stuffing/Dressing: For holiday meals or roasted chicken, stale bread cubes are a key ingredient in stuffing. They soak up broth and flavors while baking to a delightful texture.
- Panzanella Salad: An Italian salad where stale bread is tossed with tomatoes, cucumbers, onions, basil, and a vinaigrette. The bread soaks up the delicious dressing and vegetable juices.
- Migas: A Spanish or Portuguese dish often made with stale bread fried with garlic and other ingredients, sometimes served with eggs or sausage.
- French Toast or Strata: While often made with fresh bread, slightly stale rolls can be excellent for French toast (sliced and soaked) or savory stratas (layered casseroles with bread, cheese, and other fillings soaked in egg mixture).
These creative uses mean that even when revival isn't an option or desired, how to revive stale rolls takes on a new meaning – reviving them into entirely different, delicious dishes.
Conclusion: Enjoy Fresh-Tasting Rolls Every Time with BakeWithEase
Dealing with stale bread rolls is a common kitchen occurrence, but as we've explored, it doesn't have to mean wasted food or disappointing mealtimes. With a little knowledge and a few simple techniques, you can effectively bring stale rolls back to life, restoring their soft texture and warmth. Learning how to revive stale rolls using methods like the water dip, oven heating (especially with foil), steaming, or even a quick microwave burst empowers you to make the most of your baking efforts and reduce food waste.
Remember that prevention is also key. Proper storage techniques, including using appropriate containers and understanding the effects of temperature and humidity, can significantly slow down the staling process. And when revival isn't the goal, transforming stale rolls into delicious breadcrumbs, croutons, bread pudding, or other dishes offers wonderful culinary opportunities. At BakeWithEase, we hope this guide gives you the confidence to tackle stale rolls head-on, ensuring you can enjoy fresh-tasting bread whenever you desire.
Frequently Asked Questions
How can I quickly revive stale rolls to make them edible again?
The quickest method involves reheating them in the oven with a small amount of moisture. This helps to rehydrate the crumb and soften the crust.
What's the best temperature and time to revive stale rolls in the oven?
Generally, a low temperature of around 300°F (150°C) for 5-10 minutes is ideal. Keep a close eye on them to prevent over-baking and drying out.
Can I use a microwave to revive stale rolls?
While possible, microwaving can make rolls rubbery. If you must, wrap them in a damp paper towel and microwave in short bursts to minimize moisture loss.
What if my rolls are very hard and dry?
For severely stale rolls, try sprinkling them lightly with water before baking. This provides more moisture for rehydration during the warming process.
Besides reheating, are there other creative ways to use stale rolls?
Absolutely! Stale rolls are perfect for making breadcrumbs, croutons, or even ingredients in dishes like bread pudding or strata.
Final Reflection: The Enduring Appeal of a Perfectly Crisp Roll
The fight against stale bread is a timeless battle, one waged daily in kitchens across the globe. The seemingly simple act of reviving a stale roll speaks to a larger desire for resourcefulness and a refusal to let perfectly good food go to waste. This seemingly small act holds a surprising amount of significance in our increasingly conscious world, where minimizing food waste is becoming paramount.
The subtle art of roll resuscitation transcends mere practicality; it's a testament to our connection with food and a celebration of culinary resourcefulness. It’s a reminder that even the simplest ingredients deserve respect and a second chance. Waste not, want not,
an old adage, rings truer than ever in our modern context, urging us to find creative solutions to everyday challenges. This simple act of reviving stale rolls embodies that spirit, encouraging us to think outside the box and appreciate the potential hidden within seemingly discarded items.
Consider the impact of this seemingly small skill. You, the reader, now possess the knowledge to transform yesterday's slightly hard roll into today's delicious addition to a meal. This isn't just about reviving bread; it's about reviving resourcefulness, about embracing a mindful approach to food, and about finding joy in the small victories of everyday life.
So, the next time you find yourself with a slightly stale roll, remember these techniques and rediscover the pleasure of a perfectly crisp crust. Let the simple act of reviving a roll inspire you to find creative solutions in other areas of your life.
Rediscover the Joy of Fresh Bread!
Thanks for taking the time to learn how to revive those slightly stale rolls! We hope you now have the tools to avoid bread waste and enjoy delicious, fresh-tasting bread longer. Ready to put your new skills to the test?
- Try our top tip: Revive your day-old rolls using the steaming method described in the article – you'll be amazed by the difference!
- Share your freshly revived bread success stories with us on social media using #BakeWithEaseRevival! We'd love to see your creations.
- Experiment with different bread types – which one responds best to the steaming method? Let us know in the comments!
What’s your favorite method for keeping bread fresh? Let's discuss!