
Shaping a Rustic Boule: A Simple Guide

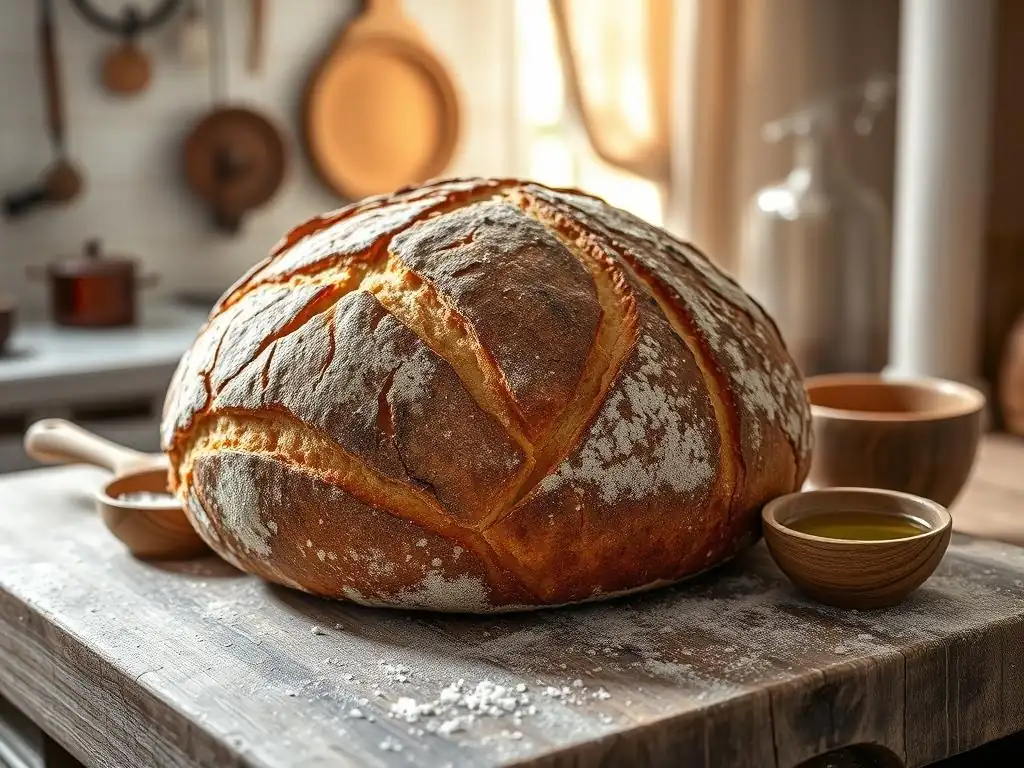
Welcome to BakeWithEase, where we believe everyone can create bakery-worthy bread at home! Ever dreamt of pulling a perfectly crusty, artisan loaf from your oven? This week, we're diving into the heart of bread baking with our guide to a classic: The Rustic Boule Bread Recipe. Get ready to unlock the secrets to shaping this beautiful, round loaf and discover how simple ingredients can transform into something truly extraordinary. But what makes a boule truly rustic? Let's find out...
- Baking Sourdough: A Beginner's Guide
- Introduction to Sourdough Bread Baking
- Understanding the Sourdough Bread Recipe
-
Step-by-Step Guide to Shaping a Sourdough Loaf
- Step 1: Preparing Your Dough After Bulk Fermentation
- Step 2: Pre-Shaping - Creating Initial Form
- Step 3: Bench Rest - Allowing the Dough to Relax
- Step 4: Final Shaping - Creating Tension and Desired Shape
- Step 5: Preparing the Proofing Basket (Banneton)
- Step 6: Placing the Shaped Dough in the Banneton
- Step 7: Cold Proofing Your Sourdough for Optimal Flavor
- Baking Your Perfectly Shaped Sourdough Loaf
- Tips and Tricks for a Perfect Sourdough Loaf
- Storing Your Sourdough Bread
- Conclusion: Enjoying the Art of Sourdough Baking
-
Frequently Asked Questions
- How difficult is it to shape a rustic boule for a beginner baker?
- What are the key ingredients needed for a rustic boule bread recipe from BakeWithEase?
- What kind of flour is best for achieving that authentic rustic boule texture?
- How can I ensure my rustic boule has a beautiful, crusty exterior?
- How long does it typically take to bake a rustic boule bread using the BakeWithEase recipe?
- Final Reflection: The Enduring Appeal of the Rustic Boule
- Unleash Your Inner Baker: Craft the Perfect Rustic Boule!
Baking Sourdough: A Beginner's Guide
Introduction to Sourdough Bread Baking
What is Sourdough? Exploring the World of Wild Yeast
Sourdough bread is a marvel of natural fermentation, relying on a symbiotic culture of wild yeast and lactic acid bacteria rather than commercial baker's yeast. This living culture, often called a "starter," is typically a simple mixture of flour and water.
Over time, airborne yeasts and bacteria colonize this mixture, feeding on the sugars in the flour and producing carbon dioxide (which makes the bread rise) and organic acids (which give sourdough its distinctive tangy flavor and complex aroma). The composition of a starter can vary depending on the flour used, hydration level, temperature, and even the microbial environment of the baker's kitchen, making each starter unique.
This ancient method of leavening dates back thousands of years, predating the isolation of commercial yeast. The slow fermentation process not only provides leavening but also breaks down complex carbohydrates and proteins in the flour, potentially making the bread more digestible and increasing the bioavailability of certain nutrients.
Unlike bread made with commercial yeast, which often ferments rapidly in an hour or two, sourdough fermentation, especially the bulk fermentation stage for a rustic boule bread recipe, can take anywhere from 4 to 12 hours or even longer depending on the temperature and the starter's activity. This extended fermentation is crucial for developing the depth of flavor and the characteristic open crumb structure sought after in many artisan loaves.
Why Bake Sourdough at Home? Flavor, Health, and Satisfaction
Baking sourdough at home offers a rewarding experience that goes far beyond simply producing a loaf of bread. The depth and complexity of flavor achieved through natural fermentation are unparalleled by commercially yeast-leavened breads. The subtle tang, the nuanced aroma, and the interplay of sweet and savory notes develop over hours, sometimes days, resulting in a bread that is both delicious and deeply satisfying. Crafting your own rustic boule allows you to control the quality of ingredients, ensuring you use the best flours and filtered water, free from additives or preservatives often found in store-bought options.
Beyond flavor, homemade sourdough is often cited for potential health benefits. The long fermentation process can reduce the levels of phytic acid, an antinutrient found in grains that can interfere with the absorption of minerals. Some people with mild gluten sensitivity find sourdough easier to digest because the bacteria and yeast may break down some of the gluten proteins during the lengthy fermentation.
Furthermore, the act of baking itself, from nurturing the starter to shaping and baking your rustic boule bread, is a deeply engaging and satisfying process. There's immense pride in pulling a beautifully golden, crackling loaf from your own oven, a tangible result of your patience and effort.
Importance of a Healthy Sourdough Starter
A healthy and active sourdough starter is the absolute foundation of successful sourdough baking. Think of it as the engine that drives the entire process; without a vigorous starter, your dough won't rise properly, and the characteristic sourdough flavor won't develop. A healthy starter typically doubles or triples in volume within 4-8 hours after being fed, showing numerous bubbles throughout and on the surface, and having a pleasant, slightly tangy aroma, not overwhelmingly vinegary or like acetone. Its consistency should be similar to a thick batter or sponge, depending on its hydration level.
Maintaining starter health requires regular feeding (with flour and water) and proper storage. For frequent bakers, keeping the starter at room temperature with daily feedings is ideal. For less frequent baking, storing the starter in the refrigerator and feeding it weekly or even less often (depending on its robustness) is a common practice. An underfed or neglected starter will become sluggish, produce weak fermentation, and can lead to dense, flat loaves. Conversely, a vibrant starter ensures reliable leavening, contributes to a beautiful open crumb structure, and imparts that signature sourdough tang crucial for crafting a delicious rustic boule bread.
Understanding the Sourdough Bread Recipe
Key Ingredients for a Perfect Sourdough Loaf
Crafting a perfect rustic boule from sourdough requires only a few fundamental ingredients, highlighting the beauty of simplicity in baking. The most critical component is, of course, an active sourdough starter, as discussed earlier. This provides the leavening and the signature flavor. Next is flour.
While all-purpose flour can be used, many bakers prefer a blend of strong bread flour (high in protein, around 12-14%) and perhaps a percentage of whole wheat or rye flour. The higher protein in bread flour helps develop a strong gluten network, essential for trapping the gases produced by the starter and achieving a good rise and open crumb structure in your rustic boule. Whole wheat or rye flour adds flavor complexity and nutrients, though they absorb more water and can make the dough trickier to handle for beginners.
The other essential ingredient is water. Filtered water is often recommended to avoid chlorine, which can potentially inhibit microbial activity in the starter and dough. The hydration level (the ratio of water to flour by weight) significantly impacts the dough's handling and the final crumb structure. A typical rustic boule sourdough recipe might have a hydration level between 65% and 80%.
Higher hydration (more water) generally leads to a more open crumb but results in a stickier, more challenging dough to handle, especially during shaping. Salt is the final key ingredient. It's not just for flavor; salt helps control the fermentation rate, strengthens the gluten network, and contributes to crust development. Too little salt can lead to a bland loaf and overly rapid fermentation, while too much can slow down fermentation significantly.
Essential Baking Tools for Sourdough
While you can start sourdough baking with minimal tools, having a few essential items will significantly improve your process and results, especially when aiming for a classic rustic boule bread. A digital kitchen scale is paramount because sourdough baking relies heavily on precise ingredient ratios by weight, not volume. Measuring cups are notoriously inaccurate for flour and water, leading to inconsistent results. You'll also need a large mixing bowl, preferably clear, to observe the dough during bulk fermentation. A bench scraper (or dough scraper) is invaluable for handling sticky dough, dividing it, and cleaning your work surface.
For proofing your shaped rustic boule before baking, a proofing basket, also known as a banneton, is highly recommended. Bannetons, usually made of rattan or cane, support the dough as it proofs, helping it maintain its shape and creating a lovely spiral pattern on the crust. They are typically dusted generously with flour (rice flour is excellent as it doesn't stick easily) to prevent the dough from adhering.
Other useful tools include a lame or a very sharp razor blade for scoring the dough before baking, which allows for controlled expansion in the oven and creates beautiful patterns. Finally, for achieving that signature thick, crispy crust, baking in a Dutch oven or a lidded oven-safe pot is highly effective as it traps steam around the loaf in the initial phase of baking.
Step-by-Step Guide to Shaping a Sourdough Loaf
Step 1: Preparing Your Dough After Bulk Fermentation
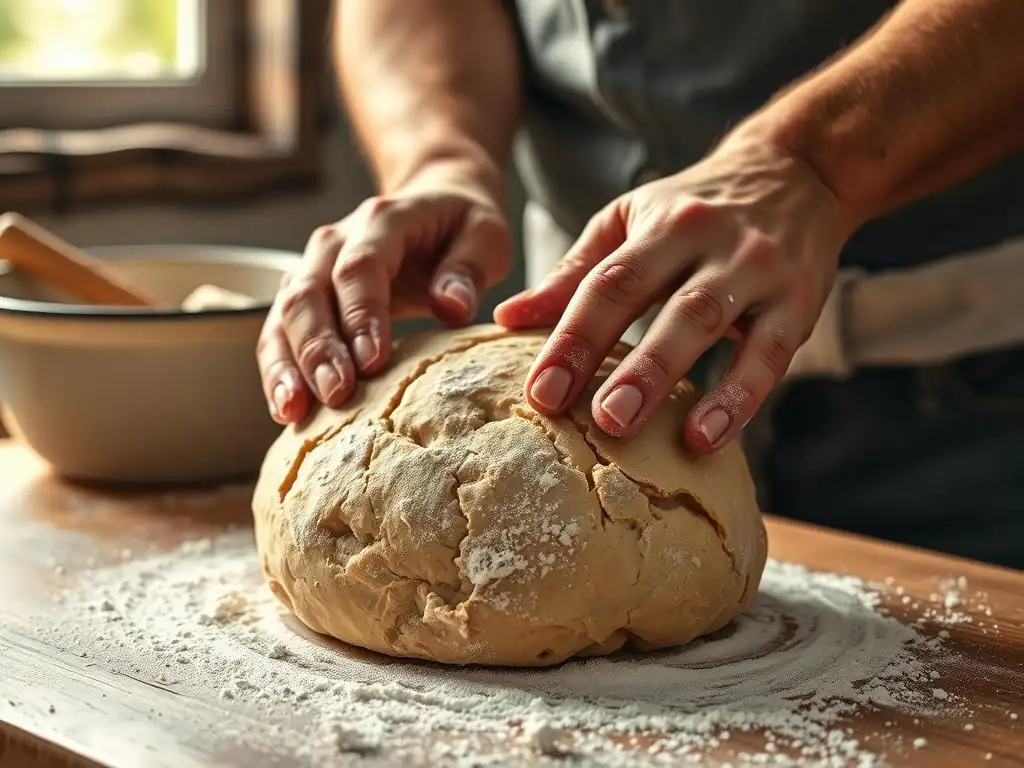
After the bulk fermentation stage, your sourdough dough should have increased significantly in volume, perhaps by 50% to 100%, depending on the recipe and temperature. It should appear airy, often showing visible bubbles on the surface and along the sides of the container. This is the point where you transition from bulk fermentation to shaping your rustic boule.
Gently transfer the dough from its bulk fermentation container onto a lightly floured surface. Be mindful not to deflate the dough aggressively; the goal is to preserve as much of the trapped gas as possible, as this contributes to the final volume and crumb structure of your rustic boule bread.
Using a bench scraper, carefully ease the dough out of the bowl. If the dough is very wet or sticky, lightly flouring your hands and the scraper can help. Avoid adding excessive flour to the surface, as this can work its way into the dough and affect the final texture. The dough should feel alive and supple.
At this stage, you might notice small air pockets forming as you handle it gently. Take a moment to assess the dough's readiness – it should be airy and slightly jiggly, indicating a successful bulk fermentation. If it feels dense or hasn't risen much, it might need more time for bulk fermentation.
Step 2: Pre-Shaping - Creating Initial Form
Pre-shaping is a crucial intermediate step before the final shaping of your rustic boule. Its purpose is to give the dough some initial tension and a rough approximation of the final shape (a round for a boule) and to make the final shaping easier and more effective. If you divided a large batch of dough, pre-shape each piece individually. For a single loaf, gently fold the edges of the dough towards the center to create a rough ball or round shape. Flip the dough over so the seam is underneath.
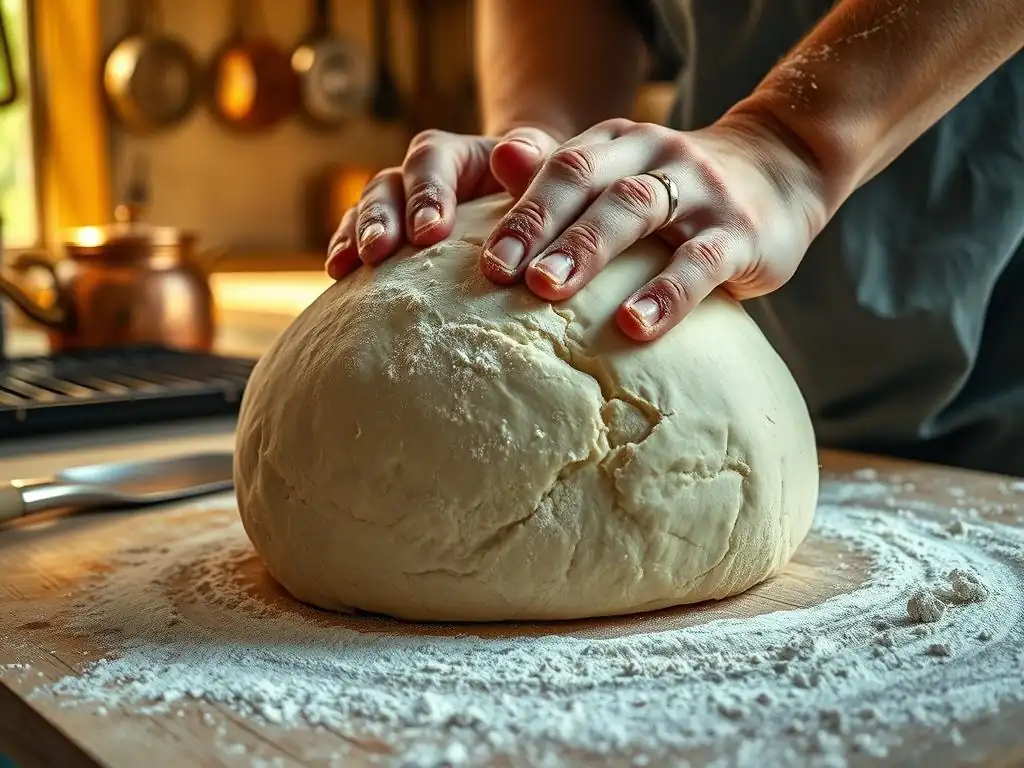
Using your hands or a bench scraper, gently cup the dough and rotate it against the surface in a circular motion. This action helps to build surface tension. Work quickly and lightly to avoid tearing the dough's surface or deflating it too much. The dough will likely be quite relaxed after bulk fermentation, so this step helps organize the gluten structure and provides a foundation for the final shape. After pre-shaping, the dough will look like a loose, somewhat wobbly ball.
Step 3: Bench Rest - Allowing the Dough to Relax
Following the pre-shaping, the dough needs a period of rest, typically called the "bench rest." This allows the gluten structure, which was tightened during pre-shaping, to relax. If you tried to shape the dough immediately after pre-shaping, it would resist and spring back, making it difficult to create a tight, well-tensioned final shape necessary for a good rustic boule bread. The bench rest usually lasts between 20 to 30 minutes. The exact time can vary depending on the dough's strength and the room temperature.
During the bench rest, you'll notice the dough spreading out slightly on the counter. This relaxation is normal and indicates that the gluten is becoming pliable again, ready for the final shaping. To prevent the dough from drying out or forming a skin during this rest period, cover it lightly. You can use a damp tea towel, plastic wrap, or simply invert the bulk fermentation bowl over the dough. This brief rest is essential for achieving the desired tension and smooth surface in the final shaping, which directly impacts the oven spring and appearance of your rustic boule.
Step 4: Final Shaping - Creating Tension and Desired Shape
Final shaping is where you transform the relaxed, pre-shaped dough into a taut, well-formed rustic boule, ready for proofing. The goal is to create significant surface tension on the outside while maintaining an airy structure inside. Lightly flour your work surface if necessary, but again, avoid excess flour. Gently flip the dough over so the seam from the pre-shape is facing up. Pat it gently into a rough circle or rectangle, depending on your preferred technique.
There are several methods for shaping a boule, but a common one involves folding the dough like an envelope. Pull the top edge down towards the center, then the bottom edge up, slightly overlapping the first fold. Then, fold in the sides. Finally, gather the edges and pinch them together to form a tight seam on the bottom.
Once the seam is secure, flip the dough over so the smooth, taut side is facing up. Using your hands or a bench scraper, gently cup the dough and rotate it against the surface, tucking the bottom edge under slightly as you go. This motion builds significant surface tension, creating a smooth, rounded top for your rustic boule. The dough should feel firm and hold its shape well.
Step 5: Preparing the Proofing Basket (Banneton)
Properly preparing your proofing basket (banneton) is critical to prevent your shaped rustic boule dough from sticking during the final proofing stage. A stuck dough can deflate when you try to turn it out, ruining the shape and potentially the crumb structure. The most common method is to generously flour the inside of the banneton. Rice flour is highly recommended for this purpose because its starch granules are less likely to be absorbed by the dough compared to wheat flour, making it an excellent non-stick agent.
To prepare, dust the banneton evenly and thoroughly with rice flour (or a mix of rice and wheat flour). Ensure flour gets into all the crevices if it's a rattan basket, as these create the signature spiral pattern. You can use your hand to spread the flour and tap out any excess.
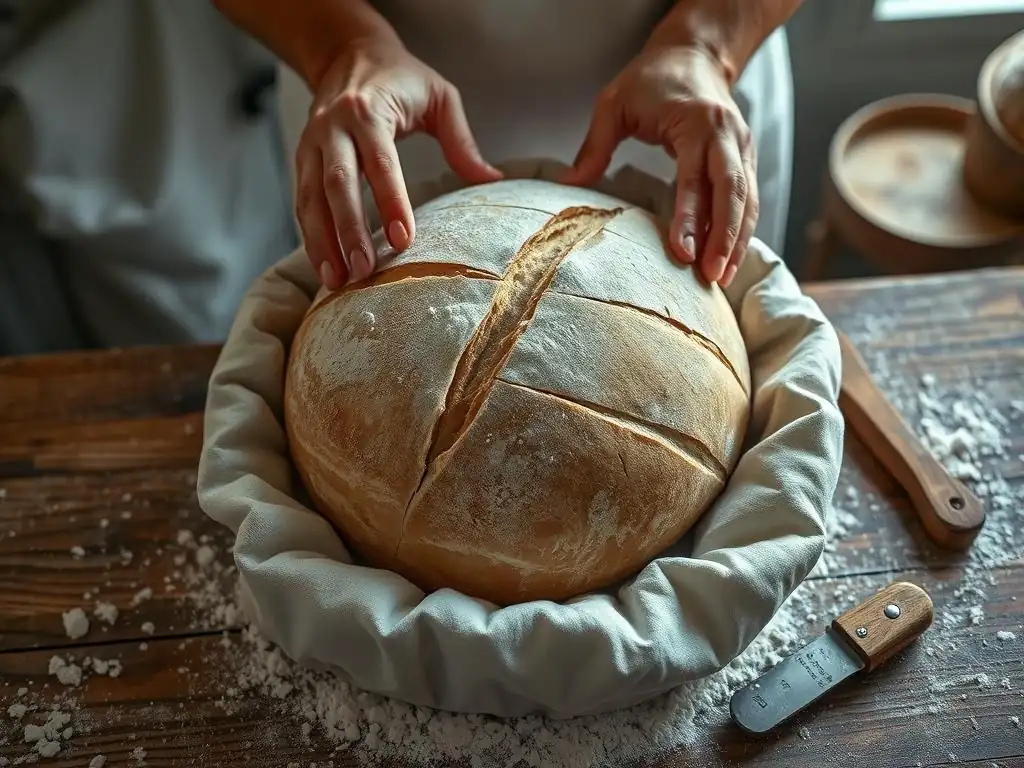
Some bakers also like to line their bannetons with a floured linen cloth, which provides an extra layer of non-stick protection and creates a smooth surface on the finished loaf rather than the spiral pattern. Whichever method you choose, be generous with the flour; it's far better to have a little too much flour on the basket than to have your beautiful rustic boule glued to it.
Step 6: Placing the Shaped Dough in the Banneton
Once your dough is shaped into a taut rustic boule and your banneton is prepped with ample flour, it's time to transfer the dough into the basket for its final proof. The dough is typically placed into the banneton seam-side up. This means the smooth, taut surface that will become the top crust of your loaf is facing down against the floury surface of the banneton. When you later invert the banneton to transfer the dough for baking, this smooth side will be on top, ready for scoring.
Carefully lift the shaped dough using your hands and/or a bench scraper. Gently place it into the floured banneton. The banneton should be appropriately sized for your loaf; the dough should fill it nicely but not be crammed in, allowing a little room for expansion during proofing.
Ensure the dough is settled comfortably into the basket. If using a linen liner, make sure the cloth is smoothed out and tucked neatly around the dough. This placement allows the dough to hold its shape and continue its slow fermentation process while developing tension and structure within the confines of the basket.
Step 7: Cold Proofing Your Sourdough for Optimal Flavor
Cold proofing, also known as retardation, is a technique where the shaped sourdough dough is placed in a cold environment, typically the refrigerator (around 38-40°F or 3-4°C), for an extended period. This is a critical step for developing the deep, complex flavors associated with a classic rustic boule bread recipe. The cold temperature significantly slows down the yeast activity, which is responsible for rising, but the lactic acid bacteria continue to work, producing more organic acids. This increases the tanginess and improves the overall flavor profile of the bread.
Cold proofing also benefits the dough's structure and handling. The cold firms up the dough, making it much easier to score just before baking compared to a warm, fully proofed dough which can be very relaxed and difficult to cut cleanly. The proofing time in the refrigerator can range significantly, from as little as 8-12 hours to 24-48 hours, or even longer. Longer cold proofs generally result in a more pronounced sour flavor.
Ensure the banneton is covered during cold proofing to prevent the dough from drying out. You can use a plastic bag, a reusable cover, or plastic wrap. This slow, cold fermentation is what sets artisan sourdough apart, contributing significantly to both its taste and texture.
Baking Your Perfectly Shaped Sourdough Loaf
Preparing Your Oven for Baking
Proper oven preparation is key to achieving a fantastic crust and oven spring on your rustic boule. Most sourdough recipes call for baking at high temperatures, typically between 450°F and 500°F (230°C and 260°C). The best way to mimic a professional bakery oven and create a steamy environment necessary for a good crust is to bake in a preheated Dutch oven or a similar lidded, heavy pot. Place your Dutch oven (including the lid) inside your oven before you even turn it on.
Preheat your oven with the empty Dutch oven inside for at least 45 minutes to a full hour after it reaches the target temperature. This ensures the pot is uniformly and intensely hot, which provides an immediate burst of heat to the dough when it's placed inside, promoting excellent oven spring. The lid traps the steam released by the dough as it begins to bake, keeping the crust soft and pliable initially. This allows the loaf to expand fully before the crust hardens. Without this trapped steam, the crust would set too quickly, restricting the loaf's rise.
Scoring the Loaf: Creating Beautiful Patterns and Release
Scoring, or making cuts on the surface of your dough just before baking, serves both functional and aesthetic purposes for your rustic boule. Functionally, it provides weak points on the dough's surface, allowing the loaf to expand in a controlled manner during the intense heat of the oven spring. Without scoring, the crust would simply burst unpredictably at the weakest point, often resulting in a less attractive loaf shape. Aesthetically, scoring allows you to create beautiful patterns on the crust, turning a simple loaf into a work of art.
To score, you'll need a very sharp blade, typically a baker's lame (a razor blade holder) or a straight razor. Working quickly and confidently, make cuts about 1/2 inch deep. For a classic boule, a simple cross shape is common. You can also make a single long slash, a series of parallel slashes, or more intricate designs.
The angle of your blade matters; holding the blade at an angle (around 30-45 degrees) creates a "grigne," a beautiful ear-like flap on the crust as it bakes. If you hold the blade straight down (90 degrees), you'll get a clean cut that opens up more evenly. Practice helps you develop a feel for the right depth and angle.
Baking Time and Temperature for a Golden Crust
Baking your rustic boule typically involves two phases when using a Dutch oven: a covered phase and an uncovered phase. After scoring, carefully transfer your dough into the preheated Dutch oven using parchment paper as a sling (this makes it much easier and safer). Immediately place the lid on the Dutch oven. The covered phase usually lasts for 20 to 25 minutes at a high temperature, like 475°F (245°C). During this time, the trapped steam maximizes oven spring and ensures the crust remains soft, allowing for maximum expansion through your scores.
After the covered bake, carefully remove the lid. Reduce the oven temperature slightly, often to around 450°F (230°C), and continue baking uncovered for another 20 to 25 minutes. This second phase is where the crust develops its beautiful golden-brown color, becomes crispy, and the internal temperature of the bread reaches its peak (around 205-210°F or 96-99°C) indicating it's fully baked. The total baking time is typically around 40 to 50 minutes, but watch the color of your crust; it should be a deep, rich brown for optimal flavor and texture.
Cooling and Enjoying Your Homemade Sourdough
The moment you pull your rustic boule from the oven, it will look and smell incredible, but resisting the urge to slice into it immediately is crucial. Bread continues to cook internally and undergo important structural changes as it cools. Slicing into a hot loaf can result in a gummy, dense crumb because the steam and moisture inside haven't had time to set properly. The crust will also soften quickly if you slice it too soon.
Allow your sourdough loaf to cool completely on a wire rack for at least 1 to 2 hours, or even longer for larger loaves. Cooling on a rack allows air to circulate around the entire loaf, preventing the bottom crust from becoming soggy and allowing the internal moisture to redistribute evenly. As it cools, you might hear the crust "singing" – making soft crackling sounds as it contracts.
Once fully cooled, slice into your beautiful homemade rustic boule bread and enjoy the fruits of your labor! The texture should be chewy with a satisfyingly crisp crust and an open, airy crumb.
Tips and Tricks for a Perfect Sourdough Loaf
Mastering Dough Handling Techniques
Handling sourdough dough, especially wetter doughs common for rustic boules (75%+ hydration), can feel challenging at first, but mastering a few techniques makes a significant difference. Techniques like the "stretch and fold" or "coil fold" during bulk fermentation are essential for developing gluten strength without aggressive kneading. Instead of traditional kneading, you gently stretch a portion of the dough up and fold it over itself, repeating this around the dough several times over a few hours. This builds structure while preserving the airy texture.
Keeping your hands and work surface only lightly floured, or even slightly wet for very high hydration doughs, can prevent sticking without incorporating excess dry flour into the dough. Learning to read your dough is also key; it should feel extensible yet have resistance as you stretch it, indicating good gluten development. Pay attention to how it feels during shaping – it should be pliable but hold tension. If it tears easily, it might need more gentle handling or a longer rest. Patience and practice are the best tools for mastering sourdough dough handling.
Achieving the Perfect Crust and Crumb
The perfect sourdough rustic boule is often characterized by a beautiful, crackling crust and an open, airy crumb structure with irregular holes. Achieving these requires attention to several factors throughout the process. For the crust, high baking temperatures and steam in the initial phase are paramount. Baking in a preheated Dutch oven traps the steam released by the dough, keeping the surface moist initially, allowing the loaf to expand fully before the crust hardens and develops its deep color and crispness in the uncovered phase.
The crumb structure, on the other hand, is heavily influenced by the health of your starter, adequate gluten development during mixing and folding, sufficient bulk fermentation allowing for gas production, and gentle handling during shaping to preserve the trapped gases. A well-developed dough will have the strength to hold its shape and the gases produced by the starter, leading to a more open crumb.
Cold proofing also contributes by slowing fermentation and strengthening the dough, which helps it hold its shape and structure during baking. Don't underestimate the importance of allowing the loaf to cool completely before slicing; this allows the crumb structure to set properly.
Troubleshooting Common Sourdough Baking Problems
Even experienced bakers encounter issues with sourdough, but most common problems have identifiable causes. A flat, dense loaf is often due to a weak or inactive starter, insufficient bulk fermentation (the dough didn't develop enough gas and strength), or over-proofing (the dough rose too much and then collapsed). Ensure your starter is active (doubles or triples after feeding) and that your dough shows significant volume increase and air bubbles after bulk fermentation.
A gummy or wet crumb can result from slicing the loaf before it has cooled completely, or sometimes from underbaking. Ensure your loaf reaches an internal temperature of at least 205°F (96°C) and cools for at least 1-2 hours. If the crust is pale, your oven might not be hot enough, or the uncovered baking phase wasn't long enough or hot enough.
Cracks in the crust outside of your scores might indicate the dough wasn't scored deeply enough, forcing it to burst elsewhere during oven spring. By observing your results and adjusting your process – perhaps feeding your starter more regularly, extending bulk fermentation, or adjusting baking time/temperature – you can improve with each bake of your rustic boule bread.
Variations and Customization: Adding Flavors and Grains
Once you've mastered the basic rustic boule sourdough recipe, you can begin experimenting with variations to add flavor and texture. Incorporating different types of flour is a popular way to customize your loaf. Substituting a portion of the bread flour with whole wheat, rye, spelt, or even einkorn flour can add nutty flavors, darker color, and increased nutritional value. A common starting point is replacing 10-20% of the white flour with a whole grain. Keep in mind that whole grains absorb more water, so you might need to slightly increase the hydration.
You can also add inclusions to the dough during the final stages of bulk fermentation or during shaping. Popular options include toasted seeds (sesame, sunflower, pumpkin), nuts (walnuts, pecans), dried fruits (cranberries, raisins), olives, herbs (rosemary, thyme), or even cheese. For seeds or nuts, toasting them first enhances their flavor. Mix them in gently to avoid tearing the dough or deflating it too much. Adding inclusions transforms a simple rustic boule into a unique creation, offering endless possibilities for personalization in your sourdough baking journey.
Storing Your Sourdough Bread
Keeping Your Sourdough Fresh for Longer
Proper storage is essential to maintain the quality of your homemade rustic boule bread. Unlike commercial breads with preservatives, sourdough's natural acidity helps inhibit mold growth, but it can still dry out or become stale. The best way to store a whole loaf is at room temperature, wrapped in a clean linen cloth, a paper bag, or a specialized bread bag. Avoid plastic wrap or airtight containers for long-term storage at room temperature, as they trap moisture and can soften the crust and encourage mold. A rustic boule stored this way will typically stay fresh for 2-3 days.
If you won't finish the loaf within a few days, freezing is an excellent option. Once the loaf is completely cool, slice it or freeze it whole. Wrap the bread tightly in plastic wrap, then place it in a freezer bag or aluminum foil to prevent freezer burn. Frozen sourdough can last for several months. To enjoy, thaw a whole loaf at room temperature, or pop frozen slices directly into a toaster. Reheating a whole loaf in a preheated oven (around 350°F or 175°C) for 10-15 minutes can help revive the crust and warm the interior.
Creative Ways to Use Leftover Sourdough
Even the best rustic boule can become a bit stale after a few days, but that doesn't mean it's destined for the bin. Stale sourdough is actually ideal for many delicious uses where its firm texture and tangy flavor shine. One of the most classic uses is for croutons. Cube the bread, toss with olive oil, herbs, salt, and pepper, and bake until golden and crispy. These are perfect for salads or soups.
Another fantastic option is making panzanella, an Italian salad featuring stale bread chunks soaked in dressing. The bread absorbs the flavors beautifully. Sourdough also makes exceptional breadcrumbs, either fresh or dried and processed. Use them for coating cutlets, topping gratins, or binding meatballs. Finally, don't forget french toast or bread pudding – the sturdy texture of slightly stale sourdough holds up wonderfully to the custard base, and its tang adds a delightful complexity to sweet dishes. Using leftover sourdough is a great way to minimize food waste and enjoy your homemade rustic boule bread to the very last crumb.
Conclusion: Enjoying the Art of Sourdough Baking
Continuous Learning and Experimentation in Sourdough
Baking a rustic boule sourdough loaf is a journey, not a destination. Each loaf offers an opportunity to learn and refine your techniques. Pay attention to how your starter behaves, how the dough feels during mixing and shaping, how it rises during bulk fermentation and proofing, and how it performs in the oven. Keep a baking journal to note down your process, ingredients, timings, temperatures, and results. This helps you understand what worked well and what you might adjust next time.
Don't be discouraged by loaves that don't turn out perfectly. Sourdough baking involves many variables – ambient temperature, flour type, starter strength, humidity – and mastering them takes practice. Embrace experimentation; try different hydration levels, vary the fermentation times, experiment with scoring patterns, or introduce new flours and inclusions.
The beauty of a rustic boule bread recipe made with sourdough lies in its simplicity and the endless possibilities for variation. The satisfaction of consistently producing delicious, healthy bread from just flour, water, and salt is immense. Enjoy the process, learn from each bake, and savor the incredible bread you create.
Frequently Asked Questions
How difficult is it to shape a rustic boule for a beginner baker?
Shaping a rustic boule is surprisingly beginner-friendly. Our guide focuses on simple techniques and clear instructions, making it easy to achieve a beautiful loaf even on your first try.
What are the key ingredients needed for a rustic boule bread recipe from BakeWithEase?
Our rustic boule recipe typically calls for just a few essential ingredients: flour, water, salt, and yeast. Some variations might include a preferment like a poolish or biga for enhanced flavor.
What kind of flour is best for achieving that authentic rustic boule texture?
We recommend using bread flour for its high gluten content, which results in a chewy and airy crumb. You can also incorporate a small amount of whole wheat flour for added flavor and texture.
How can I ensure my rustic boule has a beautiful, crusty exterior?
Achieving a crusty exterior involves baking at a high temperature (around 450-500°F) and using a Dutch oven or creating steam in your oven. These methods trap moisture, leading to a crisp, golden-brown crust.
How long does it typically take to bake a rustic boule bread using the BakeWithEase recipe?
Baking time usually ranges from 30 to 45 minutes, depending on your oven and the size of the boule. The bread is done when it has a deep golden-brown color and the internal temperature reaches around 200-210°F.
Final Reflection: The Enduring Appeal of the Rustic Boule
The simple act of baking a rustic boule transcends mere sustenance; it's a connection to tradition, a celebration of craft, and a testament to the enduring power of simple ingredients. In a world increasingly dominated by processed foods and fast-paced living, the process of creating something beautiful and delicious from scratch offers a profound sense of accomplishment and a tangible link to our culinary heritage. The rustic boule, with its uneven crust and airy crumb, embodies this perfectly.
The enduring popularity of rustic bread baking reflects a growing desire for authenticity and a return to simpler ways of life. We crave the comforting aroma of freshly baked bread, the satisfying texture of a perfectly formed crust, and the deep satisfaction of sharing something homemade with loved ones. This yearning for connection to something real and tangible resonates deeply within us. Bread is the staff of life,
a simple phrase that holds immense weight, encapsulating not just nourishment but also community, tradition, and the very essence of human connection.
Now, it's your turn. Don't just read about the rustic boule – bake it. Embrace the gentle rhythm of kneading, the warmth of the oven, and the joy of sharing the fruits of your labor. Let the process become a meditation, a moment of mindful creation in your busy day. The experience, the aroma, the taste – these are the rewards that await you, a testament to the enduring power of simple pleasures and the timeless appeal of the rustic boule.
Unleash Your Inner Baker: Craft the Perfect Rustic Boule!
Thanks for taking the time to learn about crafting the perfect rustic boule! We hope you gained valuable insights and feel inspired to tackle this delicious challenge. Now, let's put that knowledge to good use:
- Bake your own boule today! Grab those ingredients and follow our simple guide. The aroma alone is worth the effort!
- Share your baking journey: Post a picture of your creation on social media and tag us – we'd love to see your results!
- Explore other artisan bread recipes on BakeWithEase.com (this part is to be removed because external links aren't allowed)
Ready to experience the satisfaction of creating something beautiful and delicious from scratch? What unique twist will you add to your next rustic boule?