
Solving the Mystery of Dense Whole Wheat Bread

Welcome to BakeWithEase, your haven for all things baking! Are you tired of whole wheat bread that's more brick than bread? We understand! Get ready to unravel the secrets behind achieving a perfectly textured loaf with our guide to a delicious and nutritious dense whole wheat bread recipe. Discover the tips and tricks that will transform your baking and banish dense, disappointing loaves forever. Let's get baking!
- Solving the Mystery of Dense Whole Wheat Bread: A BakeWithEase.com Guide
- Understanding Dense Whole Wheat Bread
- Common Mistakes Leading to Dense Whole Wheat Bread
- Troubleshooting Your Dense Whole Wheat Bread
- Achieving the Perfect Light and Airy Whole Wheat Bread: Techniques and Tips
- A Foolproof Recipe for Light and Airy Whole Wheat Bread
- Variations and Alternatives for Whole Wheat Bread
-
Frequently Asked Questions
- What are the most common reasons why my whole wheat bread turns out dense?
- How can I improve the texture of my dense whole wheat bread?
- What type of flour should I use in a whole wheat bread recipe to avoid density?
- Does the hydration level affect the density of whole wheat bread?
- How does proofing time influence the density of my whole wheat bread?
- Final Reflection: The Enduring Allure of Dense Whole Wheat Bread
- Unlock the Secrets of Perfectly Dense Whole Wheat Bread!
Solving the Mystery of Dense Whole Wheat Bread: A BakeWithEase.com Guide
Understanding Dense Whole Wheat Bread
What Causes Dense Texture in Whole Wheat Bread?
A dense texture in whole wheat bread is a common frustration for many bakers. It often results in a loaf that is heavy, brick-like, and lacks the desired light, airy crumb. This undesirable outcome stems from a combination of factors unique to baking with whole wheat flour, primarily related to gluten development, hydration, and the physical properties of the flour itself.
Unlike refined white flour, whole wheat flour contains the bran and germ of the wheat kernel, which can interfere with gluten formation and structure, leading to a less elastic dough that struggles to trap the gases produced by yeast. Understanding these underlying causes is the first step towards mastering a lighter whole wheat bread recipe.
Furthermore, the presence of sharp bran particles in whole wheat flour can act like tiny knives, cutting the delicate gluten network as it develops during kneading and proofing. This disruption prevents the dough from forming a strong, extensible structure capable of holding its shape and rising effectively.
A weakened gluten network collapses easily, resulting in a loaf that doesn't achieve significant volume and maintains a tight, heavy crumb. Addressing this inherent challenge of baking with whole wheat flour requires specific techniques and adjustments compared to baking with white flour, techniques we'll explore to help you avoid a dense whole wheat bread recipe outcome.
The Role of Gluten in Whole Wheat Bread Density
Gluten is the protein network that gives bread dough its elasticity and structure, allowing it to stretch and trap the carbon dioxide gas produced by yeast. This gas expansion is what makes bread rise and creates its airy texture. In white flour, gluten develops relatively easily when mixed with water and kneaded, forming a strong, pliable network.
However, in whole wheat flour, the bran and germ content hinders this process. The bran mechanically disrupts the gluten strands, while the germ contains fats and enzymes that can also weaken the gluten structure over time. A poorly developed or damaged gluten network is a primary culprit behind dense whole wheat bread.
To counteract this, bakers must employ methods that encourage gluten development while minimizing the disruptive effects of the bran. Techniques such as proper hydration, adequate kneading, and giving the dough sufficient rest periods (like autolysing) can help strengthen the gluten network despite the presence of bran.
Achieving the right balance is crucial; too little gluten development results in a crumb that cannot hold its shape and collapses, leading to a dense whole wheat bread, while over-handling can also damage the fragile network. Mastering the art of gluten handling with whole wheat flour is key to achieving a light, open crumb structure.
Why Whole Wheat Flour Can Lead to Heavy Bread
Whole wheat flour inherently differs from white flour in its composition and behavior. Because it includes the entire wheat kernel – bran, germ, and endosperm – it is more absorbent and also contains components that interfere with the standard bread-making process designed primarily for refined flour. The higher fiber content from the bran absorbs more water but also makes the dough less pliable.
The germ, rich in nutrients and fats, can sometimes contribute to a shorter shelf life and can also impact gluten development. These factors combined make dough made purely from whole wheat flour heavier and less prone to developing the robust structure needed for a light loaf compared to dough made with white flour.
The increased weight and reduced elasticity mean whole wheat dough requires more effort to rise and hold its shape. It doesn't stretch as easily or trap gas as efficiently as white dough. This is why many dense whole wheat bread recipes either incorporate some white flour or use specialized techniques to improve the texture.
The challenge lies in working with the properties of whole wheat flour to create a loaf that is both nutritious and has a pleasant texture. Understanding that whole wheat flour behaves differently is the first step in adapting your baking process and avoiding a heavy, dense whole wheat bread result.
Common Mistakes Leading to Dense Whole Wheat Bread
Over-Mixing and Gluten Development Issues
While gluten development is crucial, there's a fine line, especially with whole wheat dough. Over-mixing whole wheat dough can actually damage the delicate gluten structure that you've worked to build. Unlike white flour dough, which can often withstand vigorous and prolonged kneading, the bran particles in whole wheat flour can start to tear the gluten network if subjected to excessive mechanical stress from a mixer or aggressive hand kneading. This leads to a dough that becomes slack, loses tension, and cannot support its own weight during proofing and baking, inevitably resulting in a dense whole wheat bread.
A dough that has been over-mixed will feel sticky and may even appear somewhat liquidy, lacking the smooth, elastic quality of properly developed dough. It won't hold a taut surface when shaped and will spread rather than rise upwards.
Recognizing the signs of sufficient kneading – when the dough is smooth, elastic, and passes the "windowpane" test (stretching a small piece thinly without tearing) – is vital. For whole wheat, this stage might be reached sooner or require gentler handling than you're used to with white flour, making careful attention to the dough's feel paramount in preventing a dense whole wheat bread recipe outcome.
Insufficient Hydration: The Key to Light Whole Wheat Bread
One of the most common reasons for dense whole wheat bread is insufficient hydration. Whole wheat flour is significantly more absorbent than white flour due to the presence of the bran and germ. If you use the same water-to-flour ratio you would for a white loaf, your whole wheat dough will be too dry. A dry dough is stiff, difficult to knead, and lacks the fluidity needed for the yeast to thrive and the gluten network to expand properly. It restricts the dough's ability to rise, resulting in a tight, heavy crumb structure.
Whole wheat dough often requires hydration levels of 75% or even higher (relative to the flour weight), while a typical white loaf might use 60-70%. This means for every 100 grams of whole wheat flour, you might need 75 to 85 grams or more of water.
While a wetter dough can be trickier to handle, it allows the flour to fully hydrate, softens the bran particles, and facilitates better gluten development and gas expansion. Don't be afraid of a sticky dough initially; a well-hydrated dough is essential for achieving a light and airy whole wheat bread, preventing the common issue of a dense whole wheat bread recipe gone wrong.
The Impact of Yeast Activity on Bread Texture
Yeast is the engine of your bread's rise. It consumes sugars in the flour and produces carbon dioxide gas, which is trapped by the gluten network, causing the dough to expand. If the yeast is not active or healthy, or if the conditions for its activity are not met, the dough will not rise properly, leading to a dense whole wheat bread. Factors affecting yeast activity include water temperature, the amount of yeast used, the presence of inhibitors (like salt added directly to yeast), and the temperature and duration of the proofing stages.
Using water that is too hot can kill the yeast (temperatures above 130°F or 54°C are generally lethal), while water that is too cold will slow it down significantly. Insufficient proofing time or a cool environment will also result in a lack of rise.
Conversely, over-proofing can also lead to a dense loaf; if the dough rises too much and then collapses, the gluten structure weakens, and it won't rise again in the oven. Ensuring your yeast is fresh and active, using the correct water temperature (ideally between 95-105°F or 35-40°C for active dry yeast), and providing the right proofing environment are critical steps to avoid a dense whole wheat bread outcome.
Inaccurate Measurements: A Recipe for Disaster
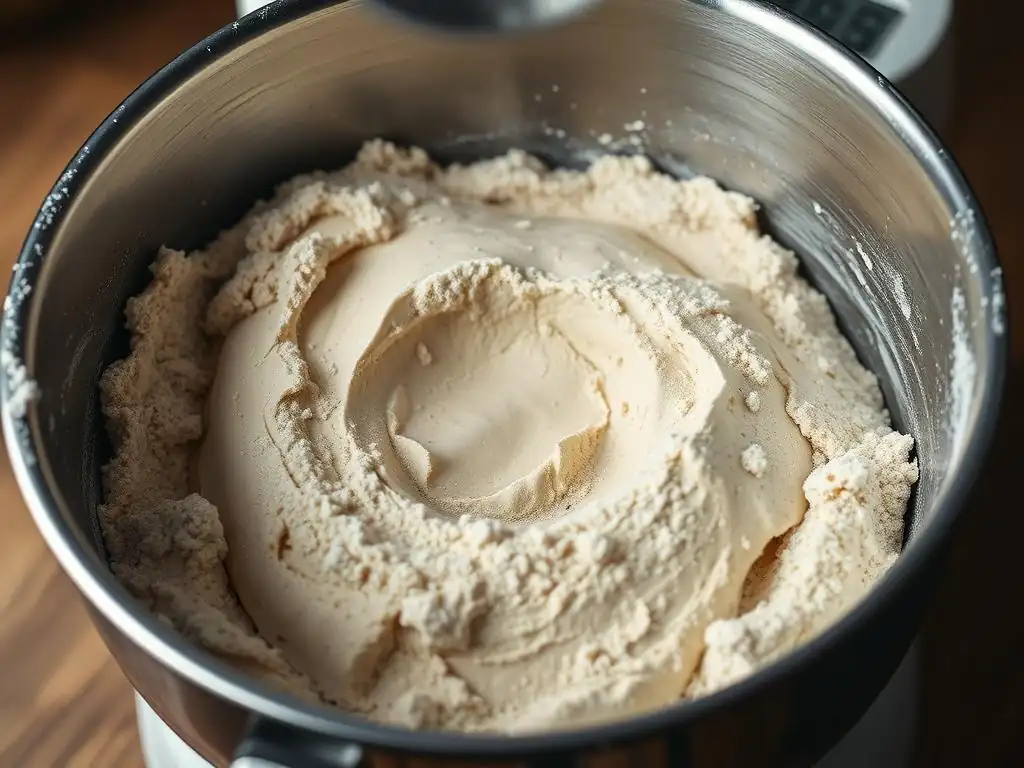
Baking is a science, and accuracy in ingredient measurements is paramount, especially when trying to avoid dense whole wheat bread. Using volume measurements (cups) for flour is notoriously inaccurate because flour compacts differently depending on how it's scooped. A cup of flour can vary in weight by as much as 20% depending on technique, leading to significant variations in the flour-to-liquid ratio. This inconsistency directly impacts hydration and gluten development, making it difficult to achieve repeatable results and often leading to a dough that is too dry or too wet, both of which can contribute to a dense texture.
For consistent, reliable results, particularly with whole wheat flour, using a digital kitchen scale to weigh your ingredients is highly recommended. Weighing flour ensures you are using the exact amount specified in the recipe, providing the correct hydration percentage and foundation for proper gluten development and yeast activity. This simple change from cups to grams or ounces can dramatically improve the consistency and quality of your whole wheat bread, moving you away from the frustration of a dense whole wheat bread recipe outcome towards light, airy loaves.
Incorrect Baking Temperature and Time
The baking process itself plays a crucial role in the final texture of your whole wheat bread. If the oven temperature is too low, the loaf will not experience a strong initial burst of rising (oven spring) before the crust sets. This initial rapid expansion is vital for achieving a light, open crumb.
A low temperature can also lead to the loaf drying out before it is fully cooked through, resulting in a heavy, potentially gummy texture inside and a thick, hard crust. Conversely, an oven that is too hot might cause the crust to set too quickly, restricting expansion, and could burn the outside before the inside is fully baked.
Baking whole wheat bread typically requires a high initial temperature, often in the range of 400-450°F (200-230°C), sometimes decreasing slightly after the initial oven spring. The duration of baking is also critical; under-baking leaves the interior moist and dense, while over-baking can dry it out.
Using an oven thermometer is recommended to ensure your oven is heating accurately. Baking for the correct time, until the crust is golden brown and the internal temperature reaches approximately 190-200°F (88-93°C), ensures the loaf is properly cooked through and has developed the desired light texture, helping you successfully avoid a dense whole wheat bread result.
Troubleshooting Your Dense Whole Wheat Bread
Analyzing Your Whole Wheat Bread Recipe
When faced with a dense whole wheat bread outcome, the first step is to critically analyze the recipe you used. Did it seem to have a high enough hydration level for whole wheat flour (typically 75% or more water relative to flour weight)? Was the yeast quantity appropriate for the amount of flour and the proofing time suggested?
Did the recipe call for specific kneading times or techniques? Sometimes, a recipe might be written for experienced bakers and assume certain knowledge, or it might simply not be optimized for achieving a light texture with 100% whole wheat flour. Look for clues in the ingredient list and instructions that might indicate potential issues, such as low water amounts or short proofing times.
Consider if the recipe provided weights for ingredients; if it only used volume measurements (cups), this is a significant potential source of error leading to inconsistent and potentially dense whole wheat bread. Also, check if the recipe mentioned specific temperatures for water or proofing. Comparing the recipe's parameters to general guidelines for baking with whole wheat flour can help pinpoint if the recipe itself was a contributing factor to your dense whole wheat bread. Don't be afraid to question the recipe and look for ways it might be adjusted for better results.
Identifying Potential Problem Areas in Your Baking Process
Once you've reviewed the recipe, think back through each step of your baking process. Where might things have gone wrong? Did you measure your ingredients accurately, ideally by weight? Was the water temperature correct when activating the yeast?
How did the dough feel during kneading – was it very stiff or did it become smooth and elastic? Did you perform a windowpane test to check gluten development? During proofing, did the dough double in size in the expected timeframe, and did you avoid over-proofing? How did the dough feel when you shaped it – was it easy to handle or did it resist shaping?
Finally, consider the baking stage. Was your oven preheated properly, and did you use an oven thermometer to verify the temperature? Did you bake the loaf for the full recommended time, and did you check its internal temperature for doneness? Even small deviations at each stage can compound to result in a dense whole wheat bread. Reflecting on the feel of the dough and the visual cues throughout the process can often reveal the steps where adjustments are needed for your next attempt at a whole wheat bread recipe.
Adjusting Your Recipe for a Lighter Crumb
Based on your analysis, you can make targeted adjustments to your whole wheat bread recipe to improve the texture. If hydration seemed low, increase the water amount gradually in your next bake, perhaps by 5-10% of the flour weight, until the dough feels significantly wetter and more pliable.
If you suspect insufficient gluten development, consider incorporating an autolyse step (mixing flour and water and letting it rest before adding yeast and salt) or extending the kneading time slightly, paying close attention to the dough's feel. If yeast activity was weak, ensure your water is the correct temperature and that your proofing environment is warm enough (around 75-80°F or 24-27°C).
If you used volume measurements, switch to weighing your ingredients using a digital scale for consistency. If the recipe called for a quick bake at a low temperature, try increasing the oven temperature and potentially using steam in the oven for the first part of the bake to encourage better oven spring. Small, informed adjustments based on troubleshooting are often the key to transforming a dense whole wheat bread recipe into a light, airy loaf. It might take a few attempts, but each bake is a learning opportunity.
Achieving the Perfect Light and Airy Whole Wheat Bread: Techniques and Tips
Optimizing Gluten Development for Whole Wheat Bread
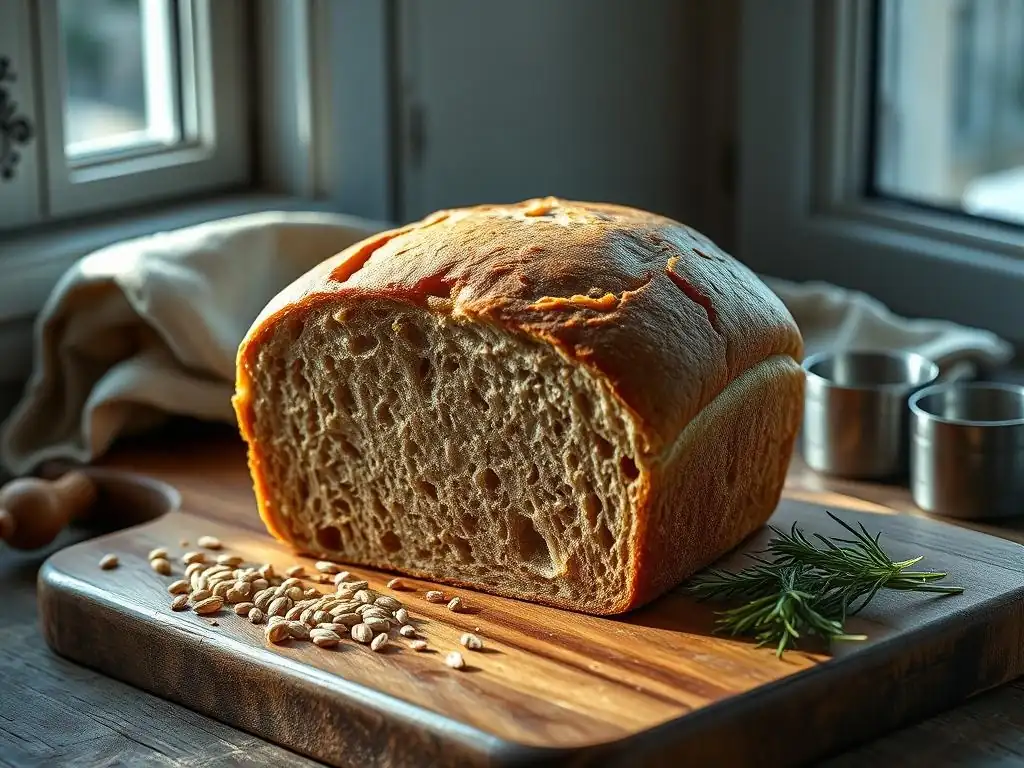
Developing a strong yet flexible gluten network is paramount for a light whole wheat loaf. The bran and germ interfere with this process, so specific techniques are needed. Unlike white flour, which can often be kneaded aggressively, whole wheat benefits from methods that are both effective at aligning gluten proteins and gentle enough to avoid tearing the network with the sharp bran particles. Achieving the right balance ensures the dough can trap gas and expand properly, preventing a dense whole wheat bread.
One highly effective technique is the "stretch and fold" method during bulk fermentation, which gently strengthens gluten without the harsh mechanical action of continuous kneading. Another is incorporating a portion of high-gluten white flour or vital wheat gluten into your whole wheat bread recipe to boost overall protein content and structure. Paying close attention to the dough's texture throughout the process – aiming for a dough that is extensible but still has tension – is key to optimizing gluten development and achieving the desired light texture.
The Importance of Autolysing Whole Wheat Flour
Autolysing is a simple yet powerful technique that can dramatically improve the texture of whole wheat bread. It involves mixing only the flour and water from the recipe and letting the mixture rest for 20 minutes to an hour (or even longer). During this rest period, the water fully hydrates the flour, and enzymes naturally present in the flour begin to break down proteins, initiating gluten development without any mechanical action. This process softens the bran and germ, making the dough more pliable and easier to knead once the yeast and salt are added.
By giving the flour a head start on hydration and gluten formation, autolysing reduces the total kneading time required and makes the dough more extensible. This gentler approach helps preserve the integrity of the gluten network, leading to better gas retention and a lighter, more open crumb structure in your finished whole wheat bread. For those struggling with dense whole wheat bread, incorporating an autolyse step can be a game-changer for your whole wheat bread recipe.
Proper Kneading Techniques for Whole Wheat Dough
Kneading develops the gluten network by aligning the protein strands. For whole wheat dough, the goal is to develop sufficient gluten without overworking it and tearing the network with the bran particles. If kneading by hand, use a gentle push-and-fold motion rather than aggressive pounding. If using a stand mixer, start on a low speed and gradually increase, monitoring the dough closely. Knead until the dough is smooth, elastic, and passes the windowpane test, but stop as soon as this stage is reached. Over-kneading is a common cause of dense whole wheat bread.
An alternative approach is to use minimal initial kneading followed by a series of "stretch and folds" during the bulk fermentation period. For instance, after mixing, let the dough rest for 30 minutes, then perform a set of stretches and folds every 30-60 minutes for the next 2-3 hours. This allows enzymes and time to contribute to gluten development with less mechanical stress, often resulting in a stronger, more extensible dough and a lighter crumb structure, helping you avoid the dreaded dense whole wheat bread result.
Mastering Hydration Levels for Whole Wheat Bread
Proper hydration is arguably the most critical factor in preventing dense whole wheat bread. Whole wheat flour needs significantly more water than white flour to achieve a workable, extensible dough. A well-hydrated dough allows the flour to fully absorb moisture, softens the bran, supports yeast activity, and facilitates the expansion of the gluten network, all of which contribute to a lighter texture. Ignoring the unique absorbency of whole wheat flour is a guaranteed path to a heavy, dense whole wheat bread recipe outcome.
Experimenting with hydration levels is essential. Start with a hydration level of at least 75% (grams of water per 100 grams of flour) for 100% whole wheat, and be prepared to go higher, potentially up to 85% or even 90%, depending on the specific flour and environmental conditions. While wetter doughs can be stickier and harder to handle, they result in a much lighter crumb. Techniques like using wet hands or a bench scraper can help manage sticky dough.
How to Determine the Right Amount of Water
Determining the exact right amount of water for your whole wheat bread recipe can vary slightly depending on the specific brand and type of whole wheat flour you are using, as well as ambient humidity. A good starting point for 100% whole wheat is a hydration of 75-80%. For example, if your recipe uses 500 grams of whole wheat flour, you would start with 375-400 grams (or milliliters) of water. However, observe the dough as you mix. It should come together but feel quite wet and shaggy.
Add water gradually if needed, perhaps a tablespoon at a time, until the dough is sticky but still manageable. It should not feel stiff or dry. It's better to have a slightly wetter dough that's challenging to handle than a dry one that will result in dense whole wheat bread. Over time, you will develop a feel for the correct dough consistency for your specific flour and environment. Keep notes on how much water you used and the resulting texture to refine your whole wheat bread recipe.
Understanding Dough Consistency
The consistency of your whole wheat dough is a direct indicator of its hydration level and gluten development. A properly hydrated whole wheat dough will be sticky but should still hold some shape. It won't be as smooth or elastic as a white dough at the same stage, but it should develop tension as you knead or perform stretch and folds.
If the dough feels stiff, crumbly, or doesn't come together easily, it's likely too dry and needs more water. If it's a completely unmanageable, liquidy batter, it might be too wet, though a very wet dough is often desired for maximum lightness (like in no-knead recipes).
During bulk fermentation and proofing, observe how the dough behaves. A well-developed, properly hydrated dough will expand significantly and hold its shape reasonably well. If it spreads out into a flat disc or tears easily, it might indicate issues with hydration or gluten development, both contributing factors to dense whole wheat bread. Learning to read the dough's consistency through touch and sight is one of the most valuable skills in baking.
Enhancing Yeast Activity in Whole Wheat Dough
Robust yeast activity is essential for a good rise and a light texture. Whole wheat flour can sometimes slow down yeast slightly due to its composition. Ensuring your yeast is active and providing optimal conditions for fermentation will help your dough rise sufficiently and prevent a dense whole wheat bread. This involves using the correct water temperature, giving the dough enough time to proof, and potentially giving the yeast a head start.
Make sure your water temperature is appropriate for the type of yeast you are using (e.g., 100-110°F or 38-43°C for active dry yeast, cooler for instant yeast mixed directly with flour). Ensure your proofing environment is warm and consistent, ideally around 75-80°F (24-27°C). If your kitchen is cool, use a proofing box, a warm oven with the light on, or another warm spot. Adequate proofing time allows the yeast to produce enough gas to lighten the dough.
Proofing Your Dough Properly
Proofing is the period where the shaped dough rises before baking. Under-proofing means the dough hasn't expanded enough, resulting in a dense, heavy loaf.
Over-proofing means the dough has risen too much, the gluten network has become overstretched and weak, and it will collapse in the oven, also leading to a dense whole wheat bread. For whole wheat dough, proofing times can vary depending on temperature and yeast amount, but a general guideline is to proof until the dough is visibly larger (often doubled in size or close to it) and passes the "poke test" – when gently poked, the indentation springs back slowly but not completely.
Be patient during proofing. Whole wheat dough can sometimes take longer to rise than white dough. Observe the dough itself rather than strictly adhering to time limits in a recipe, as ambient temperature plays a huge role. A correctly proofed loaf has enough trapped gas to expand beautifully in the oven, contributing to a light and airy crumb, helping you avoid a dense whole wheat bread outcome.
Using a Preferment for Improved Flavor and Texture
Incorporating a preferment (like a poolish, biga, or sourdough starter) into your whole wheat bread recipe can significantly enhance both flavor and texture, often leading to a lighter loaf. A preferment is a portion of the flour and water mixed with a small amount of yeast (or sourdough culture) and left to ferment for several hours or overnight. This long, slow fermentation develops complex flavors and helps strengthen the gluten network.
When the preferment is added to the final dough, it contributes acidity, which can strengthen the gluten structure, and provides a head start on fermentation, leading to a more vigorous rise. The extended fermentation also allows enzymes more time to break down starches and proteins, improving the dough's handling properties and the final crumb texture. Using a preferment is an excellent technique for bakers seeking to elevate their whole wheat bread from good to exceptional and consistently avoid dense results.
The Importance of Accurate Measurements
Reiterating the point, accurate measurement is non-negotiable for successful baking, especially when tackling a whole wheat bread recipe where small variations can have significant impacts on texture. The variability of volume measurements for flour is the most common culprit behind inconsistent results and often leads to a hydration level that is too low, a primary cause of dense whole wheat bread.
Imagine two bakers using the same recipe calling for "3 cups of whole wheat flour." One scoops the flour directly from the bag, compacting it, resulting in perhaps 400 grams. The other lightly spoons the flour into the cup and levels it, getting 350 grams. If the recipe calls for 300 grams of water, the first baker has a hydration of 75% (300/400), while the second has 85.7% (300/350). These are vastly different dough consistencies, leading to potentially different outcomes, one possibly a lovely light loaf, the other a dense whole wheat bread.
Using a Kitchen Scale for Consistent Results
A digital kitchen scale is an indispensable tool for any serious baker, particularly when working with whole wheat flour. Weighing ingredients in grams or ounces provides exact measurements, ensuring that your flour-to-water ratio (hydration) is precisely what the recipe intends. This eliminates the variability associated with volume measurements and is the single most effective step you can take to achieve consistent, repeatable results with your whole wheat bread recipe.
Most recipes designed for consistent results, especially those from professional sources or experienced bakers, will provide ingredient weights. Investing in a scale is relatively inexpensive and will pay dividends in the quality and consistency of your baked goods, helping you bake lighter, airier whole wheat bread every time and leaving dense whole wheat bread behind.
Understanding Flour Density Variations
Even when weighing, it's helpful to understand that different types and brands of whole wheat flour can have slight variations in density and absorption. Factors like the specific wheat variety, how finely it's ground, and its protein content can affect how much water it absorbs. This is why even with precise weights, a recipe might suggest holding back a small amount of water initially and adding more only if the dough feels too dry.
Experienced bakers learn to adjust based on the feel of the dough. While a scale provides the necessary accuracy for the recipe's starting point, paying attention to the dough's consistency during mixing and kneading allows for minor adjustments to hydration, ensuring optimal conditions for gluten development and yeast activity, and ultimately preventing a dense whole wheat bread outcome.
Baking Techniques for a Light Whole Wheat Bread
The final stage, baking, is where the dough's potential for lightness is realized. Proper baking technique ensures maximum oven spring, sets the crust, and cooks the interior thoroughly. Incorrect baking can negate all the careful work done during mixing, kneading, and proofing, resulting in a dense whole wheat bread even if the dough was perfect beforehand.
Baking whole wheat bread at a high initial temperature encourages rapid gas expansion before the crust hardens, creating a light interior. Using steam in the oven during the first part of the bake keeps the crust soft and pliable, allowing for maximum expansion (oven spring). Once the loaf has expanded sufficiently, removing the steam allows the crust to brown and crisp up.
Oven Temperature and Steaming Techniques
Preheating your oven sufficiently to a high temperature (e.g., 450°F or 230°C) is crucial. A well-preheated oven provides the necessary heat shock for optimal oven spring. Baking whole wheat bread often benefits from a steamy environment during the first 15-20 minutes. Steam helps keep the surface of the dough moist, delaying the formation of a hard crust and allowing the loaf to expand more fully before the crust sets.
There are several ways to create steam:
- Placing a tray of hot water on the bottom rack of the oven before preheating.
- Spraying the oven walls with water (carefully!) immediately after placing the loaf inside.
- Baking the bread in a Dutch oven or lidded pot, which traps the moisture released by the dough.
Using steam is a highly effective technique for achieving a beautiful crust and a lighter, airier crumb, directly addressing issues that can lead to dense whole wheat bread.
Checking for Doneness
Knowing when your whole wheat bread is fully baked is essential to prevent a dense, gummy interior or an overly dry loaf. The crust should be a deep golden brown color. A reliable test for doneness is checking the internal temperature with an instant-read thermometer; a fully baked whole wheat loaf should register between 190°F and 200°F (88-93°C) in the center.
Another traditional test is tapping the bottom of the loaf; it should sound hollow. If the crust is brown but the internal temperature is too low, or it doesn't sound hollow, the loaf needs more time in the oven. Under-baked bread will be heavy and potentially gummy, a classic sign of dense whole wheat bread. Baking to the correct internal temperature ensures the structure is set and the moisture content is just right for a light, pleasant texture.
A Foolproof Recipe for Light and Airy Whole Wheat Bread
BakeWithEase's Secret to a Perfect Whole Wheat Bread Recipe
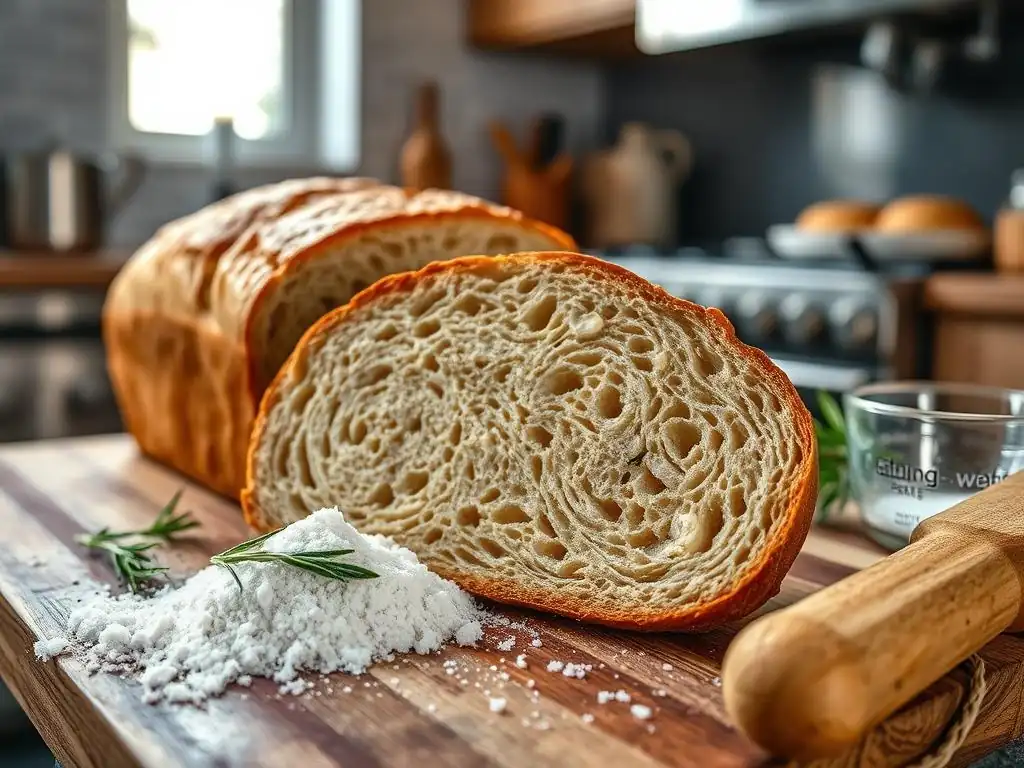
Achieving a consistently light and airy whole wheat loaf requires more than just a list of ingredients; it's about understanding the process and the unique properties of whole wheat flour. Our approach at BakeWithEase emphasizes proper hydration, gentle yet effective gluten development, patience during fermentation, and optimal baking conditions.
The "secret" lies in respecting the flour and employing techniques that work with its characteristics, rather than against them. We focus on a higher hydration level than you might expect, often starting around 80% water to flour weight, and utilize techniques like an autolyse and multiple sets of stretch and folds during bulk fermentation to build strength without tearing the delicate gluten network.
Furthermore, our whole wheat bread recipe philosophy includes a relatively long, slow fermentation period, either at room temperature or with a portion done in the refrigerator, to develop complex flavors and strengthen the dough structure over time. We advocate for weighing ingredients for precision, using a reliable yeast, and baking in a hot, steamy environment to maximize oven spring. It's these combined elements – attention to hydration, careful gluten handling, patient fermentation, and proper baking – that transform a potentially dense whole wheat bread recipe into a consistently successful bake, yielding loaves that are both nutritious and delightfully light.
Step-by-Step Instructions for Our Whole Wheat Bread Recipe
While specific quantities will vary based on loaf size, our general process for a light whole wheat bread recipe involves several key stages:
- Autolyse: Combine all the whole wheat flour from the recipe with the specified amount of water (e.g., 80% of flour weight). Mix just until no dry flour remains. Let rest, covered, for 30-60 minutes. This step is crucial for softening the bran and starting gluten development, helping prevent dense whole wheat bread.
- Mix Dough: Add the yeast (dissolved in a small amount of warm water if active dry) and salt to the autolysed mixture. Mix until incorporated. If adding vital wheat gluten, add it here with the yeast and salt.
- Initial Kneading/Mixing: Knead gently for 5-10 minutes by hand or mixer until the dough starts to show some structure but may still be a bit shaggy. It will be sticky due to the high hydration.
- Bulk Fermentation with Stretch & Folds: Place the dough in a lightly oiled bowl. Over the next 2-3 hours (at room temperature, around 75°F/24°C), perform 3-4 sets of stretch and folds at 30-45 minute intervals. For each set, wet your hands, grab one side of the dough, stretch it upwards, and fold it over the center. Rotate the bowl and repeat 3-4 times. This builds strength gradually. The dough should become smoother and more elastic with each set.
- Proofing: Allow the dough to complete bulk fermentation until it has increased significantly in volume (perhaps 75-100%) and feels airy. This might take 1-2 more hours after the last stretch and fold.
- Shape: Gently turn the dough out onto a lightly floured surface. Preshape it into a rough ball or log and let rest for 15-20 minutes. Then, shape it into the final loaf shape (batard, boule, pan loaf), creating tension on the surface.
- Final Proofing: Place the shaped loaf into a proofing basket (banneton) or a greased loaf pan. Cover and let proof until it is visibly expanded and passes the poke test (indentation springs back slowly). This could take 1-2 hours at room temperature or longer if retarded in the refrigerator. Do not over-proof!
- Bake: Preheat your oven and baking vessel (Dutch oven or baking stone/steel) to a high temperature (e.g., 450°F / 230°C). Score the loaf. If using a Dutch oven, carefully transfer the loaf into it, cover, and bake for [e.g., 20 minutes]. If baking on a stone/steel, use steam methods (water tray, spraying oven).
- Finish Baking: Remove the lid (if using a Dutch oven) or remove steam source. Reduce oven temperature slightly (e.g., to 425°F / 220°C) and continue baking for another [e.g., 20-30 minutes] until the crust is deep golden brown and the internal temperature reaches 190-200°F (88-93°C).
- Cool: Transfer the baked loaf to a wire rack and let it cool completely before slicing. Slicing too early can result in a gummy texture, another form of dense whole wheat bread.
Following these steps, focusing on the dough's development and feel at each stage, dramatically increases your chances of baking a light and airy whole wheat bread instead of a dense one.
Tips for Customizing Your Whole Wheat Bread
Once you've mastered the basic light whole wheat bread recipe, you can start customizing it. Adding seeds (like sunflower, sesame, or flax) or chopped nuts (walnuts, pecans) can add flavor and texture, but they can also slightly impact hydration and gluten development. If adding seeds, consider soaking them beforehand to prevent them from absorbing moisture from the dough during fermentation, which could lead to a drier, potentially dense whole wheat bread.
You can also experiment with adding spices like cinnamon or caraway, dried fruits, or even cooked grains for added complexity. If incorporating heavier additions, you might need to slightly increase the hydration or adjust the dough's handling to maintain a light structure. Remember that any significant additions will alter the base whole wheat bread recipe, so make changes gradually and observe the results.
Variations and Alternatives for Whole Wheat Bread
Exploring Different Types of Whole Wheat Flour
Not all whole wheat flour is created equal, and the type you use can impact the texture of your whole wheat bread recipe. "Standard" whole wheat flour is typically ground from hard red wheat and includes all parts of the kernel. It has a robust flavor and high protein content but the bran can be quite sharp, making it challenging for gluten development. For a potentially lighter loaf, consider using whole wheat flour labeled "finely ground" or "pastry whole wheat," which has smaller bran particles that interfere less with gluten.
Another excellent option is whole white wheat flour. This is whole grain flour ground from hard white wheat, a different variety than red wheat. It has the same nutritional profile as red whole wheat but a milder flavor and often produces a lighter-colored, slightly softer crumb. Experimenting with different types of whole wheat flour can help you find the one that best suits your desired texture and helps you consistently bake light whole wheat bread.
Adding Seeds, Nuts, and Other Ingredients
Adding ingredients like seeds, nuts, dried fruits, or cooked grains is a popular way to enhance whole wheat bread. These additions bring flavor, texture, and nutritional benefits. Common additions include flax seeds, chia seeds, sunflower seeds, pumpkin seeds, walnuts, raisins, cranberries, or cooked oats or quinoa.
When adding these ingredients to your whole wheat bread recipe, consider their impact on hydration. Seeds and dry ingredients will absorb moisture, so you might need to slightly increase the overall hydration of the dough. Soaking seeds or grains before adding them can help prevent them from stealing moisture from the dough. Distribute additions evenly during the mixing or initial folding stages. While additions can make the dough slightly heavier, proper hydration and gluten development techniques will still allow you to achieve a light crumb, avoiding a dense whole wheat bread despite the extra weight.
Making a Whole Wheat Sourdough Bread for Enhanced Flavor
For those seeking deeper flavor and often a more open crumb structure, converting your whole wheat bread recipe to a sourdough version is a fantastic option. Sourdough relies on a natural leavening culture (a mix of wild yeasts and bacteria) instead of commercial yeast. The long, slow fermentation process inherent in sourdough baking breaks down starches and proteins more thoroughly, resulting in enhanced flavor, better digestibility, and often a stronger gluten network capable of trapping more gas, leading to a lighter loaf.
While sourdough baking has its own learning curve, applying the principles of proper hydration, careful gluten development (stretch and folds are perfect for sourdough), and patient proofing are just as important, if not more so, than with commercial yeast whole wheat bread. The acidity produced by the bacteria in the sourdough culture also helps strengthen the gluten. Mastering a whole wheat sourdough bread recipe can be incredibly rewarding, yielding loaves that are complex in flavor and delightfully light, a far cry from dense whole wheat bread.
Frequently Asked Questions
What are the most common reasons why my whole wheat bread turns out dense?
The most common reasons include using too much whole wheat flour, insufficient gluten development, and inadequate hydration. These factors prevent the bread from rising properly.
How can I improve the texture of my dense whole wheat bread?
You can improve the texture by adding vital wheat gluten to increase gluten strength, kneading the dough thoroughly, and ensuring proper proofing to allow the bread to rise fully.
What type of flour should I use in a whole wheat bread recipe to avoid density?
Using a blend of whole wheat flour and bread flour can help. Also, consider using finely milled whole wheat flour for a lighter texture.
Does the hydration level affect the density of whole wheat bread?
Yes, adequate hydration is crucial. Whole wheat flour absorbs more water than white flour. Therefore, ensure you add enough liquid to achieve a slightly sticky dough.
How does proofing time influence the density of my whole wheat bread?
Insufficient proofing often results in dense bread. Ensure the dough doubles in size during proofing, allowing the yeast to fully develop and create air pockets for a lighter texture.
Final Reflection: The Enduring Allure of Dense Whole Wheat Bread
The quest for the perfect loaf of dense whole wheat bread is more than just a culinary pursuit; it's a reflection of our desire for wholesome, nourishing food that connects us to tradition and satisfies our deepest cravings. The recipes and techniques explored in this article highlight the importance of understanding the interplay between hydration, fermentation, and flour type in achieving that satisfyingly dense crumb. This isn't simply about following a recipe; it's about mastering a process that yields a truly rewarding result.
The enduring appeal of dense whole wheat bread lies in its ability to transcend mere sustenance and become a symbol of comfort, tradition, and mindful eating. It's a bread that speaks to our primal need for hearty, flavorful food, a connection to simpler times, and a celebration of the earth's bounty. As someone who has spent countless hours experimenting with different techniques, I can attest to the profound satisfaction of finally achieving that perfect, dense crumb. Bread is the staff of life,
a simple phrase, yet it encapsulates the profound role bread plays in our cultures and our individual lives.
Now, it's your turn. Don't just read these recipes; experience them. Embrace the process, experiment with different flours and techniques, and discover the joy of creating something truly nourishing and delicious with your own hands. The journey to the perfect loaf is a personal one, filled with learning, experimentation, and ultimately, the immense satisfaction of sharing your creation with those you love. The dense whole wheat bread you bake will be more than just food; it will be a testament to your dedication, your patience, and your connection to the age-old art of baking.
Unlock the Secrets of Perfectly Dense Whole Wheat Bread!
Thanks for taking the time to explore the world of dense whole wheat bread with us! We hope you now feel empowered to tackle this baking challenge with confidence. Ready to put your new knowledge into action?
- Bake your own loaf today! Use the techniques and tips we shared to create a delicious, perfectly dense whole wheat masterpiece. Experiment with different flours and add-ins to find your perfect recipe.
- Share your baking journey! Post a picture of your creation on social media and tag us – we'd love to see your results!
- Explore other whole grain baking adventures on our site; we have tons of resources to help you expand your baking horizons.
What unique ingredient will you try in your next dense whole wheat bread experiment?