
The Ultimate Easy Guide to Flatbread Baking

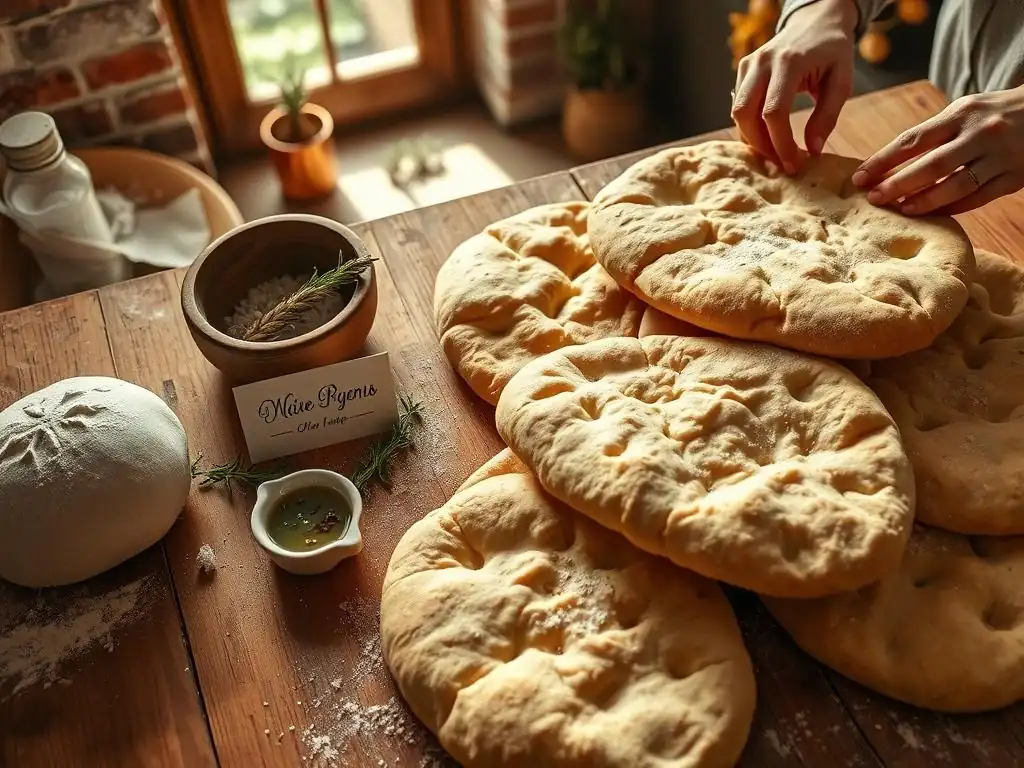
Welcome to BakeWithEase, your kitchen companion for turning baking dreams into delicious realities! Ever wished you could whip up warm, satisfying bread with minimal effort? Our Easy Homemade Flatbread Recipe Guide is your starting point. Discover the surprisingly simple secrets to crafting perfect flatbread, and prepare to be amazed at how quickly you can create restaurant-quality results. Curious to learn more? Let's get baking!
- Culinary Delights Presents: The Art of Authentic Naan Bread
- Why Bake Your Own Naan? The Magic of Homemade Naan
- Essential Ingredients for Perfect Naan Bread
- Step-by-Step: Our Authentic Naan Bread Recipe Guide
- Tandoor Naan: The Traditional Cooking Method
- Oven-Baked Naan: A Convenient and Accessible Method
- Stovetop Naan: A Quick and Easy Alternative
- Flavor Variations: Naan Bread Recipe Ideas to Explore
- Serving Suggestions: Pairing Naan with Your Favorite Dishes
- Troubleshooting: Common Naan Baking Problems and Solutions
- Storing Your Homemade Naan: Keeping It Fresh
- Beyond the Basics: Elevating Your Naan Baking
- Frequently Asked Questions
- Final Reflection: The Enduring Appeal of Simple Baking
- Unleash Your Inner Baker: Craft the Perfect Flatbread!
Culinary Delights Presents: The Art of Authentic Naan Bread
Welcome to the wonderful world of baking! Today, we're diving into one of the most beloved flatbreads across the globe: Naan. This soft, pillowy bread, often associated with Indian cuisine, is surprisingly simple to make right in your own kitchen. Forget dry, store-bought versions – mastering homemade naan bread is a rewarding experience that brings incredible flavor and texture to your table. Think of this as your ultimate easy guide to making delicious, authentic flatbread at home.
Naan is more than just a side dish; it's a culinary canvas. Its versatility allows it to be paired with rich curries, used as a base for quick pizzas, or simply enjoyed on its own, warm and brushed with melted ghee. This easy homemade flatbread recipe guide will walk you through each step, demystifying the process and showing you how to achieve that perfect, slightly charred, yet incredibly soft texture that makes naan so special. Get ready to impress yourself and your loved ones with your newfound naan-making skills!
Why Bake Your Own Naan? The Magic of Homemade Naan
Baking your own naan bread offers a multitude of advantages over relying on store-bought options. While convenient, commercial naan often lacks the nuanced flavor, delightful texture, and sheer warmth that comes from a freshly baked batch. Embarking on the journey of making homemade naan bread is an act of creating something truly special, transforming simple ingredients into a culinary masterpiece right before your eyes.
Choosing to create an easy homemade flatbread recipe guide like this isn't just about following steps; it's about experiencing the joy of baking. The aroma that fills your kitchen as the dough proofs and cooks is incomparable. Furthermore, knowing exactly what goes into your bread gives you peace of mind and the ability to tailor it to your specific preferences or dietary needs. It's a rewarding process from start to finish.
Unmatched Freshness and Flavor: The Superior Taste of Homemade Naan
The most significant difference between homemade and store-bought naan is the freshness. When you bake naan at home, you enjoy it moments after it comes off the heat, at its peak flavor and texture. The subtle tang from the yogurt, the richness from the ghee or butter, and the slightly smoky char from cooking combine to create a depth of flavor that pre-packaged versions simply cannot replicate. Imagine tearing into a warm piece that's still slightly steamy inside – that's the magic of fresh, homemade naan.
Store-bought naan, designed for a longer shelf life, often contains preservatives and stabilizers that can compromise taste and texture. While they serve a purpose, they inherently lack the vibrant, fresh notes of bread made with simple, natural ingredients just hours or minutes before consumption. The difference is often described as night and day, with homemade naan providing a far superior sensory experience that elevates any meal it accompanies.
Ingredient Control: Crafting Wholesome and Authentic Naan
Making your own naan bread gives you complete control over the ingredients used. You can select high-quality flour, fresh yogurt, and the best yeast, ensuring your bread is free from artificial additives or hydrogenated oils sometimes found in commercial products. For those with sensitivities or specific dietary preferences, this control is invaluable, allowing you to choose organic ingredients or make small adjustments, like using dairy-free yogurt.
This level of control also means you can tailor the naan to your liking. Want it richer? Add a little more ghee. Prefer a specific type of flour? Experiment with blends. An easy homemade flatbread recipe guide empowers you to make these choices, resulting in a product that's not only delicious but also aligns with your personal standards for wholesome food. It's about crafting authentic naan that you feel good about eating.
Cost Savings: Enjoying Restaurant-Quality Naan at Home
Baking naan at home is significantly more cost-effective than purchasing it from restaurants or grocery stores. The primary ingredients – flour, yogurt, yeast, sugar, salt, and oil or ghee – are relatively inexpensive staples. A single batch, which might yield 6-8 large pieces of naan, costs just a fraction of what you would pay for the same amount at a restaurant or even a specialty grocery store.
Consider the typical cost. A pound of all-purpose flour might cost around $0.50-$1.00, a container of yogurt maybe $1.00-$2.00, and yeast and other ingredients add minimal cost per batch. For a total ingredient cost perhaps under $3.00, you can produce naan that would easily cost $10-$15+ if ordered out. This easy homemade flatbread recipe guide helps you achieve delicious, restaurant-quality naan without the premium price tag, making it a smart choice for both your palate and your wallet.
Essential Ingredients for Perfect Naan Bread
Creating perfect homemade naan bread starts with understanding the role each ingredient plays. While the list is relatively short and simple, the quality and interaction of these components are key to achieving the desired soft, chewy texture and rich flavor. Think of these as the building blocks for your easy homemade flatbread recipe guide journey.
Getting these basics right ensures a successful bake every time. Using fresh, active ingredients makes a significant difference in the dough's rise and the final texture of the naan. Let's break down the purpose of each essential element in your homemade naan bread recipe.
Flour Selection: Using All-Purpose or Bread Flour for Naan
The type of flour you choose directly impacts the texture of your naan. All-purpose flour is widely available and works beautifully, producing a soft and tender naan. It typically has a protein content of around 10-12%, which develops just enough gluten for a good structure without making the naan tough. This makes it an excellent choice for an easy homemade flatbread recipe guide.
Bread flour, with its higher protein content (typically 12-14%), will develop more gluten during kneading. This results in a chewier naan with a slightly more elastic texture. While some bakers prefer this chewiness, it can also make the dough a bit trickier to handle for beginners. For a truly easy homemade naan recipe, starting with all-purpose flour is often recommended.
Yogurt's Role: Achieving Softness and Tang in Naan Dough
Yogurt is a cornerstone ingredient in many authentic naan recipes, and for good reason. Its acidity helps to tenderize the gluten in the dough, contributing significantly to the naan's characteristic softness. Plain, full-fat yogurt is usually preferred, as the fat also adds richness and moisture. About 1/4 to 1/2 cup of yogurt per 2-3 cups of flour is a common ratio.
Beyond tenderness, yogurt also adds a subtle tanginess that balances the richness of the bread and the dishes it's served with. This unique flavor profile is part of what distinguishes naan from other flatbreads. Using plain, unsweetened yogurt is crucial; flavored or sweetened varieties will alter the taste of your homemade naan bread in unintended ways.
Yeast Activation: Ensuring Proper Rise for Light and Airy Naan
Yeast is the leavening agent that makes naan light and airy, giving it those wonderful bubbles and pockets when cooked. Most recipes call for active dry yeast or instant yeast. To ensure your yeast is active, especially if using active dry yeast, it's best to "proof" it first. This involves dissolving the yeast (about 1-2 teaspoons per 2-3 cups of flour) and a pinch of sugar in warm water (around 105-115°F or 40-46°C) for 5-10 minutes. If it becomes foamy, the yeast is alive and ready to work.
Instant yeast can often be mixed directly with the dry ingredients, but proofing it in warm water (slightly cooler, around 120-130°F or 49-54°C, is fine) can still help ensure a good rise and distribute it evenly. Proper yeast activation is vital for the dough to double in size during the first proofing, which is essential for a fluffy homemade naan bread. Without sufficient rise, your naan will be dense and flat.
Ghee or Butter: Adding Richness and Flavor to Naan
Fat, in the form of ghee or melted butter, plays a crucial role in enriching the naan dough and adding flavor. Ghee, clarified butter, is traditionally used and provides a distinct nutty richness. It can be added directly to the dough or brushed onto the naan after cooking for a glossy finish and extra flavor boost. About 2-4 tablespoons per batch is typical.
If ghee isn't available, melted unsalted butter is an excellent substitute, offering similar richness. Some recipes also use a small amount of vegetable oil in the dough for moisture and tenderness. Brushing the hot naan with melted ghee or butter just after cooking is a simple step that elevates the flavor and keeps the bread soft. It's a signature touch for authentic homemade naan bread.
Step-by-Step: Our Authentic Naan Bread Recipe Guide
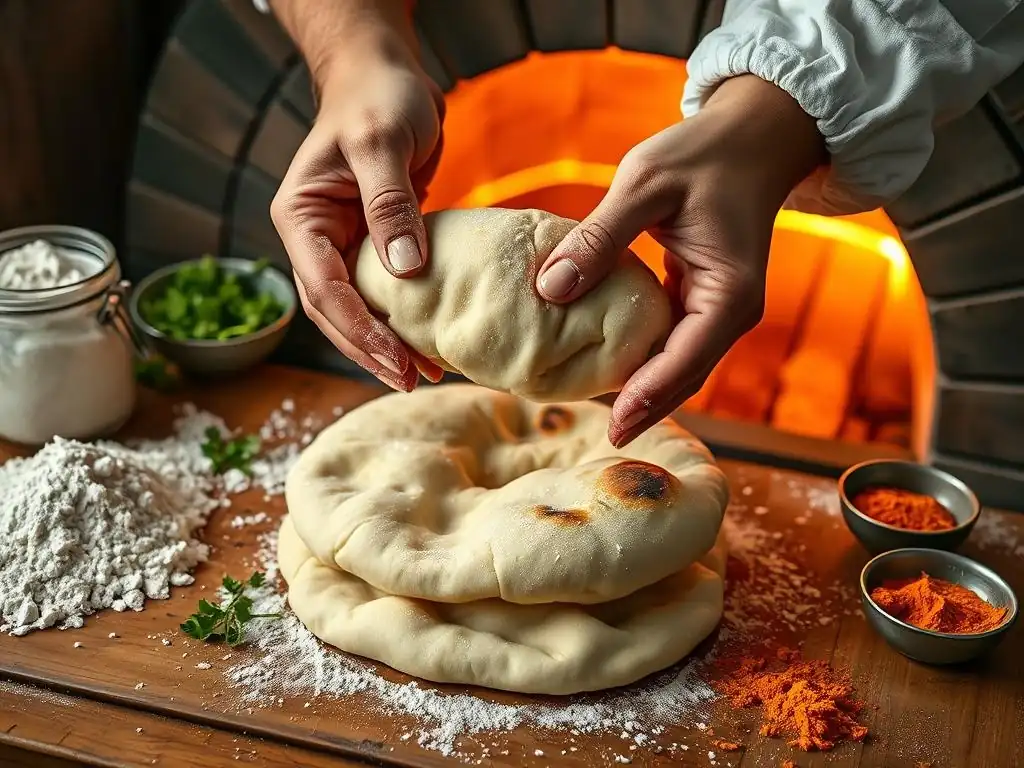
Ready to bake? This easy homemade flatbread recipe guide breaks down the process into manageable steps. From mixing the dough to cooking the naan, we'll walk you through everything you need to know to create delicious homemade naan bread in your kitchen.
Follow these instructions carefully, and you'll be enjoying warm, fresh naan in no time. Remember, baking is a process, and slight variations in environment (like room temperature) can affect timing, so pay attention to the visual cues described.
Dough Preparation: Mixing and Kneading for Optimal Texture
Begin by combining the dry ingredients: flour, salt (about 1 teaspoon per 2-3 cups flour), and sugar (about 1 teaspoon). If using active dry yeast, add the proofed yeast mixture; if using instant yeast, add it directly to the dry ingredients. Then, add the wet ingredients: yogurt, oil or melted ghee, and enough warm water (start with about 1/2 to 3/4 cup per 2-3 cups flour) to bring everything together into a shaggy dough.
Turn the dough out onto a lightly floured surface and knead. Kneading develops the gluten, which is crucial for naan's texture. Knead for about 5-10 minutes until the dough is smooth, elastic, and no longer sticky. It should spring back slowly when poked. Avoid adding too much extra flour during kneading; a slightly tacky dough is better than a dry one. Proper kneading is key to a tender homemade naan bread.
First Proofing: Allowing the Dough to Rise for Fluffiness
Once kneaded, shape the dough into a ball. Lightly oil a large bowl, place the dough ball inside, and turn it to coat with oil. Cover the bowl tightly with plastic wrap or a damp cloth. Place the bowl in a warm place to rise. An oven with just the light on is a great spot, typically reaching around 80-90°F (27-32°C).
Allow the dough to rise until it has roughly doubled in size. This usually takes about 1 to 1.5 hours, depending on the warmth of the environment and the yeast's activity. This first proofing is essential for developing the airy pockets that are characteristic of perfect homemade naan bread. A slow, steady rise builds flavor and texture.
Dividing and Shaping: Creating Even Naan Portions
After the first proofing, gently punch down the dough to deflate it. Turn the dough out onto a lightly floured surface. Knead it briefly, just enough to bring it together. Divide the dough into equal portions. For standard-sized naan, dividing the dough into 6 to 8 pieces is typical. This will yield naan roughly 6-8 inches in diameter.
Shape each portion into a smooth ball. You can do this by pulling the edges of the dough underneath the ball and pinching them together, creating surface tension. Cover the dough balls loosely with plastic wrap or a clean towel and let them rest for about 10-15 minutes. This rest period allows the gluten to relax, making the dough much easier to roll out evenly into your easy homemade flatbread shapes.
Rolling Out the Dough: Achieving the Ideal Thickness and Shape
Take one dough ball and place it on a lightly floured surface. Using a rolling pin, roll the dough out into an oval, teardrop, or round shape, about 1/8 to 1/4 inch thick. Naan is traditionally not perfectly round, so embrace the rustic shapes! Aim for relatively even thickness so the naan cooks evenly.
Avoid rolling the dough too thin, as it might become crispy rather than soft and chewy. If the dough springs back excessively while rolling, let it rest for another 5 minutes before trying again. This step is crucial for getting the right texture in your homemade naan bread before it hits the heat.
Cooking Methods: Tandoor, Oven, or Stovetop Naan
Naan is traditionally cooked in a tandoor, a cylindrical clay oven that reaches extremely high temperatures, cooking the bread quickly and giving it its signature char and puff. However, you can achieve excellent results using more accessible methods at home. The most common alternatives are using a very hot oven (simulating tandoor heat) or cooking on a stovetop, typically in a cast-iron skillet.
Each method offers a slightly different result but can produce delicious homemade naan bread. The oven method often yields a puffier naan, while the stovetop method is quicker and easier for beginners, providing a lovely char. This easy homemade flatbread recipe guide covers all three approaches so you can choose the one that works best for you.
Tandoor Naan: The Traditional Cooking Method
Cooking naan in a tandoor is the authentic way, resulting in that unique smoky flavor and perfect texture. While most home kitchens don't have a dedicated tandoor, we can replicate the conditions to get as close as possible to traditional tandoor-style homemade naan bread. High heat is the absolute key here.
The intense, radiant heat of a tandoor cooks the naan almost instantly, causing it to puff dramatically and develop beautiful charred spots. Replicating this requires getting your cooking surface extremely hot, much hotter than typical baking temperatures.
Simulating a Tandoor: Using a Pizza Stone or Baking Steel
To simulate the intense heat of a tandoor in a standard oven, a pizza stone or baking steel is your best friend. These surfaces absorb and retain heat incredibly well, providing a scorching-hot surface for the naan dough to cook on as soon as it's placed down. A baking steel generally retains heat better and cooks faster than a stone.
Place your pizza stone or baking steel in your oven on the top rack (or second to top) and preheat the oven to its highest possible temperature, typically 500°F to 550°F (260°C to 290°C). Allow the stone/steel to preheat for at least 30-60 minutes to ensure it's screaming hot. This radiant heat is essential for achieving the characteristic puff and char of tandoor-style homemade naan bread.
Achieving High Heat: The Key to Tandoor-Style Naan
As mentioned, extreme heat is non-negotiable for tandoor-like results. Your oven should be preheated to its maximum setting, ideally 500°F to 550°F (260°C to 290°C), with the pizza stone or steel inside for at least 30-60 minutes. This ensures the surface is hot enough to cook the naan very quickly, usually within 2-4 minutes per piece.
The high temperature causes the water in the dough to rapidly turn to steam, creating large pockets and puffing the naan beautifully. Simultaneously, the direct contact with the hot surface creates those desirable charred bubbles on the bottom. Don't be afraid of the heat; it's what makes this method produce truly authentic homemade naan bread.
Slapping the Naan: Adhering the Dough to the Tandoor Wall
In a traditional tandoor, the rolled-out naan dough is 'slapped' onto the hot interior wall of the oven, where it sticks and cooks. The radiant heat from the walls and the hot base cooks the bread. Achieving this direct-contact cooking is what the pizza stone or steel simulates in a home oven.
While you won't be 'slapping' your naan onto the oven wall (please don't! ), you will carefully transfer the rolled dough directly onto the preheated stone or steel. Some traditional methods involve briefly moistening one side of the naan dough with water before placing it on the hot surface; the steam helps it adhere and puff. Using a pizza peel or carefully sliding it from an inverted baking sheet works well for transferring the dough onto the hot surface for your homemade naan bread.
Oven-Baked Naan: A Convenient and Accessible Method
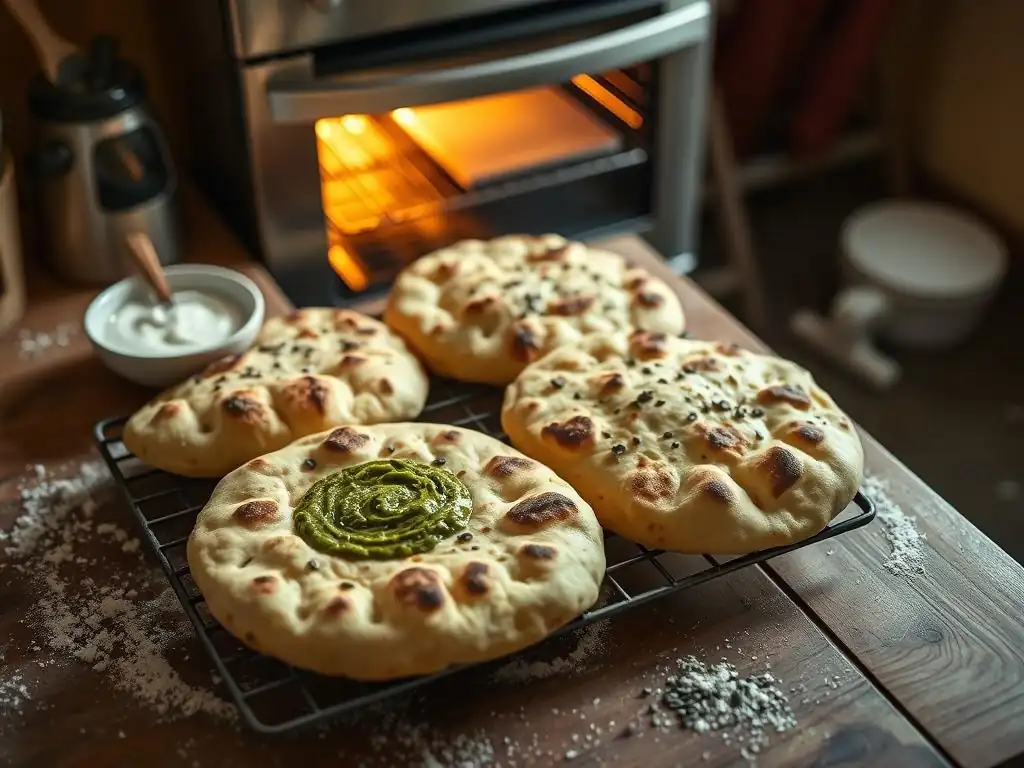
Baking naan in a standard oven is a very accessible and popular method for home cooks. While it might not replicate the exact char of a tandoor, it consistently produces soft, fluffy naan with lovely golden spots. This method is part of what makes this an easy homemade flatbread recipe guide for everyone.
This approach relies on high oven heat combined with a hot surface to cook the naan efficiently. It's less intimidating than trying to mimic a tandoor perfectly but still yields delicious results perfect for accompanying your favorite meals.
Oven Temperature and Baking Time: Achieving Golden Perfection
For oven-baked naan, preheat your oven to a high temperature, typically 450°F to 500°F (230°C to 260°C). While not as high as the simulated tandoor method, this is still significantly hotter than most bread baking. If using a baking stone or steel, preheat it for at least 30 minutes at this temperature.
Carefully place the rolled-out naan dough onto the hot surface (stone/steel) or a preheated baking sheet. Bake for 2-4 minutes, or until the naan puffs up and the surface develops golden-brown spots and some charring. The exact time will depend on your oven and the thickness of your naan. Watch them closely as they cook very quickly! This rapid bake is key to soft homemade naan bread.
Using a Baking Stone or Upside-Down Baking Sheet: Optimizing Heat
Using a preheated baking stone or steel provides a burst of heat from the bottom, similar to the tandoor effect, helping the naan to puff quickly and evenly. If you don't have a stone or steel, you can achieve a similar effect by placing a heavy-duty baking sheet upside down in the oven while it preheats.
Once the oven and sheet are hot, carefully slide the rolled-out naan dough onto the hot surface. The stored heat in the metal will help cook the underside of the naan rapidly, contributing to a good puff and texture. This simple trick makes your easy homemade flatbread recipe work even better in a standard oven.
Brushing with Ghee: Adding Flavor and Softness Post-Bake
Once the naan is baked and still hot, it's traditional and highly recommended to brush it generously with melted ghee or butter. This adds a wonderful richness, enhances the flavor, and keeps the naan soft and pliable as it cools slightly. Use a pastry brush to apply the melted fat evenly over the surface.
This step is particularly important for oven-baked naan, as it might not have the same inherent moisture content as tandoor-cooked naan. Brushing with ghee adds that luxurious finish and prevents the naan from drying out, ensuring each piece of your homemade naan bread is moist and delicious.
Stovetop Naan: A Quick and Easy Alternative
If you're looking for the fastest and simplest way to make homemade naan bread without needing a scorching-hot oven, the stovetop method is perfect. It's incredibly efficient and yields naan with beautiful char marks and a slightly different, but equally delicious, texture. This is arguably the easiest method in any easy homemade flatbread recipe guide.
This method relies on direct heat from a pan, typically a cast-iron skillet, to cook the naan quickly. It's ideal for making just a few pieces at a time and requires minimal cleanup compared to oven methods.
Cast Iron Skillet: Achieving Char and Cooked Texture
A heavy-duty cast-iron skillet is ideal for stovetop naan due to its ability to retain and distribute heat evenly. Place the skillet over medium-high heat and let it preheat for several minutes until it's very hot. You can test the heat by flicking a tiny bit of water into the pan; it should sizzle and evaporate instantly.
The hot surface of the cast iron skillet provides the necessary heat to cook the naan quickly and create those signature charred bubbles on the surface. The direct contact ensures a crispy exterior while the inside remains soft. This makes the cast iron skillet an indispensable tool for making easy homemade flatbread on the stovetop.
Dry Cooking Technique: Mastering the Stovetop Method
Stovetop naan is typically cooked using a dry cooking technique – meaning, you don't add any oil or fat to the pan initially. The rolled-out naan dough is placed directly onto the hot, dry surface of the preheated skillet. The heat immediately begins to cook the dough.
Place one rolled-out naan piece into the hot dry skillet. Bubbles will start to form on the surface within 30 seconds to a minute. This dry cooking allows the surface to blister and char beautifully, mimicking aspects of tandoor cooking. It's a straightforward method for achieving delicious homemade naan bread quickly.
Flipping Technique: Ensuring Even Cooking on the Stovetop
Once bubbles appear on the surface of the naan and the underside has developed some char spots (after about 1-2 minutes), it's time to flip it. Use tongs or a spatula to carefully turn the naan over. Cook the second side for another 1-2 minutes, or until it is also cooked through and has developed nice char marks.
Some cooks like to briefly hold the flipped naan directly over an open gas flame (if you have a gas stove) using tongs for a few seconds per side to enhance the charring and puffing, similar to how it's done in some restaurants. Be very careful if attempting this! Regardless of the final charring method, ensure both sides are cooked through for perfect stovetop homemade naan bread.
Flavor Variations: Naan Bread Recipe Ideas to Explore
While plain naan is delicious on its own, one of the joys of making homemade naan bread is the ability to easily add flavorings and stuffings. This transforms the basic easy homemade flatbread into a gourmet treat. The possibilities are nearly endless, allowing you to customize your naan to pair perfectly with specific dishes or enjoy as a standalone snack.
Experimenting with different additions can elevate your naan baking skills and delight your taste buds. Here are a few popular variations to try once you've mastered the basic naan dough.
Garlic Naan: A Classic and Aromatic Delight
Garlic naan is perhaps the most popular flavored variation. It involves infusing the naan with the pungent, aromatic flavor of garlic. This is typically achieved by finely mincing fresh garlic (about 1-2 cloves per naan piece) and mixing it with melted ghee or butter.
Once the naan is cooked and still hot, brush the garlic-ghee mixture generously over the surface. The heat of the naan will gently cook the garlic, releasing its aroma. For an even stronger garlic flavor, some recipes incorporate a small amount of minced garlic directly into the dough during kneading. Garlic homemade naan bread is a perfect accompaniment to rich curries.
Peshwari Naan: Sweet and Nutty Stuffed Naan
Peshwari naan is a sweet and rich stuffed variation originating from Peshawar, Pakistan. The filling typically consists of a mixture of desiccated coconut, raisins, almonds or other nuts, and sometimes sugar or jaggery, often bound together with a little ghee or milk.
To make Peshwari naan, roll out the dough portion halfway, place a spoonful of the filling in the center, gather the edges of the dough around the filling, and pinch to seal. Then, gently roll or pat the stuffed dough ball out into a flat disc, taking care not to let the filling burst through. Cook using your preferred method. This sweet homemade naan bread is often served with savory dishes to balance the flavors.
Cheese Naan: A Cheesy and Indulgent Variation
Cheese naan is a wonderfully indulgent variation where cheese is stuffed inside the dough. Almost any melting cheese can be used, such as cheddar, mozzarella, paneer, or a blend. Grated cheese (about 1/4 to 1/3 cup per naan piece) is usually placed in the center of the rolled-out dough.
Similar to Peshwari naan, the dough edges are gathered around the cheese filling and sealed before gently rolling or patting the stuffed dough back into a flat shape. Cook until the naan is golden and the cheese is melted and gooey inside. Cheese homemade naan bread is fantastic on its own or served with tomato-based dishes.
Onion Naan: Savory and Flavorful with Caramelized Onions
Onion naan incorporates finely chopped or thinly sliced onions, often sautéed or caramelized first to soften and sweeten them. The prepared onions (about 1-2 tablespoons per naan piece) can be mixed directly into the dough during kneading, or they can be used as a stuffing similar to cheese or Peshwari naan.
If mixing into the dough, ensure the onions are very finely chopped. If stuffing, sautéing them first removes excess moisture and enhances their flavor. Onion homemade naan bread offers a savory depth that pairs well with a wide range of Indian and Middle Eastern dishes. Adding a pinch of cumin or nigella seeds to the dough or the onion mixture can further enhance the flavor.
Serving Suggestions: Pairing Naan with Your Favorite Dishes
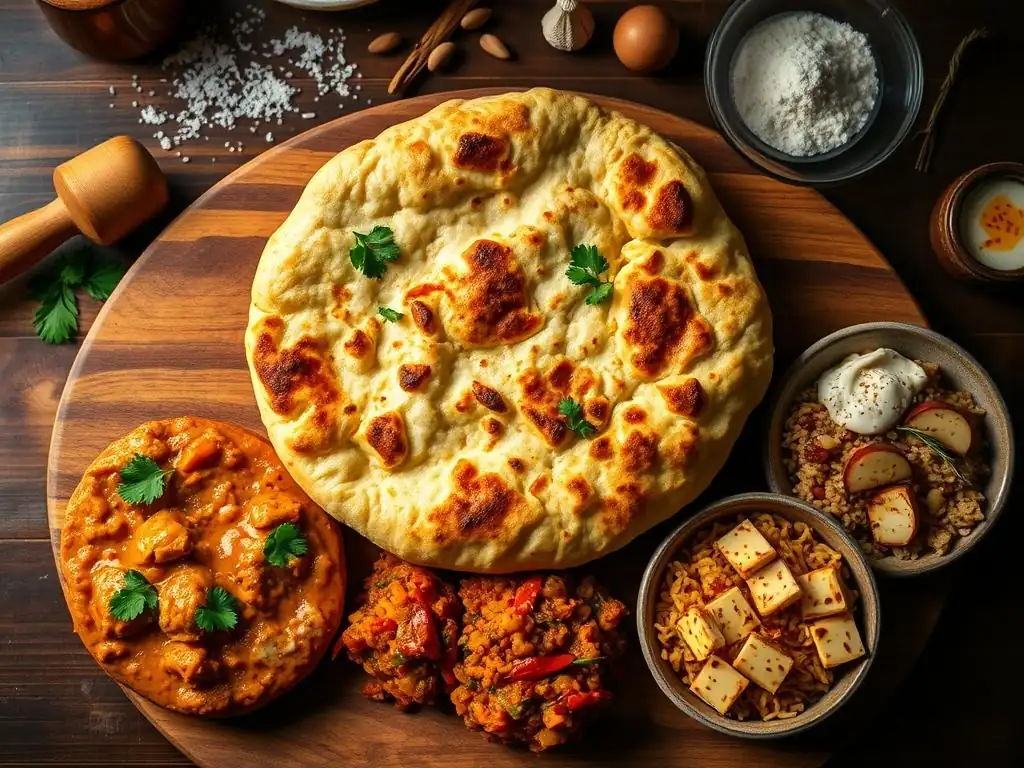
Homemade naan bread is incredibly versatile and can enhance a wide variety of meals beyond its traditional role with Indian cuisine. Its soft texture and rich flavor make it a perfect vehicle for soaking up sauces or serving as the base for creative dishes. This easy homemade flatbread is ready to be enjoyed in countless ways.
Whether you're serving a classic Indian feast or looking for a quick weeknight meal idea, naan fits right in. Here are some popular and creative ways to enjoy your freshly baked naan.
Naan with Curry: The Perfect Accompaniment
The classic pairing for naan is, of course, curry. The soft, slightly chewy texture and absorbent nature of naan make it ideal for scooping up rich, flavorful sauces from dishes like Chicken Tikka Masala, Lamb Rogan Josh, or Vegetable Korma. It provides a textural contrast and a neutral base that complements the complex spices of the curry.
Serving a basket of warm, homemade naan bread alongside your favorite curry transforms a simple meal into a feast. Guests will love tearing off pieces to soak up every last drop of sauce. It's the quintessential way to enjoy this easy homemade flatbread.
Naan Wraps: Creating Delicious and Portable Meals
Naan makes an excellent base for wraps or roll-ups. Its sturdy yet flexible texture holds fillings well. You can use larger pieces of naan as a wrapper for grilled meats, vegetables, falafel, or leftover curry. Simply pile your desired fillings onto the naan and roll it up tightly.
Naan wraps are perfect for packed lunches, picnics, or a quick and easy dinner. They offer a more flavorful and interesting alternative to traditional tortillas or bread for wraps. Get creative with fillings like spiced chickpeas, chicken tikka, or mixed roasted vegetables for a delicious homemade naan bread wrap.
Naan as a Side: Enhancing Any Indian Feast
Beyond just curry, naan is a fantastic side dish for almost any part of an Indian meal. Serve it alongside tandoori meats, dal (lentils), vegetable dishes like Aloo Gobi (potato and cauliflower), or biryani (rice pilaf). It acts as a comforting and satisfying accompaniment that ties the meal together.
Having a stack of warm, homemade naan bread available allows everyone to customize their plates, using the bread to complement bites of different dishes. It's an essential component for experiencing the full range of flavors and textures in a traditional Indian feast.
Naan Pizza: A Quick and Creative Meal
Looking for a fast and easy dinner? Use leftover or freshly made naan as a base for individual pizzas! The shape is already perfect, and the slightly chewy texture makes a great crust. Simply top the naan with your favorite pizza sauce, cheese, and toppings, then bake in a preheated oven (around 400°F/200°C) for 8-12 minutes, or until the cheese is melted and bubbly and the crust is heated through.
Naan pizzas are a fantastic way to use your easy homemade flatbread and are ready in minutes. They are particularly popular with kids but enjoyed by everyone. Try Indian-inspired toppings like paneer and peppers, or stick to classic pepperoni and mushrooms for a fusion twist on homemade naan bread.
Troubleshooting: Common Naan Baking Problems and Solutions
Even with an easy homemade flatbread recipe guide, sometimes things don't go exactly as planned. Don't be discouraged! Baking is a learning process, and understanding common issues and how to fix them will help you improve. Here are some typical problems you might encounter when making homemade naan bread and how to solve them.
Identifying the cause of a baking problem is the first step towards fixing it. Often, small adjustments in technique or ingredients can make a big difference in the final outcome of your naan.
Dough Too Sticky: Adjusting Flour-to-Liquid Ratio
If your naan dough is excessively sticky and difficult to handle, it means the flour-to-liquid ratio is off, with too much liquid or not enough flour. This is a common issue, especially when measuring by volume rather than weight, as flour can pack differently.
To fix this, add a small amount of flour (1-2 tablespoons at a time) to the dough while kneading. Incorporate it fully before adding more. Continue adding flour until the dough is smooth, elastic, and only slightly tacky, but no longer sticking excessively to your hands or the work surface. Remember, a little stickiness is okay for soft homemade naan bread, but it shouldn't be unmanageable.
Naan Not Puffing Up: Ensuring Proper Yeast Activation
If your naan isn't puffing up during cooking, the most likely culprit is inactive or insufficient yeast, or the dough didn't proof properly. Ensure your yeast is fresh and active by proofing it in warm water (105-115°F / 40-46°C) with a pinch of sugar before adding it to the dry ingredients. If it doesn't become foamy within 5-10 minutes, your yeast is likely dead, and you need to start over with fresh yeast.
Also, ensure the dough had enough time and a warm enough environment to double in size during the first proofing (typically 1-1.5 hours at 80-90°F / 27-32°C). If the dough didn't rise sufficiently before shaping, the final naan will be dense and less likely to puff. Ensure your oven or stovetop is also at the correct high temperature, as quick, high heat is crucial for puffing homemade naan bread.
Naan Burning Too Quickly: Lowering Cooking Temperature
If your naan is burning on the outside before it's cooked through, your cooking surface (oven stone/steel or skillet) is too hot, or you're cooking it for too long. High heat is necessary for quick cooking and char, but excessive heat will scorch the bread.
Reduce the heat slightly. If using the oven, try lowering the temperature by 25-50°F (15-30°C) or reducing the preheating time of your stone/steel by 10 minutes. If using the stovetop, lower the burner heat from medium-high to medium. Also, reduce the cooking time per side. Naan cooks very fast, often in just 1-2 minutes per side on high heat. Keep a close eye on your first few pieces to gauge the correct temperature and time for your specific setup when making homemade naan bread.
Storing Your Homemade Naan: Keeping It Fresh
Freshly baked naan is best enjoyed warm, straight from the oven or skillet. However, it's often practical to bake a larger batch and store some for later. Proper storage is key to keeping your homemade naan bread soft and delicious for as long as possible.
While it won't be quite as good as fresh, correctly stored and reheated naan can still be very enjoyable. Avoid letting it sit out at room temperature for too long, as it can quickly dry out.
Cooling Completely: Preventing Soggy Naan
Before storing, it is crucial to let the naan cool completely on a wire rack. Storing warm naan in an airtight container will trap steam, leading to condensation. This moisture will make the naan soggy and can encourage mold growth.
Allowing the naan to cool fully ensures any residual steam escapes, leaving you with the desired soft texture before storage. This step might take 15-30 minutes, depending on the thickness of the naan and the room temperature. Don't rush this step if you plan on storing your homemade naan bread.
Storage Options: Airtight Containers or Freezing
Once completely cool, homemade naan bread can be stored in an airtight container or a resealable plastic bag at room temperature for 1-2 days. For longer storage, refrigeration is an option, where it will keep for up to 4 days, although it may dry out slightly.
For optimal freshness beyond a few days, freezing is the best method. Wrap individual pieces or stacks of 2-3 pieces tightly in plastic wrap, then place them in a freezer-safe bag or container. Frozen naan will keep well for up to 2-3 months. This allows you to enjoy easy homemade flatbread whenever the craving strikes.
Reheating Naan: Restoring Warmth and Softness
To restore the warmth and softness of stored naan, several reheating methods work well. For refrigerated or room temperature naan, a quick warm-up is usually sufficient.
- Oven: Wrap the naan in foil and heat in a preheated oven at 350°F (175°C) for 5-10 minutes.
- Stovetop: Place the naan in a dry skillet over medium heat for 1-2 minutes per side, until warm and pliable.
- Microwave: While quick, the microwave can sometimes make naan chewy. Heat for 15-30 seconds.
- From Frozen: Thaw frozen naan in the refrigerator overnight or at room temperature for an hour before reheating using one of the methods above. You can also reheat directly from frozen in a foil-wrapped package in the oven for a bit longer (10-15 minutes). Reheating helps bring your homemade naan bread back to life.
Beyond the Basics: Elevating Your Naan Baking
Once you've mastered the easy homemade flatbread recipe for basic naan, you might want to explore ways to add complexity and depth to your baking. There are several avenues to experiment with that can take your homemade naan bread to the next level, offering different textures, flavors, and baking challenges.
These techniques and ingredient variations allow you to refine your skills and create naan that's even more tailored to your preferences. Consider these options when you're ready to go beyond the simple guide.
Using Different Flours: Experimenting with Whole Wheat or Semolina
While all-purpose and bread flour are standard, experimenting with other flours can change the texture and flavor profile of your naan. Substituting a portion of the all-purpose flour with whole wheat flour (start with 25-50%) will result in a denser, nuttier, and more rustic naan. Whole wheat absorbs more liquid, so you might need to adjust the water slightly.
Adding a small amount of fine semolina flour (perhaps 1/4 cup per 2 cups of other flour) can contribute to a slightly crispier exterior while keeping the interior soft. It also adds a subtle sweetness. Each flour substitution will alter the dough handling and final texture, offering new dimensions to your easy homemade flatbread.
Adding Herbs and Spices to the Dough: Infusing Flavor
Incorporating finely chopped fresh herbs or ground spices directly into the naan dough is a simple way to infuse flavor throughout the bread. Herbs like cilantro, mint, or chives work well. Add about 1-2 tablespoons of finely chopped fresh herbs per batch of dough during the kneading process.
Spices like nigella seeds (kalonji), cumin seeds, or even a pinch of garam masala can add authentic Indian flavors. Add about 1 teaspoon of seeds or 1/2 teaspoon of ground spice per batch. These additions distribute flavor evenly, making every bite of your homemade naan bread aromatic and delicious.
Mastering Sourdough Naan: A Deeper Dive into Fermentation
For a more complex flavor and texture, consider making sourdough naan. This involves substituting commercial yeast with an active sourdough starter. Sourdough fermentation takes longer, often requiring an overnight proof in the refrigerator after an initial few hours at room temperature.
Sourdough naan offers a unique tanginess and a more complex crumb structure compared to yeast-leavened versions. The longer fermentation can also make the dough easier to digest for some people. While slightly more involved than a quick yeast recipe, mastering sourdough homemade naan bread is a rewarding step for adventurous bakers.
Frequently Asked Questions
What makes this flatbread recipe "easy"?
This recipe focuses on simple ingredients and a straightforward method, minimizing complex techniques or specialized equipment. The emphasis is on making delicious flatbread accessible to all bakers.
What are the key ingredients I'll need for this flatbread recipe?
You'll primarily need flour, water, salt, and olive oil. Some variations might include yeast or baking powder for a different texture.
Can I customize the flatbread with different flavors or toppings?
Absolutely! Feel free to add herbs, spices, or seeds to the dough. After baking, you can top the flatbread with your favorite toppings, like cheese, vegetables, or meats.
How should I store leftover flatbread to keep it fresh?
Store cooled flatbread in an airtight container at room temperature for up to two days. You can also freeze it for longer storage, wrapping it tightly in plastic wrap.
What are some serving suggestions for homemade flatbread?
Flatbread is incredibly versatile! Enjoy it with dips like hummus or tzatziki, use it as a base for mini pizzas, or serve it alongside soups and salads.
Final Reflection: The Enduring Appeal of Simple Baking
The accessibility of homemade flatbread, as detailed in this guide, transcends mere culinary convenience; it's a gateway to connection and creativity in the kitchen. This isn't just about following a recipe; it's about reclaiming the joy of simple, satisfying food creation, a skill that's increasingly valuable in our fast-paced world. The ease of the process, highlighted throughout this guide, empowers even the most novice baker to experience the satisfaction of creating something delicious from scratch.
The enduring appeal of flatbreads lies not only in their versatility—from savory accompaniments to sweet treats—but also in their ability to connect us to culinary traditions across cultures. Food is symbolic of love when words are inadequate.
This quote perfectly encapsulates the emotional resonance of sharing homemade flatbread, a simple act that fosters warmth and connection. The process itself, from kneading the dough to the satisfying sizzle on the pan, is a meditative experience, offering a welcome respite from the demands of modern life.
Now, I invite you to take what you've learned and embark on your own flatbread journey. Experiment with different flours, herbs, and spices. Don't be afraid to deviate from the recipe; let your creativity guide you. The most important ingredient isn't listed in the recipe; it's your own passion and willingness to explore the simple pleasures of baking. So, gather your ingredients, preheat your pan, and discover the joy of creating your own perfect, easy homemade flatbread.
Unleash Your Inner Baker: Craft the Perfect Flatbread!
Thanks for joining us on this flatbread baking adventure! We hope you've gained the confidence and know-how to create delicious, homemade flatbreads. Ready to take your baking to the next level?
- Bake your first flatbread today! Grab your ingredients, follow your favorite recipe (or try one from our website! ), and experience the joy of fresh-baked bread.
- Share your creations! Post a picture of your flatbread masterpiece on social media and tag us – we’d love to see your results!
- Experiment with different flours and toppings! What exciting flavor combinations will you discover?
So, what unique twist will you add to your next flatbread creation? Let's hear your ideas in the comments below!