
Whole Wheat Ciabatta: A Healthier Twist on a Classic

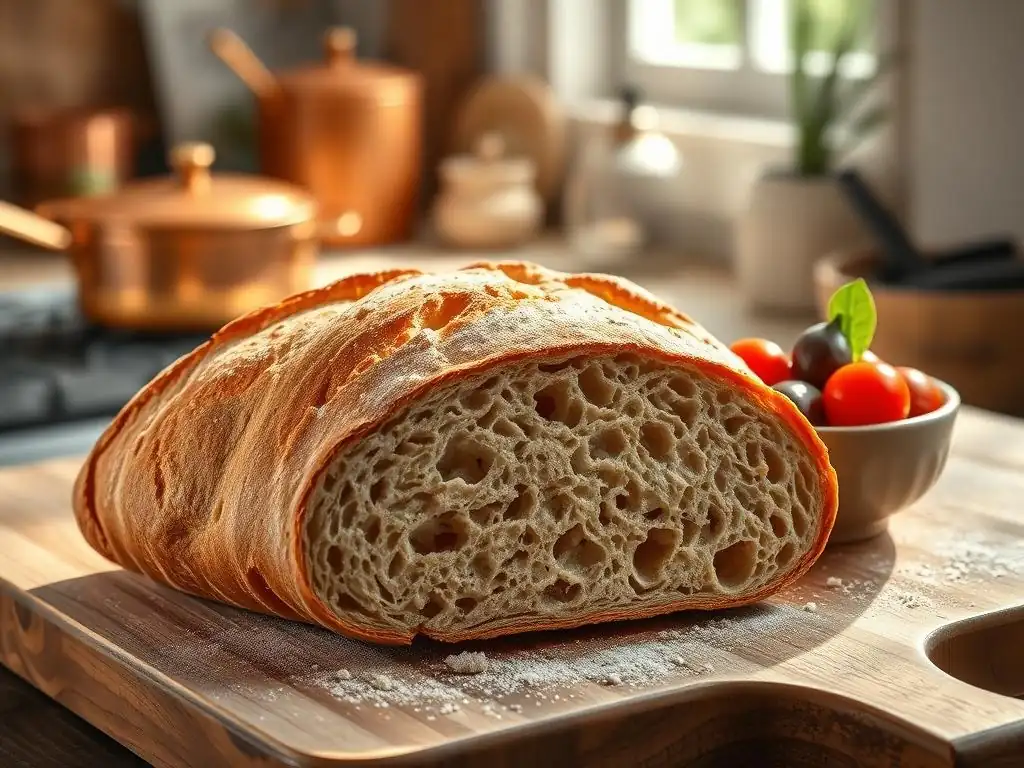
Welcome to BakeWithEase, your kitchen companion for all things baking! Ever dreamt of crafting a perfectly airy ciabatta, but with a wholesome twist? Discover how to bake a delicious and nutritious loaf with our healthy whole wheat ciabatta recipe. Unlock the secrets to authentic Italian flavor while incorporating the goodness of whole grains. Intrigued? Let's get baking!
- Sourdough Bread: A Beginner's Guide
- Introduction to Sourdough Baking
- Creating Your Own Sourdough Starter
- Step-by-Step: Cultivating Your Sourdough Starter
- Crafting Your First Sourdough Loaf
- Step-by-Step: The Ultimate Sourdough Bread Recipe
- Tips and Tricks for Perfect Sourdough Bread
- Serving Suggestions for Your Homemade Sourdough Bread
- Storing Your Sourdough Bread for Freshness
- Conclusion: Enjoying the Art of Sourdough Baking
- Frequently Asked Questions
- Final Reflection: The Enduring Appeal of Wholesome Baking
- Unleash Your Inner Baker: Craft the Perfect Ciabatta!
Sourdough Bread: A Beginner's Guide
Introduction to Sourdough Baking
Welcome to the wonderful world of sourdough baking! This ancient method of leavening bread uses a living culture of wild yeast and bacteria, known as a sourdough starter, instead of commercial yeast. It's a process that connects you deeply with your ingredients and yields bread with incredible flavor, texture, and aroma that simply can't be replicated with instant yeast. Think of it as a natural fermentation journey that results in a loaf with a complex, tangy profile and a delightfully chewy crust.
Embarking on the sourdough journey requires patience and observation, but the rewards are immense. You'll learn to nurture your starter, understand the subtle cues of fermentation, and ultimately produce loaves that are not only delicious but also potentially more digestible for some people. Whether you're aiming for a rustic country loaf or a light and airy ciabatta, the principles of sourdough baking provide a versatile foundation for countless bread types.
Understanding the Benefits of Sourdough Bread
One of the most celebrated benefits of sourdough bread is its potential impact on digestion. The long fermentation process involving lactic acid bacteria helps to break down complex carbohydrates and phytic acid, an anti-nutrient found in grains that can inhibit mineral absorption. While it doesn't eliminate gluten, this breakdown can make sourdough easier on the stomach for individuals with mild gluten sensitivities compared to bread made with commercial yeast.
Beyond digestibility, sourdough offers a unique nutritional profile. The fermentation can increase the availability of certain vitamins and minerals in the flour. Furthermore, studies suggest that sourdough fermentation may lead to a lower glycemic index compared to standard white bread, meaning it could cause a slower rise in blood sugar levels. This slow, natural process contributes not just to health benefits but also to the bread's signature tangy flavor and satisfying texture.
Why Choose Sourdough Over Commercial Yeast Bread?
Choosing sourdough over bread leavened with commercial yeast is often a decision rooted in flavor, texture, and the desire for a more natural process. Commercial yeast provides a rapid, predictable rise, resulting in a consistent but often less complex flavor profile. Sourdough, on the other hand, develops deep, nuanced flavors through the slow fermentation of a diverse microbial community, yielding a bread with characteristic tanginess and aroma that evolves over time.
The texture of sourdough bread is also distinct, often featuring a chewy crust and an open, airy interior crumb. This structure is a result of the specific gluten development and gas production facilitated by the wild yeast and bacteria in the starter. While commercial yeast can produce soft bread, it typically lacks the structural integrity and complex chewiness that defines a great sourdough loaf. Baking sourdough becomes a craft, offering a rewarding connection to the ancient art of bread making that a quick yeast rise simply doesn't provide.
Creating Your Own Sourdough Starter
The heart of sourdough baking is the starter – a simple mixture of flour and water that captures wild yeast and bacteria from the environment. Think of it as your personal, living leavening agent. Creating and maintaining a healthy starter is the foundational step to baking delicious sourdough bread. It requires consistency and a little patience, but the process itself is fascinating and rewarding.
Starting your own culture takes about 7 to 14 days, sometimes longer depending on ambient temperature and the flour used. During this time, you'll observe the mixture bubbling, rising, and developing a distinct aroma as the microbial community establishes itself. Once mature, your starter can live indefinitely with regular feeding, becoming a reliable tool in your baking repertoire and a connection to countless generations of bakers before you.
Gathering Essential Supplies for a Sourdough Starter
To begin cultivating your sourdough starter, you'll need just a few basic items. A clean jar or container is essential – glass is often preferred as it allows you to easily observe the activity within the starter. Wide-mouthed jars, like Mason jars, are convenient for stirring and feeding. Ensure the container is large enough to accommodate the starter as it grows, perhaps starting with a 1-quart size.
Accurate measurement is key, especially in the early stages. A digital kitchen scale is highly recommended for measuring both flour and water by weight, as this provides consistent hydration levels. While volume measurements (cups, tablespoons) can vary, weight is always precise. You'll also need a non-metal spoon or spatula for stirring, and a breathable cover for your jar, such as cheesecloth secured with a rubber band, or a loosely fitted lid, to allow air circulation while preventing contaminants.
Flour: The Foundation of Your Starter
The type of flour you choose significantly impacts your starter's development. Many bakers recommend starting with whole grain flours like rye or whole wheat, as they contain a higher concentration of nutrients and wild yeast naturally present on the grain husks. These flours can help kickstart microbial activity more quickly than refined white flour.
Once your starter is established, you can transition to feeding it with unbleached all-purpose flour or bread flour, or continue using a mix. Using unbleached flour is generally advised, as the bleaching process can sometimes interfere with microbial growth. Experimenting with different flours for feeding can also influence the final flavor profile of your starter and, subsequently, your bread.
Water: Hydrating Your Starter
The water used to hydrate your starter should be free of chlorine, as chlorine can inhibit the growth of the beneficial microbes you're trying to cultivate. Standard tap water often contains chlorine or chloramine.
To remove chlorine, you can leave tap water out in an open container for 24 hours, allowing the chlorine to dissipate. Alternatively, using filtered water or bottled spring water is a reliable option. Avoid distilled water, as it lacks the minerals that can be beneficial for microbial health. Aim for water that is roughly room temperature when mixing.
Step-by-Step: Cultivating Your Sourdough Starter
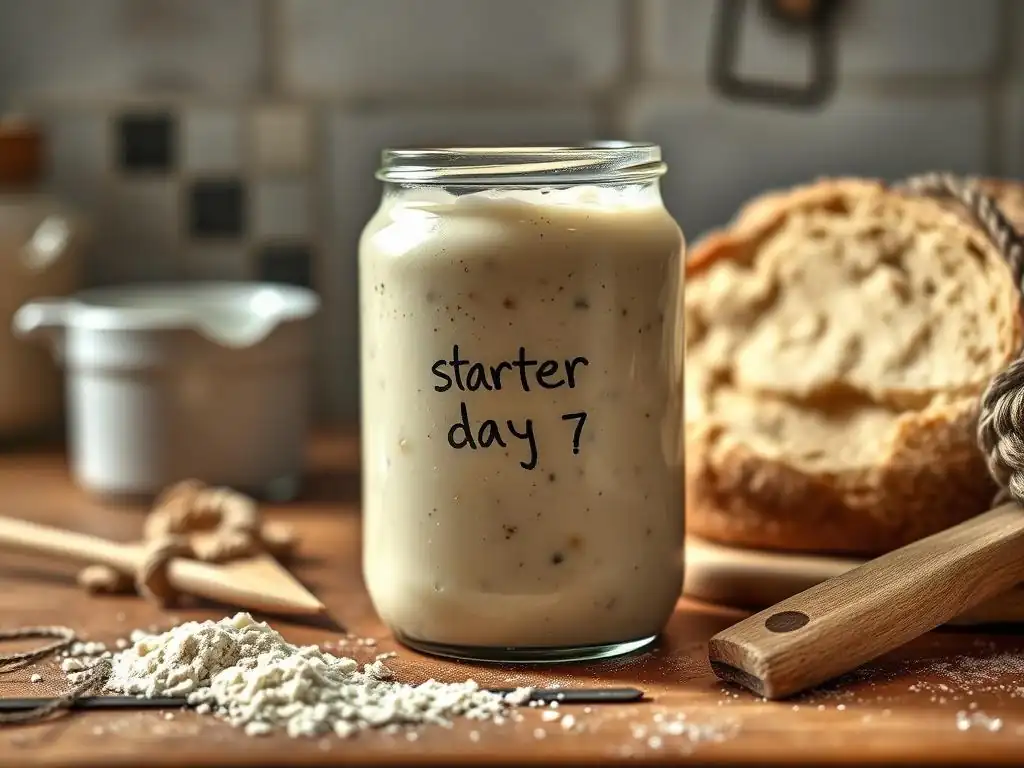
Cultivating a sourdough starter is a daily commitment for the first week or two, but the steps are simple. It involves an initial mix of flour and water, followed by regular feeding and discarding to encourage the right balance of yeast and bacteria. Patience is crucial, as the activity level will fluctuate in the early days before stabilizing into a reliable culture.
The process mimics the natural fermentation that occurs when flour and water are left exposed to the environment, but by feeding and discarding, we select for the desirable microbes that provide leavening and flavor. Observing the changes – the appearance of bubbles, the rise and fall, the developing aroma – is part of the learning process and signals the starter's progress.
Day 1: Mixing the Initial Flour and Water
To begin, you'll create the initial mixture that will become your starter. A common starting ratio is equal parts flour and water by weight. For example, you might combine 50 grams of flour (such as whole rye or whole wheat) with 50 grams of unchlorinated water. Using a kitchen scale ensures accuracy in these measurements.
Combine the flour and water in your clean jar. Stir the mixture thoroughly until there are no dry pockets of flour left. The consistency should be like a thick batter or paste. Cover the jar loosely with a lid, plastic wrap, or cheesecloth secured with a rubber band. Place the jar in a warm spot, ideally between 70-80°F (21-27°C), away from direct sunlight, and let it rest for 24 hours.
Initial Mixing Instructions
- Weigh out 50 grams of your chosen flour (e.g., whole rye or whole wheat) and 50 grams of unchlorinated water.
- Combine the flour and water in a clean glass jar (approx. 1-quart size).
- Stir vigorously with a non-metal spoon or spatula until all the flour is hydrated and the mixture is smooth, like a thick paste. Scrape down the sides of the jar.
- Cover the jar loosely to allow air to escape but prevent drying (e.g., loose lid, plastic wrap with holes, or cheesecloth).
- Leave the jar at room temperature (ideally 70-80°F / 21-27°C) for 24 hours.
Days 2-7: Feeding and Observing Your Starter
Starting on Day 2, and each day thereafter for about a week or two, you will feed your starter. Feeding involves discarding a portion of the old starter and adding fresh flour and water. This process removes metabolic waste products and provides new food for the growing microbial population, encouraging activity and preventing the starter from becoming too acidic.
A standard feeding ratio is 1:1:1 by weight (starter:flour:water). For example, you might keep 50 grams of your existing starter and discard the rest. Then, add 50 grams of fresh flour and 50 grams of fresh unchlorinated water to the kept starter. Stir thoroughly, cover loosely, and return it to its warm spot. You should start seeing bubbles and perhaps a slight rise and fall within these first few days; this indicates activity is starting!
Feeding Schedule and Ratios
- Daily Feeding: For the first 7-14 days, feed your starter once every 24 hours.
- Discard: Before feeding, discard a significant portion of the starter. A common practice is to keep 50-100 grams and discard the rest.
- Ratio: Feed the kept starter with equal parts fresh flour and water by weight. A typical feeding is 50g starter : 50g flour : 50g water.
- Mix: Combine the kept starter, fresh flour, and water thoroughly in a clean jar.
- Observe: Note any changes – bubbles, rise, texture, smell. Activity will increase over time.
Recognizing a Mature and Active Starter
After about one to two weeks of consistent daily feeding, your starter should show clear signs of maturity and activity. The most reliable indicator is its ability to consistently double in size within a predictable timeframe after feeding, typically within 4 to 8 hours when kept at a warm room temperature (around 75°F / 24°C). This consistent doubling shows that the yeast population is strong and actively producing carbon dioxide.
A mature starter will also have a pleasant, tangy, slightly yeasty aroma – not overly acidic, cheesy, or alcoholic. When you stir it, you'll see a network of bubbles throughout the mixture, not just on the surface. The texture should be spongy and airy after it has risen. A small dollop dropped into water should float (the 'float test'), indicating it's full of gas and ready to leaven dough, although this test is a good indicator, consistent doubling is the most important sign.
Signs of a Ready-to-Bake Starter
- Consistent Doubling: The starter reliably doubles (or triples) in volume 4-8 hours after being fed.
- Bubble Activity: It shows significant bubble formation throughout, not just on the surface.
- Pleasant Aroma: It has a tangy, slightly sweet, yeasty smell.
- Spongy Texture: After rising, it looks airy and spongy.
- Float Test (Optional): A small piece dropped into water floats (indicates it's full of gas).
Crafting Your First Sourdough Loaf
With a healthy, active sourdough starter ready, you're prepared to bake your first loaf! This is where the magic of fermentation really shines, transforming simple ingredients into a complex and satisfying bread. While there are countless sourdough recipes, a basic country loaf typically involves just four main components: active sourdough starter, flour, water, and salt.
The process involves several stages, including mixing, bulk fermentation with folds, shaping, proofing, and finally, baking. Each step plays a crucial role in developing the dough's structure, flavor, and texture. Don't be discouraged if your first few loaves aren't perfect; learning to work with sourdough is a skill that improves with practice and understanding your starter and dough.
Gathering Essential Ingredients for Sourdough Bread
The quality of your ingredients significantly impacts the final loaf. You'll need a quantity of your active sourdough starter, often referred to as 'levain' or 'preferment' when specifically built for a bake. This starter should be at its peak activity, typically 4-8 hours after its last feeding, when it has doubled in size and is full of bubbles. Using a starter that isn't active enough is a common cause of flat loaves.
The primary flour used is usually a strong bread flour with a high protein content, typically 12-14%. This high protein level is essential for developing a strong gluten network capable of trapping the gases produced by the starter, giving the bread its structure and rise. You'll also need unchlorinated water, and non-iodized salt (like sea salt or kosher salt) for flavor and structure.
Bread Flour: Providing Structure
Bread flour is the backbone of most classic sourdough loaves. Its high protein content, particularly gluten-forming proteins, is crucial for developing the strong, elastic dough structure needed to support the slow fermentation and achieve an open crumb.
When hydrated and worked, the gluten in bread flour forms a network that stretches and holds the carbon dioxide produced by the yeast. Using a lower protein flour, like all-purpose flour (typically 10-11.5% protein), will result in a weaker dough and a denser crumb, although it can still be used, especially in combination with bread flour.
Water: Hydration for Dough Development
Water plays a vital role in sourdough bread by hydrating the flour and enabling gluten development. The amount of water relative to flour (hydration percentage) is a key factor influencing the dough's texture and the final crumb structure. Higher hydration doughs (e.g., 75-80% hydration) tend to result in a more open crumb but are stickier and harder to handle.
As with your starter, use unchlorinated water to avoid inhibiting microbial activity. The temperature of the water can also influence dough temperature and fermentation speed; warmer water will speed up fermentation, while cooler water will slow it down. Many recipes specify a target dough temperature after mixing, often around 75-80°F (24-27°C).
Salt: Enhancing Flavor and Controlling Fermentation
Salt is more than just a flavor enhancer in sourdough bread; it also plays a critical role in dough development and fermentation control. It strengthens the gluten network, making the dough easier to handle and contributing to a better structure and crust.
Additionally, salt helps to regulate the fermentation rate, slowing down the activity of both yeast and bacteria. Adding salt too early in the process, especially directly to the starter, can inhibit its activity. For this reason, salt is often added after the initial autolyse phase or mixed in thoroughly during the main mixing stage. Most sourdough recipes use around 1.8% to 2.2% salt relative to the total flour weight.
Step-by-Step: The Ultimate Sourdough Bread Recipe
Baking sourdough follows a general sequence of steps designed to maximize flavor development, structure, and rise. While timings can vary based on room temperature and starter activity, understanding the purpose of each stage is key. This guide outlines a common workflow for a basic sourdough loaf.
Remember that flexibility is important in sourdough baking. Pay attention to the dough itself – how it feels, looks, and smells – rather than strictly adhering to times, especially as you gain experience. This recipe assumes you have an active, ready-to-bake starter.
Step 1: Autolyse - Hydrating the Flour
The autolyse step is a simple yet powerful technique that involves mixing just the flour and water from the recipe and letting the mixture rest. This allows the flour to fully hydrate and gives the gluten-forming proteins a head start in developing a network without the presence of salt or starter, which can initially stiffen the dough and inhibit this passive development.
Typically, the flour and water are mixed until no dry bits remain, forming a shaggy dough. This mixture is then covered and left to rest for a period ranging from 30 minutes up to several hours. During this rest, enzymes naturally present in the flour begin to break down starches into sugars, which will later feed the yeast, and the gluten starts to align and develop on its own.
Instructions for Autolysing
- In a large mixing bowl, combine the measured bread flour (and any other flours specified in your recipe) with the measured unchlorinated water.
- Mix with your hands, a spoon, or a dough whisk until all the flour is fully hydrated and no dry clumps remain. The mixture will be shaggy and somewhat sticky.
- Cover the bowl with a damp towel or plastic wrap to prevent the surface from drying out.
- Let the mixture rest at room temperature for 30 minutes to 1 hour (or longer for high hydration doughs or certain flour types).
Step 2: Mixing the Sourdough Dough
After the autolyse period, it's time to incorporate the active sourdough starter and the salt into the hydrated flour and water mixture. This is the point where fermentation officially begins, and the salt is added to enhance flavor and control the rate of yeast activity.
Add the measured amount of active starter and salt to the bowl with the autolysed dough. Now, you need to thoroughly mix these new ingredients into the dough. This can be done by hand using techniques like the Rubaud method (scooping and folding the dough) or stretch and folds within the bowl, or using a stand mixer with a dough hook for several minutes until the ingredients are evenly distributed and the dough starts to show some initial strength. The dough will become smoother as you mix.
Combining Starter, Flour, Water, and Salt
- Add your ripe, active sourdough starter and the measured salt to the autolysed dough in the bowl.
- Mix the ingredients together thoroughly. You can use your hands (wetting them helps prevent sticking), a dough whisk, or a stand mixer on low speed.
- Continue mixing until the starter and salt are fully incorporated into the dough, and the dough begins to look slightly smoother and more cohesive. This might take 5-10 minutes by hand or 3-5 minutes in a mixer.
- Once mixed, the dough is ready for bulk fermentation.
Step 3: Bulk Fermentation Process
Bulk fermentation, or the first rise, is a critical stage where the dough develops flavor, structure, and gas. It's the period from when the starter and salt are mixed in until the dough is divided and shaped. This phase typically lasts several hours at room temperature and is highly dependent on the ambient temperature and the starter's activity. A common bulk fermentation time might be 4-6 hours at 75°F (24°C).
During bulk fermentation, you will perform a series of "folds" to strengthen the gluten network and evenly distribute the gases being produced. These folds help build tension in the dough, which is essential for oven spring. Observing the dough's increase in volume (aiming for a 30-50% increase) and its texture (becoming airy and slightly domed) is key to knowing when bulk fermentation is complete.
Folding Techniques for Strength and Structure
Folding the dough during bulk fermentation helps align the gluten strands, build tension, and create a stronger structure capable of trapping gas. The most common method is the stretch and fold: wet your hands slightly to prevent sticking, grab one edge of the dough, stretch it gently upwards without tearing, and fold it back over the center of the dough mass. Rotate the bowl a quarter turn and repeat this action 3-4 times, effectively folding the dough onto itself from all sides.
Perform these sets of folds periodically throughout the first few hours of bulk fermentation. A typical schedule might be 3-5 sets of folds, spaced 30-60 minutes apart. As the dough strengthens, you'll notice it becomes more resistant to stretching and holds its shape better. The number and frequency of folds can be adjusted based on the dough's hydration and strength.
Step 4: Shaping the Sourdough Loaf
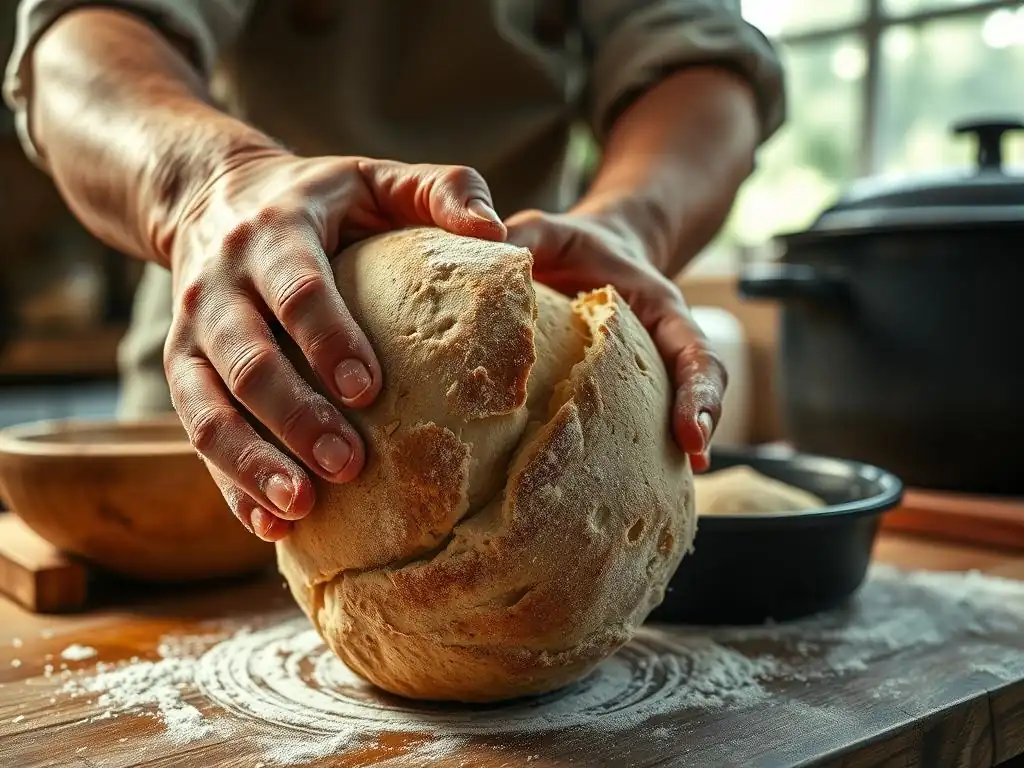
Once bulk fermentation is complete, the dough needs to be shaped into its final form before proofing. Shaping creates tension on the surface of the dough, which helps it hold its structure during proofing and provides the necessary surface tension for a good oven spring. Shaping techniques vary depending on whether you are making a round loaf (boule) or an oval loaf (batard).
Turn the dough gently out onto a lightly floured surface. Avoid using excessive flour, which can prevent the dough from sticking to itself and creating tension. The goal is to gently degas the dough only slightly while creating a smooth, taut surface. Different techniques involve folding the edges of the dough into the center and then using your hands or a bench scraper to create tension by pulling the dough towards you across the surface.
Techniques for Tightening the Dough
- Pre-shape: Gently turn the dough out onto a lightly floured surface. If making a boule, gently round the dough into a loose ball. If making a batard, shape it into a rough oval. Let the dough rest, uncovered, for 20-30 minutes. This allows the gluten to relax before final shaping.
- Final Shape (Boule): Flip the pre-shaped dough over. Fold the top edge down towards the center, then fold the bottom edge up over the top fold. Fold in the sides. Flip the dough over again and, using lightly floured hands or a bench scraper, cup the sides and pull the dough towards you across the surface to create tension and a smooth, taut ball.
- Final Shape (Batard): Flip the pre-shaped dough over. Fold the top edge down about two-thirds of the way. Fold the dough in half lengthwise, sealing the seam with the heel of your hand. Roll the dough back and forth gently to create an oval shape and tighten the surface.
- Place the shaped dough seam-side up into a well-floured banneton (proofing basket) or a bowl lined with a floured kitchen towel or couche.
Step 5: Proofing the Sourdough Loaf
Proofing is the final rise of the shaped dough before baking. This stage allows the yeast to produce a final burst of gas, expanding the loaf to its pre-baking volume. The duration and temperature of proofing significantly impact the final bread's texture and flavor. There are two primary methods: cold proofing and room temperature proofing.
Cold proofing is highly recommended for sourdough. It involves placing the shaped loaf in the refrigerator for an extended period, typically 8 to 12 hours, or even longer (up to 24-48 hours). The cold temperature slows down fermentation dramatically, allowing enzymes to continue breaking down starches and proteins, which contributes to a more complex flavor profile and improves the crust development during baking.
Cold Proofing vs. Room Temperature Proofing
- Cold Proofing: Place the shaped loaf in its banneton or proofing container in the refrigerator (around 38-40°F / 3-4°C) for 8-12 hours or more. Benefits include: deeper flavor development, easier handling of the dough (it firms up), and better oven spring because the cold dough hits the hot oven. This is the preferred method for many sourdough bakers aiming for maximum flavor and structure.
- Room Temperature Proofing: Let the shaped loaf rise at room temperature (around 70-75°F / 21-24°C) for 2-4 hours. The dough will rise more quickly. This method is faster but results in less complex flavor compared to cold proofing. It also requires careful timing to avoid over-proofing, which can lead to a flat loaf in the oven. The dough will be softer and potentially harder to score.
Step 6: Baking Your Sourdough Bread
Baking is the grand finale where the dough transforms into a beautiful loaf with a signature crust and airy interior. Achieving a great crust and maximum oven spring (the final rise in the oven) requires high heat and initial steam. The most common method for home bakers is using a Dutch oven or a baking stone with added steam.
Preheating your oven to a high temperature, typically 450-500°F (230-260°C), is crucial. If using a Dutch oven, place it in the oven during the preheat. If using a stone, place it in the oven and prepare a method for generating steam, such as placing a tray of hot water or ice cubes in the bottom of the oven when you load the bread.
Scoring the Loaf for Expansion
Just before baking, you need to score the surface of the loaf. Scoring involves making shallow cuts in the dough with a sharp blade (like a lame or razor blade). These cuts serve a vital purpose: they provide weak points on the dough's surface, allowing the loaf to expand predictably during the initial phase of baking (oven spring) without bursting randomly.
The pattern of the score can influence the final shape and appearance of the loaf. A single long slash down the center is common for batards, encouraging a beautiful 'ear'. For boules, multiple smaller cuts or geometric patterns are popular. Score the dough confidently and relatively quickly, using a sharp blade held at a slight angle (about 30 degrees) to the surface.
Tips and Tricks for Perfect Sourdough Bread
Mastering sourdough baking is an ongoing process of learning and refinement. While following a recipe provides a roadmap, understanding some common techniques and troubleshooting methods can significantly improve your results. Pay attention to the subtle cues your dough provides – its stickiness, elasticity, and how it feels throughout the process.
Keeping a baking journal can be incredibly helpful. Note down details like ambient temperature, hydration percentage, bulk fermentation time, proofing time, and observations about your starter's activity. This allows you to identify what worked well and what didn't, helping you make adjustments for future bakes. Don't be afraid to experiment with different flours or techniques as you gain confidence.
Achieving an Open Crumb Structure
Many sourdough bakers strive for an open crumb structure – that desirable pattern of large, irregular holes in the interior of the bread. Several factors contribute to achieving this. Firstly, using an active and vigorous starter is essential, as it produces the gas needed for expansion. Secondly, proper hydration is key; higher hydration doughs (often 75% or more) tend to yield a more open crumb, although they are more challenging to handle.
Thirdly, developing sufficient dough strength through proper mixing and consistent folding during bulk fermentation is crucial. This builds the gluten network needed to trap the gases. Finally, ensuring adequate, but not excessive, bulk fermentation and proofing, along with a hot oven and good steam during baking, allows for maximum oven spring and the formation of those sought-after large holes.
Troubleshooting Common Sourdough Baking Issues
Encountering issues is a normal part of the sourdough journey. One common problem is dough that is excessively sticky and difficult to handle. This is often related to hydration levels; if your recipe uses a high percentage of water, the dough will naturally be sticky. Ensure you are measuring accurately by weight. Using wet hands or a dough scraper instead of adding lots of extra flour during handling can help manage sticky dough without compromising the hydration.
Another frequent issue is bread that doesn't rise adequately, resulting in a dense loaf. This could be due to an inactive starter – make sure your starter is consistently doubling after feeding before you bake with it. It could also be under-proofing; the dough didn't have enough time to develop gas during bulk fermentation or final proof. Conversely, over-proofing can also cause a loaf to collapse in the oven, as the gluten structure weakens after peak expansion. Learning to read your dough's readiness is key here.
Dough Too Sticky?
- Ensure you are measuring ingredients accurately by weight, especially water.
- Try reducing the hydration slightly (by 2-5%) in your next bake until you find a level you are comfortable handling.
- Use wet hands or a bench scraper when handling sticky dough instead of adding excessive flour to the surface, which can make the crust tough.
- Develop sufficient gluten strength through proper mixing and folding, as a strong dough is easier to manage even at high hydration.
Bread Not Rising?
- Check your starter's activity: Is it reliably doubling in size within 4-8 hours after feeding? If not, give it more frequent feedings or find a warmer spot.
- Evaluate your bulk fermentation: Did the dough increase in volume by 30-50%? Was the room temperature warm enough (ideally 75°F / 24°C)?
- Consider your proofing time: Was it too short (under-proofed) or too long (over-proofed and collapsed)? Pay attention to how the dough feels – it should be airy and slightly jiggly but still hold its shape.
- Ensure your oven is reaching the correct temperature and that you are providing sufficient steam during the initial bake.
Serving Suggestions for Your Homemade Sourdough Bread
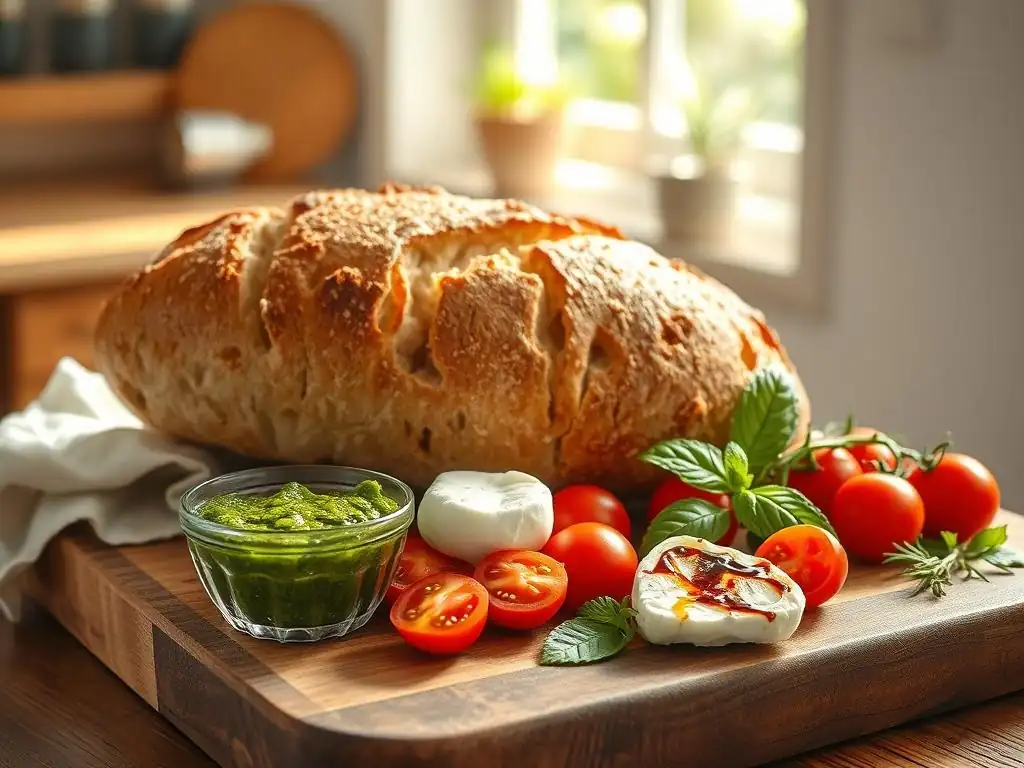
Baking your first loaf of sourdough bread is a moment of triumph, and enjoying it is the ultimate reward. The beauty of sourdough is its versatility; its tangy flavor and robust texture make it a perfect accompaniment to a wide variety of dishes. Slice it thickly and simply enjoy it warm from the oven with a pat of butter.
The complex flavor profile of sourdough stands up well to rich toppings and spreads. Consider using it as the base for gourmet sandwiches, where its structure holds up beautifully to fillings. It's also fantastic toasted, providing a crispy canvas for everything from avocado and eggs to jam or cheese. Don't forget about using slightly older sourdough for croutons, breadcrumbs, or even bread pudding.
Delicious Ways to Enjoy Your Sourdough Bread
There are countless ways to savor your homemade sourdough. A simple slice toasted and topped with butter or olive oil is a classic for a reason, allowing the bread's flavor to shine. For breakfast or brunch, try it with avocado toast, scrambled eggs, or smoked salmon.
Sourdough makes exceptional sandwiches. Its sturdy crust and chewy crumb provide great texture and support for hearty fillings like roasted vegetables, grilled meats, or a classic BLT. It's also wonderful served alongside soups and stews, perfect for soaking up every last bit of flavorful broth.
Sandwiches, Toast, Soups
- Sandwiches: Use thick slices for hearty sandwiches with cheese, meats, or vegetables. A grilled cheese on sourdough is particularly delicious.
- Toast: Perfect for breakfast or snack. Top with butter, jam, honey, avocado, cream cheese, or even a poached egg.
- Soups & Stews: Serve slices alongside or use cubes for dipping into robust soups like tomato, lentil, or beef stew.
- Bruschetta/Crostini: Toast thin slices and top with fresh tomatoes, garlic, basil, or other flavorful toppings.
- Croutons: Cube slightly stale sourdough, toss with olive oil and herbs, and bake until crispy for salads or soup toppings.
Storing Your Sourdough Bread for Freshness
Proper storage is key to keeping your homemade sourdough bread fresh and delicious for as long as possible. Unlike commercial bread, sourdough often stays fresh longer due to its acidity, which naturally inhibits mold growth. However, maintaining its signature crust and interior texture requires the right approach.
At room temperature, a whole loaf can typically last 2-3 days while maintaining good quality. Sliced bread tends to dry out faster. The best way to store sourdough depends on how quickly you plan to eat it and your preference for crust texture. Avoiding airtight plastic immediately after baking is generally recommended, as it traps moisture and softens the crust.
Maintaining the Quality and Flavor of Your Baked Bread
For the first day or two, store your sourdough at room temperature. A bread box is an excellent option, providing a balance of air circulation and moisture retention. Alternatively, you can store it cut-side down on a cutting board or wrap it loosely in a linen or cotton bread bag. These methods help keep the crust crisp while protecting the interior from drying out too quickly.
For longer storage, especially beyond 2-3 days, freezing is the best option. Allow the bread to cool completely before storing. For convenience, slice the loaf before freezing. Wrap slices or the whole loaf tightly in plastic wrap, then place in a freezer bag or aluminum foil to prevent freezer burn. Thaw slices as needed or reheat a whole loaf gently in a warm oven. Avoid refrigerating sourdough, as it can accelerate staling.
Conclusion: Enjoying the Art of Sourdough Baking
Baking sourdough bread is more than just following a recipe; it's a journey of discovery, patience, and connection to a timeless craft. From nurturing your own living starter to understanding the nuances of fermentation, each step offers an opportunity to learn and grow as a baker. Don't aim for perfection on your first try; embrace the process, learn from each bake, and celebrate the unique loaves you create.
The beauty of sourdough lies in its adaptability. Once you have a healthy starter and understand the basic principles, you can begin to experiment with different flours, hydrations, and additions like seeds, herbs, or cheese. Each variation will bring a new dimension to your bread, making every loaf a unique creation. Sourdough baking is a rewarding hobby that fills your home with incredible aromas and your table with delicious, wholesome bread.
Embrace the Process and Experiment with Flavors
The journey of sourdough baking is continuous learning. Don't get discouraged by setbacks; flat loaves, overly sticky dough, or dense crumbs are all part of the learning curve. Each bake provides valuable insights into how your starter is behaving and how the dough responds in your specific environment. Pay attention, take notes, and adjust your approach for the next bake.
Once you feel comfortable with a basic sourdough recipe, the possibilities for experimentation are vast. Try incorporating a percentage of whole wheat, rye, or spelt flour for different flavors and textures. Add seeds like sesame, poppy, or sunflower, or mix in herbs, roasted garlic, or olives. Play with hydration levels to achieve different crumb structures. The more you experiment, the more you'll discover the endless potential of your sourdough starter and the joy of creating truly personalized bread.
Frequently Asked Questions
What makes this whole wheat ciabatta recipe "healthy"?
The recipe is considered healthy because it uses whole wheat flour, which is higher in fiber and nutrients compared to refined white flour. This provides a more nutritious and filling alternative to traditional ciabatta.
Is this recipe suitable for beginner bakers?
While ciabatta can be slightly challenging, this recipe from BakeWithEase aims to be approachable with clear, step-by-step instructions. It emphasizes easy-to-find ingredients and provides tips for success, making it manageable for beginners.
Can I substitute any ingredients in this whole wheat ciabatta recipe?
Minor substitutions are possible, but altering the flour type significantly may affect the texture. Using a portion of bread flour can help improve the rise. Refer to the BakeWithEase website for detailed substitution advice.
How should I store my homemade whole wheat ciabatta?
Store the ciabatta in a paper bag at room temperature for up to 2 days. For longer storage, slice and freeze the bread to maintain its freshness.
What dishes pair well with whole wheat ciabatta?
This bread is incredibly versatile! It pairs well with soups, salads, and sandwiches. It's also delicious as a side dish for pasta or simply enjoyed with olive oil and balsamic vinegar.
Final Reflection: The Enduring Appeal of Wholesome Baking
The pursuit of healthy eating doesn't mean sacrificing taste or texture; the vibrant, rustic world of whole wheat ciabatta proves this perfectly. This recipe, designed to be both delicious and nutritious, highlights the power of simple ingredients transformed through mindful preparation. The satisfying chew, the airy crumb, and the subtle nutty flavor of whole wheat are a testament to the rewarding experience of baking with intention.
The journey of creating this ciabatta, from kneading the dough to the satisfying aroma filling the kitchen, underscored for me the importance of connecting with our food on a deeper level. It's a reminder that healthy eating isn't just about restricting ourselves, but about actively choosing nourishing ingredients and savoring the process of creating something wholesome. Food is symbolic of love when words are inadequate.
- Alan D. Wolfelt. This quote resonates deeply, as the act of baking this bread, and sharing it, becomes an expression of care and nourishment.
Now, I invite you to try your hand at this recipe. Don't be intimidated by the seemingly complex process; the rewards are well worth the effort. Embrace the tactile experience of working with the dough, the anticipation of the rising loaves, and the ultimate satisfaction of sharing a warm, crusty slice of whole wheat ciabatta with loved ones. Let this recipe be a starting point for your own exploration of healthy and delicious baking, a journey that nourishes both body and soul.
Unleash Your Inner Baker: Craft the Perfect Ciabatta!
Thanks for joining us on this delicious journey into the world of whole wheat ciabatta! We hope you gained valuable insights into crafting this healthier, yet equally satisfying, bread. Ready to put your new skills to the test?
- Bake your own ciabatta today! Use our recipe as a springboard, experimenting with different flours and herbs to create your signature loaf.
- Share your baking triumphs (and challenges!) with our community on social media using #BakeWithEaseCiabatta. Let's inspire each other!
- Explore other healthy bread recipes on our website – discover new flavors and techniques to expand your baking repertoire.
What unique ingredient will you add to your next whole wheat ciabatta creation?