
Adapting Any Bread Recipe to Be Whole Wheat


Welcome to BakeWithEase, your partner in conquering the world of baking! Ever wondered how to transform your favorite bread recipe into a healthier, more flavorful loaf? This guide dives deep into the secrets of whole wheat bread conversion, unlocking the potential of whole grains in your baking. Prepare to discover simple adjustments that will revolutionize your bread-making, creating delicious and nutritious loaves every time. Intrigued? Let's get baking!
- Adapting Bread Recipes to Whole Wheat: A Comprehensive Guide
- Understanding Whole Wheat Flour in Bread Baking
- Mastering Whole Wheat Bread Conversion: A Step-by-Step Guide
- Converting Different Bread Types to Whole Wheat
- Troubleshooting Common Whole Wheat Bread Issues
- Tips and Tricks for Flavorful Whole Wheat Bread
- Whole Wheat Bread Conversion: Practical Examples
- Advanced Whole Wheat Bread Baking
-
Frequently Asked Questions
- How do I convert a regular bread recipe to use whole wheat flour?
- Will the taste and texture of my bread change if I use whole wheat flour?
- What adjustments should I make to the hydration level when using whole wheat flour?
- Can I substitute 100% of the all-purpose flour with whole wheat flour?
- What are some tips for baking successfully with whole wheat flour?
- Final Reflection: The Enduring Power of Whole Wheat
- Unlock the Nutty Goodness of Whole Wheat Baking!
Adapting Bread Recipes to Whole Wheat: A Comprehensive Guide
Whole wheat bread offers a rich flavor and significant nutritional benefits compared to bread made solely with refined white flour. Making a successful whole wheat bread conversion from your favorite recipes involves understanding how whole wheat flour behaves differently and making appropriate adjustments. This guide will walk you through the process, helping you achieve delicious and wholesome results in your whole wheat bread baking journey. Mastering whole wheat bread conversion opens up a world of possibilities in your kitchen.
Understanding Whole Wheat Flour in Bread Baking
Whole wheat flour is milled from the entire wheat kernel, including the bran, germ, and endosperm. This contrasts sharply with white flour, which uses only the starchy endosperm. This fundamental difference in composition is the root of the challenges and rewards of whole wheat bread conversion. Understanding these differences is the first step towards achieving a great loaf.
The Nutritional Advantages of Whole Wheat Bread
One of the primary motivations for whole wheat bread conversion is the boost in nutritional value. Whole wheat flour retains the bran and germ, which are packed with fiber, vitamins, minerals, and healthy fats. For instance, a typical whole wheat flour contains roughly 12-14 grams of dietary fiber per 100 grams, significantly more than the 2-3 grams found in refined white flour. This higher fiber content aids digestion and contributes to a feeling of fullness.
Beyond fiber, whole wheat bread provides a richer array of micronutrients. The germ is a good source of B vitamins (like niacin, thiamine, and riboflavin) and vitamin E, while the bran offers minerals such as iron, magnesium, and zinc. While some of these nutrients are added back to enriched white flour, they are naturally present and in higher quantities in whole wheat. This makes whole wheat bread a more nutrient-dense option for many diets.
Differences Between Whole Wheat and White Flour in Baking
The presence of bran and germ in whole wheat flour significantly impacts its baking properties compared to white flour. White flour, being mostly endosperm, is primarily starch and protein (gluten). This pure composition allows gluten to develop easily into a strong, elastic network that traps gases and gives bread its structure and rise.
Whole wheat flour, however, contains sharp bran particles that can cut through the developing gluten strands, inhibiting their formation and weakening the overall network. The germ also contains fats that can interfere with gluten development. Additionally, whole wheat flour is more absorbent than white flour due to the fiber in the bran, requiring more liquid to achieve a similar dough consistency. These differences necessitate adjustments in hydration, kneading, and proofing when undertaking a whole wheat bread conversion.
Impact of Whole Wheat on Bread Texture and Flavor
The inclusion of bran and germ gives whole wheat bread a distinct texture and flavor. The bran contributes to a denser, heartier crumb structure compared to the light, airy texture often achieved with white flour. The sharp bran particles also make the crumb less smooth. Achieving a light texture in whole wheat bread requires careful handling and sufficient hydration.
Flavor-wise, whole wheat flour imparts a nuttier, slightly sweeter, and more complex taste than the neutral profile of white flour. Sometimes, a slightly bitter note can be present due to compounds in the bran and germ (like phytic acid), though this can often be mitigated with proper fermentation and ingredient additions. Embracing these unique characteristics is part of the appeal of whole wheat bread conversion.
Mastering Whole Wheat Bread Conversion: A Step-by-Step Guide

Successfully converting a recipe to whole wheat involves more than just a simple flour swap. It requires a thoughtful approach to hydration, gluten development, and fermentation. Each step in this guide addresses a critical aspect of whole wheat bread conversion, helping you anticipate and manage the unique properties of whole wheat flour.
Step 1: Determining the Whole Wheat Flour Percentage
When you first attempt a whole wheat bread conversion, it's often best to start by substituting only a portion of the white flour with whole wheat. This allows you to get a feel for how whole wheat affects your specific recipe without drastically altering the outcome. Beginners might start with a smaller percentage, while experienced bakers can experiment with higher ratios.
Recommended Starting Percentage: 25-50%
A common and manageable starting point for whole wheat bread conversion is substituting 25% to 50% of the total flour weight with whole wheat flour. For example, if a recipe calls for 500 grams of white flour, you could try using 125 grams of whole wheat flour and 375 grams of white flour (25%) or 250 grams of whole wheat and 250 grams of white flour (50%).
This range provides a good balance, offering some nutritional benefits and flavor while minimizing the challenges related to gluten development and texture. Starting here makes your first whole wheat bread conversion less daunting.
Step 2: Adjusting Liquid Content for Hydration
Whole wheat flour is significantly more absorbent than white flour. The bran and germ components soak up more water, meaning you'll need to increase the total liquid in your recipe to achieve a dough consistency similar to the original. Failing to increase the liquid will result in a dry, stiff dough that is difficult to knead and won't rise properly.
Why Whole Wheat Flour Requires More Liquid
The fibrous bran and protein-rich germ in whole wheat flour have a higher capacity to absorb and retain water compared to the starchy endosperm that makes up white flour. Think of the bran like tiny sponges. When you substitute white flour with whole wheat, you're introducing these thirsty components into your dough. A general guideline is to increase the liquid by about 10-20% of the weight of the whole wheat flour you are adding. For instance, if you replace 200g of white flour with 200g of whole wheat, you might need to add an extra 20-40g (ml) of water.
Gradual Hydration Techniques
Adding all the extra liquid at once can sometimes lead to a dough that is too wet. It's often better to add the initial amount you estimate is needed and then hold back a small portion of the liquid. As you mix and knead the dough, gradually add the remaining liquid only if the dough feels too dry or stiff.
Observe the dough's texture – it should feel soft, pliable, and slightly sticky, similar to a properly hydrated white flour dough. This gradual approach allows you to fine-tune the hydration level based on the specific flour you are using, as absorption rates can vary.
Step 3: Optimizing Gluten Development
Gluten development is crucial for trapping the gases produced during fermentation, which gives bread its rise and structure. As mentioned, the bran and germ in whole wheat flour can hinder gluten formation. Therefore, techniques that promote stronger gluten development are particularly important when doing a whole wheat bread conversion.
The Importance of Gluten in Whole Wheat Bread
Despite the challenges posed by the bran and germ, developing a sufficient gluten network is still essential for a good whole wheat loaf. A well-developed gluten structure provides the elasticity needed for the dough to expand during proofing and oven spring. Without adequate gluten development, the bread will be dense, heavy, and have a poor crumb structure. The protein content of the flour itself (typically 12-14% in whole wheat) is the source of gluten, but it needs proper hydration and manipulation (kneading) to form strong bonds.
Enhancing Gluten Development: Autolyse and Kneading Techniques
One effective technique for enhancing gluten development in whole wheat bread conversion is autolyse. This involves mixing the flour and water from the recipe and letting them rest for 20-60 minutes before adding the salt and yeast. This resting period allows the flour to fully hydrate and enzymatic activity to begin breaking down proteins, making subsequent kneading more efficient for gluten development.
Whole wheat dough often benefits from slightly longer or more vigorous kneading than white dough to overcome the interference from the bran. Some bakers also use techniques like stretch and folds during bulk fermentation to gently strengthen the gluten network without tearing it.
Step 4: Adapting Proofing Times for Fermentation
Whole wheat dough often ferments at a slightly different pace than white dough. While yeast activity is similar, the presence of bran and germ can sometimes affect the dough's structure and how it holds gas, influencing how quickly it appears to rise and when it is ready for baking.
Whole Wheat Dough Fermentation Considerations
The denser nature and potentially weaker gluten structure of whole wheat dough mean it might not achieve the same dramatic volume increase during proofing as a white dough. It's crucial not to rely solely on doubling in size as an indicator of readiness, especially when performing a whole wheat bread conversion with a high percentage of whole wheat flour. The fermentation process is still building flavor and structure, even if the visual rise is less pronounced. The bran can also make it harder to see internal signs of fermentation like bubbles.
Determining Dough Readiness for Baking
Instead of relying solely on visual size, use the "poke test" to determine if your whole wheat dough is ready for baking. Gently press a floured finger about half an inch into the dough. If the indentation springs back very slowly or only partially, the dough is likely ready. If it springs back immediately, it needs more time.
If it collapses completely, it is likely over-proofed. Pay attention to the overall feel and appearance – the dough should look well-aerated, perhaps with some small bubbles visible on the surface. This tactile test is key for successful whole wheat bread conversion proofing.
Converting Different Bread Types to Whole Wheat
The approach to whole wheat bread conversion can vary slightly depending on the type of bread recipe you are starting with. Lean doughs, enriched doughs, and sourdoughs each present unique considerations when incorporating whole wheat flour.
Converting Enriched Bread Recipes to Whole Wheat
Enriched bread recipes, which contain ingredients like eggs, milk, butter, or sugar, present a slightly different scenario for whole wheat bread conversion. These added ingredients already tenderize the dough and can sometimes help mask the effects of the bran on gluten structure. However, the increased absorbency of whole wheat flour still requires careful liquid adjustment. You might need to add extra milk or water. The richness of the added ingredients can also complement the nutty flavor of whole wheat. When converting, consider how the richness will interact with the whole wheat flavor profile.
Converting Lean Bread Recipes to Whole Wheat
Lean bread recipes, typically made only with flour, water, salt, and yeast, rely heavily on gluten development for structure. Whole wheat bread conversion with lean doughs requires particular attention to hydration and kneading techniques like autolyse or stretch and folds to build a strong gluten network that can support the rise. Because there are no fats or sugars to tenderize the dough, the potential for a dense loaf is higher if gluten is underdeveloped or hydration is insufficient. Mastering hydration and kneading is paramount for successful whole wheat bread conversion in lean doughs.
Converting Sourdough Bread Recipes to Whole Wheat
Sourdough starters can thrive on whole wheat flour, and incorporating it into sourdough recipes is a popular whole wheat bread conversion. Whole wheat flour can accelerate starter activity due to its higher nutrient content. When adding whole wheat to a sourdough recipe, remember its higher absorbency and adjust the water accordingly.
The longer fermentation times inherent in sourdough baking can also help break down some of the compounds in whole wheat that can cause bitterness, resulting in a more mellow flavor. Pay close attention to the dough's activity, as the whole wheat might cause it to ferment faster than a pure white sourdough.
Troubleshooting Common Whole Wheat Bread Issues
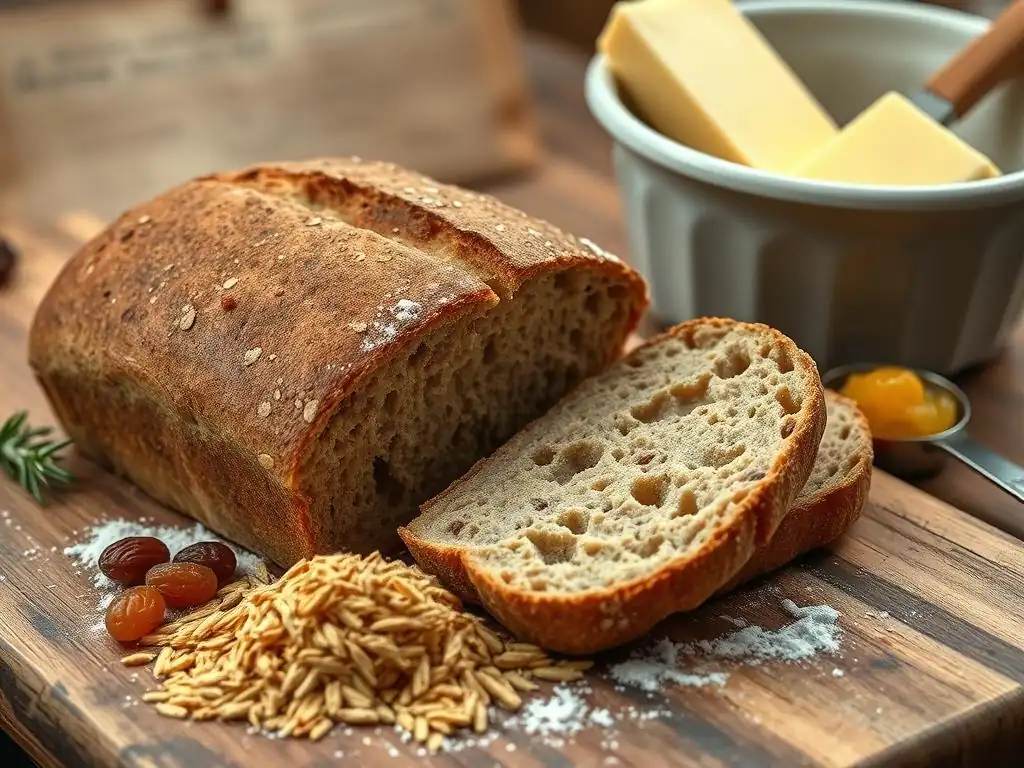
Even with careful whole wheat bread conversion, you might encounter some common challenges. Knowing how to identify and address these issues is part of the learning process in whole wheat baking.
Dense and Heavy Whole Wheat Bread: Causes and Solutions
A dense, heavy crumb is a frequent issue in whole wheat bread conversion. This is usually caused by insufficient gluten development or under-proofing.
- Causes:
- Not enough liquid (under-hydrated dough).
- Insufficient kneading or poor gluten development.
- Under-proofing (dough didn't ferment long enough).
- Too much whole wheat flour for the recipe's structure to handle without adjustments.
- Solutions:
- Increase hydration; the dough should be soft and slightly sticky.
- Use techniques like autolyse or stretch and folds to improve gluten.
- Knead longer or more effectively.
- Allow adequate proofing time, using the poke test.
- Consider reducing the percentage of whole wheat flour in your whole wheat bread conversion if starting with a high amount.
Dry and Crumbly Whole Wheat Bread: Causes and Solutions
If your whole wheat loaf is dry and falls apart easily, it's likely a hydration issue coupled with structure problems.
- Causes:
- Significantly under-hydrated dough.
- Over-baking, drying out the crumb.
- Lack of sufficient fat or enrichment in the recipe (for certain bread types).
- Solutions:
- Ensure adequate liquid during mixing; whole wheat needs more water.
- Check your oven temperature and baking time – reduce if necessary.
- For enriched breads, ensure fats (like butter or oil) are correctly incorporated. Proper whole wheat bread conversion requires careful hydration adjustments.
Bitter Flavor in Whole Wheat Bread: Causes and Solutions
Sometimes, whole wheat bread can have an undesirable bitter or slightly harsh taste.
- Causes:
- Compounds (like phytic acid) naturally present in the bran and germ.
- Insufficient fermentation time to break down these compounds.
- Poor quality or rancid whole wheat flour.
- Solutions:
- Allow for a longer, slower fermentation, especially during the bulk rise or if using sourdough, as this helps enzymes neutralize some bitter compounds.
- Ensure you are using fresh, high-quality whole wheat flour. Store it properly (ideally in the freezer or fridge) as the germ's fats can go rancid.
- Adding a touch of sweetener like honey or molasses can help balance the flavor profile in your whole wheat bread conversion.
Tips and Tricks for Flavorful Whole Wheat Bread
Beyond the technical adjustments, a few simple tips can elevate the flavor and texture of your whole wheat loaves, making your whole wheat bread conversion efforts even more rewarding.
Selecting Quality Whole Wheat Flour
The quality and type of whole wheat flour you use can significantly impact your results. Look for stone-ground whole wheat flour, which is often considered superior for flavor and nutrition as it retains more of the germ and bran in a finer particle size compared to roller-milled flour.
- Consider sourcing flour from local mills or reputable baking suppliers.
- Check the protein content; higher protein flour (around 13-14%) can help with gluten development.
- Store whole wheat flour properly in an airtight container in a cool, dark place, or ideally, the refrigerator or freezer, to prevent the fats in the germ from oxidizing and becoming rancid.
Enhancing Flavor: Adding Honey and Molasses
Whole wheat flour pairs beautifully with sweeteners like honey, molasses, or maple syrup. These not only add a subtle sweetness that complements the nutty flavor of the whole wheat but can also contribute to a softer crumb and richer crust color due to the sugars caramelizing during baking.
- Replace a small portion of the liquid with honey or molasses (adjusting total liquid accordingly).
- Molasses, in particular, adds a deep, malty flavor that works exceptionally well in whole wheat breads.
- Start with a small amount, perhaps 1-2 tablespoons per loaf, and adjust in future bakes based on your preference. This is a simple but effective tip for enhancing your whole wheat bread conversion results.
Storing Whole Wheat Bread for Freshness
Whole wheat bread, with its higher oil content from the germ, can sometimes dry out faster than white bread, but it can also be more prone to spoilage if not stored correctly. Proper storage is key to enjoying your delicious whole wheat bread conversion creations.
- Allow the bread to cool completely on a wire rack before storing. Slicing warm bread traps moisture and can make it gummy.
- Store cooled bread at room temperature in a bread box, a paper bag inside a plastic bag, or wrapped in a linen bread bag. Avoid airtight plastic containers at room temperature, as they can trap moisture and promote mold growth.
- For longer storage, slice the cooled loaf and freeze slices in an airtight bag or container. Frozen whole wheat bread maintains quality for several months.
Whole Wheat Bread Conversion: Practical Examples

Let's look at how these principles apply to converting common bread recipes. These examples illustrate the practical steps involved in making a whole wheat bread conversion.
Example 1: Converting a White Sandwich Bread Recipe to 50% Whole Wheat
Imagine a basic white sandwich bread recipe calling for 500g white flour, 300g water (60% hydration), 10g salt, and 7g instant yeast.
- Goal: Convert to 50% whole wheat.
- Step 1 (Flour): Use 250g whole wheat flour and 250g white flour.
- Step 2 (Liquid): Whole wheat needs roughly 10-20% more liquid by its weight. For 250g whole wheat, add an extra 25g to 50g of water. Start with 30g extra, making the total water 330g. Add gradually as needed during mixing.
- Step 3 (Gluten): Consider an autolyse step: Mix flours and water (330g) and rest for 30 minutes before adding salt and yeast. Knead until dough passes the windowpane test, which might take slightly longer than pure white dough.
- Step 4 (Proofing): Bulk proof until roughly 1.5 times its original size (poke test is key). Shape, then final proof until the poke test indicates readiness (slow spring back). Baking time and temperature should remain similar, but watch for crust color. This whole wheat bread conversion results in a heartier loaf.
Example 2: Converting a Sourdough Boule Recipe to Whole Wheat
Consider a sourdough boule recipe using 400g bread flour, 100g active sourdough starter (50g flour, 50g water), 350g water (70% hydration excluding starter water), and 10g salt. Total flour: 450g (400+50), Total water: 400g (350+50). Overall hydration: ~89%.
- Goal: Convert to 100% whole wheat (using whole wheat starter).
- Step 1 (Flour): Use 400g whole wheat flour for the main dough and ensure your 100g starter is fed with whole wheat flour (50g whole wheat, 50g water). Total whole wheat flour: 450g.
- Step 2 (Liquid): 100% whole wheat requires significant hydration. The original recipe is already high hydration. Estimate adding 15-20% of the total whole wheat flour weight in extra water. For 450g whole wheat, this is 67g to 90g extra water. Start by adding 75g extra water, bringing total water to 475g. Overall hydration is now ~105% (475g water / 450g flour), which is appropriate for a wet, whole wheat sourdough. Add gradually.
- Step 3 (Gluten): Use a long autolyse (60 minutes or more) with just the 400g whole wheat flour and 400g of the water. Add starter, salt, and remaining water (75g+) after the rest. Employ multiple stretch and folds (4-6 sets) during the initial bulk fermentation to build strength.
- Step 4 (Proofing): Bulk fermentation might be slightly faster or slower depending on your starter and ambient temperature; watch the dough activity (bubbles, slight increase in volume). Cold proofing in the refrigerator overnight is highly recommended for flavor and managing the dough structure before baking. Bake as usual, potentially extending bake time slightly due to higher hydration. This whole wheat bread conversion yields a rustic, flavorful loaf.
Advanced Whole Wheat Bread Baking
Once you're comfortable with basic whole wheat bread conversion, you can explore more advanced techniques and ingredients to further refine your whole wheat loaves.
Exploring Different Varieties of Whole Wheat Flour
Not all whole wheat flours are the same. They can vary based on the type of wheat used (hard red wheat, soft white wheat, etc.) and how finely they are milled.
- Hard Red Wheat: The most common type, producing robust, flavorful flour with high protein content, excellent for hearty loaves.
- Soft White Wheat: Milder in flavor and color, lower in protein, often used for pastries or lighter whole wheat breads.
- Stone-Ground vs. Roller-Milled: Stone-ground flour typically retains more of the germ and bran and can have a coarser texture and richer flavor.
- Experimenting with different types and grinds will show you how they affect your whole wheat bread conversion results.
Combining Whole Wheat Flour with Other Grains and Seeds
Incorporating other flours and additions can enhance texture, flavor, and nutrition in your whole wheat bread.
- Rye Flour: Adds tang and moisture, pairs well with whole wheat. Start by substituting 10-20% of the whole wheat flour with rye.
- Spelt Flour: An ancient grain with a slightly nutty, sweet flavor and more easily digestible gluten (though not gluten-free). Can replace a portion of whole wheat.
- Additions: Incorporating seeds (flax, sesame, sunflower), nuts, or cooked grains (like oats or farro) adds texture, flavor, and nutritional value. Add these during the kneading phase after gluten has started to develop. These additions require slight hydration adjustments too.
Enhancing Flavor and Texture with Pre-Ferments
Using a pre-ferment (like a poolish, biga, or levain/sourdough starter) in your whole wheat bread conversion recipe can significantly improve flavor complexity, crumb texture, and shelf life.
- A pre-ferment is a portion of the flour, water, and yeast (or starter) mixed and allowed to ferment for several hours or overnight before being added to the main dough.
- This slow fermentation develops organic acids and other compounds that contribute desirable flavors not present in straight doughs.
- It also helps strengthen the dough's structure, which is particularly beneficial when working with whole wheat flour. Incorporating a whole wheat pre-ferment into your whole wheat bread conversion is a fantastic way to boost your loaf's quality.
Frequently Asked Questions
How do I convert a regular bread recipe to use whole wheat flour?
To convert a recipe, start by substituting 25-50% of the all-purpose flour with whole wheat flour. You may need to add a bit more liquid, as whole wheat absorbs more moisture.
Will the taste and texture of my bread change if I use whole wheat flour?
Yes, using whole wheat flour will result in a denser and nuttier flavored bread compared to bread made with only all-purpose flour. The texture will also be slightly coarser.
What adjustments should I make to the hydration level when using whole wheat flour?
Whole wheat flour absorbs more water than all-purpose flour, so you'll likely need to add 1-2 tablespoons of extra water per cup of whole wheat flour used to achieve the desired dough consistency.
Can I substitute 100% of the all-purpose flour with whole wheat flour?
While possible, a 100% substitution can result in a very dense and heavy loaf. It's generally recommended to start with a partial substitution and adjust from there based on your preferences and the specific recipe.
What are some tips for baking successfully with whole wheat flour?
Allow the dough to rest for 20-30 minutes after mixing (autolyse) to allow the flour to fully hydrate. Also, be careful not to over-knead, as whole wheat dough can become tough.
Final Reflection: The Enduring Power of Whole Wheat
The simple act of swapping out all-purpose flour for whole wheat is far more than just a recipe adjustment; it's a gateway to a healthier, more flavorful, and ultimately more sustainable baking experience. This article explored the nuances of converting beloved bread recipes to whole wheat, highlighting the importance of understanding hydration levels, adding vital wheat gluten, and embracing the unique character of whole wheat flour. The techniques discussed remain incredibly relevant in today's world, where conscious consumption and a focus on nutritional well-being are increasingly important.
The shift towards whole wheat baking reflects a broader cultural movement towards healthier eating and a deeper appreciation for the origins of our food. This isn't just about swapping ingredients; it's about connecting with the process of baking, understanding the properties of different flours, and ultimately, savoring the richer, more complex flavors that whole wheat offers. As Michael Pollan famously stated, Eat food. Not too much. Mostly plants.
This simple philosophy perfectly encapsulates the spirit of embracing whole wheat baking – a commitment to nourishing ourselves with wholesome ingredients and appreciating the artistry of creating something delicious from scratch.
Now, I invite you to take what you've learned and embark on your own whole wheat baking journey. Don't be afraid to experiment, to adjust recipes to your preferences, and to embrace the occasional imperfection. The rewards – a loaf of bread bursting with flavor and nutrition, baked with your own two hands – are well worth the effort. So, grab your flour, your mixing bowls, and let the transformative power of whole wheat bread enrich your kitchen and your life.
Unlock the Nutty Goodness of Whole Wheat Baking!
Thanks for taking the time to explore the world of whole wheat bread! We hope you now feel confident in adapting your favorite recipes. Ready to get baking?
- Try it out! Choose your favorite bread recipe and make it whole wheat using the techniques we've outlined. Let us know how it turns out!
- Share your results! Post a picture of your creation on social media using #BakeWithEaseWholeWheat. We'd love to see your delicious loaves!
- Explore our other articles for more whole grain baking inspiration! Discover new flavor combinations and techniques to perfect your whole wheat baking.
What delicious whole wheat bread creation will you bake first?