
Bake Foolproof GlutenFree Bread in Your Bread Maker

Welcome to BakeWithEase, your trusted guide to baking bliss! Ever dreamed of effortlessly crafting the perfect loaf of gluten-free bread? Imagine the aroma of freshly baked, gluten-free goodness filling your kitchen. Dive into our Glutenfree bread maker recipe and discover how simple it is to bake foolproof, delicious bread right in your own bread maker. Intrigued? Let's unlock the secrets to gluten-free bread baking success!
- Introduction to Gluten-Free Bread Baking with a Bread Maker
- Understanding Gluten-Free Bread Making Essentials
- Choosing the Right Bread Maker for Gluten-Free Baking
-
Foolproof Gluten-Free Bread Maker Recipe: A Step-by-Step Guide
- Tested and Approved Gluten-Free Bread Maker Recipe
- Ingredients List
- Step 1: Preparing the Ingredients
- Step 2: Adding Ingredients to the Bread Maker Pan
- Step 3: Selecting the Gluten-Free Cycle
- Step 4: Monitoring the Dough and Adjusting as Needed
- Step 5: Removing and Cooling Your Freshly Baked Gluten-Free Bread
- Troubleshooting Common Gluten-Free Bread Maker Problems
- Tips and Tricks for the Best Gluten-Free Bread Maker Results
- Variations on Our Basic Gluten-Free Bread Maker Recipe
- Conclusion: Enjoying Delicious Gluten-Free Bread Made Easy
-
Frequently Asked Questions
- What are the essential ingredients for a gluten-free bread maker recipe?
- Can any bread maker be used for a gluten-free bread maker recipe?
- What makes gluten-free bread making different from traditional bread making?
- How can I prevent my gluten-free bread from being too dense?
- Where can I find reliable gluten-free bread maker recipes?
- Final Reflection: The Joy of Gluten-Free Baking, Simplified
- Unleash Your Inner Baker: Gluten-Free Bread Awaits!
Introduction to Gluten-Free Bread Baking with a Bread Maker
Baking fresh bread at home is a rewarding experience, and for those avoiding gluten, it opens up a world of delicious possibilities. While traditional gluten-free bread making can sometimes feel daunting, requiring precise measurements and tricky dough handling, the advent of the bread maker has simplified the process significantly. This guide will walk you through everything you need to know to bake consistently excellent gluten-free loaves right in your kitchen appliance.
Using a bread maker takes much of the guesswork and manual effort out of gluten-free baking. From mixing and rising to baking, the machine handles the critical stages, making it an ideal tool for beginners and experienced bakers alike who want reliable results without the mess and fuss. Get ready to enjoy warm, homemade gluten-free bread with minimal effort!
Why Use a Bread Maker for Gluten-Free Bread?
Baking gluten-free bread presents unique challenges compared to wheat bread. Without the elastic network that gluten provides, GF dough is often sticky, more like a thick batter than a kneadable dough, and requires careful handling. A bread maker excels here because it automates the mixing and rising processes, which are particularly sensitive for gluten-free formulations.
The machine's controlled environment ensures consistent temperatures for rising and baking, crucial factors for achieving a good texture and reliable rise in a gluten-free bread maker recipe. It eliminates the need for manual kneading (which isn't suitable for GF dough anyway) and provides a stable environment for the often-finicky GF rise.
Furthermore, many modern bread makers feature a dedicated "Gluten-Free" cycle. This specialized setting is programmed to accommodate the specific needs of gluten-free dough, typically involving less mixing, a shorter or single rise period, and adjusted baking times and temperatures. This automation saves you from having to manually time and monitor each stage, dramatically increasing the chances of success compared to trying to adapt a standard cycle or relying on manual methods.
For example, a typical gluten-free cycle might be around 2.5 to 3 hours total, whereas a standard wheat cycle can be 3-4 hours with multiple kneads and rises. This tailored approach makes baking a foolproof gluten-free bread maker recipe much more accessible and reliable.
Understanding Gluten-Free Bread Making Essentials
Mastering a delicious gluten-free bread maker recipe starts with understanding the fundamental components that make GF baking work. Unlike traditional bread, where gluten provides structure, GF bread relies on a careful balance of different flours, starches, and binders to achieve a desirable crumb and texture.
Key Ingredients for Perfect Gluten-Free Bread Maker Recipes
A successful gluten-free bread maker recipe hinges on the right combination of ingredients. The core components typically include a gluten-free flour blend, a binder (like xanthan gum or psyllium husk), liquid (water, milk, or plant-based milk), yeast, a sweetener (sugar, honey, or maple syrup) to feed the yeast, fat (oil or butter) for tenderness, and salt for flavor and yeast control.
Each ingredient plays a vital role; the flour blend provides the bulk, the binder mimics gluten's structure, the liquid hydrates everything and activates the yeast, yeast causes the bread to rise, sweetener helps the yeast, fat softens the crumb, and salt balances the flavor. Understanding the function of each helps troubleshoot issues.
For a standard 1.5-pound loaf, a typical gluten-free bread maker recipe might call for approximately 3.5 cups of gluten-free flour blend, 1.5 cups of warm liquid, 1-2 teaspoons of binder (if not already in the blend), 2 teaspoons of yeast, 1 tablespoon of sweetener, 1 teaspoon of salt, and 2 tablespoons of fat. These quantities are approximate and can vary based on the specific flour blend used, as different flours absorb liquid differently.
Using the correct ratio of liquid to dry ingredients is paramount for achieving the right dough consistency, which in gluten-free baking is often more like a thick batter than a traditional elastic dough. Precise measurement, especially of the flour blend and binder, is crucial for consistent results.
Gluten-Free Flour Blends: Choosing the Right One
Choosing the right gluten-free flour blend is perhaps the most critical factor in a successful gluten-free bread maker recipe. Unlike wheat flour, which is a single ingredient, GF blends are typically a mix of different flours and starches designed to approximate the texture and behavior of wheat. Common components include rice flour (white and brown), sorghum flour, millet flour, tapioca starch, potato starch, and cornstarch.
An effective blend usually combines whole-grain GF flours (like sorghum or millet) for flavor and nutrition with starches (like tapioca or potato) for lightness and texture. The ratio of these components significantly impacts the final bread. For instance, a blend high in starches might yield a lighter crumb but could be more prone to gumminess if not handled correctly.
Many high-quality pre-mixed gluten-free flour blends are available commercially, and their composition varies widely between brands. Some popular brands include Bob's Red Mill 1-to-1 Baking Flour, King Arthur Gluten-Free All-Purpose Flour, or Cup4Cup. It's important to note whether a blend already contains a binder like xanthan gum; if it does, you'll need to adjust the amount of added binder in your recipe accordingly.
Experimenting with different store-bought blends or even creating your own custom blend (e.g., a simple mix of 40% brown rice flour, 30% tapioca starch, and 30% sorghum flour) can help you find the one that produces the texture and flavor you prefer in your gluten-free bread maker recipe. Always store GF flours in a cool, dry place, ideally the refrigerator or freezer, to maintain freshness.
The Importance of Binders: Xanthan Gum and Other Options
Binders are indispensable in gluten-free bread making. Their role is to replace the function of gluten, providing structure, elasticity, and cohesion to the dough. Without a binder, gluten-free bread would likely collapse, be excessively crumbly, or fail to rise properly. Xanthan gum is the most commonly used binder in gluten-free baking due to its ability to mimic gluten's properties effectively.
It helps create a network that traps the gases produced by the yeast, allowing the bread to rise and hold its shape. For a standard gluten-free bread maker recipe using about 3.5 cups of flour blend, you typically need to add 1 to 1.5 teaspoons of xanthan gum if your flour blend doesn't already contain it. Adding too much can result in a gummy or dense texture, while too little will lead to a crumbly loaf.
While xanthan gum is popular, other binders can also be used, such as psyllium husk (whole or powder) or guar gum. Psyllium husk, in particular, has gained popularity for its ability to create a slightly chewier, more elastic texture that some bakers find closer to traditional wheat bread. Psyllium husk powder is often used at a higher ratio than xanthan gum, typically around 1 to 2 tablespoons per loaf, and often requires soaking in the liquid portion of the recipe for a few minutes before combining with dry ingredients to form a gel.
Guar gum is sometimes used interchangeably with xanthan gum but can produce a slightly different texture and is often used in smaller quantities. Choosing the right binder and using the correct amount is a critical step towards perfecting your gluten-free bread maker recipe.
Yeast and Gluten-Free Bread: Activating and Proofing Techniques
Yeast is the leavening agent that makes bread light and airy by producing carbon dioxide gas. In gluten-free bread making, yeast works similarly to how it does in wheat bread, consuming sugars and releasing gas. However, because there's no gluten network to efficiently trap the gas, the rise in GF bread can be less dramatic or structured.
Active dry yeast needs to be activated in warm liquid (around 105-115°F or 40-46°C) with a pinch of sugar before being added to the other ingredients; it should become foamy within 5-10 minutes, indicating it's alive and active. Instant yeast, on the other hand, can usually be mixed directly with the dry ingredients, as it's designed to activate upon contact with liquid during mixing. Ensure your yeast is fresh by checking the expiration date or performing a quick activation test.
Proofing, or the rising stage, is handled automatically by most bread makers, especially on the gluten-free cycle. This is beneficial because the machine maintains an optimal temperature for yeast activity. Unlike wheat dough which often doubles or triples in size, gluten-free dough typically has a more modest rise, perhaps increasing by 50-75%. Over-proofing can be detrimental to GF dough's fragile structure, causing it to collapse.
The bread maker's programmed cycle helps prevent this by controlling the rise time. If your bread maker doesn't have a GF cycle or you're adapting a recipe, understanding the signs of a sufficient GF rise (a noticeably expanded but not overly airy dough) is important. Always ensure your liquid is warm, not hot, to avoid killing the yeast, which is crucial for any successful gluten-free bread maker recipe.
Choosing the Right Bread Maker for Gluten-Free Baking
Selecting the appropriate bread maker is key to simplifying and succeeding at gluten-free baking. Not all machines are created equal when it comes to handling the unique properties of gluten-free dough.
Bread Maker Features to Look for: Gluten-Free Cycle and More
The single most important feature to look for in a bread maker for gluten-free baking is a dedicated "Gluten-Free" cycle. This specialized program is essential because it's designed with the specific needs of GF dough in mind: typically, a longer mixing period (as GF dough doesn't require kneading), a single, carefully timed rise (to prevent the fragile structure from collapsing), and often a longer bake time at a specific temperature.
Using a standard cycle on GF dough usually results in poor texture and collapse due to excessive kneading and inappropriate rise times. Beyond the GF cycle, look for machines with multiple loaf size options (e.g., 1 lb, 1.5 lb, 2 lb) to match different recipe yields, and crust color settings (light, medium, dark) to customize your loaf.
Other helpful features include a delay timer (use cautiously with GF dough, especially if using fresh ingredients that could spoil), a window to observe the baking process, and an automatic dispenser for adding mix-ins like seeds or nuts (though manual addition is often preferred for GF to ensure even distribution). A non-stick bread pan is standard but essential for easy removal of the baked loaf.
While not strictly necessary, some higher-end machines have features like dual kneading blades (though less crucial for GF's batter-like consistency) or a heating element in the lid for more even browning. Prioritizing a reliable gluten-free cycle is the best investment for consistent results with your gluten-free bread maker recipe.
Top Bread Maker Recommendations for Gluten-Free Bread
Several bread maker models consistently receive high marks for their performance with gluten-free recipes. These machines often feature robust GF cycles and reliable heating elements.
Cuisinart CBK-200
The Cuisinart CBK-200 2-lb Convection Bread Maker is a popular choice that offers a dedicated gluten-free setting. This model is known for its convection feature, which circulates air for a more even bake and crust development, a benefit for GF loaves which can sometimes have uneven texture. It offers 16 preset menu options, including the crucial GF cycle, and three crust color settings.
It can bake 1 lb, 1.5 lb, or 2 lb loaves, providing flexibility for various gluten-free bread maker recipes. Typically priced around $100-$150, it offers good value for its features and performance, making it a solid mid-range option for GF bakers.
Users often report consistent success with the Cuisinart CBK-200's gluten-free cycle, noting that it produces well-risen loaves with a good crumb structure when paired with a reliable gluten-free bread maker recipe. The convection baking helps achieve a nicely browned crust. Its typical gluten-free cycle runs for approximately 2 hours and 45 minutes, which is well-suited for the single-rise GF dough process. While results can always vary slightly depending on the specific flour blend and recipe used, the CBK-200 is widely regarded as a dependable machine for everyday gluten-free bread baking.
Zojirushi BB-PDC20
The Zojirushi BB-PDC20 Home Bakery Virtuoso Plus is a premium bread maker often cited as a top performer for gluten-free bread. While it comes at a higher price point, typically ranging from $250-$350, its features are designed for optimal results. It boasts multiple gluten-free settings, including a basic GF cycle and a rapid GF cycle, offering versatility.
Its dual kneading blades ensure thorough mixing of even thick GF batters, and its heating element in the lid promotes uniform baking and crust color on the top of the loaf, which can sometimes be pale in other machines. It consistently bakes a standard 2 lb horizontal loaf.
The Zojirushi BB-PDC20 is renowned for its consistent and high-quality results, particularly with challenging doughs like gluten-free. Its precise temperature control and even heating contribute to a reliable rise and bake. The "Homemade" cycle option also allows experienced bakers to program their own custom gluten-free bread maker recipe cycles. While it's a significant investment, many dedicated GF bakers find the superior performance and reliability of the Zojirushi worth the cost, especially when aiming for the best possible texture and appearance in their gluten-free loaves.
Foolproof Gluten-Free Bread Maker Recipe: A Step-by-Step Guide
Ready to bake? This tested and approved gluten-free bread maker recipe is designed for reliability and delicious results using your bread maker's GF cycle.
Tested and Approved Gluten-Free Bread Maker Recipe
This recipe is formulated to work well in most bread makers with a dedicated gluten-free cycle, yielding a soft, flavorful loaf perfect for slicing. It balances common GF flours and binders for a consistent texture.
Ingredients List
Here are the ingredients you'll need for a 1.5-pound loaf:
- Warm water or milk (approx. 105-115°F or 40-46°C):
1.5 cups - Olive oil or melted butter:
2 tbsp - Apple cider vinegar (optional, for texture/rise):
1 tsp - Gluten-free all-purpose flour blend (containing xanthan gum, or add separately):
3.5 cups(approx. 475 grams) - Xanthan gum (if not in flour blend):
1.5 tsp - Sugar or honey:
1 tbsp - Salt:
1 tsp - Active dry yeast or instant yeast:
2 tsp
Step 1: Preparing the Ingredients
Accuracy is key in gluten-free baking. Measure all ingredients precisely. For the best results, measure the flour blend by weight (around 475 grams for 3.5 cups, but check your specific blend's weight per cup). Ensure your liquid is within the specified temperature range (105-115°F or 40-46°C) if using active dry yeast; too hot will kill the yeast, too cold won't activate it properly. Have all ingredients at room temperature before starting, except for the warm liquid.
Make sure your bread maker pan is clean and the kneading paddle is securely in place at the bottom. Gather all your measured ingredients so they are ready to be added to the pan in the correct order. This preparation step helps ensure a smooth process and reduces the chance of errors when starting your gluten-free bread maker recipe.
Step 2: Adding Ingredients to the Bread Maker Pan
Most bread maker manuals recommend adding liquid ingredients first, followed by dry ingredients, and finally the yeast. Pour the warm water or milk, oil or butter, and apple cider vinegar (if using) into the bread pan. Next, carefully add the measured gluten-free flour blend, ensuring it covers the liquid. Add the sugar, salt, and xanthan gum (if adding separately) on top of the flour, keeping the salt and yeast separate initially if possible, as salt can inhibit yeast activity.
Finally, make a small well in the center of the dry ingredients and add the yeast there. Close the bread maker lid. Adding ingredients in this order helps protect the yeast from direct contact with salt or liquid that is too hot before the mixing cycle begins. Double-check that the paddle is in place at the bottom of the pan before adding any ingredients.
Step 3: Selecting the Gluten-Free Cycle
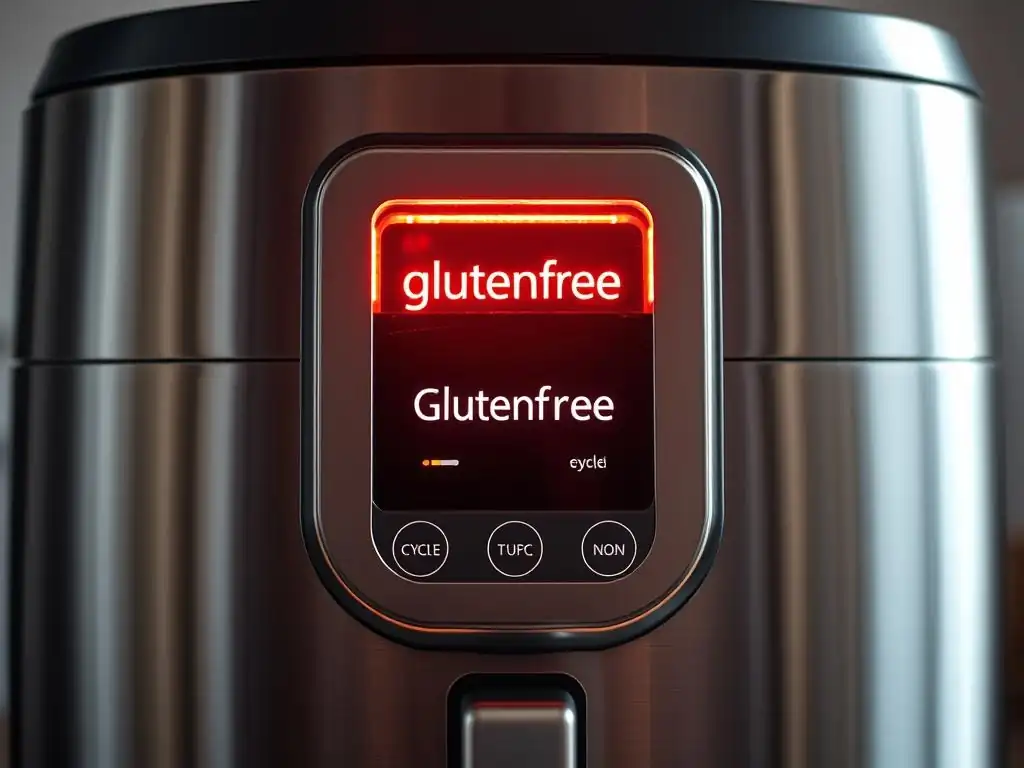
With the ingredients in the pan and the lid closed, select the "Gluten-Free" cycle on your bread maker. Consult your machine's manual if you're unsure how to navigate the menu. Most machines offer options for crust color (light, medium, dark) and sometimes loaf size (1.5 lb in this case); select your preferences.
Once you've made your selections, start the cycle according to your bread maker's instructions. The machine will now take over, proceeding through the programmed mixing, rising, and baking stages tailored specifically for gluten-free dough. Resist the urge to open the lid frequently during the rise and bake cycles, as this can cause the delicate GF structure to collapse. The typical duration for the GF cycle is between 2 to 3 hours.
Step 4: Monitoring the Dough and Adjusting as Needed
During the initial mixing phase (usually the first 5-15 minutes), it's helpful to briefly check the consistency of the dough through the lid window or by quickly opening and closing the lid (only during the mixing phase!). Gluten-free dough will not form an elastic ball like wheat dough; it should resemble a thick, sticky batter or a very wet cookie dough. It should be well combined with no dry pockets of flour.
If the mixture appears too dry and chunky, you can add liquid, one tablespoon at a time, allowing it to incorporate before adding more, until the consistency is a thick batter. If it looks too wet and soupy, add a tablespoon of the GF flour blend. Use a rubber spatula to gently scrape down any flour sticking to the sides of the pan to ensure all ingredients are incorporated into the mix. This quick check and potential adjustment can make a significant difference in the final texture of your gluten-free bread maker recipe.
Step 5: Removing and Cooling Your Freshly Baked Gluten-Free Bread
Once the bread maker cycle is complete, the machine will typically beep. Immediately put on oven mitts and carefully remove the hot bread pan from the machine. It is crucial to remove the bread from the pan right away to prevent the bottom crust from becoming soggy due to trapped steam. Invert the pan onto a wire cooling rack. The loaf should slide out easily if the pan is non-stick.
After removing the loaf from the pan, check the bottom for the kneading paddle, which is often stuck inside the bread. Carefully remove it using a small spatula or knife, being mindful of the hot bread. Now, and this is vital for gluten-free bread, let the loaf cool completely on the wire rack before attempting to slice it. This can take 1 to 2 hours. Slicing warm GF bread will almost always result in a gummy, unappealing texture. Patience during the cooling stage is key to a successful gluten-free bread maker recipe.
Troubleshooting Common Gluten-Free Bread Maker Problems
Even with a reliable gluten-free bread maker recipe and machine, you might encounter issues. Here are solutions to common problems.
Why is My Gluten-Free Bread Dense?
Density is a common complaint with gluten-free bread, but it can often be avoided.
- Too little liquid: Ensure you are measuring liquids accurately. GF flours absorb differently, so sometimes a recipe needs a tablespoon or two more liquid depending on your specific blend.
- Inactive yeast: Verify your yeast is fresh and activated properly if using active dry.
- Not enough binder: Ensure you've added the correct amount of xanthan gum or psyllium husk, especially if your flour blend doesn't contain it. Too little binder prevents proper structure development.
- Slicing too early: Always cool the bread completely before slicing. Slicing while warm causes the starches to compress, leading to a gummy, dense texture.
My Gluten-Free Bread Didn't Rise: Troubleshooting Guide
A lack of rise is usually a yeast issue or related to the baking environment.
- Yeast is dead or inactive:
- Check the expiration date on your yeast.
- Ensure your liquid temperature was correct (105-115°F for active dry). Too hot kills yeast, too cold doesn't activate it.
- Make sure salt or sugar didn't come into direct contact with the yeast in the pan before mixing started.
- Ingredients too cold: While the bread maker controls temperature, ensure your initial ingredients aren't straight from the refrigerator, which can slow yeast activity.
- Incorrect cycle selected: Ensure you used the dedicated Gluten-Free cycle, which is designed for the specific rise needs of GF dough.
Avoiding a Gummy Texture in Gluten-Free Bread
Gummess is almost always related to moisture and starch setting.
- Slicing before cooling: This is the primary culprit. The starches in GF flours need time to set as the bread cools. Slicing too early traps moisture and results in a gummy crumb. Always cool completely (1-2 hours) on a wire rack.
- Too much liquid: Double-check your liquid measurements. A slightly too-wet dough can sometimes contribute to gumminess.
- Underbaking: Ensure the bread is fully baked. An internal temperature of 200-210°F (93-99°C) indicates it's done. Some bread makers might require a few extra minutes on a "bake-only" cycle if your loaf consistently seems underdone.
Addressing a Crumbly Gluten-Free Bread Issue
Crumbly GF bread lacks sufficient structure to hold together.
- Not enough binder: The binder (xanthan gum, psyllium) is crucial for holding GF bread together. Ensure you added the correct amount.
- Too much flour / too little liquid: The ratio of dry to wet ingredients is critical. Too much dry can make the loaf fall apart.
- Incorrect flour blend: Some blends are naturally more crumbly. Blends with a good balance of starches and whole grains, or those containing psyllium husk, often yield a less crumbly result.
- Over-baking: Baking for too long can dry out the loaf, making it crumbly.
Tips and Tricks for the Best Gluten-Free Bread Maker Results
Elevate your gluten-free bread maker recipe with these simple tips.
Enhancing Flavor: Adding Seeds, Herbs, and Spices
Adding extra ingredients is a great way to boost the flavor and nutritional profile of your basic gluten-free bread maker recipe. Seeds like sunflower, pumpkin, flax, and chia add texture and nutrients; try adding 1/4 to 1/2 cup during the mixing cycle. Dried herbs such as rosemary, thyme, or an Italian blend (1-2 teaspoons) infuse savory notes, while spices like garlic powder or onion powder (1/2 to 1 teaspoon) add depth.
Most bread makers have a "mix-in" beep partway through the mixing cycle, which is the ideal time to add these extra ingredients. If your machine doesn't have this feature, you can gently lift the lid during the initial mixing (within the first 5-10 minutes) and add them. Be mindful not to add too many heavy additions, as this can sometimes impede the rise of the GF dough.
Achieving the Perfect Crust: Baking Secrets
The crust on gluten-free bread can sometimes be different from wheat bread – potentially paler or harder. Most bread makers offer crust color settings (light, medium, dark); selecting a darker setting can help. The amount of sugar and fat in your gluten-free bread maker recipe also affects browning.
For an even better crust, if your bread maker allows pausing the cycle briefly after the rise (before baking starts), you can gently brush the top of the loaf with a little milk or melted butter. Some high-end machines with a lid heater, like the Zojirushi BB-PDC20, naturally achieve a more evenly browned top crust. If your loaf is consistently pale or seems underbaked on top, check if your machine has a bake-only cycle you can use for an extra 5-10 minutes after the main cycle finishes.
Storing Your Gluten-Free Bread for Maximum Freshness
Gluten-free bread tends to dry out faster than wheat bread because it lacks gluten's moisture-retaining properties. To keep your loaf fresh, ensure it is completely cooled before storing. Store the cooled bread at room temperature in an airtight container, a plastic bread bag, or wrapped tightly in plastic wrap. Avoid refrigerating it, as this can actually accelerate staling.
For longer storage, freezing is the best option. Slice the cooled loaf first (this makes it easy to grab just a few slices), then wrap the slices or halves tightly in plastic wrap and place them in a freezer-safe bag or container. Frozen gluten-free bread stored this way can last for several months. Thaw slices at room temperature or pop them directly into a toaster. Properly stored, your homemade gluten-free bread maker recipe loaf should remain fresh and enjoyable for 3-4 days at room temperature or much longer in the freezer.
Cutting and Serving Your Homemade Gluten-Free Bread
Remember the golden rule: Always wait until your gluten-free bread maker recipe loaf is completely cool before slicing. Attempting to slice it while warm will result in a gummy, compressed texture and can make it difficult to get clean slices without crumbling. Use a sharp serrated knife for the cleanest cuts.
Once properly cooled and sliced, your homemade gluten-free bread is ready to enjoy! It's wonderful toasted, used for sandwiches, served alongside soups or salads, or simply enjoyed with your favorite spread. The texture is often best on the day it's baked, but proper cooling and storage, combined with toasting, can keep slices delicious for several days.
Variations on Our Basic Gluten-Free Bread Maker Recipe
Once you've mastered the basic gluten-free bread maker recipe, try these delicious variations.
Gluten-Free Sandwich Bread Recipe Variation
To create a softer, more flexible loaf ideal for sandwiches, you can make a few tweaks to the basic recipe. This often involves slightly increasing the liquid or fat content to yield a softer crumb. Adding a binder like psyllium husk powder (even if you're using xanthan gum) can also significantly improve the flexibility and sliceability, making it less likely to crumble when spread or bitten into.
Try increasing the liquid (water or milk) by 1 to 2 tablespoons and adding 1 tablespoon of psyllium husk powder along with the dry ingredients. Ensure your gluten-free flour blend is suitable for softer loaves; some blends are formulated specifically for sandwich bread texture. These minor adjustments result in a loaf that holds together better for slicing and makes for a much more enjoyable sandwich using your gluten-free bread maker recipe.
Gluten-Free Seeded Bread Recipe
Adding seeds enhances both the flavor, texture, and nutritional value of your bread. Use a mix of your favorite seeds, such as sunflower seeds, pumpkin seeds (pepitas), flax seeds, chia seeds, or sesame seeds.
Add 1/4 to 1/2 cup of mixed seeds to the bread maker pan during the mixing cycle. If your machine has a mix-in dispenser or beep, use that; otherwise, add them manually after the initial ingredients have combined into a batter. For extra visual appeal and crunch, you can brush the top of the loaf with a little water or milk before the baking cycle starts (if your machine allows) and sprinkle seeds on top. This variation adds a delightful nutty flavor and satisfying texture to your gluten-free bread maker recipe.
Gluten-Free Herb Bread
Infuse your bread with savory flavor by adding dried or fresh herbs. Popular choices include rosemary, thyme, oregano, chives, or a blend of Italian herbs. This type of loaf is fantastic served with meals, especially soups or pasta dishes.
Add 1 to 2 teaspoons of dried herbs or 1 to 2 tablespoons of finely chopped fresh herbs to the pan during the mixing cycle. You can also add 1/2 teaspoon each of garlic powder and onion powder for a more pronounced savory profile. Ensure the herbs are evenly distributed throughout the dough. This simple addition transforms the basic gluten-free bread maker recipe into a flavorful, aromatic bread.
Gluten-Free Sweet Bread Recipe
For a loaf perfect for breakfast or a snack, adapt the recipe into a slightly sweet version. This involves increasing the sweetener and adding flavorings like cinnamon or vanilla. You can also add a small amount of dried fruit, provided it's not too heavy.
Increase the sugar or honey in the basic recipe to 2 or 3 tablespoons. Add 1 teaspoon of ground cinnamon and/or 1 teaspoon of vanilla extract along with the liquid ingredients. If adding dried fruit like raisins or cranberries, limit the amount to about 1/4 cup to avoid weighing down the dough and inhibiting the rise; add the fruit during the mix-in cycle. This variation yields a delicious, mildly sweet loaf from your gluten-free bread maker recipe, perfect for toasting or enjoying on its own.
Conclusion: Enjoying Delicious Gluten-Free Bread Made Easy
Baking gluten-free bread at home can seem challenging, but using a bread maker significantly simplifies the process. By understanding the unique properties of gluten-free ingredients, selecting a machine with a dedicated GF cycle, and following a reliable gluten-free bread maker recipe, you can consistently produce delicious, fresh loaves with minimal effort.
Final Thoughts on Gluten-Free Bread Making
While gluten-free dough behaves differently than wheat dough, it's entirely possible to achieve great results in a bread maker. The key is using the right balance of flours and starches, incorporating an effective binder, ensuring your yeast is active, and trusting the automated process of your machine's GF cycle. Don't be discouraged if your first loaf isn't perfect; like all baking, it can take a little practice and perhaps minor adjustments based on your specific ingredients and environment.
The satisfaction of slicing into a warm, homemade loaf is immense, especially when you know exactly what ingredients went into it. Using a bread maker makes this achievable for busy individuals or those new to gluten-free baking. Experiment with the basic gluten-free bread maker recipe and its variations to find your favorites, and enjoy the simple pleasure of fresh, delicious, homemade gluten-free bread anytime you like.
Further Resources for Gluten-Free Baking Enthusiasts
To continue your gluten-free baking journey, explore resources specifically dedicated to GF recipes and techniques. Many excellent gluten-free baking blogs and cookbooks offer a wealth of information and tested recipes designed for various methods, including bread makers.
Joining online communities or forums focused on gluten-free baking can also be incredibly helpful. These platforms allow you to connect with other bakers, ask questions, share your successes, and troubleshoot problems. You can learn about new gluten-free flour blends, discover tips for using different binders, and find inspiration for new gluten-free bread maker recipes to try. Continuous learning and experimentation are part of the fun in mastering gluten-free baking.
Frequently Asked Questions
What are the essential ingredients for a gluten-free bread maker recipe?
The essential ingredients typically include a gluten-free flour blend, a binder like xanthan gum, yeast, and a liquid such as water or milk. Specific recipes may vary.
Can any bread maker be used for a gluten-free bread maker recipe?
While most bread makers can be used, it's ideal to use one with a dedicated gluten-free setting. This setting usually has a different kneading and baking profile suitable for gluten-free dough.
What makes gluten-free bread making different from traditional bread making?
Gluten-free bread making differs because it lacks gluten, which provides structure and elasticity. Therefore, ingredients like binders are crucial for mimicking gluten's role.
How can I prevent my gluten-free bread from being too dense?
To prevent dense gluten-free bread, ensure accurate measurements, use high-quality gluten-free flour blends, and avoid over-kneading. Also, allowing the dough to rise properly is key.
Where can I find reliable gluten-free bread maker recipes?
You can find reliable gluten-free bread maker recipes on websites like BakeWithEase.com, gluten-free baking blogs, and cookbooks specifically dedicated to gluten-free baking. Look for recipes with good reviews.
Final Reflection: The Joy of Gluten-Free Baking, Simplified
The accessibility of gluten-free baking has revolutionized the lives of millions, and the bread maker stands as a powerful tool in this revolution. No longer is delicious, homemade gluten-free bread a distant dream, reserved only for those with advanced baking skills. This simple appliance democratizes the process, making it achievable for everyone.
The journey of mastering gluten-free bread has been a deeply personal one for me, filled with both frustration and triumphant moments of perfectly risen loaves. The ease and consistency a bread maker provides is transformative. It allows focus on the joy of creating something nourishing and delicious, rather than being bogged down in the technicalities. The best things in life are homemade,
and this rings especially true when it comes to the comforting aroma and taste of freshly baked bread, regardless of dietary restrictions.
Now, I invite you to embrace the simplicity and satisfaction of baking your own gluten-free bread. Experiment with different flours, add-ins, and recipes to discover your perfect loaf. Don't be afraid to get your hands a little messy – the reward is a warm, wholesome bread that nourishes both body and soul. The journey of gluten-free baking is a continuous one, filled with learning and delicious discoveries. Let your bread maker be your guide on this rewarding path.
Unleash Your Inner Baker: Gluten-Free Bread Awaits!
Thanks for joining us on this gluten-free baking adventure! We hope you now feel confident and excited to create delicious, healthy bread at home. Ready to take your skills to the next level?
- Bake your first loaf today! Grab your ingredients and follow the recipe – we're confident you'll be amazed by the results.
- Share your baking triumph! Post a picture of your masterpiece on social media and tag us – we'd love to see it!
- Explore more gluten-free recipes on our website. Discover a world of delicious possibilities beyond bread!
What innovative gluten-free recipe will you tackle next?