
Beyond the Basic Ball: Creative Choux Shapes to Impress

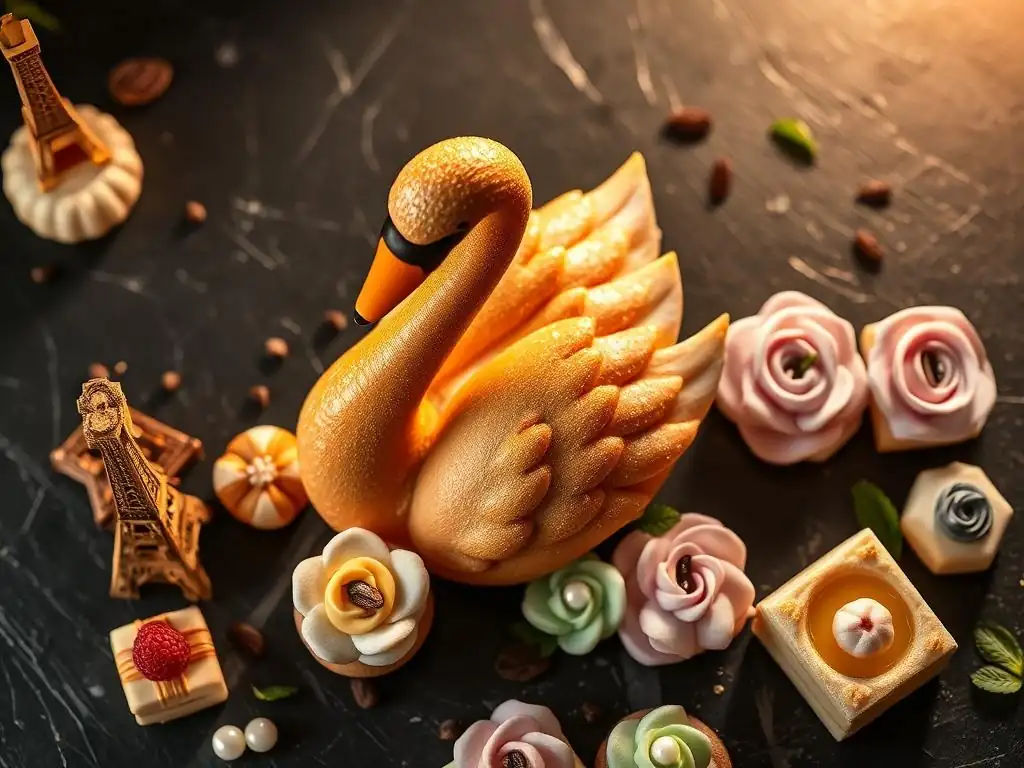
Welcome to BakeWithEase, your guide to unlocking baking brilliance! Ever wondered how to elevate your creations beyond the ordinary? This week, we delve into the delightful world of choux pastry, taking it far beyond the basic ball. Prepare to be amazed as we explore creative choux shapes that are guaranteed to impress. Intrigued? Discover the secrets to crafting stunning éclairs, swans, and more – let's get baking!
- Introduction to Creative Choux Pastry Shapes
- Mastering the Choux Paste Recipe: A Foundation for Creativity
- Shaping Techniques for Stunning Choux Pastry
- Tools and Equipment for Shaping Choux Pastry
- Baking and Finishing Your Shaped Choux
- Troubleshooting Common Choux Shaping Problems
- Inspiration Gallery: Showcasing Creative Choux Designs
- Conclusion: Unleash Your Creativity with Choux Pastry
-
Frequently Asked Questions
- What exactly is choux pastry and what makes it unique?
- Can I really achieve creative shapes with choux pastry, or is it too difficult?
- What are some tips for preventing my choux pastry from deflating after baking?
- What kind of fillings work best with creatively shaped choux pastry?
- Where can I find detailed instructions and recipes for making specific creative choux pastry shapes?
- Final Reflection: The Enduring Allure of the Choux Pastry
- Unleash Your Inner Pastry Chef: Sculpt Stunning Choux Creations!
Introduction to Creative Choux Pastry Shapes
Elevating Your Baking: Moving Beyond Round Choux
Choux pastry, or pâte à choux, is a remarkably versatile dough renowned for its ability to puff up dramatically when baked, creating a hollow interior perfect for fillings. While the classic round profiterole is a staple, mastering choux pastry creative shapes allows bakers to elevate their creations from simple treats to stunning edible art. The fundamental dough, typically made from water, butter, flour, and eggs, relies on steam generated during baking to create its signature lift.
Slight adjustments in the ratio of these ingredients or the mixing technique can subtly alter the dough's viscosity and structure, influencing how well it holds intricate shapes. For instance, a dough with slightly less liquid might be stiffer, ideal for detailed piping work like swans, while a slightly softer dough might be better suited for larger, more flowing shapes like wreaths.
Pushing beyond the basic ball opens up a world of possibilities for presentation and flavor combinations. Imagine serving elongated éclairs filled with exotic creams, or intricate, multi-layered choux structures for special occasions. The visual impact of uniquely shaped choux pastry is undeniable, making your baked goods stand out.
Furthermore, different shapes allow for varying ratios of pastry to filling, impacting the overall textural and flavor experience. A narrow éclair offers a concentrated burst of filling with each bite, while a broader ring shape like a Paris-Brest provides a more balanced mix of pastry, filling, and often, a layer of praline cream. Embracing these creative choux shapes is a natural progression for any baker looking to refine their skills and impress with both taste and appearance.
Why Experiment with Choux Pastry Forms?
Experimenting with choux pastry forms offers significant advantages, primarily centered around aesthetic appeal, enhanced functionality, and expanded culinary possibilities. Visually striking shapes, like elegant swans or intricate wreaths, immediately capture attention and are perfect for celebrations, holidays, or simply showcasing baking prowess. A beautifully piped swan, for example, involves creating a body and a separate neck/head piece, baked and assembled – a process that transforms simple dough into a recognizable form. This kind of presentation elevates the perceived value and artistry of your baking.
Beyond just looking good, creative choux shapes can also improve the eating experience. Shapes like éclairs or Paris-Brest rings offer larger surface areas or specific cavities that are ideal for generous amounts of filling or unique layering. A standard profiterole might hold 10-15ml of cream, while a large Paris-Brest ring can accommodate significantly more, perhaps 100-150ml of praline mousseline, allowing for a richer and more complex flavor profile.
Different shapes can also lend themselves to specific applications; small, savory gougères piped into tiny mounds or logs are perfect for appetizers, while larger, interlocking shapes can form impressive centerpieces like a croquembouche, a pyramid of cream-filled profiteroles typically bound with caramel. Exploring these diverse forms unlocks new ways to enjoy and serve this classic French pastry.
Mastering the Choux Paste Recipe: A Foundation for Creativity
The Essential Choux Dough Recipe for Shape Definition
A robust and well-structured choux dough is paramount for achieving defined and stable creative choux shapes. The standard ratio often starts with equal parts water and butter, boiled together, followed by the addition of flour (typically about 1 cup of flour to 1 cup of liquid). This mixture is then cooked into a panade, a process crucial for gelatinizing the starch in the flour and drying out the dough.
Cooking for 2-3 minutes over medium heat until a thin film forms on the bottom of the pan ensures sufficient moisture evaporates, creating a stable base for egg incorporation. The dough is then cooled slightly before eggs are added, one by one, beating thoroughly after each addition. The number of eggs can vary, usually between 3 to 5 large eggs per cup of flour, depending on their size and the desired consistency.
The correct consistency after adding the eggs is key for successful choux shaping. The dough should be smooth, glossy, and fall from a spoon in a 'V' shape or a thick ribbon. If it's too stiff, shapes may crack during baking; if too soft, they will spread and lose definition. Achieving this 'just right' consistency is often the most challenging part for beginners.
Using eggs at room temperature helps them incorporate more smoothly into the warm dough. Some recipes call for a small amount of sugar or salt, which can enhance flavor but don't significantly alter the dough's structural properties for shaping. Focusing on the correct panade cooking and gradual egg incorporation based on visual cues is far more critical for producing dough suitable for intricate piping.
Tips for Achieving Perfect Choux Consistency for Shaping
Achieving the ideal choux consistency is non-negotiable when aiming for detailed creative choux shapes. One primary tip is to weigh your ingredients rather than using volume measurements, especially flour and liquid. Using a digital scale ensures precision, as even a slight difference in flour can significantly impact the dough's stiffness.
For example, using 140g of all-purpose flour per 240ml of water/milk and 115g of butter provides a consistent starting point. Another crucial factor is properly cooking the panade; stir vigorously over medium heat until the dough pulls away from the sides of the pan and a thin layer forms on the bottom – this indicates sufficient moisture has cooked off, usually taking 2-4 minutes after adding the flour.
The most variable step is the addition of eggs. Do not add all the eggs at once. Beat them lightly in a separate bowl and add them gradually to the warm (but not hot) panade, usually one egg at a time, mixing thoroughly until fully incorporated before adding the next.
The dough's consistency is correct when it is smooth, glossy, and holds its shape when piped but is still pliable enough to flow. A common test is the 'finger test': if you draw a line through the dough with your finger, the line should hold its shape without the dough immediately flowing back together.
Another is the 'spoon test': lifting the dough with a spoon, it should hang in a 'V' shape or a thick ribbon that breaks after a few seconds. If the dough is too stiff, you can whisk in a tiny amount of additional beaten egg; if too soft, unfortunately, it's difficult to fix and often requires starting over, emphasizing the importance of adding eggs cautiously towards the end.
Shaping Techniques for Stunning Choux Pastry
Classic Shapes Revisited: Eclairs, Profiteroles, and Gougères with a Twist
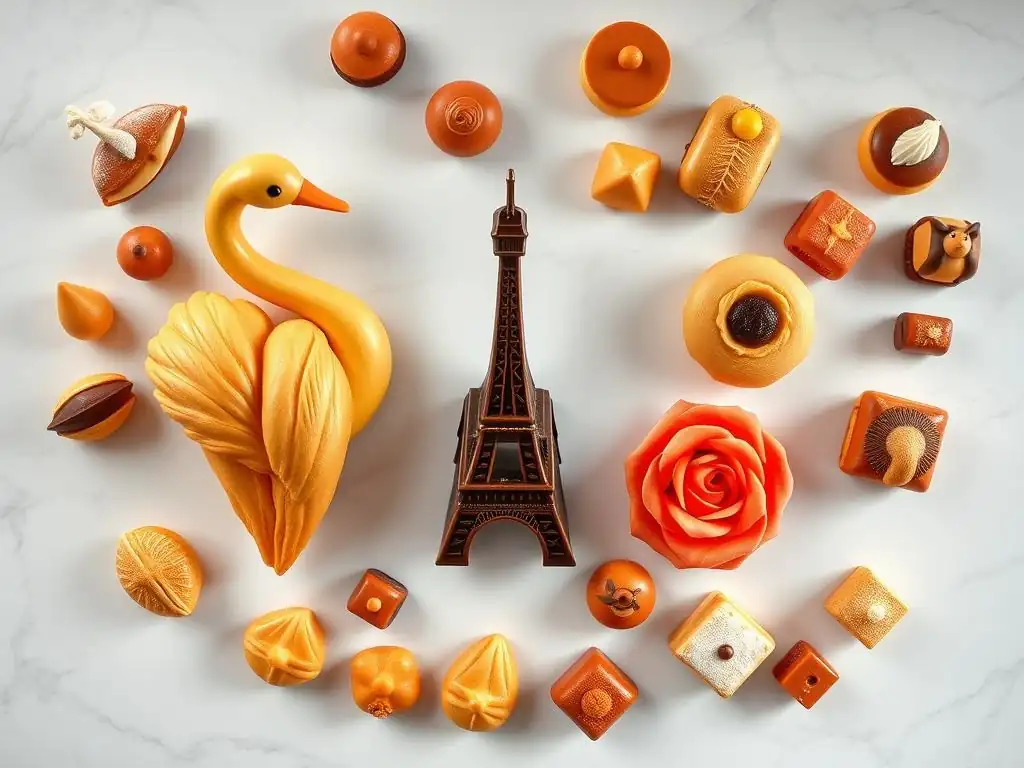
Even classic choux forms like éclairs, profiteroles, and gougères can be given a creative twist through variations in piping and presentation, expanding your repertoire of choux pastry creative shapes. Éclairs are traditionally piped as straight logs, but you can experiment with different nozzle shapes (like a star tip for ridged texture) or even pipe them in gentle curves or S-shapes for a more dynamic look.
A lightning bolt éclair, for example, involves piping a slightly wavy line rather than a perfectly straight one, adding visual interest before baking. Zigzag éclairs can be created by moving the piping bag back and forth as you pipe the log, resulting in a fun, textured shape.
Profiteroles, typically small rounds, can be transformed by piping them into slightly larger sizes or arranging them creatively before or after baking. Piping uniformly sized profiteroles is essential for building structures like a Croquembouche, a traditional French dessert cone made of stacked profiteroles. While the basic shape is simple, the creative aspect comes in the assembly and decoration, gluing the balls together with caramel into a towering pyramid, often reaching heights of 30-60 cm (about 1-2 feet) and decorated with spun sugar or nougatine.
Savory gougères, usually small rounds flavored with cheese, can be piped into mini logs, rings, or even abstract blobs, offering varied textures and surface areas for cheese crusting. Piping gougère dough with a star tip adds ridges that become delightfully crispy when baked.
Eclair Variations: Lightning Bolt and Zigzag Eclairs
Elevating the simple éclair shape is an easy way to introduce creative choux shapes into your baking. Instead of just a straight line, try piping lightning bolt éclairs. To achieve this, guide your piping bag, fitted with a large plain or star tip (like an Ateco 807 or 827), in a slightly wavy line as you move along the baking sheet. Apply steady pressure to ensure even thickness. The gentle curves add visual flow and make the éclair look less rigid. Aim for lengths between 10-15 cm (about 4-6 inches) for manageable size and even baking.
For zigzag éclairs, the technique involves a more pronounced side-to-side motion while piping forward. Using a star tip enhances the effect, creating deep ridges that catch glazes beautifully after baking. As you pipe, move the tip from left to right in a consistent rhythm, creating a continuous zigzag pattern. This technique adds significant texture to the surface, which can lead to a crispier bite and a more visually dynamic pastry. Ensure the width of the zigzag is consistent along the length of the éclair for uniform baking.
Profiterole Pyramids: Croquembouche Basics
Building a Profiterole Pyramid, commonly known as a Croquembouche (French for "crunch in the mouth"), is a classic demonstration of creative choux assembly using basic profiteroles. The process begins with piping and baking dozens of small, uniform choux balls, typically 3-4 cm (about 1.2-1.6 inches) in diameter. These are then filled, usually with pastry cream or crème diplomat. The magic happens during assembly: the filled profiteroles are dipped in hot caramel and quickly attached to a cone-shaped mold or built freeform into a pyramid shape. The caramel acts as the glue, hardening rapidly to hold the structure together.
Creating a stable Croquembouche requires careful handling of hot caramel and precise placement of each profiterole. Starting from the base, layer the caramel-dipped choux balls, ensuring they adhere firmly to each other and the mold (if using). Subsequent layers are built upon the previous one, gradually decreasing the number of profiteroles per layer as the pyramid narrows towards the apex.
A standard Croquembouche for 20-30 people might require 60-80 profiteroles. The structure is often finished with spun sugar threads wrapped around the pyramid or decorated with nougatine pieces, transforming simple choux balls into a spectacular and edible centerpiece, showcasing impressive choux pastry creative shapes through arrangement.
Gougères Galore: Creating Unique Savory Choux Bites
Gougères, the savory sibling of profiteroles, offer fertile ground for creative choux shapes in the realm of appetizers and snacks. While often piped as simple rounds, you can easily create unique savory choux bites by varying the piping technique and incorporating different flavors directly into the dough.
For example, piping the cheese-flavored choux dough into small logs (about 5-7 cm or 2-3 inches long) using a plain tip results in elegant cheese sticks perfect for dipping. Using a medium star tip (like an Ateco 825) to pipe small rosettes or stars creates gougères with a greater surface area, leading to more crispy edges and pockets for melted cheese, enhancing the texture.
Beyond simple shapes, you can pipe gougère dough into rings (like mini Paris-Brests) for a different presentation, ideal for filling with savory mousses or spreads after baking. Incorporating finely chopped herbs like chives or rosemary, or spices like black pepper or paprika, directly into the dough adds color and flavor variations.
For a more complex savory choux pastry creative shape, pipe the dough into small, elongated shapes and top with grated Parmesan cheese before baking for an extra crispy crust. Baking time for these smaller shapes is typically shorter than sweet choux, often around 18-22 minutes at 375°F (190°C) until golden brown and firm.
Advanced Choux Shaping Techniques
For those ready to tackle more intricate choux pastry creative shapes, techniques like piping swans, Paris-Brest rings, and elaborate wreaths offer rewarding challenges and stunning results. These shapes require a slightly steadier hand and a good understanding of choux consistency.
Swan-Shaped Choux: A Step-by-Step Guide
Creating elegant swan-shaped choux pastries is a classic advanced technique that beautifully demonstrates the dough's potential for artistic expression. This shape requires piping two separate components: the body and the neck/head. For the body, use a large plain tip (like Ateco 808) to pipe an elongated oval shape, approximately 6-8 cm (2.5-3 inches) long and 3-4 cm (1.2-1.6 inches) wide. This oval will puff up significantly during baking.
For the swan's neck and head, switch to a small plain tip (like Ateco 802 or 803) or even a piping bag with a very small snip in the end. Pipe an 'S' shape onto a separate baking sheet. Make the base of the 'S' slightly thicker and taper it towards the top, forming the neck and head.
These neck pieces are much thinner than the bodies and will bake faster, typically needing only 10-12 minutes at 375°F (190°C). The bodies, like éclairs, will require longer, around 25-30 minutes. After baking and cooling, the bodies are sliced horizontally, filled with whipped cream or pastry cream, and the 'S' shaped neck is gently inserted into the filling at the back of the body, bringing the swan to life.
Paris-Brest Rings: The Classic Cycle Shape
The Paris-Brest is a celebrated French pastry traditionally shaped as a ring, commemorating the Paris–Brest–Paris bicycle race. This circular form is a prominent example of creative choux shapes used for a specific purpose – providing ample surface area for a rich praline-flavored cream filling. To create the ring, use a large star tip (like Ateco 827 or 829) to pipe a circle of choux dough onto a parchment-lined baking sheet.
For a standard size, aim for a diameter of 18-20 cm (about 7-8 inches). You can pipe one continuous ring or pipe two concentric rings side-by-side for a sturdier structure.
The use of a star tip is characteristic of the Paris-Brest, creating ridges that add texture and visual appeal. Before baking, the ring is often topped with sliced almonds for added crunch. Baking a large ring requires careful temperature control; start at a higher temperature like 400°F (200°C) for 10-15 minutes to achieve a good initial puff, then reduce the temperature to 375°F (190°C) and continue baking for another 25-35 minutes until deeply golden and firm.
After cooling, the ring is sliced horizontally and generously filled, most famously with a mousseline cream flavored with praline paste. The large size and unique shape make it ideal for sharing.
Choux Wreaths: Festive and Elegant Designs
Choux wreaths are beautiful and festive examples of creative choux shapes, perfect for holidays or special occasions. This shape involves piping choux dough into a circular wreath form, allowing for decorative elements and a central space for additional fillings or decorations. Use a large star or plain tip to pipe a continuous circle of choux dough, similar to a Paris-Brest but potentially larger, perhaps 25-30 cm (10-12 inches) in diameter. You can pipe a single thick ring or multiple overlapping rings to create a fuller wreath effect.
For added visual interest, consider varying the piping pressure or using different tips around the wreath. Before baking, you can sprinkle the dough with pearl sugar or chopped nuts. Baking a choux wreath requires similar attention to temperature as a Paris-Brest, starting high and finishing lower to ensure it bakes through and becomes crisp without collapsing.
Total baking time might range from 35-50 minutes depending on size and thickness. Once baked and cooled, the wreath can be dusted with powdered sugar, glazed, and decorated with fresh fruit, edible flowers, or small meringue kisses placed in the center or nestled among the choux puffs, creating a truly elegant and impressive choux pastry creative shape.
Tools and Equipment for Shaping Choux Pastry
Essential Piping Bags and Nozzles for Precision
Achieving precise and consistent creative choux shapes relies heavily on having the right tools, particularly quality piping bags and a selection of nozzles. Piping bags come in various materials, including disposable plastic, reusable silicone, and traditional canvas. Disposable bags are convenient for quick cleanup, while silicone and canvas bags are more eco-friendly and durable. For choux pastry, which is a relatively thick dough, sturdy bags are essential to withstand the pressure required for piping. Bags ranging from 12 to 18 inches are practical sizes, offering enough capacity without being unwieldy.
A collection of piping nozzles (also called tips) is fundamental for creating diverse choux pastry creative shapes. Essential types include round tips (like Ateco 802, 804, 806, 808) for smooth, classic shapes like profiteroles and éclair bodies, and star tips (like Ateco 825, 827, 829) for shapes with defined ridges like Paris-Brest rings or decorative éclair finishes. Small round tips (like Ateco 800 or 801) are necessary for delicate details like swan necks.
Having a coupler set is also useful, allowing you to switch tips on the same bag of dough without emptying it. Investing in a few high-quality stainless steel tips in various sizes will cover most creative choux shaping needs.
Stencils and Templates for Uniform Shapes
For bakers aiming for perfect uniformity in their creative choux shapes, especially when making multiples for a large event or a complex structure like a Croquembouche, stencils and templates are invaluable tools. These can range from simple hand-drawn circles or lines on parchment paper (placed under the baking sheet liner so they are visible but don't stick to the dough) to commercially available silicone mats or plastic stencils with pre-marked shapes. Using a template ensures that every profiterole is roughly the same size, every éclair is the same length, or every Paris-Brest ring has the correct diameter.
To use a template drawn on parchment, simply place your baking parchment over the template lines and pipe the choux dough directly onto the parchment, following the guides underneath. For silicone mats with printed guides, you pipe directly onto the mat. These templates are particularly helpful for consistent sizes when piping many items, like 50 profiteroles for a Croquembouche where size consistency is critical for stable stacking.
They also help beginners gain confidence in piping straight lines for éclairs or perfect circles for rings. While not strictly necessary for all choux pastry creative shapes, templates significantly reduce variability and improve the overall professional appearance of your baked goods.
Baking Sheets and Parchment Paper for Optimal Results
The choice of baking surface plays a crucial role in how creative choux shapes bake and release. Heavy-duty, light-colored aluminum baking sheets are preferred because they conduct heat evenly, preventing the bottoms of the choux from browning too quickly or burning before the tops are fully baked. Avoid dark-colored sheets, which absorb more heat and can lead to over-browning on the bottom. Using two baking sheets stacked together can also help insulate the bottom, promoting more even baking.
Lining your baking sheets with parchment paper or a silicone baking mat (like Silpat) is essential for preventing the choux dough from sticking. Choux pastry adheres firmly to ungreased metal, making removal difficult and risking deflation. Parchment paper is convenient and disposable, while silicone mats are reusable and provide a slightly better non-stick surface.
For intricate shapes, parchment paper might be easier to maneuver if you need to slide the piped dough onto the sheet after shaping. Ensure the paper or mat lies flat on the sheet to avoid misshapen choux. Proper preparation of the baking surface is a simple step that significantly impacts the success of your creative choux shapes.
Baking and Finishing Your Shaped Choux
Achieving the Perfect Rise and Golden Brown Color
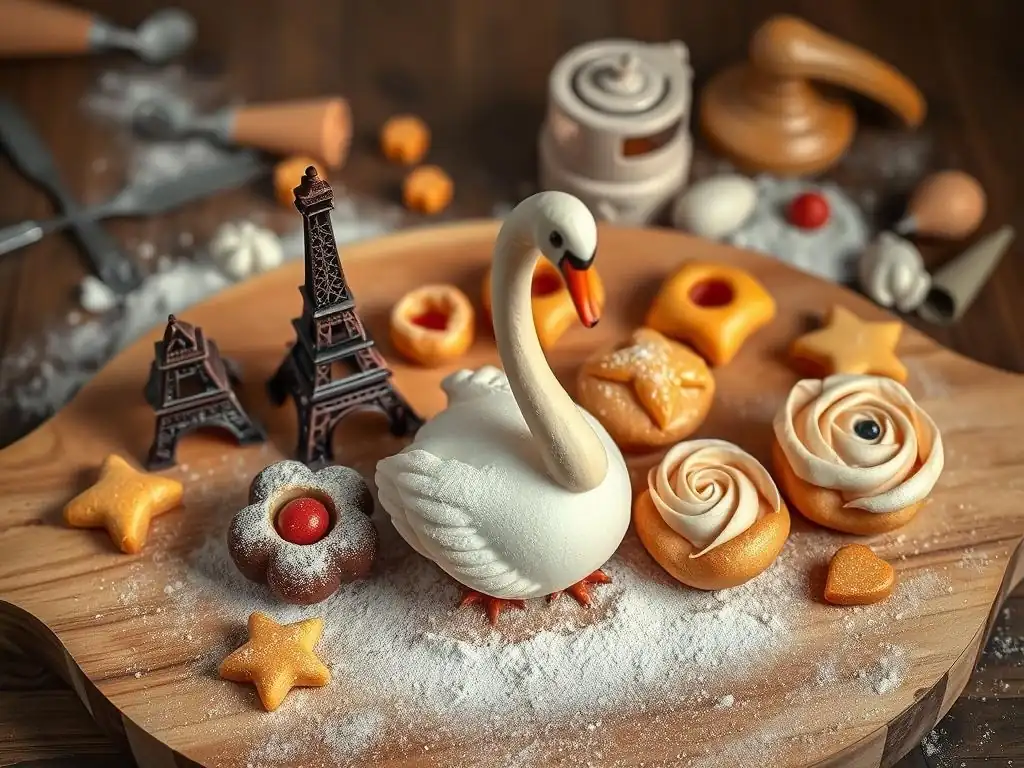
Baking choux pastry creative shapes requires precise temperature control to achieve maximum puff and a beautiful golden-brown color without collapse. A common technique involves starting with a high oven temperature, typically 400°F to 425°F (200°C to 220°C), for the first 10-15 minutes. This initial burst of high heat creates steam rapidly within the dough, causing it to puff up dramatically and set the outer shell. During this critical phase, do not open the oven door, as the sudden drop in temperature can cause the choux to deflate.
After the initial high-heat period, the oven temperature is typically reduced to 375°F (190°C) for the remainder of the baking time. This lower temperature allows the choux to continue cooking through, drying out the interior and developing a stable structure, while the exterior continues to brown. Baking time varies depending on the size and shape of the choux; small profiteroles might take 20-25 minutes total, éclairs or swans around 25-35 minutes, and large rings like Paris-Brest or wreaths 35-50 minutes.
The choux are done when they are deeply golden brown all over, feel light and hollow when lifted, and sound hollow when tapped on the bottom. They should be firm and hold their shape outside the oven. If they are removed too early, they will collapse.
Filling and Decorating Your Creative Choux Pastries
Once your creative choux shapes are perfectly baked and cooled, the fun of filling and decorating begins, transforming them into complete pastries. The hollow interior of the choux is designed to hold a variety of fillings, and the exterior provides a canvas for glazes and decorations. Ensure the choux are completely cool before filling to prevent the filling from melting or making the pastry soggy. Small shapes like profiteroles are typically filled by making a small hole in the bottom and piping in the cream. Larger shapes like éclairs or rings are often sliced horizontally and filled generously.
Decoration adds the final touch, enhancing both visual appeal and flavor. Glazes, dustings of sugar, chocolate coatings, and decorative elements like nuts or fruit all contribute to the finished product. The choice of decoration should complement the shape and filling. For example, the ridges of a star-tipped éclair or Paris-Brest hold glaze beautifully. Swan bodies are typically dusted with powdered sugar, while their necks remain plain.
Cream Filling Options for Shaped Choux
A variety of cream fillings pair wonderfully with creative choux shapes, each offering a different texture and flavor profile. Classic pastry cream (crème pâtissière) is a thick, rich custard made from milk, sugar, egg yolks, and flour or cornstarch. It's a stable filling perfect for most choux shapes, providing a smooth, creamy texture. A standard recipe might use 500ml milk, 100g sugar, 4 egg yolks, and 40g cornstarch, cooked until thick.
Crème diplomat is a lighter option, made by folding whipped cream into pastry cream. This results in a less dense, airier filling, ideal for delicate shapes like swans or for a lighter touch in profiteroles. The ratio is typically 1 part whipped cream to 2 parts pastry cream.
Whipped cream itself, stabilized with a little sugar and vanilla, is the simplest filling and works well for immediate consumption, though it is less stable than custard-based fillings. For specific pastries like the Paris-Brest, praline mousseline (pastry cream enriched with butter and praline paste) is traditional, offering a nutty, buttery richness that complements the choux beautifully.
Chocolate Glazes and Ganaches for Visual Appeal
Chocolate glazes and ganaches are popular and delicious ways to finish creative choux shapes, adding shine, flavor, and a professional look. A simple chocolate glaze can be made by melting chocolate (dark, milk, or white) with a small amount of butter or oil for shine. For dipping éclairs or the tops of profiteroles, melt about 100g of chocolate with 1-2 teaspoons of neutral oil or butter over a double boiler or in the microwave until smooth. Ensure the glaze is warm enough to be fluid but not so hot it melts the choux.
Ganache offers a richer, creamier coating. It's made by pouring hot cream over chopped chocolate and stirring until smooth. The ratio of chocolate to cream determines the consistency; a 1:1 ratio of chocolate to cream (e.g., 100g chocolate to 100g cream) creates a pourable ganache perfect for glazing éclairs, while a 2:1 or 2.5:1 ratio yields a thicker ganache suitable for piping decorations or truffle-like fillings. Adding a touch of glucose syrup can improve the shine and prevent cracking. Applying the glaze or ganache while the choux is cool but the glaze is warm allows it to set smoothly.
Decorative Elements: Nuts, Sugars, and Edible Flowers
Beyond glazes, various decorative elements can enhance the appearance and texture of creative choux shapes. Chopped nuts, such as almonds (traditionally on Paris-Brest), pistachios, or hazelnuts, can be sprinkled onto wet glaze or ganache before it sets, adding crunch and visual contrast. Pearl sugar or nib sugar offers a coarse, sparkly texture and is often sprinkled on choux before baking (as seen on some types of chouquettes) or onto glazes.
Powdered sugar is a simple yet elegant finish, often dusted over swan bodies or wreaths using a fine sieve. For a more vibrant look, edible flowers or small pieces of fresh fruit like berries can be placed on top of filled choux or nestled within ring or wreath shapes, adding color and freshness. Chocolate curls, cocoa nibs, or even finely ground freeze-dried fruit can also be used to add texture and flavor complexity. These decorative elements allow for personalization and creativity, making each choux pastry creative shape a unique piece of edible art.
Troubleshooting Common Choux Shaping Problems
Preventing Cracking and Deflation
Two common frustrations when making creative choux shapes are cracking during baking and deflation afterward. Cracking often occurs if the dough is too stiff or if the oven temperature is too high initially and the crust sets too quickly before the interior has fully expanded. To prevent this, ensure your choux dough has the correct consistency – it should be pliable and fall in a 'V' from a spoon, not be overly stiff.
If the dough feels too dry after adding eggs, you may need to whisk in a tiny bit more beaten egg. Also, scoring the top of larger shapes like éclairs or rings with a sharp knife or using a moistened finger to smooth the tops before baking can help control expansion and prevent random cracks.
Deflation is usually a sign that the choux pastry was not baked long enough or at a sufficient temperature to dry out the interior and build a stable structure. If removed from the oven too early, the steam inside condenses, causing the fragile shell to collapse. Ensure your choux are baked until they are deeply golden brown and feel light and hollow.
A good test is to remove one choux; if it stays puffed and doesn't slowly shrink, the batch is likely done. You can also poke a small hole in the bottom of each choux immediately after removing them from the oven to allow steam to escape, further preventing deflation, especially in larger or more complex choux pastry creative shapes.
Achieving Consistent Size and Shape
Achieving consistent size and shape is key to a professional-looking batch of creative choux shapes, particularly important for structures like Croquembouche or matching pairs of swans. Inconsistent shapes can result from uneven piping pressure, an unsteady hand, or dough that is too soft or too stiff. Using stencils or templates underneath your parchment paper is one of the most effective ways to guide your piping and ensure uniformity in size and length for éclairs, rings, or individual profiteroles.
Maintain steady and even pressure on the piping bag as you pipe. If piping logs or rings, try to keep the tip at a consistent height above the baking sheet (typically about 1 cm or half an inch). For round profiteroles, pipe with consistent pressure, then stop and lift the bag with a slight twist to cleanly break the dough.
If the tops have peaks, gently smooth them down with a moistened fingertip before baking. Practicing piping with plain buttercream or even mashed potatoes can help develop the necessary control before working with choux dough. A consistent, correctly textured choux dough is also fundamental; if the dough is too soft, it will spread excessively, losing its defined shape during baking.
Dealing with Sticky Dough
Sticky choux dough can make piping creative choux shapes frustrating and difficult, leading to uneven or messy results. Stickiness usually stems from the dough being too wet, often due to insufficient cooking of the panade or the addition of too many eggs. When cooking the flour mixture (panade), ensure you cook it over medium heat for 2-4 minutes after adding the flour, stirring constantly, until it forms a ball that pulls away from the sides of the pan and a thin film develops on the bottom. This cooks out excess moisture and gelatinizes the starch properly.
When adding eggs, do so gradually and assess the consistency after each addition, especially the final one. Stop adding eggs as soon as the dough reaches the correct consistency (smooth, glossy, falling in a 'V' shape). If you accidentally add too many eggs and the dough is too soft and sticky, it's unfortunately very difficult to correct.
You can try heating it gently in a saucepan for a minute or two while stirring vigorously to cook off a little more moisture, but this often doesn't fully salvage the texture for intricate shaping. The best approach is prevention: cook the panade thoroughly and be cautious with egg incorporation, stopping as soon as the correct consistency is reached, even if you haven't used all the eggs indicated in a recipe.
Inspiration Gallery: Showcasing Creative Choux Designs
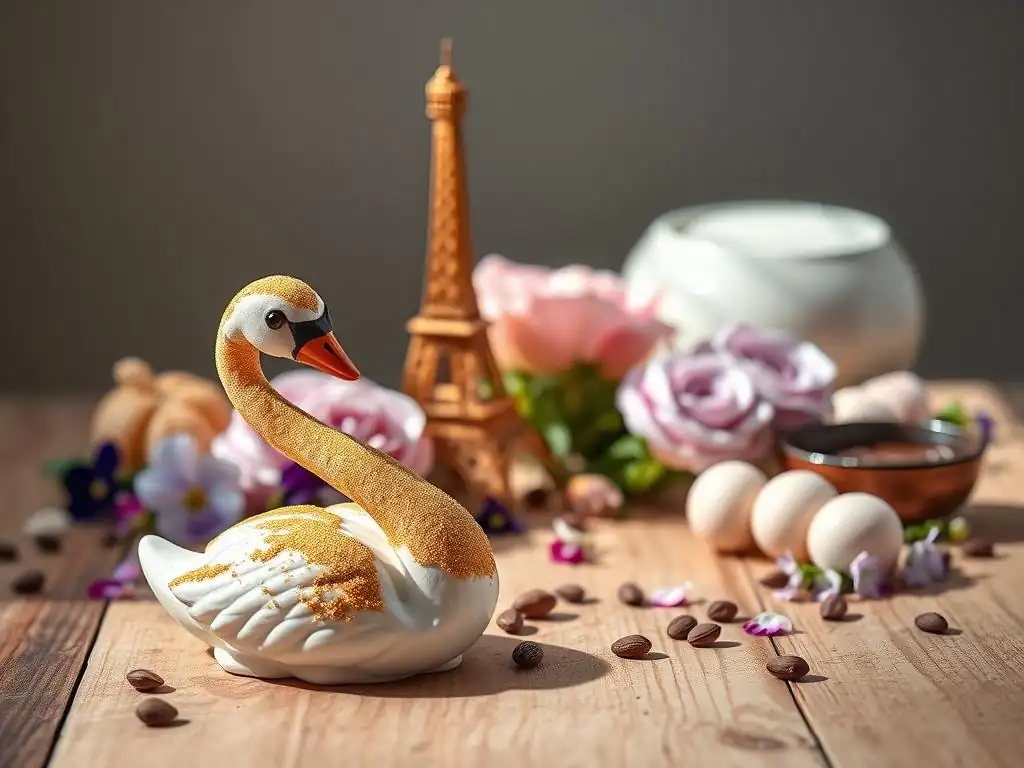
While I cannot display actual images, imagine a vibrant gallery showcasing the incredible potential of choux pastry creative shapes. Picture towering Croquembouche pyramids adorned with spun sugar, elegant white swans seemingly floating on a bed of cream, and intricate Paris-Brest rings dusted with powdered sugar and filled with luscious praline cream. Envision éclairs in unexpected shapes – gentle S-curves, sharp zigzags, or even mini-éclairs piped with decorative ruffles. See savory gougères shaped into cheesy logs, rings, or small, rustic mounds baked to a perfect golden crisp.
This gallery would feature festive choux wreaths decorated with candied cranberries and rosemary sprigs for the holidays, or delicate choux "petals" arranged to form edible flowers. It would showcase how variations in size, from tiny, bite-sized chouquettes to large, shareable rings, offer different experiences.
The colors would range from the deep golden brown of perfectly baked choux to the vibrant hues of fruit fillings, chocolate glazes, and decorative elements. Such a collection serves not just as visual inspiration but as a testament to the artistry achievable with simple choux dough and a willingness to experiment with different choux pastry creative shapes and finishing techniques.
Conclusion: Unleash Your Creativity with Choux Pastry
Embracing the Art of Choux Shaping
Mastering choux pastry creative shapes is a rewarding journey that transforms a fundamental baking skill into an art form. Moving beyond the simple ball opens up a world of possibilities, allowing you to create stunning pastries that impress with both their appearance and taste. From elegant swans and classic Paris-Brest rings to festive wreaths and uniquely shaped éclairs, each form presents its own challenge and opportunity for creativity. The key lies in understanding the basic choux dough, achieving the correct consistency, and practicing piping techniques with the right tools.
Embracing the art of choux shaping means paying attention to detail – ensuring the panade is cooked properly, adding eggs judiciously, maintaining steady piping pressure, and controlling oven temperatures precisely. While there may be challenges like cracking or deflation, troubleshooting these common issues builds expertise and confidence. Each successful batch of perfectly puffed, beautifully shaped choux is a testament to your growing skill. So, gather your ingredients, select your nozzles, and get ready to explore the exciting world of creative choux shapes.
Resources for Further Choux Pastry Exploration
To continue your journey into the world of creative choux shapes, seek out reliable resources that offer detailed guidance and inspiration. Look for comprehensive baking books that dedicate sections specifically to pâte à choux, often including step-by-step instructions and visual guides for various shapes. Online baking communities and forums are excellent places to ask questions, share experiences, and find tips from fellow bakers tackling similar creative choux shaping projects.
Many reputable baking websites and blogs provide free recipes and tutorials focusing on specific choux pastries like éclairs, gougères, or Paris-Brest. Search for tutorials on piping techniques for specific shapes, such as swan necks or intricate wreath patterns. While I cannot provide links here, a simple search for "choux pastry swan tutorial" or "how to pipe a Paris-Brest ring" will yield numerous helpful guides.
Exploring these resources will provide deeper insights into the nuances of working with choux dough and unlock even more possibilities for your choux pastry creative shapes. Practice, patience, and a willingness to experiment are your greatest assets as you continue to refine your choux shaping skills.
Frequently Asked Questions
What exactly is choux pastry and what makes it unique?
Choux pastry is a light, airy pastry dough made from just a few ingredients: water, butter, flour, and eggs. What makes it unique is the high moisture content, which creates steam during baking and causes the pastry to puff up and become hollow.
Can I really achieve creative shapes with choux pastry, or is it too difficult?
Absolutely! While the basic ball is classic, choux pastry is surprisingly versatile. With a little practice and the right techniques, you can create everything from eclairs and swans to rings and even whimsical animal shapes.
What are some tips for preventing my choux pastry from deflating after baking?
Several factors can cause deflation. Ensure you bake the pastry long enough to dry out the inside completely. Also, avoid opening the oven door frequently during baking, and consider piercing the baked pastry with a small hole to release steam.
What kind of fillings work best with creatively shaped choux pastry?
The possibilities are endless! Cream fillings like pastry cream, whipped cream, and chocolate mousse are popular choices. You can also use savory fillings such as cheese spreads or pate for a unique twist.
Where can I find detailed instructions and recipes for making specific creative choux pastry shapes?
BakeWithEase.com is your best resource! We offer step-by-step guides and recipes specifically designed to help you master various choux pastry shapes, from classic eclairs to more elaborate creations.
Final Reflection: The Enduring Allure of the Choux Pastry
The humble choux pastry, far from being a mere culinary basic, offers a canvas for boundless creativity. Its seemingly simple construction belies a world of possibilities, a testament to the power of mastering fundamental techniques to achieve extraordinary results. This exploration into unconventional choux shapes demonstrates that even the most familiar ingredients can yield breathtakingly original creations.
The journey through these diverse choux forms has highlighted not only the technical skill involved but also the enduring appeal of handcrafted artistry in a world increasingly dominated by mass production. The meticulous shaping, the delicate piping, the satisfying rise in the oven – these are the elements that elevate choux pastry beyond mere sustenance and into the realm of art. The details are not the details. They make the design.
– Charles Eames. This quote perfectly encapsulates the importance of precision and attention to detail in achieving truly impressive choux pastry creations.
Now, it's your turn. Don't be afraid to experiment! Let the techniques and inspiration shared in this article serve as a springboard for your own choux pastry adventures. Challenge yourself to go beyond the basic round, to explore new shapes, new flavors, and new ways to express your creativity through this versatile and delightful pastry. The possibilities are as limitless as your imagination.
Unleash Your Inner Pastry Chef: Sculpt Stunning Choux Creations!
Thanks for joining us on this choux pastry adventure! We hope you've discovered new techniques and inspiration to elevate your baking game. Ready to transform your baking skills?
- Master a new choux shape: Try out one of the unique designs we showcased – the possibilities are endless! Challenge yourself to perfect a swirl, a heart, or even a whimsical animal.
- Share your creations: Post a picture of your choux masterpiece on social media using #BakeWithEaseChoux – let's inspire each other!
- Explore our other pastry tutorials: Discover even more baking secrets and delicious recipes on our website, BakeWithEase.com.
What unique choux shape will you create next? Let us know in the comments below!