
Decoding Babka: Swirl Your Way to Enriched Dough Perfection

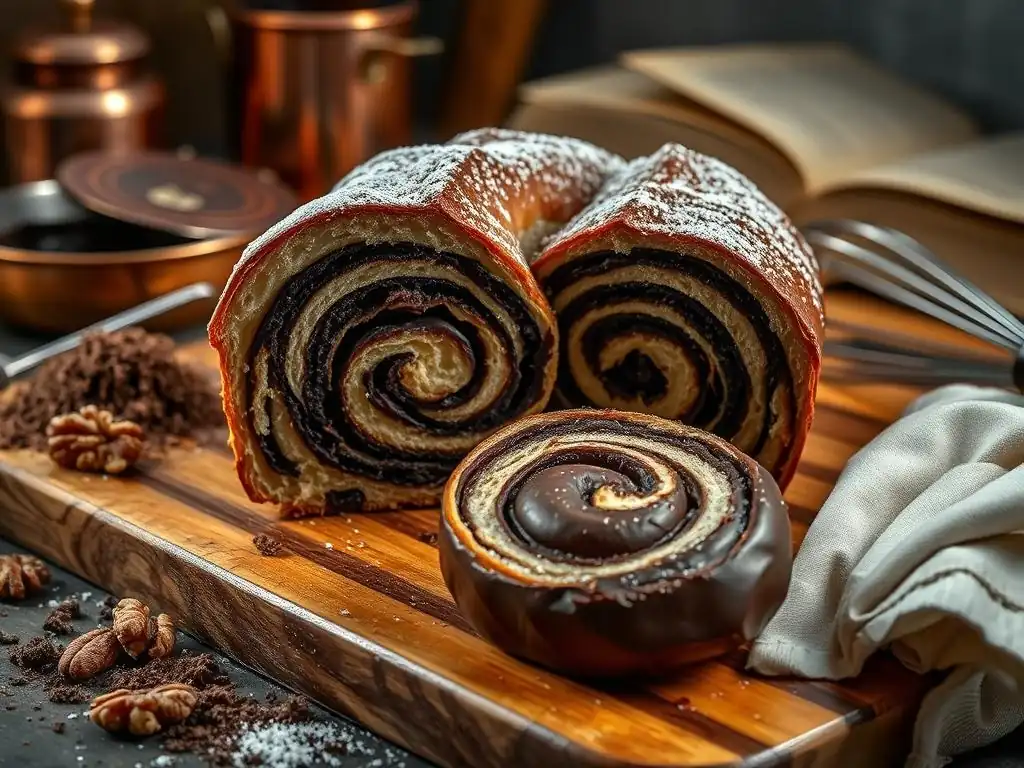
Welcome to BakeWithEase, where baking becomes a joy, not a chore! Ever dreamt of creating those intricately swirled, decadent loaves you see in bakeries? Our latest guide, "Decoding Babka: Swirl Your Way to Enriched Dough Perfection," dives deep into an easy babka recipe tutorial that will unlock the secrets of this enriched dough masterpiece. Intrigued? Discover how simple ingredients and straightforward techniques can transform your kitchen into a babka haven – read on to learn more and start baking today!
- Introduction to Babka Baking: An Easy Babka Recipe Tutorial
- Mastering the Babka Dough: A Step-by-Step Guide
- Babka Filling Options: From Classic Chocolate to Creative Twists
- Shaping and Swirling: The Art of the Babka Braid
- Baking Your Babka: Achieving Golden Perfection
- Troubleshooting Your Babka: Common Issues and Solutions
- Serving and Storing Your Homemade Babka
- Elevate Your Baking: Beyond the Basic Babka Recipe
- Conclusion: Embrace the Babka Baking Journey
- Frequently Asked Questions
- Final Reflection: The Enduring Allure of the Babka Swirl
- Unlock Your Inner Babka Baker!
Introduction to Babka Baking: An Easy Babka Recipe Tutorial
What is Babka? Exploring the Origins of this Enriched Dough Delight
Babka is a sweet, braided bread or cake that originated in the Jewish communities of Poland and Ukraine in the early 19th century. Traditionally made from an enriched dough, similar to challah or brioche, it was often baked using leftover challah dough enriched with fruit jam or cinnamon. The name "babka" itself means "grandmother" in Slavic languages, possibly referring to its appearance resembling a grandmother's skirt or the fact that grandmothers often baked it. Over time, the fillings evolved, with chocolate becoming particularly popular, especially as Eastern European immigrants brought the tradition to North America.
The defining characteristic of modern babka is its beautiful swirl pattern, created by rolling filling into the dough, slicing the roll lengthwise, and twisting the two halves together before baking. This technique results in layers of rich dough and delicious filling interwoven throughout the loaf. While chocolate remains iconic, variations now include cinnamon, nuts, poppy seeds, cheese, and even savory options. Mastering this enriched dough and the swirling technique is a rewarding step for any baker looking to expand their skills, making an easy babka recipe tutorial a fantastic starting point.
Why Babka is the Perfect Baking Project for Intermediate Bakers
Embarking on an easy babka recipe tutorial offers intermediate bakers a chance to practice several fundamental techniques crucial for more complex baking projects. Working with enriched dough requires understanding the balance between fat, sugar, and yeast activity, as well as developing proper gluten structure through kneading. Unlike lean doughs (like baguette), enriched doughs are softer, stickier, and require more careful handling and longer, slower fermentation times to develop flavor and strength.
Furthermore, the shaping process—rolling, filling, slicing, and twisting—introduces bakers to decorative techniques that can be applied to other breads and pastries. It requires precision and a gentle touch, transforming a simple dough and filling into a visually stunning loaf. The multiple steps involved, including several rises and the application of a glaze, provide a comprehensive baking experience that builds confidence and skill, making an easy babka recipe tutorial an excellent milestone in one's baking journey.
Mastering the Babka Dough: A Step-by-Step Guide
Essential Ingredients for a Delicious Babka Dough
Creating a tender and flavorful babka starts with selecting the right ingredients. You'll typically need high-quality bread flour or all-purpose flour, active dry or instant yeast, sugar, salt, milk, eggs, and a significant amount of butter. Bread flour, with its higher protein content (often 12-14%), helps develop a stronger gluten network capable of supporting the richness of the eggs and butter, resulting in a loaf with good structure and chew. All-purpose flour (around 10-12% protein) can also be used, yielding a slightly softer crumb.
Dairy plays a crucial role; whole milk adds richness and helps activate the yeast, while eggs contribute tenderness, color, and structure due to their fat and protein. Butter, often added gradually after the initial mixing, is key to the dough's enriched texture and flavor. Using unsalted butter allows you to control the salt level precisely. Ensuring all cold ingredients like milk, eggs, and butter are at room temperature is vital for proper mixing and yeast activity, leading to a more consistent and easier babka recipe tutorial experience.
Mixing the Babka Dough: Achieving the Right Consistency
Mixing babka dough differs from lean doughs because of the high fat and sugar content. Typically, you'll combine the dry ingredients (flour, yeast, sugar, salt) with the wet ingredients (warm milk, eggs) first and mix until a shaggy dough forms. Kneading develops the gluten; this can be done by hand or using a stand mixer with a dough hook. With a mixer, knead on medium speed for about 8-10 minutes, or by hand for 10-15 minutes, until the dough is smooth and elastic. It should pass the "windowpane test," where a small piece can be stretched thinly without tearing.
Once the gluten is developed, the softened butter is gradually added, piece by piece, while kneading continues. This process, known as enrichment, takes time as the dough absorbs the fat. Keep kneading until all the butter is incorporated and the dough is smooth, shiny, and very elastic. It will be soft and slightly sticky, but it should pull away from the sides of the bowl (if using a mixer). The final consistency is critical for easy handling during the shaping phase of your easy babka recipe tutorial.
First Rise: Creating Flavor and Texture in Your Babka
The first rise, or bulk fermentation, is a crucial step where the dough develops flavor and texture. After kneading, the dough should be placed in a lightly oiled bowl, covered, and left to rise in a warm place until it has roughly doubled in size. This typically takes anywhere from 1.5 to 3 hours at room temperature (around 70-75°F or 21-24°C), depending on the yeast activity and ambient temperature. A slower rise, such as overnight in the refrigerator (4°C or 40°F), can develop even deeper, more complex flavors.
During this time, the yeast produces carbon dioxide gas, which makes the dough rise, and metabolic byproducts that contribute significantly to the bread's aroma and taste. Refrigeration slows down yeast activity but allows enzymes to break down starches into sugars, enhancing flavor. For the best results in your easy babka recipe tutorial, ensure the dough has visibly increased in volume and feels light and airy before moving on to the next steps.
Babka Filling Options: From Classic Chocolate to Creative Twists
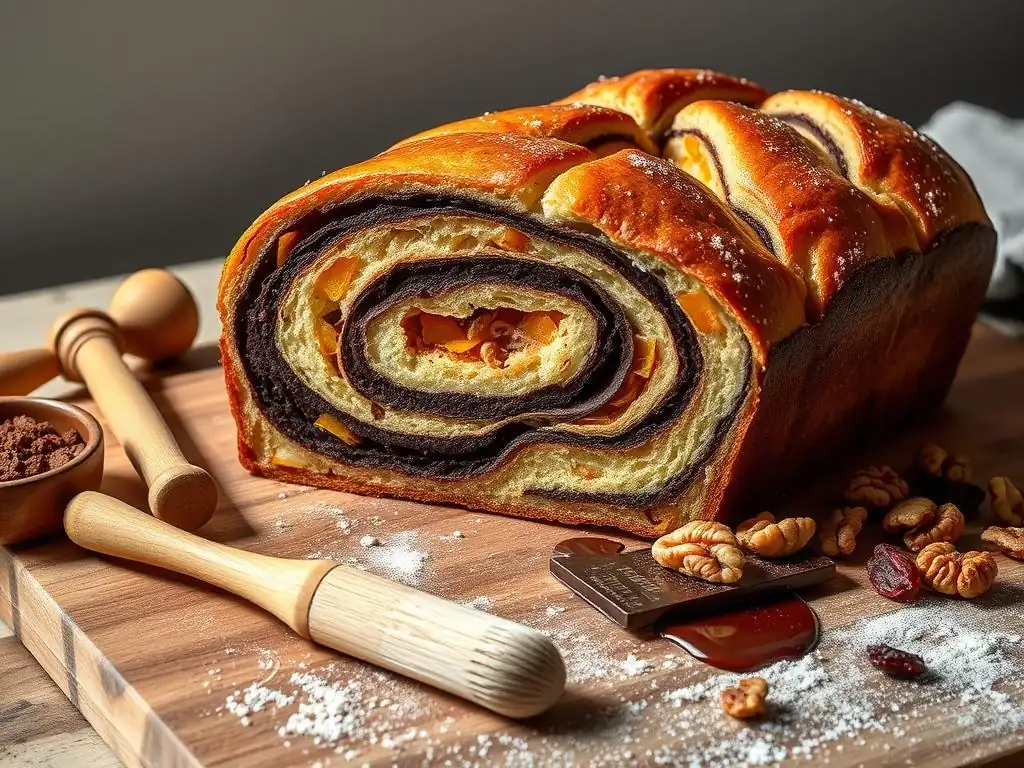
Classic Chocolate Babka Filling: A Timeless Favorite
The most iconic babka is undoubtedly the chocolate version, offering a rich, decadent contrast to the tender, slightly sweet dough. A typical chocolate filling involves combining cocoa powder, sugar, and often melted butter or oil. Some recipes also include chopped chocolate or chocolate chips for extra pockets of molten goodness. A common ratio might be equal parts cocoa powder and sugar by weight, say 100g of each, mixed with 50-75g of melted butter or oil, sometimes with a splash of milk or water to create a spreadable paste.
The key to a great chocolate filling is achieving the right consistency. It should be thick enough to stay contained within the rolled dough but spreadable enough to cover the surface evenly without tearing the dough. Adding ingredients like melted butter or a small amount of liquid helps create a smooth, fudgy texture that melts beautifully during baking, ensuring every slice of your easy babka recipe tutorial is packed with chocolatey flavor.
Cinnamon Babka Filling: A Warm and Spiced Variation
Cinnamon babka offers a comforting, aromatic alternative to chocolate, reminiscent of cinnamon rolls but with the unique babka swirl. A standard cinnamon filling combines ground cinnamon, sugar (often brown sugar for moisture and flavor), and softened butter or oil to create a paste. A typical mix could involve 2-3 tablespoons of ground cinnamon and 100-150g of sugar mixed with 50-75g of softened butter. Sometimes, chopped nuts like walnuts or pecans are added for extra texture and flavor.
The butter helps bind the filling and prevents the sugar and cinnamon from simply falling out during shaping and baking. It also creates those lovely, slightly gooey layers within the bread. Ensure the butter is soft, not melted, for easier spreading. This warm, spiced filling makes for a delightful variation in your easy babka recipe tutorial repertoire.
Cream Cheese and Raspberry Babka Filling: A Tangy and Fruity Delight
For a brighter, tangier profile, a cream cheese and fruit filling, such as raspberry, provides a wonderful contrast to the enriched dough. This type of filling often involves softened cream cheese mixed with sugar and perhaps a touch of vanilla extract. A simple cream cheese mixture might use 150-200g of cream cheese with 50-70g of sugar. Raspberry jam or fresh raspberries (mixed with a little sugar or cornstarch to prevent excess moisture) are then spread over the cream cheese layer or swirled in.
When using fruit, especially fresh fruit, be mindful of moisture content, which can make the dough soggy or cause the filling to leak. Mixing fresh berries with a teaspoon or two of cornstarch can help absorb excess liquid. The combination of creamy, slightly tangy cheese and sweet-tart fruit creates a vibrant flavor experience, adding a delicious twist to your easy babka recipe tutorial.
Shaping and Swirling: The Art of the Babka Braid
Dividing and Rolling the Babka Dough
After the first rise, the babka dough needs to be gently punched down to release excess gas. If making two loaves from a standard batch (e.g., using 500-600g of flour), divide the dough into two equal portions, usually around 450-550g each. Work with one portion at a time, keeping the other covered. On a lightly floured surface, roll the dough into a rectangle. The target size for a single loaf might be approximately 16-18 inches (40-45 cm) long and 12-14 inches (30-35 cm) wide, aiming for a thickness of about 1/4 inch (about 6-7 mm).
Rolling the dough evenly is important to ensure consistent layers of filling throughout the finished babka. Avoid using too much flour on your surface, as this can make the dough dry and difficult to roll or seal. If the dough is resistant, let it rest for 5-10 minutes under a towel; the gluten will relax, making it easier to roll to the desired dimensions for your easy babka recipe tutorial.
Creating the Signature Babka Swirl: A Visual Guide
Creating the iconic babka swirl involves a few key steps. Once the dough is rolled into a rectangle, spread your chosen filling evenly over the surface, leaving a small border (about 1/2 inch or 1 cm) clean along one of the longer edges. This clean edge helps seal the roll later. Starting from the long edge opposite the clean border, tightly roll the dough into a log. Aim for a firm roll without trapping too much air.
Next, using a sharp knife or bench scraper, slice the log lengthwise down the center. You will now have two long halves, with the layers of dough and filling exposed. Turn the cut sides upwards. Carefully twist the two halves together, keeping the cut sides facing outwards as much as possible to showcase the layers. For a classic look, you can twist the pieces around each other like a rope. This twisting creates the beautiful, marbled effect characteristic of babka, a highlight of any easy babka recipe tutorial.
Pan Placement: Preparing for the Second Rise
Once the babka is shaped into its twist, it needs to be carefully transferred to a loaf pan for its second rise and subsequent baking. Standard loaf pans, typically measuring 9x5 inches (23x13 cm), are ideal. Ensure the pan is adequately greased and floured, or lined with parchment paper, to prevent sticking. Parchment paper is often preferred as it makes removing the finished babka much easier.
Gently lift the twisted loaf and place it seam-side down into the prepared pan. If making two loaves, repeat the shaping process for the second dough portion. The loaf should comfortably fit into the pan, leaving some space for expansion during the second rise. Proper pan placement ensures the babka bakes into the classic loaf shape, ready for the final stages of your easy babka recipe tutorial.
Baking Your Babka: Achieving Golden Perfection
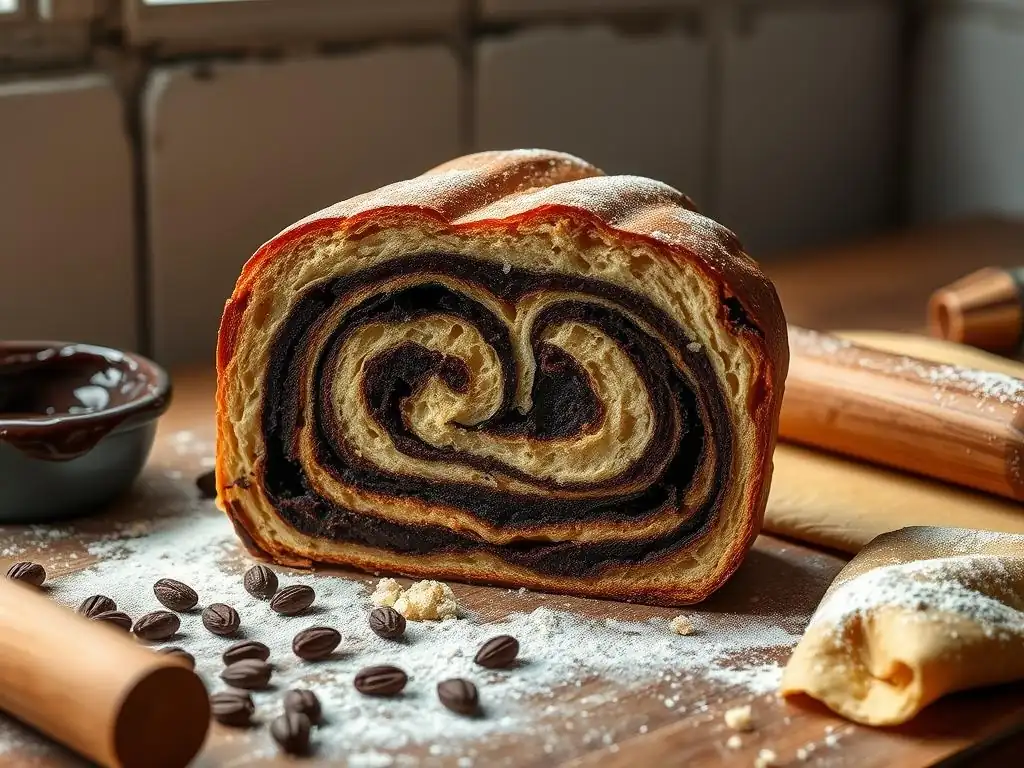
Second Rise: Ensuring a Light and Airy Babka
The second rise, also known as proofing, allows the shaped babka to increase in volume again before baking. Cover the loaf pan loosely with plastic wrap or a clean kitchen towel and let it rise in a warm place. This rise is typically shorter than the first, usually taking 45 minutes to 1.5 hours, depending on the temperature. The babka should visibly increase in size, filling out the loaf pan by about 80-90%, and look puffy and light.
Avoid over-proofing, as this can cause the babka to collapse in the oven. A good test is to gently press a finger into the dough; if the indentation springs back slowly but not completely, it's ready to bake. If it springs back immediately, it needs more time. If it stays indented, it's likely over-proofed. A proper second rise is essential for achieving a light and airy crumb in your easy babka recipe tutorial.
Baking Time and Temperature: Tips for Avoiding Over-Baking
Preheat your oven to the correct temperature, typically around 350°F (175°C) or 375°F (190°C), depending on the recipe and your oven's calibration. Baking time for a standard 9x5 inch babka loaf usually ranges from 30 to 45 minutes. The exact time will vary based on your oven, the size of the loaf, and the filling used.
To ensure the babka is fully baked through without being dry, look for visual cues: the top should be a deep golden brown, and the filling should be bubbling slightly. For absolute certainty, you can check the internal temperature with an instant-read thermometer; the center of the loaf should register around 190-200°F (88-93°C). If the top is browning too quickly, you can loosely tent the babka with aluminum foil during the last 10-15 minutes of baking. Careful monitoring during this stage is key to perfecting your easy babka recipe tutorial.
Creating a Simple Syrup Glaze for Extra Shine and Moisture
Many babka recipes call for brushing the warm loaf with a simple syrup glaze immediately after it comes out of the oven. This glaze adds a beautiful shine, enhances sweetness, and helps keep the crust soft and moist. Simple syrup is easy to make: combine equal parts sugar and water (e.g., 100g sugar and 100ml water) in a small saucepan, heat until the sugar dissolves, and bring to a gentle simmer for a minute or two.
While the babka is still hot from the oven, generously brush the top and sides with the warm syrup. The hot bread will readily absorb the liquid. You can apply multiple coats for extra shine and moisture. This final step elevates the appearance and texture of your homemade babka, providing a professional finish to your easy babka recipe tutorial success.
Troubleshooting Your Babka: Common Issues and Solutions
Dry Babka: Hydration Tips and Tricks
A common issue when baking babka is ending up with a dry loaf. This can often be attributed to insufficient hydration in the dough or over-baking. Ensure you are measuring your ingredients accurately, preferably by weight, as flour volume measurements can vary significantly. Different flours also absorb liquid differently; you might need to slightly adjust the amount of milk or eggs based on the specific flour you use. For example, a high-protein bread flour might require a tiny bit more liquid than an all-purpose flour.
Another culprit is baking the babka for too long or at too high a temperature. Use an oven thermometer to verify your oven's temperature accuracy. Start checking for doneness at the lower end of the recommended baking time range (e.g., 30 minutes for a standard loaf) and use an internal thermometer if possible (target 190-200°F). Finally, applying the simple syrup glaze immediately after baking is crucial as the hot bread absorbs the moisture, preventing the crust from drying out as it cools, which is a vital tip for any easy babka recipe tutorial.
Dense Babka: Improving Dough Rise and Texture
If your babka turns out dense instead of light and airy, the issue likely lies with yeast activity or gluten development. Ensure your yeast is fresh and active; test it by dissolving it in warm liquid with a pinch of sugar – it should bubble and foam within 5-10 minutes. Make sure your liquid (milk) is warm but not hot (ideally 105-115°F or 40-46°C for active dry yeast). Cold ingredients can also inhibit yeast.
Proper kneading is essential to develop a strong gluten network, which traps the gases produced by the yeast. Knead until the dough is smooth, elastic, and passes the windowpane test. Give the dough sufficient time for both the first and second rises. Under-proofing won't allow enough gas to build up, while over-proofing can cause the structure to weaken and collapse. Allowing a slow cold fermentation in the fridge for the first rise can improve both flavor and dough structure, contributing to a less dense babka from your easy babka recipe tutorial.
Filling Leakage: Preventing Messy Babka
Filling leakage can create a sticky mess in your oven and result in a babka with dry spots where the filling should be. This often happens if the dough isn't sealed properly after rolling into a log or if the filling is too wet or contains large chunks that tear the dough during shaping or rising. Ensure the clean edge of the dough is firmly pinched to the rolled log to create a tight seal.
When creating the swirl, handle the twisted dough gently to avoid tearing the delicate layers, especially around the filling. If using fruit, consider cooking it down slightly or mixing it with a small amount of cornstarch or flour (perhaps 1-2 teaspoons per cup of fruit) to thicken it and absorb excess moisture. A filling that is too liquid will bubble out during baking. Using a filling with the right consistency – spreadable but not runny – is key to a neat babka from your easy babka recipe tutorial.
Serving and Storing Your Homemade Babka
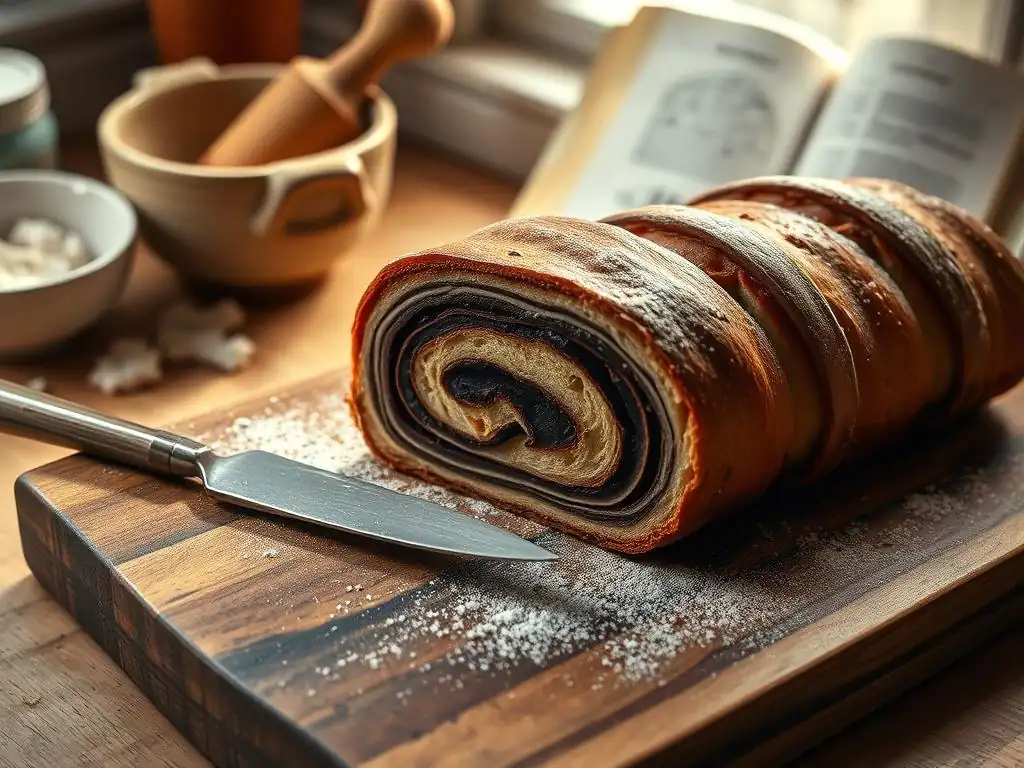
Serving Suggestions: Enjoying Your Babka Fresh
Babka is best enjoyed fresh, ideally within a day or two of baking. Allow the babka to cool in the pan for about 15-20 minutes before carefully transferring it to a wire rack to cool completely. Slicing warm babka can be difficult as the filling may still be molten and the bread structure soft, leading to squished slices. Once fully cooled, slice with a serrated knife.
Serve babka as is for a delightful treat with coffee or tea. It makes a fantastic breakfast pastry, an afternoon snack, or a simple dessert. You can gently warm slices in a toaster or oven for a few minutes to bring back some of that fresh-baked aroma and texture, especially if it's a chocolate babka where the filling can become slightly gooey again. Sharing your successful easy babka recipe tutorial creation is part of the fun!
Storing Babka: Keeping it Fresh for Days
Proper storage is essential to maintain the quality of your homemade babka. Once completely cooled, babka can be stored at room temperature for 2-3 days. Wrap the entire loaf tightly in plastic wrap or aluminum foil, or place slices in an airtight container. This prevents the bread from drying out and keeps the filling moist.
For longer storage, babka freezes exceptionally well. Wrap the cooled loaf or individual slices tightly in plastic wrap, then wrap again in aluminum foil or place in a freezer-safe bag. Frozen babka can be stored for up to 2-3 months. To thaw, leave it wrapped at room temperature overnight. Individual slices can be quickly thawed and warmed in a toaster or oven. This makes your easy babka recipe tutorial results enjoyable for weeks to come.
Elevate Your Baking: Beyond the Basic Babka Recipe
Sourdough Babka: A Tangy and Complex Variation
Once you've mastered a basic easy babka recipe tutorial using commercial yeast, venturing into sourdough babka is a rewarding next step. Using a sourdough starter introduces a tangy complexity and unique texture to the enriched dough. The process is similar to regular babka but relies on the slower fermentation of the sourdough starter for the rise. This often involves an overnight bulk fermentation in the refrigerator to allow the sourdough flavors to develop fully.
Sourdough enriched doughs can sometimes be trickier to work with due to the starter's acidity potentially weakening the gluten, but with careful handling and proper fermentation times, the result is a babka with a more sophisticated flavor profile and a wonderfully chewy texture. The slight tang of the sourdough provides a beautiful counterpoint to sweet fillings like chocolate or cinnamon.
Savory Babka with Pesto and Parmesan: A Deliciously Different Twist
Babka doesn't have to be sweet! The enriched dough provides an excellent base for savory fillings as well. A popular savory variation is pesto and Parmesan babka. The dough formula might be slightly adjusted, perhaps with less sugar, but the process of rolling, filling, and swirling remains the same. Spread a generous layer of pesto over the rolled dough and sprinkle with grated Parmesan cheese before rolling and shaping.
Other savory options include roasted garlic and herb, sun-dried tomato and olive, or even spinach and feta. Savory babka makes a fantastic accompaniment to soups, salads, or enjoyed on its own. It demonstrates the versatility of the babka dough and opens up a whole new world of possibilities beyond your initial easy babka recipe tutorial.
Conclusion: Embrace the Babka Baking Journey
Frequently Asked Questions
What makes a babka dough "enriched"?
Enriched dough means the dough contains added fats like butter, eggs, and sometimes milk or cream, which contribute to a tender and flavorful result.
Is babka difficult to make for a beginner baker?
While babka appears impressive, our Easy Babka Recipe Tutorial provides step-by-step guidance. With patience and attention to detail, even beginners can achieve success.
Can I substitute ingredients in the babka recipe?
Substitutions can impact the texture and flavor. We recommend following the recipe closely, especially for key ingredients like butter and yeast. Minor adjustments like using different nuts are usually fine.
How do I prevent my babka from drying out?
Proper baking time is crucial. Overbaking leads to dryness. Also, brushing the baked babka with a simple syrup helps to keep it moist and adds shine.
What is the best way to store leftover babka?
Wrap the babka tightly in plastic wrap or store it in an airtight container at room temperature for up to 3 days. Freezing is also an option for longer storage; thaw completely before serving.
Final Reflection: The Enduring Allure of the Babka Swirl
The seemingly simple act of swirling dough has become a global phenomenon, transforming the humble babka into a symbol of both culinary artistry and comforting tradition. This isn't just about a delicious pastry; it's about the connection we forge with food, the satisfaction of creating something beautiful, and the joy of sharing it with others. The ease of mastering the babka, as demonstrated in this tutorial, makes it accessible to everyone, regardless of baking experience.
The babka's enduring appeal lies in its ability to transcend cultural boundaries, becoming a canvas for personal expression and creativity. From classic cinnamon swirls to more adventurous fillings, the babka reflects our individual tastes and preferences, mirroring the diverse tapestry of our modern world. Baking is at once child's play and adult joy. And love, of course.
– This sentiment perfectly encapsulates the heart of the babka experience – a simple process yielding profound satisfaction.
Now, it's your turn. Don't just read about the perfect babka swirl; create it. Embrace the messy joy of kneading dough, the satisfying scent of baking spices, and the sheer delight of sharing your creation. Let this tutorial be your springboard to culinary exploration, a testament to the power of simple ingredients transformed into something truly extraordinary. The world awaits your babka masterpiece.
Unlock Your Inner Babka Baker!
Thanks for joining us on this delicious journey into the world of babka! We hope you've gained a newfound appreciation for this enriched dough masterpiece. Ready to put your newfound knowledge to the test?
- Bake your own babka! Use our detailed recipe guide (found earlier in the article) to create your own swirl of deliciousness. Let your creativity shine – experiment with different fillings and glazes!
- Share your babka creation! Post a photo on social media and tag us – we'd love to see your baking triumphs. Use #BakeWithEaseBabka to join our baking community.
- Explore more enriched dough recipes on BakeWithEase.com – we have a whole library of recipes just waiting to be discovered!
What unique twist will you add to your perfect babka? Let us know in the comments!