
Mastering the Feed: Achieving Optimal Starter Activity Every Time


Welcome to BakeWithEase, your trusted companion on the baking journey! Ever wondered how to unlock the true potential of your sourdough starter? Mastering the Feed is easier than you think. Discover the secrets to a thriving culture with our detailed sourdough starter feeding schedule, designed to eliminate guesswork and guarantee optimal activity. Ready to bake the best loaves of your life? Let's dive in!
- Introduction to Sourdough Starter Activity and Feeding
- Establishing Your Ideal Sourdough Starter Feeding Schedule
- The BakeWithEase Recommended Sourdough Starter Feeding Schedule
- Recognizing Signs of a Healthy and Active Sourdough Starter
- Troubleshooting Common Sourdough Starter Feeding Issues
- Advanced Techniques for Optimizing Your Sourdough Starter's Feeding
- Long-Term Sourdough Starter Maintenance and Feeding
- Conclusion: Achieving Baking Success Through Consistent Sourdough Starter Feeding
-
Frequently Asked Questions
- What is the ideal sourdough starter feeding schedule for optimal activity?
- How does temperature affect the sourdough starter feeding schedule?
- What are the signs that my sourdough starter needs feeding?
- What ratio of flour and water should I use when feeding my sourdough starter?
- Can I adjust my sourdough starter feeding schedule if I'm going on vacation?
- Final Reflection: The Enduring Power of the Sourdough Starter
- Unlock Your Baking Potential: Perfect Starters, Every Time!
Introduction to Sourdough Starter Activity and Feeding
Creating delicious sourdough bread hinges on having a vibrant, active sourdough starter. This living culture of wild yeast and bacteria is the heart of your loaf, providing lift, flavor, and texture. Understanding how your starter behaves and responding to its needs through consistent feeding is fundamental to successful sourdough baking. Think of your starter as a pet; it needs regular nourishment to thrive and perform its best for you.
The rhythm of feeding, resting, and using your starter is what we call the "feeding schedule." This schedule isn't just about when you feed it, but also how much and with what. Mastering this process ensures your starter reaches its peak potential right when you need it for baking, leading to reliable oven spring and that signature tangy sourdough flavor you're after.
Why Consistent Sourdough Starter Feeding Matters for Baking Success
Consistency in feeding your sourdough starter is paramount because it directly impacts the balance of yeast and bacteria within the culture. Yeast is primarily responsible for producing carbon dioxide gas, which makes your dough rise, while lactic and acetic acid bacteria contribute to flavor and help condition the dough. A consistent sourdough starter feeding schedule maintains a healthy population of these microorganisms, ensuring they are strong and ready to work when incorporated into your dough.
Without regular feeding, the yeast and bacteria deplete their food source (the flour) and become sluggish or, worse, the balance shifts, potentially leading to an overly acidic starter that doesn't rise well or imparts an unpleasant flavor. For example, a neglected starter might produce a lot of 'hooch' (a liquid layer on top) and smell strongly of acetone, indicating it's starving and the bacterial activity is dominating in a less desirable way.
A starter consistently fed with a 1:1:1 ratio (starter:flour:water) at peak activity will typically double or triple in size within 4-8 hours at room temperature (around 22-24°C or 72-75°F), a clear sign of its readiness to leaven bread effectively.
Understanding the Importance of a Regular Sourdough Starter Feeding Schedule
A regular sourdough starter feeding schedule is crucial because it establishes a predictable cycle of activity. When you feed your starter, you're providing fresh carbohydrates for the microorganisms to consume. They become active, multiply, produce gas and acids, reach a peak of activity, and then begin to decline as food runs out. Understanding this cycle allows you to time your baking to coincide with the starter's peak vigor.
Having a set sourdough starter feeding schedule also helps you troubleshoot. If your starter isn't behaving as expected (e.g., not doubling within the typical timeframe for your feeding ratio and temperature), a regular schedule provides a baseline. You know when you last fed it and how much, making it easier to diagnose potential issues like temperature fluctuations, changes in flour, or the need for a slight adjustment in your routine.
A starter fed every 24 hours at room temperature might be ready for baking 6-12 hours after feeding, while one fed every 12 hours could be ready in 4-8 hours. This predictability is key to planning your baking sessions effectively.
Establishing Your Ideal Sourdough Starter Feeding Schedule
Finding the perfect sourdough starter feeding schedule isn't a one-size-fits-all situation. It depends heavily on how often you bake and your environmental conditions. If you bake frequently (daily or every few days), keeping your starter at room temperature with regular feedings (perhaps every 12 or 24 hours) is practical. If you bake less often (weekly or bi-weekly), storing your starter in the refrigerator and feeding it less frequently is a more sustainable approach. The goal is to maintain a healthy, active starter without excessive waste from frequent large feedings.
Your personal schedule also plays a role. It's often easiest to feed your starter at a consistent time each day or night, just like any other routine task. This consistency helps the starter establish its own predictable cycle. For example, feeding it every morning around 8 AM or every evening around 9 PM makes it easier to remember and maintain the rhythm required for optimal activity.
Factors Influencing Your Sourdough Starter Feeding Schedule
Several key factors influence how often and how much you need to feed your sourdough starter. Understanding these elements allows you to adjust your sourdough starter feeding schedule for optimal results and minimize waste.
- Ambient Temperature: This is arguably the most significant factor. Warmer temperatures accelerate microbial activity, meaning your starter will consume its food faster and require more frequent feeding. Colder temperatures slow everything down, allowing for less frequent feeding.
- Flour Type: Different flours have varying protein and nutrient levels, affecting how quickly and vigorously your starter ferments. Whole grain flours (like rye or whole wheat) are typically more nutritious and lead to faster, more vigorous activity than refined white flour.
- Hydration Level: The ratio of water to flour in your starter (its hydration) affects its consistency and the rate of fermentation. A wetter starter (higher hydration, e.g., 1:1:1 ratio by weight) tends to be more active and ferments faster than a stiffer starter (lower hydration, e.g., 1:0.5:0.5 ratio).
Ambient Temperature's Effect on Starter Activity
Ambient temperature is a critical variable in determining your sourdough starter feeding schedule. Wild yeast and bacteria are highly sensitive to temperature changes. At warmer temperatures, say 26-28°C (79-82°F), your starter can reach peak activity in as little as 4-6 hours after feeding. This means if you leave it at this temperature, it will exhaust its food supply quickly and may need feeding twice a day or even more frequently to stay vigorous.
Conversely, at cooler room temperatures, perhaps 18-20°C (64-68°F), the same starter fed with the same ratio might take 10-12 hours or longer to peak. If your kitchen is particularly cool, say 16°C (61°F), peak activity could take 18-24 hours. This temperature-dependent rate dictates whether a 12-hour or 24-hour sourdough starter feeding schedule is appropriate when keeping your starter at room temperature. Understanding your kitchen's typical temperature range is essential for establishing a reliable feeding routine.
Flour Type and its Impact on Feeding Frequency
The type of flour you use to feed your sourdough starter significantly impacts its fermentation rate and thus your sourdough starter feeding schedule. Flours higher in nutrients and readily available sugars, particularly whole grain flours, provide a feast for the microorganisms, leading to faster and more robust activity. For example, feeding a starter with 100% whole rye flour often results in it doubling or tripling in volume in just 3-5 hours at typical room temperature.
In contrast, feeding with a lower protein, refined all-purpose flour might result in a slower rise, taking 6-10 hours to peak at the same temperature. Many bakers find a blend of flours, such as 50% bread flour and 50% whole wheat or rye, provides a good balance of activity and flavor. If you switch flour types, observe your starter closely; you may need to adjust the frequency of your sourdough starter feeding schedule initially until it adapts to the new diet.
Hydration Level of Your Sourdough Starter
The hydration level, or the ratio of water to flour by weight, is another factor influencing the rate of fermentation and your sourdough starter feeding schedule. A standard liquid starter is maintained at 100% hydration, meaning equal weights of flour and water are used (e.g., 50g starter, 50g flour, 50g water). This consistency is easy to work with and promotes relatively fast activity.
Stiffer starters, maintained at lower hydration levels (e.g., 50-60% hydration, using half the amount of water as flour by weight), ferment more slowly. The thicker consistency makes it harder for the yeast and bacteria to move and access food. While requiring less frequent feeding, stiff starters develop a different flavor profile, often sweeter and less acidic, and are sometimes preferred for specific pastries or breads. Adjusting your sourdough starter feeding schedule is necessary if you change your starter's hydration level.
The BakeWithEase Recommended Sourdough Starter Feeding Schedule

For bakers keeping a starter at room temperature for regular use, a common and effective sourdough starter feeding schedule is once every 24 hours. This schedule works well for most kitchen temperatures (18-24°C / 64-75°F) and provides a predictable cycle of growth and decline, ensuring your starter is typically ready to use within 6-12 hours after its morning or evening feed.
If your kitchen is warmer or you notice your starter peaking and falling significantly before 24 hours are up, you might need to switch to a 12-hour sourdough starter feeding schedule. This involves feeding it, for example, at 8 AM and 8 PM. This more frequent feeding prevents the starter from becoming overly acidic between feeds and keeps the yeast population particularly vigorous. The key is observation: watch how quickly your starter rises and falls and adjust the frequency accordingly.
A Step-by-Step Guide to Feeding Your Sourdough Starter for Optimal Rise
Feeding your sourdough starter is a simple process, but consistency in technique helps ensure optimal activity. Here's a typical step-by-step guide for maintaining a 100% hydration starter kept at room temperature on a 24-hour sourdough starter feeding schedule:
- Assess: Look at your starter. Has it risen and fallen since the last feed? Is there hooch on top? Does it smell acidic? These observations inform how it's doing.
- Discard (or Use): Scoop out most of your starter. A common approach is to keep a small amount, like 20-30 grams, especially if you aren't baking daily. This minimizes the amount of flour needed for feeding. You can use the discarded starter in other recipes (like pancakes, crackers, or muffins) or simply discard it.
- Feed: Add fresh flour and water to the jar containing the small amount of reserved starter. The ratio depends on your feeding schedule and desired starter activity (see next section). Stir thoroughly until no dry flour remains and the mixture is smooth.
- Rest: Loosely cover the jar (a lid resting on top or a piece of cloth secured with a band allows gases to escape) and let it rest at room temperature until it reaches its peak activity, ready for your next bake or its next scheduled feeding.
This process, repeated on your chosen sourdough starter feeding schedule, keeps your starter healthy and ready.
Determining the Right Amount of Flour and Water for Your Starter
The "right amount" of flour and water for your sourdough starter feeding schedule depends on the amount of starter you keep and the feeding ratio you choose. A common and effective ratio for maintaining a starter at room temperature is 1:1:1 by weight (starter:fresh flour:fresh water). If you keep 25 grams of starter, you would feed it with 25 grams of flour and 25 grams of water. This yields 75 grams of refreshed starter.
If you need a larger quantity of starter for a specific recipe, you can adjust the feeding ratio to build up more starter. For instance, a 1:2:2 ratio (20g starter + 40g flour + 40g water = 100g starter) or even a 1:5:5 ratio will produce more starter from a small amount.
Using a higher ratio of fresh flour and water to the existing starter provides more food, which can sometimes lead to a slightly slower but potentially more vigorous rise as the microbes have abundant resources. Experimenting with ratios like 1:1:1 for daily maintenance and 1:2:2 or 1:3:3 when building up for a bake allows you to find what works best with your sourdough starter feeding schedule and baking needs.
Recognizing Signs of a Healthy and Active Sourdough Starter
Knowing what a healthy, active sourdough starter looks and smells like is key to successful baking. These signs tell you if your sourdough starter feeding schedule is working and if your starter is ready to be used in a recipe.
Look for:
- Significant volume increase (often doubling or tripling).
- Numerous bubbles visible throughout the culture and on the surface.
- A pleasant, slightly tangy aroma.
- A light, airy texture.
These visual and olfactory cues are your starter's way of communicating its health and readiness.
Identifying Peak Activity After Feeding: The Float Test
One of the most reliable ways to determine if your sourdough starter is at its peak activity and ready for baking is the float test. This simple test indicates if your starter has produced enough carbon dioxide gas to be buoyant.
To perform the float test:
- Fill a glass or bowl with cool water (around 20-24°C or 68-75°F).
- Gently take a small spoonful (about a teaspoon) of your starter.
- Carefully drop the spoonful of starter into the water.
If the starter floats on the surface of the water, it contains enough trapped gas from fermentation and is likely at or near its peak activity, ready to leaven your bread. If it sinks to the bottom, it may not have built up enough gas yet, or it may have already passed its peak and is starting to deflate. A successful float test is a strong indicator that your sourdough starter feeding schedule is resulting in a vigorous culture.
Visual Cues: What a Thriving Sourdough Starter Looks Like
A thriving sourdough starter is a beautiful sight for any baker! After being fed according to your sourdough starter feeding schedule, it will typically show several clear visual signs of activity. The most obvious is a significant increase in volume; a healthy starter should at least double, and often triple or even quadruple, in size within a predictable timeframe based on temperature and feeding ratio.
You'll also observe numerous bubbles throughout the starter, not just on the surface. These bubbles indicate active gas production by the yeast. The texture will become light and airy, almost spongy when gently stirred. As it reaches its peak, the top surface might show a slightly domed shape before eventually beginning to flatten or even collapse slightly as it starts to fall. Seeing these changes consistently after feeding confirms your sourdough starter feeding schedule is effective.
The Aroma of a Well-Fed Sourdough Starter
The smell of your sourdough starter is a powerful indicator of its health and activity level. A well-fed starter, following a consistent sourdough starter feeding schedule, should have a pleasant, slightly tangy aroma. It might smell a bit like yogurt, fresh fruit, or even slightly yeasty, but it should not be overwhelmingly sharp, acidic, or unpleasant.
As the starter ferments after feeding, the aroma will develop. It will start mild and floury, then become more complex and tangy as the bacteria produce lactic and acetic acids. At its peak, the tang should be present but not overpowering. If your starter smells strongly of vinegar or acetone (like nail polish remover), it's a sign it's gone too long without food and has become overly acidic. Adjusting your sourdough starter feeding schedule or increasing the feeding ratio might be necessary to bring it back into balance.
Troubleshooting Common Sourdough Starter Feeding Issues
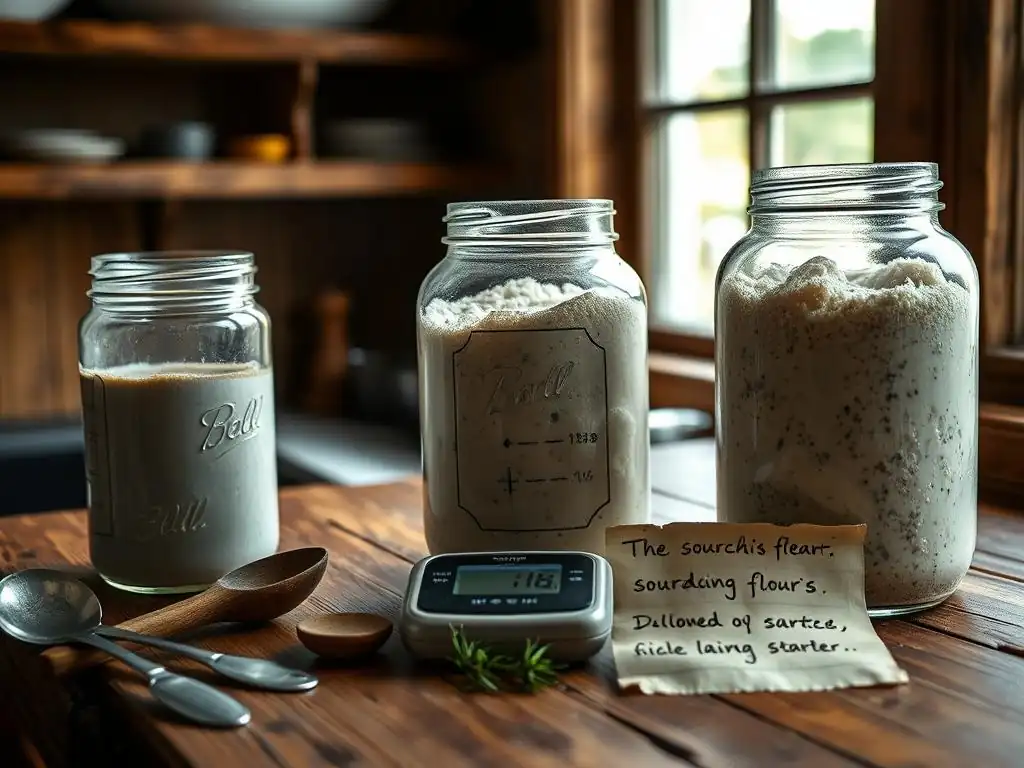
Even with a consistent sourdough starter feeding schedule, you might encounter issues. Don't worry; most problems are easily fixable with a little observation and adjustment. Common issues include a slow or inactive starter, an overly acidic starter, or, in rare cases, mold growth.
Addressing these problems usually involves evaluating your feeding practices, environmental conditions, and the quality of your ingredients. Patience is key, as it might take a few feeding cycles to bring your starter back to optimal health.
Addressing a Slow or Inactive Starter
If your sourdough starter isn't doubling in size or showing much bubbling activity after feeding, it might be slow or inactive. This can be frustrating, especially if you're following a seemingly correct sourdough starter feeding schedule. Several factors can contribute to this sluggishness:
- Low Temperature: If your kitchen is cold, fermentation slows down significantly.
- Infrequent Feeding: If you're not feeding often enough for your temperature, the yeast and bacteria might be depleted.
- Feeding Ratio: Using too much existing starter relative to fresh flour and water can dilute the fresh food source too quickly.
- Flour Quality: Using bleached flour or flour low in nutrients can hinder activity.
- Water Quality: Chlorinated water can inhibit microbial growth.
Identifying the likely cause is the first step to reviving your starter.
Adjusting Your Sourdough Starter Feeding Schedule for Inactivity
If your starter is consistently sluggish on its current sourdough starter feeding schedule, consider making adjustments. First, evaluate the ambient temperature. If it's below 20°C (68°F), try moving your starter to a warmer spot, like near a warm appliance (but not too hot! ), in a turned-off oven with the light on, or even using a proofing box if you have one. Warmer temperatures (aim for 24-26°C or 75-79°F) significantly boost activity.
If temperature isn't the issue, try increasing the frequency of feeding or adjusting the feeding ratio. Instead of a 24-hour schedule, try feeding every 12 hours for a few days. Also, consider a higher ratio of fresh food, such as feeding with a 1:2:2 or even 1:3:3 ratio (starter:flour:water) instead of 1:1:1. This provides more fresh fuel for the microbes to work through, encouraging more robust growth. Using a small amount of whole grain flour, like rye or whole wheat, for part of the feed can also give it a boost due to the higher nutrient content.
The Importance of Using Quality Flour and Water
The ingredients you use to feed your sourdough starter are just as important as your sourdough starter feeding schedule. Always use unbleached flour, as the bleaching process can damage the natural microbial populations present in the flour that help sustain your starter. Organic flour is often preferred as it's less likely to contain residual chemicals.
For water, tap water containing high levels of chlorine can inhibit or even kill the beneficial microbes in your starter. If you suspect your tap water is heavily chlorinated, leave it uncovered on the counter for 24 hours to allow the chlorine to dissipate, or use filtered or bottled water. Using quality ingredients ensures your starter has the best possible environment to thrive and maintain activity on its sourdough starter feeding schedule.
Dealing with an Overly Acidic or "Hooch"-Producing Starter
An overly acidic starter often develops a strong smell of vinegar or acetone and might have a layer of liquid (hooch) on top. This happens when the yeast and bacteria have consumed all the available food and are essentially starving. The bacteria continue to produce acids, while the yeast population declines. This indicates your sourdough starter feeding schedule isn't frequent enough for the conditions, or you're not feeding it enough flour relative to the amount of starter you're keeping.
To fix this, simply discard most of the starter (leaving only a small amount, say 10-20 grams) and feed it with a larger ratio of fresh flour and water, for example, a 1:3:3 or 1:4:4 ratio (starter:flour:water). This provides a large amount of fresh food relative to the microbial population.
You may also need to increase the frequency of your sourdough starter feeding schedule, perhaps moving from a 24-hour to a 12-hour cycle, especially if your kitchen is warm. Pouring off the hooch before feeding is optional; stirring it in can add tang, but pouring it off and feeding generously helps reduce overall acidity.
Preventing Mold Growth in Your Sourdough Starter
Mold growth is relatively rare in a healthy, active sourdough starter because the acidic environment created by the bacteria typically inhibits mold development. However, if your starter is very young, inactive, or has been neglected for an extended period, mold can sometimes appear. Mold usually looks like fuzzy patches of various colors (white, green, black, pink).
If you see any signs of mold, it is generally recommended to discard the entire starter and begin again. While some sources suggest scraping mold off the top, mold often has roots that penetrate deeper into the culture. Starting fresh is the safest approach. To prevent mold, always use clean jars and utensils, maintain a regular sourdough starter feeding schedule to keep your starter active and acidic, and avoid getting food particles (like bread crumbs) into your starter jar.
Advanced Techniques for Optimizing Your Sourdough Starter's Feeding
Once you've mastered the basics of a regular sourdough starter feeding schedule, you can explore more advanced techniques to fine-tune your starter for specific baking needs or manage it more efficiently. These techniques involve adjusting feeding ratios, creating specific levains for recipes, and implementing backup plans.
These methods offer greater control over your starter's characteristics and integrate its maintenance more smoothly into your baking workflow. They move beyond simple maintenance to actively preparing your starter for its starring role in your bread.
Building a Levain from Your Maintained Starter for Baking
For many sourdough recipes, particularly those following the Tartine or similar methods, you don't use your entire jar of maintained starter directly in the dough. Instead, you take a small amount of your active starter and use it to build a separate, specifically prepared mixture of flour and water called a "levain" (or "leaven"). This is essentially a large, very active feeding designed to peak right when you need it for mixing your dough.
For example, if your recipe calls for 100 grams of levain, you might take 20 grams of your peak-activity starter and feed it with 40 grams of flour and 40 grams of water (a 1:2:2 ratio). This levain is then allowed to ferment until it reaches its peak (often 4-6 hours at room temperature), and that mixture is added to your dough. This method allows you to keep a smaller, more manageable amount of main starter on a regular sourdough starter feeding schedule while building exactly the amount of highly active culture needed for each bake.
Adjusting Feeding Ratios for Specific Baking Projects
Beyond the standard 1:1:1 maintenance ratio, adjusting the feeding ratio can influence your starter's flavor profile and activity timeline for specific baking projects. A higher ratio of fresh flour and water to starter (e.g., 1:3:3 or 1:5:5) results in a larger batch of starter that takes longer to peak because the microbes have more food to consume. This can be useful if you need your starter to be ready later in the day or want a milder, less acidic flavor profile, as the fresh flour dilutes the existing acids.
Conversely, a lower ratio (e.g., 1:0.5:0.5, though less common for standard maintenance) or simply using a larger amount of starter relative to flour and water can make the starter peak faster. Bakers sometimes use these principles when creating a levain, tailoring the ratio and temperature to ensure the levain is perfectly ripe at the desired dough-mixing time. Understanding how ratios affect fermentation speed allows you to manipulate your sourdough starter feeding schedule and levain build for optimal timing.
Maintaining a Backup Sourdough Starter: A Baker's Insurance
Even with a perfect sourdough starter feeding schedule, accidents happen. Jars break, starters can get accidentally overheated or frozen, or mold might appear. For dedicated sourdough bakers, maintaining a backup starter is a wise precaution. The easiest way to do this is by drying a small amount of your active starter.
Spread a thin layer of active, peak-readiness starter onto parchment paper or a silicone baking mat and let it air dry completely until brittle. Once dry, break it into flakes or powder and store it in an airtight container in a cool, dark place (a pantry or even the freezer).
This dried starter can remain viable for months, sometimes even years. If anything happens to your main starter, you can easily revive the dried flakes by rehydrating them with equal weights of water and flour over a few days, effectively bringing your starter back to life without having to start from scratch.
Long-Term Sourdough Starter Maintenance and Feeding

Keeping a sourdough starter at room temperature requires a commitment to a regular sourdough starter feeding schedule, often daily or twice daily depending on conditions. For bakers who don't bake that frequently, storing the starter in the refrigerator is an excellent option for long-term maintenance with much less frequent feeding.
Refrigeration significantly slows down microbial activity, essentially putting the starter into a state of dormancy. This allows you to maintain a starter for weeks without daily feeding, making sourdough baking accessible even with a busy schedule.
Storing Your Starter in the Refrigerator: A Guide to Infrequent Feeding
Storing your sourdough starter in the refrigerator allows for a much more relaxed sourdough starter feeding schedule. Once your starter is mature and active (consistently doubling or tripling after feeding at room temperature), feed it as usual, let it sit at room temperature for 1-2 hours to kickstart fermentation, and then place the covered jar in the refrigerator.
At refrigerator temperatures (typically 3-5°C or 37-41°F), the microbes become very sluggish. You can typically store your starter this way for 1-2 weeks, sometimes even 3-4 weeks, before it needs another feed. When it's time to feed (or when you want to bake), take it out, let it warm up for a few hours, discard most of it, feed it with fresh flour and water, and let it become active at room temperature before returning it to the fridge or using it in a bake. This drastically reduces the frequency of feeding compared to room temperature storage.
Reviving a Dormant Sourdough Starter after Refrigeration
Reviving a starter that has been stored in the refrigerator on an infrequent sourdough starter feeding schedule requires a few steps to bring it back to peak activity. Take the starter out of the fridge and let it warm up to room temperature for 2-4 hours. It will look less active and might have a strong, acidic smell and possibly some hooch on top.
Discard most of the starter, leaving only a small amount (e.g., 20-30 grams). Feed this with fresh flour and water using your standard ratio (e.g., 1:1:1 or 1:2:2). Stir well and let it sit at room temperature. The first feeding after refrigeration might be slow.
It might take 12-24 hours or even longer to show significant activity. Once it shows good signs of life (some bubbles, slight rise), discard again and feed it once more. Usually, after 2-3 consecutive feedings at room temperature (every 12 or 24 hours depending on temperature), your starter will regain its full vigor and be ready for baking or returning to its refrigerated sourdough starter feeding schedule.
The Beauty of a Mature and Well-Maintained Starter
A mature sourdough starter, consistently maintained on a suitable sourdough starter feeding schedule for weeks, months, or even years, develops a robust and stable microbial community. This maturity often translates into more predictable activity and a deeper, more complex flavor profile in your bread. The balance of yeast and bacteria becomes well-established, making the starter more resilient to minor fluctuations in temperature or feeding times.
Experienced bakers cherish their mature starters, sometimes referring to them fondly by name! They are the reliable engine behind consistently excellent sourdough loaves. The effort put into understanding and implementing a proper sourdough starter feeding schedule pays off in the form of a vibrant culture that reliably leavens your bread and imparts that signature tangy complexity.
Conclusion: Achieving Baking Success Through Consistent Sourdough Starter Feeding
Mastering your sourdough starter feeding schedule is arguably the most critical skill in consistent sourdough baking. Your starter is a living ingredient, and its health and activity directly determine the success of your loaves. By understanding the factors that influence fermentation—temperature, flour type, hydration, and feeding ratios—you can establish a routine that keeps your starter vigorous and ready to perform when you need it.
Whether you maintain your starter at room temperature with daily feeds or keep it in the refrigerator with a less frequent sourdough starter feeding schedule, consistency and observation are key. Pay attention to its visual cues, aroma, and how it performs the float test. Troubleshooting issues quickly ensures your starter remains a reliable partner in your baking journey.
Recap of Best Practices for Sourdough Starter Feeding
To recap, here are the best practices for maintaining a healthy sourdough starter through effective feeding:
- Be Consistent: Establish a regular sourdough starter feeding schedule (e.g., every 12 or 24 hours at room temp, or weekly/bi-weekly in the fridge).
- Observe: Pay attention to how your starter looks, smells, and rises after feeding. These are vital clues to its health.
- Adjust for Temperature: Be prepared to feed more often in warm conditions and less often in cool conditions.
- Use Quality Ingredients: Feed with unbleached flour and chlorine-free water.
- Find Your Ratio: Common ratios are 1:1:1, but adjust based on your needs and how much starter you want to keep.
- Don't Be Afraid to Discard: Keeping a smaller amount of starter means less flour is needed for feeding, reducing waste.
- Float Test: Use this reliable method to check for peak activity before baking.
- Troubleshoot: Address inactivity, hooch, or acidity by adjusting feeding frequency, ratio, or temperature.
By following these guidelines and tuning into your starter's needs, you'll ensure it's always ready to help you bake incredible sourdough bread.
Resources for Further Learning on Sourdough Baking at BakeWithEase
Embarking on the sourdough journey is exciting, and mastering your sourdough starter feeding schedule is just one piece of the puzzle. At BakeWithEase.com, we offer a wealth of resources to help you every step of the way.
Explore our site for:
- Beginner guides to creating your first starter.
- Step-by-step sourdough bread recipes.
- Tips on shaping, scoring, and baking techniques.
- Ideas for using sourdough discard.
Our goal is to make sourdough baking accessible and enjoyable for everyone. Keep practicing your feeding routine, keep baking, and enjoy the delicious rewards of your efforts!
Frequently Asked Questions
What is the ideal sourdough starter feeding schedule for optimal activity?
The ideal schedule often involves feeding your starter every 12-24 hours depending on room temperature and the starter's activity level. A consistent feeding schedule is crucial for maintaining a healthy and active culture.
How does temperature affect the sourdough starter feeding schedule?
Warmer temperatures accelerate fermentation, requiring more frequent feedings. Colder temperatures slow it down, allowing you to feed less often. Adjust your schedule accordingly.
What are the signs that my sourdough starter needs feeding?
Signs include a doubling in size, a bubbly texture, and a slightly acidic aroma. If it has collapsed and a layer of hooch has formed, it definitely needs feeding.
What ratio of flour and water should I use when feeding my sourdough starter?
A common ratio is 1:1:1 (starter:flour:water). This ensures a balanced environment for the yeast and bacteria to thrive and provides consistent results.
Can I adjust my sourdough starter feeding schedule if I'm going on vacation?
Yes, you can store your starter in the refrigerator to significantly slow down fermentation. Feed it before refrigerating and then again a couple of days after removing it to revive its activity.
Final Reflection: The Enduring Power of the Sourdough Starter
Mastering the sourdough starter feed isn't just about baking bread; it's about cultivating patience, understanding, and a deep connection with the natural world. The seemingly simple act of feeding a starter reveals a profound relationship between human intention and microbial life, a relationship that resonates far beyond the kitchen. This connection, once established, unlocks a world of possibilities, from crafting exquisite loaves to fostering a deeper appreciation for the slow, deliberate processes that enrich our lives.
The consistent rhythm of feeding my starter has become a meditative practice, a daily ritual that grounds me amidst the chaos of modern life. It's a reminder that even the most complex creations begin with small, consistent actions. The greatest works are performed not by strength, but by perseverance.
This quote, often attributed to Samuel Johnson, perfectly encapsulates the essence of sourdough baking and the dedication required to nurture a thriving starter. The impact of this practice extends beyond the tangible results; it cultivates patience, mindfulness, and a deeper appreciation for the natural processes that shape our world.
Now, consider your own relationship with routine and intention. What daily practices could you cultivate to foster a similar sense of connection and accomplishment? Perhaps it's a daily walk in nature, a dedicated time for creative expression, or simply a moment of quiet reflection. Embrace the power of consistent action, nurture your own "starter," and watch as it flourishes into something beautiful and meaningful. The journey of mastering your sourdough starter is a microcosm of life itself – a testament to the rewards of patience, dedication, and a deep appreciation for the simple things.
Unlock Your Baking Potential: Perfect Starters, Every Time!
Thanks for joining us on this baking journey! We hope you now feel confident in creating amazing starters that elevate your bread game. Ready to put your new knowledge into practice?
- Bake your dream loaf today: Use the techniques we’ve discussed to create a starter, and document your progress. Share your baking experience in the comments below!
- Experiment with different flours: Explore how various flours impact your starter’s development and the final bread texture. What surprising results will you discover?
- Join our baking community: Connect with other bakers, share your successes (and even your stumbles! ), and learn from each other’s experiences. Let’s rise together!
What unique flavor will your perfect starter unlock in your next bake?