
Mastering the Spiral: Shaping Perfect Pain aux Raisins

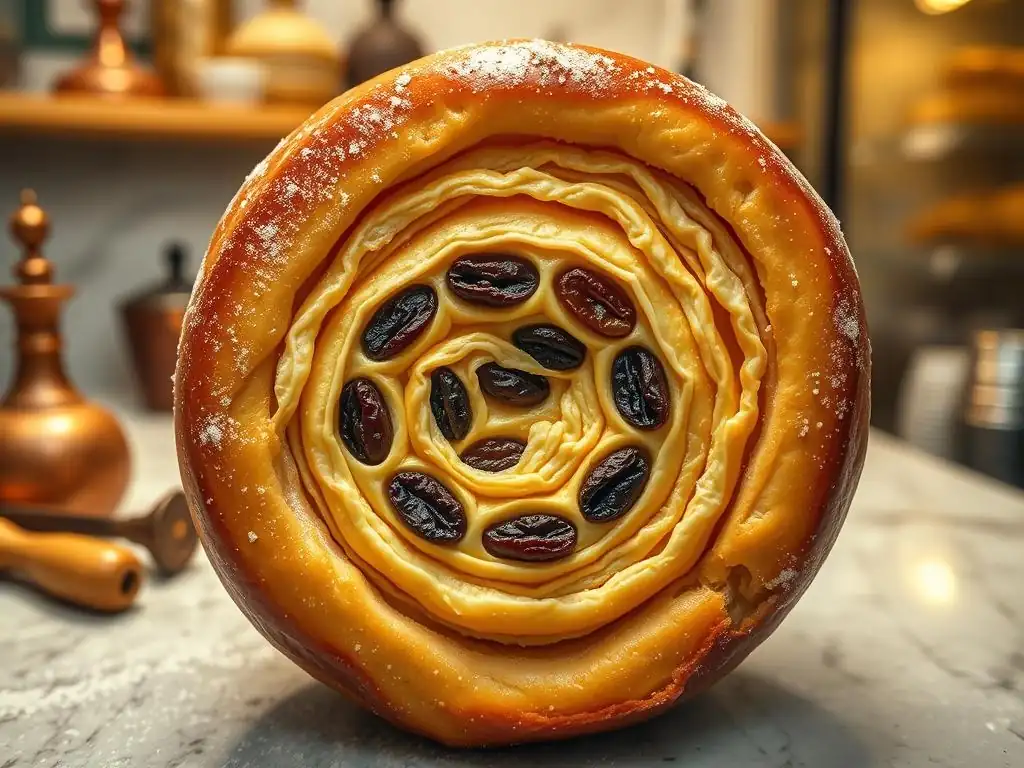
Welcome to BakeWithEase, your guide to unlocking baking brilliance! Ever dreamt of creating those stunning, bakery-worthy Pain aux Raisins with their mesmerizing swirls? This week, we're diving deep into the secrets of achieving perfect spiral pastry dough. Intrigued? Discover the step-by-step techniques to craft a dough so pliable and precise, it'll transform your baking game. Let's unravel the mystery and create spirals of deliciousness together!
- Crafting Exquisite Pain aux Raisins: A Baker's Guide
- Introduction to Pain aux Raisins: Unveiling the Art of the Spiral
- Understanding the Dough: The Foundation of Flaky Perfection
- Creating the Crème Pâtissière: The Rich and Creamy Filling
- Assembling the Pain aux Raisins: The Art of Spiral Formation
- Cutting and Shaping: Transforming the Roll into Individual Pastries
- Baking Your Pain aux Raisins: Mastering Temperature and Timing
- Troubleshooting: Addressing Common Challenges in Pain aux Raisins Baking
- Tips and Tricks for Exceptional Pain aux Raisins
- Advanced Techniques: Elevating Your Pain aux Raisins
- Conclusion: Savoring Your Homemade Pain aux Raisins
-
Frequently Asked Questions
- What makes Pain aux Raisins distinct from other pastries?
- What's the most challenging aspect of achieving a "perfect spiral pastry dough"?
- Can I use a different type of filling besides crème pâtissière and raisins?
- How can I ensure my dough is properly laminated for the ideal spiral shape?
- What are some common mistakes to avoid when shaping Pain aux Raisins?
- Final Reflection: The Enduring Allure of the Perfect Spiral
- Unleash Your Inner Boulanger: Bake the Perfect Pain aux Raisins Today!
Crafting Exquisite Pain aux Raisins: A Baker's Guide
Introduction to Pain aux Raisins: Unveiling the Art of the Spiral
The Spiral's Significance: Balancing Aesthetics and Flavor
The perfect spiral in a pain aux raisins is more than just visually appealing; it's fundamental to the pastry's texture and flavor distribution. A well-formed spiral ensures that each bite offers a delightful balance of flaky laminated dough, creamy crème pâtissière, and sweet, plump raisins. Achieving this perfect spiral pastry dough is a key indicator of a baker's skill in handling viennoiserie. The layers of dough, when rolled and cut correctly, create the characteristic pinwheel shape that expands beautifully during baking, trapping steam and resulting in that sought-after airy, buttery texture.
Beyond aesthetics, the spiral structure dictates how the heat penetrates the pastry. A tight, even spiral ensures uniform cooking, preventing the center from being underbaked while the edges overcook. This consistency is crucial for achieving the ideal contrast between the crisp exterior layers and the soft, rich interior. Mastering the technique for creating this perfect spiral pastry dough is an essential step for anyone aspiring to bake professional-quality pain aux raisins at home.
A Comprehensive Guide to Mastering Pain aux Raisins
This guide will walk you through every stage of creating exquisite pain aux raisins, from understanding the foundational dough to troubleshooting common issues. We'll delve into the nuances of lamination, the secrets to a silky crème pâtissière, and the precise techniques required for shaping that perfect spiral pastry dough. Whether you're new to viennoiserie or looking to refine your skills, this resource aims to provide the knowledge and confidence needed to achieve bakery-quality results.
We'll break down complex steps into manageable actions, offering insights into the science behind each process. For instance, understanding the importance of cold temperatures during lamination or the role of proofing in developing the pastry's structure is vital. By the end of this guide, you'll possess a comprehensive understanding of the craft, enabling you to consistently produce pain aux raisins that are as delicious as they are beautiful, highlighted by their flawless perfect spiral pastry dough.
Understanding the Dough: The Foundation of Flaky Perfection
Laminated Dough: The Key to Achieving Exceptional Spirals
Laminated dough is the backbone of pain aux raisins and the secret to its incredible flakiness. This type of dough is created by repeatedly folding a block of butter within a simple dough (détrempe), creating hundreds or even thousands of thin layers of dough separated by equally thin layers of butter. During baking, the water in the butter turns to steam, forcing the dough layers apart and creating that characteristic airy, crisp texture. The success of the perfect spiral pastry dough heavily relies on this lamination process.
The process typically involves enclosing a butter block within the détrempe, then rolling and folding the dough multiple times. A standard approach for viennoiserie involves three "turns," which can yield over 700 layers of dough and butter. Resting periods between turns are crucial, usually lasting 30-60 minutes in the refrigerator, allowing the gluten to relax and the butter to firm up, preventing it from breaking through the layers during subsequent rolling. This meticulous process is what builds the structure necessary for a stunning perfect spiral pastry dough.
Essential Ingredients for a Superior Pain aux Raisins Dough
The quality of your pain aux raisins is directly linked to the quality of its ingredients. Strong bread flour, typically with a protein content of 12-14%, is essential for developing a robust gluten network that can withstand the lamination and proofing processes. This network provides the structure needed to support the layers and achieve a high rise, contributing significantly to the texture of the perfect spiral pastry dough.
High-quality unsalted butter, ideally with a fat content of 82% or higher, is non-negotiable for successful lamination. The plasticity of the butter is key; it needs to be firm but pliable, capable of being rolled into thin, even layers without melting or becoming brittle. Fresh yeast, milk (whole milk is preferred for richness), sugar (granulated or caster), and salt are also standard components. Using whole milk adds richness and promotes browning, while sugar provides food for the yeast and aids in caramelization during baking, enhancing the flavor and appearance of the perfect spiral pastry dough.
Preparing the Dough: A Detailed Step-by-Step Process
- Step 1: Prepare the Détrempe.: Combine the flour, sugar, salt, and yeast in a mixing bowl. Gradually add the cold milk and any other liquid specified in your recipe. Mix until a shaggy dough forms. Knead for about 8-10 minutes until the dough is smooth and elastic. The target dough temperature after kneading should ideally be between 22-24°C (72-75°F).
- Step 2: Chill the Détrempe.: Shape the dough into a rectangle, wrap it tightly, and chill in the refrigerator for at least 1-2 hours, or until it is firm and well-chilled. This initial chilling is vital for coordinating the dough's temperature with the butter.
- Step 3: Prepare the Butter Block.: Shape the cold butter into a rectangle, roughly half the size of your chilled détrempe rectangle. This is often done by pounding and rolling the butter between two sheets of parchment paper. Aim for a block that is pliable but still cold.
- Step 4: Enclose the Butter.: Roll out the chilled détrempe into a rectangle about twice the size of your butter block. Place the butter block on one half of the dough rectangle. Fold the other half of the dough over the butter, sealing the edges completely. Ensure the butter is fully encased.
- Step 5: First Turn.: Lightly flour your work surface and the dough. Roll the dough rectangle away from you into a long, even rectangle, about 6-8 mm thick. Perform a "letter fold": fold one-third of the dough up from the bottom, then fold the top third down over it. This completes one turn. Wrap the dough and chill for 30-60 minutes.
- Step 6: Subsequent Turns.: Rotate the dough 90 degrees (so the folded edge is now on your left or right). Repeat Step 5 (rolling and folding) for the required number of turns (typically two more for a total of three). Chill the dough after each turn. Proper execution of these turns is critical for developing the layers that define a perfect spiral pastry dough.
Creating the Crème Pâtissière: The Rich and Creamy Filling
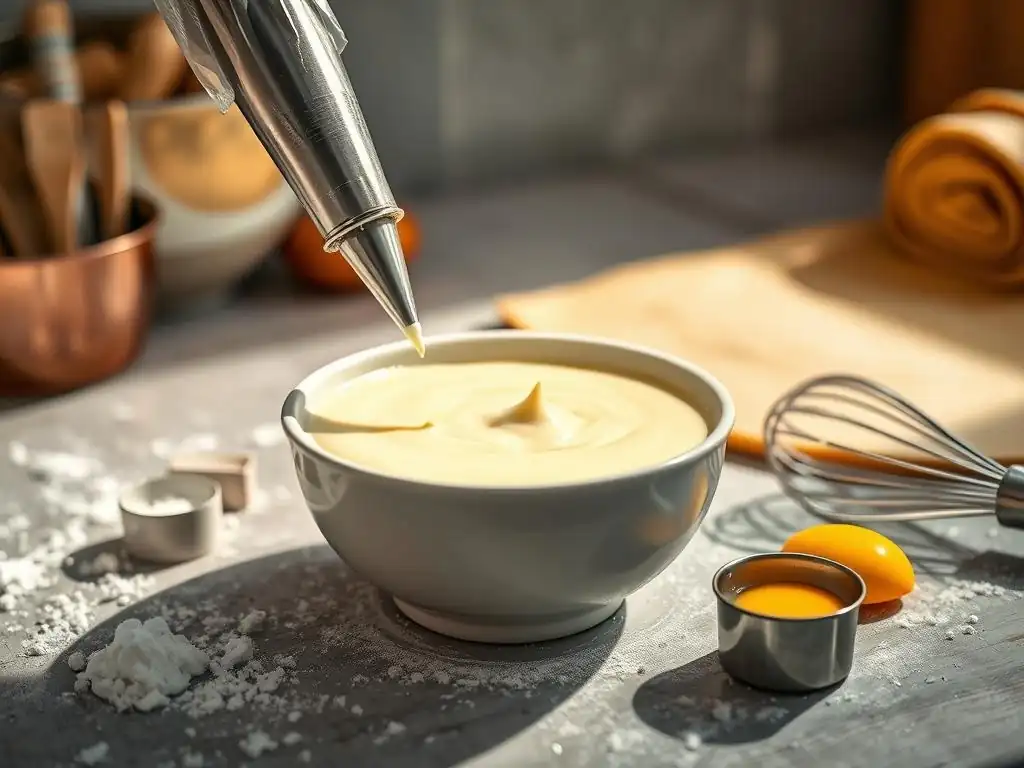
Classic Crème Pâtissière Recipe: A Timeless Foundation
Crème pâtissière, or pastry cream, is the traditional filling for pain aux raisins, providing a rich, creamy contrast to the flaky dough. A classic recipe typically involves heating milk (about 500ml) with half of the sugar (around 125g) and a vanilla bean or extract. In a separate bowl, whisk together egg yolks (4-6), the remaining sugar, and a thickener like cornstarch or flour (approx. 40-50g).
Once the milk is hot (just before boiling), temper the egg mixture by slowly whisking a small amount of hot milk into it. Then, pour the tempered egg mixture back into the saucepan with the remaining hot milk. Cook over medium heat, whisking constantly, until the mixture thickens significantly and comes to a boil for 1-2 minutes.
Boiling ensures the starch is fully cooked and the cream is stable. Remove from heat, stir in a knob of cold butter (optional, but adds richness and shine, around 20g), and strain the cream through a fine-mesh sieve into a clean bowl to remove any lumps or cooked egg bits.
Achieving Silky Smoothness: Tips for Perfect Crème Pâtissière
Achieving a perfectly silky smooth crème pâtissière requires attention to detail. Whisking vigorously and continuously while cooking is paramount to prevent lumps from forming. Ensure the heat is not too high, which can cause the bottom to scorch before the rest of the cream thickens. Cooking the cream for the full 1-2 minutes after it thickens and comes to a boil is also crucial; this fully activates the starch, preventing the cream from becoming runny as it cools.
Rapid cooling is essential to stop the cooking process and prevent bacteria growth. After straining, immediately cover the surface of the hot cream with plastic wrap, pressing it directly onto the surface to prevent a skin from forming. Chill the cream quickly in an ice bath or spread it out in a shallow dish before refrigerating. Once chilled, whisk the cream again briefly before using to restore its smooth texture. A well-made crème pâtissière is key to the luscious interior of a perfect spiral pastry dough.
Flavor Infusions: Enhancing Your Crème Pâtissière [e.g., Lemon, Rum]
While vanilla is the classic, crème pâtissière is incredibly versatile and can be infused with various flavors to complement the pain aux raisins. For a bright, zesty twist, lemon zest can be steeped in the milk as it heats. Approximately the zest of one large lemon added to 500ml of milk can provide a noticeable citrus note. Strain the milk before tempering the egg yolks to remove the zest.
For a more decadent flavor, a splash of rum or other liqueur can be stirred into the finished crème pâtissière after it has been removed from the heat. About 1-2 tablespoons per 500ml batch adds a subtle warmth and depth. Ensure the alcohol is added after cooking, as heating it for too long can cause the flavor to dissipate. Other possibilities include steeping coffee beans or tea leaves in the milk, adding chocolate, or incorporating fruit purees after chilling. These infusions can elevate the traditional perfect spiral pastry dough into something truly unique.
Assembling the Pain aux Raisins: The Art of Spiral Formation
Preparing the Dough: Achieving the Ideal Shape and Thickness
Once your laminated dough has completed its final rest in the refrigerator and is well-chilled and relaxed, it's time to roll it out for assembly. The goal is to roll the dough into a large, even rectangle, typically about 40-50 cm wide and 30-40 cm tall, with a uniform thickness of approximately 3-4 mm. This precise thickness is crucial for achieving a manageable and perfect spiral pastry dough when rolled.
Work on a lightly floured surface, using gentle, even pressure with your rolling pin. Roll from the center outwards, rotating the dough occasionally to prevent sticking and ensure an even shape. If the dough resists rolling or starts to shrink back, cover it and let it rest in the refrigerator for 10-15 minutes before continuing. Patience here ensures you maintain the delicate layers created during lamination, which are vital for the flaky texture and the structure of the perfect spiral pastry dough.
Even Distribution: Spreading the Crème Pâtissière and Raisins
With the dough rolled to the correct dimensions and thickness, it's time to add the filling. The chilled crème pâtissière should be whisked briefly to loosen it and make it spreadable. Spread a thin, even layer of crème pâtissière over the entire surface of the dough rectangle, leaving a small border (about 1-2 cm) along one of the long edges. This border will help seal the roll. Aim for a layer that is approximately 2-3 mm thick; too much cream can cause leakage during baking, while too little won't provide enough moisture and flavor.
Next, scatter the plumped raisins evenly over the crème pâtissière. Raisins should ideally be soaked beforehand in warm water, rum, or orange juice for about 15-30 minutes and then drained thoroughly. This makes them soft and juicy. Distribute the raisins evenly across the cream-covered surface, ensuring a good amount in every bite. Typically, about 100-150g of raisins are used for a batch made from 500g of flour, but adjust according to your preference. Even distribution of both the cream and raisins is key to a balanced and perfect spiral pastry dough.
Perfecting the Tight Spiral: Rolling for Optimal Texture
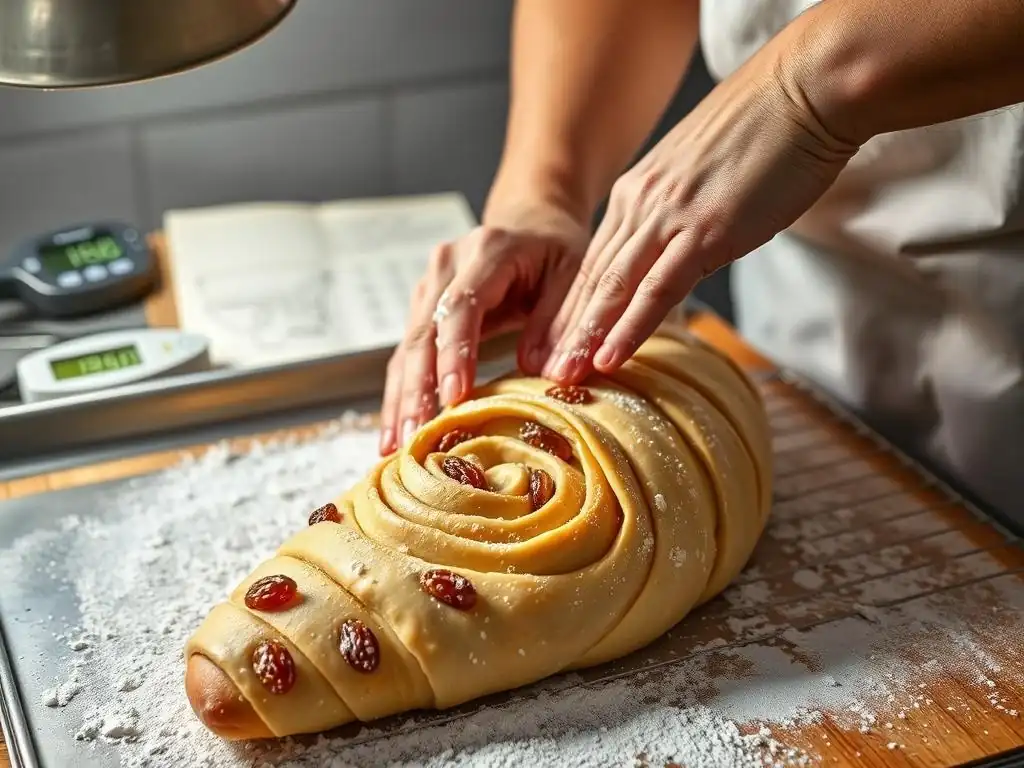
Rolling the dough into a tight, even spiral is perhaps the most critical step in forming the pain aux raisins. Starting from the long edge opposite the clear border, begin rolling the dough towards the border. Use your fingertips to keep the roll tight and even as you go. Avoid squeezing the dough too hard, which can damage the layers, but maintain enough pressure to create a compact spiral.
Roll the dough all the way to the clear border, then use a little water or egg wash on the border edge to help seal the roll. Press gently along the seam to ensure it is secure. The resulting log should be uniform in thickness along its length. A tight roll ensures that when you cut the pastries, you get distinct, beautiful spirals that hold their shape during proofing and baking. This careful rolling technique is fundamental to creating a perfect spiral pastry dough.
Cutting and Shaping: Transforming the Roll into Individual Pastries
Uniformity in Size and Shape: Precise Cutting Techniques
Once the dough log is assembled, chilling it again for 15-30 minutes in the refrigerator or freezer (until firm but not frozen solid) makes it much easier to cut cleanly. Use a very sharp knife or, preferably, a piece of unflavored dental floss or thin kitchen twine for cutting. Using floss results in less compression of the dough layers, leading to rounder, more perfect spirals.
To use floss, slide a piece underneath the dough log at the desired cutting point. Cross the ends of the floss over the top of the log and pull them tight, slicing through the dough. Aim for slices that are uniformly thick, typically between 2-3 cm (about 1 inch). Uniform size is crucial for even baking; pastries of the same size will cook at the same rate. Precise cutting ensures each piece starts its journey towards becoming a beautiful, perfect spiral pastry dough.
Arranging the Spirals: Promoting Even Baking and Rise
Place the cut spirals onto baking sheets lined with parchment paper or silicone mats. Leave ample space between each pastry, as they will expand significantly during proofing and baking. A spacing of at least 5-7 cm (2-3 inches) is recommended. Overcrowding can lead to uneven heating and pastries sticking together.
Arrange the spirals cut-side up. This allows the layers to open properly as the pastry proofs and bakes, enhancing the definition of the perfect spiral pastry dough. Gently reshape any pieces that might have been slightly compressed during cutting to maintain their round shape.
Proofing Your Pain aux Raisins: Achieving a Light and Airy Texture
Proofing is a critical stage where the yeast produces carbon dioxide, causing the pastries to rise and become light and airy. Place the baking sheets in a warm, humid, and draft-free environment. An ideal proofing temperature is around 24-26°C (75-80°F). Humidity prevents the surface of the dough from drying out, which can inhibit rising. A common method is to place the baking sheets in a turned-off oven with a pan of hot water on the rack below.
Proofing time varies depending on the temperature and the activity of your yeast, but it typically takes 1.5 to 3 hours. The pastries are ready when they have visibly increased in size (often doubled or nearly doubled) and look puffy. The layers should appear more defined. Be careful not to overproof, as this can lead to collapsed pastries in the oven. Gently press the side of a pastry; if it springs back slowly, it's ready. Proper proofing is essential for developing the light texture within the perfect spiral pastry dough.
Baking Your Pain aux Raisins: Mastering Temperature and Timing
Optimal Oven Temperature: Achieving Golden-Brown Perfection
Baking pain aux raisins at the correct temperature is essential for achieving that desirable golden-brown crust and fully cooked interior. A hot oven is needed initially to create oven spring – the rapid rise of the dough as the gases expand – and to set the layers. Preheat your oven to a relatively high temperature, typically around 190-200°C (375-390°F). Some bakers even start slightly higher, say 210°C (410°F), for the first 5-10 minutes before reducing the temperature.
The high initial heat helps the butter melt quickly and create steam, which pushes the layers apart. After the initial rise, the temperature is often reduced to around 175-180°C (350-360°F) to allow the pastries to cook through without burning the exterior. This two-stage temperature approach helps ensure a beautiful, golden color and a crisp exterior while the interior finishes baking. Achieving this color is part of showcasing the perfect spiral pastry dough.
Monitoring the Baking Process: Ensuring Even Cooking
Baking time for pain aux raisins typically ranges from 15 to 25 minutes, depending on their size and your oven. It's crucial to monitor the pastries closely as they bake. They should puff up significantly and turn a deep golden-brown color. The layers of the perfect spiral pastry dough should be clearly visible and separated.
If your oven has hot spots, you may need to rotate the baking sheets halfway through the baking time to ensure even coloring. The pastries are done when they are uniformly golden-brown across the top and bottom. You can lift one gently with a spatula to check the bottom; it should be as golden as the top. An internal temperature of around 90-95°C (195-205°F) indicates they are fully baked.
Cooling and Glazing: Adding the Final Touches
Once baked, transfer the pain aux raisins to a wire rack to cool slightly. While still warm (but not hot), they are often brushed with a simple sugar syrup or a light glaze. A simple syrup made from equal parts sugar and water, heated until the sugar dissolves, adds shine and a touch of sweetness. An apricot glaze (apricot jam strained and heated with a little water) is also traditional, providing both shine and a subtle fruity flavor.
Apply the glaze sparingly with a pastry brush while the pastries are warm; this allows the glaze to melt slightly and adhere beautifully to the surface, enhancing the visual appeal of the perfect spiral pastry dough. Allow the pastries to cool completely on the wire rack before serving. This allows the internal structure to set properly.
Troubleshooting: Addressing Common Challenges in Pain aux Raisins Baking
Sticky Dough: Managing Hydration and Temperature
Sticky laminated dough can be a frustrating issue, often stemming from improper hydration or temperature control. If your détrempe is too wet initially, it will be difficult to work with and the butter may tear through the layers during rolling. Ensure you measure your ingredients accurately, particularly the liquids. Flour absorption varies, so sometimes slight adjustments are needed, but start with the recipe's specified amount.
Temperature is equally critical. If the dough or butter gets too warm during lamination or rolling, the butter can soften excessively, leading to a greasy, sticky mess where the layers merge. Work quickly and efficiently, and don't hesitate to return the dough to the refrigerator for 15-20 minutes whenever it feels too soft or sticky. A properly chilled dough is firm but pliable, making it much easier to create a clean, perfect spiral pastry dough.
Uneven Spirals: Refining Technique for Consistent Results
Uneven spirals can result from inconsistent rolling or cutting techniques. When rolling out the dough rectangle for assembly, strive for uniform thickness across the entire sheet. Thicker or thinner spots will result in spirals that are larger or smaller, respectively, after cutting. Use a ruler if necessary to check the dimensions and thickness.
During the rolling of the log, apply even pressure along the entire length. Avoid rolling one end tighter than the other. When cutting, use a sharp knife or floss and ensure each cut is made at a consistent interval. If using a knife, try to slice straight down rather than sawing, which can compress the layers unevenly. Practice and patience are key to mastering the technique for consistently shaped, perfect spiral pastry dough.
Filling Leakage: Preventing and Resolving Issues
Filling leakage during baking is usually caused by overfilling or an improperly sealed dough log. When spreading the crème pâtissière, ensure the layer is not excessively thick, generally aiming for 2-3 mm. Also, remember to leave that small border of dough along the sealing edge free of filling and raisins.
When rolling the log, ensure the final seam is well-sealed by moistening the edge and pressing it firmly onto the roll. A loose seam can split open in the oven, allowing the filling to escape. If you notice minor leakage during baking, there's often little you can do at that stage. However, preventing it in the assembly phase is key. Ensure the crème pâtissière is properly thickened during cooking; a runny cream is more likely to leak. These steps help protect the integrity of your perfect spiral pastry dough.
Tips and Tricks for Exceptional Pain aux Raisins
Working with Cold Dough: Maintaining Butter Lamination
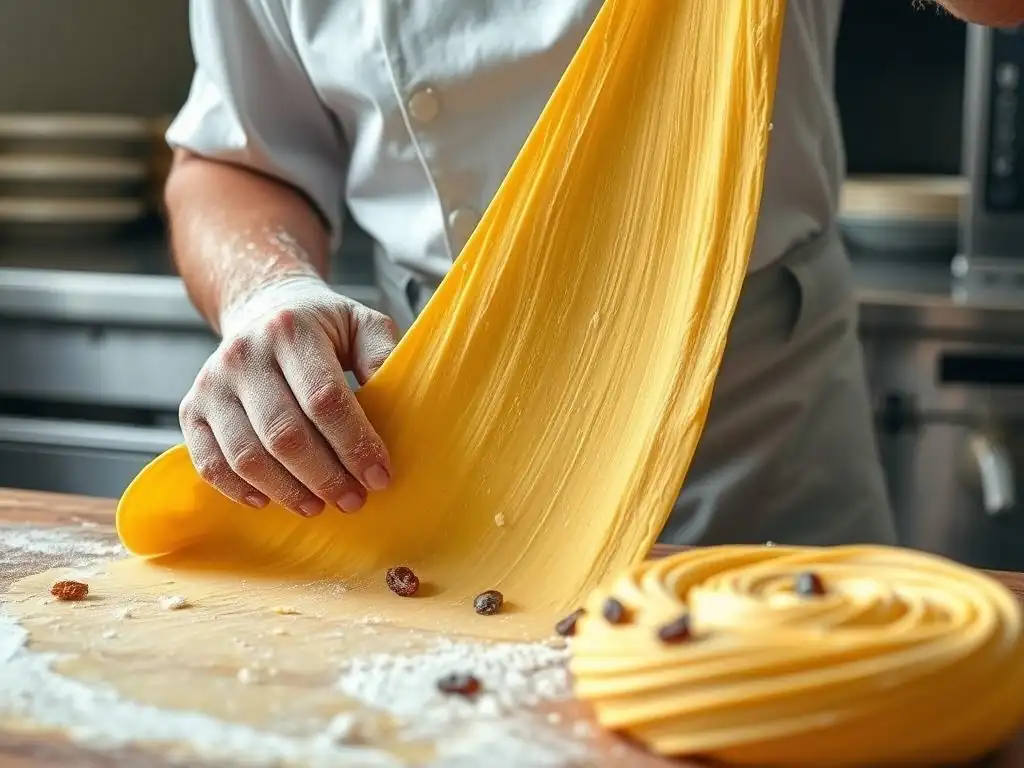
Maintaining cold temperatures is perhaps the single most important factor in successful laminated dough. The butter must remain solid and separate from the dough layers throughout the rolling and folding process. If the butter melts into the dough, you lose the distinct layers essential for flakiness.
Work in a cool kitchen if possible. Have all your tools and ingredients ready. If your hands tend to be warm, you can chill them under cold water before handling the dough. Use minimal flour on your work surface, as excessive flour can dry out the dough and prevent layers from adhering properly. If the dough becomes soft or the butter feels like it's melting, stop immediately, wrap the dough, and return it to the refrigerator for 15-20 minutes. Patience with chilling pays off in beautifully defined layers and a perfect spiral pastry dough.
The Détrempe: Building a Strong and Flexible Dough Structure
The initial dough, the détrempe, needs to be strong enough to withstand the rigorous rolling and folding of lamination without tearing, yet flexible enough to be rolled thinly. Using bread flour with a higher protein content helps build this strength through gluten development during kneading.
Knead the détrempe until it passes the "windowpane test": a small piece of dough can be stretched thinly enough to see light through it without tearing. This indicates sufficient gluten development. However, avoid over-kneading, which can make the dough tough. The détrempe should be smooth, elastic, and not overly sticky. A well-developed détrempe is the foundation that supports the intricate structure of the perfect spiral pastry dough.
Enhancing Buttery Flavor: Selecting High-Quality Butter
The flavor of your pain aux raisins is significantly influenced by the quality of the butter used for lamination. European-style butters, which typically have a higher fat content (82-84% compared to 80% in many American butters) and are often cultured, offer a richer flavor and more desirable plasticity for lamination.
While any unsalted butter can be used, investing in a good quality butter specifically designed for pastries or with a higher fat content will yield a noticeable difference in both flavor and texture. The butter's melting point and flexibility are also key; it should be firm when cold but pliable enough to roll smoothly without cracking or becoming brittle. This high-quality butter is integral to the rich taste of the perfect spiral pastry dough.
Advanced Techniques: Elevating Your Pain aux Raisins
Exploring Flavor Combinations: [e.g., Pistachio, Apricot]
Beyond the classic raisin and crème pâtissière, pain aux raisins can be a canvas for exciting flavor combinations. For a pistachio variation, replace a portion of the flour in the détrempe with finely ground pistachios (perhaps 10-15% by weight) or add pistachio paste to the crème pâtissière (around 50g per 500ml of cream). You could also scatter chopped toasted pistachios along with or instead of raisins.
An apricot version could involve spreading a thin layer of apricot jam or compote over the crème pâtissière before adding the raisins, or using dried apricots instead of raisins (soaked and chopped). Other possibilities include adding spices like cardamom or cinnamon to the cream, incorporating chocolate chips, or using different dried fruits like currants or cranberries. These variations offer delightful twists on the perfect spiral pastry dough.
Variations in Design: Creating Unique Shapes and Presentations
While the classic spiral is iconic, the dough can be shaped differently for unique presentations. Instead of a single long log, you could divide the dough and create smaller logs or even individual pinwheels by rolling up smaller rectangles.
Another variation involves cutting the rolled dough into strips and twisting them before forming coils, resulting in a more rustic look. For a braided effect, cut three strips, add filling to the center of each, and braid them together before coiling. These alternative shapes still highlight the beautiful layers of the laminated dough, offering a different perspective on the perfect spiral pastry dough.
Utilizing Puff Pastry: A Streamlined Approach [with modified instructions]
While traditional pain aux raisins uses a yeasted laminated dough, using store-bought or homemade puff pastry offers a significantly streamlined approach. Puff pastry is a non-yeasted laminated dough, meaning it skips the proofing step driven by yeast. The flakiness comes solely from the steam created by the butter layers.
To make "cheat" pain aux raisins with puff pastry:
- Roll out a sheet of puff pastry to about 3-4 mm thickness.
- Spread a thin layer of crème pâtissière (as prepared earlier) over the surface, leaving a border.
- Scatter plumped raisins evenly.
- Roll the dough into a log from the long edge, sealing the seam.
- Chill the log for 20-30 minutes.
- Cut into 2-3 cm slices.
- Place on a baking sheet, cut-side up.
- Brush with egg wash.
- Bake in a preheated oven at 190-200°C (375-390°F) for 15-20 minutes, or until puffed and golden brown.
- Glaze while warm.
This method is faster as it eliminates the long proofing time, though the resulting pastry will lack the slightly bread-like softness and yeasty flavor of traditional pain aux raisins made with perfect spiral pastry dough.
Conclusion: Savoring Your Homemade Pain aux Raisins
Appreciating the Art of Laminated Pastry
Baking pain aux raisins is a journey that teaches patience, precision, and the incredible science behind laminated dough. From carefully preparing the détrempe and butter block to executing the turns and rolling the perfect spiral pastry dough, each step contributes to the final masterpiece. The transformation of simple ingredients into a multi-layered, flaky, and flavorful pastry is truly an art form.
Taking the time to understand the process, manage temperatures, and refine your technique results in pastries that are not only delicious but also a testament to your dedication as a baker. The satisfaction of pulling warm, golden pain aux raisins from the oven, with their beautiful, defined spirals, is immense.
There's nothing quite like sharing the fruits of your labor, especially when they're as delightful as homemade pain aux raisins. Serve them warm for breakfast or brunch, or enjoy them as a special treat with a cup of coffee or tea. The flaky layers, creamy filling, and sweet raisins create a harmonious bite that is universally loved.
Encourage others to try baking them too, sharing the tips and techniques you've learned, particularly the secrets to achieving that elusive perfect spiral pastry dough. Baking is a skill that improves with practice, and each batch of pain aux raisins is an opportunity to hone your craft and create moments of joy for yourself and those around you.
Frequently Asked Questions
What makes Pain aux Raisins distinct from other pastries?
Pain aux Raisins is distinguished by its characteristic spiral shape and its filling of crème pâtissière and raisins. It's also made using a laminated dough, similar to croissants.
What's the most challenging aspect of achieving a "perfect spiral pastry dough"?
The most challenging aspect is achieving the right dough lamination, which involves layering dough and butter to create flaky layers. Temperature control is also crucial to prevent the butter from melting.
Can I use a different type of filling besides crème pâtissière and raisins?
While traditional Pain aux Raisins uses crème pâtissière and raisins, you can experiment with other fillings. However, the traditional filling is what gives the pastry its distinctive flavor.
How can I ensure my dough is properly laminated for the ideal spiral shape?
Proper lamination requires precise folding and rolling of the dough with butter. Keeping the dough cold is essential to prevent the butter from melting and ruining the layers.
What are some common mistakes to avoid when shaping Pain aux Raisins?
Common mistakes include overworking the dough, using butter that's too soft, and not allowing enough time for proofing. These can all lead to a dense, less flaky pastry.
Final Reflection: The Enduring Allure of the Perfect Spiral
The pursuit of the perfect pain aux raisins is more than just baking; it's a journey into precision, patience, and the artistry of transforming simple ingredients into something truly exquisite. The techniques detailed in this article, from the careful layering of dough to the precise shaping of the spiral, are applicable far beyond the realm of pastry. They represent a dedication to mastering a craft, a commitment to excellence that resonates in all aspects of life.
The influence of meticulous craftsmanship, as demonstrated in the creation of a perfectly spiraled pain aux raisins, extends beyond the kitchen and into our broader cultural appreciation for detail and dedication. The satisfaction derived from achieving such a feat is deeply personal, a testament to the power of focused effort. The details are not the details. They make the design.
– Charles Eames. This quote perfectly encapsulates the essence of this article: the seemingly small details in the process are what ultimately elevate the final product to perfection.
Now, consider your own pursuits. What aspects of your life require the same level of precision and patience as shaping a perfect spiral? Where can you apply the principles of careful layering and meticulous attention to detail to achieve your own goals? I invite you to reflect on this, to find the "spiral" in your own endeavors, and to embrace the challenge of mastering your own unique craft with the same dedication and passion. The reward, like the taste of a perfectly baked pain aux raisins, will be undeniably sweet.
Unleash Your Inner Boulanger: Bake the Perfect Pain aux Raisins Today!
Thanks for joining us on this delicious journey into the world of Pain aux Raisins! We hope you've gained valuable insights into crafting this classic treat. Now it's time to put your newfound knowledge into practice.
- Bake your own Pain aux Raisins! Use the recipe and techniques discussed above to create your masterpiece. Don't be afraid to experiment – even slight variations can yield amazing results!
- Share your baking journey! Snap a picture of your creation and share it on social media using #BakeWithEasePainAuxRaisins. We'd love to see your results!
- Explore our other bread recipes on BakeWithEase.com – discover even more delicious adventures await!
What unique twist will you add to your Pain aux Raisins to make it truly your own? Let us know in the comments!