
Prep Ahead: How to Store Homemade Pizza Dough for Later

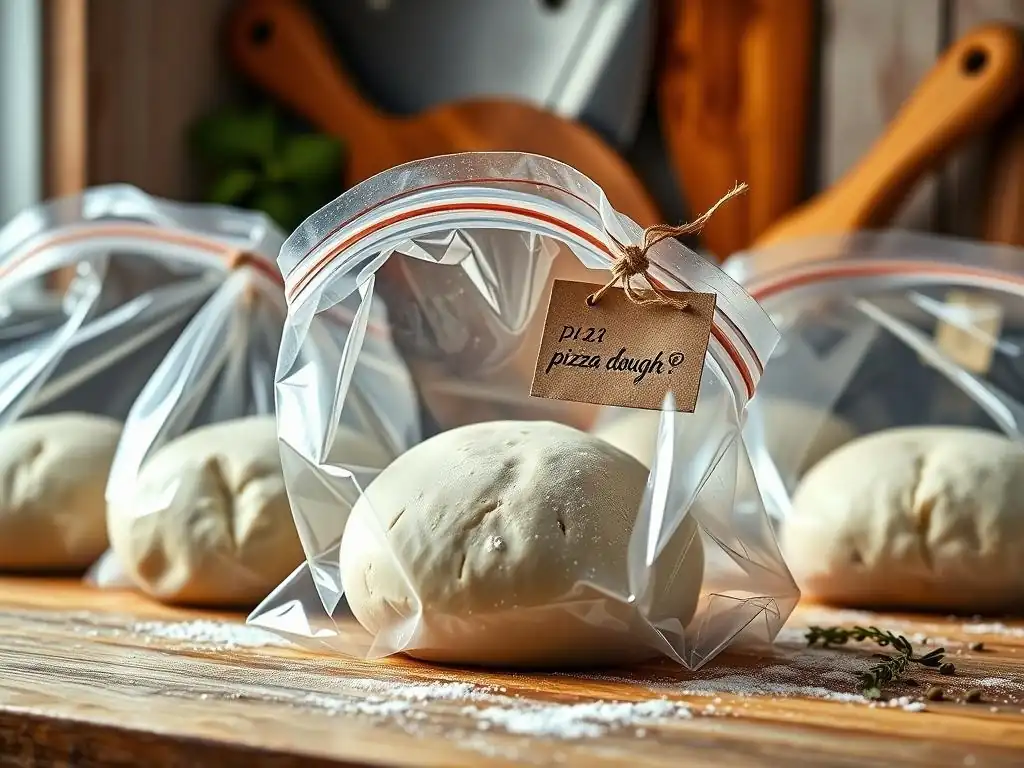
Welcome to BakeWithEase, your trusted guide to unlocking the delicious world of baking! Ever dreamt of enjoying fresh, homemade pizza anytime you want, without the last-minute rush? In this article, we'll reveal the secrets to successful homemade pizza dough storage, ensuring your dough is always ready for that perfect pizza night. Discover our tested methods, and say goodbye to pizza cravings and hello to baking bliss! Intrigued? Read on to learn how to master this essential baking skill!
- Prep Ahead: Mastering Pizza Dough Storage for Homemade Pizza
- Introduction: Optimize Pizza Dough Storage for Baking
- Why Store Homemade Pizza Dough? Benefits
- Understanding Pizza Dough: Storage Factors
- Methods for Storing Pizza Dough
- Storing Pizza Dough in the Refrigerator
- Freezing Pizza Dough for Storage
- Thawing Frozen Pizza Dough: Achieving Texture
- Troubleshooting Pizza Dough Storage
- Maximizing Flavor and Texture After Storage
- Recipes Using Stored Pizza Dough
- Conclusion: Efficient Pizza Dough Storage
- Frequently Asked Questions
- Final Reflection: The Art and Science of Preserving Pizza Perfection
- Unleash Your Inner Pizzaiolo: Craft Your Dough, Conquer Your Week!
Prep Ahead: Mastering Pizza Dough Storage for Homemade Pizza
Introduction: Optimize Pizza Dough Storage for Baking
Baking homemade pizza is a rewarding experience, offering unparalleled freshness and flavor. However, the process can sometimes feel time-consuming, especially when juggling busy schedules. This is where mastering homemade pizza dough storage becomes incredibly useful. By preparing your dough in advance and storing it correctly, you can significantly cut down on prep time on pizza night, making weeknight pizza a real possibility rather than just a weekend treat. Proper storage techniques ensure your dough remains viable and develops even better flavor and texture over time.
Understanding the best practices for storing homemade pizza dough is key to successful make-ahead baking. It's not just about tossing the dough into a container; it involves considerations like temperature, air exposure, and the dough's hydration level. Whether you plan to use the dough within a few days or several months, there are specific methods that will maintain its quality. This guide will walk you through the nuances of keeping your dough in prime condition, ready to be stretched, topped, and baked into a delicious pizza whenever the craving strikes.
Efficient Pizza Dough Preparation Guide
Preparing pizza dough efficiently starts with a reliable recipe and understanding the basics of fermentation. A standard pizza dough often involves flour, water, yeast, salt, and sometimes a little sugar or oil. The mixing process develops gluten, which gives the dough its structure and chewiness. After mixing, the dough typically undergoes a bulk fermentation period, allowing the yeast to produce gases that make the dough rise and develop flavor. This initial rise is crucial before considering homemade pizza dough storage.
For optimal results with pizza dough storage, it's often beneficial to let the dough complete at least a portion of its first rise before storing. This gives the yeast a head start. Many recipes recommend letting the dough double in size at room temperature for 1-2 hours before moving it to cold storage. This initial fermentation contributes significantly to the dough's final texture and flavor profile, even when stored for extended periods. Dividing the dough into single-pizza portions before storage also streamlines the process later, as you only need to thaw or warm up the amount needed.
Why Store Homemade Pizza Dough? Benefits
The primary advantage of homemade pizza dough storage is the immense convenience it offers. Imagine deciding on a whim that you want pizza for dinner, and all you need to do is pull the dough from the fridge or freezer, let it warm up, and start topping. This eliminates the time-consuming steps of mixing, kneading, and waiting for the initial rise on the day you want to bake. For busy families or individuals, this can be a game-changer, transforming pizza from a weekend project into an easy weeknight meal option.
Beyond convenience, storing homemade pizza dough can actually improve the quality of your final pizza. Cold fermentation, which occurs when dough is stored in the refrigerator, slows down yeast activity but allows enzymes in the dough to break down complex starches into sugars. This process deepens the flavor profile of the dough, resulting in a more complex, often slightly tangy taste and a better crust texture. Dough that has been cold-fermented for 24-72 hours often yields a superior pizza compared to dough used immediately after its first rise.
Saving Time: Pre-Made Pizza Dough
Having pre-made dough ready to go significantly reduces the active time required for making pizza. On average, mixing, kneading, and letting dough complete its first rise can take anywhere from 1.5 to 3 hours, depending on the recipe and room temperature. By handling these steps in advance and utilizing pizza dough storage, you can bypass this entire phase when you're ready to bake. This is particularly helpful on busy weeknights when time is limited after work or school activities.
Consider a scenario where you want pizza on a Tuesday evening. If you had prepared and stored the dough over the weekend, you could simply take it out of the refrigerator in the late afternoon, let it warm up while you prepare toppings, and be ready to stretch and bake within an hour or two of arriving home. This efficiency makes homemade pizza a much more accessible and less stressful meal option compared to starting from scratch every time. Effective homemade pizza dough storage truly empowers you to bake on demand.
Planning Pizza Night: A Baker's Technique
For bakers, storing homemade pizza dough is more than just a time-saver; it's a strategic part of the baking process. It allows for better planning and control over the dough's fermentation. Professional pizzerias often utilize cold fermentation for days to develop complex flavors and textures in their crusts. Home bakers can replicate this technique by preparing dough in larger batches and refrigerating it. This allows for spontaneous pizza nights throughout the week or ensures you have dough ready for entertaining guests.
Planning ahead with pizza dough storage also provides flexibility. If your original plans change, the dough is safely stored and continues to improve (within its recommended storage time). This minimizes waste compared to dough left out at room temperature, which must be used within a few hours. Whether you're a meticulous planner or prefer spontaneity, having properly stored dough on hand is a hallmark of an organized and efficient home baker.
Understanding Pizza Dough: Storage Factors
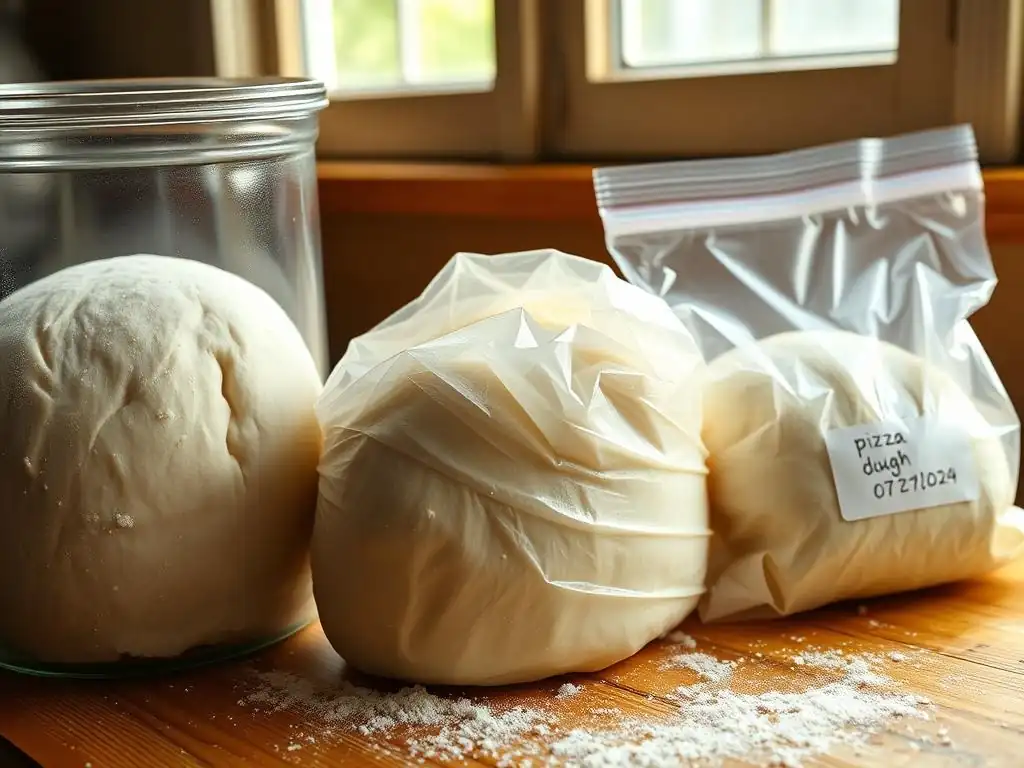
Several factors influence how well pizza dough stores and for how long. The composition of the dough itself plays a significant role. Ingredients like the type of flour used, the amount of hydration (water content), and the quantity and type of yeast all affect the dough's activity and structure during storage. A dough with higher hydration, for instance, might behave differently in storage than a stiffer dough. Understanding these elements is crucial for effective homemade pizza dough storage.
Temperature is perhaps the most critical factor in storing homemade pizza dough. Cold temperatures slow down yeast activity significantly. Refrigeration (around 40°F or 4°C) puts the yeast into a state of near-dormancy, allowing for slow fermentation and flavor development over several days. Freezing (around 0°F or -18°C) essentially stops yeast activity, preserving the dough for much longer periods. Protecting the dough from air is also vital to prevent drying out and forming a tough skin, which can negatively impact the final crust texture.
Dough Hydration and Storage
Dough hydration, the ratio of water to flour by weight, directly impacts the dough's consistency and fermentation rate. Doughs with higher hydration (above 65-70%) tend to be stickier and may ferment slightly faster than lower hydration doughs. When it comes to homemade pizza dough storage, particularly in the refrigerator, higher hydration doughs can remain pliable and moist for slightly longer, assuming they are properly sealed. However, they can also become stickier over time.
Conversely, lower hydration doughs (below 60%) are easier to handle but can dry out more quickly in storage if not sealed meticulously. Regardless of hydration, the key to successful pizza dough storage is minimizing exposure to air and maintaining a consistent cold temperature. Paying attention to your specific recipe's hydration level can help you anticipate how the dough might behave during storage and inform your wrapping strategy.
Yeast Activity and Dough Shelf Life
Yeast is a living organism responsible for leavening the dough and contributing to its flavor. Its activity is highly dependent on temperature. At room temperature, yeast is very active, causing the dough to rise relatively quickly. In the refrigerator, yeast activity slows dramatically, allowing for a long, slow fermentation. In the freezer, yeast becomes dormant, essentially pausing the fermentation process entirely. This understanding is fundamental to determining the appropriate homemade pizza dough storage method and its potential shelf life.
Refrigerated dough will continue to ferment slowly, developing more complex flavors but also becoming more acidic over time. Typically, refrigerated dough is best used within 3-5 days, although some doughs can last up to a week depending on yeast amount and recipe. Frozen dough, with dormant yeast, can last for 1-3 months without significant loss of quality. Beyond this period, the yeast might lose some viability, or ice crystals could damage the gluten structure, impacting the final rise and texture. Proper pizza dough storage techniques aim to manage this yeast activity and prevent degradation.
Methods for Storing Pizza Dough
There are two primary methods for homemade pizza dough storage: refrigeration and freezing. The choice between these depends entirely on how soon you plan to use the dough. Refrigeration is ideal for short-term storage, typically ranging from 24 hours up to about 5 days. It allows for the benefits of cold fermentation, enhancing flavor. Freezing is the method for long-term storage, preserving the dough for weeks or even months, perfect for stocking up or preparing large batches.
Both methods require careful preparation of the dough and proper packaging to prevent common issues like drying out or developing freezer burn. Understanding the specific steps for each method ensures that your dough remains in excellent condition, ready to be transformed into a delicious pizza crust. Mastering these techniques is essential for anyone serious about efficient and effective pizza dough storage.
Refrigerating Pizza Dough: Short-Term
Refrigeration is the go-to method for homemade pizza dough storage when you plan to use the dough within a few days. This method allows the dough to undergo a slow, cold fermentation, which many bakers believe significantly improves the flavor and texture of the final crust. The dough will continue to rise slowly in the fridge, often doubling or even tripling in size over 24-48 hours before its activity gradually slows down.
The ideal temperature for refrigerated pizza dough storage is consistently around 40°F (4°C). Temperatures much higher might lead to over-fermentation too quickly, while temperatures too low could hinder the desired slow fermentation process. Proper wrapping is paramount to prevent the dough from drying out and forming a tough skin, which is a common issue with refrigerated dough.
Refrigeration Steps: Fresh Dough
- Portion the dough: After the initial bulk fermentation (or a short rest), divide the dough into the desired portion sizes for individual pizzas. Gently shape each portion into a ball.
- Lightly oil each ball: Rub a small amount of olive oil or other cooking oil over the entire surface of each dough ball. This prevents sticking and helps keep the surface moist during homemade pizza dough storage.
- Place in airtight containers or bags: Place each oiled dough ball into its own airtight container or a resealable plastic bag. Leave some room for the dough to expand. If using bags, gently press out excess air before sealing.
- Refrigerate: Place the sealed containers or bags in the refrigerator, ideally towards the back where the temperature is most consistent.
Preventing Dough Dryness in the Fridge
Preventing dough from drying out is crucial for successful pizza dough storage in the refrigerator. The cool, dry air in a fridge can quickly wick moisture away from the dough's surface, leading to a tough, unworkable skin. Oiling the dough ball generously before placing it in storage helps create a barrier against the air.
Using truly airtight containers or high-quality resealable bags is the best defense against dryness. If using a bowl, ensure it's tightly covered with plastic wrap, pressing the wrap directly onto the surface of the dough if possible, then covering the bowl itself. Double-wrapping with plastic wrap and then placing the bowl in a larger bag can provide extra security against moisture loss during homemade pizza dough storage.
Freezing Pizza Dough: Long-Term Storage
Freezing is the most effective method for long-term homemade pizza dough storage. It essentially pauses the yeast activity and preserves the dough's structure for weeks or months. This is perfect for making large batches of dough at once, saving time and effort in the long run. While freezing is excellent for preservation, the process of freezing and thawing can sometimes slightly alter the dough's texture compared to fresh or short-term refrigerated dough.
Proper preparation and packaging are even more critical when freezing dough than when refrigerating it. The main enemies in the freezer are air and temperature fluctuations, which can lead to freezer burn – a condition where ice crystals form and damage the dough's structure, resulting in dry, tough spots. Effective pizza dough storage in the freezer requires meticulous wrapping.
Freezing Pizza Dough: Step-by-Step
- Portion and shape: Divide the dough into individual pizza portions and shape each into a smooth ball, just as you would for refrigeration.
- Pre-freeze slightly (optional but recommended): Place the shaped dough balls on a baking sheet lined with parchment paper. Loosely cover with plastic wrap and place the sheet in the freezer for about 1-2 hours, until the surface is firm. This prevents the dough balls from sticking together when you package them.
- Wrap individually: Once slightly firm, remove the dough balls from the freezer. Wrap each ball tightly in plastic wrap, ensuring no surface is exposed. Remove as much air as possible.
- Add a second layer of protection: Place each individually wrapped dough ball into a resealable freezer bag or wrap again tightly in aluminum foil. This double layer provides crucial protection against freezer burn during homemade pizza dough storage. Press out all excess air from bags.
- Label and freeze: Label each package with the date and the contents ("Pizza Dough"). Place the wrapped dough in the freezer. For best quality, use within 1-3 months.
Thawing Frozen Pizza Dough: Best Practices
Thawing frozen dough properly is just as important as freezing it correctly to achieve a good crust texture. The best and most recommended method is slow thawing in the refrigerator. This allows the dough to gradually come to temperature and for the yeast to reactivate gently. Avoid thawing at room temperature for prolonged periods, as the outside of the dough could warm up too quickly while the inside remains frozen, leading to uneven thawing and potential over-fermentation on the surface.
To thaw, remove the wrapped dough from the freezer and place it in a container or on a plate in the refrigerator. Allow 12-24 hours for the dough to thaw completely, depending on its size. Once thawed, remove the dough from its packaging, place it in a lightly oiled bowl, cover, and let it rest at room temperature for 1-2 hours before shaping. This allows the dough to relax and become pliable. This careful process ensures your homemade pizza dough storage efforts pay off with a great crust.
Storing Pizza Dough in the Refrigerator
Refrigerator storage is ideal when you've made dough a day or two in advance or want to make a large batch to use over the course of a week. It's a simple process, but attention to detail in packaging is key to preventing common issues like a dry skin or off-flavors. Following these steps ensures your dough stays fresh and flavorful for short-term use. Effective homemade pizza dough storage in the fridge is a basic skill for any home pizza maker.
The slow fermentation that occurs during refrigeration contributes significantly to flavor development. Dough stored for 48-72 hours often has a more complex, nuanced taste and a slightly airier crust compared to dough used after just a few hours of room-temperature fermentation. This makes refrigerator pizza dough storage a popular choice for those seeking to elevate their homemade pizza.
Step 1: Preparing Dough for Refrigeration
After your dough has completed its initial bulk fermentation at room temperature (typically until it has roughly doubled in size, about 1-2 hours), it's ready for preparation for cold storage. Gently deflate the dough by turning it out onto a lightly floured surface and folding it a few times. This helps redistribute the yeast and gases.
Next, divide the dough into the desired portion sizes for your pizzas. A standard pizza dough recipe might yield enough for two 12-inch pizzas, so you would divide it in half. Gently shape each portion into a smooth ball by tucking the edges underneath to create surface tension. This shaping helps the dough maintain its structure during homemade pizza dough storage.
Step 2: Oiling and Wrapping
Once the dough balls are shaped, it's crucial to coat them lightly with oil. Olive oil is a popular choice, but any neutral cooking oil works. Pour a small amount of oil (about a teaspoon per ball) onto your hands and rub it evenly over the entire surface of each dough ball. This thin layer of oil acts as a barrier against the air, which is the primary cause of dryness in the refrigerator.
Place each oiled dough ball into an individual airtight container or a high-quality resealable plastic bag. Ensure the container or bag is large enough to accommodate the dough's expansion as it continues to ferment slowly in the cold. If using bags, press out as much air as possible before sealing. If using containers, ensure the lid creates a tight seal. Proper sealing is paramount for successful homemade pizza dough storage.
Step 3: Refrigerating for 24-72 Hours
Place the sealed containers or bags containing the dough in the refrigerator. The ideal temperature is around 40°F (4°C). Avoid placing them in the warmest part of the fridge (like the door). The dough will continue to rise slowly over the next 24-72 hours. It might double or even triple in size within the first day or two before the yeast activity slows down considerably.
While dough can often be stored in the refrigerator for up to 5-7 days, the optimal window for flavor and texture development is typically between 24 and 72 hours. Dough stored longer than this might develop a stronger, more acidic flavor and its structure could begin to degrade slightly. Monitor the dough; if it starts to smell strongly alcoholic or acidic, it might be past its prime. Effective pizza dough storage involves knowing the limits of this method.
Freezing Pizza Dough for Storage
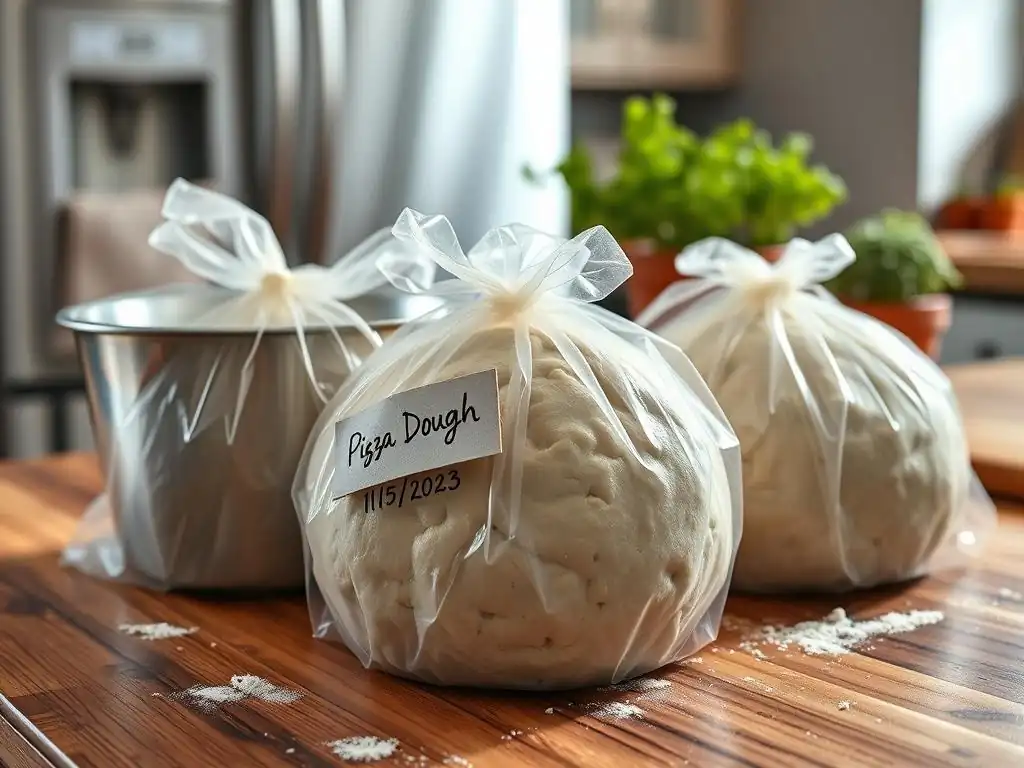
Freezing is the ultimate solution for long-term homemade pizza dough storage, allowing you to keep dough on hand for months. While it requires a bit more effort in terms of packaging to prevent freezer burn, the ability to have ready-to-use dough available whenever needed is invaluable. Proper freezing techniques ensure that when you thaw the dough, it retains its ability to rise and produce a quality crust.
The key to successful freezing lies in protecting the dough from the harsh, dry environment of the freezer. Air exposure and temperature fluctuations are the main culprits behind freezer burn, which renders portions of the dough dry, tough, and unusable. Investing a little extra time in careful wrapping during pizza dough storage for the freezer pays dividends in the quality of your thawed dough.
Step 1: Portioning Dough for Freezing
Just as with refrigeration, the first step in freezing dough is to portion it into the size needed for a single pizza. This makes thawing and using the dough much more convenient later on; you only need to take out the amount you plan to bake. Shape each portion into a smooth, tight ball by stretching and tucking the edges underneath.
Some bakers prefer to let the dough complete its first rise before portioning and freezing, while others freeze it immediately after mixing or after a short rest. Both methods can work, but allowing a short initial fermentation (30-60 minutes at room temperature) can sometimes help jumpstart the yeast activity when the dough is thawed later. Ensure the dough balls are relatively uniform in size for even freezing and thawing during homemade pizza dough storage.
Step 2: Wrapping for Freezer Burn Prevention
This is arguably the most critical step in freezing pizza dough. Freezer burn occurs when moisture evaporates from the dough's surface and forms ice crystals. To prevent this, you need to create an airtight barrier around the dough. Start by wrapping each dough ball tightly in plastic wrap. Ensure there are no gaps or exposed surfaces. Wrap it at least twice for extra protection.
After the initial plastic wrap layer, add a second layer of protection. This can be another layer of plastic wrap, aluminum foil, or placing the wrapped dough ball into a high-quality resealable freezer bag. If using bags, press out all the air before sealing. The goal is to minimize any contact between the dough and the cold freezer air. This meticulous wrapping is essential for effective long-term homemade pizza dough storage.
Step 3: Freezing and Labeling
Once the dough balls are securely wrapped, place them in the freezer. If you pre-froze the dough balls slightly on a baking sheet (as suggested in the previous section), you can now transfer the individually wrapped balls directly into a larger freezer bag or container to keep them organized.
Label each package clearly with the date it was frozen and the contents (e.g., "Pizza Dough - 1 ball"). This helps you track how long the dough has been stored and ensures you use the oldest dough first. Place the labeled dough in the freezer, making sure it's not buried under items that might cause it to get crushed.
For best quality, aim to use the frozen dough within 1 to 3 months. While it might be safe to eat beyond this, the quality of the crust can diminish. Proper labeling is a simple but effective part of pizza dough storage organization.
Thawing Frozen Pizza Dough: Achieving Texture
Thawing frozen pizza dough correctly is crucial for achieving the desired light and airy crust texture. Rushing the thawing process can result in dough that is difficult to work with, unevenly proofed, and ultimately yields a dense or tough crust. Patience is key when bringing frozen dough back to life. The goal is to allow the dough to thaw gently and for the yeast to gradually reactivate.
The best method for thawing frozen dough mimics the slow, cold fermentation environment. This allows the gluten structure to relax and the yeast to wake up without becoming overly active too quickly. Proper thawing ensures that all your efforts in homemade pizza dough storage are rewarded with a well-performing dough ready for baking.
Thawing Methods: Refrigerator vs. Counter
The recommended method for thawing frozen pizza dough is in the refrigerator. This slow process typically takes 12 to 24 hours, depending on the size of the dough ball. Remove the wrapped dough from the freezer and place it in a container or on a plate in the refrigerator. This prevents condensation from making a mess as it thaws. Once thawed, the dough will feel soft and pliable.
While it's possible to thaw dough at room temperature, it's generally not recommended as the primary method. If you're in a rush, you can place the wrapped dough in a warm spot on the counter, but monitor it closely. It might thaw in 2-4 hours, but the outside can warm up and start fermenting rapidly while the inside is still cold or frozen, leading to uneven results. The slow thaw in the fridge is safer and yields better texture after pizza dough storage.
Allowing Rise After Thawing
Once the dough has fully thawed in the refrigerator, it needs time to come to room temperature and proof before shaping and baking. Remove the dough from its packaging and place it in a lightly oiled bowl. Cover the bowl with plastic wrap or a damp kitchen towel.
Let the dough rest at room temperature for 1 to 2 hours. During this time, the dough should relax and become very pliable, making it easy to stretch. It should also increase noticeably in volume as the yeast, now fully active, produces gases. This final proofing step after homemade pizza dough storage is essential for a light, airy crust. The dough is ready to shape when it's soft, bubbly, and springs back slowly when poked gently.
Troubleshooting Pizza Dough Storage
Even with the best intentions and techniques, sometimes issues can arise during homemade pizza dough storage. Common problems include dough sticking excessively, developing a dry skin, or not rising properly after storage (especially freezing). Understanding the potential causes and solutions for these issues can help you salvage your dough and ensure your pizza-making efforts are successful.
Addressing these problems often involves adjusting your preparation, packaging, or thawing methods. Paying close attention to the dough's texture and behavior throughout the process is key. Don't be discouraged if your first attempt at pizza dough storage isn't perfect; like any baking skill, it takes practice.
Dough Sticking: Prevention
Excessive sticking can be a nuisance, whether the dough is sticking to the container during refrigeration or to surfaces after thawing. Prevention is the best approach. When preparing dough for homemade pizza dough storage, always lightly oil the surface of the dough ball before placing it in a container or bag. Use enough oil to create a thin, even coating.
Ensure the container or bag itself is also lightly oiled or floured, especially if you're concerned about sticking. When working with the dough after storage, use a light dusting of flour on your work surface and hands if needed, but avoid using too much, as this can make the dough tough. If dough is stuck to a container after cold storage, let it warm up slightly at room temperature; it will release more easily. This simple step helps prevent frustration during pizza dough storage and subsequent use.
Dough Developing a Skin: Addressing Dryness
A dry, tough skin on your dough is a clear sign that it has been exposed to air during homemade pizza dough storage. This often happens in the refrigerator if the wrapping isn't airtight. The dry skin makes the dough difficult to stretch and can result in a chewy or hard crust edge.
If your dough has developed a slight skin, you might be able to salvage it. Try placing the dough in a lightly oiled bowl, covering it tightly with plastic wrap, and letting it rest at room temperature for an hour or two. The moisture inside the dough might help rehydrate the surface. If the skin is thick and very tough, it might be best to carefully peel it away before attempting to work with the dough, though this will reduce the overall yield. Preventing the skin through proper airtight packaging is always the goal of effective pizza dough storage.
Dough Not Rising: Yeast Concerns
If your dough doesn't rise properly after thawing from the freezer or after several days in the refrigerator, it could be due to inactive yeast. In frozen dough, the yeast can lose viability if stored for too long (beyond 3 months) or if the dough experienced significant temperature fluctuations (like a freezer going through defrost cycles or losing power). In refrigerated dough, yeast activity naturally slows down over time, and after 5-7 days, it might be less vigorous.
To check if the yeast is still active, you can perform a small test: cut off a tiny piece of dough, place it in a small amount of warm water with a pinch of sugar, and see if it becomes bubbly within 10-15 minutes. If it does, the yeast is likely still viable, and the issue might be with the thawing/proofing environment (too cold?). If there's no activity, the yeast may be dead.
Unfortunately, dough with dead yeast cannot be properly leavened and won't rise, making it unsuitable for pizza crust. Ensuring proper temperature control during homemade pizza dough storage is key to maintaining yeast health.
Maximizing Flavor and Texture After Storage
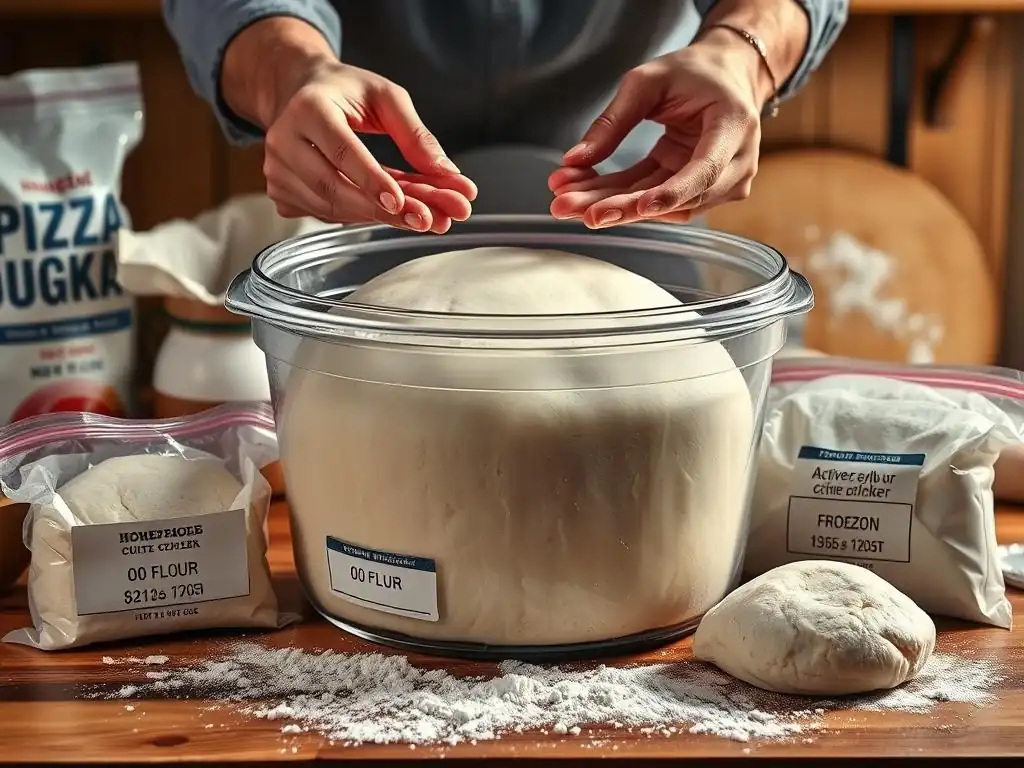
Properly stored dough offers the potential for excellent flavor and texture, particularly after cold fermentation. However, simply taking the dough out of storage and immediately stretching it might not yield the best results. A few simple steps before shaping can significantly enhance the final crust quality, ensuring it's airy, flavorful, and easy to work with. These finishing touches are as important as the initial pizza dough storage itself.
Allowing the dough to properly relax and warm up after refrigeration or thawing is crucial. This process makes the gluten more pliable, preventing it from snapping back when you try to stretch it. It also gives the yeast a final opportunity to proof the dough at a warmer temperature, contributing to a good rise and open crumb structure in the baked crust.
Punching Down Dough
For dough that has been refrigerated for more than 24 hours or has significantly expanded during cold storage, it's often beneficial to gently punch it down after removing it from the container and before the final room-temperature rest. This step helps to redistribute the gases produced by the yeast and equalizes the temperature throughout the dough.
To punch down, gently press the center of the dough ball with your fist, then fold the edges into the center. Turn the dough over and gently reshape it into a ball. This process should be gentle; you don't want to knock out all the air, just manage the structure and gas distribution. This prepares the dough for its final proofing phase after homemade pizza dough storage.
Allowing Dough to Warm Before Stretching
After thawing frozen dough or removing refrigerated dough from its container, it's essential to let it rest at room temperature before attempting to shape it. This is a critical step often overlooked. Cold dough is stiff and elastic; trying to stretch it will be frustrating as it will constantly spring back.
Place the dough ball in a lightly oiled bowl, cover it, and let it sit at room temperature for 1-2 hours (or until it is soft, pliable, and has increased in volume). The exact time will depend on your room temperature and the dough's initial temperature. The dough should feel relaxed and easy to stretch without resistance. This final proofing and warming step after pizza dough storage ensures the gluten is relaxed and the yeast is active, leading to a perfectly stretched dough and a beautiful, airy crust.
Recipes Using Stored Pizza Dough
Having homemade pizza dough storage mastered means you always have the foundation for a delicious meal ready. Whether you've refrigerated dough for a quick weeknight dinner or thawed a batch from the freezer, the possibilities are endless. Using pre-made dough frees up your time to focus on exciting toppings and perfecting your baking technique. Here are a couple of classic recipes that are perfect for utilizing your stored dough.
These recipes assume you have thawed or brought your refrigerated dough to room temperature and performed any necessary punch-down or final proofing steps, as outlined in the previous sections. The beauty of pizza dough storage is that the base is ready; you just need to add your personal touch with sauces, cheeses, and toppings.
Margherita Pizza Recipe
A classic Margherita is a fantastic way to showcase the flavor of your properly stored dough. The simple, high-quality ingredients let the crust shine.
- Ingredients:
- 1 ball of stored pizza dough (thawed and proofed)
- 1/2 cup crushed San Marzano tomatoes (or good quality canned crushed tomatoes)
- 4-6 oz fresh mozzarella cheese, torn or sliced
- Fresh basil leaves
- Extra virgin olive oil
- Salt
- Instructions:
- Preheat your oven and pizza stone/steel to the highest temperature (usually 500-550°F or 260-290°C) for at least 30-60 minutes.
- Gently stretch or roll the proofed dough ball into a roughly 10-12 inch circle on a lightly floured surface or pizza peel dusted with cornmeal.
- Spread the crushed tomatoes evenly over the dough, leaving a small border for the crust.
- Distribute the torn or sliced fresh mozzarella over the sauce.
- Add a pinch of salt and a drizzle of olive oil.
- Carefully transfer the pizza to the hot stone/steel in the oven.
- Bake for 8-12 minutes, or until the crust is golden brown and the cheese is bubbly and slightly browned in spots.
- Remove from the oven, scatter fresh basil leaves over the top, slice, and serve immediately. Enjoy the fruits of your homemade pizza dough storage!
Pepperoni Pizza Recipe
A perennial favorite, pepperoni pizza is satisfying and simple. Using stored dough makes this comfort food incredibly easy to whip up.
- Ingredients:
- 1 ball of stored pizza dough (thawed and proofed)
- 1/2 cup pizza sauce
- 6-8 oz shredded mozzarella cheese (low-moisture is best for melting)
- 3-4 oz sliced pepperoni
- Optional: pinch of dried oregano or red pepper flakes
- Instructions:
- Preheat your oven and pizza stone/steel to the highest temperature (usually 500-550°F or 260-290°C) for at least 30-60 minutes.
- Gently stretch or roll the proofed dough ball into a roughly 10-12 inch circle on a lightly floured surface or pizza peel dusted with cornmeal.
- Spread the pizza sauce evenly over the dough, leaving a small border for the crust.
- Sprinkle the shredded mozzarella cheese over the sauce.
- Arrange the pepperoni slices evenly over the cheese. Add optional oregano or red pepper flakes if desired.
- Carefully transfer the pizza to the hot stone/steel in the oven.
- Bake for 8-12 minutes, or until the crust is golden brown and the cheese is melted and bubbly.
- Remove from the oven, slice, and serve hot. This classic demonstrates the convenience of pizza dough storage.
Conclusion: Efficient Pizza Dough Storage
Mastering homemade pizza dough storage is a valuable skill that transforms the way you can approach baking pizza at home. It moves pizza from being a potentially lengthy weekend project to a flexible, convenient meal option any day of the week. By properly refrigerating dough for short-term use or freezing it for longer periods, you ensure that a delicious, homemade pizza is always within easy reach. The added benefit of cold fermentation enhancing flavor makes this technique a win-win for both convenience and quality.
Whether you're preparing a single batch to use over a few days or making a large quantity to stock your freezer, applying the correct storage techniques—from proper portioning and oiling to meticulous airtight wrapping—is paramount. Understanding how hydration and yeast activity affect the dough in cold temperatures helps in troubleshooting and achieving consistent results. With the insights provided on pizza dough storage methods, thawing best practices, and even how to troubleshoot common issues, you are well-equipped to keep high-quality dough on hand, ready for your next pizza creation.
Streamlining Pizza-Making
Efficient homemade pizza dough storage is the ultimate hack for streamlining your pizza-making process. It front-loads the time-intensive steps of mixing and initial fermentation, leaving you with quick assembly and baking on pizza day. This not only saves time but also reduces stress, making homemade pizza a relaxed and enjoyable activity rather than a race against the clock.
By incorporating pizza dough storage into your baking routine, you open up possibilities for impromptu pizza nights, easy entertaining, and experimenting with different toppings without the overhead of starting the dough from scratch every time. It’s a technique that empowers you to bake more often and more easily, bringing the joy of fresh, homemade pizza to your table whenever you desire.
Frequently Asked Questions
How long can I store homemade pizza dough in the refrigerator?
You can typically store homemade pizza dough in the refrigerator for up to 3 days. The cold temperature slows down the yeast's activity.
What's the best way to prevent my pizza dough from drying out while storing it?
The best way is to coat the dough lightly with olive oil and wrap it tightly in plastic wrap. Alternatively, you can store it in an airtight container.
Can I freeze homemade pizza dough?
Yes, freezing is a great option for longer storage. Wrap the dough tightly in plastic wrap and then place it in a freezer bag. It can last for up to 3 months.
How should I thaw frozen pizza dough?
The best method is to thaw it in the refrigerator overnight. This allows for a slow and even thaw, which helps maintain its texture.
How long should I let my pizza dough rest after removing it from the refrigerator?
Allow the dough to rest at room temperature for at least 30 minutes to 1 hour before stretching or shaping it. This allows the gluten to relax, making it easier to work with.
Final Reflection: The Art and Science of Preserving Pizza Perfection
The ability to effortlessly whip up a delicious homemade pizza, anytime, is no longer a distant dream. Mastering the art of pizza dough storage unlocks a world of culinary convenience and consistently amazing results, transforming pizza night from a stressful event into a joyful celebration. This simple skill elevates the home cooking experience, allowing for spontaneous pizza parties and the satisfaction of knowing you have the perfect base ready whenever inspiration strikes.
The impact of readily available, high-quality pizza dough extends beyond mere convenience; it fosters a deeper connection with the food we eat. It allows us to control ingredients, ensuring freshness and quality, a stark contrast to the often-processed alternatives. This mindful approach to food preparation resonates deeply with the current movement towards conscious consumption and appreciation for handcrafted goods. The best things in life are homemade,
a sentiment that rings truer than ever when considering the simple pleasure of a perfectly crafted pizza from dough you prepared yourself.
Now, consider your own kitchen. Imagine the possibilities: a quick weeknight pizza using dough you prepped on the weekend, the freedom to experiment with different toppings without the pressure of immediate dough-making, or the joy of sharing homemade pizza with loved ones, knowing you’ve taken the time to create something truly special. Take the leap. Master the art of pizza dough storage, and unlock a world of delicious possibilities. The journey to pizza perfection starts with a well-preserved dough.
Unleash Your Inner Pizzaiolo: Craft Your Dough, Conquer Your Week!
Thanks for taking the time to learn how to store your homemade pizza dough! You've just unlocked a world of fresh, delicious pizza possibilities. Now it's time to put your newfound skills to the test.
- Bake a masterpiece tonight! Use that perfectly prepped dough and create your dream pizza. Don't forget to share a picture on your socials using #BakeWithEasePizza!
- Experiment with different toppings – think beyond pepperoni! What unexpected flavor combinations will you create?
- Share your pizza-making journey! Leave a comment below and tell us about your experience. What was your favorite part of making homemade dough?
What unexpected ingredient will you add to your next homemade pizza?