
The Secret to Perfect Cake Layers for Decorating

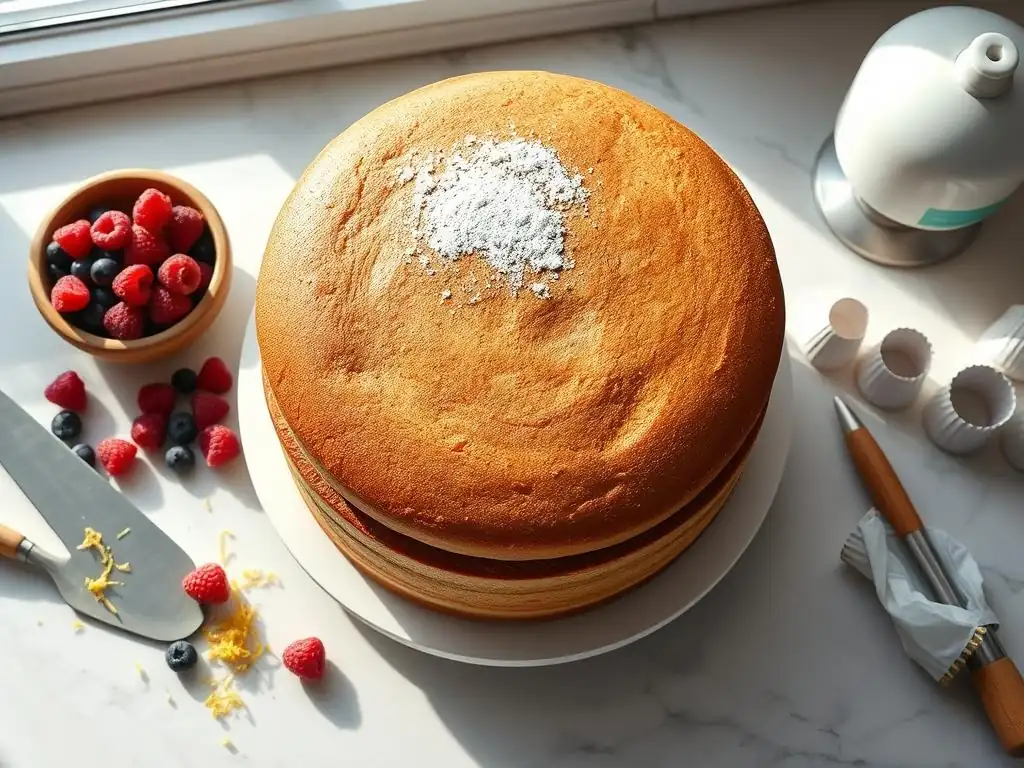
Welcome to BakeWithEase, your trusted guide to baking bliss! Ever wondered how to achieve those flawlessly even, picture-perfect cake layers that make decorating a breeze? We're about to unlock the secrets! Discover invaluable decorating tips and techniques that will elevate your cake game, no matter your skill level. Ready to bake a masterpiece? Let's dive in!
- The Secret to Perfect Cake Layers for Decorating: Bake Like a Pro
- Introduction: Achieving Flawless Cake Layers for Decorating
- Essential Ingredients for Even Cake Layers
- Step-by-Step Guide to Baking Level Cake Layers
- Leveling and Preparing Cake Layers for Decorating
- Troubleshooting Common Cake Layer Problems
- Tips for Decorating Perfectly Level Cake Layers
- Conclusion: Your Path to Perfect Cake Layers and Stunning Decorations
-
Frequently Asked Questions
- What are the most important factors for achieving perfectly even cake layers?
- What kind of pan preparation is essential for easy cake layer removal?
- How do I prevent my cake layers from having a domed top?
- What's the best way to level cake layers for professional-looking decorating?
- What are some beginner-friendly decorating tips for perfect cake layers?
- Final Reflection: The Enduring Allure of the Perfectly Layered Cake
- Unlock Your Inner Cake Artist!
The Secret to Perfect Cake Layers for Decorating: Bake Like a Pro
Introduction: Achieving Flawless Cake Layers for Decorating
Why Perfect Cake Layers Matter for Stunning Cake Decorating
Achieving perfect cake layers is the foundational step for creating visually stunning and structurally sound decorated cakes. Imagine spending hours perfecting intricate frosting designs, delicate sugar flowers, or smooth fondant finishes, only to discover your cake leans precariously or has an unsightly bulge because the layers weren't level. Uneven layers not only compromise the aesthetic appeal but also make filling and stacking the cake much more challenging.
A level, evenly baked cake layer provides a stable canvas, ensuring your frosting goes on smoothly, your fillings stay put, and the final decorated masterpiece stands tall and proud. Mastering these initial steps significantly elevates your decorating results.
Beyond structural integrity and visual appeal, consistently perfect cake layers contribute to a better eating experience. An evenly baked layer ensures a uniform texture throughout the slice, without dense spots or dry edges. When layers are level, you can achieve consistent filling-to-cake ratios in every bite, providing a balanced flavour profile. This attention to detail from the very beginning—baking perfect cake layers—is what separates a good homemade cake from a truly exceptional one, making all your subsequent decorating efforts shine. It's one of the most crucial perfect cake layers decorating tips you can embrace.
BakeWithEase's Guide to Level Cake Layers
Welcome to BakeWithEase, where we believe that mastering the basics is key to unlocking your full baking potential. Our guide is designed to walk you through the essential techniques and common pitfalls to avoid when aiming for perfectly level cake layers every single time.
We'll cover everything from selecting the right ingredients and preparing your pans to expert mixing and baking methods, culminating in tips for cooling and leveling your cakes like a seasoned professional. Whether you're tackling your first layer cake or looking to refine your skills, these perfect cake layers decorating tips will set you on the path to success.
This comprehensive guide brings together years of baking experience into actionable steps. We'll demystify common issues like doming and uneven baking, providing practical solutions that you can implement immediately. Our goal is to empower you with the knowledge and confidence to bake cake layers that are not only level and uniform but also wonderfully moist and tender, ready to be transformed into breathtaking decorated creations. Get ready to elevate your cake decorating game by starting with the perfect foundation.
Essential Ingredients for Even Cake Layers
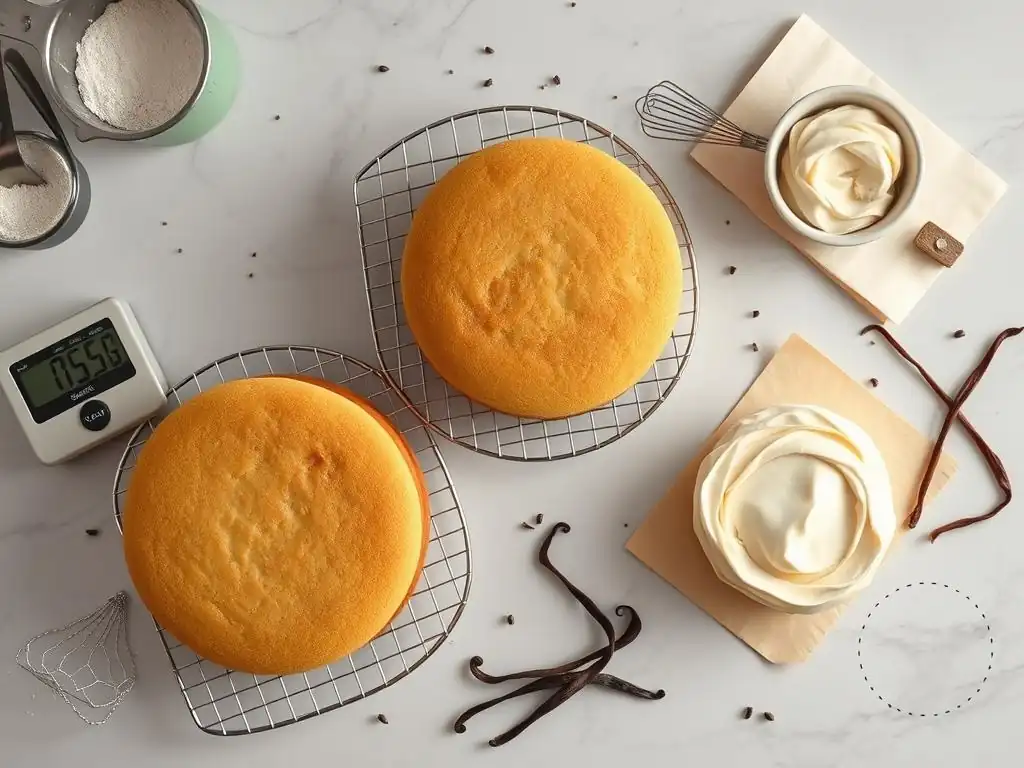
Choosing the Right Flour for Cake Decorating
The type of flour you choose significantly impacts the structure and texture of your cake layers. For most standard layer cakes intended for decorating, a bleached cake flour is often recommended. Cake flour has a lower protein content (typically around 5-8%) compared to all-purpose flour (around 10-12%).
This lower protein means less gluten development when the batter is mixed, resulting in a softer, finer crumb that is less likely to become tough. This delicate structure is ideal for layers that need to withstand handling during leveling, filling, and stacking without crumbling excessively, contributing to those perfect cake layers decorating tips.
While cake flour is excellent for a tender crumb, some recipes designed for sturdier layers might call for bleached all-purpose flour. Bleaching the flour affects the proteins and starches, helping the flour absorb more liquid and creating a slightly finer texture than unbleached varieties.
Regardless of whether you use cake flour or all-purpose, ensure it is measured accurately, preferably by weight using a kitchen scale (e.g., 1 cup of all-purpose flour is typically around 120-130 grams, while cake flour is lighter, around 100-110 grams). Sifting the flour before measuring (if measuring by volume) or adding it to the batter can also help aerate it and prevent clumps, promoting even distribution in the batter.
The Importance of Fresh Baking Powder and Baking Soda
Leavening agents like baking powder and baking soda are critical for achieving a light, airy, and evenly risen cake. Using fresh leavening is non-negotiable. Baking powder is a double-acting leavener, meaning it reacts when mixed with liquid and again when heated in the oven. Baking soda, on the other hand, requires an acidic ingredient (like buttermilk, yogurt, or brown sugar) to activate. If your baking powder or soda is old or has been exposed to moisture, it loses its potency, leading to flat, dense, and uneven cake layers.
To test if your baking powder is still active, drop a teaspoon into a small bowl of hot water; it should fizz vigorously. For baking soda, mix a teaspoon with a few tablespoons of vinegar or lemon juice; it should also fizz immediately. Replace any leavening agents that don't react properly. Storing them in airtight containers in a cool, dry place will help maintain their freshness. Ensuring your leaveners are potent is a fundamental step towards baking perfect cake layers for decorating.
Using Quality Fats for a Moist and Even Texture
Fat plays a vital role in cake baking, contributing moisture, tenderness, and richness. The type and quality of fat used significantly impact the crumb structure and how evenly the cake bakes. Butter is popular for its flavor, but it's essential to use it at the correct temperature (often room temperature for creaming). Butter contributes to tenderness and helps create a finer crumb when creamed properly with sugar. However, butter contains water (around 15-18%), which can affect gluten development and steaming during baking.
Shortening (like vegetable shortening) is 100% fat and contains no water. While it lacks the flavor of butter, it can contribute to a very tender crumb and a cake that stays moist longer. Some recipes call for a combination of butter and shortening to get the best of both worlds.
Using oil, such as vegetable or canola oil, results in a moister cake because it's liquid at room temperature and coats flour proteins more effectively, inhibiting gluten formation. Cakes made with oil tend to be less structured but very moist and are less likely to dry out. Whatever fat you choose, ensure it's fresh and measured accurately for consistent results and achieving those desired perfect cake layers decorating tips.
Step-by-Step Guide to Baking Level Cake Layers
Preparing Your Pans: The Foundation for Even Baking
Proper pan preparation is the first critical step in ensuring your cake layers bake and release cleanly and evenly. A well-prepared pan prevents sticking, which can tear delicate cake layers and lead to uneven edges. The goal is to create a non-stick surface that also allows the cake to rise uniformly. Skipping this step or doing it improperly is a common cause of frustration for bakers aiming for perfect cake layers for decorating.
The standard method involves greasing and flouring the pan. Use a solid fat like butter or shortening (avoid oil for this step as it can pool) to thoroughly coat the bottom and sides of the pan. Get into all the corners and crevices. Then, add a tablespoon or two of flour to the greased pan, tilt and tap the pan to distribute the flour evenly, coating the greasy surface. Invert the pan and tap out any excess flour. For chocolate cakes, you can use cocoa powder instead of flour to avoid white residue on the cake's edge.
Greasing and Flouring Cake Pans for Easy Release
Here's a simple process for greasing and flouring your cake pans:
- Use a piece of parchment paper, a pastry brush, or your fingers to apply a thin, even layer of softened butter or shortening to the entire inside surface of the pan—bottom and sides. Ensure full coverage right up to the rim.
- Add about 1-2 tablespoons of all-purpose flour (or cocoa powder for chocolate cakes) to the greased pan.
- Hold the pan over a sink or trash can. Rotate and tilt the pan in all directions, tapping gently, to distribute the flour evenly over the greased surface.
- Once the pan is coated, invert it and tap out any excess flour. You should be left with a thin, uniform coating of flour adhering to the grease.
This method creates a reliable barrier that prevents the cake batter from sticking to the pan as it bakes and expands. It's a fundamental technique for achieving clean edges and easy release, essential for perfect cake layers decorating tips.
Using Parchment Paper Rounds for a Smooth Bottom
For an extra layer of security and to ensure a perfectly smooth bottom surface on your cake layers, using a parchment paper round is highly recommended. This is especially helpful for delicate batters or when you need the absolute best release. A smooth bottom layer is ideal for stacking and decorating, particularly if you plan to flip the cake so the bottom becomes the top decorated surface.
To use parchment paper rounds:
- Prepare the sides of your pan by greasing and flouring as described above.
- Cut a circle of parchment paper to fit the exact diameter of the bottom of your cake pan.
- Place the parchment paper round directly onto the greased bottom of the pan. The grease will help it stick in place.
- Pour your batter directly onto the parchment paper.
This simple addition guarantees that the bottom of your cake will never stick, resulting in a clean, smooth surface every time. It's a small step that makes a big difference in achieving perfect cake layers for decorating.
Mixing the Batter: Key Techniques for Uniform Cakes
The way you mix your cake batter has a profound impact on the final texture, volume, and evenness of your baked layers. Different mixing methods produce different results, and understanding them is key to achieving the desired crumb and rise. Overmixing is a common mistake that can lead to tough, uneven layers, counteracting your efforts towards perfect cake layers decorating tips.
The two most common methods for butter-based cakes are the creaming method and the reverse creaming method. Both aim to incorporate air and combine ingredients, but they do so in different sequences, resulting in subtle differences in texture. Choosing the appropriate method based on your recipe and desired outcome is crucial for baking uniform cakes.
The Creaming Method for Light and Airy Cakes
The creaming method is perhaps the most traditional and widely used technique for butter-based cakes. It relies on creaming softened butter and sugar together to incorporate air, which provides lift and contributes to a tender crumb. This method typically involves:
- Creaming softened butter and granulated sugar until light and fluffy (this can take 3-5 minutes with an electric mixer). The mixture should lighten in color and increase in volume significantly.
- Adding eggs one at a time, beating well after each addition to ensure they are fully incorporated without curdling.
- Alternating the addition of dry ingredients (like flour mixed with leavening and salt) and wet ingredients (like milk or buttermilk), usually starting and ending with the dry ingredients. Mix only until just combined after each addition.
This method is excellent for creating cakes with a relatively open, light crumb structure. The air pockets created during the creaming process expand in the oven, helping the cake rise beautifully and evenly, contributing to perfect cake layers for decorating.
The Reverse Creaming Method for Tender Crumb
The reverse creaming method flips the script on the traditional approach and is favored by many professional bakers for creating cakes with an exceptionally fine, velvety, and tender crumb. This method is particularly good for minimizing gluten development. The process typically involves:
- Mixing the dry ingredients (flour, sugar, leavening, salt) together in a bowl.
- Cutting softened butter (or cold butter cut into cubes) into the dry ingredients using a mixer paddle or pastry blender until the mixture resembles coarse sand or fine crumbs. This coats the flour particles with fat, inhibiting gluten formation.
- Adding the wet ingredients (like eggs and milk mixed together) in one or two additions and mixing until just combined.
This method results in a cake that is less likely to dome and often bakes up more level, making it easier to achieve perfect cake layers for decorating. The crumb is typically tighter and more uniform than with the creaming method, which can be advantageous for stacking and carving.
Avoiding Overmixing: A Crucial Tip for Cake Success
Regardless of the mixing method you use, one of the most critical pieces of advice for achieving tender, even cake layers is to avoid overmixing the batter, especially once the flour has been added. Flour contains protein that develops into gluten when hydrated and agitated. While some gluten is necessary for structure, too much gluten results in a tough, rubbery, or dense cake.
After adding the dry ingredients to the wet ingredients (or vice versa in reverse creaming), mix only until the ingredients are just combined and no dry streaks of flour are visible. It's okay if there are a few small lumps; these will often dissolve during baking. Stop mixing immediately once the flour is incorporated. Overmixing is a primary culprit behind domed, uneven, and tough cake layers, directly hindering your goal of perfect cake layers decorating tips. Mix gently and minimally for the best results.
Baking for Evenness: Temperature and Time
Even with perfect ingredients and mixing, uneven baking can ruin your cake layers. Temperature and timing are paramount. An oven that runs too hot or too cool, or unevenly heated, will lead to unpredictable results like excessive doming, cracking, or dense spots. Understanding your oven and following the recipe's temperature and time guidelines closely are essential steps for baking level layers.
Preheating your oven properly is non-negotiable. Always allow your oven ample time to reach the specified temperature, typically at least 15-20 minutes after the preheat indicator light comes on. Using an oven thermometer is highly recommended, as many home ovens can be off by as much as 25-50°F (approximately 15-30°C) from the set temperature. Calibrating your oven or adjusting the temperature based on the thermometer reading can drastically improve baking consistency and help achieve perfect cake layers for decorating.
Understanding Oven Temperature and its Impact
Oven temperature directly affects how quickly the cake sets and rises. If the temperature is too high, the outside of the cake will bake and set too quickly, while the inside is still raw. This often results in a pronounced dome and can lead to a dry crust. The rapid setting of the outside traps the steam and expanding gases, forcing them upwards in the center.
Conversely, if the oven temperature is too low, the cake may not rise sufficiently, resulting in a flat, dense, or sunken layer. The cake takes longer to bake, which can also lead to dryness. Most standard cake recipes call for temperatures between 325°F and 350°F (160°C to 175°C) for optimal rise and even baking. Using an accurate oven thermometer and adjusting your oven accordingly is one of the most impactful perfect cake layers decorating tips you can follow.
Using Baking Strips for Evenly Baked Cakes
Baking strips, also known as cake strips or leveling strips, are a fantastic tool for promoting even baking and reducing doming. These fabric strips are soaked in water and wrapped around the outside of the cake pan. The wet strips insulate the sides of the pan, preventing them from heating up as quickly as the center. This allows the cake to rise more evenly across the surface rather than just in the middle.
When using baking strips:
- Soak the strips thoroughly in cold water.
- Squeeze out any excess water so they are damp but not dripping wet.
- Wrap the strip snugly around the outside of your filled cake pan. Secure them with pins if they have them, or ensure they stay in place.
- Place the pan in the preheated oven and bake as directed.
Baking strips are particularly effective for larger cakes or those prone to significant doming. They are a simple yet highly effective technique included in many perfect cake layers decorating tips guides to ensure your layers bake up flat and uniform, minimizing the need for excessive leveling.
The Toothpick Test: Knowing When Your Cake is Done
Knowing exactly when your cake is finished baking is crucial for avoiding both underbaked (gummy) and overbaked (dry) layers. The most common and reliable method is the toothpick test. While baking times provided in recipes are good guidelines, variations in ovens, pans, and even ingredient temperatures mean you should always test for doneness.
To perform the toothpick test:
- Insert a clean wooden toothpick or a thin metal skewer into the very center of the cake. Avoid inserting it too close to the edges.
- Carefully remove the toothpick.
- If the toothpick comes out clean with no wet batter attached, the cake is done.
- If it comes out with wet batter or wet crumbs, the cake needs more time.
- If it comes out with just a few moist crumbs attached, the cake is also done (this is ideal for a moist cake).
Start checking a few minutes before the recipe's minimum baking time. Overbaking even by a few minutes can significantly dry out your cake layers, making them crumbly and difficult to decorate. Mastering the toothpick test is a key element of perfect cake layers decorating tips.
Leveling and Preparing Cake Layers for Decorating
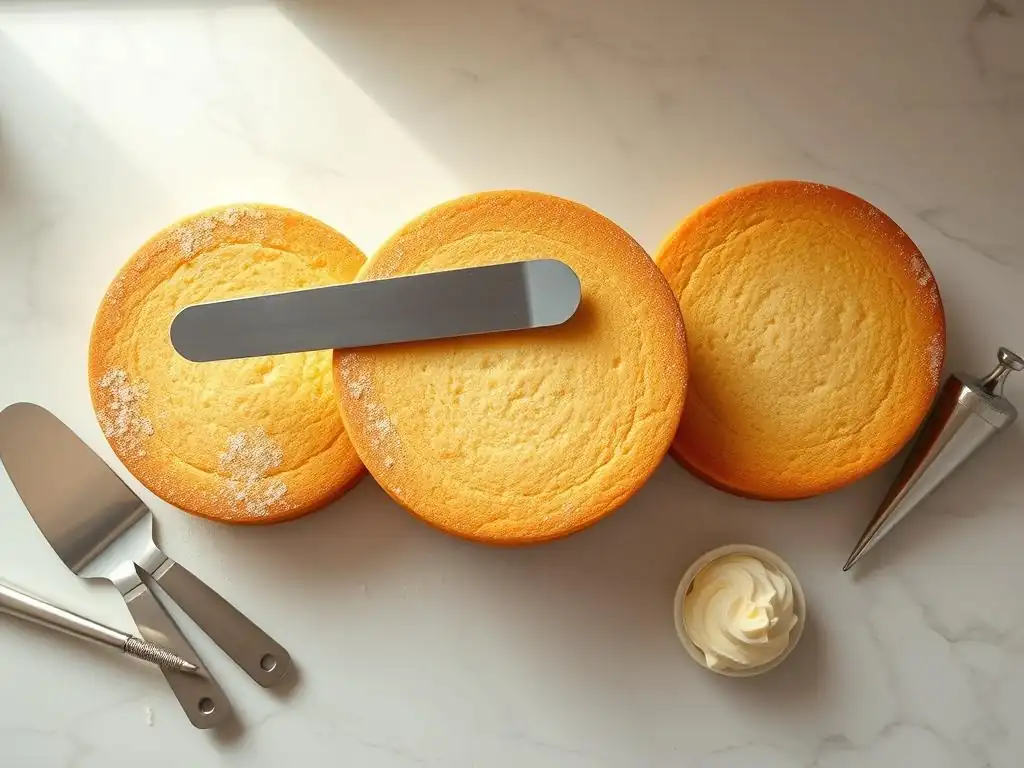
Cooling Cake Layers Properly to Prevent Crumbling
Proper cooling is just as important as proper baking when preparing cake layers for decorating. Removing a cake from its pan too soon can cause it to collapse or break, while leaving it in the hot pan for too long can lead to overbaking from residual heat and a soggy bottom. Allowing the cake to cool correctly prevents crumbling and ensures a firm yet tender texture that is easy to handle and level.
Typically, you should let the cake cool in its pan on a wire rack for about 10-15 minutes after removing it from the oven. This allows the cake to set slightly and firm up. After this initial cooling period, invert the cake onto the wire rack to cool completely.
Cooling on a wire rack allows air to circulate around the entire cake, preventing moisture from condensing on the bottom and ensuring even cooling. Allow the cake to cool completely to room temperature before attempting to level or decorate it, which can take 1-2 hours depending on the size. Warm cakes are much more prone to tearing and crumbling when handled or cut.
The Best Tools for Leveling Cake Layers
Leveling cake layers is often necessary to remove the slight dome that may form during baking and to ensure each layer is of uniform thickness for stacking. Having the right tools makes this task much easier and helps you achieve precise, flat surfaces. While several tools can be used, two are most common for achieving professional-looking perfect cake layers for decorating.
These tools provide different levels of precision and ease of use. A serrated knife is a versatile kitchen staple, while a dedicated cake leveler offers more consistency, especially for beginners or when needing multiple layers of the exact same height. Choosing the right tool for your comfort level and the task at hand is key to successful leveling.
Serrated Knives: A Baker's Essential
A long, sharp serrated knife is a classic tool for leveling cakes. The serrations help saw through the cake's crumb without tearing or dragging, making it effective for removing domes. The key is to use a knife that is longer than the diameter of your cake layer to allow for a smooth, continuous cut.
To level a cake with a serrated knife:
- Ensure your cake layer is completely cool.
- Place the cake on a flat surface, ideally a cake board or your counter.
- Hold the knife parallel to the surface of the cake. If needed, you can use your other hand to gently guide the knife or use visual cues like the edge of the pan impression on the cake.
- Using a gentle sawing motion, slowly work your way across the cake, keeping the knife as level as possible. Don't press down; let the serrations do the work.
- Once you've cut all the way through, lift off the domed top.
Practice makes perfect with this method, but a sharp serrated knife is an indispensable tool in your collection of perfect cake layers decorating tips.
Cake Levelers: Achieving Professional Results
For maximum precision and ease, especially when leveling multiple layers or torting a cake into thinner layers, a cake leveler is the tool of choice. These adjustable wire cutters allow you to set the desired height for your cake layer, ensuring a perfectly level cut every time. They come in various styles, typically with one or more adjustable wires stretched across a frame.
Using a cake leveler is straightforward:
- Ensure your cake layer is completely cool.
- Adjust the wire(s) on the leveler to the desired height for your layer. There are usually notches or markings to help you set the height evenly on both sides.
- Place the cake leveler next to the cake, ensuring the wire is positioned just below the dome you want to remove.
- Holding the leveler by its feet or handles, gently saw it back and forth through the cake layer, keeping the feet flat on your working surface.
- Continue sawing until the wire has cut all the way through the cake.
- Lift off the domed top.
Cake levelers remove the guesswork and are excellent for achieving consistent, perfect cake layers decorating tips. They are particularly useful when you need layers of identical thickness for a multi-tiered cake.
Leveling Techniques: Ensuring Flat and Even Surfaces
Beyond choosing the right tool, employing proper techniques is essential for successful cake leveling. The goal is to remove only the necessary amount of cake to create a flat surface, minimizing waste while maximizing the usable layer height. These techniques apply whether you're simply removing a dome or torting a layer into thinner sections.
Consistency and patience are key. Don't try to rush the process or force the tool through the cake. A slow, steady motion, keeping your cutting tool level relative to your work surface, will yield the best results. Remember that even a slightly uneven layer can cause issues when stacking and decorating, so taking the time to level properly is a worthwhile investment in your final decorated cake's appearance and stability.
Removing the Dome: A Step-by-Step Guide
Removing the dome is the most common reason for leveling a cake layer. This process creates a flat top surface ready for frosting or stacking.
- Ensure Cake is Cool: As mentioned, the cake must be completely cool to the touch.
- Choose Your Tool: Select your sharp serrated knife or adjustable cake leveler.
- Set Your Line (Knife Method): For the knife method, visually identify the level line just below the peak of the dome. You can use wooden skewers inserted around the cake at the desired height as a guide, or simply rely on your eye and a steady hand, keeping the knife parallel to the counter.
- Set Your Height (Leveler Method): For the cake leveler, adjust the wire to the height you want the finished layer to be. Place the leveler next to the cake to check the height relative to the dome.
- Make the Cut: Using a gentle sawing motion (with either tool), slowly cut through the cake layer horizontally. Keep the knife or leveler straight and parallel to your work surface.
- Remove the Dome: Once cut through, carefully lift off the domed top. You should be left with a flat cake layer. (The removed dome, often called 'cake scraps' or 'chef's treat', is perfect for snacking or making cake pops!)
Mastering dome removal is fundamental to many perfect cake layers decorating tips.
Torting Cake Layers: Creating Even Thickness
Torting involves slicing a single cake layer horizontally into two or more thinner layers. This technique allows you to add more filling layers, increasing the cake's height and flavor complexity. It also ensures each resulting layer is of consistent thickness, crucial for a balanced final cake.
- Ensure Cake is Cool and Level: Start with a completely cool, already leveled cake layer (dome removed).
- Mark Layers: Use a ruler to measure the desired thickness of your torted layers (e.g., 1 inch or about 2.5 cm). Use toothpicks or skewers to mark this height around the circumference of the cake at regular intervals (every 1-2 inches or 3-5 cm).
- Guide Your Cut (Knife Method): For the knife method, use the toothpicks as a guide. Insert the serrated knife into one toothpick, keeping it parallel to the work surface, and begin sawing, working your way around the cake, connecting the toothpick marks.
- Set Your Height (Leveler Method): For a cake leveler, set the wire to the desired thickness for your torted layers.
- Make the Cut: With either tool, use a gentle sawing motion to cut through the cake horizontally along your marked line or at the leveler's height.
- Separate Layers: Carefully lift off the top torted layer. You can use a cake lifter or two spatulas to help support it. Repeat the process if torting into more than two layers.
Torting allows for impressive multi-layered cakes and requires precision for perfect cake layers decorating tips.
Troubleshooting Common Cake Layer Problems
Cake Layers with a Dome: Causes and Solutions
A significant dome is one of the most frequent issues encountered when baking cake layers. As discussed earlier, it primarily occurs when the outside edges of the cake set faster than the center. This traps the expanding gases and causes the middle to push upwards. Common causes include an oven that is too hot, placing the cake pan too close to a heat source (like the bottom element), or using a batter with too much leavening or too much liquid relative to dry ingredients. Overmixing can also contribute by developing too much structure on the edges.
Solutions involve addressing the root cause. Firstly, ensure your oven temperature is accurate using an oven thermometer; lower the temperature slightly if it's running hot (e.g., from 350°F to 325°F or 175°C to 160°C). Try moving the cake rack to the center of the oven. Using baking strips (as discussed previously) is an excellent preventative measure to promote even heating.
You can also try slightly reducing the amount of leavening agent in your recipe if domes are a persistent problem, though this should be done cautiously. Lastly, always ensure you are not overmixing your batter after adding flour. While some doming is normal, excessive doming can be minimized with these adjustments, leading to flatter, more perfect cake layers for decorating.
Uneven Cake Layers: Identifying and Correcting the Issue
Uneven cake layers, where one side is significantly higher or denser than the other, can be frustrating. This often points to uneven heat distribution in your oven. Hot spots can cause one side of the cake to bake and rise faster than the other. Placing the pan too close to the oven door or a wall can also result in uneven heating. Another cause could be uneven batter distribution in the pan, although this is less common.
To correct uneven baking, first, check for hot spots in your oven by baking something simple like toast or cookies on a sheet pan placed in different areas. Rotate your cake pans halfway through the baking time (e.g., after 15 minutes for a cake that bakes for 30 minutes). Ensure your oven racks are level.
If using multiple pans, avoid overcrowding the oven, as this can restrict airflow and lead to uneven baking. While rotating pans adds a step, it's an effective strategy for achieving consistently level and perfect cake layers for decorating, even in an oven with slight temperature variations.
Dry Cake Layers: Preventing Dryness for Optimal Decorating
Dry cake layers are a common problem that makes decorating difficult (crumbs everywhere!) and results in an unappealing texture. Dryness can be caused by several factors, including overbaking, using too much flour, not enough fat or liquid in the recipe, or baking at too high a temperature. Using ingredients that aren't fresh, particularly flour or leavening agents, can also contribute to a poor texture that feels dry.
To prevent dry cake layers, always use the toothpick test to avoid overbaking; remove the cake from the oven as soon as it's done. Measure your ingredients accurately, especially the flour (using a scale is best). Ensure your recipe has a balanced ratio of dry to wet ingredients and fat. Baking at the correct temperature (not too high) promotes even cooking without drying out the edges.
If you consistently struggle with dry cakes, consider slightly reducing the flour or increasing the fat or liquid in your trusted recipes, or try recipes specifically designed for moist cakes (often using oil, buttermilk, or sour cream). Proper cooling is also essential; don't leave the cake in the hot pan for too long. Moist layers are much easier to handle and decorate, making them crucial for perfect cake layers decorating tips.
Crumbly Cake Layers: Avoiding Crumbly Texture
Crumbly cake layers can be a nightmare for decorators, as they make frosting smoothly and achieving sharp edges nearly impossible. Crumbling often goes hand-in-hand with dryness, but can also be caused by under-mixing (not developing enough structure), overmixing (creating a tough, then crumbly texture), or handling the cake before it's completely cool. Some recipes, particularly those with a very high ratio of fat or sugar, can naturally be more delicate and prone to crumbling.
To avoid crumbling, ensure you are mixing your batter adequately but not excessively; follow the recipe instructions for mixing times and methods. Always allow your cake layers to cool completely on a wire rack before attempting to level or handle them extensively. If you have a recipe that is inherently crumbly, chilling the cake layers in the refrigerator for 20-30 minutes before leveling can make them firmer and easier to cut cleanly.
Using a very sharp serrated knife or cake leveler with a gentle sawing motion, rather than pressing down, also minimizes crumbling when leveling. Handling cooled, firm layers gently is key to maintaining their structure for perfect cake layers decorating tips.
Tips for Decorating Perfectly Level Cake Layers
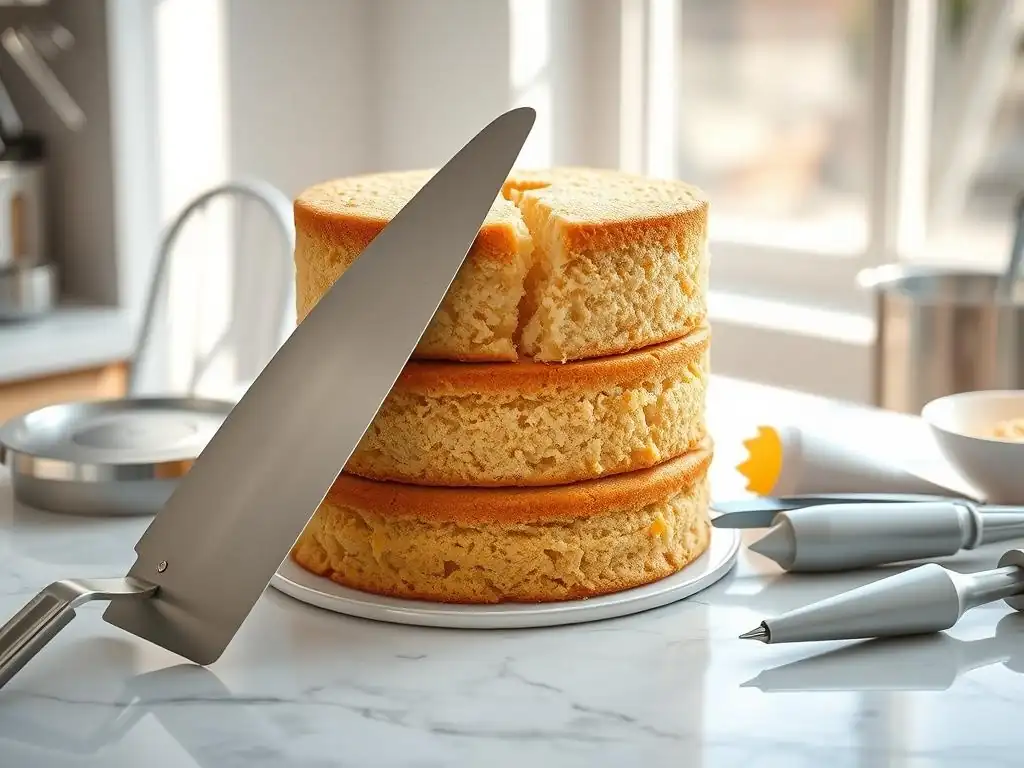
Using a Cake Turntable for Smooth Frosting Application
Once your cake layers are baked, cooled, and perfectly leveled, the fun of decorating begins! One of the most essential tools for applying frosting smoothly and evenly is a cake turntable. A turntable allows you to rotate the cake effortlessly as you apply and smooth frosting, making it significantly easier to achieve a consistent thickness and a professional finish on the sides and top.
Place your prepared cake layer (or stacked cake) on a cake board slightly smaller than the cake itself, then place the board on the center of the turntable. As you apply frosting with an offset spatula, you can slowly rotate the turntable with your other hand, allowing you to create smooth, continuous strokes. This technique is invaluable for achieving sharp edges and a flawless base for further decoration. Using a turntable is a fundamental perfect cake layers decorating tip that dramatically improves frosting results.
Applying a Crumb Coat: Sealing in Crumbs for a Flawless Finish
Even with perfectly baked and leveled layers, some surface crumbs are inevitable. A crumb coat is a thin layer of frosting applied to the entire cake specifically to trap these loose crumbs. It's a critical step before applying the final, thicker layer of frosting, ensuring a smooth, crumb-free exterior.
To apply a crumb coat:
- Ensure your cake layers are cool and level.
- Place the bottom layer on your cake board on the turntable. Add filling if desired, then place the next layer on top, ensuring it's centered and level.
- Using an offset spatula, apply a thin layer of frosting to the top and sides of the cake. Use the turntable to help spread it evenly. The goal is simply to cover the cake and trap crumbs, not to achieve a thick, perfect layer.
- Once the cake is covered, chill it in the refrigerator for at least 15-30 minutes, or until the crumb coat is firm to the touch.
This chilling step sets the crumb coat, effectively sealing the crumbs and providing a stable base for the final frosting layer. It's a non-negotiable step for achieving perfect cake layers decorating tips and a smooth finish.
Frosting Techniques for Sharp Edges
Achieving sharp, crisp edges on a frosted cake is a sign of professionalism and greatly enhances the decorated cake's appearance. Once your crumb coat is chilled and firm, you're ready for the final frosting layer.
- Apply Final Frosting: Apply a generous amount of frosting to the top and sides of the cake using an offset spatula. Don't worry about making it smooth yet.
- Smooth the Sides: Using a bench scraper or a long offset spatula held perpendicular to the side of the cake, gently press against the frosting while rotating the turntable. This will smooth the frosting around the sides and push excess frosting up over the top edge, creating a small lip.
- Smooth the Top: Clean your offset spatula. Starting from the outside edge of the top of the cake, draw the spatula towards the center in a smooth motion, pulling the excess frosting lip inwards. Clean your spatula after each swipe. Repeat this process around the entire top edge.
- Refine: Continue smoothing the sides and top as needed until you achieve your desired level of smoothness and sharp edges.
Practice is key, but starting with perfectly level cake layers and using a crumb coat makes achieving sharp edges much more attainable. These techniques, combined with level layers, are essential perfect cake layers decorating tips.
Conclusion: Your Path to Perfect Cake Layers and Stunning Decorations
Mastering the Art of Cake Decorating with Level Layers
Mastering the art of cake decorating begins with mastering the foundation: baking perfect cake layers. While intricate piping or beautiful fondant work are impressive, they can only truly shine when built upon a stable, level base. By focusing on the techniques outlined in this guide—from selecting the right ingredients and preparing your pans meticulously to employing proper mixing, baking, cooling, and leveling methods—you set yourself up for success. These perfect cake layers decorating tips are not just about baking; they are about creating a canvas that makes all your subsequent decorating efforts easier, more enjoyable, and ultimately, more beautiful.
Remember that baking is a skill that improves with practice. Don't be discouraged if your first few attempts aren't perfectly level. Pay attention to what happened, identify potential causes (oven temperature, mixing, cooling time), and adjust for your next bake. Each cake you bake is an opportunity to learn and refine your technique. With dedication to these foundational steps, you will consistently produce perfect cake layers ready to be transformed into stunning decorated masterpieces.
BakeWithEase's Commitment to Your Baking Success
At BakeWithEase, our mission is to empower bakers of all levels with the knowledge and confidence to create delicious and beautiful baked goods. We believe that with the right guidance and a focus on fundamental techniques, anyone can achieve impressive results in the kitchen. This guide to perfect cake layers for decorating is just one example of our commitment to providing clear, actionable advice that helps you overcome common challenges and elevate your baking skills.
We encourage you to explore our website for more simple recipes, detailed technique guides, and helpful tips covering a wide range of baking topics. Whether you're perfecting your sourdough, mastering delicate pastries, or creating elaborate decorated cakes, BakeWithEase is here to support your journey. We hope these perfect cake layers decorating tips help you bake with ease and create cakes that bring joy to you and those you share them with. Happy baking!
Frequently Asked Questions
What are the most important factors for achieving perfectly even cake layers?
The key factors are using accurate measurements for ingredients, ensuring even oven temperature, and employing the correct baking time to avoid sinking or uneven rising.
What kind of pan preparation is essential for easy cake layer removal?
Proper pan preparation involves greasing and flouring the pans, or using parchment paper to line the bottom. This prevents the cake from sticking and ensures clean removal after baking.
How do I prevent my cake layers from having a domed top?
To prevent a domed top, use baking strips wrapped around the cake pans to insulate the sides, ensuring even heat distribution. You can also lower the oven temperature slightly and bake for a longer time.
What's the best way to level cake layers for professional-looking decorating?
The best method is using a serrated knife or a cake leveler to carefully trim off any domed tops. Ensure the layers are completely cool before leveling to prevent tearing or crumbling.
What are some beginner-friendly decorating tips for perfect cake layers?
Start with a crumb coat of frosting to seal in any loose crumbs. Then, apply a second, thicker layer of frosting and use tools like an offset spatula or piping bags for a smooth and professional finish.
Final Reflection: The Enduring Allure of the Perfectly Layered Cake
The quest for the perfect cake layer isn't just about aesthetics; it's about the artistry of baking and the joy of creating something truly special. In a world increasingly dominated by instant gratification, the meticulous process of achieving flawlessly level, moist, and tender cake layers stands as a testament to patience, precision, and the enduring power of homemade goodness. This dedication to detail elevates a simple dessert into a masterpiece, ready to be adorned with breathtaking decorations.
The impact of a perfectly layered cake extends far beyond the immediate satisfaction of a delicious treat. It represents a connection to tradition, a celebration of culinary skill, and a tangible expression of love and care. A cake is a celebration of life, a symbol of joy and togetherness.
This sentiment resonates deeply, as the act of baking, and particularly the striving for perfection in the layering process, becomes a meditative practice, a way to connect with oneself and others through the creation of something beautiful. The visual appeal of a perfectly layered cake, ready for decorating, is undeniably captivating, but the journey to achieve it is equally rewarding.
Now, consider your own baking journey. What techniques from this article will you incorporate into your next baking project? Perhaps you'll experiment with different pan preparation methods, meticulously measure your ingredients, or embrace the power of a perfectly level cake layer.
Don't be afraid to experiment, to embrace the occasional mishap, and to learn from each attempt. The pursuit of the perfect cake layer is a continuous process of refinement, a journey of discovery that will ultimately lead you to create cakes that are not only visually stunning but also incredibly delicious. Embrace the challenge, and enjoy the sweet rewards.
Unlock Your Inner Cake Artist!
Thanks for taking the time to explore the secrets to perfectly even cake layers! We hope you’ve gained some valuable tips to elevate your baking game. Now it's time to put your newfound knowledge into practice.
- Bake your masterpiece! Try out the techniques you've learned today and create a show-stopping cake. Don’t be afraid to experiment – even small tweaks can make a big difference.
- Share your creation! We’d love to see your perfectly layered cakes! Post a picture on social media and tag us – let's inspire each other.
- Dive deeper into our cake decorating tutorials: Explore our other resources on BakeWithEase for more advanced techniques and inspiring recipes.
Ready to create your dream cake? What's the first flavor combination you'll try?