
Unlock Smooth Frosting: The Crumb Coat Secret

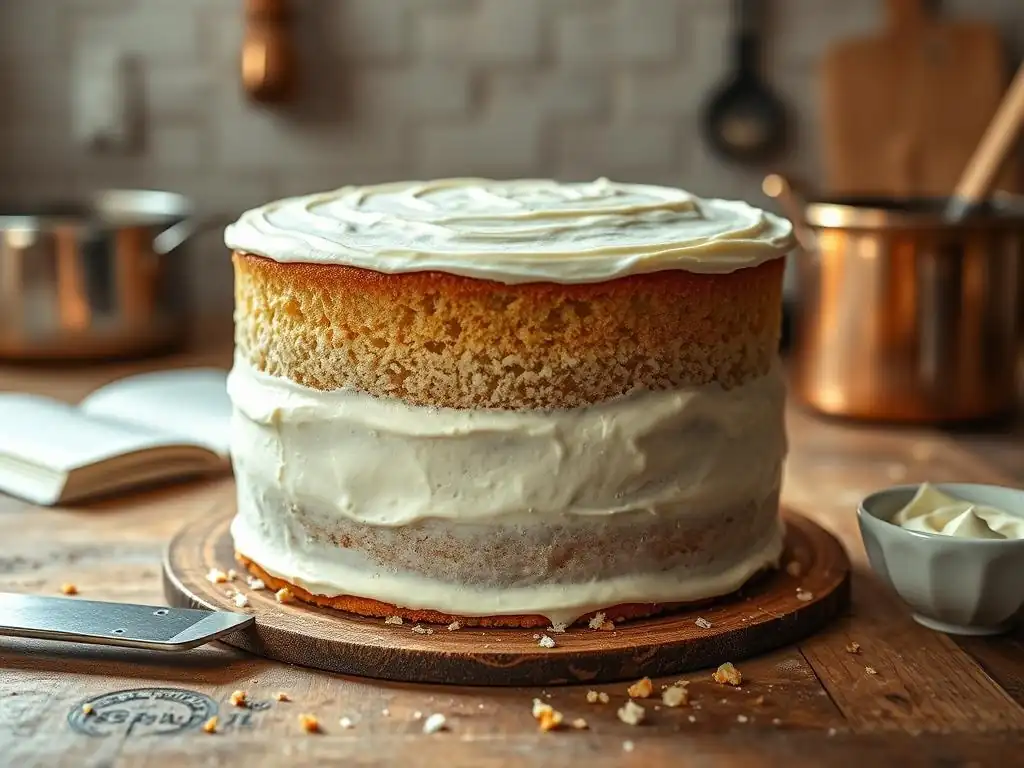
Welcome to BakeWithEase, your kitchen companion for conquering every baking challenge! Ever wondered how professional bakers achieve that flawlessly smooth frosting finish? This article unveils the surprisingly simple secret – the crumb coat frosting technique. Discover how this essential step, easily mastered even by intermediate bakers, will elevate your cakes from amateur to astonishing. Ready to say goodbye to messy frosting and hello to picture-perfect desserts? Let's get baking!
- Mastering the Crumb Coat: Your Key to Flawless Cake Frosting
- The Crumb Coat Frosting Technique Easy: A Step-by-Step Guide
- Troubleshooting Common Crumb Coat Problems
- Crumb Coat Frosting Technique: Essential Tools and Equipment
- Beyond the Basics: Advanced Crumb Coat Techniques
- The Crumb Coat Secret: Elevating Your Cake Decorating Skills
- Frequently Asked Questions
- Final Reflection: The Transformative Power of the Crumb Coat
- Unleash Your Inner Cake Boss: Master the Crumb Coat!
Mastering the Crumb Coat: Your Key to Flawless Cake Frosting
Why a Crumb Coat is Essential for Professional-Looking Cakes
Have you ever tried to apply the final layer of frosting to a cake, only to find annoying little crumbs mixing in and ruining your smooth finish? It's a frustrating problem that bakers of all levels face. This is precisely why the crumb coat is an absolutely essential step in achieving a truly professional-looking cake.
A crumb coat is a very thin layer of frosting applied directly to the bare cake layers before the final, thicker layer of frosting goes on. Its primary job is to trap any loose crumbs, effectively sealing them onto the cake so they don't migrate into your beautiful final frosting.
Beyond simply trapping crumbs, applying a crumb coat provides a smooth, even base for your final frosting layer. Think of it like primer before painting a wall – it fills in imperfections and gives the top coat something stable to adhere to. This thin layer helps to level out any minor surface inconsistencies on the cake and sets a foundation that makes applying the final coat significantly easier and faster. Skipping this step often results in a bumpy, crumb-filled final layer that no amount of smoothing can truly fix, leading to disappointment after all your hard work baking!
BakeWithEase's Guide to Achieving a Perfect Crumb Coat
Achieving a perfect crumb coat doesn't require advanced skills or fancy equipment. It's a straightforward process that, once mastered, will dramatically improve the appearance of your cakes. Our BakeWithEase guide breaks down the crumb coat frosting technique easy enough for anyone to follow, ensuring smooth, professional results every time you frost a cake. We'll walk you through each step, from preparing your cake to chilling, highlighting common pitfalls and how to avoid them.
This guide focuses on making the crumb coat technique accessible and simple. We'll discuss the ideal consistency for your frosting, the best tools to use, and crucial tips like chilling time. By following these steps, you'll find that applying the final layer of frosting becomes a breeze, allowing you to achieve that coveted smooth finish without the battle against migrating crumbs. Let's dive into the easy crumb coat process!
The Crumb Coat Frosting Technique Easy: A Step-by-Step Guide
Step 1: Baking and Cooling Your Cake Layers Completely
The very first, non-negotiable step in the crumb coat frosting technique easy process is ensuring your cake layers are completely cooled. Attempting to frost warm or even slightly warm cakes is a recipe for disaster. The heat from the cake will melt the frosting, making it impossible to spread evenly and causing excessive crumbling. Ideally, cake layers should be cooled on a wire rack immediately after coming out of the oven until they reach room temperature, which usually takes at least 1-2 hours for standard 8-inch layers.
For best results when applying a crumb coat, some bakers even recommend chilling the cooled cake layers in the refrigerator for 30 minutes to an hour, or even freezing them for 15-20 minutes. This firms up the cake structure, making it less prone to tearing and crumbling during the frosting process. A firm, cool surface is much easier to work with, helping you apply that thin, essential crumb coat without pulling chunks of cake away.
Ensuring Even Layers for Optimal Crumb Coating
Even cake layers are crucial for a stable and aesthetically pleasing finished cake, and they make the crumb coating process much simpler. If your cakes have domed tops, you'll need to level them. The easiest way to do this is using a serrated knife or a specialized cake leveler. Place the cake on a flat surface and carefully slice off the dome to create a flat top. This not only ensures your cake stands straight but also provides a smooth, consistent surface for applying the crumb coat.
Once leveled, ensure the layers are free of any loose crumbs from the cutting process. Gently brush them off with a clean pastry brush or even your hand. Stacking even, level layers makes it easier to apply an even thickness of frosting for the crumb coat, preventing thicker or thinner spots that can make the final frosting application more challenging. Taking a few minutes to level your cakes pays dividends in the final presentation.
Step 2: Preparing Your Crumb Coat Frosting
The type of frosting you use for the crumb coat can be the same as your final frosting, or even a different one if you wish. However, the consistency is key. For an effective crumb coat, the frosting should typically be slightly thinner than the consistency you would use for your final decorative layer. This thinner consistency makes it easier to spread a very thin layer without pulling up excessive crumbs from the cake surface.
Choosing the Right Frosting Consistency for Crumb Coating
To achieve the ideal consistency for your crumb coat frosting technique easy application, you might need to thin down your prepared frosting slightly. This is usually done by adding a very small amount of liquid – typically milk, cream, or even a complementary liquid like coffee or juice – one teaspoon at a time. Mix it in thoroughly until the frosting is spreadable but not runny.
It should glide over the cake rather than tug at it. For example, if you're using a standard American buttercream, adding 1-2 teaspoons of milk per cup of frosting is often sufficient to reach the right consistency for a crumb coat.
- Task List: Checking Frosting Consistency
- [ ] Prepare your main frosting.
- [ ] Scoop a small amount for the crumb coat.
- [ ] Add liquid (milk, cream) 1 tsp at a time.
- [ ] Stir until smooth and easily spreadable.
- [ ] Test on a small piece of cake scrap if available.
Step 3: Applying the Initial Crumb Coat Layer
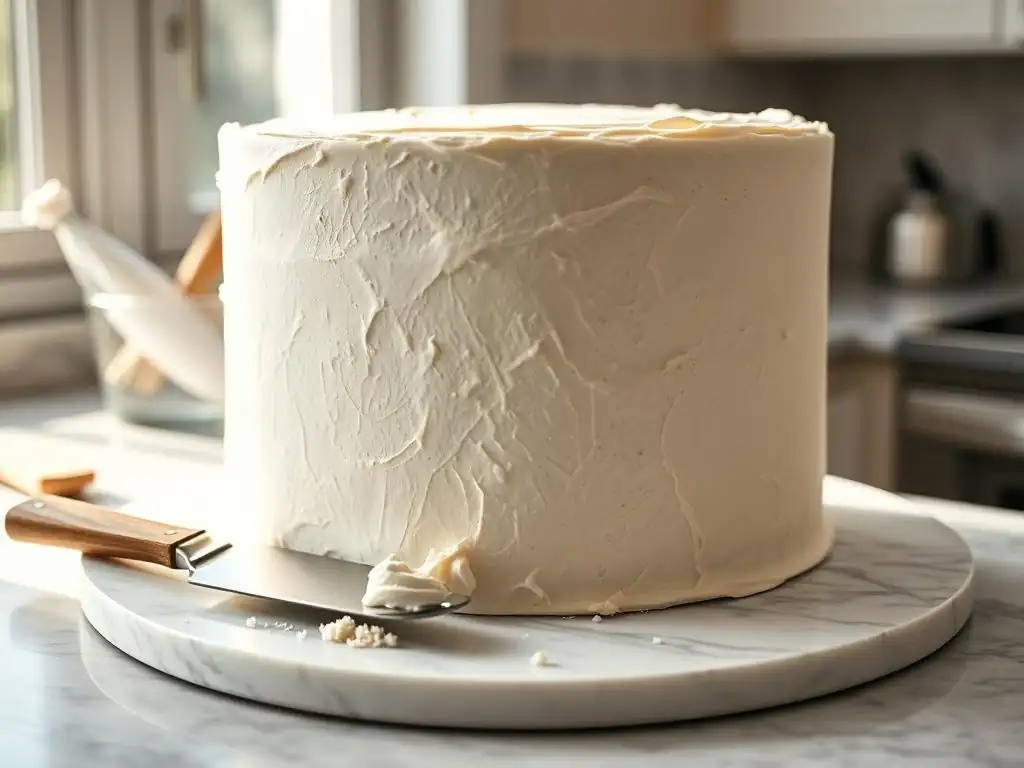
Now for the actual application of the crumb coat. Place your first cake layer (often the bottom one, right-side up or upside-down for a flat top) on your cake board or serving plate. Apply a small amount of your thinned frosting to the top of the layer. Using an offset spatula, spread this frosting thinly and evenly across the top. Don't worry about getting it perfect; the goal is just to cover the surface. Stack your next layer on top and repeat the process for the top and sides of the entire cake.
Tips for Thin and Even Crumb Coat Application
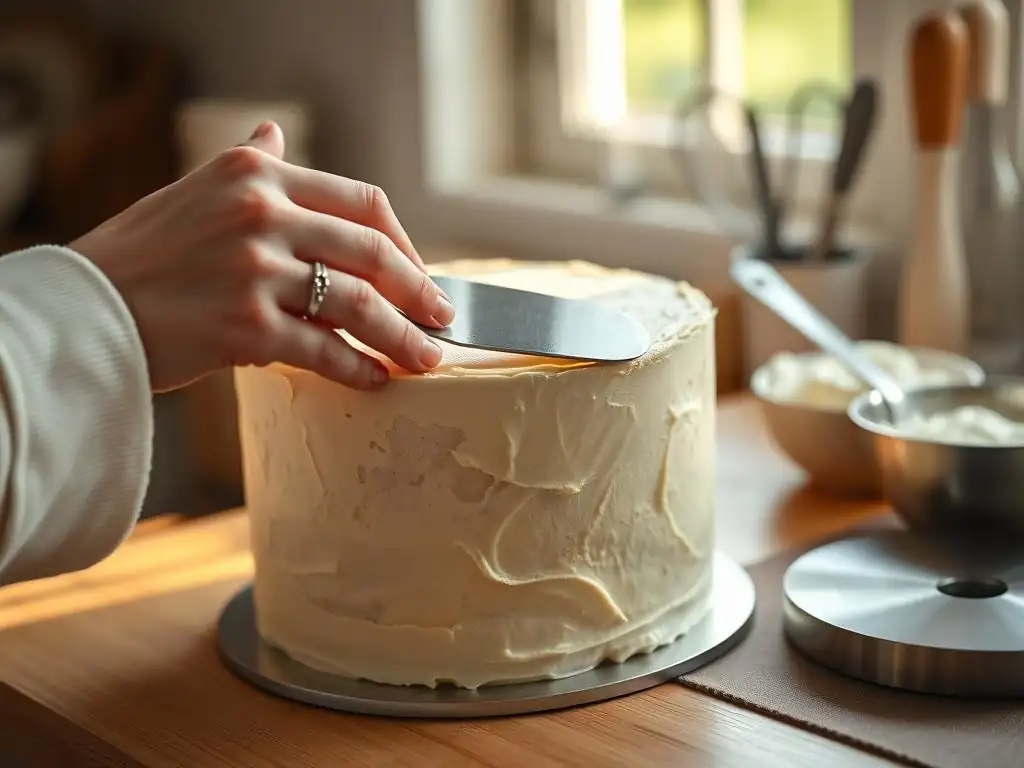
The key to a successful crumb coat is applying it thinly. You are not trying to fully opaque the cake; you are simply creating a sticky layer to capture crumbs. Use an offset spatula and hold it at a slight angle to the cake, using smooth, sweeping motions. Start with a small amount of frosting – you can always add more if needed, but it's harder to take it away once crumbs are mixed in.
Work from the top down, then apply frosting to the sides. The goal is coverage, not thickness. A thin, even coat will chill faster and provide a better base than a patchy or thick one.
The crumb coat isn't about beauty; it's about function. Embrace the messiness; it's hiding the real magic!
- BakeWithEase Pro Tip
Step 4: Chilling the Crumb Coated Cake
This step is absolutely critical for the crumb coat frosting technique easy method to work effectively. Once the entire cake is covered in the thin crumb coat, place the cake in the refrigerator. The chilling time allows the thin layer of frosting to firm up completely, effectively gluing all those pesky crumbs to the cake's surface. Skipping this step is the most common reason people struggle with crumb migration during the final frosting.
Why Chilling is Crucial for Preventing Crumb Migration
Chilling the crumb coated cake solidifies the fat in the frosting. As the frosting hardens, it creates a stable shell around the cake, locking in every single crumb. This hardened layer acts as a barrier. When you apply the final layer of frosting, you'll be spreading it over this firm, crumb-free surface. The chilling time needed can vary depending on your refrigerator and the type of frosting, but typically 15-30 minutes is sufficient. You'll know it's ready when the surface of the crumb coat is dry to the touch and no longer sticky.
- Approximate Chilling Times:
- Refrigerator: 15-30 minutes
- Freezer: 8-15 minutes (watch carefully to avoid freezing the cake)
Step 5: Applying the Final Layer of Frosting
Once your crumb coated cake is thoroughly chilled and firm, it's time for the final layer of frosting. Take the cake out of the refrigerator. Apply a generous amount of your prepared final frosting (which can be the same as the crumb coat frosting, just potentially a thicker consistency, or a completely different type). Dollop large amounts of frosting onto the top and sides of the cake.
Achieving a Smooth Finish After the Crumb Coat
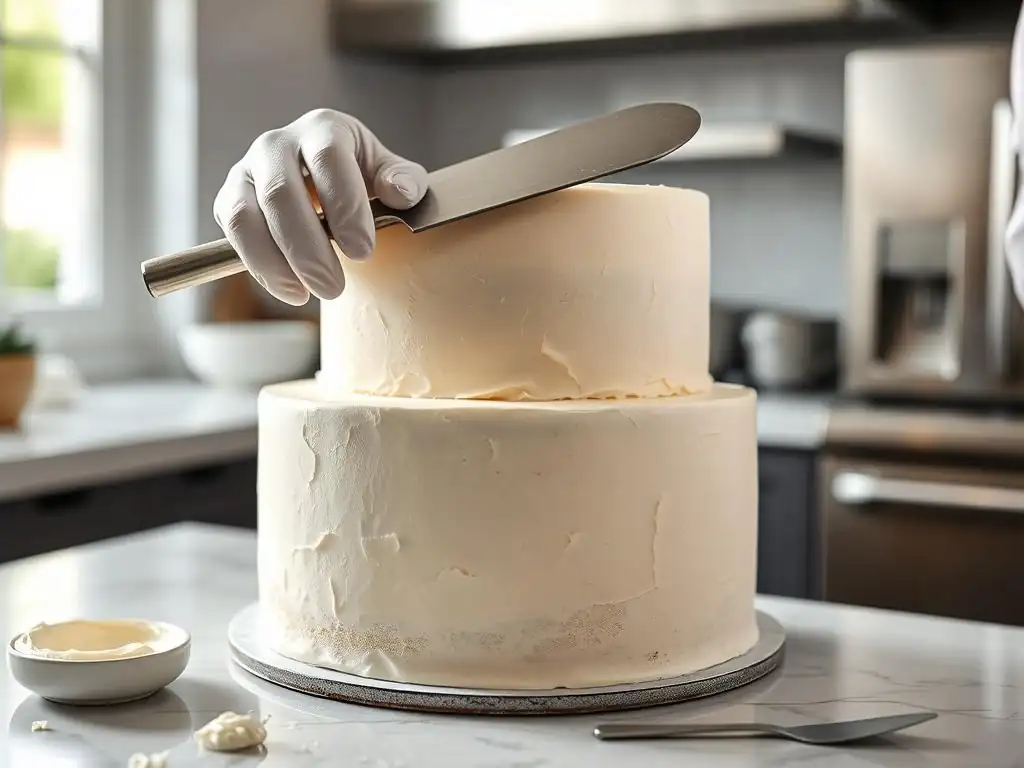
Using an offset spatula or a bench scraper, begin spreading the final layer of frosting. Start with the top, then move to the sides. The key here is to use enough frosting so that your tool glides over the crumb coat without digging into it.
The chilled crumb coat will prevent crumbs from lifting into this beautiful final layer. Work your way around the cake, smoothing the frosting until you achieve your desired finish. Because the crumb coat has already created an even base, smoothing the final layer becomes significantly easier, allowing you to achieve those smooth, professional sides and sharp edges with relative ease.
Troubleshooting Common Crumb Coat Problems
Dealing with Crumb Migration Issues
Even with a crumb coat, you might occasionally find a few crumbs appearing in your final layer. This usually indicates the crumb coat wasn't chilled for long enough, or it was applied too thinly in spots, or the cake wasn't cool enough to begin with. If you encounter this, try to gently lift the crumb out with the tip of your spatula.
If there are many crumbs, you might need to scrape off the affected area of the final frosting, re-chill the cake briefly, and apply more final frosting to that spot. Ensuring the cake is cold after the crumb coat step is the most effective preventative measure.
Fixing Uneven Crumb Coats
While the crumb coat doesn't need to be perfectly smooth, a very uneven or lumpy crumb coat can sometimes show through a thin final layer of frosting. If you notice significant unevenness before chilling, you can try to gently smooth it out with your spatula, being careful not to lift more crumbs.
If you only notice after chilling, you have two options: proceed as is (it might not be noticeable with a thicker final coat) or, if it's very bad, allow the crumb coat to soften slightly at room temperature for a few minutes and gently scrape it off, then re-apply a fresh, thin crumb coat and re-chill.
Preventing Frosting from Tearing the Cake
If your frosting is pulling or tearing chunks of cake when you apply the crumb coat, the most likely culprits are a cake that isn't cool enough or a frosting that is too stiff. Ensure your cake is properly chilled or at least at room temperature. If the frosting feels too stiff, thin it down slightly more with liquid (milk, cream, etc.)
as described in Step 2. Using an offset spatula with a flexible blade can also help, as it allows you to apply the frosting with less pressure, gliding it over the cake surface rather than pushing into it.
Crumb Coat Frosting Technique: Essential Tools and Equipment
The Best Spatulas for Crumb Coating
For applying the crumb coat frosting technique easy and effectively, offset spatulas are your best friends. An offset spatula has a handle that is angled up and away from the blade, which keeps your knuckles from dragging through the frosting or hitting the cake stand. They come in various sizes (e.g., 4-inch, 6-inch, 8-inch blades).
A small offset spatula (around 4-6 inches) is great for getting frosting onto the cake and spreading it, while a larger one (8-inch or more) can be useful for smoothing the sides. Look for spatulas with a bit of flexibility in the blade for easier spreading.
Turntables: A Baker's Best Friend for Smooth Frosting
A cake turntable, also known as a revolving cake stand, is invaluable when applying both the crumb coat and the final frosting. It allows you to easily rotate the cake as you work, making it simple to apply even layers of frosting to the sides without having to constantly move yourself or the cake. This is particularly helpful for achieving smooth sides. A good quality turntable with a smooth rotation mechanism makes the entire frosting process, including the crumb coat frosting technique easy, much more efficient and enjoyable.
Frosting Smoothers for a Professional Finish
While not strictly necessary for the crumb coat itself (as it doesn't need to be perfectly smooth), frosting smoothers are essential for achieving that flawless look on your final layer, which is made possible by the crumb coat. These tools, often made of plastic or metal (like bench scrapers), have a straight, flat edge. You hold the smoother against the side or top of the cake while rotating the turntable to scrape away excess frosting and create a perfectly smooth surface. Having one on hand makes the transition from a crumb-coated cake to a polished masterpiece seamless.
Beyond the Basics: Advanced Crumb Coat Techniques
Using Different Frosting Flavors for the Crumb Coat
An interesting variation on the basic crumb coat frosting technique easy method is to use a different flavor of frosting for the crumb coat than you do for the final layer. This can add an extra dimension of flavor to your cake. For example, you could use a thin layer of chocolate ganache or coffee buttercream as the crumb coat under a vanilla bean final frosting. Just ensure the consistency is suitable for a thin application and that the flavors complement each other.
Creating a Textured Crumb Coat Finish
Sometimes, you might want a rustic or intentionally textured look for your cake. In these cases, you can modify the crumb coat technique. Instead of smoothing the crumb coat perfectly, you might apply it slightly thicker and use your spatula to create swirls, peaks, or other textures. This textured crumb coat then becomes the final look of the cake, skipping the second layer of frosting entirely. This approach is faster and creates a charming, less formal appearance.
Crumb Coating Cakes with Fillings
Crumb coating cakes with soft fillings (like fruit compotes or mousses) requires an extra step: creating a frosting dam. Before applying the crumb coat, pipe a ring of slightly stiffer frosting around the outer edge of the cake layer that will hold the filling. This dam acts as a barrier, preventing the filling from oozing out when the layers are stacked and frosted. Once the dam is in place and the filling added within the dam, you can proceed with the crumb coat frosting technique easy steps as usual, frosting over the dam and filling together.
The Crumb Coat Secret: Elevating Your Cake Decorating Skills
From Amateur to Pro: The Impact of a Well-Executed Crumb Coat
Mastering the crumb coat is truly one of the foundational skills that separates amateur-looking cakes from those with a polished, professional finish. It's a simple step that prevents the most common frustration in cake decorating – migrating crumbs. By taking just a few extra minutes to apply and chill a thin crumb coat, you set yourself up for success with the final frosting layer. The crumb coat frosting technique easy to learn, and the impact it has on the smoothness and overall appearance of your cakes is undeniable.
Incorporating the crumb coat into your baking routine will not only make frosting easier but will also give you the confidence to tackle more complex decorating techniques, knowing you have a stable, crumb-free base to work with. It's a small step with a huge payoff, transforming your homemade cakes into stunning centerpieces. Practice this easy crumb coat method, and watch your cake decorating skills elevate from amateur attempts to professional-looking creations!
Frequently Asked Questions
What is a crumb coat and why is it important?
A crumb coat is a thin layer of frosting applied before the final frosting layer. It's crucial because it seals in loose crumbs, preventing them from contaminating the final frosting and resulting in a smoother finish.
How thin should the crumb coat be?
The crumb coat should be very thin, just enough to trap the crumbs. You should still be able to slightly see the cake underneath.
What kind of frosting is best for a crumb coat?
Generally, any frosting you plan to use for the final layer will work for the crumb coat. However, a slightly thinner consistency can make application easier.
How long should I chill the cake after applying the crumb coat?
Chilling is essential after the crumb coat. Typically, 20-30 minutes in the freezer or 45-60 minutes in the refrigerator is sufficient to firm up the frosting.
What if my crumb coat still has some crumbs showing through?
Don't worry! That's perfectly normal. The goal is to minimize the crumbs. After chilling, you can apply the final layer of frosting, which will completely cover any remaining imperfections and create a smooth, professional finish.
Final Reflection: The Transformative Power of the Crumb Coat
Mastering the crumb coat isn't just about achieving flawlessly smooth frosting; it's about unlocking a world of creative baking possibilities. The seemingly simple technique detailed in this article represents a fundamental shift in how we approach cake decorating, moving from frustration to effortless elegance. This isn't just about aesthetics; it's about empowerment, allowing bakers of all skill levels to confidently create stunning cakes.
The impact of the crumb coat extends far beyond the individual cake. It's a symbol of the power of incremental improvement, a testament to the idea that even the smallest technique can dramatically elevate the final product. This resonates deeply with me, as I've witnessed firsthand the joy and confidence that mastering this technique brings to bakers. The difference between ordinary and extraordinary is that little extra.
This quote perfectly encapsulates the transformative power of the crumb coat – that little extra effort yields extraordinary results.
Now, I invite you to take this knowledge and apply it to your own baking journey. Don't be afraid to experiment, to embrace the imperfections, and to celebrate the small victories along the way. The next time you face a blank canvas of cake, remember the power of the crumb coat – a simple technique that unlocks a world of creative potential. Go forth and create something beautiful!
Unleash Your Inner Cake Boss: Master the Crumb Coat!
Thanks for diving into the world of flawlessly frosted cakes! You've just unlocked a secret weapon for baking success: the crumb coat. Now it's time to put your new knowledge into practice.
- Bake a masterpiece! Try your hand at a cake this weekend, using the crumb coat technique you just learned. Don't be afraid to experiment with different flavors and frostings.
- Share your creations! Post a picture of your perfectly frosted cake on social media and tag us – we'd love to see your baking journey!
- Explore our other cake decorating tutorials to discover even more baking magic.
What delicious cake will you create with your newfound crumb coat skills?