
Simple Dot Borders and Patterns

Welcome to BakeWithEase, where baking becomes a joy, not a chore! Are you ready to elevate your creations with a touch of elegance? In this article, we'll delve into the surprisingly simple world of easy dot border patterns. Discover how these charming embellishments can transform ordinary baked goods into extraordinary masterpieces, adding a professional finish that will wow your friends and family. Intrigued? Let's get started and unlock the secrets to beautiful, edible art!
- Mastering Cake Decorating with Dot Borders
- Why Choose Dot Borders for Your Cakes?
- Essential Tools and Supplies for Creating Dot Borders
- Step-by-Step Guide: Creating Basic Dot Borders
- Easy Dot Border Pattern Ideas for Beginners
- Intermediate Dot Border Techniques and Patterns
- Advanced Dot Border Techniques for Experienced Bakers
- Troubleshooting Common Dot Border Problems
- Dot Border Inspiration: Cake Decorating Gallery
- Elevate Your Cakes with Simple Dot Borders: Conclusion
-
Frequently Asked Questions
- What exactly are easy dot border patterns, and why are they used in baking?
- What kind of icing is best for creating dot border patterns?
- Are there any specific tools needed to create these dot borders?
- What are some simple dot border pattern ideas for beginners?
- How can I prevent my dot borders from looking messy or uneven?
- Final Reflection: The Enduring Allure of Simple Dot Borders
- Unleash Your Inner Pastry Artist!
Mastering Cake Decorating with Dot Borders
Why Choose Dot Borders for Your Cakes?
The Simplicity and Elegance of Dot Borders
Dot borders offer a wonderfully straightforward yet visually stunning way to finish a cake. Unlike intricate piping techniques that require years of practice, creating simple dot borders relies on just a few basic principles and tools. This accessibility makes them perfect for bakers looking to elevate their cake designs without feeling overwhelmed. The elegance of a perfectly placed dot lies in its uniformity and rhythm, providing a clean, polished look that can complement almost any cake style, from rustic naked cakes to smooth fondant finishes.
Furthermore, the ease of execution means you can quickly add a professional touch. For instance, finishing the edge of a simple round cake with a border of evenly spaced dots using buttercream takes significantly less time and skill than piping complex shells or rosettes. This efficiency is a huge benefit when decorating multiple cakes or working within a limited timeframe, proving that beautiful cake decorating doesn't always require hours of elaborate work.
Dot Borders: A Beginner-Friendly Cake Decorating Technique
Learning how to pipe easy dot border patterns is often one of the first techniques bakers master after achieving consistent icing. The fundamental action involves simply applying even pressure to a piping bag fitted with a round tip, allowing a dot of icing to form, and then quickly releasing the pressure while pulling straight up. This simple squeeze-release motion is much easier to control than the continuous flow needed for lines or swirls.
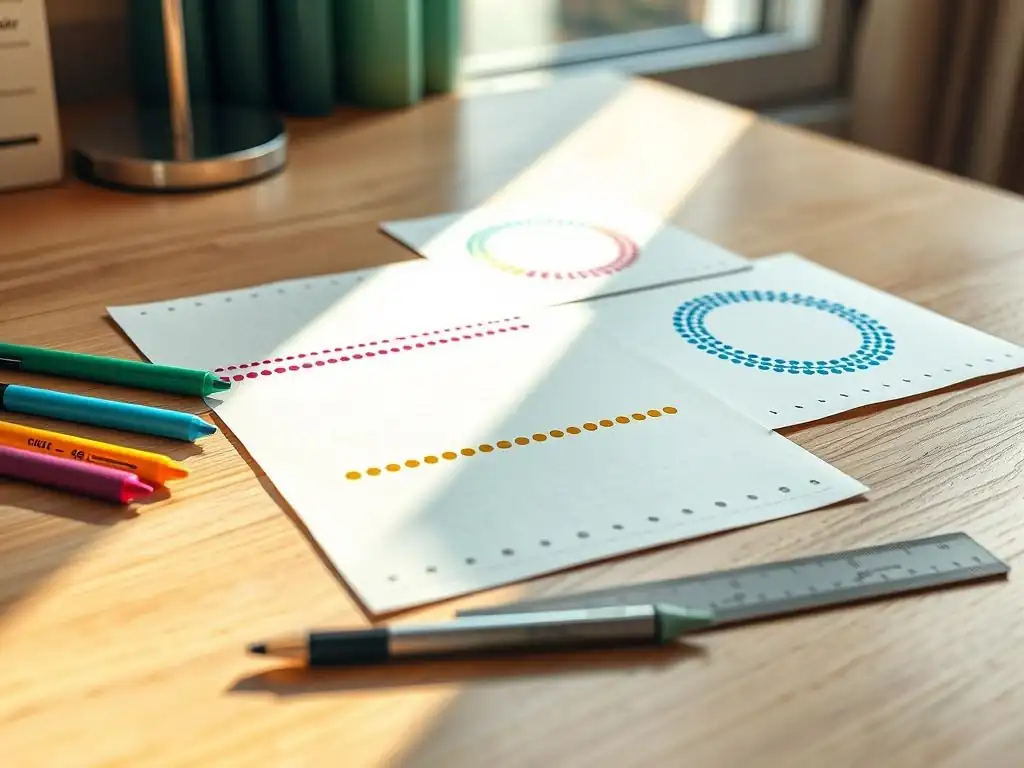
Many beginners start by practicing on parchment paper taped to a surface, creating rows and clusters of dots to get a feel for the pressure needed and how the icing behaves. Within just a few minutes of practice, most individuals can achieve reasonably consistent dots. This low barrier to entry makes easy dot border patterns an ideal starting point for anyone new to cake decorating, building confidence before moving on to more complex designs.
Versatility of Dot Patterns: From Classic to Modern Designs
The humble dot is incredibly versatile. By simply changing the size of the piping tip, the spacing between dots, or the color of the icing, you can create a vast array of effects. A border of small, tightly packed dots can look delicate and traditional, perfect for a vintage-inspired cake. Conversely, large, widely spaced dots in bold colors can give a cake a playful, modern, or even minimalist aesthetic.
Consider the impact of color: using a single color for the dots creates a cohesive look, while alternating two or more colors can add vibrancy and pattern. For example, on a white cake, a border of alternating navy and gold dots feels sophisticated and contemporary, whereas a border of pastel pink dots provides a soft, classic feel. The ability to adapt easy dot border patterns to suit any theme or occasion truly highlights their design flexibility.
Essential Tools and Supplies for Creating Dot Borders
Piping Bags and Round Piping Tips for Dot Borders
The foundation of creating perfect dots lies in using the right tools: a piping bag and a round piping tip. Piping bags come in various materials, including disposable plastic, reusable silicone, and cloth. Disposable bags are convenient for easy cleanup, while reusable bags are more environmentally friendly. For easy dot border patterns, any standard piping bag will work well.
The critical component is the round piping tip. These tips are identified by numbers, with lower numbers indicating smaller openings and higher numbers indicating larger openings. Common sizes for dot borders range from a small Wilton #3 or #5 for delicate dots, up to a larger #10 or #12 for more prominent, bold dots. Having a small selection of these round tips allows you to experiment with different dot sizes and find the one that best suits your design vision.
Achieving the Right Icing Consistency for Perfect Dots
The success of your dot borders heavily depends on the consistency of your icing. For well-defined dots that hold their shape without drooping or spreading, you need a medium-stiff consistency. If the icing is too thin, the dots will flatten and lose their shape as soon as you pipe them. If it's too thick, it will be difficult to pipe smoothly, and the dots might have jagged edges or peaks that are hard to get rid of.
A good test for medium-stiff consistency is to scoop some icing into a spoon and turn it upside down; it should stay put or fall off in a single, cohesive blob after a few seconds. If it drips off immediately, it's too thin. If it doesn't budge at all, it's likely too stiff. You can adjust consistency by adding a tiny amount of liquid (like milk or water) to thin it or a bit more powdered sugar or cornstarch to thicken it, mixing thoroughly each time until you reach the desired state.
Gel Food Coloring for Vibrant Dot Border Designs
When adding color to your icing for dot borders, gel food coloring is the preferred choice over liquid food coloring. Liquid colors can alter the consistency of your icing by adding too much moisture, potentially making it too thin for piping defined dots. Gel colors, on the other hand, are highly concentrated, meaning you need only a small amount to achieve vibrant hues, thus minimally impacting the icing's texture.
Start by adding just a tiny drop of gel color to your icing using a toothpick, then mix thoroughly. Add more color gradually until you achieve the desired shade. For very deep or bright colors, you may need a bit more, but always add it incrementally. Using gel colors ensures your easy dot border patterns pop with rich, true colors without compromising the structural integrity of your piped dots.
Step-by-Step Guide: Creating Basic Dot Borders
Preparing Your Cake and Icing for Dot Borders
Before you begin piping your easy dot border patterns, ensure your cake is properly prepared. The cake should be fully cooled and ideally have a crumb coat applied and chilled. A smooth, firm surface provides the best base for piping, allowing you to pipe evenly and correct any mistakes more easily. Your final layer of frosting should also be smooth and set, whether it's buttercream, ganache, or another icing type suitable for piping.
Next, prepare your icing. Ensure it is the correct medium-stiff consistency as discussed earlier. Color it if desired using gel food coloring. Fill your piping bag fitted with the chosen round tip (e.g., a Wilton #5 for a standard dot size). Do not overfill the bag; fill it about two-thirds full, then twist the top to seal and push the icing down towards the tip, removing any air bubbles.
Mastering the Dot Piping Technique: A Visual Guide
The basic dot piping technique is simple: Position the tip of the piping bag perpendicular to the cake surface, very close to where you want the dot to be. Apply steady, even pressure to the bag, allowing the icing to flow out and form a round "blob" or dot on the cake. As the dot reaches the desired size, stop applying pressure.
Crucially, while you stop squeezing, quickly pull the piping bag straight up and away from the dot. This quick pull helps break the flow of icing cleanly, leaving a nice, rounded top on your dot with minimal peak. If you pull away too slowly or at an angle, you might drag the icing, creating a tail or an uneven shape. Practice this squeeze-stop-pull motion a few times on parchment paper before attempting it on your cake.
Achieving Uniform Dot Size and Spacing
Consistency is key to creating appealing easy dot border patterns. Aim for dots that are roughly the same size. This is primarily controlled by the amount of pressure you apply and how long you apply it. More pressure or longer squeezing time results in larger dots. Practice will help you develop a feel for the right amount of pressure needed for your desired dot size with your chosen tip.
Maintaining even spacing between dots is also crucial for a neat border. You can eyeball this, but for greater accuracy, especially when starting out, consider marking your cake lightly with a toothpick or scribe tool to indicate where each dot should go. For a bottom border, you might mark points every half-inch or inch around the base. For a border around the top edge, mark points evenly spaced along the circumference. This helps ensure your easy dot border patterns look professional and symmetrical.
Easy Dot Border Pattern Ideas for Beginners
Classic Single Dot Border: A Timeless Design
The classic single dot border is the simplest and most enduring pattern. It involves piping a single row of evenly sized dots along the edge of the cake, most commonly around the base or the top perimeter. This pattern is incredibly versatile and works well on cakes of any size or shape. Using a medium-sized tip like a Wilton #7 or #9 creates a noticeable yet understated border.
This pattern is particularly effective when using a contrasting color to the cake's main frosting, making the border stand out. For example, a vibrant red dot border on a white vanilla cake for a holiday theme, or a dark chocolate dot border on a pale pink cake for a charming look. It's the perfect pattern to start with when learning easy dot border patterns, as it focuses solely on mastering the basic dot technique and consistent spacing.
Two-Tone Dot Border: Adding Depth and Dimension
Once you're comfortable with the single dot border, try a two-tone version. This involves alternating two different colors of icing within the same row of dots. This simple variation instantly adds visual interest, depth, and a touch of complexity without requiring advanced piping skills. You'll need two piping bags, each filled with a different colored icing of the same consistency, and the same size round tip for both.
Pipe one dot of the first color, then a dot of the second color immediately next to it, repeating the sequence around the cake. Ensure the dots are spaced evenly and are the same size for a clean look. For example, alternating light blue and white dots around the base of a cake can evoke a sky or water theme, while alternating black and white creates a bold, graphic effect. This technique is still considered one of the easy dot border patterns but offers significantly more design possibilities.
Vertical Dot Border: Creating a Modern Look
Moving beyond horizontal borders, vertical dot borders offer a fresh, modern take on this classic technique. Instead of piping dots along the circumference, you pipe rows of dots vertically down the sides of the cake. This can be done as a single row, multiple rows, or even covering the entire side of the cake with a grid of dots. This technique works best on cakes with relatively straight sides.
To create a vertical dot border, start at the top edge of the cake and pipe a dot, then move down directly below the first dot and pipe another, continuing in a straight line to the bottom edge. You can space the vertical rows as desired. A single row of large dots spaced several inches apart creates a minimalist look, while multiple closely spaced rows of smaller dots can create a textured effect. This variation proves that easy dot border patterns aren't limited to traditional styles.
Intermediate Dot Border Techniques and Patterns
Layered Dot Borders: Building Height and Texture
Layered dot borders add a wonderful sense of depth and texture to your cake design. This technique involves piping multiple rows of dots, with each subsequent row slightly overlapping the row below it. This creates a cascading or layered effect that is more visually dynamic than a single flat row of dots. It works well at the base of the cake or around the top edge.
Start by piping your first row of dots along the desired edge. Then, pipe a second row directly above the first, positioning each new dot so its bottom edge slightly overlaps the top edge of a dot in the row below. Continue adding rows, slightly overlapping each time, until you achieve the desired height. Using different shades of the same color (ombre effect) or alternating colors in the layers can enhance the visual interest of this easy dot border pattern variation.
Swirl Dot Border: Adding Movement and Flair
A swirl dot border introduces movement and a slightly more organic feel compared to perfectly spaced individual dots. This pattern involves piping dots and then, while the icing is still fresh, gently swirling the tip of a toothpick or small offset spatula through the center of each dot. This pulls the icing slightly, creating a soft swirl effect within the dot.
Pipe a row of dots as you normally would, but work in small sections (e.g., 3-4 inches at a time) so the icing doesn't crust over before you swirl it. Immediately after piping a dot, take your swirling tool and gently make a small circular motion in the center of the dot. Clean your tool frequently to prevent dragging excess icing. This technique transforms easy dot border patterns into something more artistic and flowing.
Geometric Dot Patterns: Creating Modern Designs
Beyond simple linear borders, dots can be used to create striking geometric patterns on the sides or top of a cake. This involves mapping out a design – such as chevrons, stripes, diamonds, or even polka dots covering the entire surface – and then filling in the pattern using piped dots. This requires a bit more planning and precision than a simple border.
You might lightly mark your pattern onto the cake surface using a ruler and a scribe tool before piping. For example, to create a diamond pattern, mark a grid of intersecting diagonal lines. Then, pipe a dot at each intersection point and/or within each diamond shape formed by the lines. Using different sized dots or colors within the pattern can further enhance the geometric effect. While more complex than a basic border, using dots for geometric shapes is still relatively straightforward compared to intricate piping, making it an accessible intermediate technique.
Advanced Dot Border Techniques for Experienced Bakers
Using Stencils for Complex Dot Patterns
For highly intricate or perfectly symmetrical dot patterns, experienced bakers can leverage stencils. Cake stencils, often made of thin plastic, have cut-out designs that can be transferred onto the cake surface. While stencils are commonly used with royal icing or airbrushing, they can also guide the placement of dots, especially for repeating motifs or complex overall patterns on the side of a cake.
To use a stencil with dots, secure the stencil against the side of your chilled, firm-frosted cake. Instead of spreading icing over the stencil, use it as a guide to pipe dots directly onto the cake through the openings or along the edges of the cut-outs. For instance, a damask stencil could guide you to pipe small dots following the curves of the pattern. This method allows for creating patterns that would be extremely difficult to freehand, taking dot borders to a new level of precision.
Combining Dot Borders with Other Decorating Techniques
Advanced cake decorators often combine dot borders with other piping techniques to create multi-layered and visually rich designs. For example, a simple dot border around the base might be paired with piped swirls or rosettes on top, or dots could be used to fill in spaces between other elements like piped lines or basketweave patterns.
Consider using dots as accents within a larger design. Small dots can resemble pearls or beads when piped with white or metallic icing, adding a touch of elegance to floral arrangements or piped swags. Larger dots can serve as the base for attaching small sugar flowers or other edible decorations. The dot's fundamental simplicity makes it an excellent complementary element to more complex piping or fondant work.
Creating 3D Dot Effects
Beyond flat or slightly raised dots, experienced decorators can create 3D dot effects. One method involves layering dots directly on top of each other, building up height to create spheres or half-spheres. This requires a very stiff icing consistency and careful, steady piping, allowing each layer to set slightly before adding the next.
Another 3D technique is using dots to create texture across the entire cake surface, sometimes called "beadwork" or "pearls." By piping thousands of small, uniform dots tightly packed together over a section or the entire cake, you can create a raised, textured finish that mimics fabric or beads. This is time-consuming and requires significant control over dot size and placement but results in a stunning, tactile effect that transforms easy dot border patterns into high-level artistry.
Troubleshooting Common Dot Border Problems
Icing Too Thick or Thin: Adjusting Consistency
One of the most frequent issues when piping easy dot border patterns is incorrect icing consistency.
- Icing too thin: Dots won't hold their shape; they'll spread and flatten into puddles.
- Icing too thick: Hard to squeeze from the bag; dots will have sharp peaks or irregular shapes that don't settle.
To fix thin icing, gradually mix in more powdered sugar or a thickener like cornstarch (a teaspoon at a time for a standard batch). For thick icing, add liquid very sparingly – a tiny drop of milk, water, or clear extract (like vanilla or almond) at a time, mixing well after each addition until the desired consistency is reached. Always test on parchment paper before piping on the cake.
// Adjusting Icing Consistency
If icing is too thin:
  Add powdered sugar (1/4 cup increments) OR cornstarch (1 tsp increments).
  Mix thoroughly. Test.

If icing is too thick:
  Add liquid (milk/water/extract - 1/4 tsp increments).
  Mix thoroughly. Test.
Uneven Dot Size: Tips for Consistency
Achieving uniform dot size is a skill that improves with practice, but unevenness is a common problem. The primary cause is inconsistent pressure on the piping bag or varying the length of time pressure is applied for each dot.
To improve consistency:
- Ensure your icing consistency is perfect – medium-stiff.
- Hold the bag the same way for each dot.
- Focus on applying the same amount of pressure for the same amount of time for every dot. A quick "squeeze-stop-pull" motion of consistent duration is key.
- Practice on parchment paper first, trying to make rows of identical dots. Don't move to the cake until you feel comfortable.
- If necessary for critical areas, gently reshape slightly uneven dots with a clean, damp fingertip or small offset spatula immediately after piping, before the icing crusts.
- [ ] Check icing consistency.
- [ ] Practice squeeze-stop-pull motion on parchment paper.
- [ ] Maintain consistent pressure and timing for each dot.
- [ ] Gently reshape dots if needed immediately after piping.
Preventing Icing Bleeding: Color Management
Icing colors, particularly dark or vibrant ones, can sometimes "bleed" into lighter colors or the base frosting, especially in humid conditions or if the cake is stored for a long time. This can ruin the crisp look of your easy dot border patterns.
Tips to prevent bleeding:
- Use high-quality gel food colors. Cheaper colors are more prone to bleeding.
- Color your icing in advance (several hours or even a day) and let it sit. Sometimes, colors will deepen as they sit, meaning you might need less color overall, reducing the risk of bleeding.
- For very dark colors like black or red, use a special "no-taste red" or "super black" color designed to achieve intense shades without needing excessive amounts of dye. Some bakers also add a tiny amount of cocoa powder to dark colors to help stabilize them.
- Ensure your base frosting is well-crusted or firm before piping the dots onto it.
- Avoid excessive moisture on the cake surface.
- Store the finished cake in a cool, dry environment if possible.
Dot Border Inspiration: Cake Decorating Gallery
Examples of Cakes Decorated with Dot Borders
Imagine a classic white wedding cake tier finished with a delicate border of small, pearl-like dots around the base, adding a touch of understated elegance. Or picture a vibrant child's birthday cake with large, colorful dots in primary colors marching around the middle, giving it a fun, playful look. These are just a couple of ways easy dot border patterns are used.
Consider a sophisticated chocolate cake: a simple border of contrasting white buttercream dots creates a clean, modern edge that frames the rich dark frosting beautifully. On a tiered cake, you might use a different dot size or pattern on each tier – perhaps a single row of medium dots on the bottom, smaller dots on the middle, and tiny dots on the top, creating visual interest while maintaining a cohesive theme.
Showcasing Unique and Creative Dot Border Designs
Beyond the basics, decorators get creative with dots. One unique approach is using different sized dots within the same border, creating a gradient effect from large to small, or alternating sizes for a whimsical look. Another is using metallic or glittery edible dust brushed onto the dots after they've crusted slightly, turning simple dots into sparkling jewels.
Some designs incorporate dots into specific shapes or motifs, like using tiny dots to create a lace-like pattern, or arranging dots to form flowers or abstract shapes across the cake surface. The versatility of easy dot border patterns truly allows for endless creativity, from minimalist chic to elaborate artistic expressions, all stemming from that fundamental piping technique.
Chocolate Cake with Vanilla Dot Border Recipe
Here’s a simple recipe for a basic chocolate cake and instructions for making a vanilla buttercream perfect for piping easy dot border patterns.
Simple Chocolate Cake
- Yields: One 8-inch round cake layer
- Prep time: 20 minutes
- Bake time: 30-35 minutes
Ingredients:
- 1 3/4 cups all-purpose flour
- 1 3/4 cups granulated sugar
- 3/4 cup unsweetened cocoa powder
- 1 tsp baking soda
- 1 tsp baking powder
- 1/2 tsp salt
- 2 large eggs
- 1 cup milk
- 1/2 cup vegetable oil
- 2 tsp vanilla extract
- 1 cup boiling water
Instructions:
- Preheat oven to 350°F (175°C). Grease and flour an 8-inch round cake pan.
- In a large bowl, whisk together flour, sugar, cocoa, baking soda, baking powder, and salt.
- Add eggs, milk, oil, and vanilla extract. Beat with an electric mixer on medium speed for 2 minutes.
- Carefully stir in the boiling water (batter will be thin).
- Pour batter into prepared pan.
- Bake 30-35 minutes, or until a wooden skewer inserted into the center comes out clean.
- Let cool in the pan for 10 minutes, then invert onto a wire rack to cool completely.
Vanilla Buttercream for Piping
- Yields: Approx. 3 cups
- Prep time: 10 minutes
Ingredients:
- 1 cup (2 sticks) unsalted butter, softened
- 4 cups powdered sugar, sifted
- 1/4 cup milk or heavy cream
- 1 tsp vanilla extract
- Pinch of salt (optional)
Instructions:
- In a large bowl, beat softened butter with an electric mixer until creamy.
- Gradually add sifted powdered sugar, alternating with milk/cream and vanilla extract, beating on low speed until combined, then on medium speed until light and fluffy. Add salt if using.
- If too thick for piping easy dot border patterns, add milk/cream 1 tsp at a time. If too thin, add more sifted powdered sugar 1/4 cup at a time. Beat until desired medium-stiff consistency is reached.
- Transfer a portion to a piping bag fitted with a round tip (e.g., Wilton #7) and pipe dots onto the cooled chocolate cake as desired.
Elevate Your Cakes with Simple Dot Borders: Conclusion
Mastering easy dot border patterns is an accessible and rewarding step in your cake decorating journey. From the straightforward elegance of a single row to the dynamic possibilities of layered or geometric designs, dots offer a fantastic way to add polish, texture, and visual interest to any cake. With just a few basic tools and a bit of practice, you can confidently apply this versatile technique.
Whether you're a beginner looking for a simple way to finish your first decorated cake or an experienced baker seeking a clean, modern aesthetic, easy dot border patterns provide a reliable and beautiful solution. Experiment with different tip sizes, colors, and spacing to find your signature style. The simple dot, often overlooked, is truly a powerhouse in the world of cake decorating, ready to transform your baked creations into edible works of art.
Frequently Asked Questions
What exactly are easy dot border patterns, and why are they used in baking?
Easy dot border patterns are simple decorative designs created using dots of icing or other edible materials. They're often used to add visual appeal to cakes, cookies, and other baked goods, and are easy to create.
What kind of icing is best for creating dot border patterns?
Royal icing is generally considered the best icing for dot borders because it holds its shape well and dries firm. Buttercream can also be used, but it's less stable and may require chilling.
Are there any specific tools needed to create these dot borders?
While you can use a piping bag and tip, a simple squeeze bottle or even a toothpick can be used for smaller dots. The size of the tip will determine the size of the dots.
What are some simple dot border pattern ideas for beginners?
Beginners can start with basic patterns like a single row of dots, alternating sizes, or simple scallops. Practicing on parchment paper first is a great way to improve technique.
How can I prevent my dot borders from looking messy or uneven?
Consistent pressure when piping and a steady hand are key. Practicing beforehand and using a template as a guide can help ensure even spacing and a clean, professional look.
Final Reflection: The Enduring Allure of Simple Dot Borders
The seemingly simple act of arranging dots into borders and patterns holds a surprising power; it's a testament to the beauty found in minimalism and a potent reminder of the creative potential within readily available tools. From ancient cave paintings to modern digital art, the humble dot has consistently served as a foundational element in visual expression, proving its enduring relevance in today's fast-paced, visually saturated world.
The impact of simple dot patterns extends far beyond mere aesthetics. They represent a democratization of art, accessible to anyone with a pen and paper, or a digital stylus. They offer a quiet meditative practice, a space for focused creativity that can be both calming and invigorating. Art washes away from the soul the dust of everyday life.
– Pablo Picasso. This quote, while referring to art in a broader sense, perfectly encapsulates the restorative and refreshing quality inherent in the simple act of creating dot patterns.
Now, consider your own creative journey. What simple elements can you use to express yourself? Don't underestimate the power of the seemingly insignificant; the next time you feel overwhelmed or uninspired, pick up a pen, open a digital art program, and let the simple elegance of dots guide you. Experiment with different arrangements, sizes, and colors. Discover the unique beauty you can create with this accessible and timeless art form. Let the dots lead you to your own personal masterpiece.
Unleash Your Inner Pastry Artist!
Thanks for taking the time to explore the world of simple dot borders and patterns! We hope you've discovered some fresh inspiration to elevate your baking creations. Ready to put your newfound skills to the test?
- Master a new dotting technique: Choose your favorite pattern from the article and try it out on your next batch of cookies or cupcakes. Challenge yourself to create a unique variation!
- Share your masterpiece: Snap a picture of your decorated treats and share them on social media using #BakeWithEaseDots! We'd love to see your beautiful work.
- Explore pattern possibilities: Experiment with different colors, sizes, and tools to discover endless variations on these simple techniques. What new designs can you create?
Ready to transform your baking from ordinary to extraordinary? What unique dot pattern will you create next?