
Level Up Your Cakes: How to Torte Perfectly

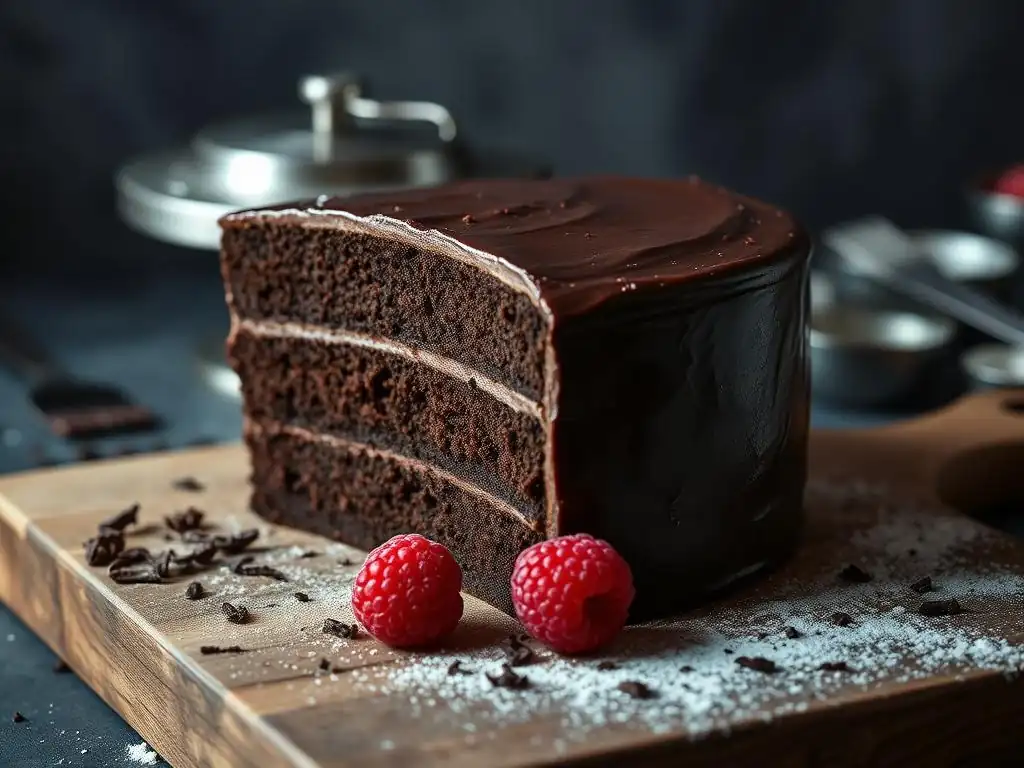
Welcome to BakeWithEase, where every baker finds their sweet spot! Ever dream of creating a show-stopping cake with impeccable layers and a flawless finish? You're in the right place. Today, we're diving deep into the art of torting, unlocking the secrets to a perfectly layered chocolate cake recipe and transforming your baking skills from good to gourmet. Curious how to achieve professional-looking results at home? Let's get started!
- Introduction: Achieving Perfectly Layered Chocolate Cake with Ease
- Understanding the Basics of Cake Torting
- Step-by-Step Guide to Torting a Chocolate Cake Perfectly
- Tips and Tricks for Torting Different Types of Cakes
- Troubleshooting Common Torting Problems
- Perfect Layered Chocolate Cake Recipe: Putting Your Skills to the Test
- Mastering Cake Torting: Beyond the Basics
- Conclusion: Creating Impressive Cakes with Perfect Layers
-
Frequently Asked Questions
- How exactly does BakeWithEase define "torting" a cake?
- Why is torting especially important for a perfectly layered chocolate cake recipe?
- What tools does BakeWithEase recommend for achieving a clean, even torte?
- What common mistakes do people make when torting a cake, and how can BakeWithEase help avoid them?
- Besides the recipe, what other resources does BakeWithEase offer to help me master baking skills?
- Final Reflection: The Art and Joy of the Perfectly Layered Cake
- Unleash Your Inner Torte Artist!
Introduction: Achieving Perfectly Layered Chocolate Cake with Ease
Creating a stunning, multi-layered cake might seem like a daunting task, but with the right technique, it's entirely achievable for bakers of all levels. The secret often lies in a fundamental skill called torting. This process allows you to transform a single cake layer into multiple thinner layers, providing more surface area for delicious frosting and fillings, ultimately leading to a more impressive and flavorful result. Whether you're aiming for a classic vanilla or a rich, perfectly layered chocolate cake recipe, mastering torting is your next step to cake-decorating success.
At BakeWithEase, we believe that every baker can create beautiful and delicious cakes. Torting is a skill that elevates your creations from simple baked goods to show-stopping centerpieces. It's not just about aesthetics; thinner, evenly torted layers ensure a better cake-to-filling ratio in every bite, enhancing the overall taste and texture experience. Let's dive into how you can torte your cakes like a pro, setting the foundation for that exquisite perfectly layered chocolate cake recipe you've been dreaming of.
Why Torting is Essential for a Stunning Cake
Torting is the key technique that allows bakers to build towering, multi-layered cakes that are both visually impressive and structurally sound. By slicing a single cake round horizontally into two or more thinner discs, you dramatically increase the potential for filling and frosting, which are often the most flavorful components of a cake.
Imagine a standard 2-inch tall cake layer; torting it into two 1-inch layers instantly doubles the surface area available for your favorite ganache, buttercream, or fruit filling. This simple step is what differentiates a basic cake from a truly spectacular one, especially when crafting a perfectly layered chocolate cake recipe where rich chocolate flavor is enhanced by creamy frosting between layers.
Beyond aesthetics and flavor, torting also allows for more even saturation if you're using a simple syrup or other liquid to moisten your cake layers. Thinner layers absorb moisture more uniformly, preventing soggy spots or dry patches. This precision in preparation contributes significantly to the overall quality and texture of your final product. Furthermore, torting can help level a slightly domed cake top, ensuring each layer is flat and stacks perfectly, preventing leaning towers of cake despair. It's a foundational skill that opens up a world of decorating possibilities, from simple naked cakes to intricate tiered designs.
BakeWithEase's Guide to Torting Like a Pro
BakeWithEase is here to guide you through the process of torting with simple, step-by-step instructions and helpful tips. We'll cover everything from choosing the right tools to executing the cuts with precision, ensuring you feel confident tackling any cake, including your next perfectly layered chocolate cake recipe. Our approach focuses on making complex techniques accessible, breaking them down into manageable steps that even beginner bakers can follow successfully. We understand that handling a delicate cake layer can be nerve-wracking, and we'll provide tips to minimize crumbling and breakage.
This guide is designed to equip you with the knowledge and techniques needed to achieve consistently even and clean cake layers every time. We'll highlight common pitfalls and how to avoid them, ensuring your torting experience is smooth and successful. By the end of this guide, you'll have the skills to confidently prepare your cake layers for assembly, setting the stage for creating a truly memorable dessert, whether it's a simple snack cake or an elaborate perfectly layered chocolate cake recipe for a special occasion. Let's gather our tools and get started on the path to perfect cake layers!
Understanding the Basics of Cake Torting
Before you even think about picking up a knife, it's crucial to understand what torting entails and why it's such a vital step in creating impressive cakes. Torting isn't just randomly slicing a cake; it's a deliberate process aimed at creating uniform layers for optimal structure, flavor distribution, and visual appeal. Grasping the fundamentals will make the actual cutting process much easier and significantly improve the outcome of your perfectly layered chocolate cake recipe or any other cake you choose to decorate.
Knowing the why behind torting helps you appreciate the how. It's about maximizing the potential of your baked cake, turning a single entity into a canvas for creativity. Understanding the impact of layer thickness on the final cake structure and taste profile will empower you to make informed decisions during the process, ensuring that each layer contributes positively to the overall harmony of your perfectly layered cake creation.
What is Cake Torting and Why Does It Matter?
Cake torting, simply put, is the technique of slicing a single cake layer horizontally into two or more thinner layers. The term comes from the French word 'torte,' which traditionally refers to a rich, multi-layered cake or pastry. While the term's origin points to the finished product, in modern baking, "torting" specifically refers to this slicing process.
The primary goal is to increase the number of layers in a cake, thereby increasing the ratio of filling and frosting to cake, which is essential for creating those tall, decadent cakes often seen in bakeries and on social media. For a perfectly layered chocolate cake recipe, this means more space for luscious chocolate ganache or creamy chocolate buttercream between tender cake layers.
Why does it matter? Beyond the aesthetic appeal of a tall, layered cake, torting significantly enhances the eating experience. More layers mean more opportunities for delicious fillings and frostings, ensuring that each bite is a delightful mix of cake and complement.
This is particularly important for dense or intensely flavored cakes, where a bit of creamy frosting can balance the richness. Furthermore, torting allows you to level uneven cake tops and remove any slightly dry edges, resulting in consistently moist and flat layers that stack neatly, preventing your perfectly layered cake from leaning or collapsing. It's a foundational skill for anyone serious about cake decorating.
Essential Tools for Torting Your Chocolate Cake
Having the right tools makes the torting process infinitely easier and more precise. While it's possible to torte a cake with just a good knife, using specialized tools can help ensure your layers are consistently even and straight. For your perfectly layered chocolate cake recipe, precision is key to achieving that professional finish. Investing in or simply having access to a few key items will dramatically improve your torting results and save you frustration.
Consider this a small investment in your baking toolkit that pays off with every beautifully layered cake you create. From the initial leveling to the final separation of layers, the right equipment provides the stability and guidance needed to make clean, even cuts, regardless of the cake's texture or size.
The Importance of a Serrated Knife for Clean Cuts
A long, serrated knife is arguably the most crucial tool for torting a cake freehand. The serrations act like tiny saw blades, allowing the knife to glide through the cake with minimal tearing or crumbling, especially important for tender cakes like a delicate chocolate sponge. A straight-edged knife tends to push and compress the cake, leading to uneven cuts and excessive crumbs. Look for a knife with a blade long enough to span the diameter of your cake in a single pass – typically 10 to 12 inches is ideal for most standard cake sizes (8-inch or 9-inch rounds).
Using a serrated knife with a gentle sawing motion, rather than pressing down, allows you to make a clean, straight cut across the cake. This technique minimizes distortion of the cake's structure and ensures that your layers are smooth and ready for frosting or filling. It's the workhorse tool for achieving those clean lines necessary for a perfectly layered cake.
Using Cake Levelers for Consistent Cake Layers
For guaranteed evenness, a cake leveler is an invaluable tool. These adjustable wire cutters allow you to set the desired height for your cake layers (often measured in inches or centimeters, from about 0.5 to 2 inches) and then simply pull the wire through the cake. This ensures that each layer is precisely the same thickness, which is critical for a stable, perfectly layered chocolate cake. There are different types, from simple wire frames to more robust adjustable models.
While a serrated knife relies on your steady hand and eye, a cake leveler provides mechanical consistency. It's particularly helpful when torting multiple layers from a single cake (e.g., splitting a 2-inch tall cake into three layers, each approximately 0.67 inches thick) or when needing multiple layers of exactly the same height for a tiered cake. Using a leveler significantly reduces the risk of uneven layers that can lead to a lopsided perfectly layered cake.
Turntables and Rulers: Ensuring Even Torting
A cake decorating turntable isn't just for frosting; it's incredibly useful during the torting process, especially when using a serrated knife. Placing your cooled cake on a turntable allows you to rotate the cake smoothly as you cut, keeping your knife hand stationary and ensuring a straight, continuous cut all the way around. This technique minimizes the risk of your knife drifting upwards or downwards, resulting in a wedge-shaped layer.
A ruler or measuring tape can also be helpful, particularly when freehand torting with a knife. You can use it to make small marks around the perimeter of the cake at the desired height before you begin cutting. For example, if you want two 1-inch layers from a 2-inch cake, you'd make marks 1 inch up from the base. These marks act as a guide as you slice, helping you maintain a consistent level around the cake, crucial for achieving a perfectly layered cake.
Step-by-Step Guide to Torting a Chocolate Cake Perfectly
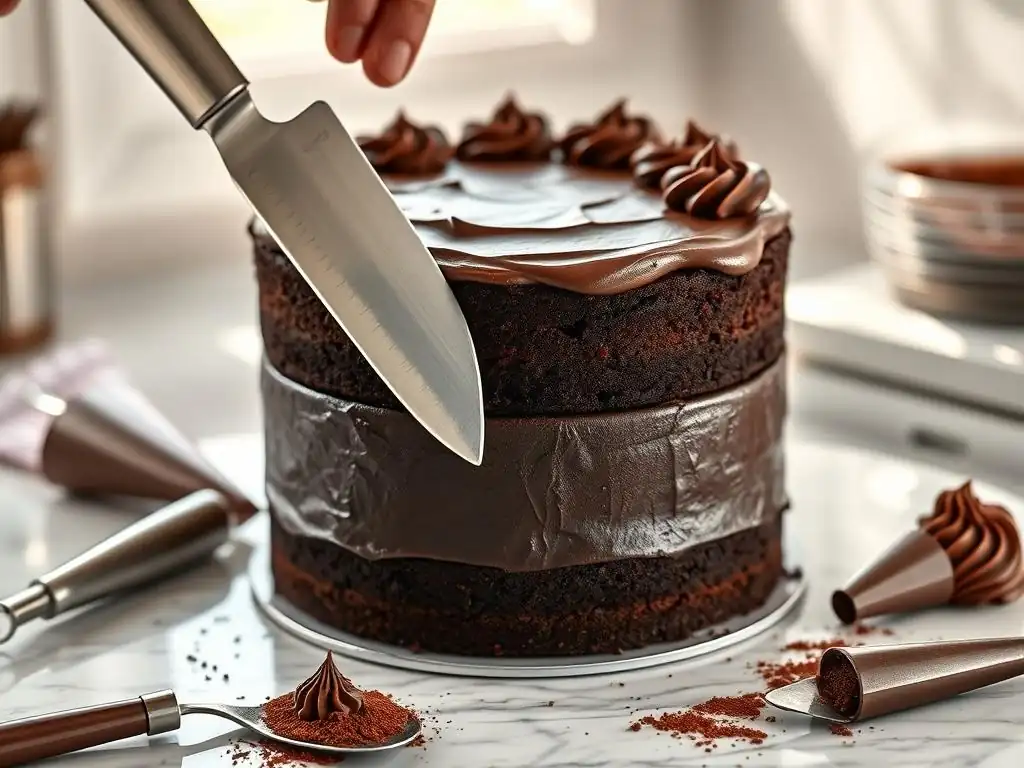
Now that you understand the basics and have your tools ready, let's walk through the process of torting your chocolate cake. This step-by-step guide is designed to make the process straightforward, ensuring you achieve perfectly level layers every time, setting the stage for an exquisite perfectly layered chocolate cake recipe. Precision and patience are your allies here.
Follow these steps carefully, and you'll be well on your way to mastering the art of torting. Remember, practice makes perfect, so don't worry if your first attempt isn't absolutely flawless. Each cake you torte will build your confidence and skill.
Step 1: Cooling Your Cake Completely for Optimal Results
This is perhaps the most critical, yet often overlooked, step in successful torting: ensure your cake is completely cool. Attempting to torte a warm or even slightly warm cake is a recipe for disaster. Warm cakes are fragile, soft, and prone to crumbling and tearing when sliced. They lack the firmness needed to hold their shape under the pressure of a knife or leveler. Allowing your cake to cool fully, ideally to room temperature (around 68-72°F), makes the crumb firmer and more stable, allowing for cleaner, straighter cuts.
For best results, bake your cake ahead of time and allow it to cool in the pan for the amount specified in the recipe (usually 10-20 minutes) before inverting it onto a wire rack to cool completely. For a standard 8 or 9-inch cake, this cooling process can take anywhere from 1 to 3 hours, depending on the density and ambient temperature.
For an even firmer cake that's easier to torte, some bakers recommend chilling the cake in the refrigerator for 30-60 minutes after it has reached room temperature. This extra step can significantly reduce crumbling, particularly helpful for a delicate chocolate sponge in your perfectly layered chocolate cake recipe.
Step 2: Preparing Your Cake for Torting
Once your cake is completely cool, it's time to prepare it for slicing. This involves potentially leveling the dome and making some guiding marks if you're freehand cutting. Proper preparation ensures you start with a stable, flat base and have guides to keep your cuts even. This foundation work is essential for building a stable and perfectly layered chocolate cake.
Taking a few moments to prepare the cake surface and mark your desired layer heights will pay dividends in the accuracy and ease of your torting process. Don't rush this stage; a little planning here prevents a lot of frustration later.
Leveling the Dome: Creating a Flat Surface
Most cakes bake with a slight dome on top. While some recipes specifically aim for a flat top, many traditional recipes result in a rounded surface. For a perfectly layered cake, especially one with multiple layers, a flat top on each layer is crucial for stable stacking. Use your long serrated knife to gently slice off the dome, creating a perfectly flat surface. Hold the knife parallel to your work surface and use a gentle sawing motion, removing just enough cake to make the top level.
This trimmed-off dome, often called the "cake scrap," is perfectly edible and delicious! Save it for cake pops, trifles, or simply enjoy it as a baker's treat. Removing the dome ensures that when you stack your torted layers, they sit flush against each other, creating a clean, professional look and preventing your perfectly layered chocolate cake from looking lopsided.
Marking Your Cake for Even Layers
If you're using a serrated knife without a leveler, marking your cake provides essential guidance for an even cut. Decide how many layers you want and the approximate thickness of each. For example, to get two layers from a 2-inch tall cake, you'll want to make a mark 1 inch up from the base. Use a ruler and a toothpick or the tip of your serrated knife to make small, shallow marks around the entire circumference of the cake at the desired height.
Make these marks every inch or two around the cake's edge. These small indentations serve as a visual guide as you begin slicing. They help you keep your knife blade level and on the correct plane as you cut through the cake, significantly increasing your chances of achieving perfectly even layers without the aid of a leveler. This simple step is a game-changer for freehand torting precision, especially when working on a detailed perfectly layered chocolate cake recipe.
Step 3: The Torting Technique: Achieving Perfect Cake Layers
With your cake cooled and prepared, it's time for the main event: the torting itself. Whether you're using a knife or a leveler, the technique involves careful, controlled movements to slice through the cake cleanly and evenly. This is where your preparation pays off and leads to those coveted perfect cake layers for your perfectly layered chocolate cake recipe.
Focus on maintaining a steady hand and a consistent cutting depth. Rushing through this step is the quickest way to end up with uneven or broken layers. Patience and a smooth motion are key to success in this crucial stage of cake preparation.
Using a Serrated Knife for Precise Cuts
To torte using a serrated knife, place your cooled, leveled cake on a flat surface, ideally a cake turntable. Position the knife parallel to your work surface, aligning the blade with the marks you made around the cake's perimeter (if using). Begin slicing into the cake using a gentle sawing motion, keeping your knife as level as possible. Do not press down; let the serrations do the work.
As you cut, slowly rotate the turntable with your other hand, keeping the knife stationary relative to your body but moving through the cake. Continue sawing and rotating until you have cut all the way through the cake's center. The goal is a smooth, continuous cut that results in two (or more) separate, equally thick layers. This technique is essential for achieving those perfectly layered results in your perfectly layered chocolate cake recipe.
Rotating the Cake While Cutting
As mentioned, rotating the cake while keeping the knife relatively still is a highly effective technique for achieving straight, even cuts when using a serrated knife. Instead of moving the knife around the cake, which can lead to an inconsistent angle, place the cake on a turntable and rotate it smoothly while you maintain a steady sawing motion with the knife held parallel to the surface.
This method allows you to focus on keeping the knife level at a single point relative to your body, while the cake rotates into the blade. Think of it like using a lathe – the tool stays steady while the material spins. This simple coordination of movements dramatically reduces the likelihood of your knife wandering up or down, ensuring your perfectly layered cake starts with straight, even layers.
Utilizing a Cake Leveler for Uniform Thickness
Using a cake leveler is arguably the easiest way to guarantee perfectly uniform layers. First, adjust the leveler's wire(s) to the desired height for your layers. Many levelers have notches indicating common layer heights, often in half-inch increments (e.g., 0.5", 1", 1.5"). Ensure both sides of the wire are set to the exact same height.
Place the cake on a flat surface. Position the leveler so the wire is just touching the edge of the cake at the desired height. Holding the leveler steady with both hands, gently pull it through the cake using a back-and-forth sawing motion, similar to using a hand saw. The wire will glide through the cake, creating a perfectly flat and even layer.
Continue until the leveler has passed completely through the cake. Repeat for additional layers as needed. This tool is fantastic for consistent results, especially when preparing multiple cakes for a large perfectly layered chocolate cake or tiered structure.
Step 4: Separating and Handling Your Cake Layers
Once you've made your cuts, you're left with separate cake layers. These layers, particularly the thinner ones, can be delicate. Handling them correctly is crucial to prevent breakage and crumbling before you get to the exciting part of assembling your perfectly layered chocolate cake. Gentle, deliberate movements are key here.
Don't try to simply lift the top layer with your fingers unless the cake is very sturdy. Using the right technique for separation ensures your beautiful, evenly torted layers remain intact and ready for assembly, contributing to the overall success of your perfectly layered cake.
Gentle Handling to Prevent Crumbling
Cake layers, especially those from tender recipes like many chocolate cakes, can be fragile after torting. Avoid gripping the edges too tightly or bending the layers. The best way to separate layers is to gently slide a thin, flat object between them. A cake lifter, a large, flat spatula, or even a piece of cardboard cut slightly larger than the cake diameter works well.
Carefully slide your chosen tool under the top layer, supporting its full weight. Once fully supported, lift and transfer the layer to a separate plate or cake board. Repeat for any subsequent layers. Handle each layer as little as possible, and support it completely from underneath during transport. This minimizes stress on the cake crumb and prevents those frustrating breaks that can mar a perfectly layered chocolate cake.
Using Parchment Paper for Easy Transfer
Parchment paper can be a baker's best friend when handling torted layers. After torting a layer, you can gently slide a piece of parchment paper cut to size underneath it before transferring it. This provides extra support and makes lifting and moving the delicate layer much easier. Simply slide the parchment under the layer, then use a cake lifter or board to support the parchment and the cake together.
Alternatively, you can torte the cake directly on a piece of parchment paper. Once cut, you can often gently slide the top layer off using the parchment paper itself as a support. This is especially useful if you plan to chill the layers before stacking, as you can stack them on parchment with a piece of parchment between each layer to prevent sticking. Using parchment simplifies handling and helps keep your perfectly layered cake layers intact.
Tips and Tricks for Torting Different Types of Cakes
Not all cakes are created equal, and their differing textures require slightly different approaches to torting. A light and airy sponge cake behaves differently than a dense pound cake or a moist chocolate fudge cake. Understanding these nuances will help you adjust your technique for the best results, ensuring you can torte any cake successfully, not just your perfectly layered chocolate cake recipe.
Adapting your tools and technique based on the cake's crumb structure is a mark of a skilled baker. These tips will help you navigate the unique challenges presented by various cake types.
Torting Delicate Cakes: Preventing Breakage
Delicate cakes, such as angel food cake, chiffon cake, or very tender sponge cakes (like some types of chocolate sponge), are prone to crumbling and tearing during torting. The key here is using a very sharp serrated knife or a thin-wire cake leveler and exercising extreme gentleness. Ensure the cake is thoroughly chilled after cooling to room temperature; this firms up the delicate crumb significantly, making it less likely to tear. Chilling for at least 30-60 minutes in the refrigerator is often recommended.
When cutting, use the lightest possible sawing motion, letting the blade do the work. Avoid any downward pressure. When separating layers, always use a flat, rigid support like a cake lifter or thin cake board that covers the entire diameter of the layer. Slide it slowly and carefully between the layers. Handle these layers as little as possible and support them fully from underneath at all times to prevent them from breaking or bending, which can ruin the structure of your perfectly layered cake.
Torting Dense Cakes: Ensuring Clean Cuts
Dense cakes, like pound cake, fruitcake, or some rich mud cakes (including certain dense chocolate cake variations), are generally sturdier than delicate sponges but can still present challenges. Their density means they require more effort to cut through, and a dull knife can easily get stuck or compress the cake, leading to uneven or jagged cuts. Ensure your serrated knife is sharp.
When torting a dense cake, you can apply slightly more pressure than with a delicate cake, but still rely on a sawing motion rather than forcing the blade through. A sturdy cake leveler can be particularly effective with dense cakes as it provides mechanical force and a consistent cutting plane. Take your time and use smooth, continuous strokes. Dense cakes are less likely to crumble, but uneven cuts can still occur if you rush or use inappropriate tools, impacting the final look of your perfectly layered chocolate cake.
Torting Cakes with Fillings: Special Considerations
Some cakes are baked with fillings already in them, such as a swirl of jam, cream cheese, or nuts. Torting these cakes requires extra care to ensure the filling doesn't cause the cake to tear or the knife to drag the filling through the cake, creating a messy cut. Ensure the cake is very well chilled; this helps firm up any internal filling.
When cutting, be mindful of where the filling is located. Try to make your cut just above or below a dense area of filling if possible. Use a clean, sharp serrated knife and wipe the blade clean between cuts if necessary to prevent sticky filling from dragging. A cake leveler can sometimes work well here too, as the wire cuts cleanly through most fillings. The key is a clean, swift cut to minimize disruption to both the cake and the filling, preserving the integrity of your layers for a perfectly layered cake.
Troubleshooting Common Torting Problems
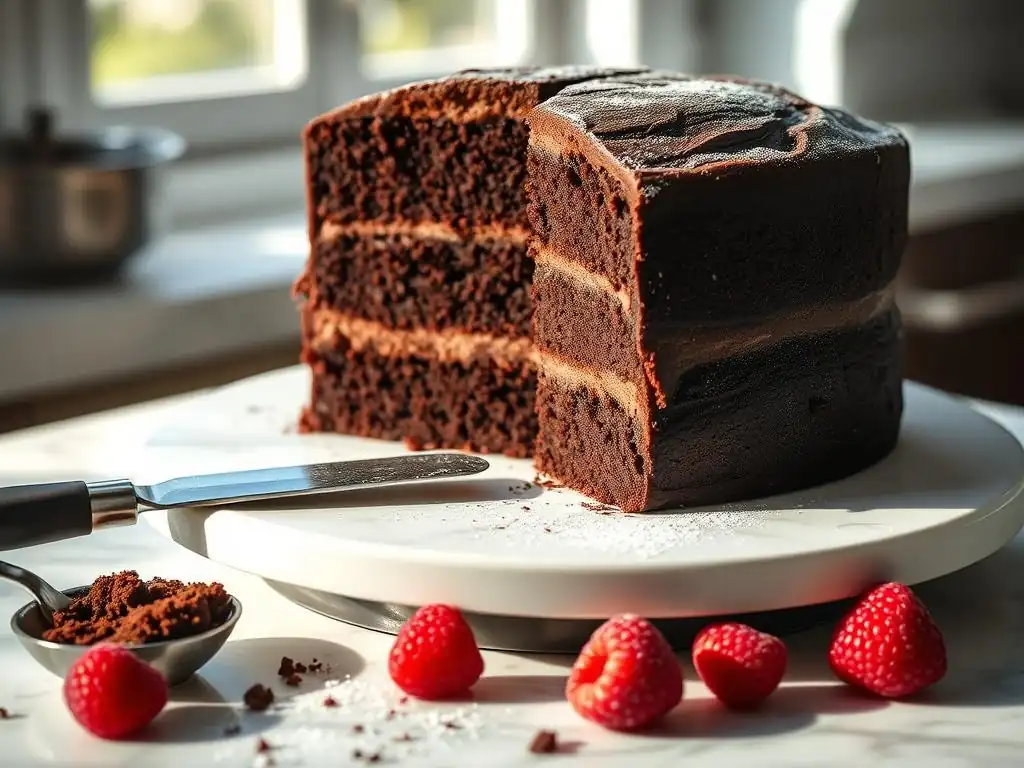
Even with the right tools and techniques, you might encounter some hiccups when torting your cakes. Don't be discouraged! Many common problems have simple solutions. Identifying what went wrong is the first step to fixing it and ensuring future torting attempts result in beautiful, perfectly layered cakes.
Let's look at some frequent issues bakers face when torting and how you can overcome them, ensuring your next perfectly layered chocolate cake recipe comes together smoothly.
Cake Crumbling During Torting: Causes and Solutions
Crumbling is one of the most common torting problems, especially with delicate cake recipes or when working with chocolate cakes which can sometimes be more tender. The primary cause is usually attempting to torte a cake that is not fully cooled or chilled. Warm cake is soft and fragile, making it highly susceptible to crumbling under the pressure of a knife or leveler.
- Solution 1: Ensure complete cooling/chilling.: Always let your cake cool completely on a wire rack. For delicate cakes or those prone to crumbling, chill them in the refrigerator for at least 30-60 minutes after cooling to room temperature.
- Solution 2: Use a sharp serrated knife or thin-wire leveler.: Dull tools tear the cake instead of slicing cleanly.
- Solution 3: Gentle sawing motion.: Let the tool do the work. Avoid pressing down hard. Use a light, back-and-forth motion.
- Solution 4: Handle layers gently.: Use a cake lifter or board to support layers fully when moving them.
Uneven Cake Layers: How to Correct Mistakes
Uneven layers can lead to a lopsided cake, which is frustrating after putting in the effort to bake and torte. The main causes are not keeping the knife or leveler parallel to the work surface, or not making consistent marks if freehand cutting.
- Cause 1: Knife/Leveler not level. Your hand or the tool drifted up or down during the cut.
- Solution: Use a cake leveler for guaranteed evenness. If using a knife, make clear marks around the cake perimeter as a guide. Use a turntable and keep your knife hand steady while rotating the cake. Practice helps improve your eye for keeping the blade level.
- Cause 2: Rushing the cut. Trying to slice too quickly can lead to jerky movements and an uneven line.
- Solution: Slow down! Use controlled, smooth movements. Let the knife or leveler glide through the cake.
- Correction: If you end up with slightly uneven layers, you can sometimes carefully trim the thicker part with a serrated knife to even it out, but be cautious not to remove too much cake. For very uneven layers, it might be better to use them for a trifle or cake pops and bake a fresh cake.
Cake Sticking to the Knife: Preventing Future Issues
Cake sticking to your knife blade makes clean cuts difficult and can lead to dragging crumbs and tearing. This often happens with moist or slightly warm cakes, or if the knife isn't clean.
- Cause 1: Cake is too warm or moist. Sticky crumbs adhere to the blade.
- Solution: Ensure the cake is completely cool, and ideally chilled, before torting.
- Cause 2: Dirty blade. Accumulation of crumbs and frosting/filling from previous cuts.
- Solution: Keep a damp cloth or paper towel handy and wipe the knife blade clean after each pass, or even mid-cut if necessary, especially when torting a perfectly layered chocolate cake with rich, potentially sticky crumb. Dry the blade before the next cut.
- Cause 3: Using a straight-edged knife. These knives compress and stick to the cake more than serrated ones.
- Solution: Use a long, sharp serrated knife specifically designed for slicing cakes and bread.
Perfect Layered Chocolate Cake Recipe: Putting Your Skills to the Test
Now that you've mastered the art of torting, it's time to apply your skills to a delicious project! What better way to showcase your newly acquired technique than by creating a truly spectacular perfectly layered chocolate cake? This recipe is a BakeWithEase favorite, designed to be moist, rich, and the perfect candidate for torting into beautiful layers.
This recipe provides a solid foundation. Feel free to experiment with different fillings and frostings once you're comfortable with the basic assembly. The focus here is on using your torting skills to build a stunning, multi-layered dessert.
BakeWithEase's Signature Layered Chocolate Cake Recipe
This perfectly layered chocolate cake recipe yields a moist, tender crumb with deep chocolate flavor, ideal for stacking. It's designed to be sturdy enough for torting while remaining incredibly delicious. We'll bake two 8-inch rounds, torte them into four layers, and fill them with a classic chocolate buttercream.
**Perfectly Layered Chocolate Cake Recipe**

Yields: One 4-layer, 8-inch cake
Prep time: 30 minutes
Bake time: 30-35 minutes
Cooling & Torting time: 2-3 hours
Assembly time: 30-45 minutes
This recipe is a fantastic way to practice your precision cutting and gentle handling techniques. The reward is a show-stopping cake that tastes as good as it looks, proving that mastering torting is well worth the effort.
Ingredients for the Perfectly Layered Chocolate Cake
Here's what you'll need to bake and assemble this delightful perfectly layered chocolate cake recipe:
- For the Cake:
- 2 and 1/2 cups (312g) All-Purpose Flour
- 1 and 1/4 cups (113g) Unsweetened Cocoa Powder (natural or Dutch-process)
- 1 teaspoon Baking Soda
- 1/2 teaspoon Baking Powder
- 1 teaspoon Salt
- 2 cups (400g) Granulated Sugar
- 1/2 cup (113g) Unsalted Butter, softened
- 1/2 cup (120ml) Vegetable Oil
- 4 Large Eggs, room temperature
- 1 cup (240ml) Buttermilk, room temperature
- 1 cup (240ml) Hot Coffee (or hot water)
- 1 teaspoon Vanilla Extract
- For the Chocolate Buttercream:
- 1 cup (227g) Unsalted Butter, softened
- 4 cups (480g) Powdered Sugar, sifted
- 3/4 cup (64g) Unsweetened Cocoa Powder, sifted
- 1/2 cup (120ml) Milk or Cream
- 1 teaspoon Vanilla Extract
- Pinch of Salt
Having all your ingredients prepped and measured before you begin baking ensures a smooth process, crucial for a recipe like this perfectly layered chocolate cake recipe where precision matters from start to finish.
Step-by-Step Baking Instructions
Follow these steps to bake the cake layers for your perfectly layered chocolate cake:
- Preheat oven to 350°F (175°C). Grease and flour two 8-inch round cake pans, or line the bottoms with parchment paper.
- In a large bowl, whisk together the flour, cocoa powder, baking soda, baking powder, salt, and sugar.
- In a separate bowl, cream the softened butter and vegetable oil together until combined. Beat in the eggs one at a time, then stir in the vanilla extract.
- Alternate adding the dry ingredients and the buttermilk to the wet ingredients, beginning and ending with the dry ingredients. Mix until just combined; do not overmix.
- Gradually whisk in the hot coffee (or hot water) until the batter is smooth and slightly thin. The batter will be quite liquidy – this is normal for a moist chocolate cake!
- Divide the batter evenly between the two prepared pans.
- Bake for 30-35 minutes, or until a wooden skewer inserted into the center comes out with moist crumbs attached.
- Let cakes cool in pans for 10-15 minutes before inverting onto a wire rack to cool completely. This is essential for successful torting! Allow at least 2-3 hours for full cooling.
Once your cakes are fully cooled, you can proceed to the torting steps outlined earlier in this guide. Remember to chill the cakes briefly if they feel too delicate or moist for easy slicing, ensuring the best outcome for your perfectly layered chocolate cake recipe.
Assembling and Frosting Your Torted Chocolate Cake
With your cake layers perfectly torted (you should have four layers from your two cakes), it's time to assemble and frost your stunning perfectly layered chocolate cake.
- Place the first cake layer (often the bottom layer from one of the original cakes) onto your serving plate or cake board.
- Spread a generous, even layer of chocolate buttercream over the first layer, extending almost to the edge. A typical amount is about 1/2 to 3/4 cup of frosting per layer.
- Carefully place the second torted layer on top, aligning the edges. Gently press down to ensure it's level.
- Repeat with the remaining layers and frosting, stacking one torted layer on top of another, spreading frosting between each.
- Once all layers are stacked, apply a thin "crumb coat" of frosting all over the cake (top and sides). This traps any loose crumbs. Chill the cake in the refrigerator for 15-30 minutes until the crumb coat is firm.
- Finally, apply your final, thicker layer of frosting, smoothing it with an offset spatula or cake scraper as desired. Decorate as you wish!
This assembly process brings together all your hard work, culminating in a beautiful and delicious perfectly layered chocolate cake. The even layers you created through torting will make the final frosting process much easier and yield a professional-looking result.
Mastering Cake Torting: Beyond the Basics
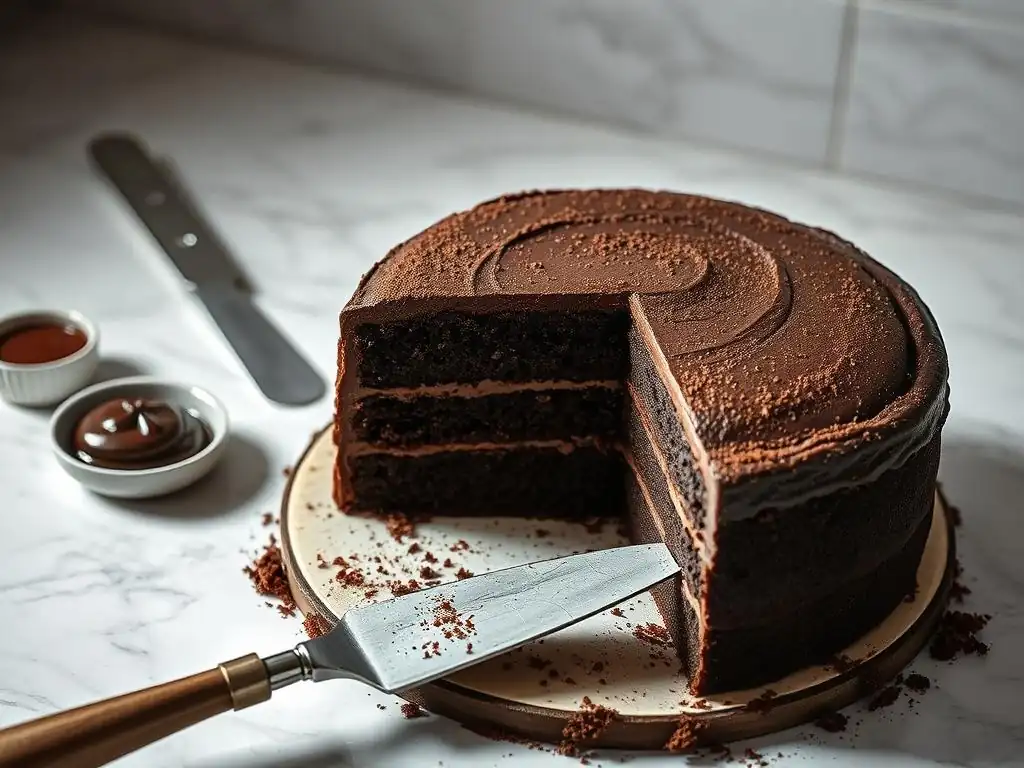
Once you're comfortable with the fundamental torting techniques using a knife or leveler, you can explore more advanced methods and applications. Torting isn't just for creating simple two or three-layer cakes; it's a gateway to more complex cake designs and structures. Expanding your skills in this area opens up new creative possibilities for your baking.
Pushing the boundaries of your torting abilities allows you to tackle more intricate recipes and decorating styles, further enhancing your journey with BakeWithEase.
Exploring Different Torting Techniques
Beyond the standard serrated knife and wire leveler, there are other tools and techniques bakers use. Some professional bakers use a cake cutting harp, which is similar to a leveler but often larger and more heavy-duty. For very tall cakes, adjustable cake rings are sometimes used; these rings hold the cake firmly while a long knife is used to slice within the ring at different heights.
Another technique involves using dental floss or thin fishing line for extremely delicate cakes. Once marks are made around the cake's perimeter, a length of floss is carefully threaded into one mark and slowly pulled through the cake, meeting back at the starting point. This method minimizes pressure and can be very effective for cakes that are too fragile for traditional slicing. Exploring these methods can further refine your ability to create perfectly layered cakes of all types.
Advanced Cake Decorating with Perfectly Torted Layers
Perfectly torted layers are the foundation for many advanced cake decorating techniques. With flat, even layers, you can achieve sharp edges on your frosting, create stunning naked cakes that showcase the layers, or build tall, stable tiered cakes for special events. Torted layers are also essential for techniques like checkerboard cakes, where alternating colors of cake are assembled using round cutters before stacking.
Having consistently sized and shaped layers makes filling and stacking significantly easier and more stable. This stability is paramount when adding heavier fillings, creating tall structures, or applying intricate decorations. Mastering torting is truly a prerequisite for advancing your cake decorating skills and confidently tackling complex projects, including multi-tiered perfectly layered chocolate cakes for celebrations.
Conclusion: Creating Impressive Cakes with Perfect Layers
You've now learned the essential techniques for torting a cake, transforming simple baked rounds into the building blocks for stunning, multi-layered creations. From understanding the importance of cooling and chilling to mastering the use of a serrated knife or cake leveler, you have the knowledge to achieve perfectly even cake layers every time. This skill is fundamental for any baker looking to elevate their cakes from simple desserts to show-stopping centerpieces, whether it's a classic vanilla or a rich, perfectly layered chocolate cake recipe.
Remember that patience and practice are key. Your first torting attempt might not be flawless, but each cake you torte will build your confidence and refine your technique. Don't be afraid to make mistakes; they are part of the learning process. With the tips and techniques from BakeWithEase, you are well-equipped to tackle any cake and create beautiful, perfectly layered results.
Recap of Key Torting Techniques
Let's quickly recap the most important takeaways for achieving perfect cake layers:
- Cool Completely: Never torte a warm cake. Chilling after cooling can help, especially for delicate cakes.
- Level the Dome: Start with a flat surface by trimming the top.
- Use the Right Tool: A long serrated knife or adjustable cake leveler are your best friends.
- Mark Your Cake (if freehand): Use a ruler and toothpick/knife tip to guide your cuts.
- Cut Level: Keep your knife or leveler parallel to the surface. Use a turntable if using a knife.
- Gentle Handling: Support layers fully when separating and moving them, ideally using a cake lifter or board.
- Clean Blade: Wipe your knife clean between cuts to prevent sticking and dragging.
By focusing on these core techniques, you'll consistently achieve smooth, even layers ready for filling and frosting.
Elevate Your Cake Baking with BakeWithEase's Tips
At BakeWithEase, our goal is to empower you to bake with confidence and creativity. Mastering skills like torting is a significant step in that journey. With your newfound ability to create perfectly layered cakes, the possibilities for decorating and flavor combinations are endless. Imagine the stunning results you can achieve with a perfectly layered chocolate cake recipe, filled with luscious ganache and covered in smooth buttercream!
Keep practicing, keep experimenting, and don't hesitate to try new recipes and techniques. BakeWithEase is here to provide you with the resources and guidance you need every step of the way. Happy baking, and enjoy creating those beautiful, perfectly layered cakes!
Frequently Asked Questions
How exactly does BakeWithEase define "torting" a cake?
Torting, as we use it, refers to the process of slicing a baked cake horizontally to create even layers. This allows for adding fillings and creating a visually appealing and delicious layered cake.
Why is torting especially important for a perfectly layered chocolate cake recipe?
A perfectly layered chocolate cake relies on even layers for both structural integrity and flavor distribution. Torting ensures each bite has the right balance of cake and chocolatey filling.
What tools does BakeWithEase recommend for achieving a clean, even torte?
We suggest using a long, serrated knife (like a bread knife) or a cake leveler. A rotating cake stand can also be helpful for maintaining a consistent cut.
What common mistakes do people make when torting a cake, and how can BakeWithEase help avoid them?
A frequent error is attempting to torte a cake that's still warm, leading to crumbling. BakeWithEase emphasizes completely cooling the cake before torting and offers tips for stabilizing the cake during the process.
Besides the recipe, what other resources does BakeWithEase offer to help me master baking skills?
BakeWithEase.com provides step-by-step guides, video tutorials, and troubleshooting tips for various baking techniques, including working with different types of frosting and fillings.
Final Reflection: The Art and Joy of the Perfectly Layered Cake
The pursuit of the perfectly layered chocolate cake transcends mere baking; it's a testament to precision, patience, and the undeniable power of a flawlessly executed dessert. In a world often characterized by instant gratification, the meticulous process of creating a torte offers a welcome counterpoint – a reminder that the most rewarding achievements often require careful attention to detail and a willingness to embrace the journey. This isn't just about a recipe; it's about mastering a skill and experiencing the profound satisfaction of creating something truly beautiful.
The impact of a perfectly executed cake extends far beyond the individual experience. It's a symbol of celebration, a centerpiece of gatherings, a tangible expression of love and care. A cake is a celebration of life, a symbol of joy, and a delicious way to share happiness.
This simple truth resonates deeply, reminding us of the power of food to connect us and create lasting memories. The art of cake-making, therefore, is not just a culinary skill, but a powerful tool for fostering connection and spreading joy.
Now, consider your own approach to baking. Perhaps you've been hesitant to tackle the challenge of a layered cake, intimidated by the perceived complexity. But I urge you to reconsider. Take the techniques and insights shared in this article, apply them to your next baking endeavor, and experience the transformative power of creating something exquisite. Don't just bake a cake; craft a masterpiece. The journey may be challenging, but the reward – a perfectly layered, beautifully delicious cake – is well worth the effort.
Unleash Your Inner Torte Artist!
Thanks for taking the time to explore the art of torte-making with us! We hope you gained valuable insights and feel ready to create stunning, delicious cakes. Now it’s time to put your new skills into action.
- Bake your masterpiece: Try out one of the techniques you learned today – and don't be afraid to experiment! A perfectly layered torte is within your reach.
- Share your creation: Show off your baking prowess on social media using #BakeWithEaseTorte and inspire others!
- Join our community: Head over to our forums and share your experience, ask questions, and connect with fellow bakers. Let's create a supportive environment for cake lovers!
What surprising flavor combination will you try in your next torte creation?