
Piping Basics: Your Guide to Simple, Elegant Borders

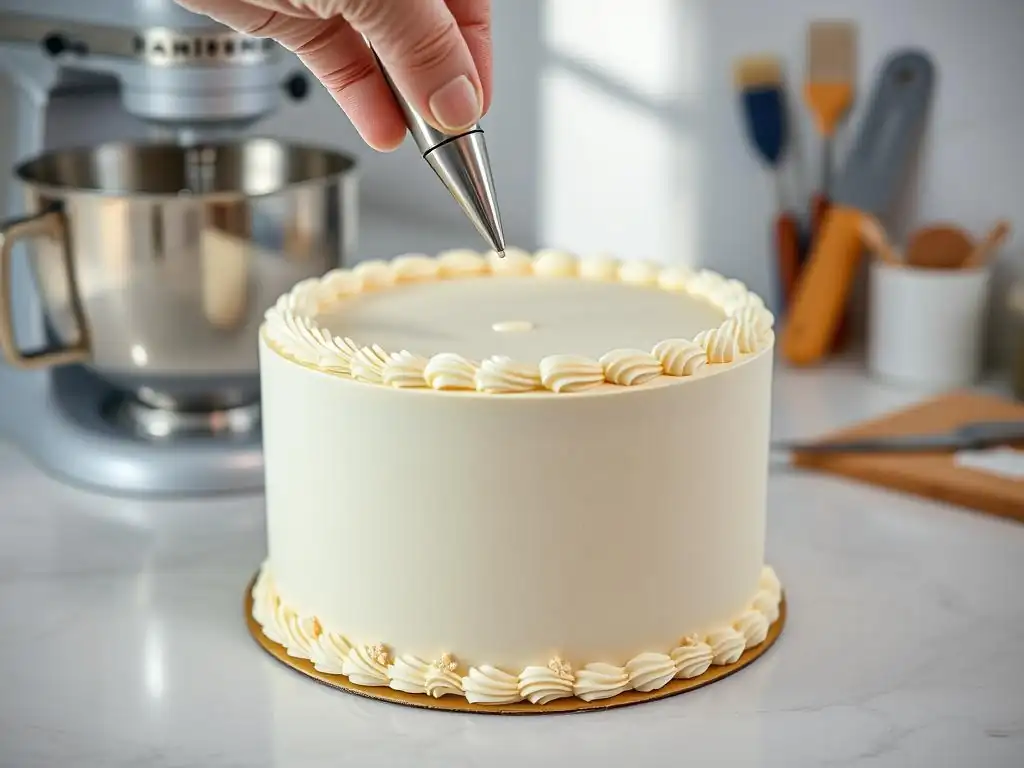
Welcome to BakeWithEase, where unlocking your inner pastry chef is simpler than you think! Are you ready to transform your baked creations from delicious to dazzling? This week, we're diving into easy buttercream piping techniques that will elevate your cakes and cookies with professional-looking flair. But what if we told you that achieving those perfect swirls and elegant borders is easier than you ever imagined? Let's unravel the secrets and turn your baking dreams into a beautifully decorated reality...
- BakeWithEase Presents: Mastering Buttercream Piping for Beautiful Borders
- Easy Buttercream Piping Techniques for Stunning Cake Borders
- Troubleshooting Common Buttercream Piping Problems: A BakeWithEase Guide
- Buttercream Piping Border Ideas and Inspiration: Elevate Your Cake Decorating
- Maintaining Your Piping Tools: Ensuring Longevity and Performance
- Conclusion: Unleash Your Creativity with Easy Buttercream Piping Techniques
-
Frequently Asked Questions
- What is buttercream piping and why is it important for cake decorating?
- What are some essential tools I need for easy buttercream piping?
- Can a beginner learn easy buttercream piping techniques?
- What kind of buttercream works best for piping?
- What are some common mistakes to avoid when piping buttercream?
- Final Reflection: Mastering the Art of Simple Elegance
- Unleash Your Inner Piping Artist!
BakeWithEase Presents: Mastering Buttercream Piping for Beautiful Borders
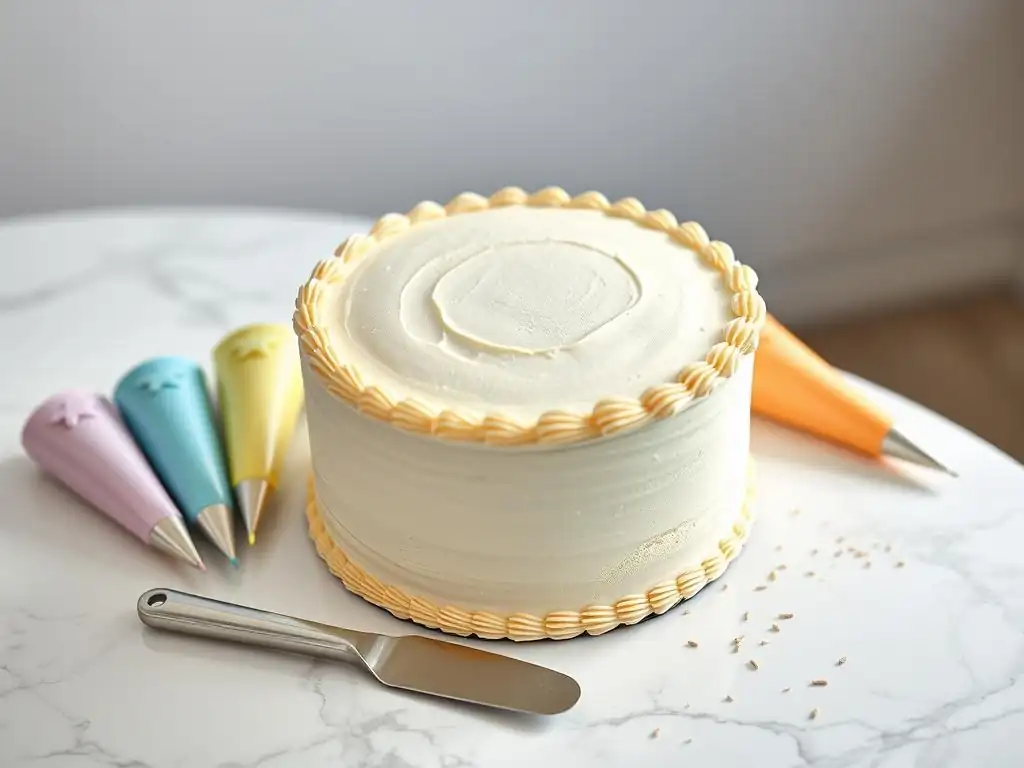
What is Buttercream Piping and Why is it Essential for Cake Decorating?
Buttercream piping is the art of using a piping bag and tip filled with buttercream frosting to create decorative elements on cakes, cupcakes, and other baked goods. While it can be used for writing, filling, and creating intricate designs, one of its most fundamental applications is creating borders.
Borders serve multiple purposes: they provide a clean, finished edge to a cake, they can hide imperfections where the cake meets the board, and they add a layer of visual interest and elegance. Mastering even the most easy buttercream piping techniques allows you to transform a simple frosted cake into a professional-looking centerpiece, significantly enhancing its appeal.
Beyond aesthetics, piping borders also offer structural benefits. A well-piped border can act as a dam to contain fillings within cake layers or provide a base for additional decorations like sprinkles, candies, or fruit. Learning simple buttercream piping techniques is a foundational skill for any aspiring cake decorator, offering a gateway to more complex designs once the basics are mastered. It's a practical skill that yields immediate, satisfying results, making it a favorite among beginners looking to elevate their baking creations without needing years of practice.
Essential Tools for Buttercream Piping Borders: A BakeWithEase Checklist
To get started with easy buttercream piping techniques, you'll need a few key tools. Having the right equipment makes the process smoother and helps you achieve cleaner, more consistent results. Think of these as your essential companions in the journey to beautiful cake borders.
Here's a checklist of the tools you'll need:
- [ ] Piping Bags (disposable or reusable)
- [ ] Piping Tips (various shapes, especially star and round)
- [ ] Couplers (optional, but highly recommended)
- [ ] Cake Turntable (for round cakes)
- [ ] Offset Spatula (for smoothing)
- [ ] Bench Scraper or Smoother (for side frosting)
- [ ] Food Coloring (specifically gel colors for vibrant shades)
Piping Bags: Choosing the Right Size and Material
Piping bags come in various sizes and materials. Disposable plastic bags are convenient for quick cleanup, especially when using multiple colors, and are widely available in rolls or boxes. They typically come in sizes ranging from 8 inches to 16 inches. For piping borders on a standard 8-inch round cake, a 12 or 14-inch bag is usually sufficient, holding enough frosting to complete the border without needing constant refills. Reusable bags, often made of canvas or silicone, are more environmentally friendly but require thorough cleaning. Many beginners find disposable bags easier to handle initially.
The material can also affect grip. Some disposable bags have a slightly textured surface which can be helpful, especially if your hands get warm. Silicone bags offer good grip but can sometimes feel less flexible than plastic. The key is to choose a size and material that feels comfortable in your hand and allows you to maintain steady pressure, which is crucial for executing easy buttercream piping techniques smoothly.
Piping Tips: Understanding Different Tip Shapes for Border Designs
Piping tips, also known as decorating tips or nozzles, determine the shape of the buttercream as it's squeezed out of the bag. For simple, elegant borders, a few basic tips are indispensable. Open star tips (like Wilton 1M, 2D, or similar sizes) are perfect for creating classic shell borders and rosettes, two of the most popular easy buttercream piping techniques. Closed star tips produce a more defined, ridged pattern. Round tips (sizes #10, #12, #21) are great for simple dot borders or creating smooth lines.
Straight tips with specific openings are used for things like basketweave or petal borders, but for beginner-friendly borders, focusing on star and round tips is a great starting point. A small set of these basic tips is relatively inexpensive and unlocks a wide range of easy buttercream piping techniques. Experimenting with just a few different tips will quickly show you the variety of designs you can achieve.
Couplers: Making Tip Changes Easy
Couplers are a two-part plastic piece that allows you to change piping tips on a bag without changing the bag itself or emptying the frosting. The base of the coupler is inserted into the bag before filling, the tip is placed over the base on the outside of the bag, and a ring screws on to hold the tip securely. This is incredibly useful when you want to use the same color buttercream but create different border styles or details on the same cake.
While not strictly essential for learning a single easy buttercream piping technique, couplers significantly enhance efficiency and versatility, especially when working on more complex designs or using multiple tips for one border style (like different sizes of shells). They save time and reduce the number of bags you need to prepare, making the overall decorating process much more streamlined. A standard coupler fits most small to medium-sized tips.
Turntables: Achieving Smooth, Consistent Borders
A cake turntable is a rotating platform that holds your cake. While you can pipe borders on a stationary cake, a turntable makes it significantly easier to achieve smooth, continuous, and consistent borders, particularly on round cakes. As you pipe, you simply rotate the turntable with one hand while maintaining steady pressure and angle with the piping bag in the other.
Using a turntable helps maintain the same angle and distance from the cake as you work your way around, which is key to uniform shell borders or even dot placement. Even a basic, inexpensive plastic turntable can make a huge difference in the quality and ease of your buttercream piping techniques. For serious decorators, a heavier, ball-bearing turntable offers smoother rotation and stability.
Spatulas: For Smoothing and Correcting Imperfections
Spatulas, particularly offset spatulas, are crucial tools not just for frosting the cake initially but also for correcting any mistakes or smoothing out areas before or after piping. A small offset spatula is handy for scraping excess frosting off your tip, fixing a slightly crooked shell, or gently nudging a dot into place.
A bench scraper or a dedicated cake smoother is also essential for getting smooth sides on your cake before you start piping the border. A smooth base ensures your piped border sits correctly and looks its best. Having these tools on hand allows for quick fixes and adjustments, which is part of the learning process when mastering easy buttercream piping techniques.
Easy Buttercream Piping Techniques for Stunning Cake Borders
Now that you have your tools ready, let's dive into some simple yet effective buttercream piping techniques that will add beautiful borders to your cakes. These techniques are perfect for beginners and can be mastered with just a little practice.
Preparing Your Buttercream for Piping: Consistency is Key
The success of your easy buttercream piping techniques heavily relies on the consistency of your frosting. Buttercream that is too soft will lose its shape and droop, while buttercream that is too stiff will be difficult to pipe smoothly and might break. Finding that 'just right' consistency is crucial for creating defined and elegant borders.
The ideal piping consistency is firm enough to hold a defined shape when squeezed through a tip, but soft enough to flow smoothly without excessive pressure. It should hold a peak that stands up straight when you lift your spatula. Achieving this consistency might require slight adjustments based on your recipe, the type of fat used (butter vs. shortening), and even the temperature of your kitchen.
Achieving the Perfect Buttercream Consistency for Piping Borders
Start with your basic buttercream recipe. If it seems too stiff, add a small amount (like a teaspoon at a time) of milk, cream, or even water, mixing thoroughly after each addition until the desired consistency is reached. Be careful not to add too much liquid at once, as it's easier to thin frosting than to thicken it. If your buttercream is too soft, often due to being too warm or having too much liquid, you can thicken it by adding a tablespoon or two of sifted powdered sugar or chilling it in the refrigerator for 10-15 minutes.
Sometimes, simply beating the buttercream for a few minutes can help. This incorporates air and can make it fluffier and slightly firmer. Remember that buttercream consistency can change with temperature; warmer frosting becomes softer. If you're working in a warm kitchen, you might need to chill your buttercream periodically or use a recipe that incorporates some shortening for stability. Practicing your easy buttercream piping techniques with properly conditioned frosting is key to getting clean lines and shapes.
Coloring Your Buttercream for Vibrant Borders: BakeWithEase Tips
Adding color to your buttercream is a simple way to make your borders pop. For best results, use gel food coloring rather than liquid coloring. Liquid coloring can alter the consistency of your buttercream, making it too thin for piping, whereas gel colors are highly concentrated and require only a small amount to achieve vibrant shades without significantly affecting thickness.
Add color gradually, mixing well after each addition, until you reach your desired shade. Remember that colors often deepen slightly as they sit. For deep reds, blues, or blacks, it might be necessary to use a significant amount of gel color or color the frosting in advance to allow the color to develop. Always mix the color thoroughly to avoid streaks. Having brightly colored buttercream makes your easy buttercream piping techniques even more visually impressive!
Mastering Basic Buttercream Border Techniques: Step-by-Step Instructions
These basic techniques are foundational for anyone learning to pipe. They are simple, require minimal practice to get a decent result, and look beautiful on almost any cake. These are the cornerstones of easy buttercream piping techniques.
The Shell Border: A Classic and Simple Design
The shell border is perhaps the most iconic piped border and one of the easiest to master. It uses a star tip (like 1M or 21) to create a series of overlapping shells that resemble waves or ropes.
- Steps:
- Hold the piping bag at a 45-degree angle to the cake surface, with the tip slightly above the cake edge.
- Apply steady pressure, allowing the buttercream to fan out and form the base of the shell.
- As you release pressure, quickly pull the tip down and towards yourself, creating the tail of the shell. Stop pressure completely as you pull away.
- For the next shell, start with the base slightly overlapping the tail of the previous shell.
- Continue this motion around the entire cake perimeter, ensuring consistent size and overlap.
It might take a few tries to get the pressure and pull-away motion just right, but once you do, you can pipe a beautiful shell border quickly and consistently. This is an excellent technique for practicing uniform pressure, a key skill for all easy buttercream piping techniques.
The Rope Border: Adding Texture and Dimension
The rope border is another classic that uses a star tip but with a slightly different motion to create a twisted, rope-like effect. It adds lovely texture to the edge of a cake.
- Steps:
- Using a star tip (like 1M), pipe a large shell shape as you would for the shell border, but make it slightly fatter.
- For the second segment, start piping beside the first segment (not overlapping the tail), piping a shell shape that crosses over the tail of the first one.
- Continue this pattern, always starting the new segment beside the previous one and crossing it over the tail.
- Maintain consistent pressure and angle to create a smooth, twisting effect around the cake.
This technique requires a bit more coordination than the simple shell, but the result is a visually appealing border that looks more intricate than it is. It's a slightly more advanced easy buttercream piping technique that adds great dimension.
The Rosette Border: Creating Elegant Floral Accents
Rosettes are simple swirls of buttercream that resemble small roses. Piped side-by-side, they create a beautiful, continuous floral border. This technique uses a star tip (again, 1M is perfect).
- Steps:
- Hold the piping bag perpendicular (90 degrees) to the cake surface.
- Start piping in the center of where you want the rosette.
- Apply pressure and pipe in a tight circular motion, moving outward from the center in a spiral, or starting at the edge and spiraling inward.
- Stop pressure as you complete the circle and lift the tip away.
- Pipe the next rosette right next to the first one, perhaps slightly overlapping, to create a continuous border.
Rosettes are quick to pipe and forgiving of minor inconsistencies, making this one of the most satisfying easy buttercream piping techniques for beginners. They look lovely piped along the top edge or even down the sides of a cake.
The Dot Border: A Simple and Versatile Option
The dot border is incredibly simple but can be very effective, especially for modern or minimalist designs. It uses a round tip.
- Steps:
- Hold the piping bag perpendicular (90 degrees) to the cake surface with a round tip (size depending on desired dot size, e.g., #10, #12).
- Touch the tip to the cake surface.
- Apply quick, even pressure, letting the buttercream build up into a dot.
- Stop pressure and quickly pull the tip straight up. A small peak might form; you can leave it or gently tap it down with a damp finger or spatula.
- Repeat at regular intervals around the cake edge.
You can vary the size of the dots, the spacing between them, or even pipe multiple rows of dots. It's a versatile and arguably the most basic of the easy buttercream piping techniques, proving that simple can still be stunning.
Advanced Buttercream Piping Techniques for Impressive Borders
Once you're comfortable with basic techniques, you can explore slightly more complex borders that add extra flair. These build upon the skills learned from easy buttercream piping techniques.
The Braided Border: An Intricate and Eye-Catching Design
The braided border creates a woven effect that looks impressive but is achievable with practice. It typically uses a large round tip or a small basketweave tip.
- Steps (using a round tip):
- Pipe a thick, slightly curved line along the cake edge.
- Pipe a second curved line parallel to the first, leaving a small gap.
- Pipe short, connecting lines across the gap, alternating direction (e.g., from the top of the first line to the bottom of the second, then from the top of the second to the bottom of the first).
- Continue this weaving pattern, ensuring the lines are evenly spaced and angled to create the braided look.
This technique requires more control over line consistency and spacing than the basic borders, but the result is a beautiful, textured edge that elevates the cake's design. It's a step up from the initial easy buttercream piping techniques.
The Scalloped Border: Adding a Touch of Sophistication
The scalloped border creates a series of elegant curves around the cake edge. It can be done with various tips depending on the desired effect (e.g., a large round tip for smooth scallops, a star tip for ridged ones).
- Steps (using a round tip):
- Hold the bag at a slight angle.
- Pipe a curved line outwards from the cake edge, then curve it back inwards towards the cake.
- Stop pressure and pull away.
- Start the next scallop where the previous one ended, following the same curved motion.
- Ensure consistent size and curvature for a uniform look.
This technique relies on smooth, controlled hand movements. Practicing the curve motion on parchment paper first can be very helpful before attempting it on the cake. It's an elegant application of easy buttercream piping techniques fundamentals.
The Inverted Shell Border: A Unique Twist on a Classic
The inverted shell border is similar to the classic shell but piped in the opposite direction, creating a different visual flow. It also uses a star tip.
- Steps:
- Hold the piping bag at a 45-degree angle, but this time, start with the tip touching the cake surface where the tail of the shell will end.
- Apply pressure and move the tip away from the cake edge, building the base of the shell.
- As you finish the base, release pressure and pull the tip back towards the cake edge, ending where you started the previous shell (creating overlap).
- Continue this motion around the cake.
This technique can feel a bit counter-intuitive if you've mastered the regular shell, but it creates a lovely, distinct border. It's a fun variation to try once you're comfortable with basic easy buttercream piping techniques.
Troubleshooting Common Buttercream Piping Problems: A BakeWithEase Guide
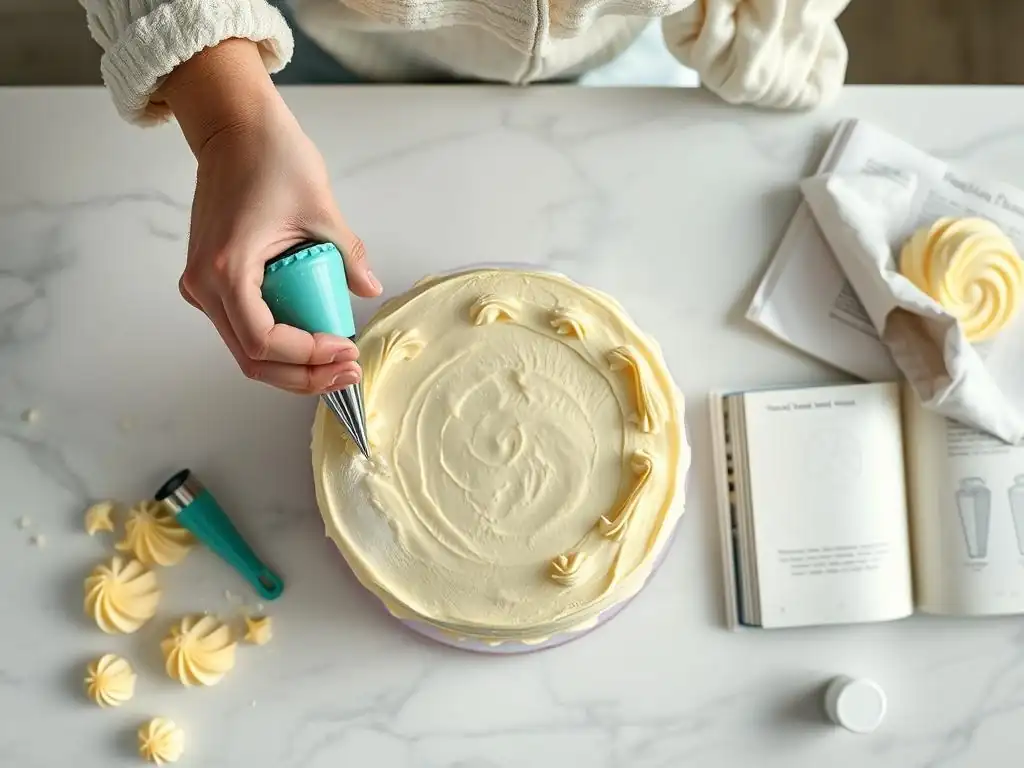
Even with easy buttercream piping techniques, you might encounter some common issues. Don't get discouraged! Most problems have simple solutions.
Dealing with Air Bubbles in Your Piping Bag
Air bubbles can cause breaks in your piped lines or shells, leading to inconsistent borders. They often get trapped when filling the bag.
- Solution: Before you start piping, squeeze a little buttercream onto a piece of parchment paper until the flow is smooth and free of bubbles. If you notice bubbles while piping, gently squeeze the bag downwards to push the air to the top, then massage the bag slightly to work the bubble out or pop it near the tip.
Preventing Buttercream from Melting While Piping
Warm hands or a warm kitchen can cause the buttercream in your piping bag to soften and lose its shape, making easy buttercream piping techniques difficult.
- Solution: Work in a cool environment if possible. Fill the bag only partially to keep the bulk of the buttercream cool in its bowl. If your hands are warm, take breaks and wash them with cold water. You can also try wrapping the part of the bag you're holding in a paper towel or even using two bags, one inside the other, for insulation. If the buttercream in the bag gets too soft, swap it out for some cooler frosting or place the bag (with the tip pointing up) in the fridge for a few minutes.
Fixing Uneven Borders: Tips and Tricks
Uneven borders can result from inconsistent pressure, angle, or speed.
- Solution: Practice! The more you pipe, the better you'll become at maintaining consistency. Try practicing on parchment paper first – you can scrape the buttercream back into the bowl and reuse it. Focus on keeping your hand pressure steady and moving at a consistent speed. For round cakes, using a turntable is invaluable for keeping your angle consistent as you rotate the cake. If a section is particularly uneven, you can gently scrape it off with a small spatula and re-pipe that section (though this works best with simpler designs like shells or dots).
Achieving Sharp and Defined Piping Lines
If your piped shapes look blurry or smudged instead of sharp, the buttercream might be too soft, or the tip might be clogged.
- Solution: Check your buttercream consistency – it might be too warm or need a bit more powdered sugar. Ensure your tip is clean before you start and clear any blockages as you go. The angle and pressure also matter; holding the bag at the correct angle for the specific technique and applying steady, firm pressure helps the buttercream exit the tip cleanly, resulting in sharper lines and more defined shapes in your easy buttercream piping techniques.
Buttercream Piping Border Ideas and Inspiration: Elevate Your Cake Decorating
Once you've mastered the basic easy buttercream piping techniques, you can start thinking about how to combine them or adapt them for different looks and occasions.
Simple Buttercream Border Designs for Beginner Bakers
These designs are straightforward and rely on the basic techniques you've learned.
- Classic Shell Border: Perfect for any traditional cake. Can be one row or multiple rows stacked.
- Simple Dot Border: A modern look, great for minimalist cakes or as a base for other decorations. Try varying dot sizes.
- Rosette Garland: Pipe rosettes close together around the edge for a continuous, slightly ruffled look.
- Reverse Shell Border: A subtle variation on the classic shell that adds a different flow.
These easy buttercream piping techniques are quick to execute and provide a clean, finished appearance to any cake.
Elegant Buttercream Border Designs for Special Occasions
For birthdays, anniversaries, or celebrations, you can elevate your borders.
- Overlapping Rosettes: Pipe rosettes that significantly overlap, creating a fuller, more textured border.
- Stacked Shells: Pipe one row of shells directly on top of another for a bolder, more substantial border.
- Shells with Pearls/Sprinkles: Pipe a shell border and immediately add edible pearls or sprinkles along the base or tails for extra sparkle. On average, adding sprinkles to a border might take an extra 5-10 minutes depending on cake size.
- Combination Border: Alternate between two different easy buttercream piping techniques, like a shell and a rosette, or a large dot and a small dot, around the cake.
Using slightly more buttercream or combining simple techniques adds a touch of luxury suitable for special events.
Modern Buttercream Border Designs for Contemporary Cakes
For a more contemporary feel, think clean lines, geometric patterns, or unique textures.
- Smooth Edge with Piped Line: Achieve a perfectly smooth cake edge, then pipe a single, clean line (using a round tip) just inside the top edge.
- Geometric Dot Placement: Instead of continuous dots, pipe dots in specific patterns, like triangles or squares, around the cake.
- Horizontal Ridges: Use a straight tip or the side of a large star tip to pipe horizontal lines or ridges around the side of the cake, extending them all the way to the bottom border.
- Textured Swipe Border: Use a spatula to create texture on the side frosting, then add a simple dot or small shell border on top.
These ideas often pair easy buttercream piping techniques with other frosting methods to create a modern aesthetic.
Maintaining Your Piping Tools: Ensuring Longevity and Performance
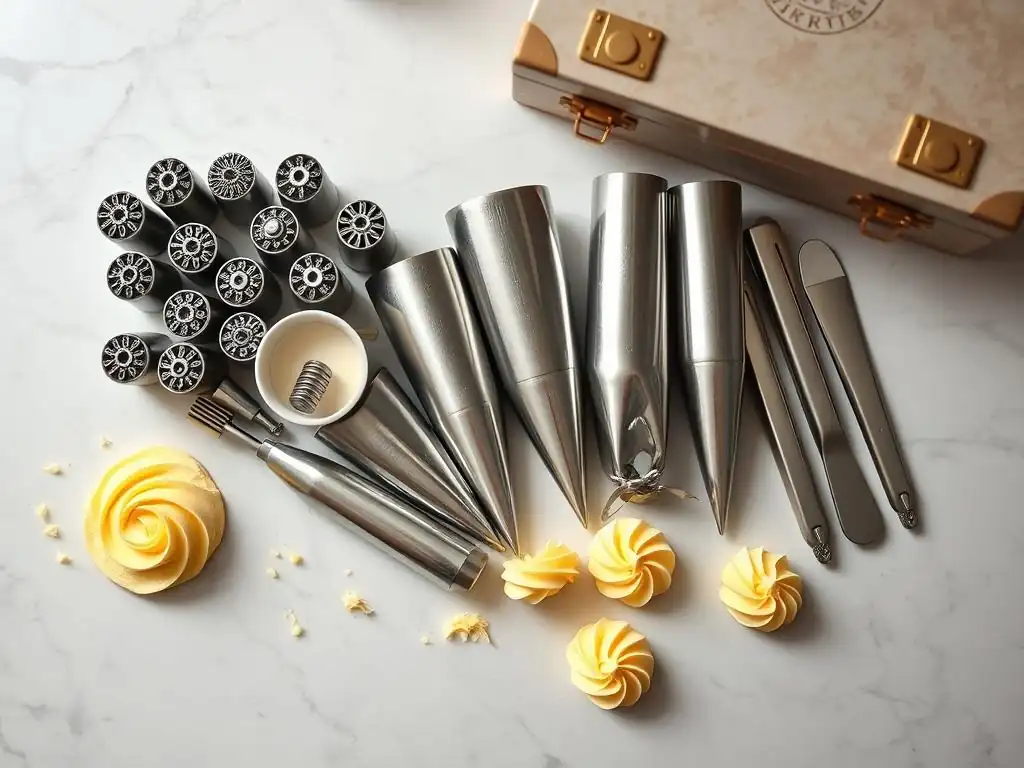
Proper care of your piping tools is essential to keep them in good condition and ready for your next baking project. Clean tools are crucial for successful and hygienic easy buttercream piping techniques.
Cleaning Your Piping Bags and Tips Properly
Cleaning should happen immediately after use, as dried buttercream is much harder to remove.
- Disposable Bags: Scrape out as much excess buttercream as possible into a separate bowl. Discard the bag.
- Reusable Bags: Turn the bag inside out. Scrape out excess buttercream. Wash thoroughly with warm, soapy water, using a bottle brush or pipe cleaner to get into seams if necessary. Rinse well and hang upside down to dry completely. Ensure they are fully dry before storing to prevent mold.
- Piping Tips & Couplers: Remove from the bag. Scrape out excess buttercream. Soak in warm, soapy water for a few minutes. Use a small brush (like a pastry brush or a dedicated tip brush) or a toothpick to clean out any frosting stuck inside the tip opening or ridges. Rinse thoroughly.
Leaving buttercream to dry inside tips, especially star tips with intricate teeth, makes them difficult to clean and can harbor bacteria. A quick wash goes a long way in maintaining your tools for future easy buttercream piping techniques.
Storing Your Piping Tools for Future Use
Proper storage keeps your tools organized and protected.
- Piping Tips: Store tips in a container designed for piping tips, a small plastic box, or even a clean jar. Keeping them together prevents them from getting lost and makes it easy to find the tip you need for your next easy buttercream piping techniques project. Some bakers group tips by type (e.g., all star tips together).
- Piping Bags: Ensure reusable bags are completely dry. Fold or roll them neatly and store them in a drawer or container. Disposable bags can be kept in their original packaging or a designated drawer.
- Couplers: Keep coupler bases and rings together in the same container as your tips or in a small baggie. This ensures you can quickly find the matching pieces when you need to change tips during piping.
Organized tools save time and frustration, making your baking and decorating experience more enjoyable. A small investment in storage containers can significantly improve your workflow and the longevity of your tools.
Conclusion: Unleash Your Creativity with Easy Buttercream Piping Techniques
Frequently Asked Questions
What is buttercream piping and why is it important for cake decorating?
Buttercream piping involves using a piping bag and tips to create decorative designs on cakes and other desserts. It's important because it elevates the visual appeal and can add a personal touch.
What are some essential tools I need for easy buttercream piping?
You'll need piping bags, a variety of piping tips (like star, round, and leaf tips), and of course, good quality buttercream. A coupler is also helpful for easily switching tips.
Can a beginner learn easy buttercream piping techniques?
Absolutely! This guide focuses on simple techniques perfect for beginners. Practice on parchment paper before decorating your cake for best results.
What kind of buttercream works best for piping?
American buttercream is generally recommended for beginners due to its stability and ease of use. Swiss meringue buttercream is another good option, offering a smoother finish.
What are some common mistakes to avoid when piping buttercream?
Avoid overfilling the piping bag, using buttercream that's too warm or too cold, and applying too much pressure when piping. Practice makes perfect!
Final Reflection: Mastering the Art of Simple Elegance
The ability to create beautiful buttercream borders is more than just a cake decorating skill; it's a gateway to expressing creativity and adding a professional touch to any baked good. From simple rosettes to more intricate shells, mastering even basic piping techniques elevates your baking from hobby to artistry, making even the simplest cake feel special and memorable. This accessibility is what makes buttercream piping so incredibly relevant today, in a world where homemade treats are valued for their personal touch.
The impact of simple, elegant design extends far beyond the plate. It's a testament to the power of mindful detail and the satisfaction of creating something beautiful with your own hands. This resonates deeply with the current trend towards mindful making and the appreciation for handcrafted items. The details are not the details. They make the design.
– Charles Eames. This quote perfectly encapsulates the importance of mastering even the most basic piping techniques; they are the building blocks of truly stunning creations. The ability to confidently pipe a border transforms a plain cake into a masterpiece, showcasing both skill and intention.
Now, it's your turn. Don't be intimidated by the seemingly complex world of piping. Pick up a piping bag, choose your favorite tip, and experiment! Start with the simple techniques outlined in this guide, and gradually build your confidence and skill. The joy of creating something beautiful, something you can be proud of, is waiting for you. Embrace the process, celebrate your successes, and remember that even the most intricate designs begin with a single, perfectly piped swirl.
Unleash Your Inner Piping Artist!
Thanks for joining us on this piping adventure! We hope you now feel confident in creating beautiful, professional-looking borders for your cakes and cupcakes. Ready to put your newfound skills to the test?
- Master a new piping technique: Try practicing the shell border or star tip technique from the article – you'll be amazed at how quickly you improve!
- Share your creations: Post a photo of your piped masterpiece on social media using #BakeWithEasePiping and tag us! We'd love to see your beautiful work.
- Challenge yourself: Experiment with different tips and frostings to create unique border designs. What unexpected flavour combinations will you discover?
What stunning border will you create for your next baking project?