
Adding Simple Sugar Pearls and Dragees

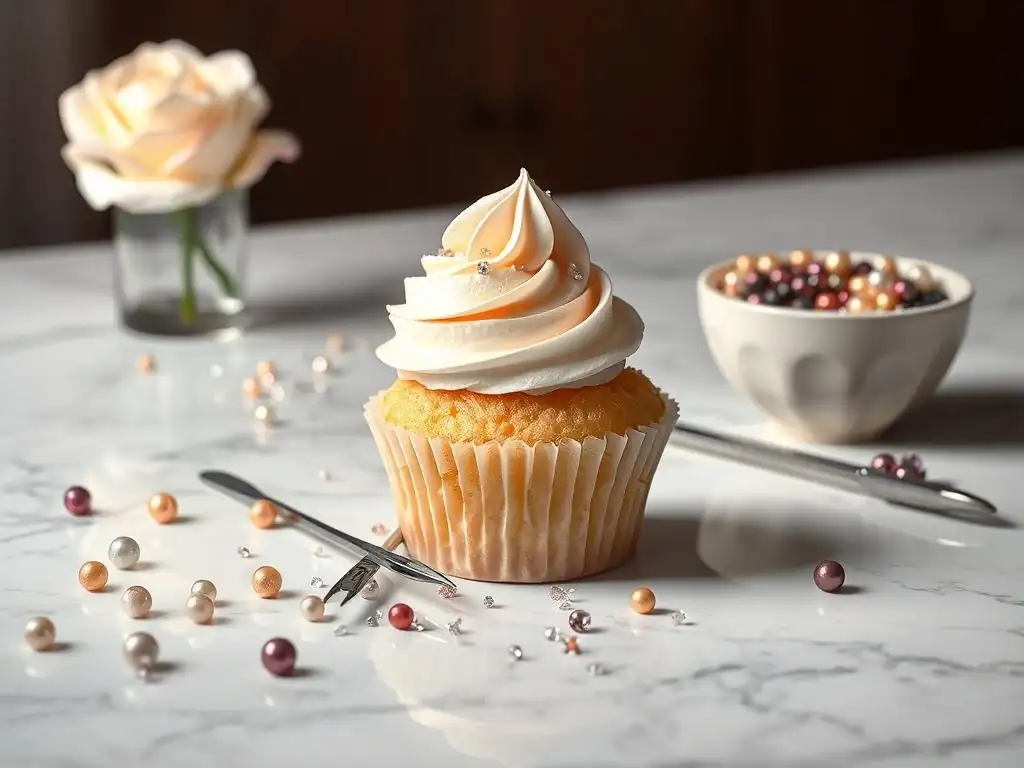
Welcome to BakeWithEase, your guide to effortlessly creating delicious baked goods! Ever wondered how to add that professional touch to your creations? This time, we're diving into the surprisingly simple world of easy sugar pearl decorating. Discover how these tiny treasures can elevate your cakes, cookies, and more from simple to stunning. Ready to unlock the secrets to perfect placement and dazzling designs? Read on!
- Decorating Cakes with Edible Pearls and Dragees
- Introduction to Edible Pearl and Dragee Cake Decoration
- Preparing Your Cake for Decoration
- Techniques for Applying Edible Pearls and Dragees
- Cake Decorating Ideas Using Edible Pearls and Dragees
- Understanding Different Types of Edible Pearls and Dragees
- Tips for a Professional Finish
- Storing Decorated Cakes
- Troubleshooting Common Issues
- Advanced Techniques
- Conclusion: Mastering Edible Pearl and Dragee Cake Decoration
-
Frequently Asked Questions
- What exactly are sugar pearls and dragees, and are they the same thing?
- When is the best time to add sugar pearls to my baked goods?
- How can I make sure the sugar pearls stick properly to my frosting or icing?
- Where can I buy sugar pearls and dragees?
- Are sugar pearls edible, and are there any safety concerns I should be aware of?
- Final Reflection: The Enduring Sweetness of Simple Decoration
- Unleash Your Inner Cake Artist!
- Elevate Your Baking Game!
- Join the BakeWithEase Community!
Decorating Cakes with Edible Pearls and Dragees
Introduction to Edible Pearl and Dragee Cake Decoration
Decorating cakes with edible pearls and dragees is a simple yet effective way to add elegance, sparkle, and texture to your baked creations. Whether you're a beginner looking for easy sugar pearl decorating ideas or an intermediate baker wanting to refine your skills, these tiny edible spheres offer incredible versatility. They come in a dazzling array of colors and sizes, making them suitable for everything from sophisticated wedding cakes to fun birthday treats. Mastering the application of sugar pearls and dragees can elevate the appearance of even the simplest cake design with minimal effort.
This guide will walk you through the basics of working with edible pearls and dragees, from understanding what they are and the essential tools needed, to preparing your cake, applying the decorations using various techniques, and even troubleshooting common issues. By the end, you'll have the confidence to incorporate easy sugar pearl decorating into your repertoire and create stunning, professional-looking cakes right in your own kitchen.
What are Edible Pearls and Dragees?
Edible pearls and dragees are small, hard, spherical confectionery decorations primarily made from sugar and starch. Edible pearls typically have a smooth, often iridescent or matte finish, resembling miniature pearls. They are commonly used to add a touch of sophistication or whimsy to cakes, cupcakes, cookies, and other desserts.
Dragees, on the other hand, are sugar-coated candies, often with a harder center like sugar, chocolate, or nuts (though sugar-only centers are common for smaller sizes used in decorating). The term "dragee" is sometimes used interchangeably with "pearl," especially for the metallic-finished varieties. These metallic dragees achieve their shine through a coating that may contain metallic pigments, traditionally silver or gold, which in some regions are approved for decorative use but not necessarily for consumption in large quantities. Common sizes range from tiny 1mm nonpareils up to large 10mm or 12mm spheres.
Benefits of Using Edible Pearls and Dragees for Cake Decoration
Using edible pearls and dragees offers numerous advantages for cake decorators of all skill levels, particularly when aiming for easy sugar pearl decorating. Their primary benefit is their ease of application; unlike intricate piping or fondant work, applying pearls and dragees can be done relatively quickly and requires minimal specialized artistic skill to achieve a beautiful result. They instantly add a touch of glamour, texture, or playful color that can transform a plain frosted cake into a showstopper.
Furthermore, they are incredibly versatile. A simple scatter of iridescent pearls can make a cake look elegant, while brightly colored dragees can add a fun, festive feel to a child's birthday cake. They are also relatively inexpensive compared to other decorating elements, making them a cost-effective option for adding significant visual impact. For bakers exploring easy sugar pearl decorating, these small spheres provide a low-barrier-to-entry method to create visually appealing designs.
Essential Tools for Working with Edible Pearls
While you can apply edible pearls and dragees by hand, having a few simple tools will make the process much easier and allow for more precise application, crucial for achieving clean, professional designs with easy sugar pearl decorating. The most fundamental tool is a pair of fine-tipped tweezers. Tweezers allow you to pick up individual pearls or dragees and place them exactly where you want them on the cake, which is essential for creating patterns, borders, or placing larger dragees accurately.
Another useful tool is a scribe or toothpick. This can be used to nudge pearls into position once placed or to create small indentations in the frosting to guide placement. For applying many small pearls or dragees, a small spoon or even shaking them gently from a container can work for scattered effects. If you're using edible glue or royal icing to adhere the pearls, a small brush or a piping bag fitted with a very fine round tip (like a Wilton #1 or #2) will be necessary to apply the adhesive precisely before placing the decorations.
Preparing Your Cake for Decoration
Proper cake preparation is key to ensuring that your edible pearls and dragees adhere well and your final design looks polished. The surface you are applying the decorations to needs to be suitable, typically a layer of frosting. The type of frosting matters; buttercream and ganache are popular choices. Achieving a smooth base is the first step in creating a beautiful canvas for your easy sugar pearl decorating.
Ensuring the cake is firm before decorating is also important. A chilled cake is much easier to handle, and the frosting will be less likely to smudge as you work. Finally, the method and thickness of your final frosting layer will impact how easily you can apply and secure the pearls and dragees.
Achieving a Smooth Frosting Finish
A smooth frosting surface provides the best backdrop for edible pearls and dragees, especially if you plan to create patterns or borders where precision is visible. To achieve a smooth finish with buttercream, apply a crumb coat first – a thin layer of frosting that seals in crumbs. Chill the cake until the crumb coat is firm, typically 20-30 minutes in a refrigerator.
Next, apply a thicker final layer of frosting. Use an offset spatula or cake scraper to smooth the sides and top. For extra smoothness, you can dip your spatula in hot water, dry it, and then smooth the frosting. Alternatively, the 'wax paper transfer' method or using a Viva paper towel (if using crusting buttercream) can yield exceptionally smooth results. Aim for a consistent surface with no large air bubbles or streaks where you plan to place your easy sugar pearl decorating.
Importance of Chilling the Cake
Chilling your frosted cake before applying edible pearls and dragees is a crucial step that significantly simplifies the decorating process. When the frosting is cold and firm, it is less delicate and much easier to handle without accidentally creating dents or smudges as you lean over the cake or maneuver around it. This is particularly helpful when using tools like tweezers for precise placement.
A chilled frosting surface also provides a firmer base for the pearls and dragees to adhere to, whether you are pressing them directly into the frosting or using edible glue. The slight tackiness of firm, cold buttercream can hold decorations in place initially before they are fully set. Chilling for at least 30-60 minutes, or until the frosting is firm to the touch, is generally recommended before starting your easy sugar pearl decorating.
Applying a Final Frosting Layer
The final layer of frosting serves as the adhesive for your edible pearls and dragees if you are pressing them directly onto the cake. The thickness and consistency of this layer are important. A layer that is too thin might not provide enough depth for the pearls to sit securely, while a layer that is too thick could look messy. Aim for a consistent layer, generally around 1/4 to 1/2 inch thick, depending on your design and the size of the pearls.
Ensure the frosting is still slightly soft or "tacky" when you begin applying the decorations, especially if you are not using additional edible glue. If the frosting has crusted over, you might need to mist it lightly with water or apply a thin layer of edible glue where the decorations will go. Applying your easy sugar pearl decorating relatively soon after the final frosting layer is smoothed is often best for direct application.
Techniques for Applying Edible Pearls and Dragees
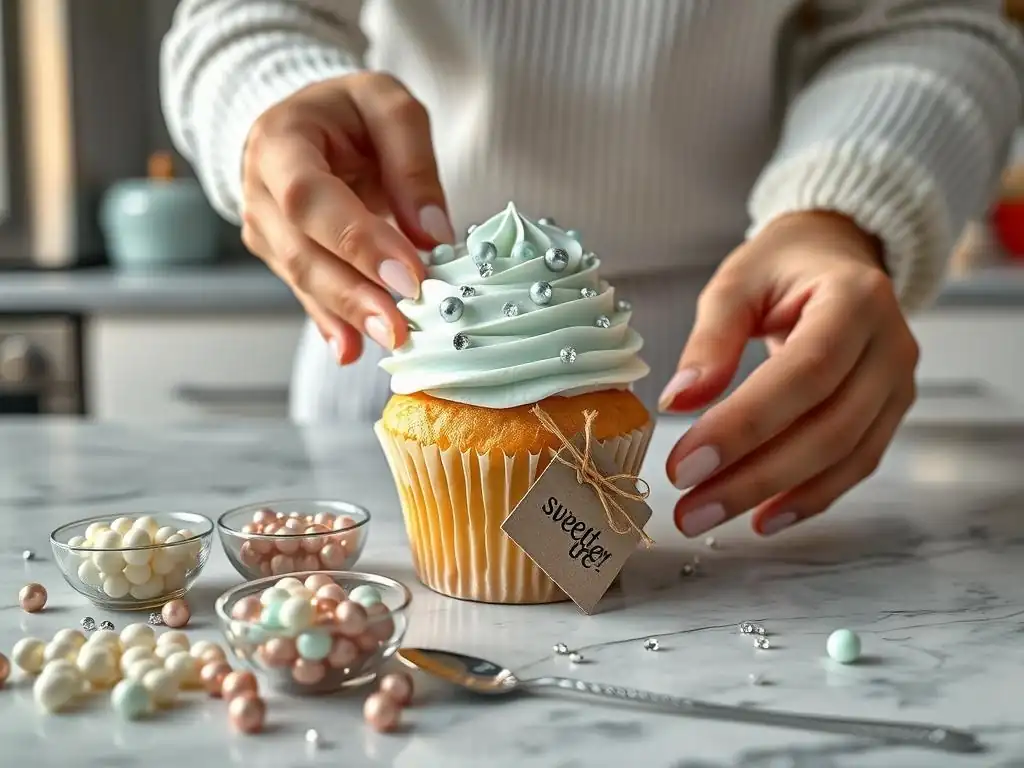
Applying edible pearls and dragees can range from simply scattering them to meticulously placing each one. The technique you choose will depend on the desired effect and the size of the pearls or dragees you are using. For easy sugar pearl decorating, several methods are effective and relatively simple to execute.
Whether you need precision for intricate details or a more random, organic look, understanding different application techniques will help you achieve your vision. Combining techniques can also lead to unique and dynamic designs on your cakes.
Precise Placement with Tweezers
Using fine-tipped tweezers is the go-to method for precise placement of edible pearls and dragees, especially for creating patterns, borders, or placing larger dragees. This technique allows you to control the exact position and spacing of each individual decoration, ensuring uniformity and neatness in your design. It is essential for creating geometric patterns, writing with pearls, or outlining specific areas on the cake.
To use tweezers effectively for easy sugar pearl decorating, gently pick up a single pearl or dragee with the tips. Then, carefully press it into the frosting or edible glue on the cake surface. For best results on buttercream, ensure the frosting is slightly firm but still soft enough for the pearl to embed slightly. Work slowly and steadily to maintain your pattern or line. This method requires patience but yields the most accurate and professional-looking results for detailed work.
Using a Piping Bag for Controlled Application
For applying many small edible pearls or dragees in a specific area or along a line, using a piping bag with a small amount of royal icing or buttercream as adhesive can be very effective. This method offers more control than simply scattering but is faster than placing each pearl individually with tweezers. It's particularly useful for creating dotted patterns or adhering pearls along curved lines or edges.
Fill a piping bag fitted with a small round tip (like #1 or #2) with royal icing or a stiff buttercream. Pipe small dots of icing onto the cake where you want the pearls to go. The size and spacing of the dots will determine the placement of the pearls. Then, using tweezers or by gently rolling the cake or tapping the area (for very small nonpareils), place or adhere the pearls onto the wet dots of icing. This technique is excellent for easy sugar pearl decorating when you need consistent spacing or placement along a guide line.
Creating Scattered Effects
Creating a scattered effect with edible pearls and dragees is perhaps the easiest method for adding sparkle and texture to a cake, perfect for quick and easy sugar pearl decorating. This technique works well for covering large areas, adding a festive touch, or mimicking effects like falling snow or stars. It's less precise than other methods but can be very visually appealing when done right.
To scatter pearls or dragees, you can simply take a handful and gently sprinkle them over the desired area of the cake. For more control over density and placement, you can hold a small amount in your hand or a spoon and lightly tap it over the cake, allowing the decorations to fall more gradually. Ensure the frosting surface is slightly tacky for the pearls to adhere to.
For areas that have crusted, a light mist of water or edible glue can help them stick. Practice over a piece of parchment paper first to get a feel for the scattering motion and density.
Cake Decorating Ideas Using Edible Pearls and Dragees
Edible pearls and dragees are incredibly versatile and can be incorporated into countless cake designs. From adding subtle elegance to creating bold, eye-catching patterns, they offer a simple way to enhance the visual appeal of your baked goods. Exploring different ideas will help you discover just how effective easy sugar pearl decorating can be.
Consider the theme of your cake and the overall look you want to achieve. Pearls and dragees can complement various styles, from classic and sophisticated to modern and fun. Let's look at some popular ways to use these delightful decorations.
Elegant Borders and Edges
One of the most classic and effective ways to use edible pearls and dragees is to create elegant borders and edges around your cake tiers or the base of the cake. A single row of evenly spaced pearls can add a sophisticated touch to a wedding cake, while a double or triple row can create a more pronounced decorative trim. Using different sizes or colors of pearls along a border can also add interest.
To create a pearl border, you can either press the pearls directly into the edge of a freshly frosted cake (especially effective if the edge is slightly rounded) or pipe a thin line of royal icing or buttercream along the desired path and then carefully place the pearls onto the wet icing using tweezers. For a 6-inch cake, a simple single border might require approximately 200-300 4mm pearls. This technique is fundamental to achieving polished results with easy sugar pearl decorating.
Creating Intricate Patterns and Designs
Beyond simple borders, edible pearls and dragees can be used to create more intricate patterns and designs directly on the cake surface. Think polka dots, stripes, geometric shapes, or even abstract arrangements. Using different colors and sizes of pearls allows for creative exploration. For instance, a pattern of alternating pearl sizes can add subtle texture, while contrasting colors can create a bold visual impact.
Creating patterns often requires precise placement using tweezers. You might first lightly mark your design onto the chilled frosting using a scribe tool or toothpick as a guide. Then, apply edible glue or small dots of icing along your guide marks and place the pearls. For a dense polka dot pattern on an 8-inch cake tier, you might use upwards of 500-600 3mm pearls. This method takes more time but allows for highly customized and detailed easy sugar pearl decorating.
Accentuating Cake Features
Edible pearls and dragees are excellent for accentuating specific features of your cake design. They can be used to highlight piped details, define tiers, add centers to piped flowers, or draw attention to specific elements of a fondant decoration. For example, placing a few iridescent pearls around the base of a gumpaste flower can make it stand out beautifully.
They can also be used to add a touch of sparkle to edible images or hand-painted details. Consider adding a trail of small pearls behind a fondant figure to suggest movement, or using larger dragees as decorative 'buttons' or 'jewels' on a themed cake. Using edible glue is often necessary when applying pearls to fondant or gumpaste, as these surfaces are not typically tacky like buttercream. This selective application is a key part of easy sugar pearl decorating for adding strategic impact.
Understanding Different Types of Edible Pearls and Dragees
The world of edible pearls and dragees is vast, offering a wide variety of options in terms of size, color, finish, and composition. Understanding these differences is important for choosing the right type for your specific cake design and ensuring they are safe and appropriate for consumption (or at least decorative use). This knowledge is helpful for anyone engaging in easy sugar pearl decorating.
From tiny nonpareils to large metallic spheres, each type has its own characteristics and best uses. Let's delve into some of the key distinctions you'll encounter when selecting these decorations.
Exploring Size and Color Options
Edible pearls and dragees come in a remarkable range of sizes, from minuscule 1mm nonpareils to substantial 10mm or even 12mm spheres. The size you choose significantly impacts the final look of your cake. Smaller sizes are excellent for scattering, creating delicate textures, or filling in areas. Medium sizes (around 3-6mm) are versatile for borders, patterns, and accents. Larger sizes (8mm+) work well as bold focal points or statement decorations.
The color options are virtually limitless, ranging from classic white and ivory pearls to vibrant neons, pastels, and deep jewel tones. You can find solid colors, mixed color blends, and finishes like matte, satin, iridescent, and metallic. Selecting colors that complement your cake's theme and color scheme is crucial for a harmonious design. For easy sugar pearl decorating, starting with a basic set of white pearls and a few key colors that match popular frosting shades is a great starting point.
Using Metallic Dragees Safely
Metallic dragees, often silver or gold, are popular for adding glamour and shine to cakes, especially for special occasions like anniversaries or holidays. However, it's important to be aware of the composition of metallic dragees. Traditionally, the metallic sheen was achieved using silver or aluminum foil, which are considered non-toxic but non-digestible. In some regions, like the European Union, these are classified as decorative items only and not meant for consumption, although they are still widely used in the US.
Always check the packaging to understand the ingredients and intended use. If you are concerned about serving metallic dragees, especially larger ones, inform your guests that they are primarily for decoration and can be removed before eating. Alternatively, look for newer varieties that use mica-based pigments for a metallic effect, which are generally considered fully edible. For easy sugar pearl decorating with a metallic touch, using them sparingly or opting for smaller, mica-based options can be a good approach.
Matching Pearls and Dragees to Cake Themes
Selecting edible pearls and dragees that align with your cake's theme is essential for creating a cohesive and impactful design. The color, size, and finish of the decorations should complement the overall aesthetic. For example, white or ivory iridescent pearls are perfect for elegant wedding or anniversary cakes, evoking a sense of classic beauty.
For a festive Christmas cake, red, green, gold, or silver dragees might be appropriate. A child's birthday cake could feature brightly colored mixed dragees or pearls in shades matching their favorite characters or party theme. A mermaid-themed cake might use iridescent pearls in shades of blue, green, and purple. Thinking about the mood and style of your cake will guide your selection for effective and easy sugar pearl decorating.
Tips for a Professional Finish
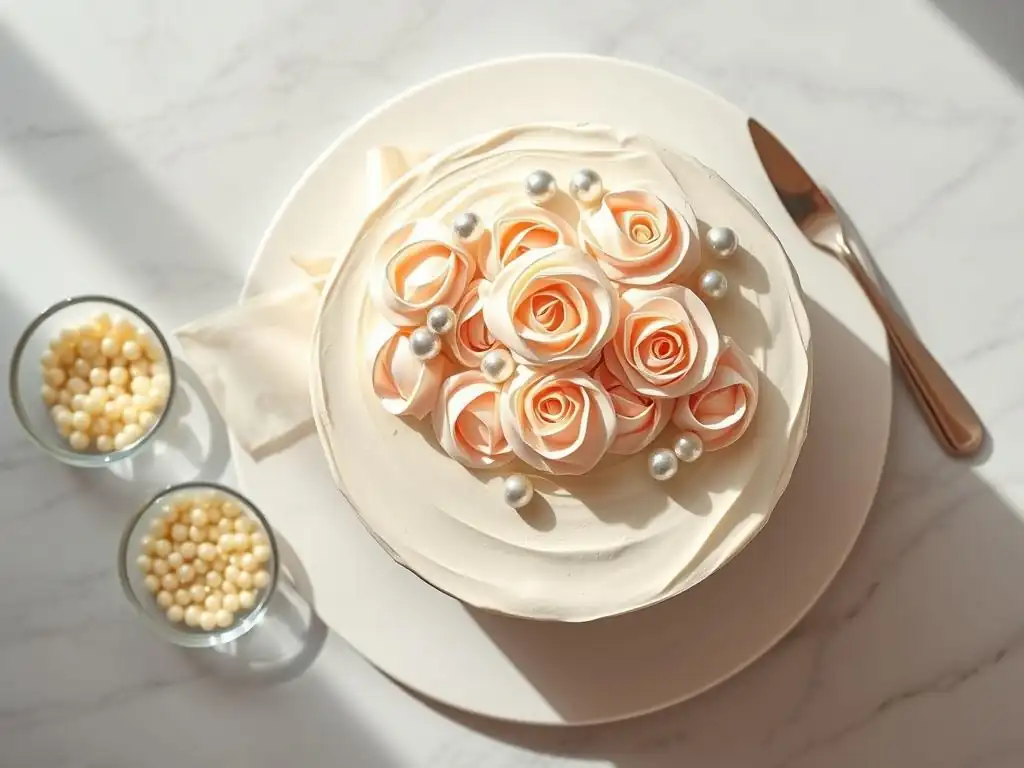
Achieving a professional look when decorating with edible pearls and dragees involves more than just applying them; it's about precision, balance, and attention to detail. Even with easy sugar pearl decorating techniques, a few simple tips can elevate your results from homemade to polished.
Focusing on consistency in placement, knowing when to stop, and using the right adhesive are key elements that distinguish a well-decorated cake. These tips will help you achieve clean lines, even coverage, and a design that looks intentionally crafted.
Maintaining Even Spacing and Alignment
Consistency in spacing and alignment is critical for designs like borders, geometric patterns, or any arrangement where the pearls are meant to form a regular sequence. Uneven spacing or crooked lines can make an otherwise beautiful design look messy. Using guides can be incredibly helpful here.
For borders, you can lightly score a line in the frosting or use a ribbon as a guide before placing the pearls. For patterns on the surface, measuring out your design or using a template can ensure even spacing. When placing pearls with tweezers, take a moment to step back and look at your work from a slight distance periodically to check for alignment issues before the frosting or glue sets. Patience and careful placement are key to professional easy sugar pearl decorating.
Avoiding Over-Decoration
While it might be tempting to cover every available surface with edible pearls and dragees, knowing when to stop is an important aspect of achieving a professional finish. Over-decoration can make a cake look cluttered and overwhelm other design elements. The goal is to enhance the cake, not bury it under decorations.
Consider the size of your cake and the complexity of your design. A few strategically placed pearls can have more impact than a dense covering. For example, a simple scattering on the top and a single elegant border can be much more visually appealing than covering the entire cake in pearls. Step back frequently as you decorate to assess the overall balance and stop when the design feels complete and harmonious. This restraint is a valuable skill in easy sugar pearl decorating.
Using Edible Adhesive
While pressing pearls directly into soft buttercream works for many applications, using edible adhesive provides extra security, especially for larger dragees, vertical placements, or when applying to surfaces like fondant or crusted buttercream. Common edible adhesives include royal icing (piped thinly), melted chocolate or candy melts (for heavier decorations or quick setting), or commercially available edible glue.
Edible glue is a clear, tasteless liquid that dries firm and is ideal for attaching pearls to fondant or gumpaste. Apply a small dot of adhesive to the back of the pearl or directly onto the cake surface where the pearl will go. Place the pearl onto the wet adhesive and hold for a few seconds if needed. Be careful not to use too much adhesive, as it can seep out and become visible. Using the right adhesive ensures your easy sugar pearl decorating stays in place until the cake is served.
Storing Decorated Cakes
Proper storage is essential for keeping your decorated cake fresh and, perhaps even more importantly, for protecting your beautiful edible pearl and dragee decorations from damage. Temperature, humidity, and physical protection all play a role in preserving the integrity of your easy sugar pearl decorating.
Understanding the best conditions for storage will help prevent common issues like decorations falling off, colors running, or the cake itself drying out. Let's look at the recommended practices for storing your finished masterpiece.
Preventing Damage to Decorations
The most common risks to edible pearl and dragee decorations during storage are physical contact and moisture. Decorations can be easily brushed off or dislodged if the cake bumps against something. Moisture, either from condensation or high humidity, can dissolve sugar pearls or cause metallic dragees to lose their shine or even bleed color.
To prevent damage, store the cake in a sturdy cake box. Ensure the box is tall enough that the lid does not touch the top or sides of the cake decorations. If stacking boxes, place the decorated cake on top. Avoid placing anything on top of the cake box that could press down on the lid. Handle the box carefully during transport.
Maintaining Cake Freshness
While protecting the decorations, you also need to keep the cake itself fresh. The best way to do this depends on the type of cake and frosting. Cakes frosted with buttercream or cream cheese frosting should generally be stored in the refrigerator. Fondant-covered cakes can often be stored at room temperature, but this is less common when significant buttercream is involved underneath or as decoration base.
Storing in an airtight container or a cake box placed inside a plastic bag helps prevent the cake from drying out and absorbing odors from the refrigerator. If refrigerating, remove the cake from the fridge about 1-2 hours before serving (depending on size) to allow it to come to room temperature for the best flavor and texture. This also helps reduce condensation buildup on the decorations.
Recommended Storage Conditions
For most cakes decorated with edible pearls and dragees on a buttercream base, refrigeration is recommended. The ideal temperature is typically between 35°F and 40°F (1°C and 4°C). Ensure the refrigerator is not overly humid, which can be a challenge. Storing the cake in a sealed container minimizes exposure to humidity within the fridge.
If storing a fondant-covered cake with pearl decorations at room temperature, choose a cool, dry place away from direct sunlight. Avoid storing near sources of heat or humidity, such as ovens or kettles. The ideal room temperature is usually around 68°F to 72°F (20°C to 22°C). Check the specific type of edible pearls or dragees used, as some delicate finishes might be more sensitive to environmental conditions than others. Proper storage ensures your easy sugar pearl decorating remains pristine.
Troubleshooting Common Issues
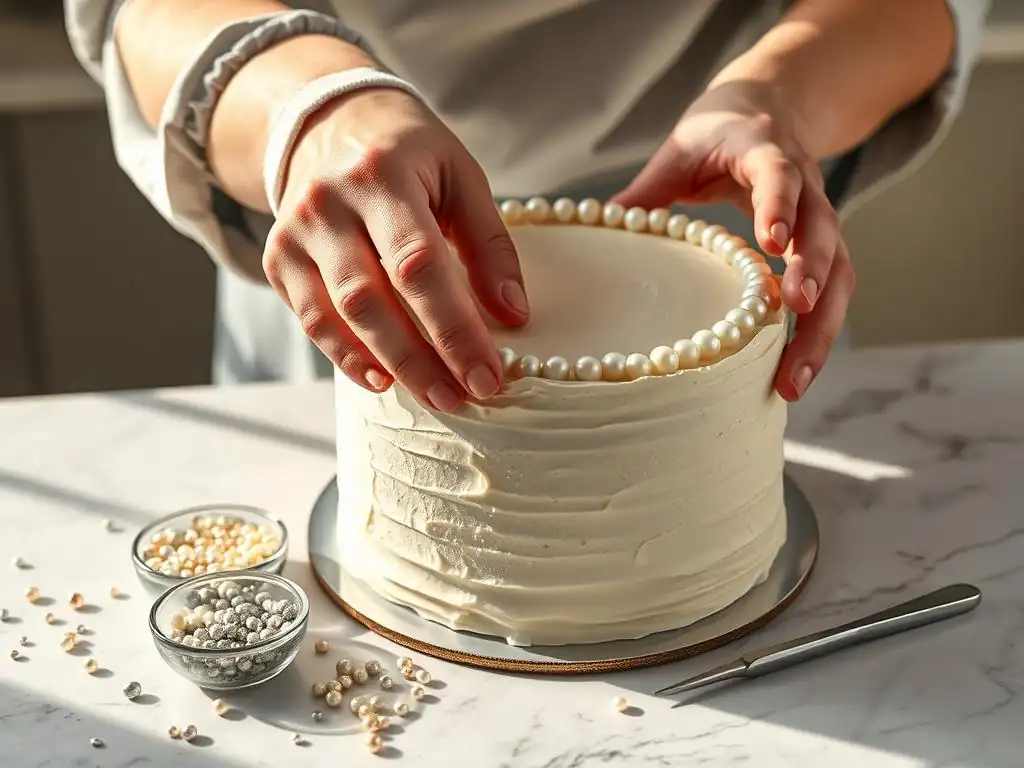
Even with careful planning and application, you might encounter a few common issues when decorating with edible pearls and dragees. Knowing how to troubleshoot these problems can save your design and help you learn for future easy sugar pearl decorating projects. Don't worry, most issues have simple solutions or preventative measures.
Whether decorations are falling off, lines aren't straight, or colors are bleeding, addressing these problems promptly can help you achieve the desired professional finish. Let's look at some frequent challenges and how to tackle them.
Addressing Pearls and Dragees Falling Off
One of the most frustrating issues is finding that your carefully placed edible pearls or dragees are falling off the cake. This usually happens because the adhesive (either frosting or glue) wasn't sufficient, had crusted over before application, or the decorations were applied to a surface that wasn't suitable.
If applying to buttercream, ensure the frosting is fresh and still slightly tacky. If it has crusted, you'll need to use edible glue or pipe small dots of fresh buttercream or royal icing where you want the pearls to go. For fondant, edible glue is almost always necessary.
If decorations are falling off after the cake has been moved or refrigerated, it might be due to condensation (which can dissolve the adhesive) or rough handling. When placing, give each pearl a gentle press to ensure it's securely embedded in the adhesive. For easy sugar pearl decorating success, sufficient and appropriate adhesive is key.
Correcting Misalignment
If you notice that your pearl border or pattern is crooked or uneven, correcting it depends on how recently the pearls were applied and the type of adhesive used. If you used soft buttercream and the pearls were just placed, you might be able to gently adjust them using tweezers or a scribe tool. Work carefully to avoid smudging the frosting.
If the pearls have been in place longer or were applied with a faster-setting adhesive like royal icing or edible glue, attempting to move them can damage the frosting or leave visible marks. In this case, it might be better to carefully remove the misaligned pearls and reapply them using fresh adhesive. For future projects aiming for easy sugar pearl decorating precision, using a guide line drawn with a scribe or a template before applying helps prevent misalignment.
Preventing Color Run
Color run occurs when the dye from the edible pearls or dragees bleeds into the surrounding frosting, creating unwanted streaks or discoloration. This is more common with brightly colored or metallic dragees, especially in humid conditions or when applied directly to very moist frosting.
To prevent color run, try to minimize the decorations' contact time with moisture. If refrigerating, store the cake in an airtight container to reduce condensation. Applying decorations to a crusted buttercream or fondant surface using edible glue can also help, as the glue creates a barrier. Some types of pearls and dragees are more prone to color run than others; testing a few on a small patch of frosting beforehand can be helpful. Using high-quality pearls specifically designed for cake decorating can also reduce this risk, ensuring your easy sugar pearl decorating stays vibrant.
Advanced Techniques
Once you've mastered the basics of easy sugar pearl decorating, you might want to explore more advanced techniques to create even more stunning and complex cake designs. These techniques involve combining different sizes and colors, integrating pearls into more elaborate decorations, and using them to create gradients or textures that go beyond simple placement.
Pushing the boundaries with edible pearls and dragees can add incredible depth and artistry to your cakes. Let's look at how you can take your pearl decoration skills to the next level.
Creating Pearl and Dragee Gradients
Creating a gradient effect with edible pearls or dragees involves transitioning smoothly from one color or size to another across the surface of the cake. This technique can produce visually striking results, such as a cascade of pearls that changes color from top to bottom or a texture that becomes denser with smaller pearls towards one edge.
To create a color gradient, you'll need pearls or dragees in several shades that transition from light to dark or one color to another. Apply the pearls starting with one shade at the beginning of your gradient, then gradually mix in the next shade, increasing its proportion as you move along, until you are applying only the final shade. For a size gradient, start with larger dragees and transition to smaller pearls. Precise placement with tweezers is usually required for a smooth transition, making this a more advanced form of easy sugar pearl decorating.
Incorporating Pearls and Dragees into Complex Designs
Edible pearls and dragees can be seamlessly integrated into more complex cake designs that involve other decorating elements like fondant, gumpaste flowers, stenciling, or intricate piping. They can serve as accents, fillers, or structural components within a larger artistic vision.
For example, small pearls can be used to add texture within fondant panels, larger dragees can form the centers of gumpaste flowers, or a pattern of pearls can be stenciled onto the cake surface using royal icing as the adhesive medium. When combining elements, consider how the weight and placement of the pearls will interact with the other decorations. Planning your design carefully and applying elements in the correct order is crucial for success. This level of integration elevates easy sugar pearl decorating into true cake artistry.
Combining with Other Decorations
Using edible pearls and dragees in combination with other types of cake decorations can create incredibly dynamic and visually rich cakes. Think about pairing them with edible glitter, sprinkles, metallic paints, isomalt decorations, or fresh flowers. The contrast in textures, finishes, and forms can make your cake truly unique.
For instance, a cake with a smooth fondant finish might feature a delicate pattern of pearls alongside brushed metallic accents. A buttercream cake with piped swirls could have pearls placed within the swirls for added sparkle. When combining elements, ensure they are compatible in terms of taste, texture, and how they adhere to the cake. Experimenting with different combinations can lead to innovative and beautiful easy sugar pearl decorating outcomes.
Conclusion: Mastering Edible Pearl and Dragee Cake Decoration
Mastering edible pearl and dragee cake decoration is an achievable goal for any baker looking to add a touch of sparkle and elegance to their creations. We've explored everything from the basic definitions and essential tools to preparing your cake, applying the decorations using various techniques, and even venturing into more advanced applications like gradients and combinations.
Remember that successful easy sugar pearl decorating relies on a few key principles: proper cake preparation, using the right tools and techniques for your desired effect, choosing appropriate types of pearls and dragees, and paying attention to detail for a professional finish. Don't be afraid to experiment with different sizes, colors, and placements. With practice, you'll become increasingly comfortable incorporating these versatile decorations into your cake designs, transforming simple baked goods into dazzling centerpieces that are as enjoyable to look at as they are to eat. So grab your tweezers and get ready to add some sparkle!
Frequently Asked Questions
What exactly are sugar pearls and dragees, and are they the same thing?
Sugar pearls and dragees are both edible decorations used in baking, but they differ slightly. Sugar pearls are typically small, round, and made entirely of sugar. Dragees often have a hard candy shell with a core, sometimes containing a nut or chocolate.
When is the best time to add sugar pearls to my baked goods?
The ideal time to add sugar pearls depends on the recipe. For things like cookies, add them before baking. For frosting or icing, add them after it has set slightly to prevent them from sinking in too much and to ensure optimal adherence.
How can I make sure the sugar pearls stick properly to my frosting or icing?
Use a slightly sticky or tacky frosting/icing. Lightly press the sugar pearls into the frosting while it's still soft but not overly wet. You can also use a small amount of edible glue for extra hold.
Where can I buy sugar pearls and dragees?
Sugar pearls and dragees are widely available at baking supply stores, craft stores with baking sections, and online retailers. Look for them in the cake decorating aisle.
Are sugar pearls edible, and are there any safety concerns I should be aware of?
Yes, sugar pearls are edible, but some dragees may contain a hard, inedible core. Always check the product description and use them with caution, especially for young children who might choke. Look for food-grade decorations.
Final Reflection: The Enduring Sweetness of Simple Decoration
The art of adding sugar pearls and dragees is more than just a culinary technique; it's a gateway to effortless elegance. In a world increasingly focused on complex and time-consuming crafts, the simplicity and immediate impact of these tiny decorations offer a refreshing counterpoint. Their versatility allows for personalization and creative expression, making them accessible to both seasoned bakers and enthusiastic beginners alike.
The enduring appeal of sugar pearls and dragees lies in their ability to elevate even the simplest creations. They add a touch of whimsy and sophistication, transforming ordinary baked goods into something truly special. This accessibility, this ease of use, resonates deeply with the modern desire for quick, beautiful results. Simplicity is the ultimate sophistication.
- Leonardo da Vinci. This quote perfectly encapsulates the power of these small, yet impactful, decorations. Their understated elegance speaks volumes, proving that sometimes, less truly is more.
Now, consider your own baking projects. Think about how a simple scattering of sugar pearls could transform a cupcake, a cookie, or even a plain cake. I invite you to experiment, to embrace the joy of effortless embellishment, and to discover the transformative power of these tiny, sweet treasures. Let your creativity flow, and don't be afraid to let your inner artist shine through. The world of easy sugar pearl decorating awaits – and it's sweeter than you think.
Here are a few options for a Call to Action (CTA) for an article on BakeWithEase.com titled "Adding Simple Sugar Pearls and Dragees," following the provided instructions:
Option 1 (Focus on Decoration):
Unleash Your Inner Cake Artist!
Thanks for exploring the delightful world of sugar pearls and dragees! You've learned how these tiny treats can transform your baking. Now it's time to put your newfound knowledge into practice.
- Create your masterpiece: Try adding sugar pearls and dragees to your next baking project – cupcakes, cookies, or even a stunning cake!
- Share your creation: Post a picture of your decorated treat on social media and tag us @BakeWithEase! We'd love to see your work.
- Experiment with color and texture: Explore different sizes and colors to find your perfect combination.
What unique design will you create with your sugar pearls and dragees?
Option 2 (Focus on Baking Skill Improvement):
Elevate Your Baking Game!
We hope you enjoyed learning about the simple elegance of sugar pearls and dragees! You’ve gained a valuable new skill to enhance your baking.
- Master the art of detail: Practice incorporating sugar pearls and dragees into your next recipe, focusing on precise placement and even distribution.
- Expand your repertoire: Try experimenting with other edible decorations to further enhance your baking artistry.
- Share your tips: Leave a comment below and share your best tips for working with these delicate decorations.
What’s the next baking project you’ll elevate with sugar pearls and dragees?
Option 3 (Focus on Community):
Join the BakeWithEase Community!
Thanks for reading about sugar pearls and dragees! We hope you found some inspiration to add a touch of magic to your baking.
- Share your baking journey: Join our online community forum (link implied, but not included as per instructions) to connect with other baking enthusiasts and share your creations.
- Try our sugar pearl recipe: (Implied link to a specific recipe, not included as per instructions) Explore our step-by-step tutorial for making your own sugar pearls at home.
- Challenge yourself: Try incorporating sugar pearls and dragees into an entirely new type of dessert.
What innovative ways will you use sugar pearls and dragees in your next bake?
Remember to choose the option that best suits the overall tone and focus of your article. These CT